Google Photos archive: the what, why, and how
Make your photos safer and more private

One of the best cloud storage solutions for photos in the market, Google Photos is a great application you can use to organize and back up your images. With over a billion users, it was popular for its free unlimited storage plan for high-quality photos, before this ended on 1 June 2021.
While Google Photos is packed with many useful features, our focus will be on a slightly obscure feature: Archive. We’ll look at what the archive feature is, why it’s of use, and how you can utilize it effectively.
What is the Google Photos Archive feature?
The Archive feature improves photo organization on a device, enabling images to be hidden from the Photos view. Note that they are not deleted but are just removed from sight. The images will continue to be found in search results, albums they were added to, and other folders on the device they’re stored on.
Why archive?
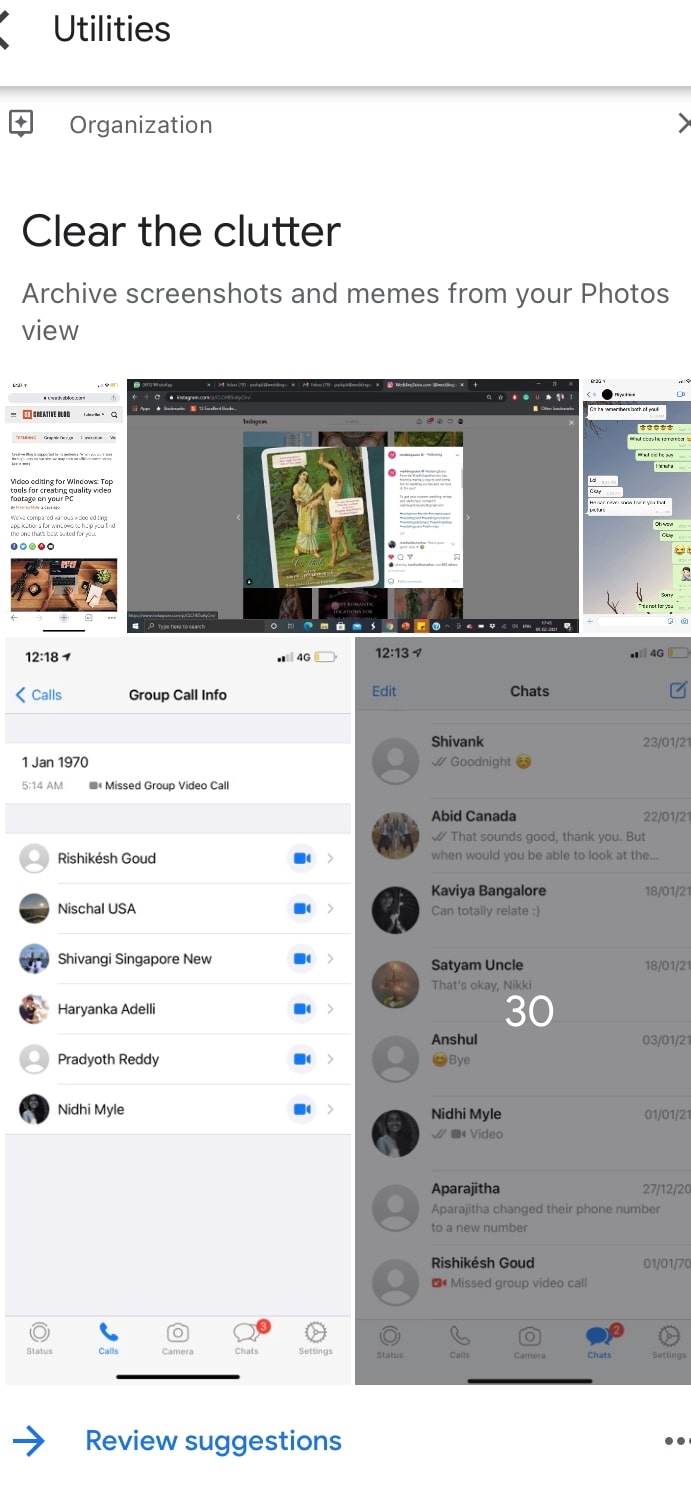
Archiving can help to declutter your photos. You can archive your screenshots, outdated bills, and important documents to keep them safe and for easy reference in the future. However, be aware that photos and videos that have been archived will not be used for movies or animations.
Google Photos automatically recommends photos that can be archived, and you can turn off these suggestions if you prefer.
How to use Archive on Google Photos
To use the Archive feature, you’ll need Google Photos installed on your device. You’ll also need to be signed in to your Google account. The steps to archive your photos will vary slightly depending on the device you’re using. We’ll look at steps on how you can archive photos on Android, computer, and iPhone and iPad.
How to archive on Android
Step 1: Select an image
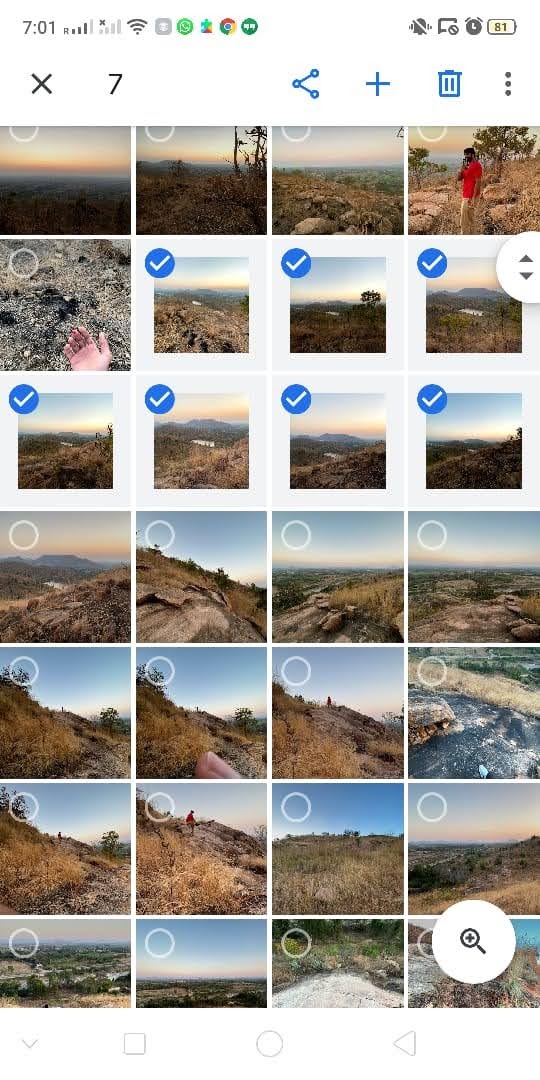
Once you’ve launched Google Photos, select an image by long-pressing it.
Get instant access to breaking news, the hottest reviews, great deals and helpful tips.
Step 2: Tap the More icon
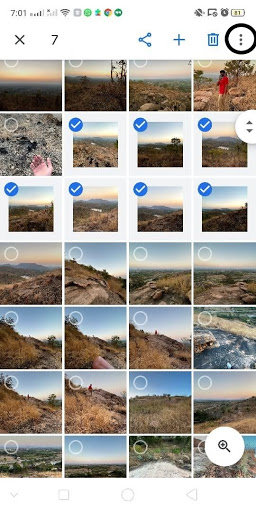
Tap the "More" icon with three vertical dots in the top right corner. Do this once you’ve selected the images you want to archive.
Step 3: Move to archive
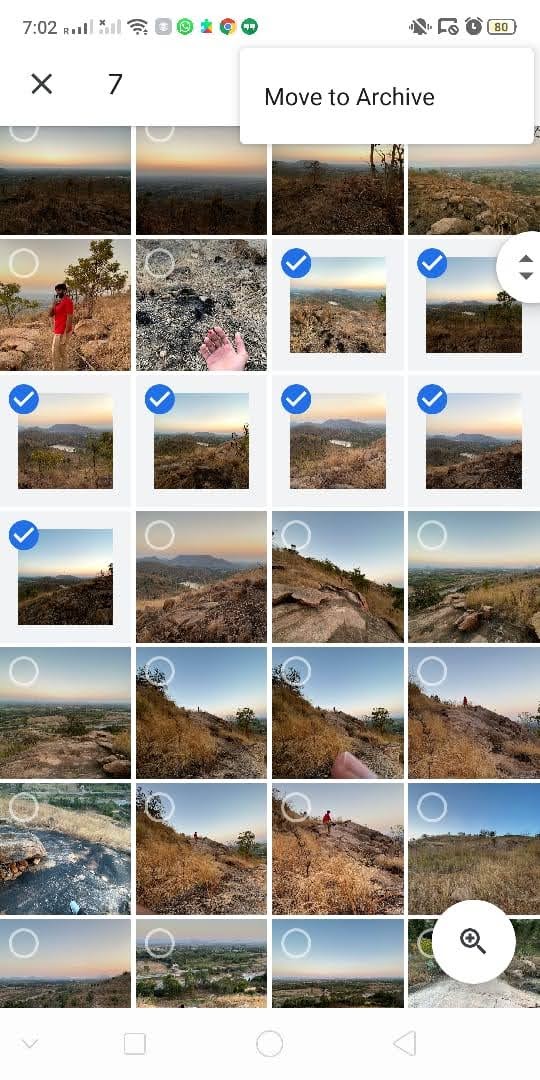
Clicking on the "More" icon will give you the option of moving your selected images to archive, and you can click "Move to Archive" to begin.
Archive folder on Android
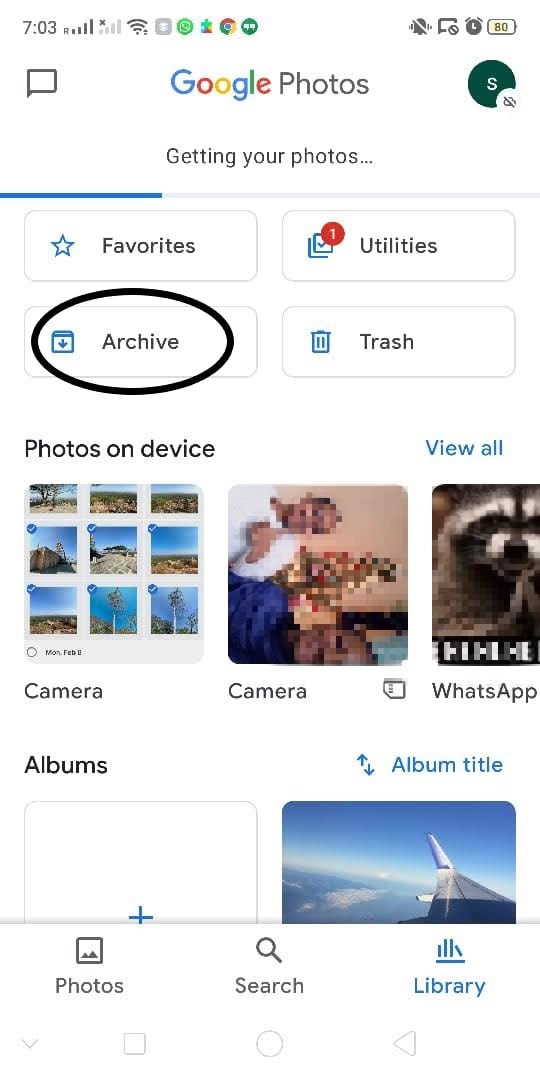
Find the archive folder by clicking on "Library" in the bottom right corner.
How to unarchive on Android
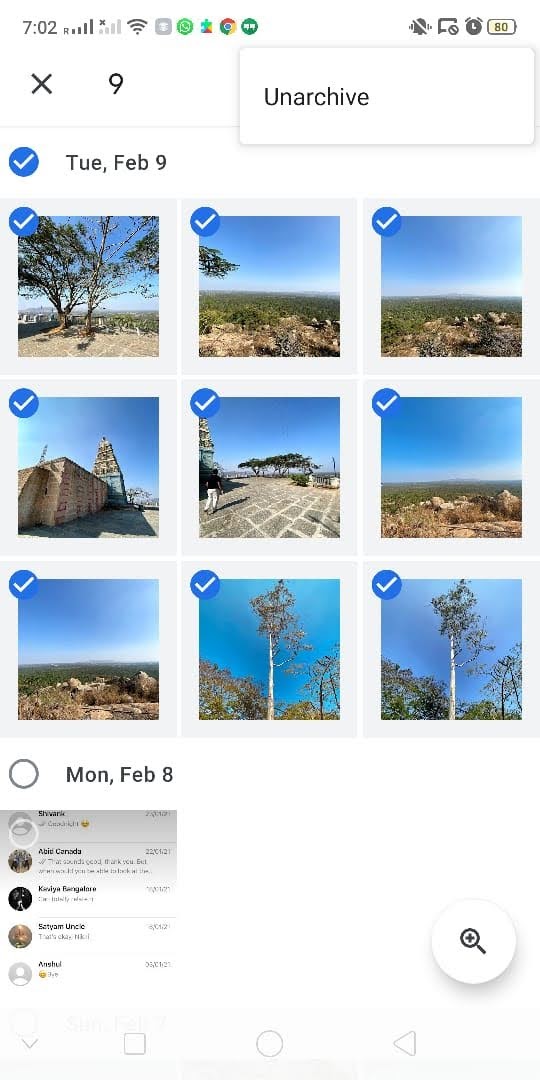
To unarchive an image, you’ll first have to open the Archive folder and select the image. After selecting it, click the "More" icon in the top right corner and choose the "Unarchive" option. This will move your photos back to their original places on the Photos view.
How to archive on desktop
Step 1: Select an image
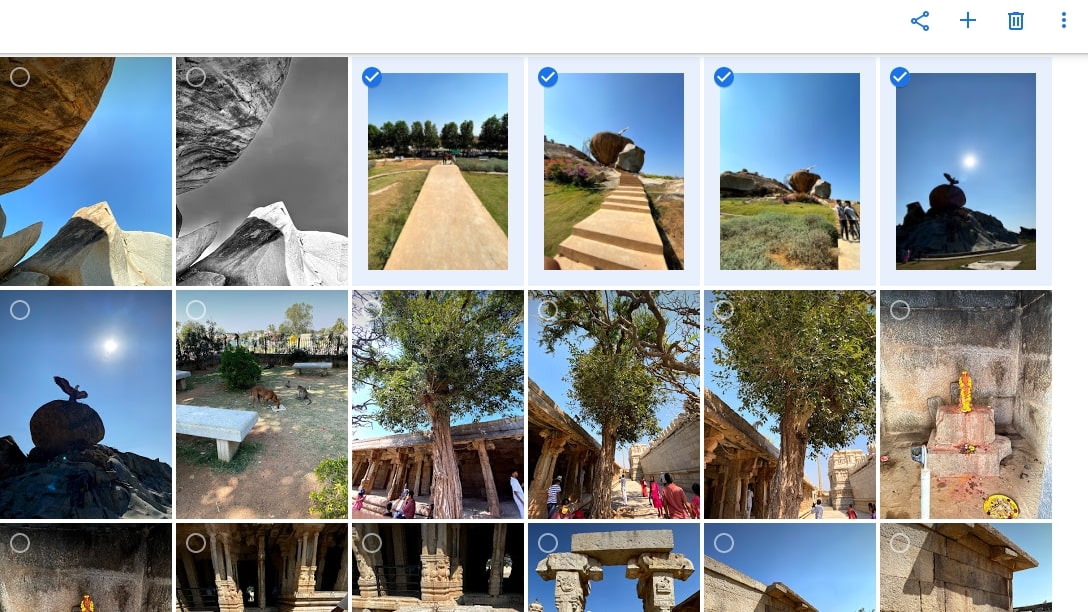
Launch Google Photos on your computer’s browser, or open it directly if it’s installed on your desktop. To select an image, click the top left corner of the image. A blue tick will appear to let you know it’s selected.
Step 2: Tap the More icon
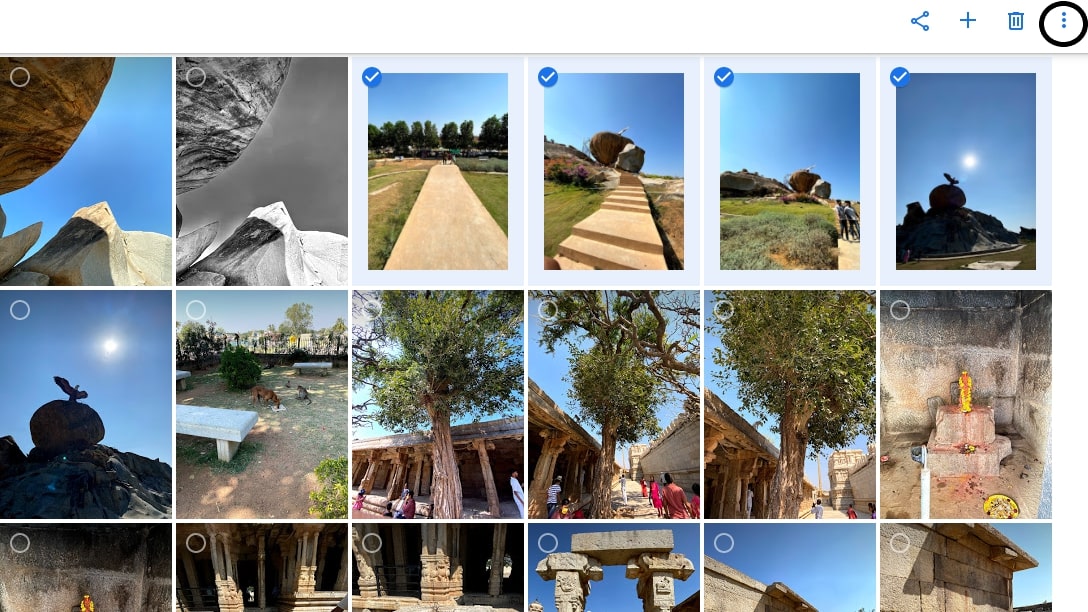
In the top right corner, you’ll find the "More" icon with three vertical dots. Click on this after selecting your images.
Step 3: Move to archive
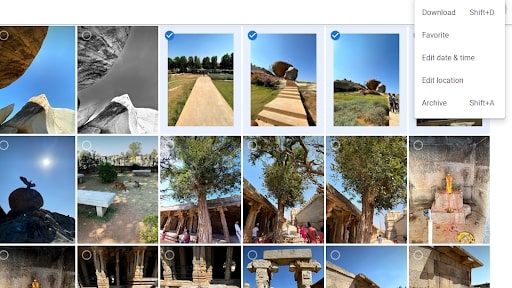
Clicking on the "More" icon will load multiple options like "Download", "Favorite", "Edit date and time", "Edit location", and "Archive". Click on "Archive" to send your selected photos to the Archive folder. Alternatively, you could use the shortcut keys Shift+A to archive the images.
Archive folder on computer
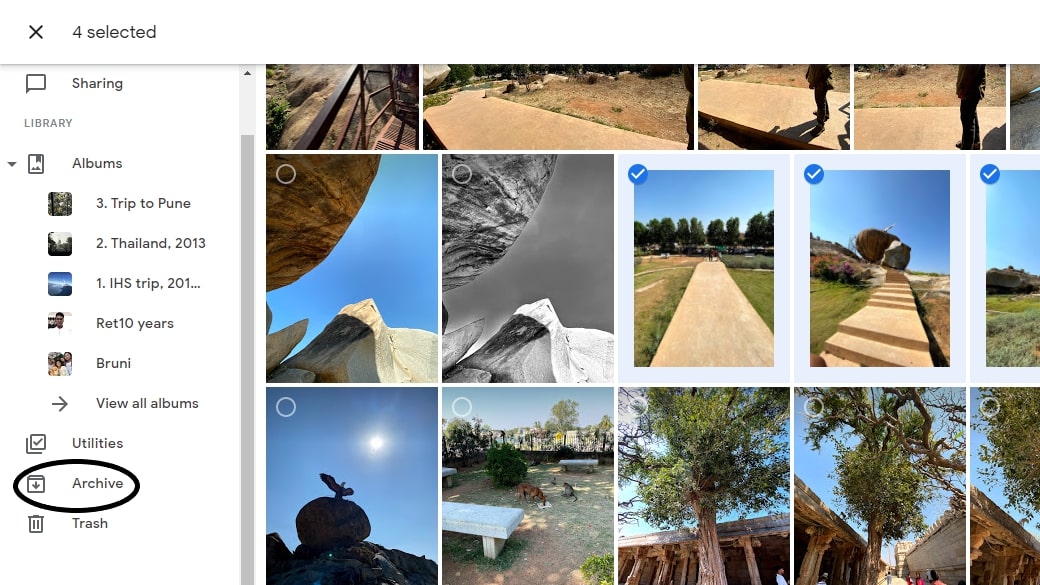
You’ll find the Archive folder in the navigation pane on the left side of the application. Click here to see all your archived images.
How to unarchive on computer
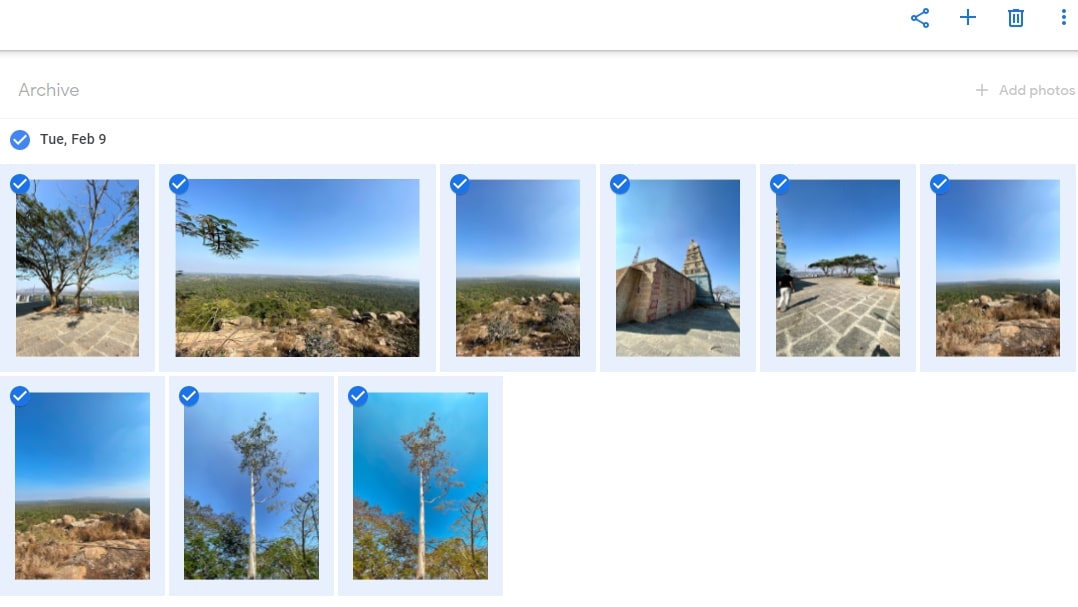
To unarchive an image, open the Archive folder and select the images you want to unarchive. Once you’ve made your selection, you could either hit Shift+A or click on the "More" icon in the top right corner to unarchive the images. Unarchiving will move the images to their original place in your Photos view.
How to archive on iPhone and iPad
Step 1: Select an image
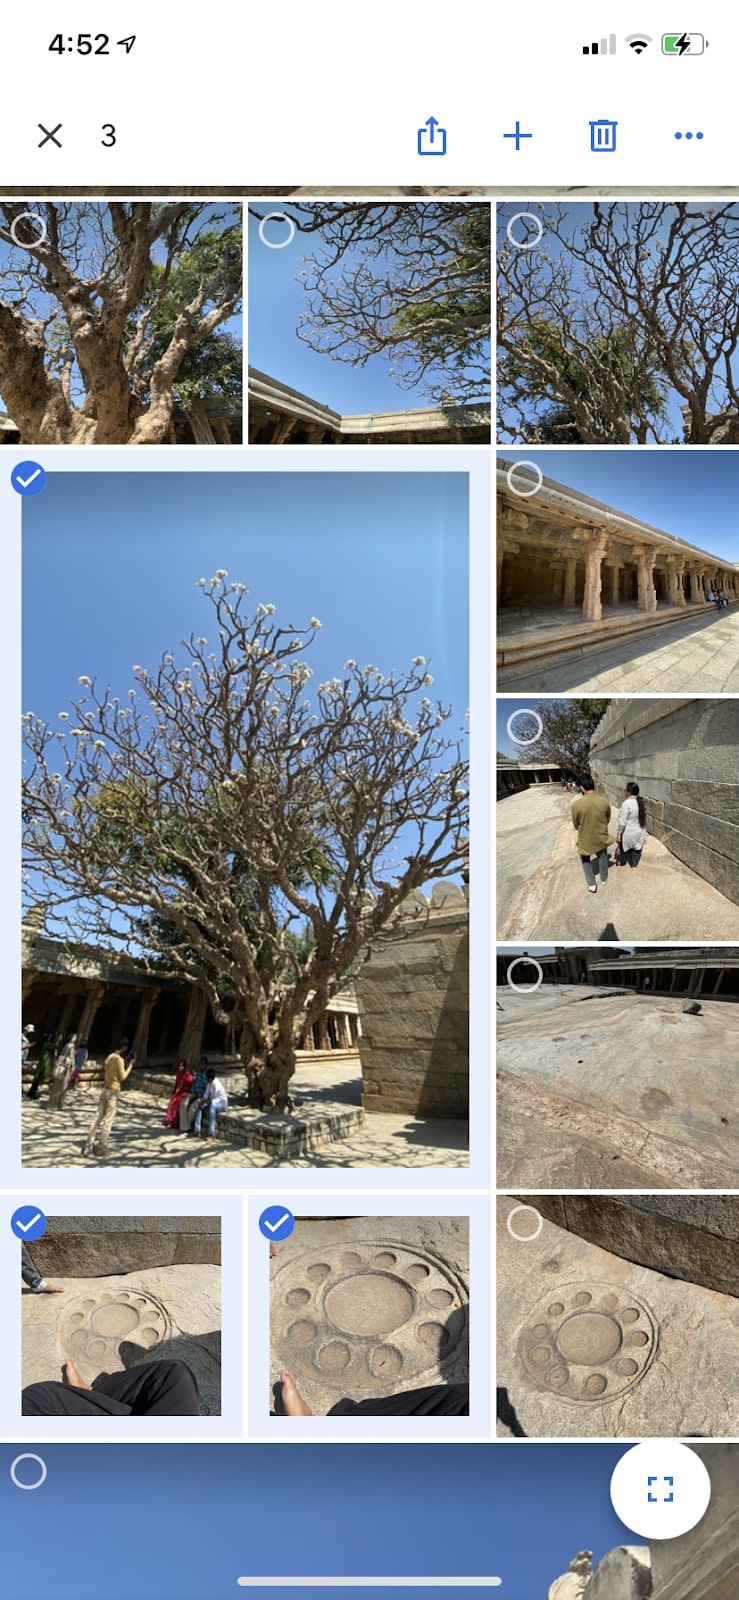
After launching Google Photos on your iPhone or iPad, select the images you want to archive by long-pressing them.
Step 2: Tap the More icon
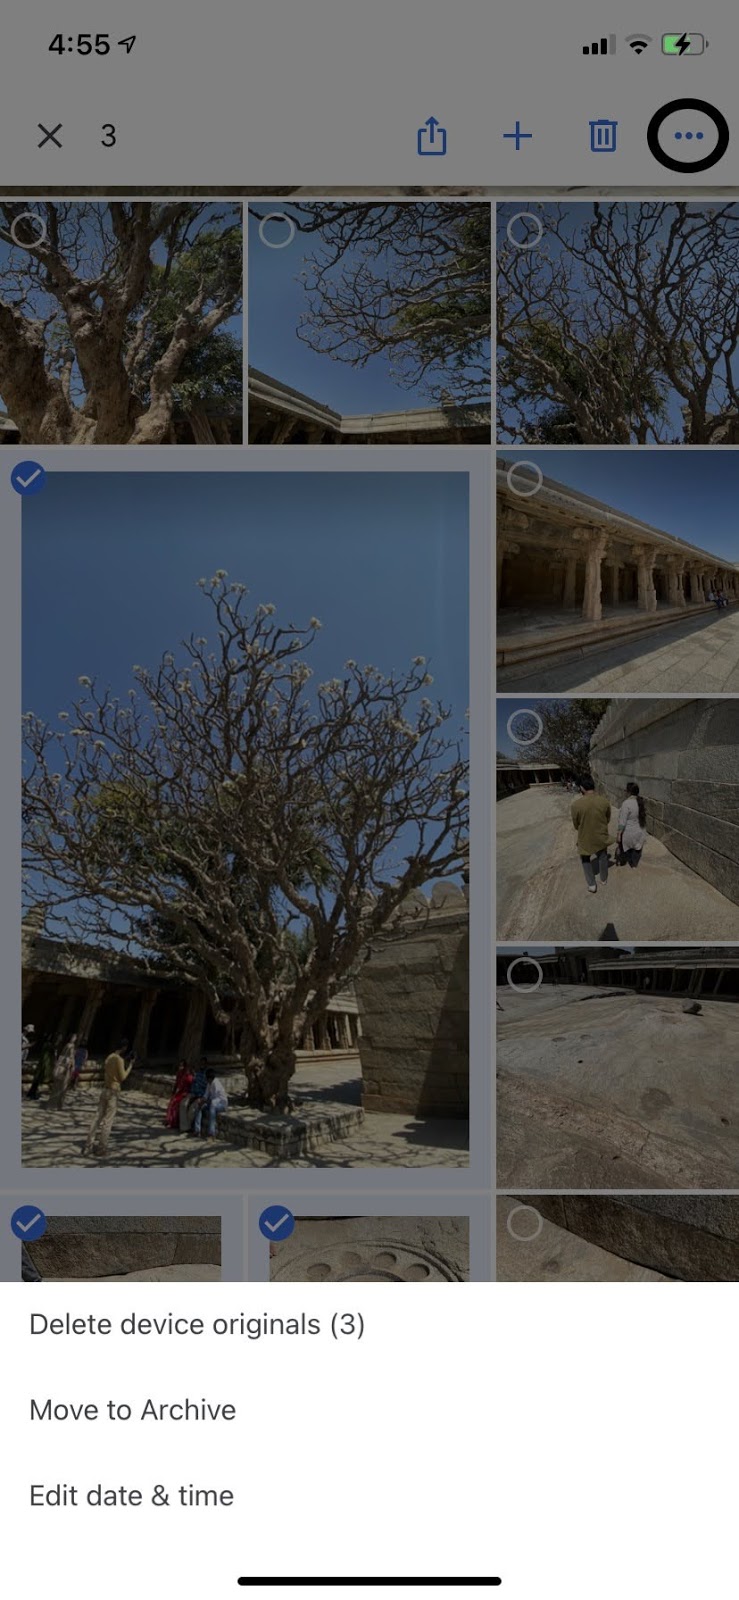
In the top right corner, you’ll see the "More" icon with three horizontal dots. Click on this once you’ve selected the images you want to archive.
Step 3: Move to archive
Clicking on the More icon will give you three options: "Delete device originals", "Move to Archive", and "Edit date and time". Click on "Move to Archive" to send the selected images to the archive folder.
Archive folder on iPhone and iPad
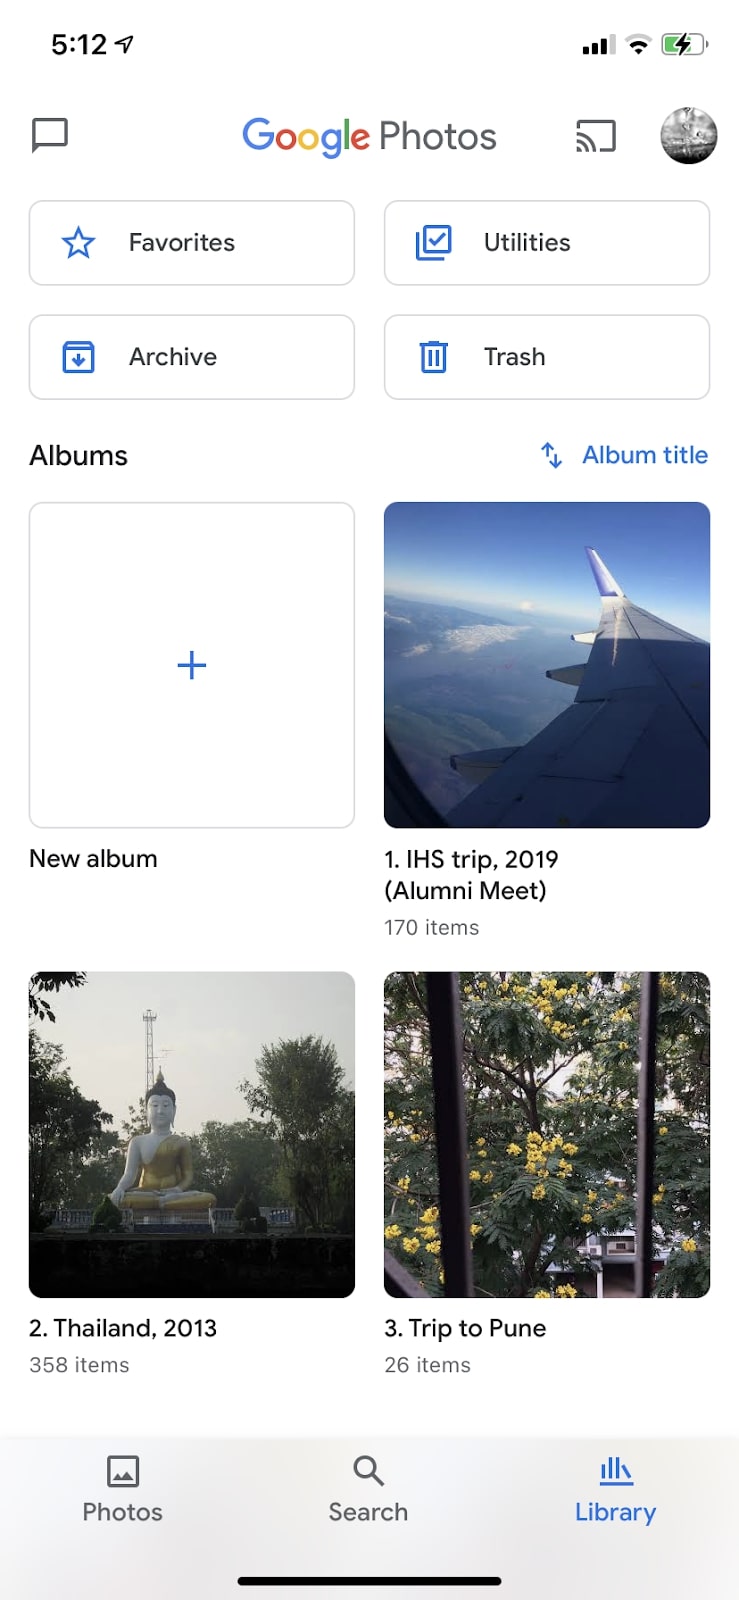
To access the Archive folder, click on "Library" at the bottom right corner. It will present you with your albums and other folders, including the archive section.
How to unarchive on iPhone and iPad
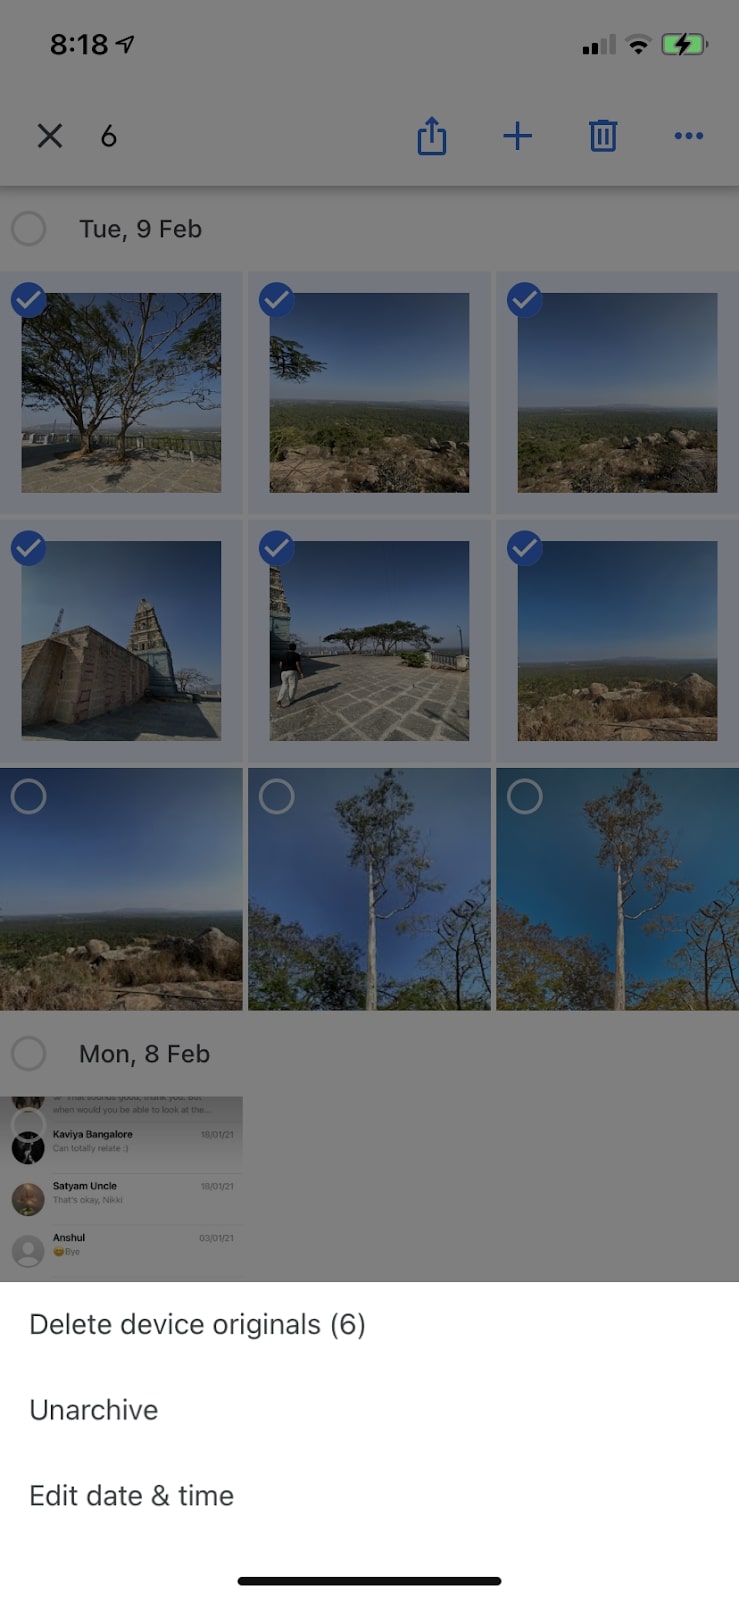
To unarchive an image, open the Archive folder and select the photo you want to unarchive. You can then click on the "More" icon in the top right corner. This will give you multiple options, and you can choose the "Unarchive" option to move the image back to where it was originally in your Photos view.
Summary
Following the steps mentioned above, you can archive your images easily on any device you’re using Google Photos on. Archiving will organize your Photos view better and keep the archived images hidden away.
Google Photos has excellent features, and ranks highly among the best cloud storage for photos and pictures. If you’d like to use it more effectively, do check out our article on how to use Google Photos, as well as our article spelling out how to upload to Google Photos.
- News: Google Photos just got killer Pixel features — what you need to know
- Want a different option? Check out our best Google Photos alternatives
- How to delete Google Photos permanently

Nikshep Myle is a freelance writer covering tech, health, and wellbeing. He has written for popular tech blogs like TechRadar, GadgetReview, SlashGear, and Creative Bloq, and has extensively reviewed consumer gadgets. When he’s not writing, you’ll find him meditating, gaming, discovering new music, and indulging in adventurous and creative pursuits.
 Club Benefits


