You can never have too much storage space for all of your photos, videos, music, and other files — but getting enough for all of that data and the rest of your household can cost you a small fortune if you're not careful. Soon enough, you’re spending what you would to subscribe to all of the best streaming services for data you might just want to hold onto for safekeeping but don’t necessarily access every day.
Don’t get me wrong, the best cloud storage certainly has its place, especially if you follow the 3-2-1 backup rule where you keep three copies of all of your most important data: one copy locally on your devices, one copy on one of the best external hard drives, and one copy off-site, using either your cloud storage or the best cloud backup services.
At a time when we’re all dealing with subscription fatigue, these small monthly costs of a few dollars here and $10 there quickly add up. While I haven’t cancelled my own cloud storage subscriptions yet, I have found a better and cheaper way to store all my most important files. And the best part? There’s no monthly subscription, plus I can access my files from anywhere.

I’ve always wanted to set up my own Network Attached Storage (NAS) device, but up until recently, doing so was complicated and expensive. Fortunately though, that’s no longer the case, and after testing out the Ugreen NASync DH4300 Plus ($429, Amazon) for the past two weeks, I can’t believe I waited this long to give my home network the ultimate local storage upgrade.
A NAS for the rest of us

The NASync DH4300 Plus is not Ugreen’s first NAS device — that honor belongs to the higher-specced NASync DXP4800 Plus. While the DXP is geared toward professionals and power users, the DH4300 Plus is strictly for beginners and anyone, like me, who is just getting started with a NAS.
In the box, you get the sleek device itself, a power brick, a high-speed Ethernet cable, and all the screws you’ll need to install either your 3.5-inch hard drives, 2.5-inch SSDs, or even a mix of both.


The DH4300 Plus’s magnetic top pops right off, revealing four drive bays. If you want something smaller or don’t think you’ll need up to a whopping 120TB of storage (that’s four 30TB hard drives!), there’s also the cheaper, 2-bay Ugreen NASync DH2300 with a 60TB capacity.
Keep in mind though, with either model and the rest of Ugreen’s NAS lineup, you will have to provide your own drives. Luckily, Ugreen sent over four 4TB hard drives to get started, though I may swap them out later for faster SSDs or even larger 30TB hard drives to take full advantage of this NAS device’s max storage capacity.

Around back, the ports speak to the DH4300 Plus’s focus: a 2.5 gigabit Ethernet port to connect to one of the best Wi-Fi routers, two USB 3.2 ports for external drives, and an HDMI port. Given this is a NAS, you’ll mostly access your files over the network, but you can plug it into your TV directly for 4K video playback—a great value-add feature! (The port is not used to access Ugreen’s UGOS operating system, but more on that in a bit.)

On the front of the DH4300 Plus, there’s a power button, five status lights, and a handy USB-C port for quick-connecting and syncing external storage.
With everything unboxed, it was time for the fun part: adding storage to the DH4300 Plus.
Pop, screw, click

If you’ve ever built your own PC or added more storage to one, you’ll be right at home setting up the DH4300 Plus. However, even if you haven’t, the whole installation process is easy enough and shouldn’t take you more than a few minutes.
To get started, you just pop off the magnetic top and remove the drive bay enclosures for the number of drives you plan to use. Then, you need to screw your 3.5-inch HDDs or 2.5-inch SSDs into the trays using the corresponding, clearly labeled screws provided in the box.

From there, it’s just a matter of putting each drive enclosure back into the DH4300 Plus and pushing them down until you hear a click. Honestly, it couldn’t be easier, but do take your time and don’t use too much force when inserting your drives.

In just a few minutes, I had all four 4TB drives installed. With the hardware sorted, I powered the DH4300 Plus on. Then, I had to create a UGreen Account, register the DH4300 Plus to it, and wait for the system to boot up for the first time before I could proceed with getting everything configured.

A cloud’s worth of data at your fingertips

I jest, but the numbers don't lie: for most people, even using the DH4300 Plus with a single, large-capacity drive will equate to a whole lot more space than they currently have in their iCloud or Google Drive accounts. For instance, with a free Google Drive account, you get just 15GB of storage. With the DH4300 all set up and even though I’m only using 13.3% of its total storage space, I now have 1,092.3 times more than that.

Although you can access your files on the DH4300 Plus using any web browser, the easiest way to get started is by giving your phone a quick tap on the front of the device. This NFC Quick Connect feature immediately launches the Ugreen NAS app. I’m using one of the best Android phones, but this works just as well on an iPhone or any tablet with an NFC chip.

After configuring how I wanted to have the four hard drives in my NAS work (I chose a protected RAID setup to guard against drive failure and data loss), I headed to the app store within Ugreen’s UGOS operating system. There, I found loads of free apps — everything from media players to utilities — and downloaded a few essential ones to get started.
In addition to Ugreen’s own first-party apps, you can install third-party ones like Firefox or even Home Assistant, which I’m planning to put on my NAS later to control the best smart home devices using a custom dashboard on my phone, tablet, etc.
One of the main reasons I was interested in finally trying out a NAS is that, due to my work testing and reviewing the best mini PCs, I’m constantly switching between computers. I used to grab the nearest flash drive and transfer all of the data off a finished machine, but now I plan on doing that right in my browser using the DH4300 Plus.
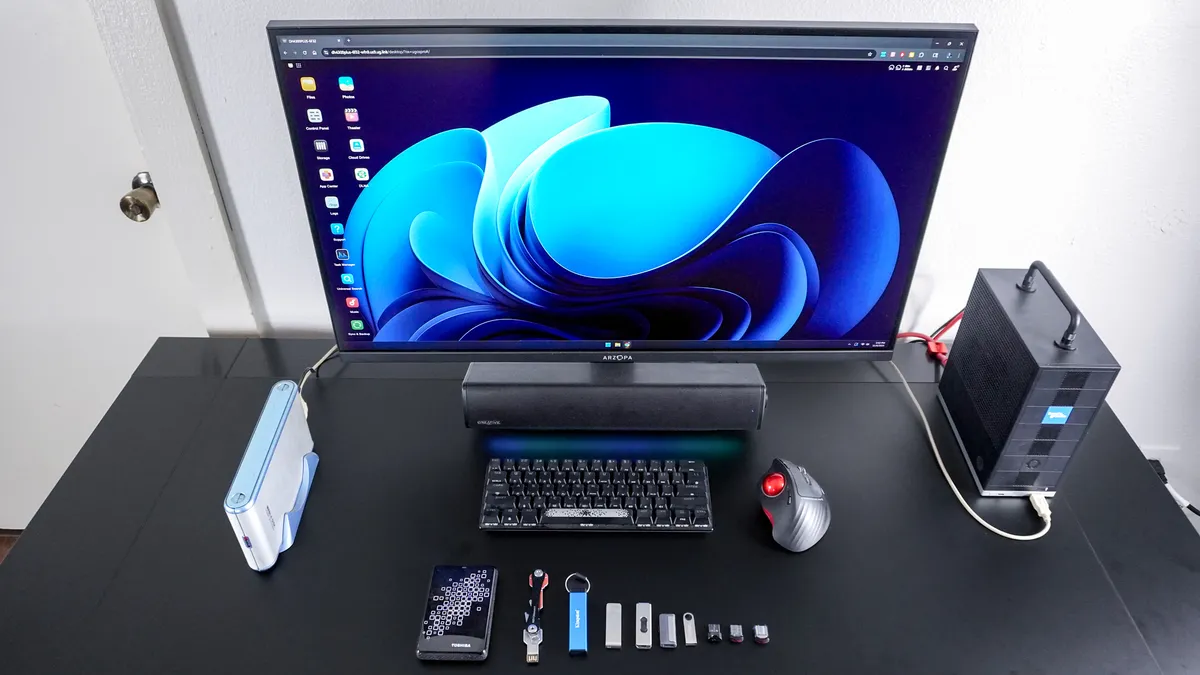
Besides transferring data off all of my various flash drives, I decided to grab my portable hard drive and back that up to my new NAS too. I didn't stop there. Once those files were transferred, I went up into the attic, took down a 20-year-old hard drive (pictured above on the left), and successfully transferred all of my old pictures and videos off that vintage disk, too.
In addition to being a less expensive way to store all of your data, another cool thing you can do with a NAS is watch videos from it anywhere. I know most people prefer Plex or Jellyfin, but I was really impressed with Ugreen’s own Theater app. Not only does it make organizing your movie and TV show collection easier, but it also pulls relevant data from The Movie Database (TMDB). That way, all of your video content has thumbnails and ratings, plus the Theater app takes things a step further by also adding actor info and more.

Although I could have hooked up the DH4300 Plus via HDMI to my TV, I found a better and easier way to stream content locally. By installing Ugreen’s DLNA utility (available in the UGOS app store), I was able to use that protocol to have my NAS show up directly in the Roku Media Player app on my Roku Ultra. This let me watch all of our old home movies on the big screen with ease. However, I do prefer using the Theater app on my computer, as it gives me the option to download any missing subtitles.
Back in the summer, my mother-in-law showed up with five crates of old DVDs and Blu-rays that she and my wife had purchased over the years. My next plan (besides trying out Home Assistant) for the DH4300 Plus is to rip all of those old movies and TV shows to build out my own locally hosted, internet outage-free Netflix.
A digital must
Given the sheer amount of data each of us now creates almost daily on our smartphones, you absolutely need a secure and, more importantly, cost-effective way to store it — or you risk losing all of your precious photos and videos. Sure, you could just keep paying more for a phone or laptop with extra storage or rely on external drives and cloud storage, but as I mentioned before, that cycle gets expensive real fast.
Years ago, when I first became interested in NAS devices, there were really only two expensive options: Synology and QNAP. Then though, the former decided to heavily restrict third-party drives on its NAS devices. While that hurt some consumers in the short term, it actually ended up being a great thing for everyone else. With Synology losing its grip on the NAS market due to backlash, Ugreen, Minisforum, TerraMaster, and a bunch of other hardware makers used this to their advantage.
Now, you can get a reasonably-priced NAS setup like the DH4300 Plus I tested out far more easily. While you do still have to bring your own drives, that freedom of choice is now a massive advantage. You simply have a lot more affordable options when it comes to adding a high-capacity NAS to your home network than you used to.
If you’re tired of overpaying for cloud storage every month or just want the peace of mind from knowing that your most important files are backed up safely at home instead of on someone else’s servers, then a NAS could be the perfect, one-time investment for your own digital life.
While I’ve just scratched the surface of what I can do with the DH4300 Plus, I can’t wait to load it up with even more data and try out more apps. For now though, I’m off to start ripping those old DVDs and Blu-rays and set up Home Assistant, so stay tuned.

Follow Tom's Guide on Google News and add us as a preferred source to get our up-to-date news, analysis, and reviews in your feeds.
More from Tom's Guide
- I tested the Framework Desktop — and it made me rethink everything I knew about mini PCs
- I added this $29 smart sensor to my mailbox and it's one of my favorite home upgrades ever
- I ditched my laptop for a pocketable mini PC and a pair of AR glasses — here’s what happened