How to build a website with Shopify
Build a website with Shopify and sell online in next to no time
Here at Tom’s Guide our expert editors are committed to bringing you the best news, reviews and guides to help you stay informed and ahead of the curve!
You are now subscribed
Your newsletter sign-up was successful
Want to add more newsletters?

Daily (Mon-Sun)
Tom's Guide Daily
Sign up to get the latest updates on all of your favorite content! From cutting-edge tech news and the hottest streaming buzz to unbeatable deals on the best products and in-depth reviews, we’ve got you covered.

Weekly on Thursday
Tom's AI Guide
Be AI savvy with your weekly newsletter summing up all the biggest AI news you need to know. Plus, analysis from our AI editor and tips on how to use the latest AI tools!

Weekly on Friday
Tom's iGuide
Unlock the vast world of Apple news straight to your inbox. With coverage on everything from exciting product launches to essential software updates, this is your go-to source for the latest updates on all the best Apple content.

Weekly on Monday
Tom's Streaming Guide
Our weekly newsletter is expertly crafted to immerse you in the world of streaming. Stay updated on the latest releases and our top recommendations across your favorite streaming platforms.
Join the club
Get full access to premium articles, exclusive features and a growing list of member rewards.
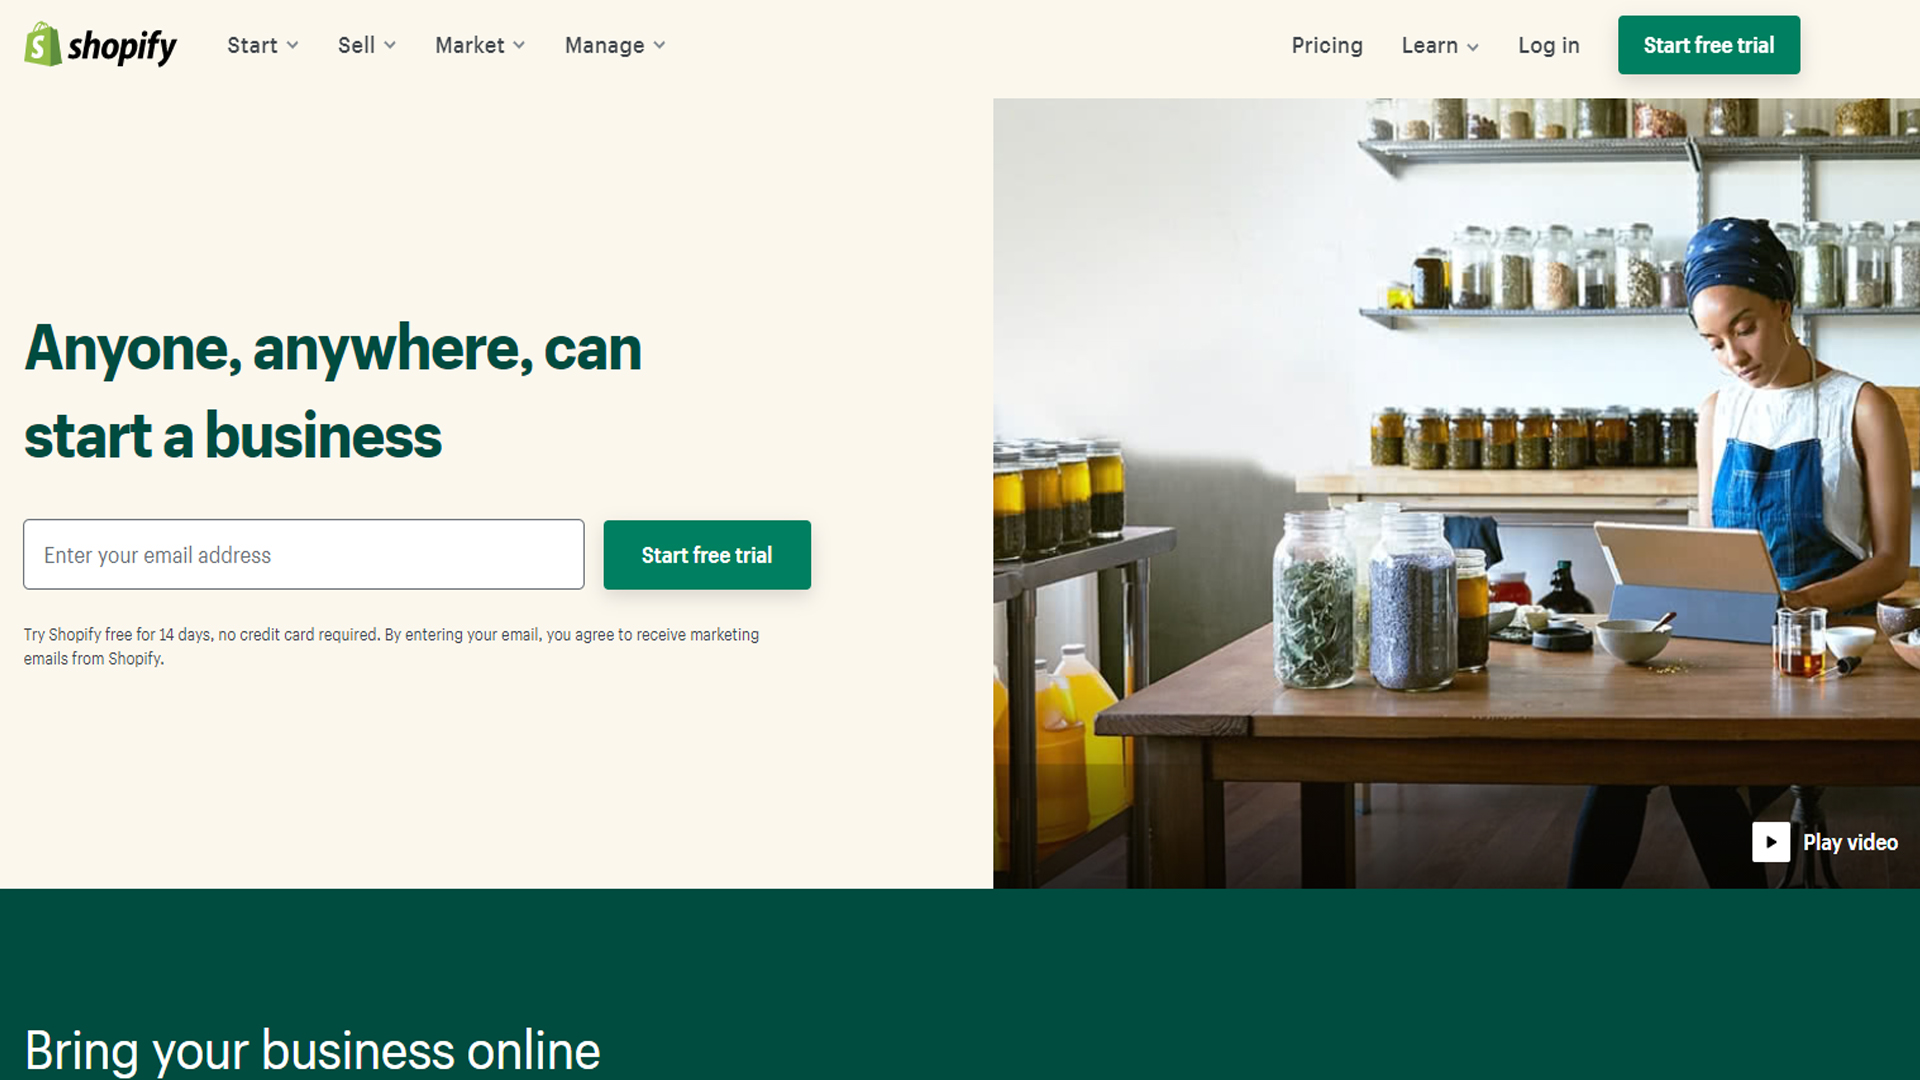
Shopify is one of the best website builders, and specifically one of the best ecommerce website builders, offering a complete platform for building online stores. You can use it to sell products online via desktop, mobile, and online marketplaces, as well as social media. In turn, it’s also cloud-based, so you don’t have to worry about installation, and you can try it free for 14 days.
Shopify ranks highly in regards to the tools we’ve tested and tried out, and it allows you to build a complete, professional ecommerce store without touching a line of code. In this step-by-step guide, we'll show you how to build a website with Shopify.
Step 1: Sign up for Shopify
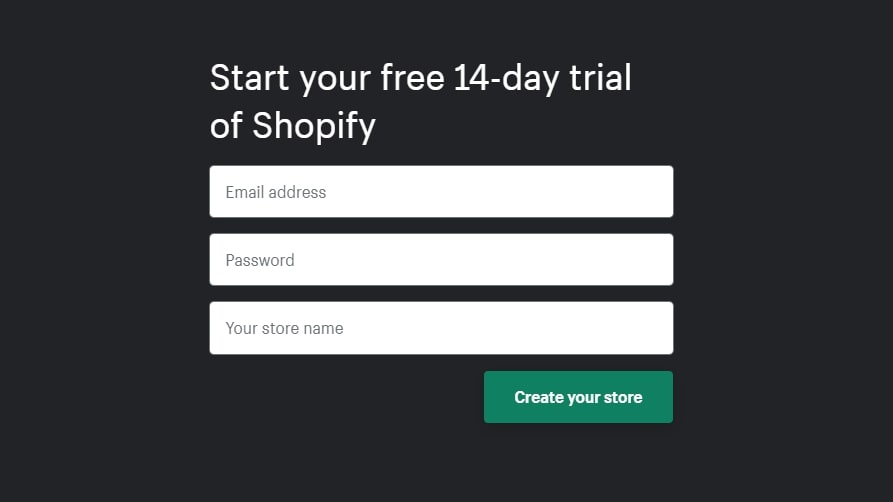
To begin, head to Shopify.com and choose "Start free trial". Enter your email address, create a password, and choose a store name.
Step 2: Complete the Getting Started wizard
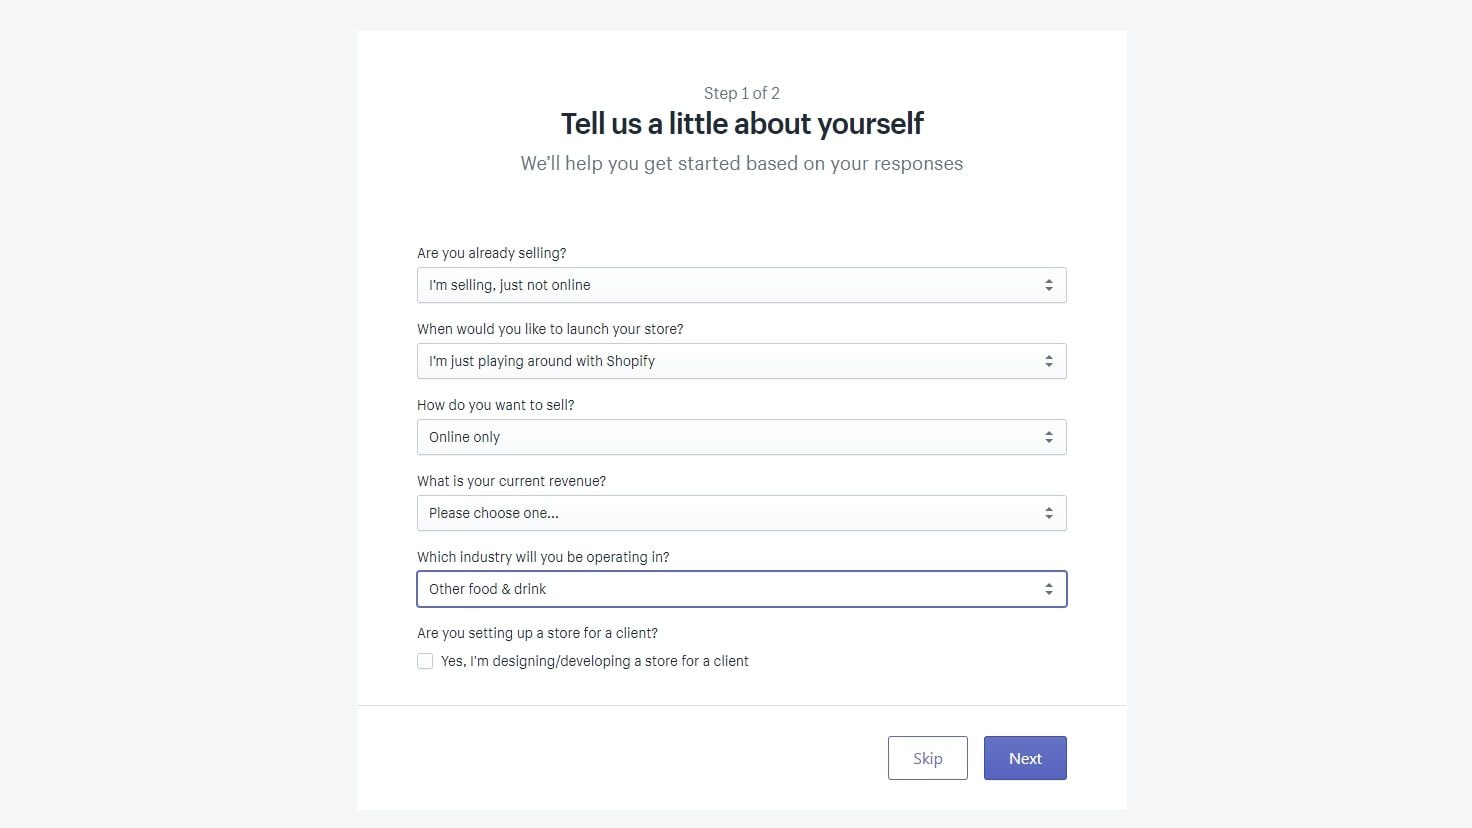
Shopify has a short questionnaire that sets up the defaults for your website. Fill in whether you’re already selling, the size of your business, and the industry you work in. On the next page, you’ll be asked for your full address.
Step 3: Add products
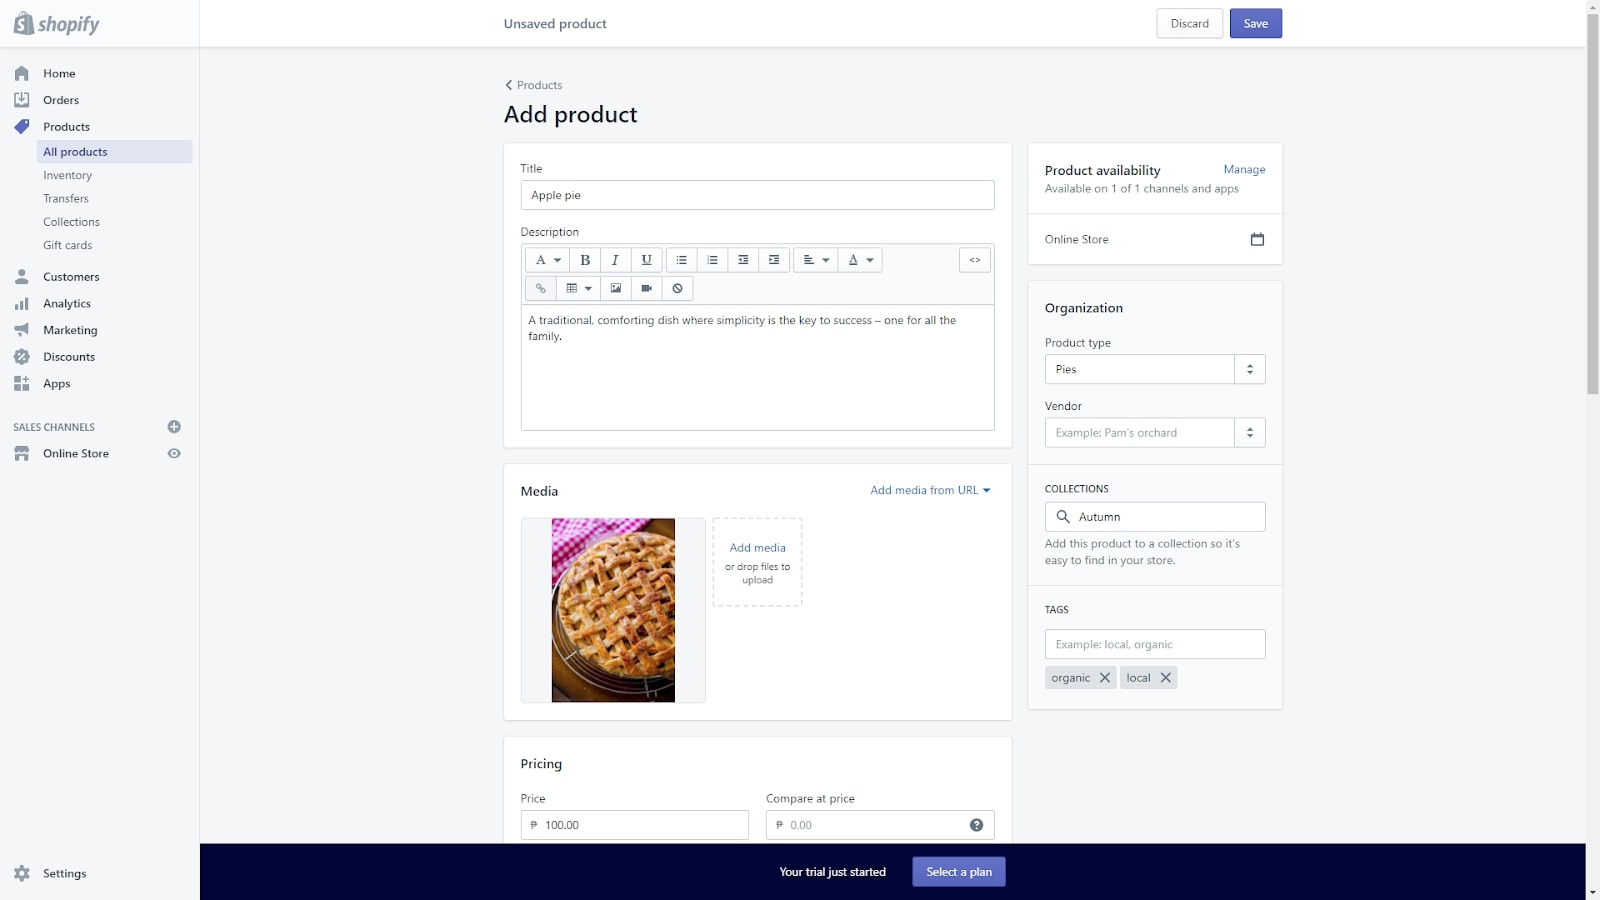
To get a feel for how Shopify works, we suggest adding a few of your products first. In the menu on the left, click "Products".
There’s a large amount of information that you can add to each product, some of which might not apply to your business. At the very least, add a title, description, price, and images. You can upload images and videos from your computer or include media from a URL. If it’s a physical product, you can specify details, such as weight and country of origin.
You can organize products by product type, vendor, collection, and tag. The more meta information that you add to your products, the easier it will be to categorize them in the store.
Get instant access to breaking news, the hottest reviews, great deals and helpful tips.
Step 4: Choose a site theme
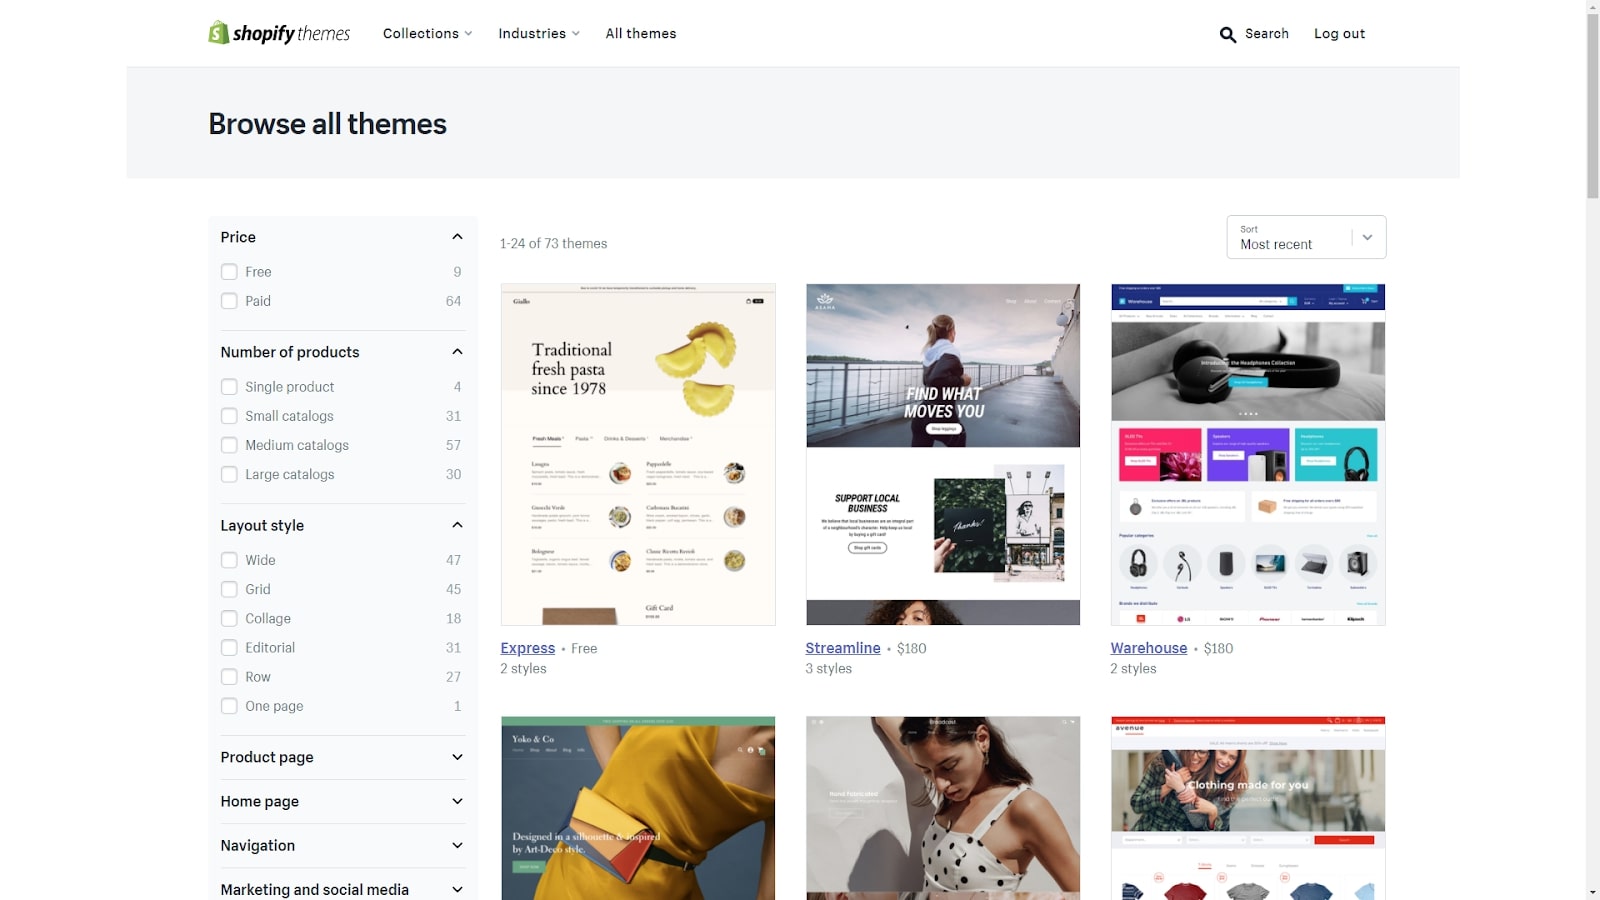
Your store will have been set up with a default theme based on the category that you chose in the questionnaire. When you click on "Online Store" and then "Themes" in the left-hand menu, you can see the current theme and choose from others.
To preview your current theme, click on "Actions" and then "Preview". You can also choose from the free themes and paid themes at the foot of the page. There are currently nine free themes and 64 paid themes in the Shopify Themes Store. Don’t worry if you don’t find a perfect one—you can edit your chosen theme in the next step.
Step 5: Customize your theme settings
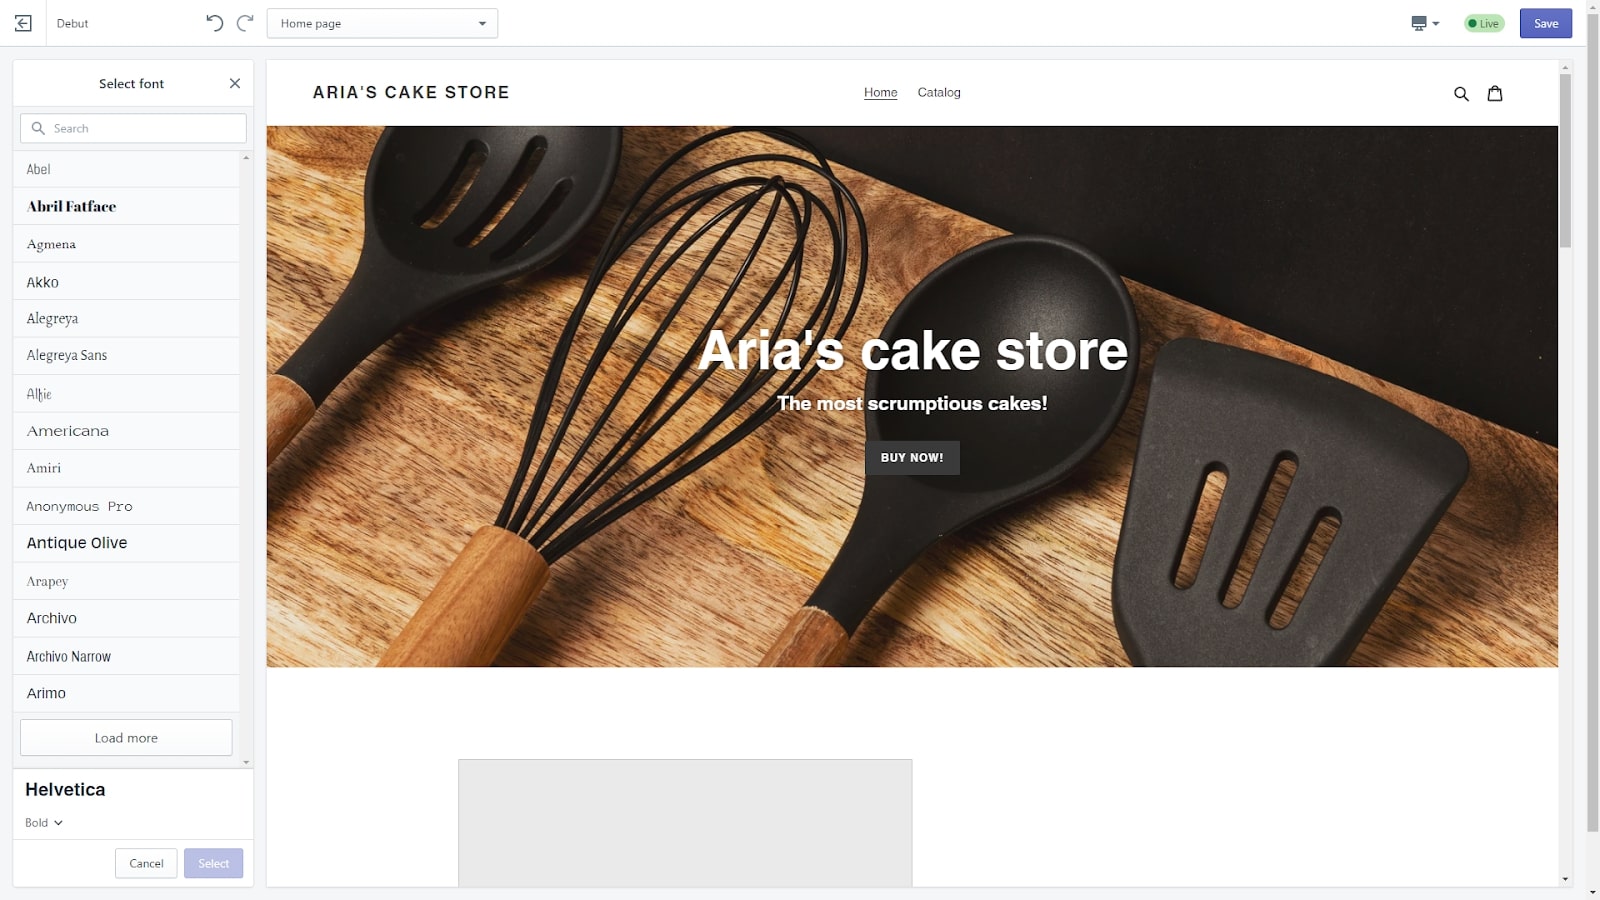
Click on "Customize" to edit your theme. At the bottom left of the page, choose "Theme settings". Here, you can choose the colors, typography, borders, and image opacity of your website. You can also set options such as whether to include social sharing buttons or show a notification when an item has been added to the cart.
Step 6: Edit your home page sections
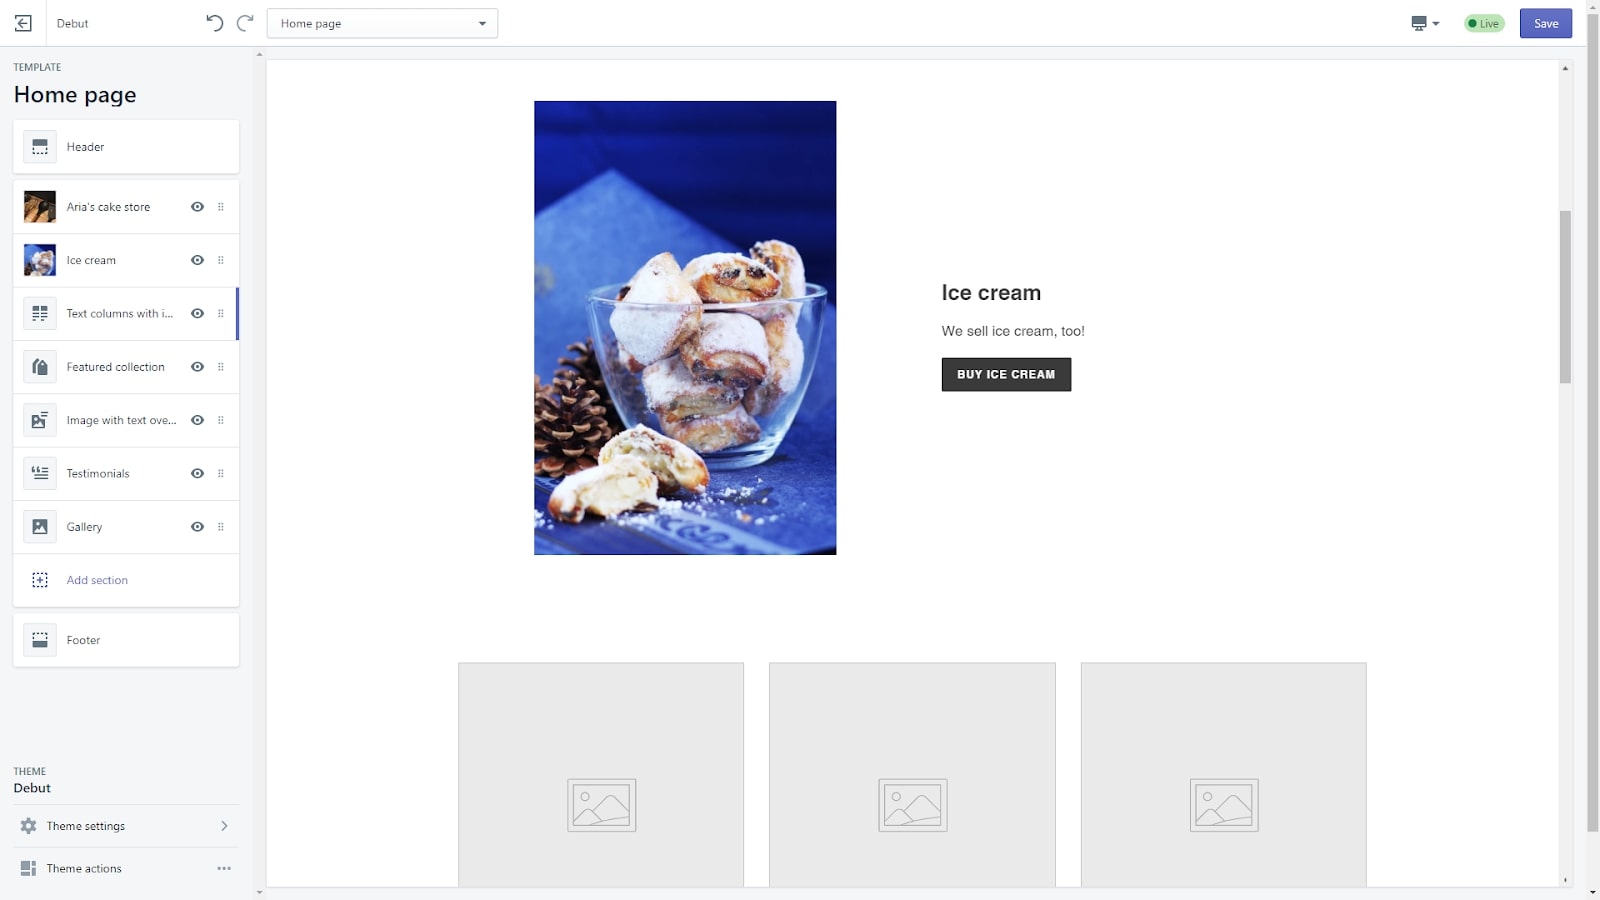
Return to your home page, and think about how you want each section of the page to look. On Shopify, pages are split into horizontal sections that you can move up and down, edit, and delete by using the left-hand menu. There’s also an editable header and footer section.
Click on any of these page sections on the menu, and you can change their details. Each section has different options depending on its type. For example, in an "Image with text" section, you can select the image, specify the text, and add an optional button.
You make all your edits in the box on the left-hand side, and your changes are reflected in real time in the preview pane. If you’re not happy with a section, you can hide it completely. Remember to click "Save" to save your changes.
Step 7: Add more pages
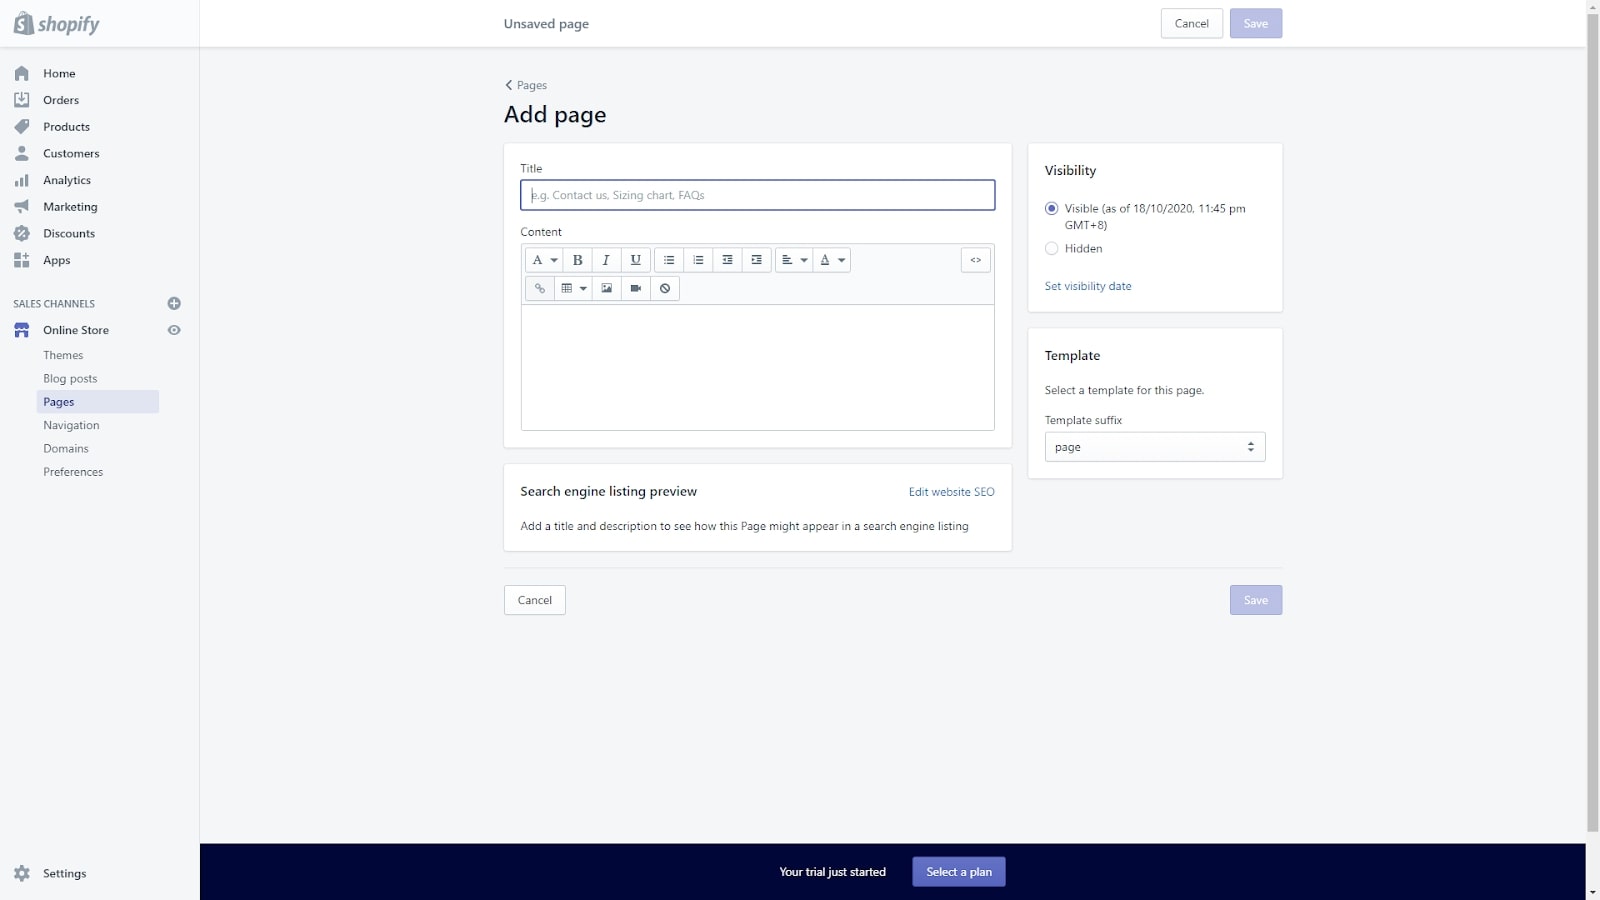
If you want more pages on your site, click on "Online Store" and choose "Pages". Here, you can add more pages and edit them just as you did with your home page.
Step 8: Set your site’s title and meta description
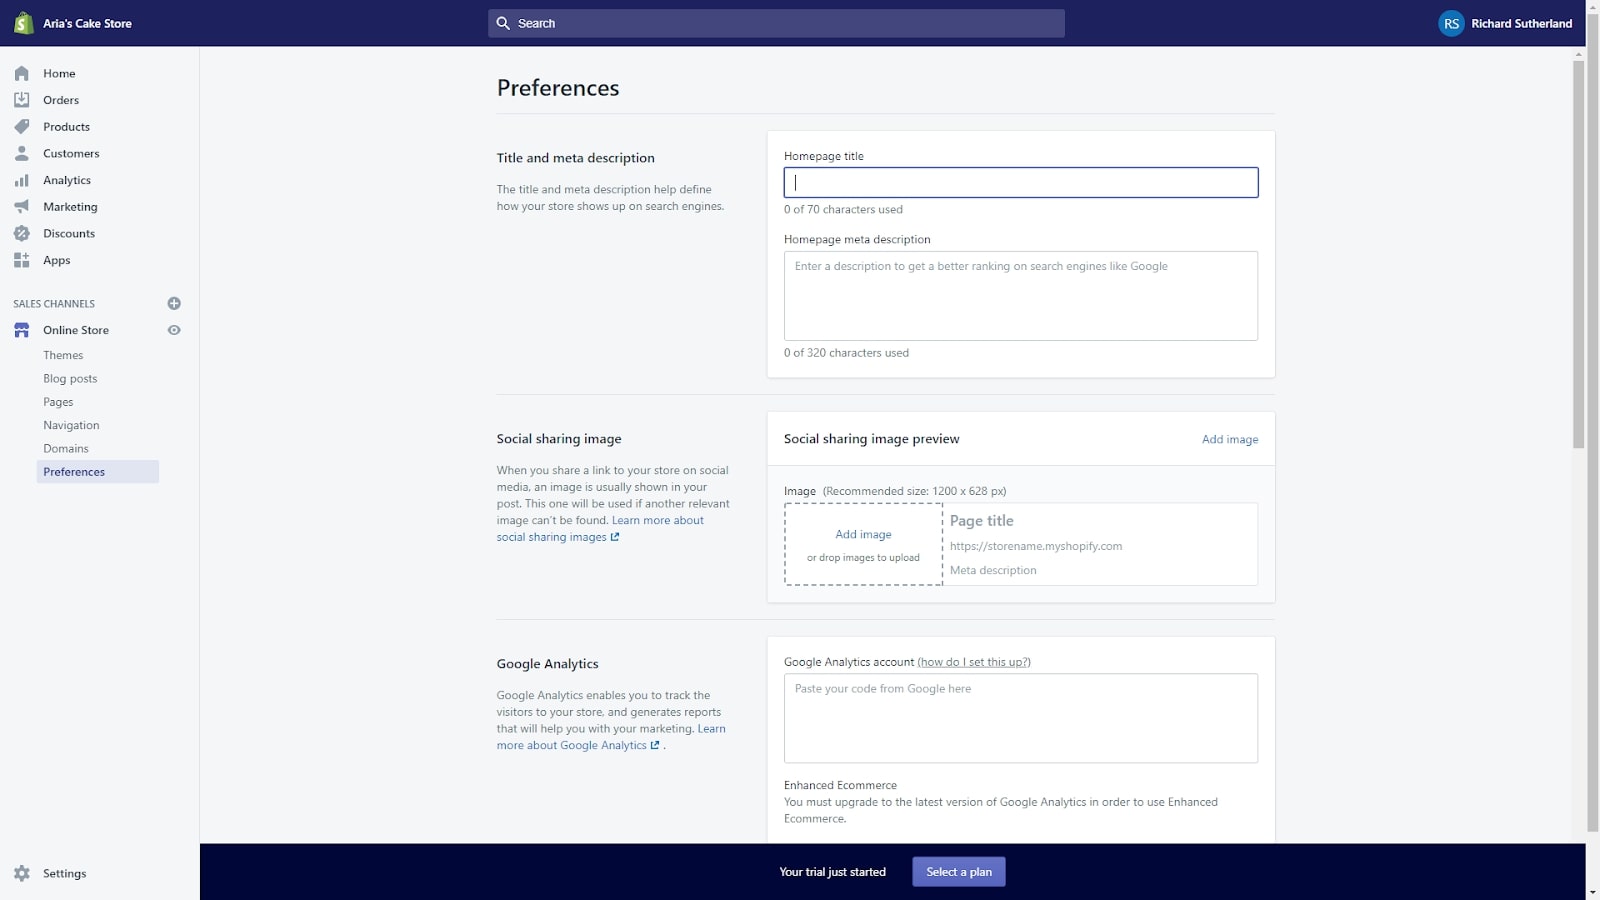
Click on "Online Store", and choose "Preferences" to find more site settings. Here, you can set the homepage title and meta description, which is the text that will appear on search engines describing your website.
You can also set up a social-sharing image, Google Analytics tracking code, and Facebook Pixel tracking if you plan to use these services.
Step 9: Set delivery options
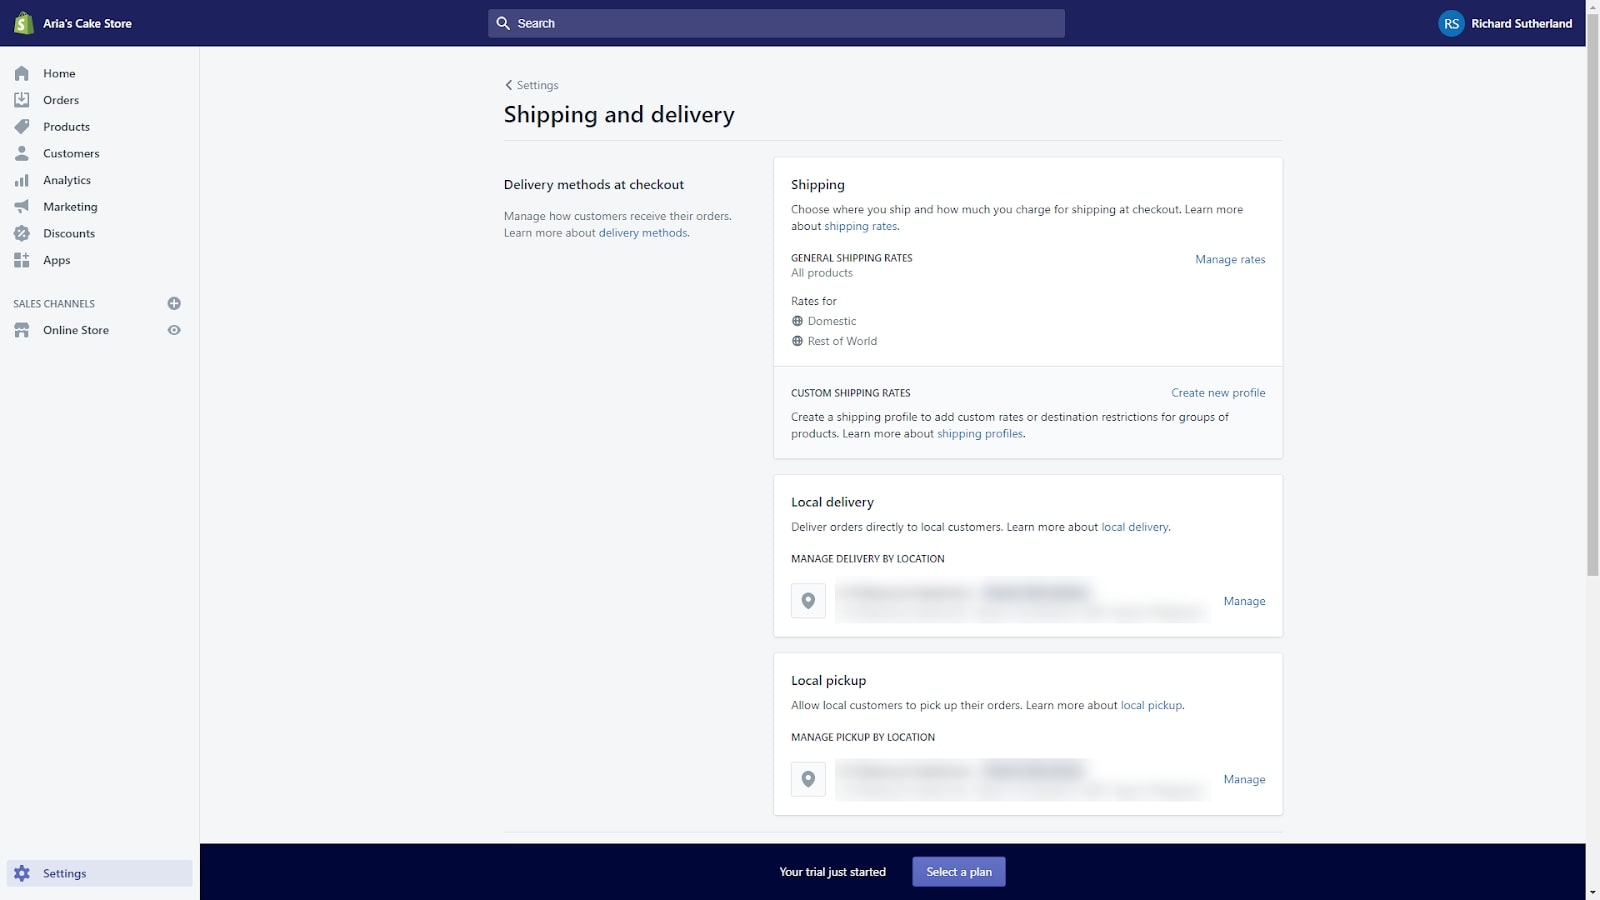
Click on "Settings" and choose "Shipping and delivery". Here, you set the delivery options available to your visitors at checkout. You can set domestic, international, local, and pickup rates, if applicable. Next, choose the package sizes that you use to ship your products.
Step 10: Buy or connect a domain
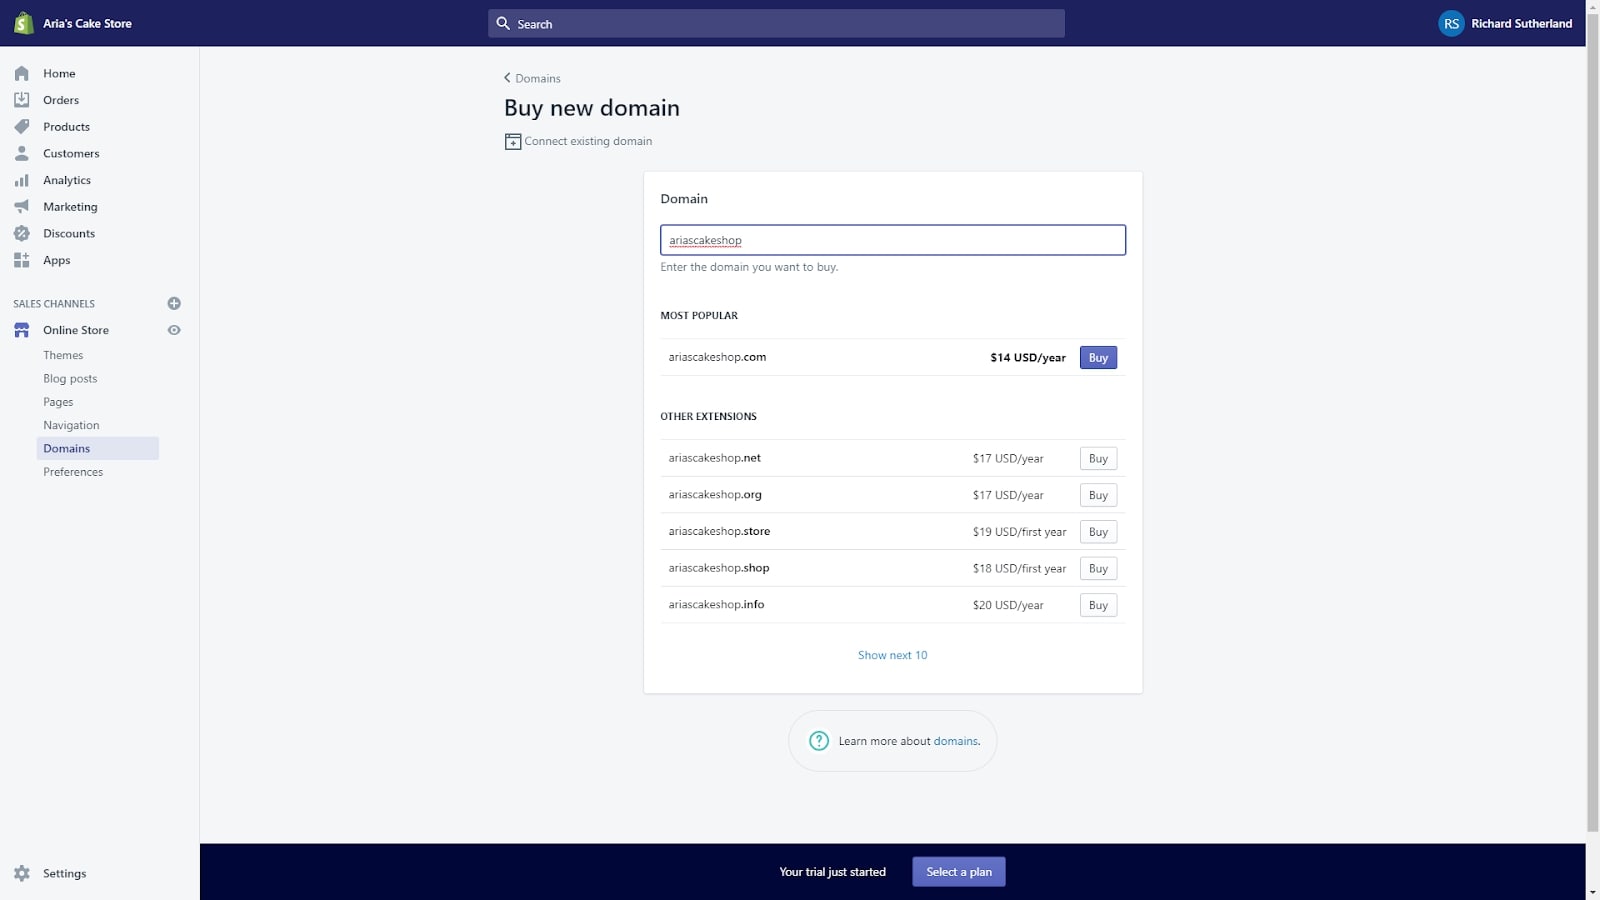
Your website is now available at yourstorename.myshopify.com, but for a more professional site, you should get your own domain name. Click on "Domains", and you’re presented with a few options. You can buy a domain through Shopify, transfer a domain that you own from another registrar, or get your existing domain registrar to point your domain to Shopify.
Step 11: Launch your website
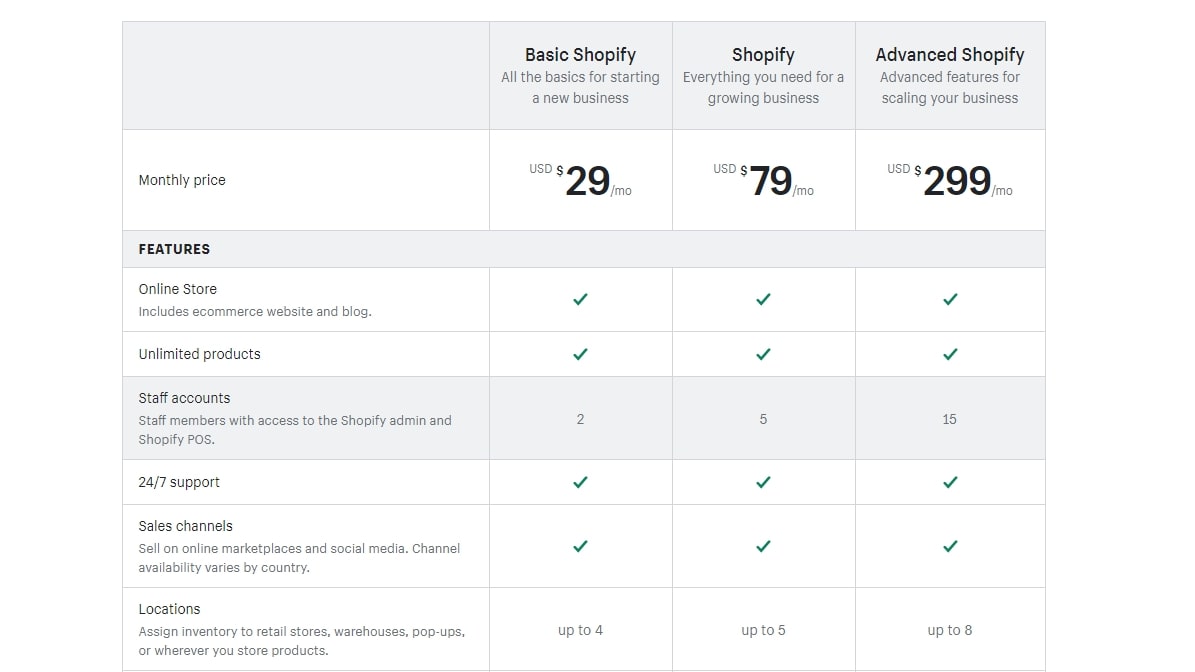
Your site is available online already, but it's password protected. Until you buy a Shopify plan, when anyone visits the page without the password, they just see a holding page. To buy a plan, choose "Select a plan". Shopify plans start at $29 a month, and can be paid for by credit card or through PayPal.
How to build a website with Shopify: Summary
Shopify is one of the best website builders for businesses looking to begin selling online. Its tools are laser-focused on the things that ecommerce stores need to get right, while still offering the power to design websites as desired.
Now that you know how to build a website with Shopify, there's so much you can do to personalize and improve it. Browse through all of Shopify’s settings, apps, and marketing tools to perfect your ecommerce website.
Further reading on website builders
You can read our comparison articles pitting Wix vs Shopify, Squarespace vs Shopify, and Shopify vs BigCommerce. It's also worth reading our guide on how to build an ecommerce website, to learn more about Shopify.
Those with more web development experience may want to try WordPress via the best website builders for WordPress, and create an ecommerce store hosted with the best WordPress hosting services (ensure you choose the best web hosting services, too).

Richard is a technology writer with over 20 years experience in website development, marketing, and SEO. A graduate in Computer Science, he has lectured in Java programming and built software for companies including Samsung and Walmart. Richard writes for TechRadar, IT Pro, Tom's Guide, and PC Gamer.
 Club Benefits


