I used this classic IKEA cart to build a rollable workstation for my laptop — and it's a game changer for working comfortably from anywhere
No more being hunched over my laptop and now I can recline while I work
Here at Tom’s Guide our expert editors are committed to bringing you the best news, reviews and guides to help you stay informed and ahead of the curve!
You are now subscribed
Your newsletter sign-up was successful
Want to add more newsletters?
Daily (Mon-Sun)
Tom's Guide Daily
Sign up to get the latest updates on all of your favorite content! From cutting-edge tech news and the hottest streaming buzz to unbeatable deals on the best products and in-depth reviews, we’ve got you covered.

Weekly on Thursday
Tom's AI Guide
Be AI savvy with your weekly newsletter summing up all the biggest AI news you need to know. Plus, analysis from our AI editor and tips on how to use the latest AI tools!

Weekly on Friday
Tom's iGuide
Unlock the vast world of Apple news straight to your inbox. With coverage on everything from exciting product launches to essential software updates, this is your go-to source for the latest updates on all the best Apple content.
Weekly on Monday
Tom's Streaming Guide
Our weekly newsletter is expertly crafted to immerse you in the world of streaming. Stay updated on the latest releases and our top recommendations across your favorite streaming platforms.
Join the club
Get full access to premium articles, exclusive features and a growing list of member rewards.
Finding the space and the budget in your home or apartment for a dedicated home office with a full desk setup can certainly be difficult. While I’m lucky enough that I have the room, many other people are left hunched over their kitchen tables working from one of the best laptops. But after a bit of DIY and plenty of research, I’ve found a better and more affordable solution that will work for anyone, regardless of their space or budget limitations.
Before I started reviewing standing desks, I had a chance to check out a few rolling desks, and to this day, my wife still uses one of them in her classroom. What I love about rolling desks is that you’re not just limited to working in one place. Instead, you can bring your workstation with you.
What if I told you there was a way to combine this feature with the ability to recline while you work? And to top it all off, you can build this same setup yourself using an inexpensive rolling cart from IKEA and one of the best monitor arms. After stumbling upon a video online where I saw someone design and build a rollable workstation this way, I knew I had to try it out for myself.
After a week of tinkering and using my new rollable workstation, it just might be my favorite (and the most comfortable) way to use my laptop yet. Here’s how I put it together, all the products I used and why you too might want to consider building your own, whether you're short on space or just want to recline all the way back in your chair while getting some work done.
Repurposing an IKEA classic
Before I go into the build itself, I want to give credit where credit’s due. One day while scrolling through YouTube Shorts, I came across a video from Tools. Electro. DIY (T.E.D) where he shows off his original rollable workstation and walks viewers through the products he used for the project.
Even though I hadn’t seen his content before, I was immediately impressed with the idea.To that end, I picked up an IKEA RÅSKOG utility cart ($40, IKEA) just like the one T.E.D used in his project to build my own.
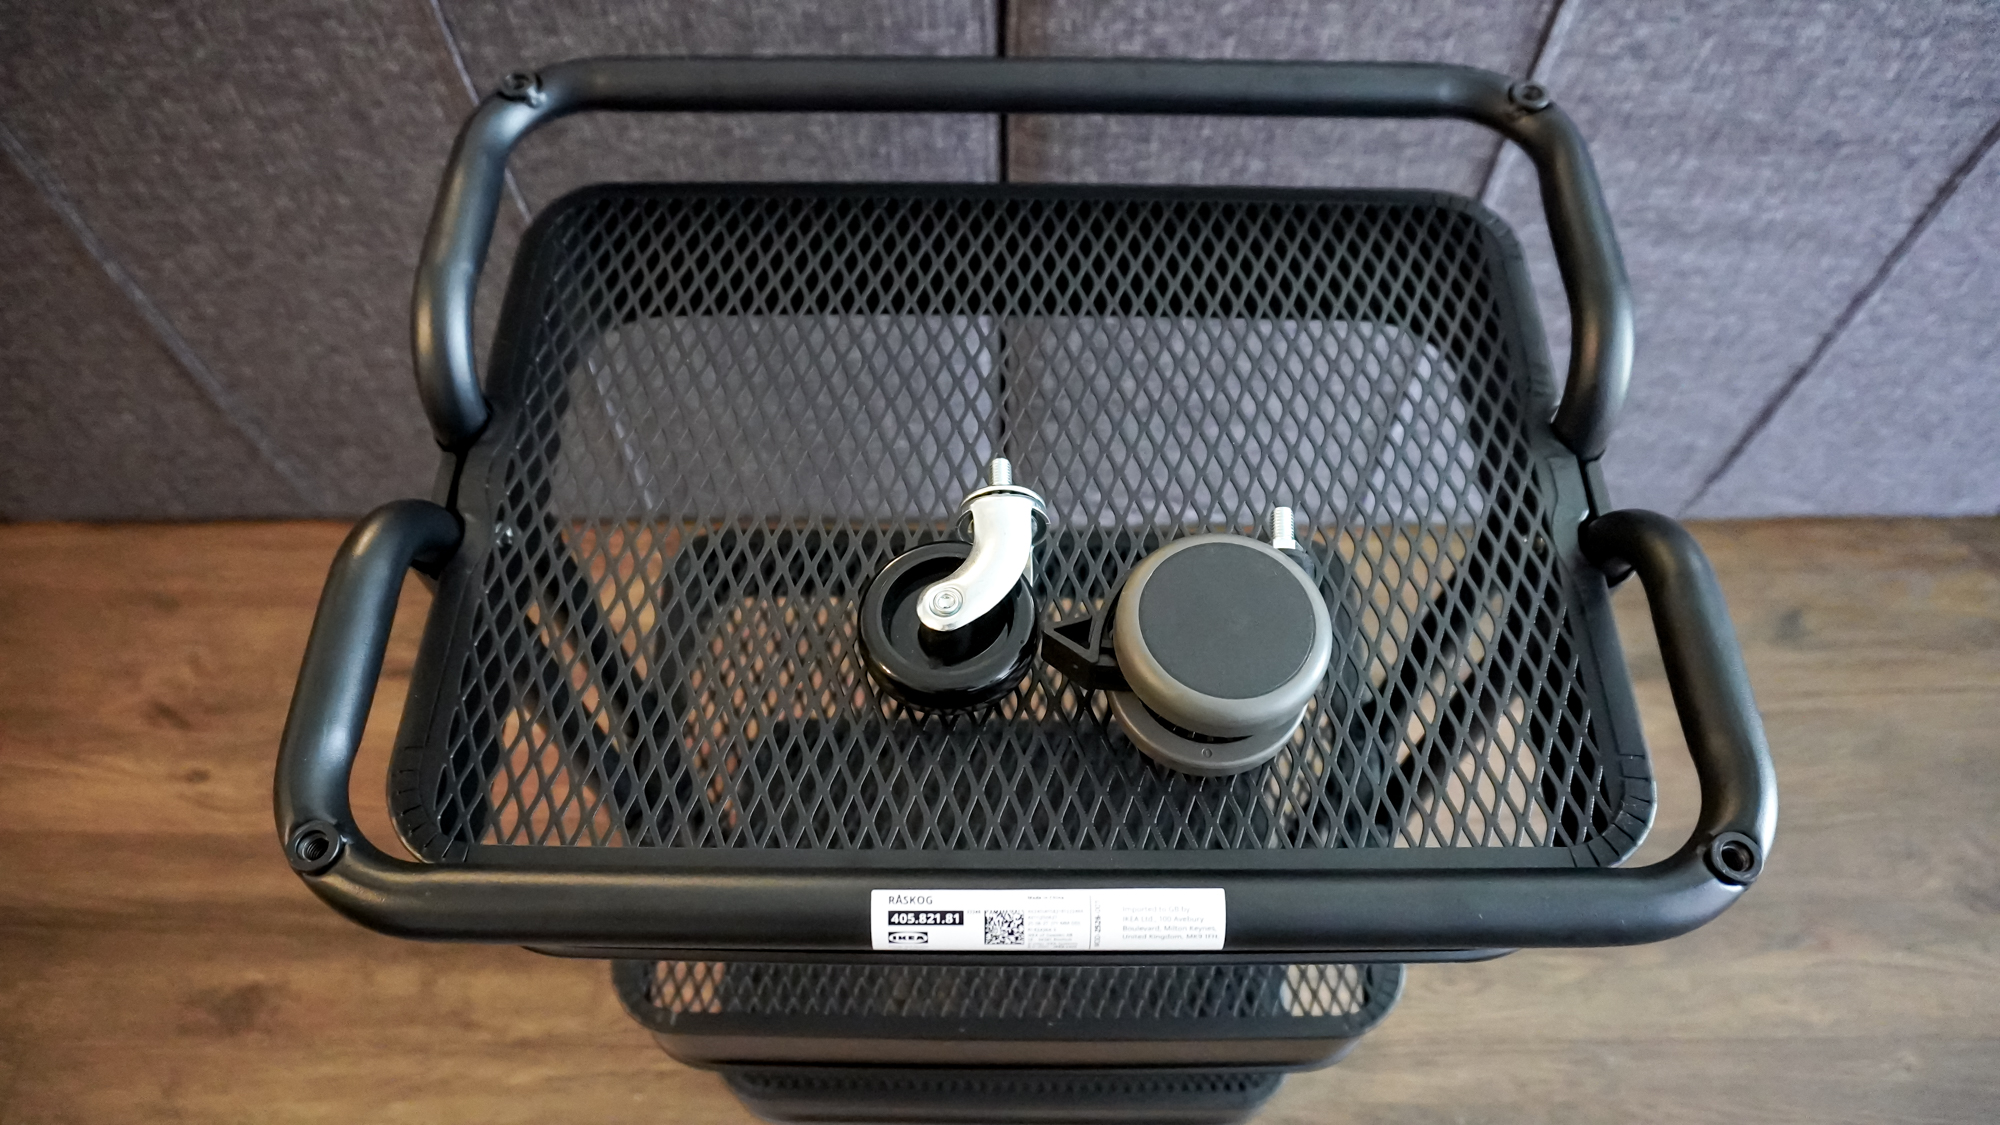
Even if you have a hard time putting other IKEA furniture together, the Raskog is very easy to assemble and doing so only took me about 10 minutes. While the included casters or wheels are more than good enough for what you’re supposed to use this utility cart for, I swapped them out for a pair of Uplift Desk’s Soft Roll Desk Casters ($79, Uplift Desk) I had on hand from back when I tried out a desk from the company’s new Collegiate Collection.
Get instant access to breaking news, the hottest reviews, great deals and helpful tips.
In the picture above, you can see how these heavy-duty casters differ from the ones IKEA includes with the Raskog. Not only are they twice as wide, they’re also a lot softer and, unlike the cart’s stock casters, all four of them can be locked in place. Since I’m going to be using this cart with a monitor arm and a laptop (and possibly even one of the best monitors), I figured having extra support at its base makes a lot of sense.
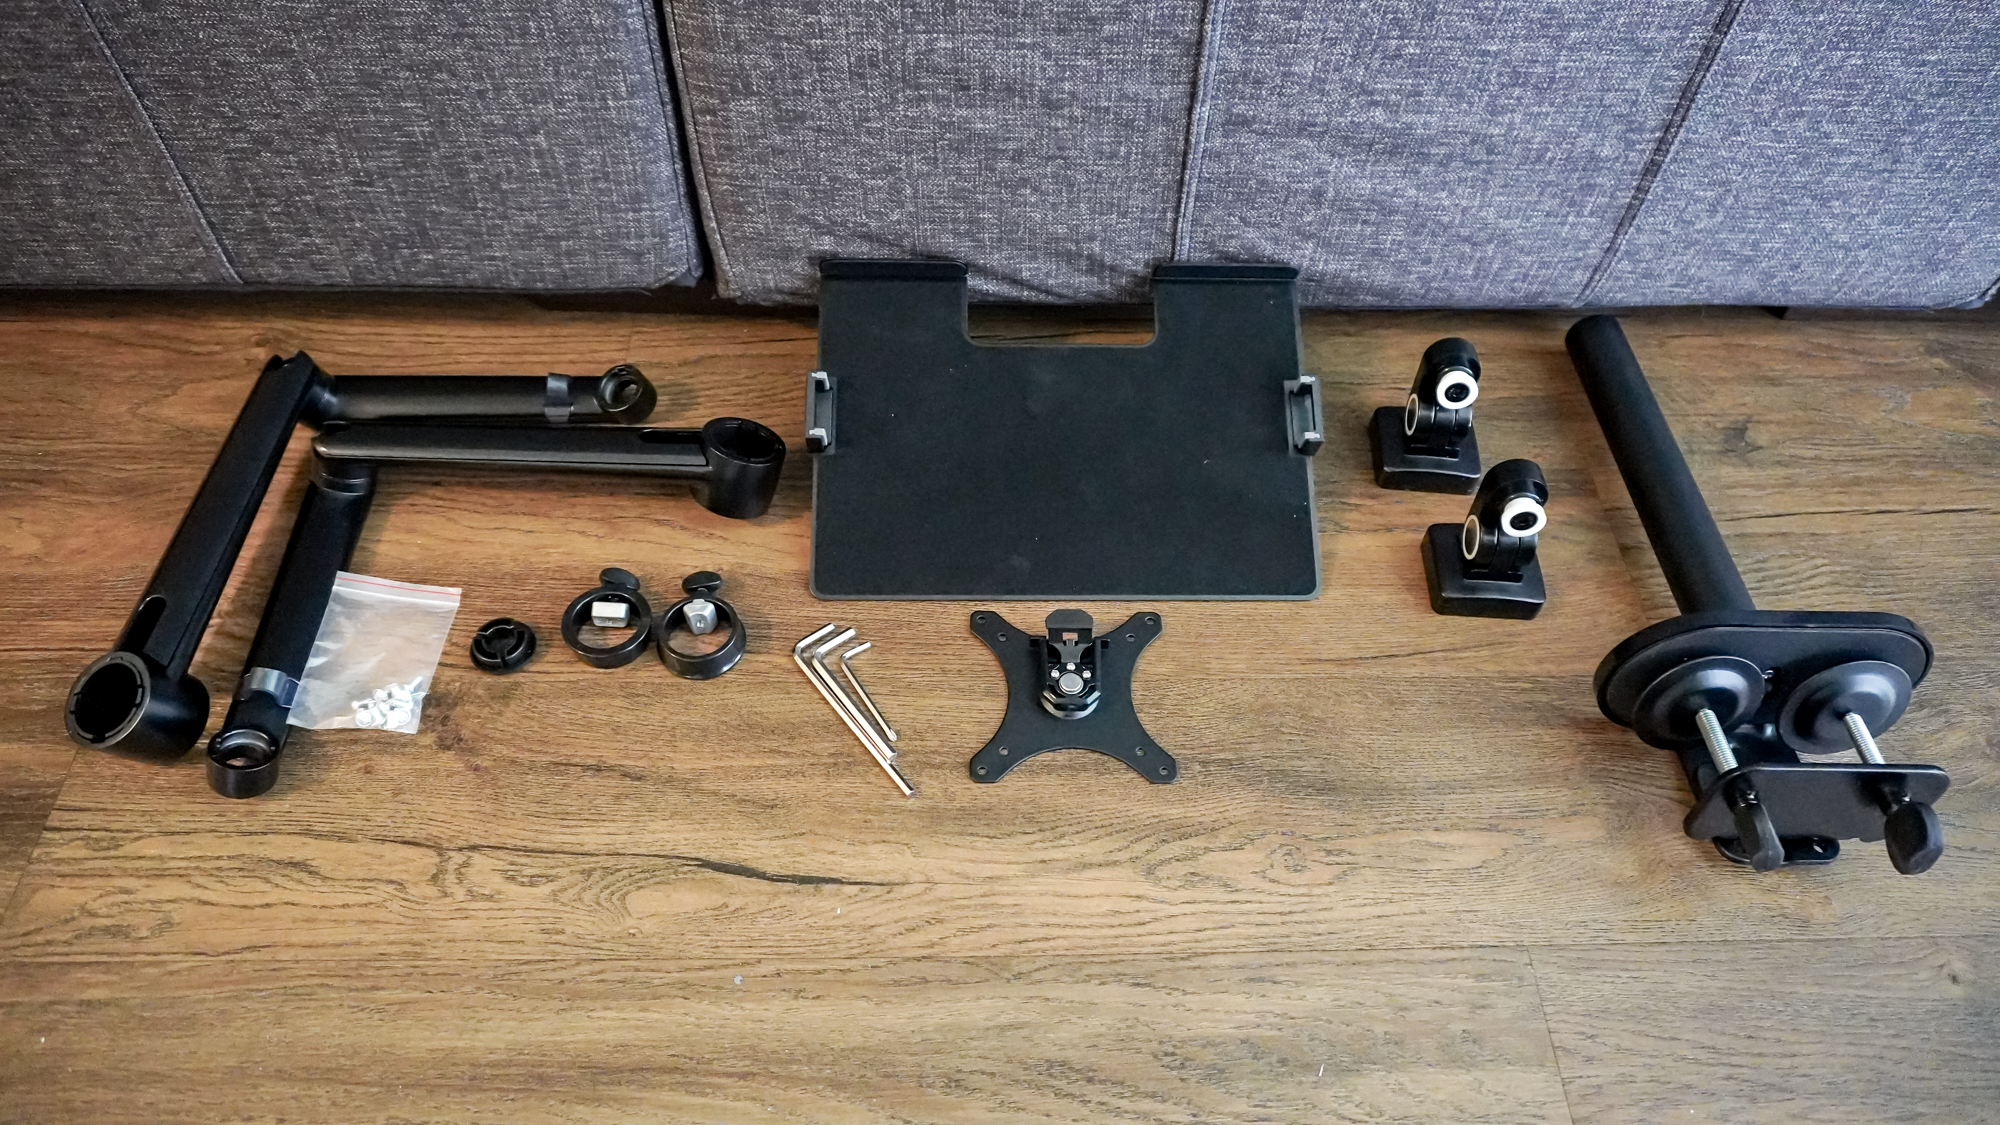
Speaking of the monitor arm, I picked up the exact same model that T.E.D used in his rollable workstation video for a few reasons. I like that the Viozon Monitor and Laptop Mount ($88, Amazon) comes with a laptop tray included and that it has a longer pole than the other monitor arms I have on hand. Its arms aren’t spring-loaded nor do they have a gas cylinder for on the fly height adjustments but you do get plenty of flexibility in regard to how high or low you want to install them on its pole.
The Viozon monitor arm was also very easy to assemble. With it all put together, it was time for the hardest part of this project: drilling a hole through the top shelf of the Raskog cart.
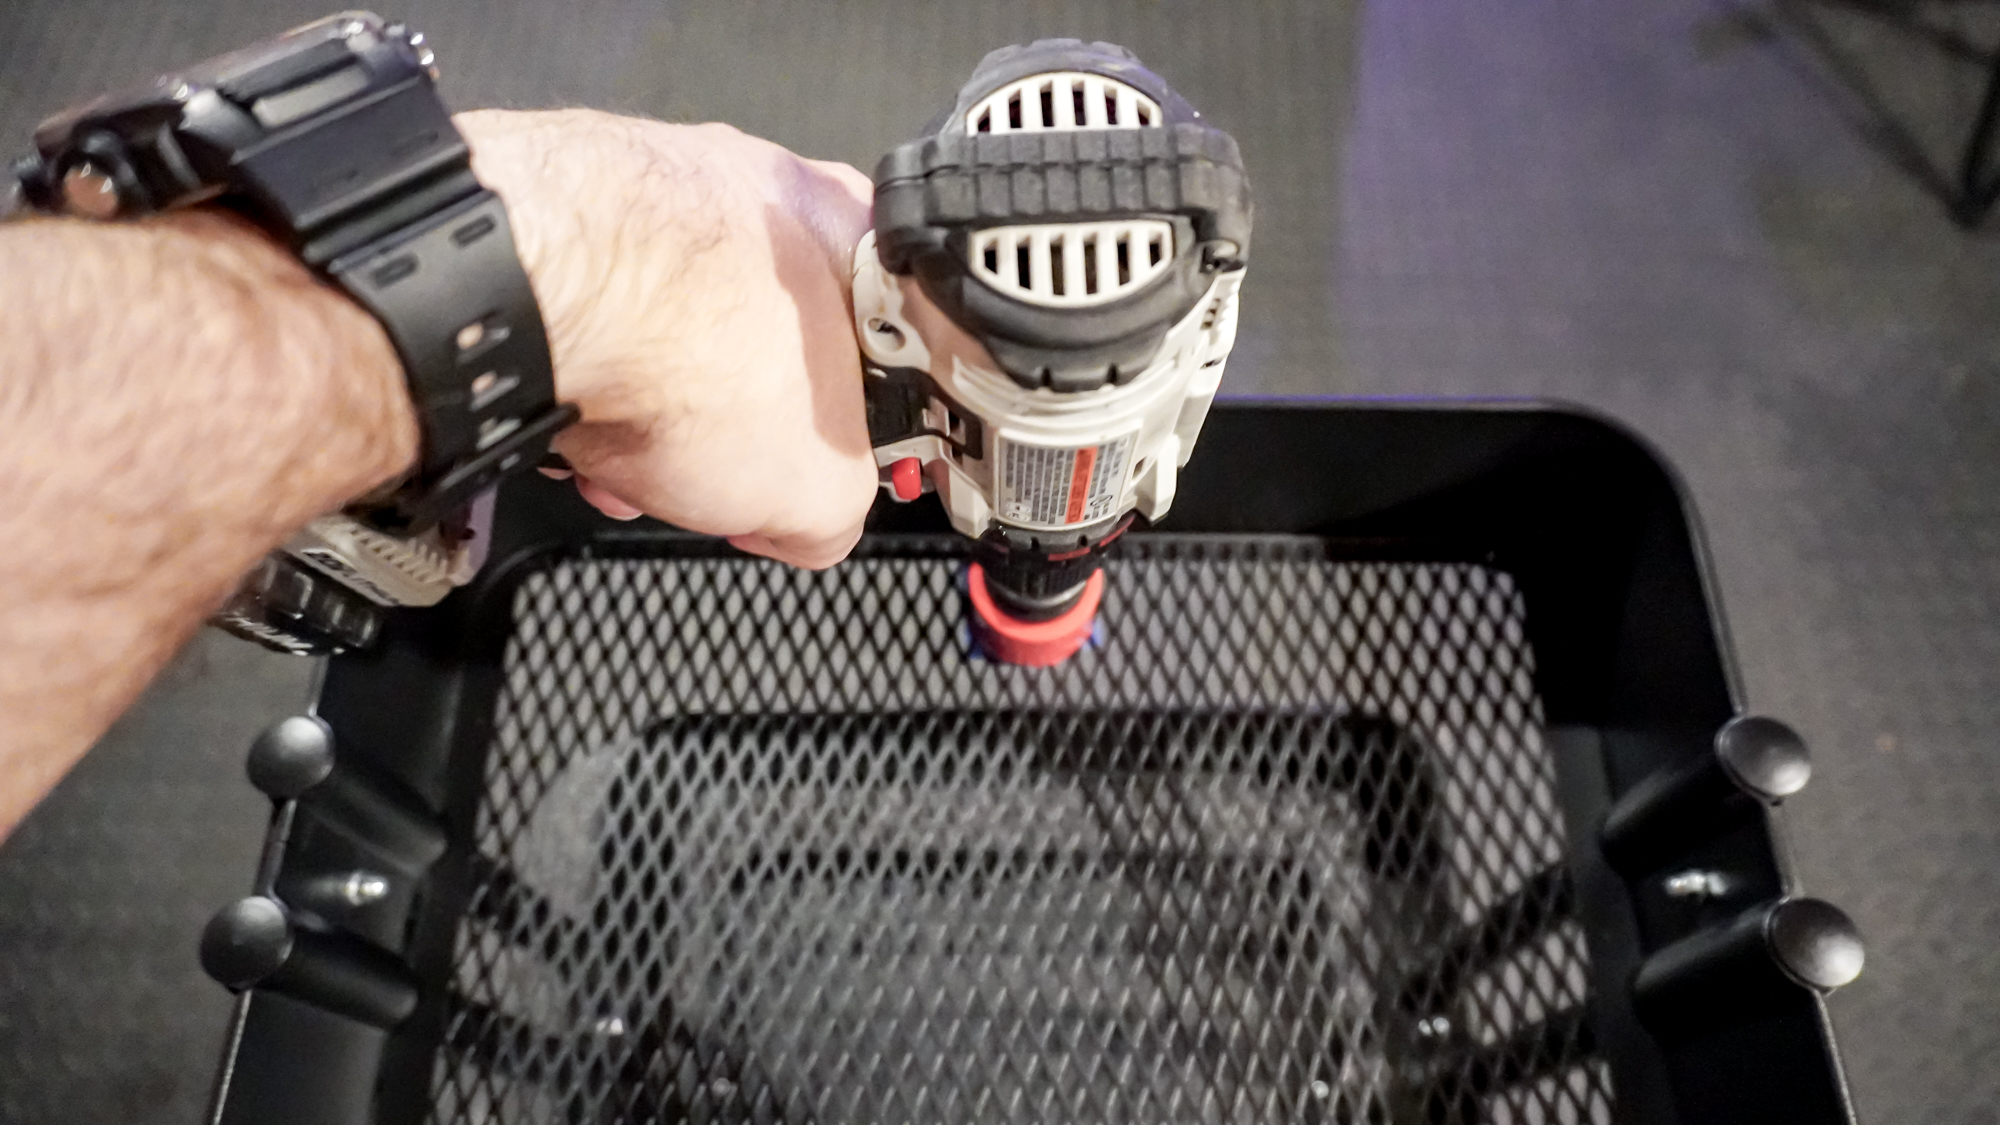
Drilling through wood or other softer materials is easy enough with my power drill but for this project, I picked up a bi-metal hole saw kit online ($30, Amazon). I thought drilling a circular hole large enough for the monitor arm’s pole would be more difficult but once I got started, it was also fairly easy to do.
If you plan on building your own rollable workstation with an IKEA cart, just take your time and go slowly. You also want the hole as close to the edge of the cart’s shelves as possible as that’s where you’ll be installing the monitor arm’s base.
Rollable, adjustable and expandable
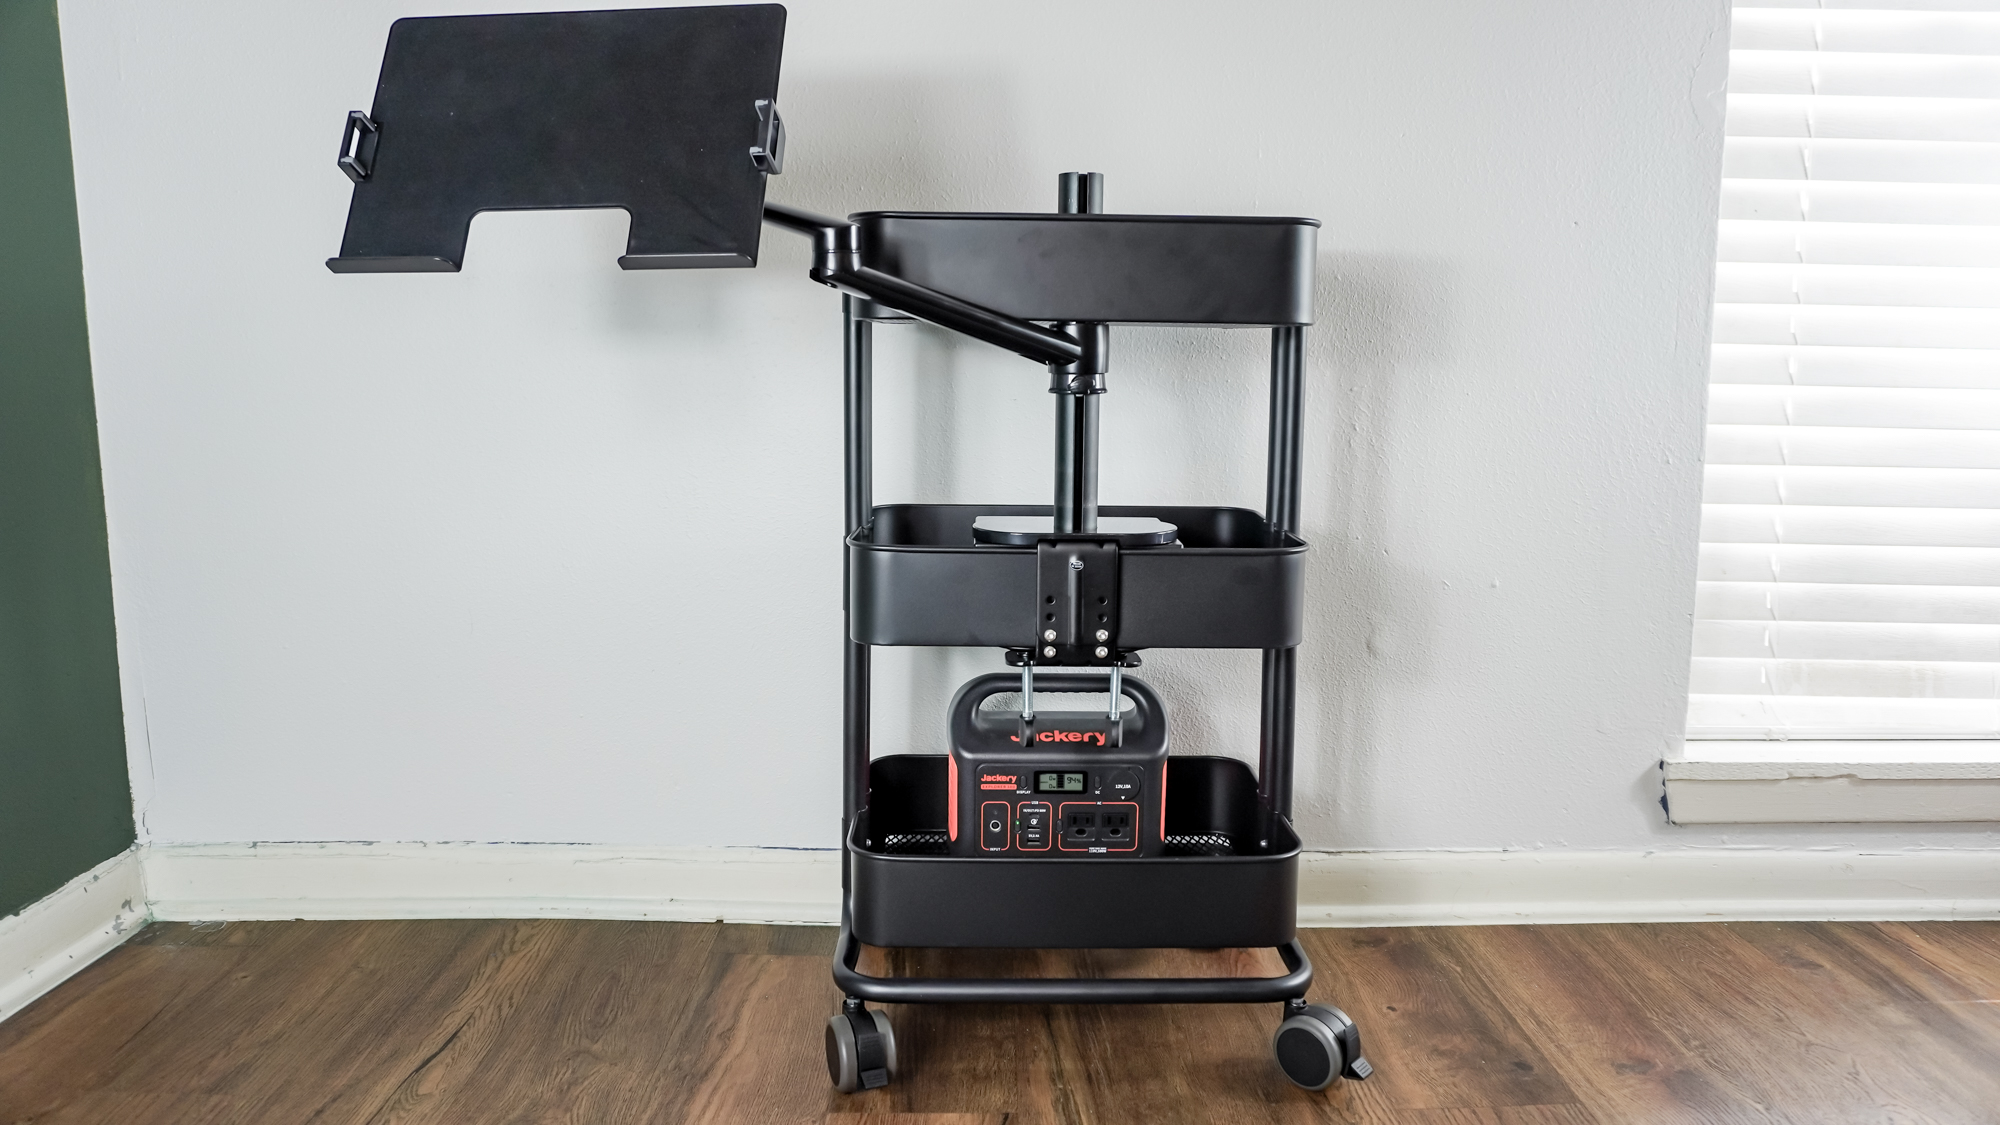
With the hole drilled in the top shelf of the Raskog cart, it was time to put all the pieces in their place. The monitor arm clamps onto the second shelf with its pole extending through the hole in the top shelf. I then have one of the arms in the middle of the two shelves with the laptop mount attached.
Whether you have the arm for your laptop in this position or above the top shelf will depend on both your height and whether you’re planning to recline while using it.
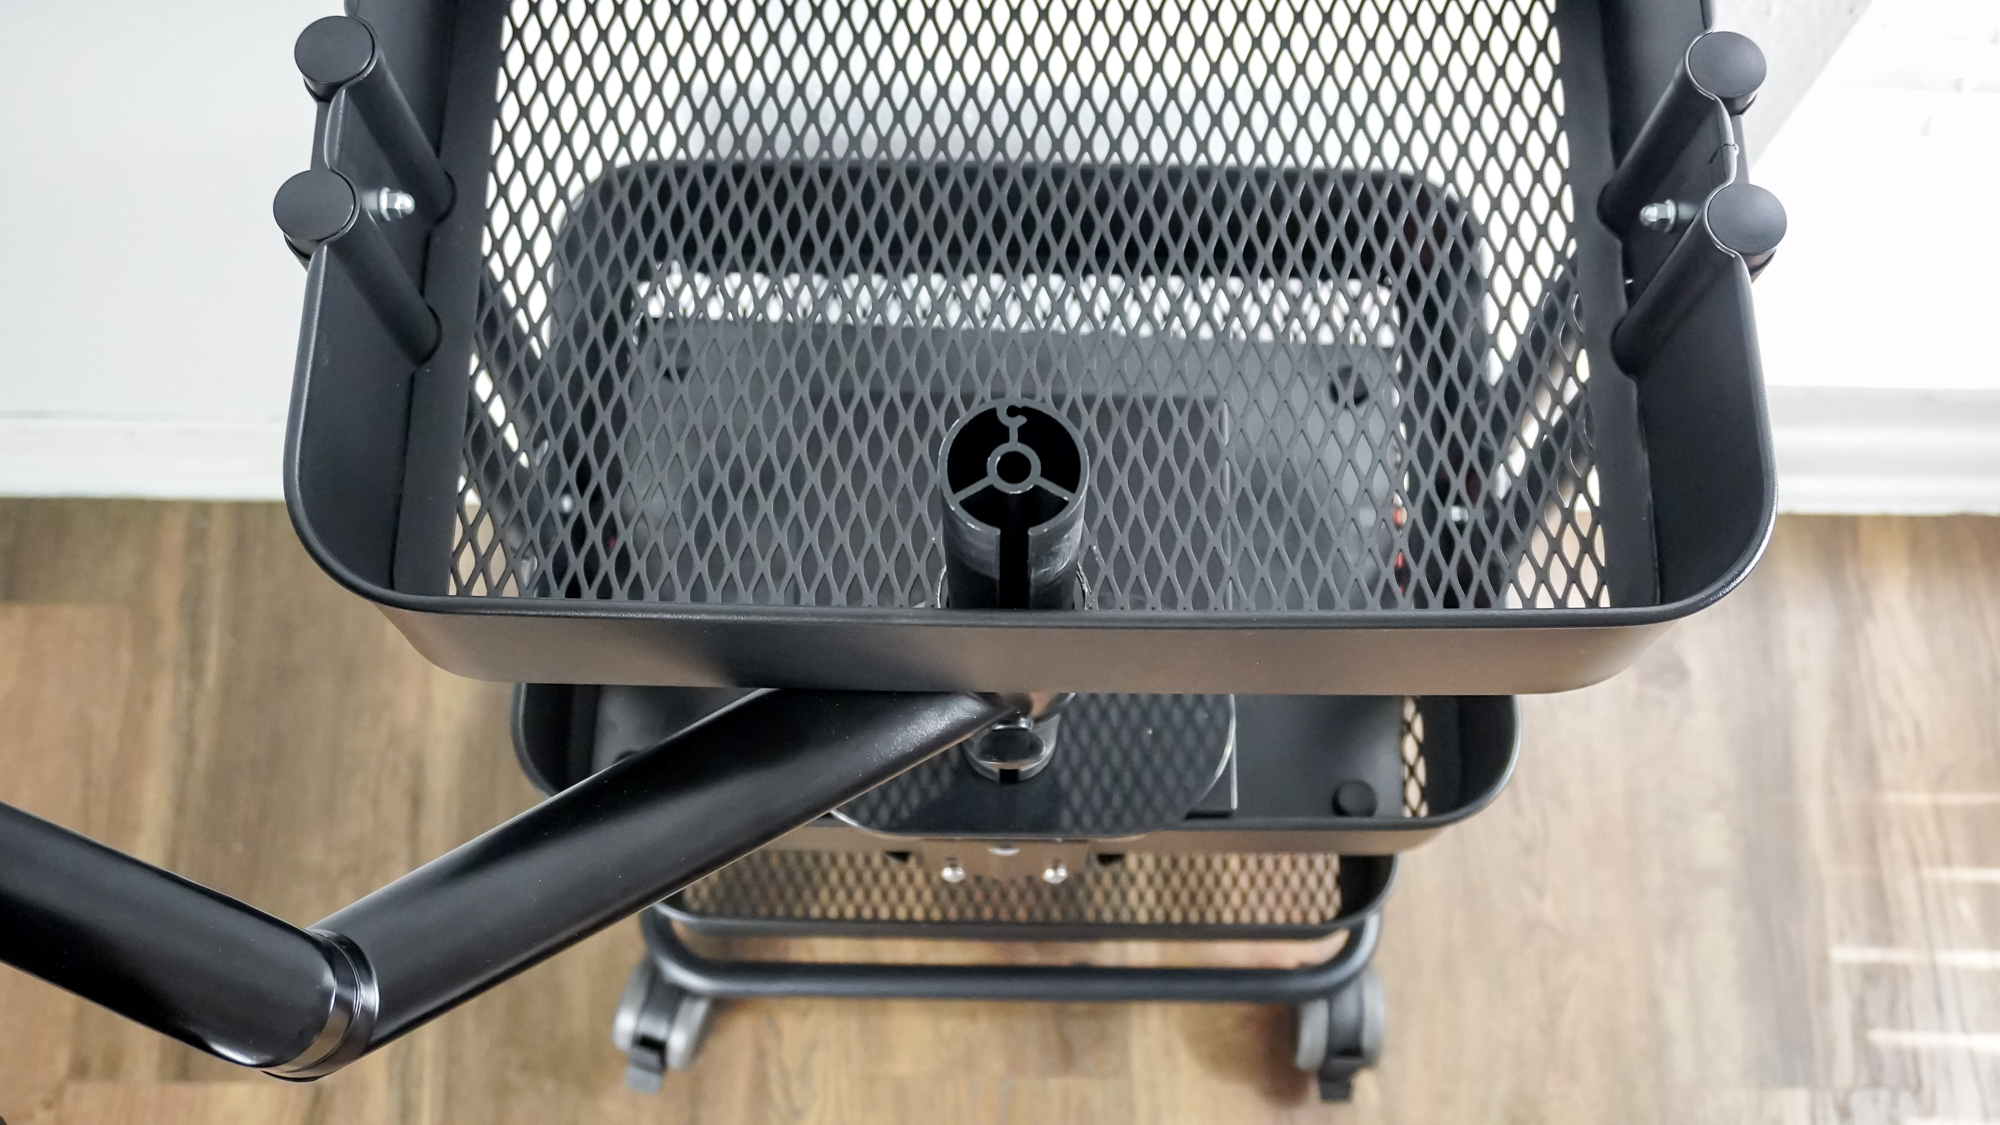
The hole in the top shelf is crucial because it allows the pole to extend up while also holding it securely in place. Alternatively, you could just clamp a monitor arm onto the top shelf, but I wanted to recreate the build I saw in that video before making my own modifications.
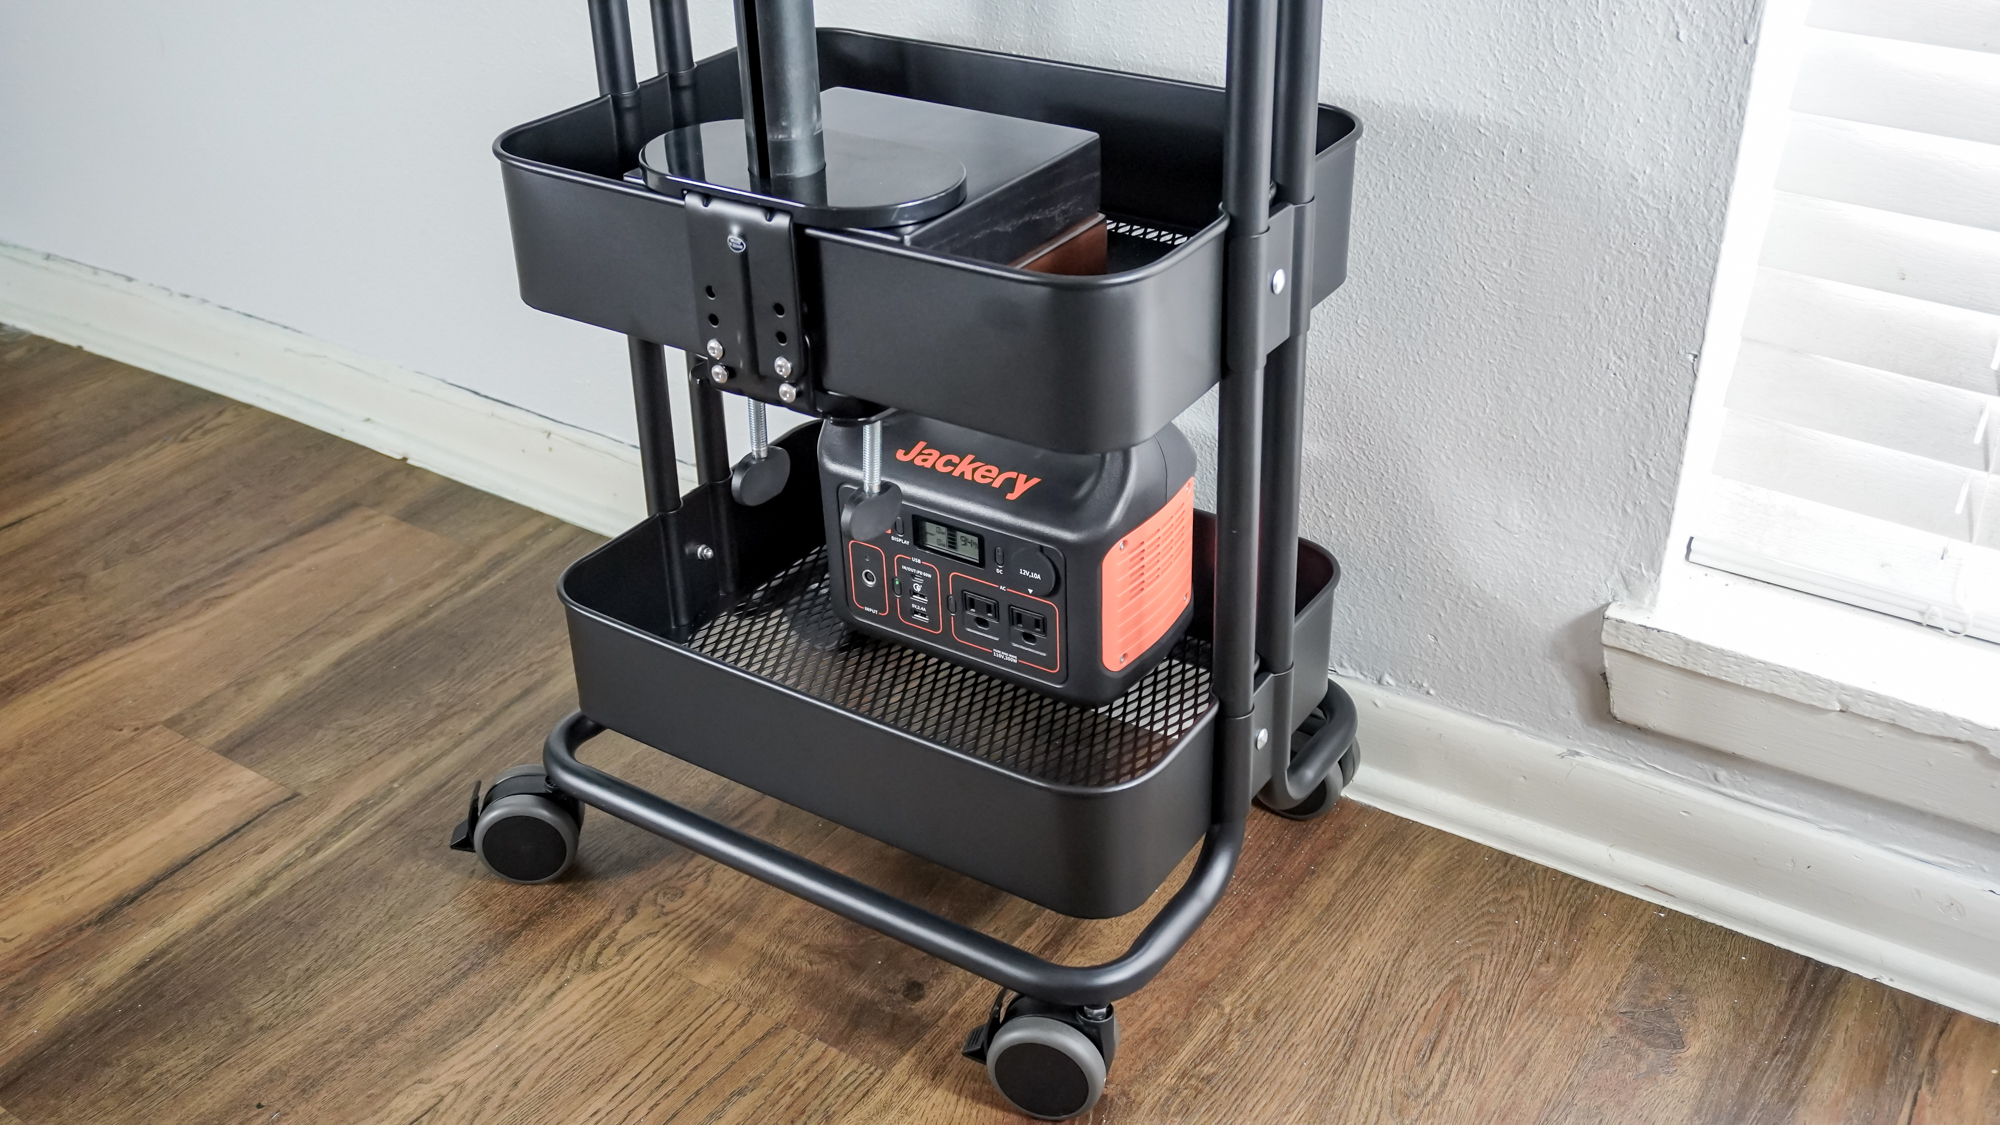
To give the monitor arm’s base something to clamp onto, I used a few desk samples I had left over from back when I tested Uplift’s headphone stand. Given that you probably won’t have something like this, you can use either scrap wood or some books stacked on top of each other (the heavier the better) to achieve the same thing.
To power my laptop while also weighing the cart down to prevent it from falling over, I used my Jackery Explorer 300 portable power station as it also has two AC outlets in case I want to add a monitor to my rollable workstation or even one of the best mini PCs later on. Weights, bricks, cinderblocks or anything else you have around the house that’s heavy will do the job too. Basically, you want something heavy on the bottom shelf to keep the cart from tipping over once you put your laptop on the monitor arm.
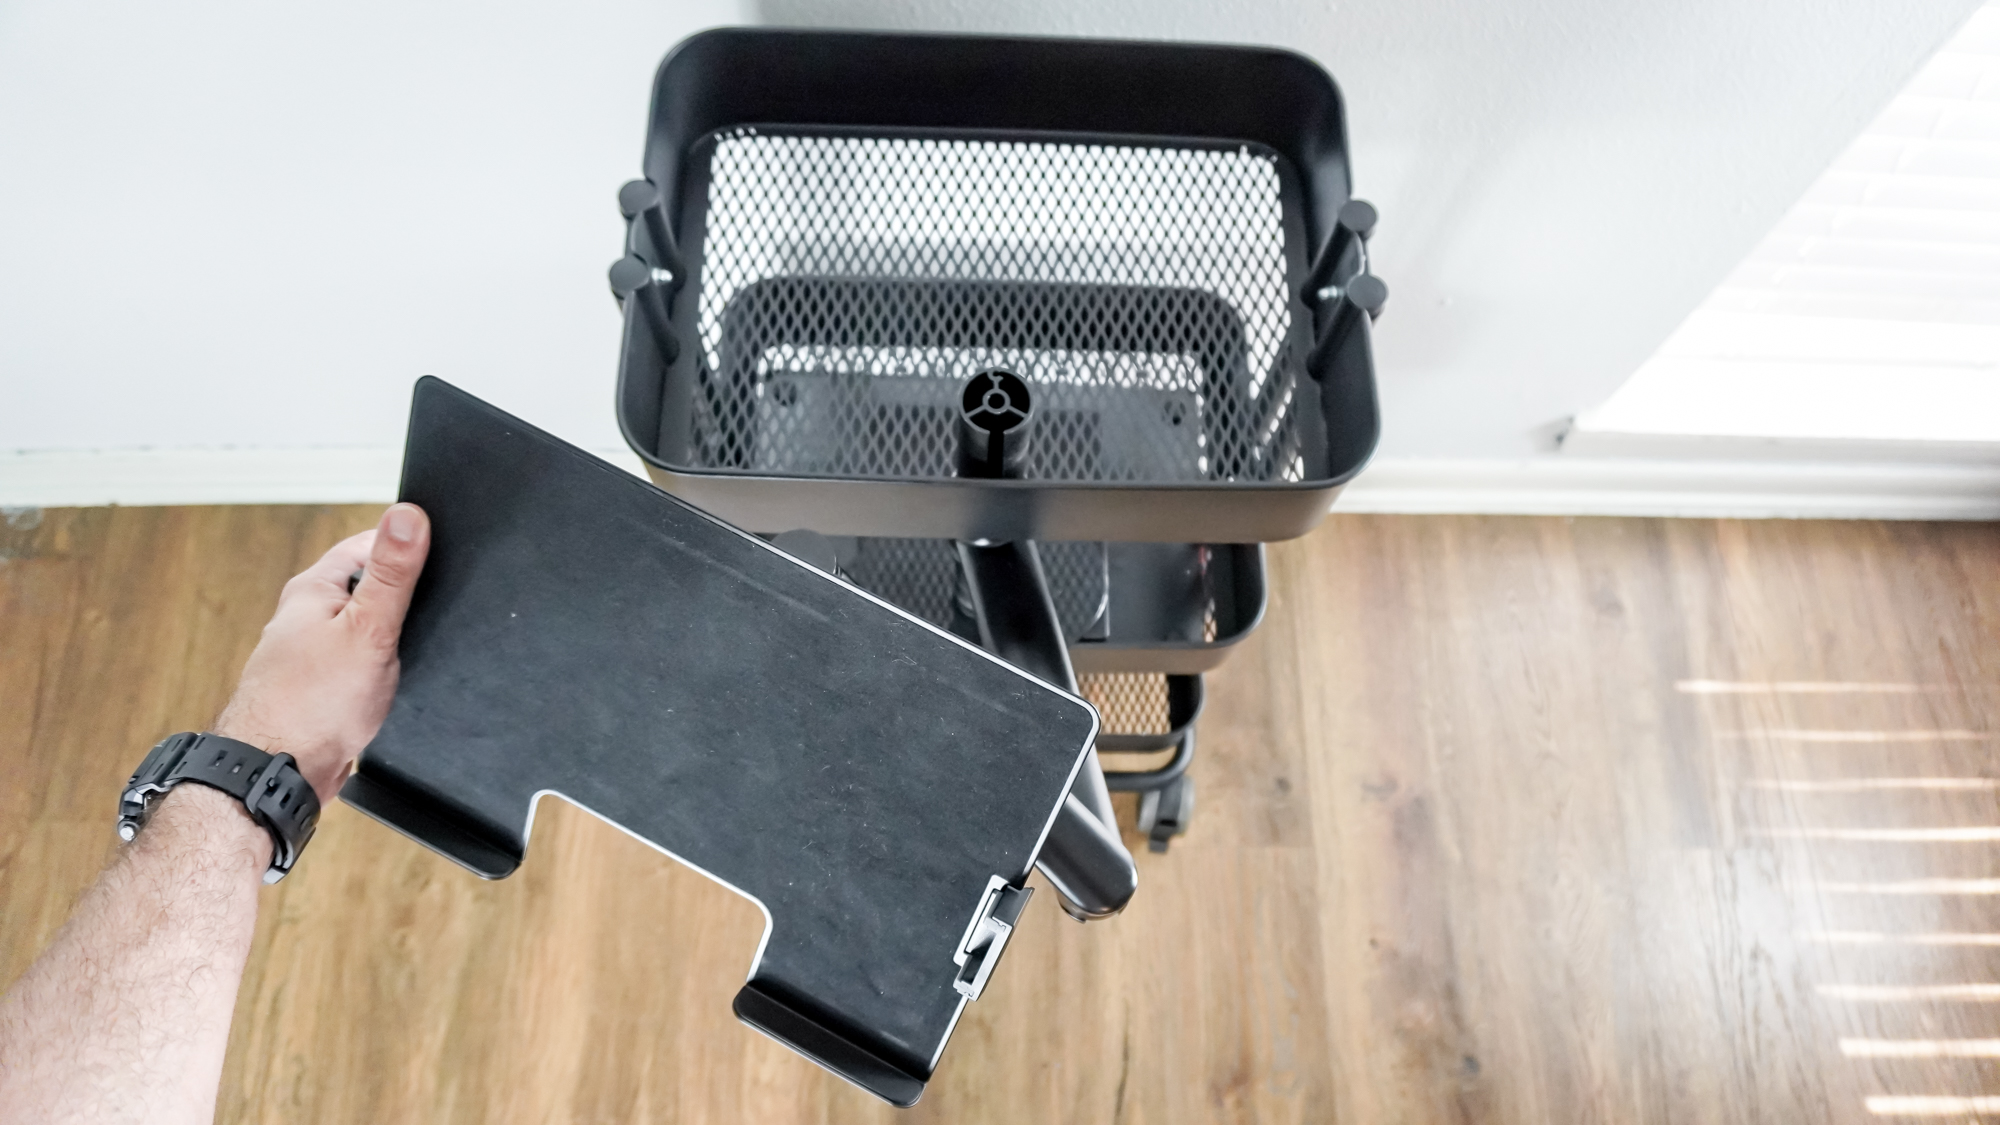
Although this Viozon monitor arm isn’t as versatile as some of the others I’ve tried in the past, I like how you can rotate the laptop mount and easily reposition it. This came in handy for me as I could have the cart on either the left or right side of my chair without having to take the monitor arm down and then reinstall it.
Another thing I really like about this design is that you have plenty of extra space for storage and the option to add to it further later on. For instance, I noticed with the Viozon monitor arm that I didn’t quite have enough room between its two arms to have a larger 27-inch monitor up top and use the laptop mount as a keyboard tray. Given that I have a few more of those wood blocks on hand, I might add a second monitor arm to the top shelf for this very purpose.
With my rollable workstation complete, it was time to put it to the test and see if it really did make a difference when working on my laptop and if I actually could recline in my chair while using it.
Inclined to recline
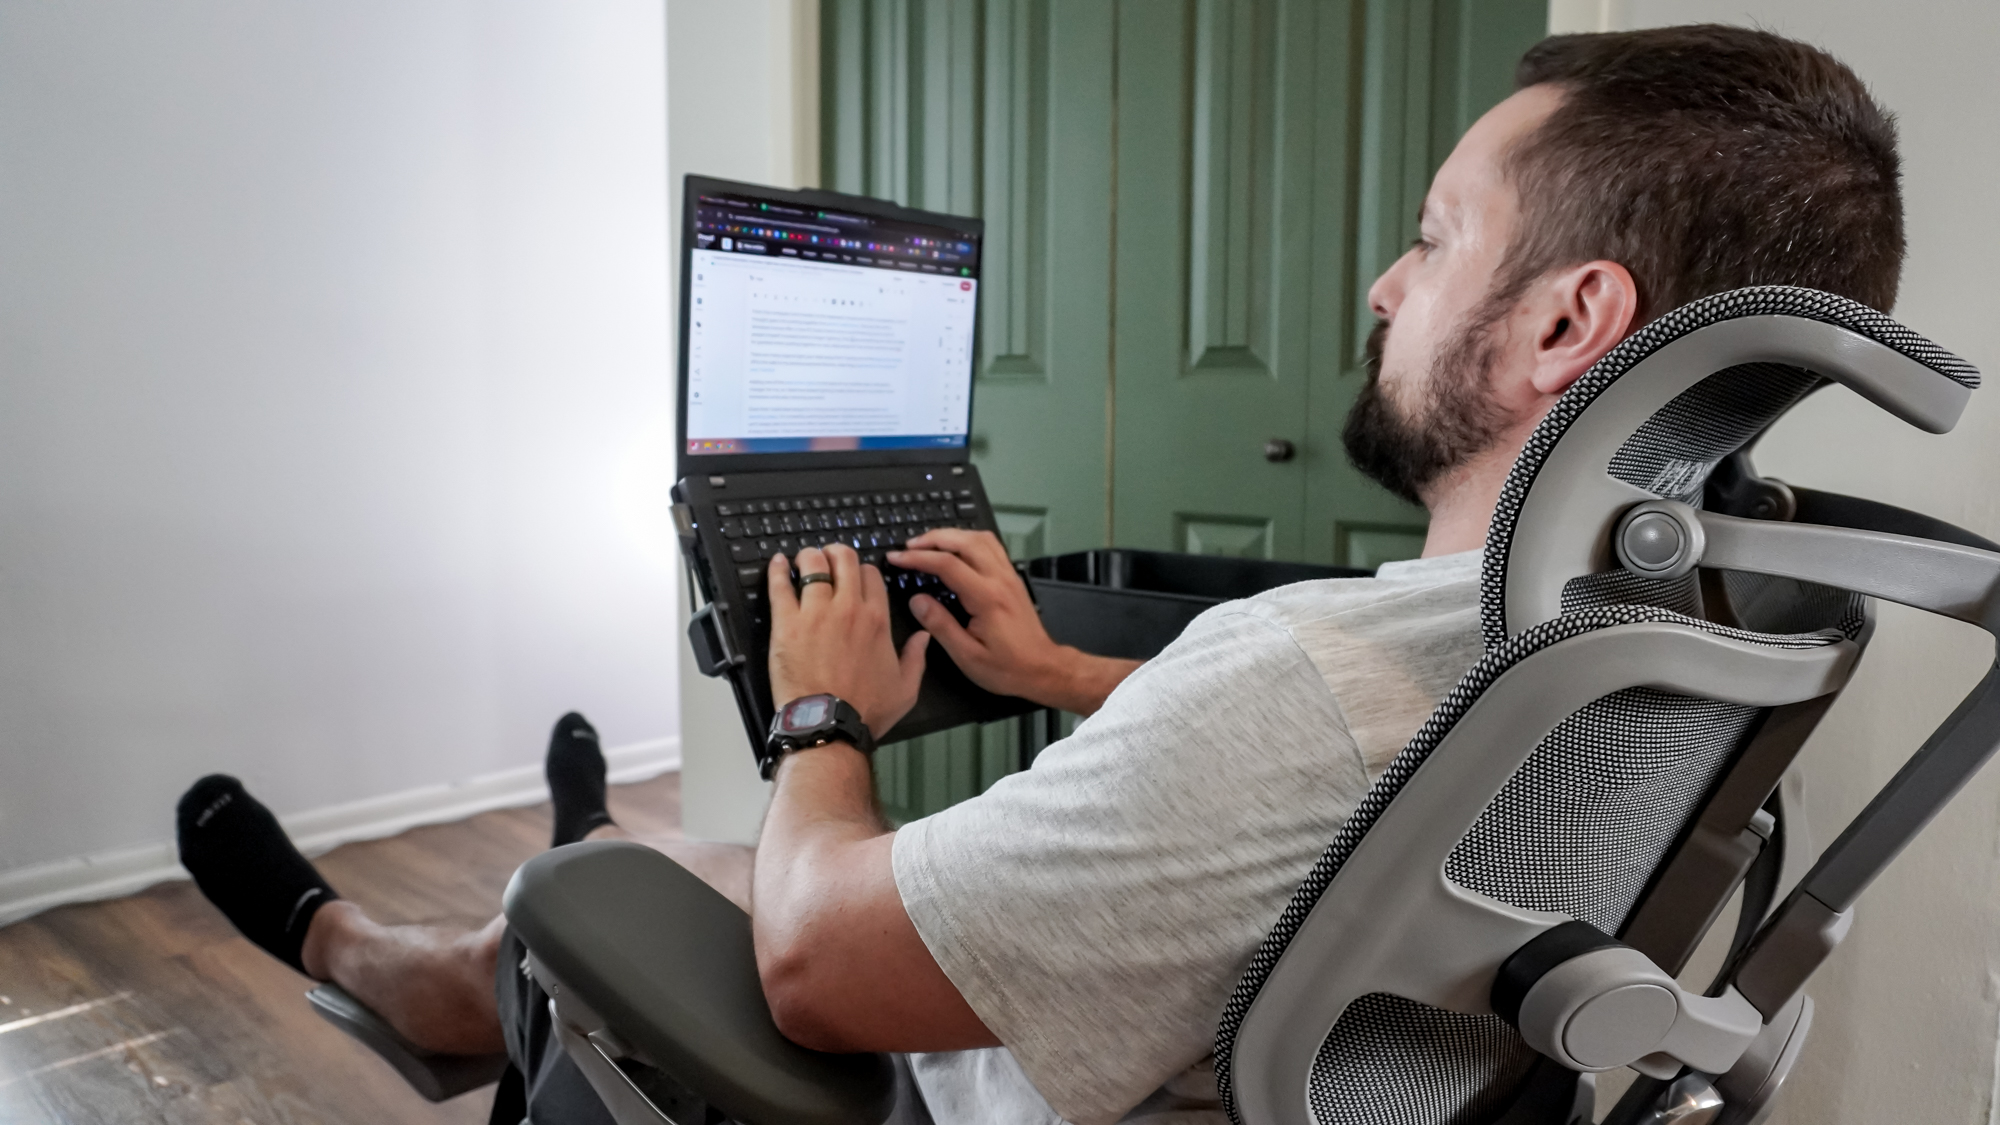
Seeing someone use a rollable workstation like this one in a video is one thing but trying it out for yourself, especially after all that planning and building it, is another. From the get go, I couldn’t believe how stable it was and I liked how switching out the Raskog’s stock casters for better ones made it so easy to roll around my house. Then when I found where I wanted to work, I just locked the casters and my rollable workstation stayed firmly in place like a rock.
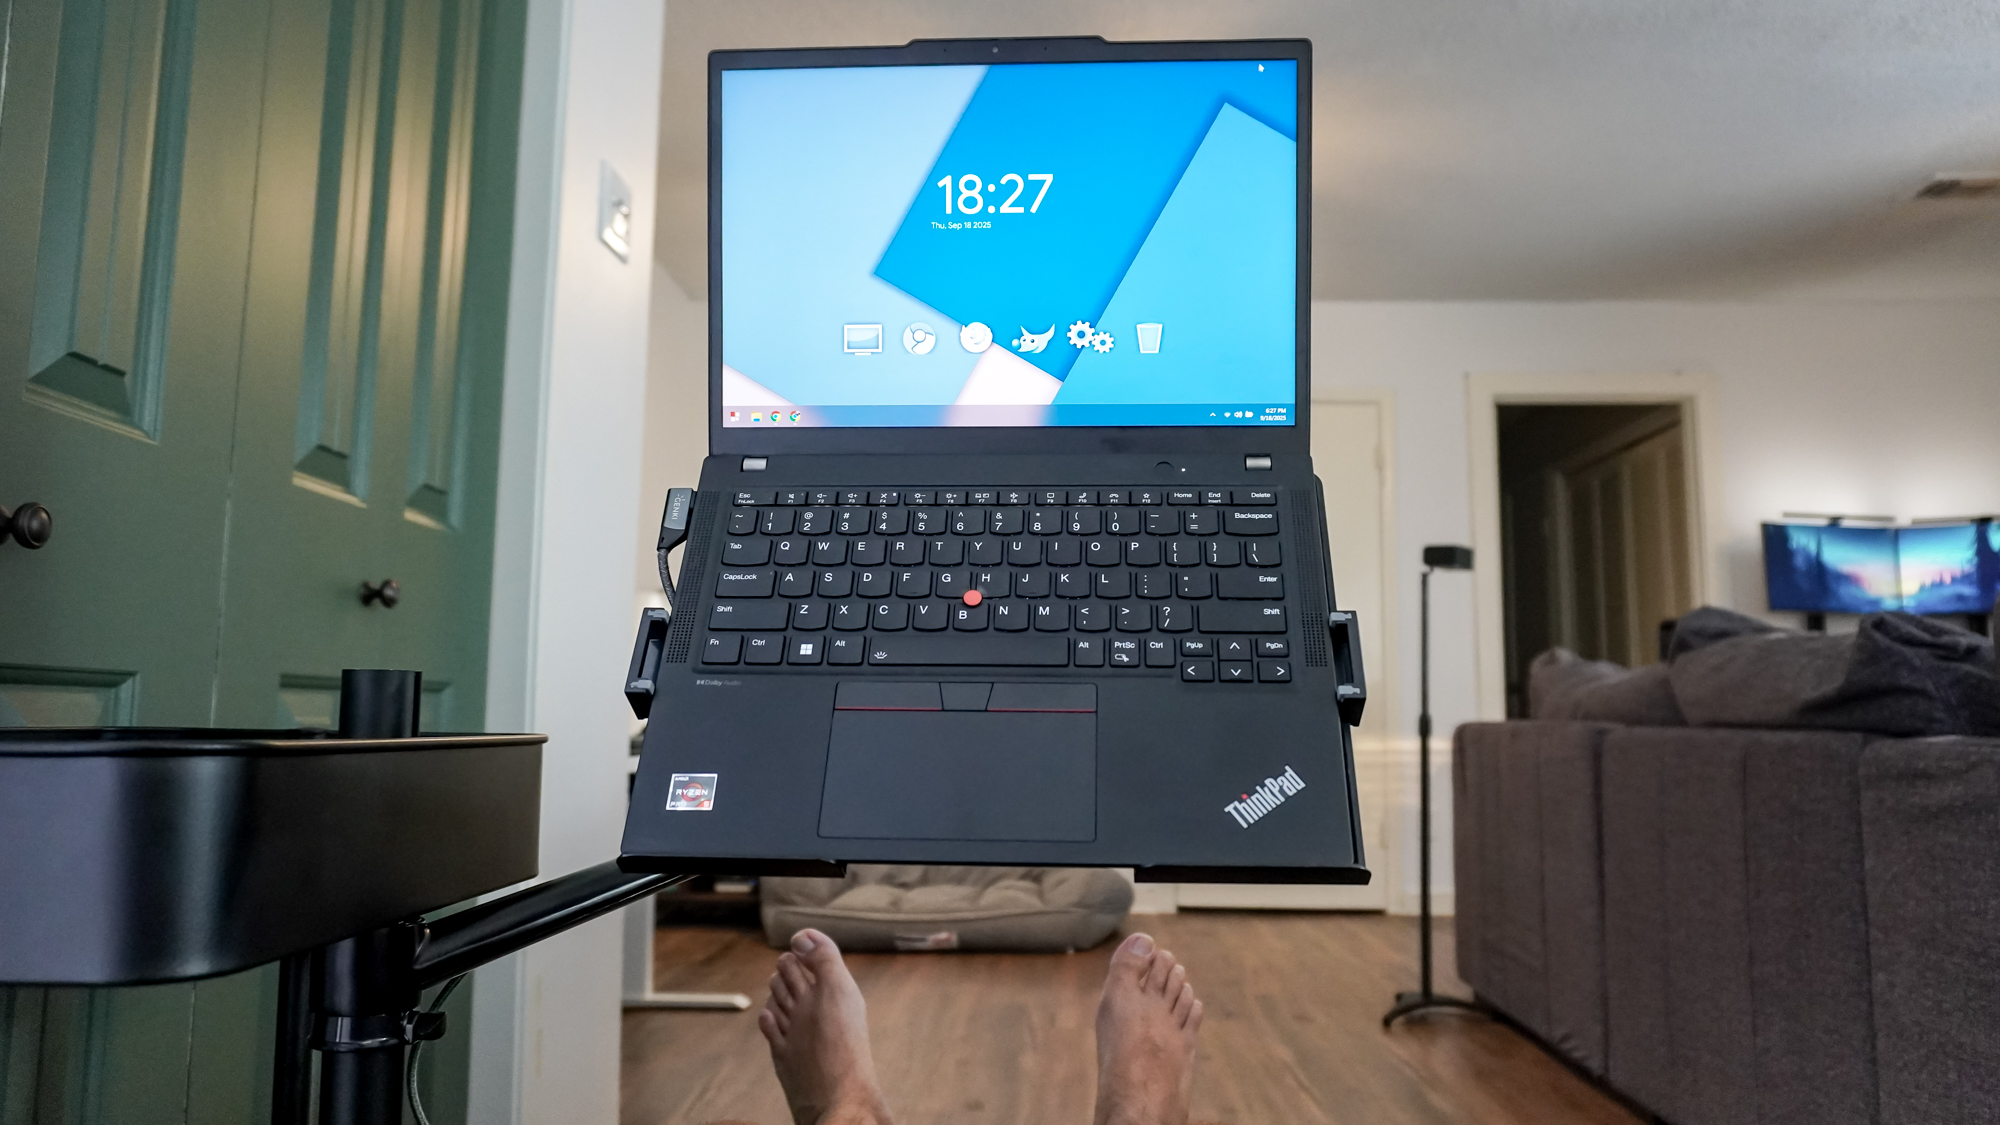
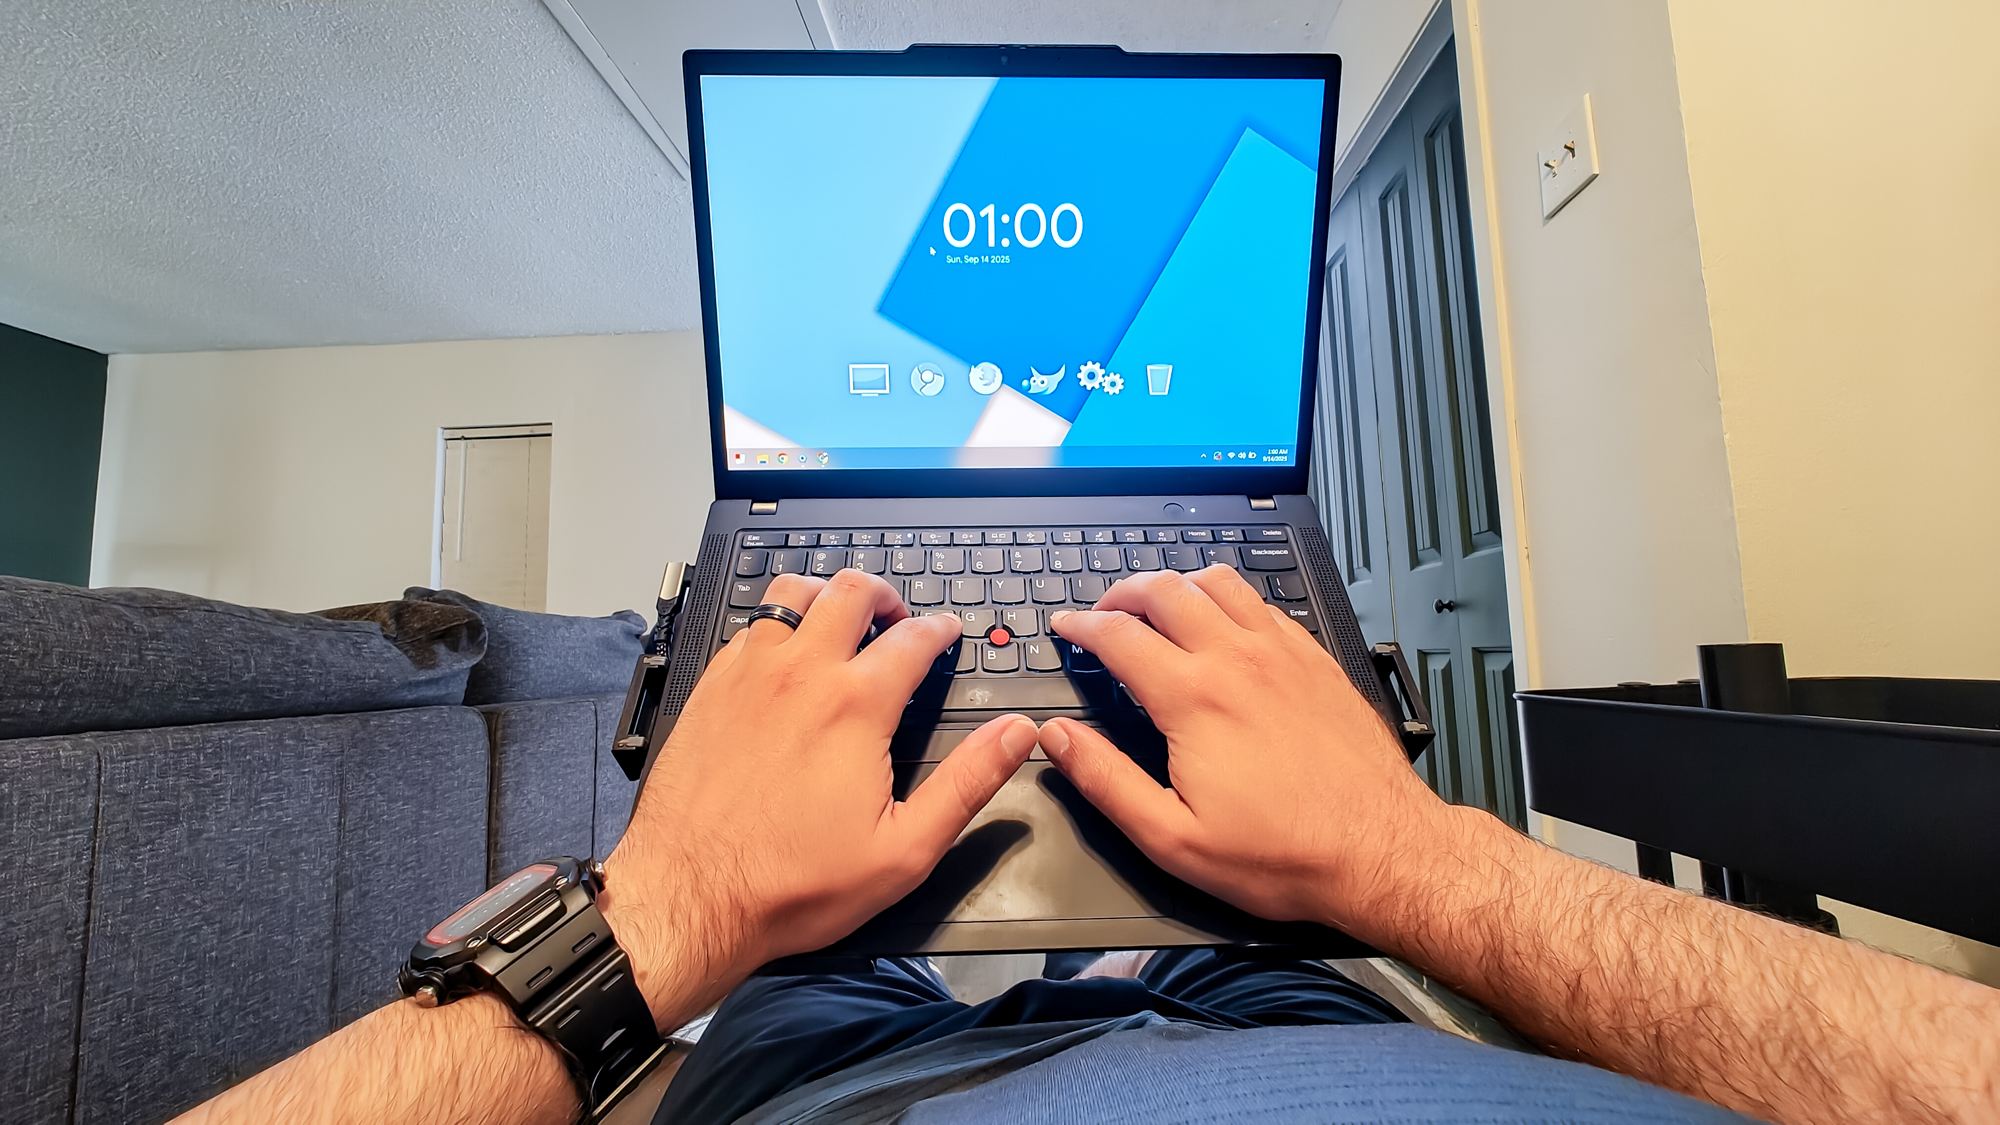
As I mainly work from my desktop at home, I have a smaller, 13-inch ThinkPad that I use while traveling or for those times when I need to get out of the house and work from a coffee shop. At just over 2.5 pounds, it’s very light and my rollable workstation had no trouble supporting its weight once attached to the monitor arm. To power it, I ran a USB-C cable up from the bottom of the cart and secured it on the underside of the arm as it has clips for cable management on its underside.
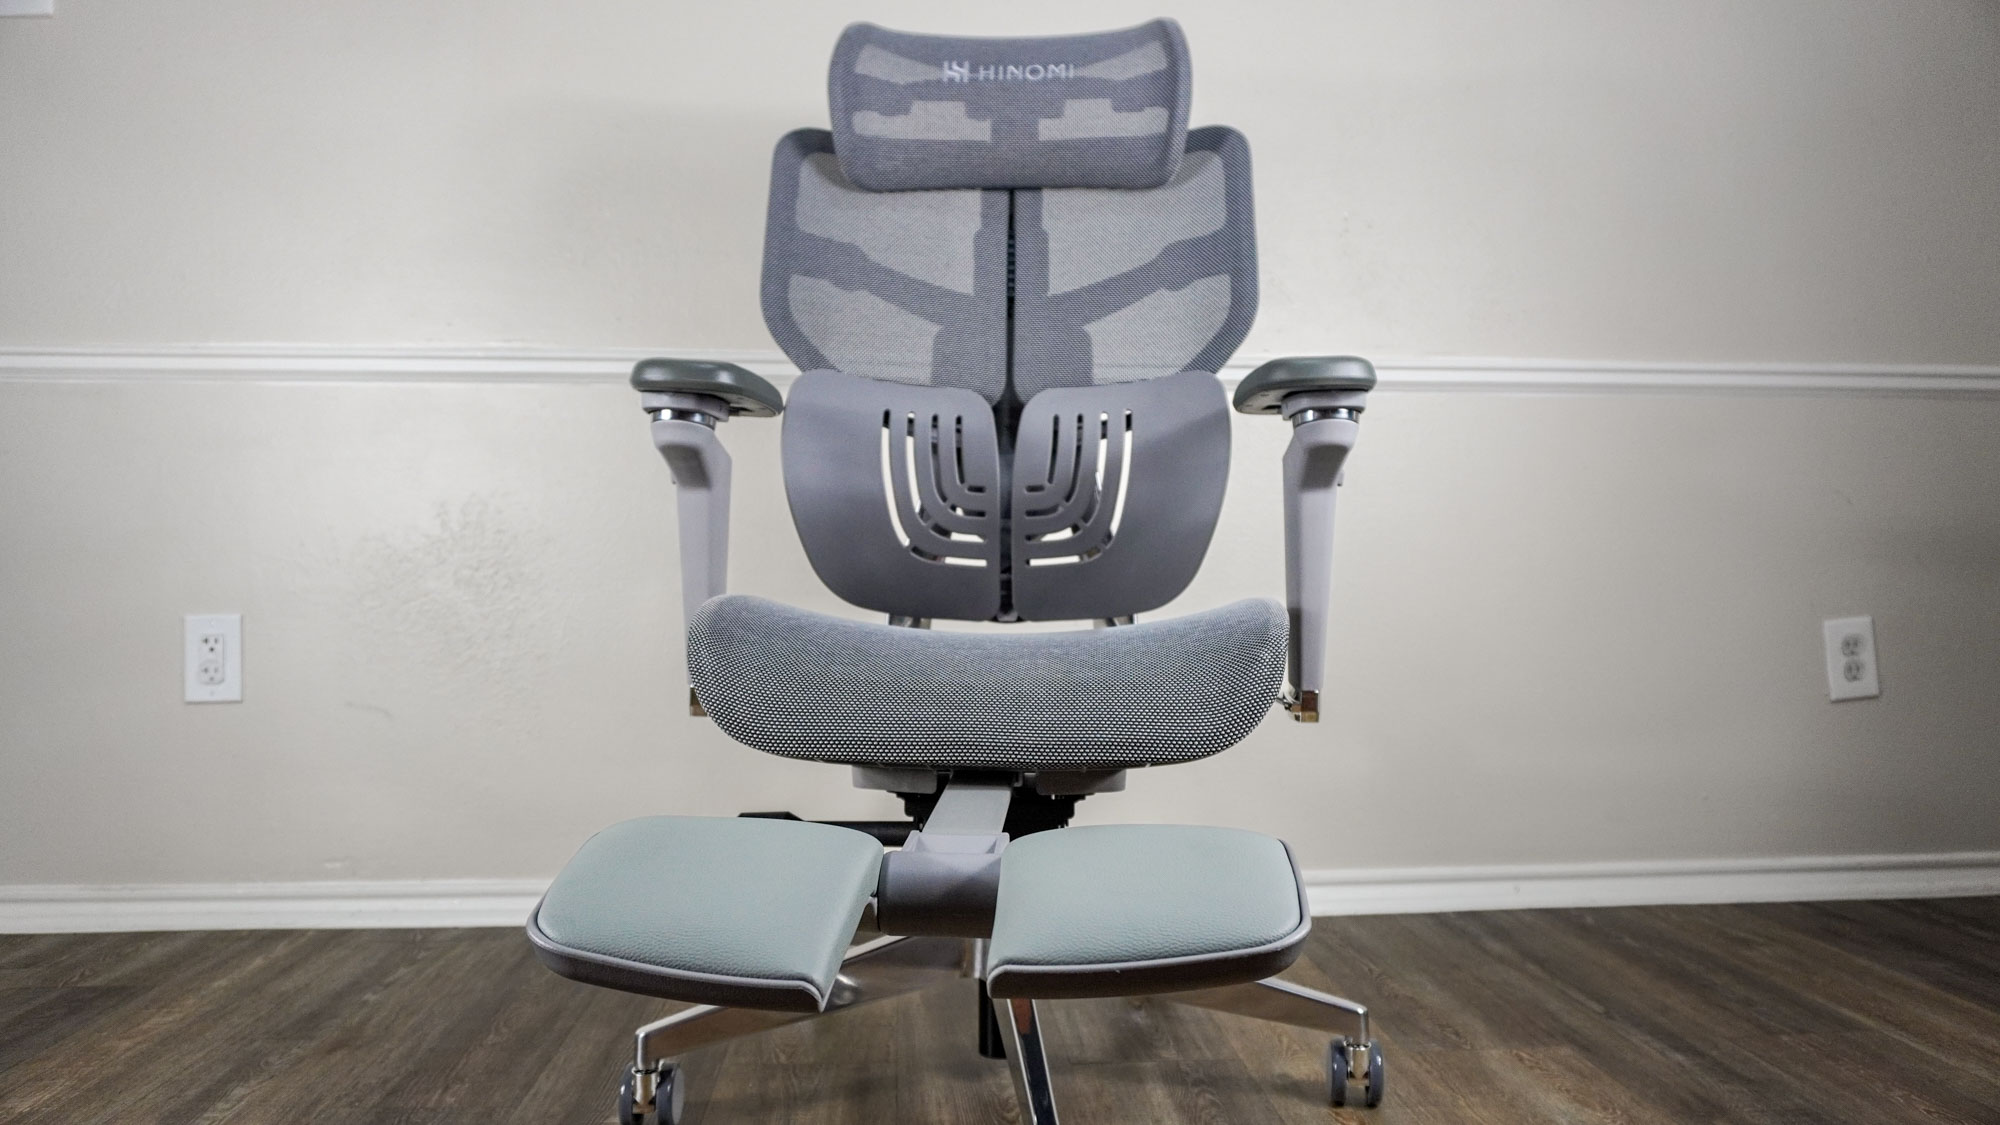
In addition to standing desks, I also test and review the best office chairs. I recently reviewed the Hinomi X1 and this was the first office chair I’ve tried with a pull-out footrest. In fact, leaning back in it with my feet up at my desk was what inspired me to build my own rollable workstation in the first place after I came across that video.
Working in the Hinomi X1 with my feet up at my new rollable workstation was quite comfortable and I can easily see myself spending hours at a time doing so. However, with a maximum recline angle of 135 degrees, I could only lay back so far. Fortunately, I have another chair in for review right now that can go even farther back.
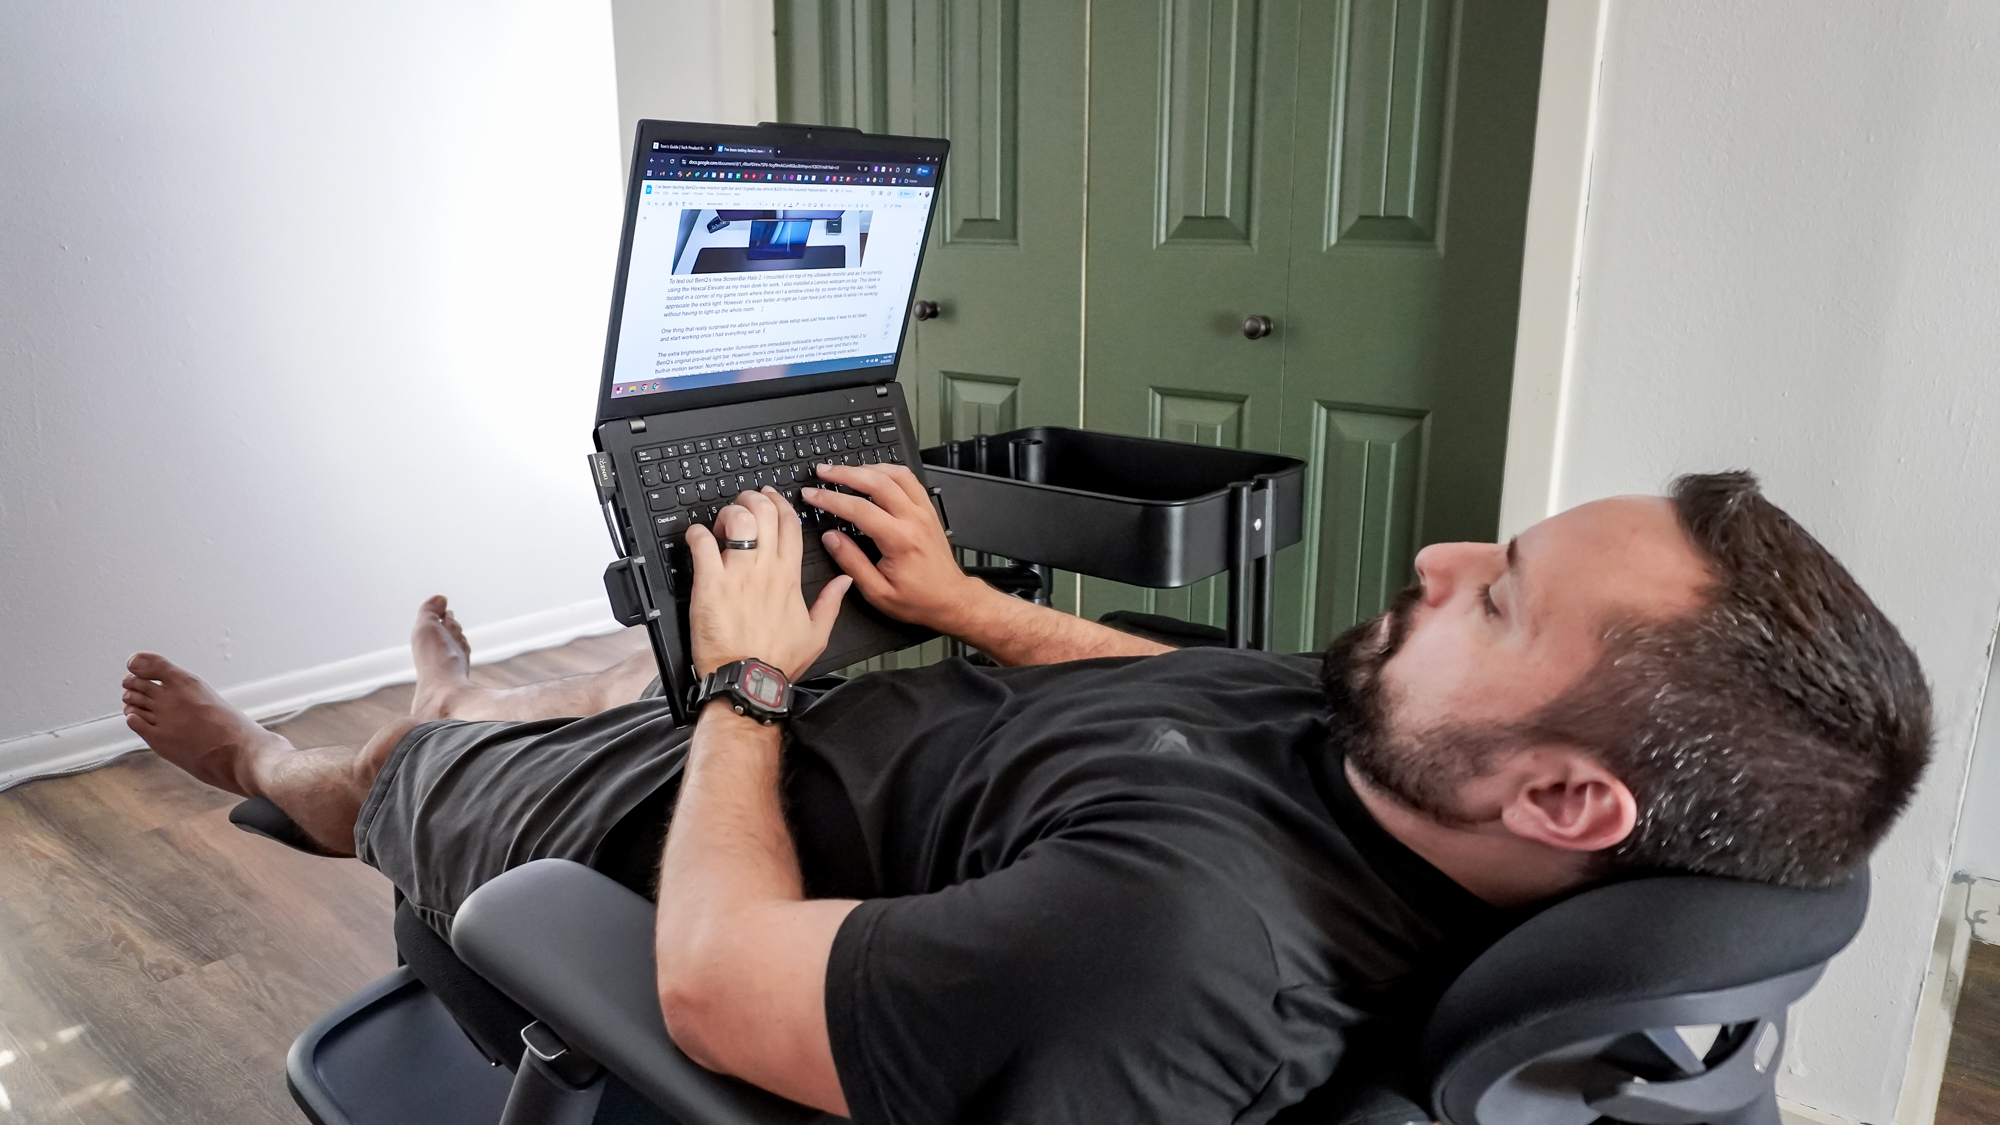
The LibreNovo Omni is an even more impressive chair in several key ways. I’m saving those for my full review but for this project, the most important feature is its incredible 160-degree recline.
While it doesn’t have a pull-out footrest, you can get this chair with an optional one like I did for my review. Compared to the pull-out footrest on the X1, the Omni’s is even more comfortable as like the chair itself, it features a soft-touch fabric cushion you can really feel your legs sinking into.
Unlike my first attempt, I did spend hours leaning all the way back working in the Omni from my laptop with it installed on the rollable workstation. The monitor arm’s laptop tray can be tilted vertically, and I found this to be perfect for using my laptop while fully reclined. My ThinkPad helped here too since its screen doesn’t stop at a certain angle and you can actually extend it completely flat.
If you don’t have room for a desk at home, chances are you don’t have an office chair either. No need to worry though, as I soon found that my rollable workstation works just as well without one.
No office chair, no problem
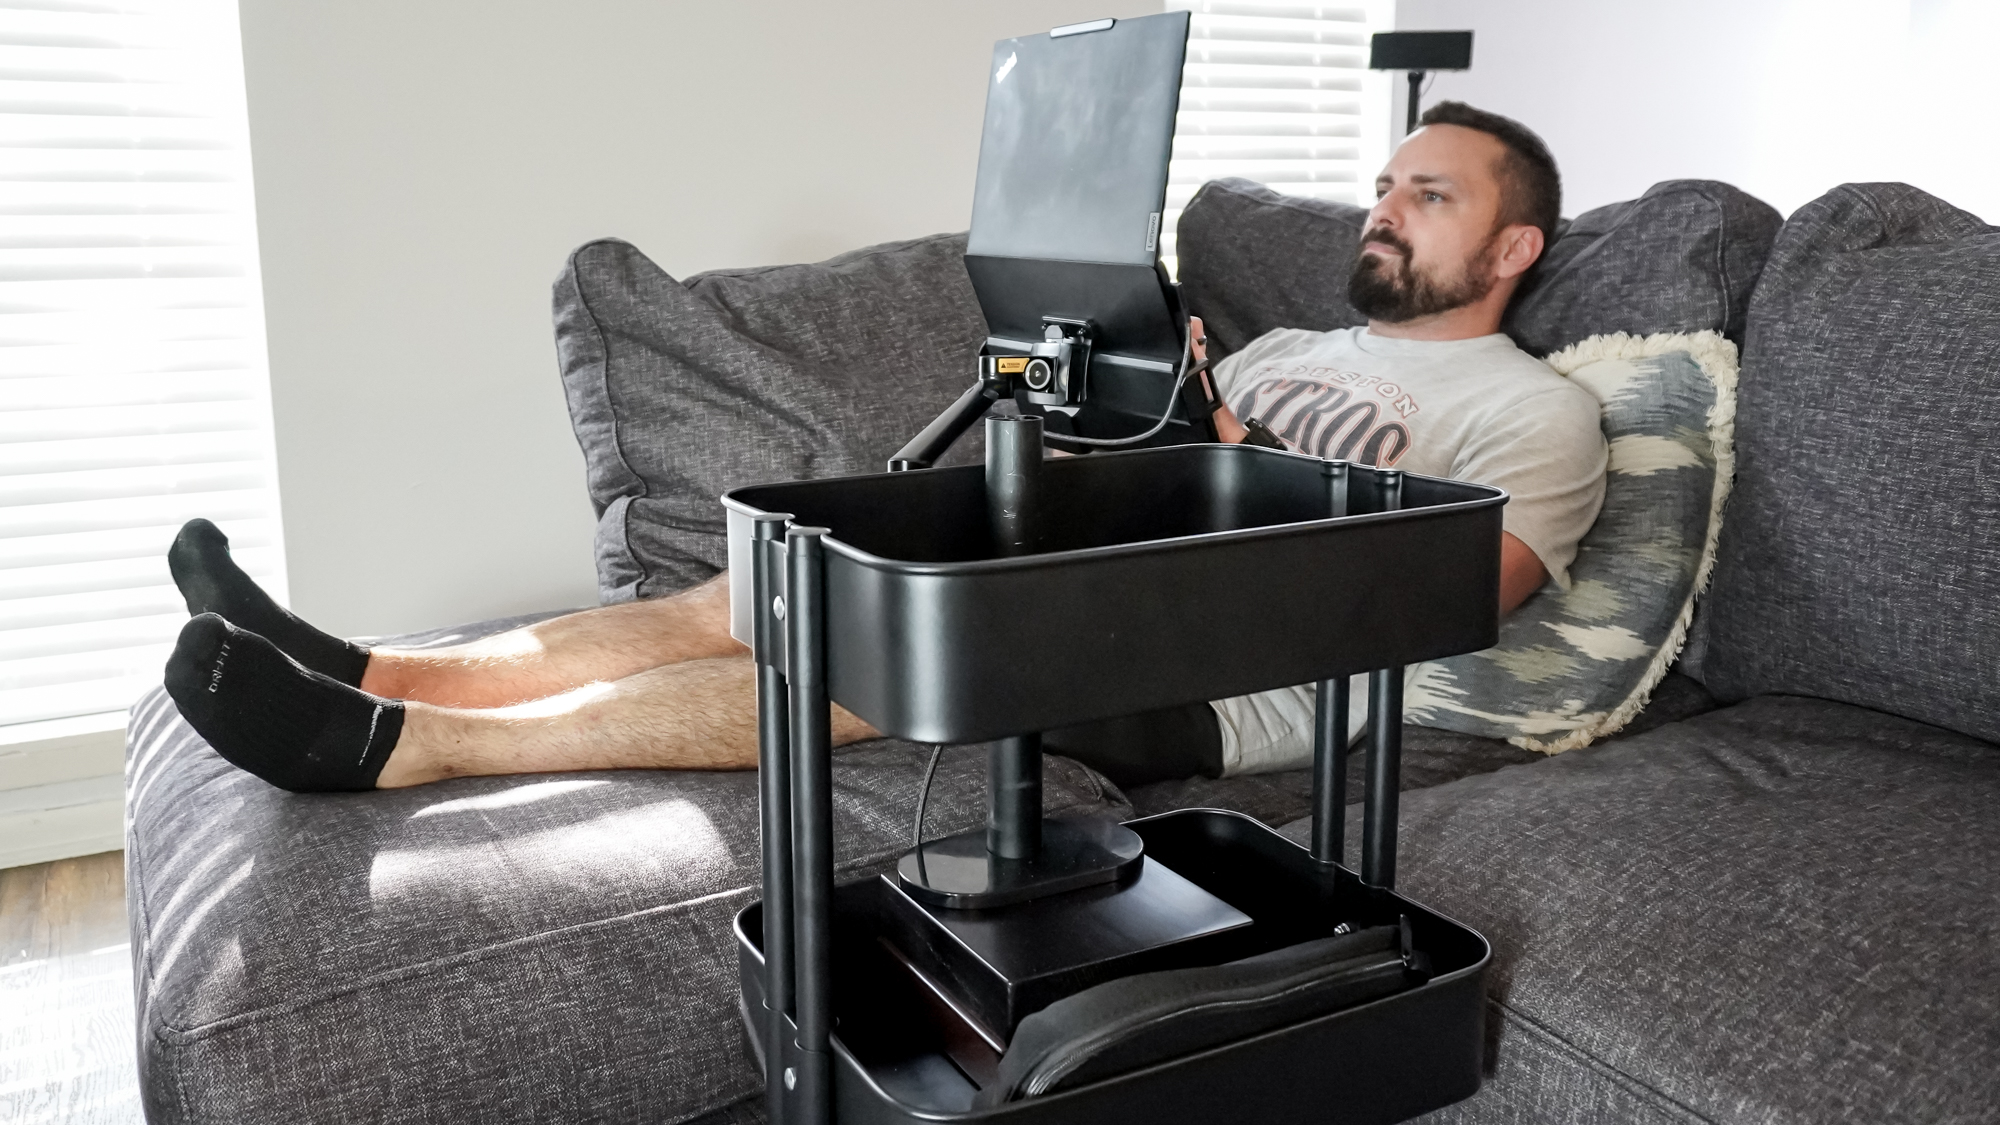
In the evenings as I work from my desk, my wife works on her laptop from the couch with one of those lap desks and I know a lot of other people do, too. While convenient, lap desks aren’t ergonomic and over time, they can put a lot of unnecessary strain on your neck and shoulders. Fortunately, working on my new rollable workstation is just as good on the couch as it is from an office chair.
I just had to unlock its casters, roll it over to the couch and I was good to go. With my portable power station on the bottom shelf, I didn’t have to worry about charging my laptop and could just keep working.
I know my 13-inch ThinkPad is on the smaller side, so I swapped it out with one of the best Chromebooks with a larger 16-inch screen that weighs 3.75 pounds for my next test. The monitor arm held it firmly in place, and the included laptop tray’s retractable grips extended far enough out to hold it without any issues either.
With my couch test out of the way, it was time to take my rollable workstation to the holy grail for laptop users: my bed. I unlocked its casters once again and rolled it over to my bedroom where it was just as useful and convenient as it was in my living room.
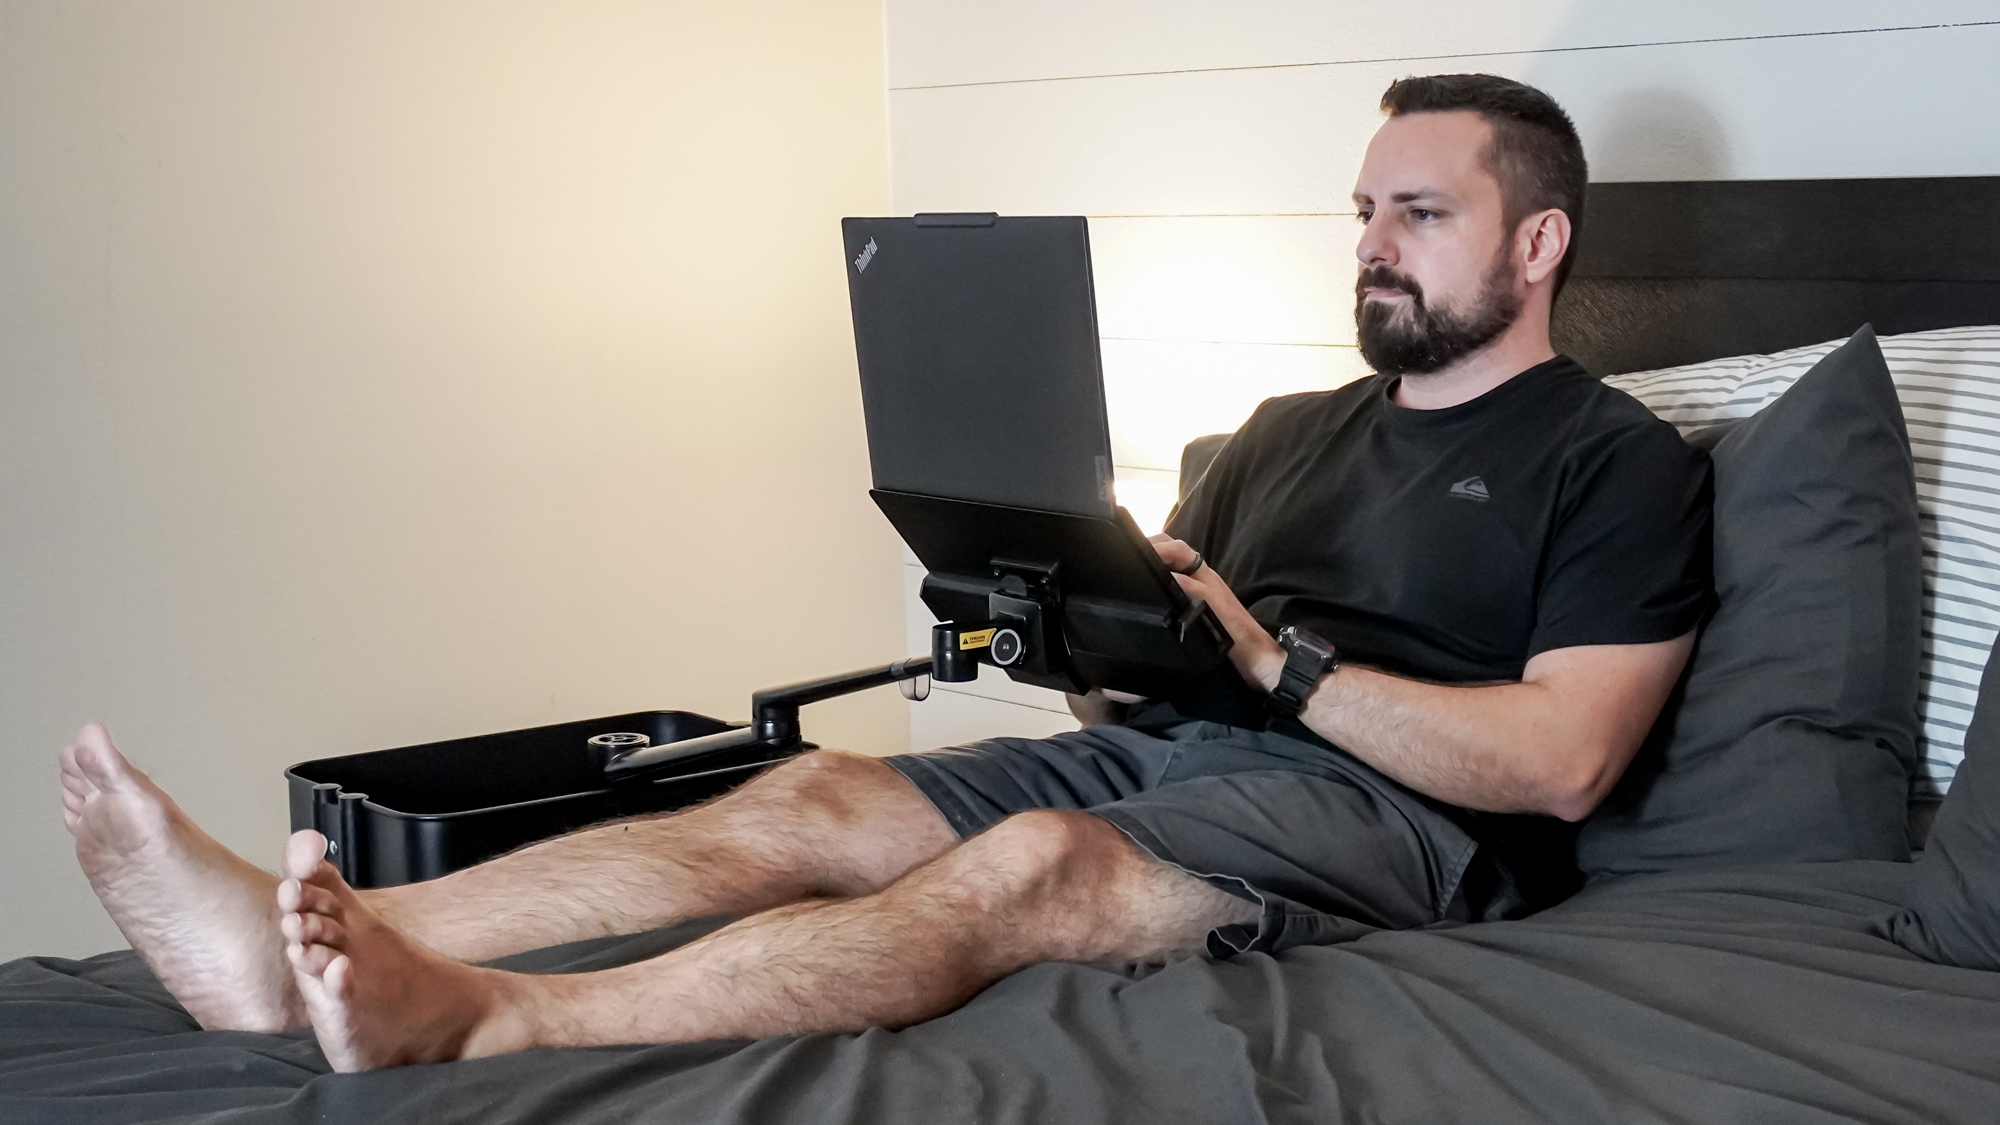
Remember earlier when I said you may need to move the monitor arm up to the top shelf depending on your height? Well, my bed is a bit higher up than my couch or office chair, so I had to do just that. This is where that monitor arm having two separate arms came in handy. I just installed the second one on the very top of the monitor arm’s pole, detached and then reattached the laptop tray and I was good to go.
Using a more complex monitor arm with on-the-fly height adjustment might be a better choice if you plan to use your own rollable workstation in bed, as that way, you can lie down flat and use your laptop that way. Still, I found that I could sit comfortably in my bed at a bit of an angle and use my laptop with this one perfectly fine.
Overall, my new rollable workstation proved to be just as useful next to my couch as it was next to my bed and I’d still recommend building your own even if you don’t have an office chair.
Surprisingly simple but incredibly versatile
If you’ve ever gone down the DIY rabbit hole on YouTube — maybe you want to build a custom desk with an IKEA kitchen countertop or add some inexpensive shelves that look like built-in ones using IKEA’s Billy bookcases — then you know how easy those videos can make much more difficult projects look. Well, after building my own version of T.E.D’s rollable workstation, this DIY project was as simple to complete as the original video made it seem.
Along the way, I got to put some spare parts and other gadgets around my house to good use, but what I really like about this project is that you don’t have to follow the original design to a T. Instead, you can mix, match and experiment to create something that really works for you.
In total, everything cost me $238, but if I had just used the Raskog’s stock casters or borrowed those hole saw attachments for my drill from a friend or family member, I could have gotten the cost down to just $128 — not bad for a workstation that lets you roll around your house and work while lying down.
I plan to keep using my new rollable workstation like I have it set up now but I also want to experiment with it a bit more to see if I can add a monitor up top and use the monitor arm’s laptop mount as a keyboard tray. I got really close the first time I tried, and with a bit more trial and error, I’m sure I can easily find a solution that works for me.
So what do you think? Do you prefer working on the couch or at the kitchen table or is building a rollable workstation like this one your next big project? Let me know in the comments below and if you have any questions on my build or suggestions on how I can improve it further, I’m all ears.
More from Tom's Guide
- I turned an old monitor into a digital dashboard and it's a game changer
- Monitor stand vs monitor arm: how to pick the right one for your display
- I built a completely distraction-free desk setup with these 10 gadgets and now I’m truly locked in

Anthony Spadafora is the managing editor for security and home office furniture at Tom’s Guide where he covers everything from data breaches to password managers and the best way to cover your whole home or business with Wi-Fi. He also reviews standing desks, office chairs and other home office accessories with a penchant for building desk setups. Before joining the team, Anthony wrote for ITProPortal while living in Korea and later for TechRadar Pro after moving back to the US. Based in Houston, Texas, when he’s not writing Anthony can be found tinkering with PCs and game consoles, managing cables and upgrading his smart home.
You must confirm your public display name before commenting
Please logout and then login again, you will then be prompted to enter your display name.
 Club Benefits


