If you spend most of your day typing, your mechanical keyboard is probably filthy. Crumbs from snacks eaten at your desk, dust, pet hair, dead skin cells, and oils from your fingers all accumulate between the keys and around the switches. It's gross when you actually think about it, but mechanical keyboards are surprisingly easy to clean.
Unlike membrane keyboards, where everything is sealed, mechanical keyboards let you pop off each keycap individually to clean every crevice. The entire process takes about 30 minutes and requires only basic household items you probably already have.
Here's how to deep clean your mechanical keyboard without damaging any components.
1. Unplug your keyboard

Before you start taking anything apart, unplug your keyboard from your computer. Even if you have a wireless keyboard, turn it off completely. You'll be using a damp cloth later in the process, and you don't want any moisture near active electronics.
Next, take a clear photo of your keyboard layout with your phone before removing any keys. This reference photo is crucial for reassembly, especially if you have an unusual layout or custom keycaps. Some keyboards have non-standard key sizes or positions that aren't immediately obvious once everything's scattered on your desk.
The photo ensures you'll put everything back in the right place without having to guess or search online for your specific keyboard's layout.
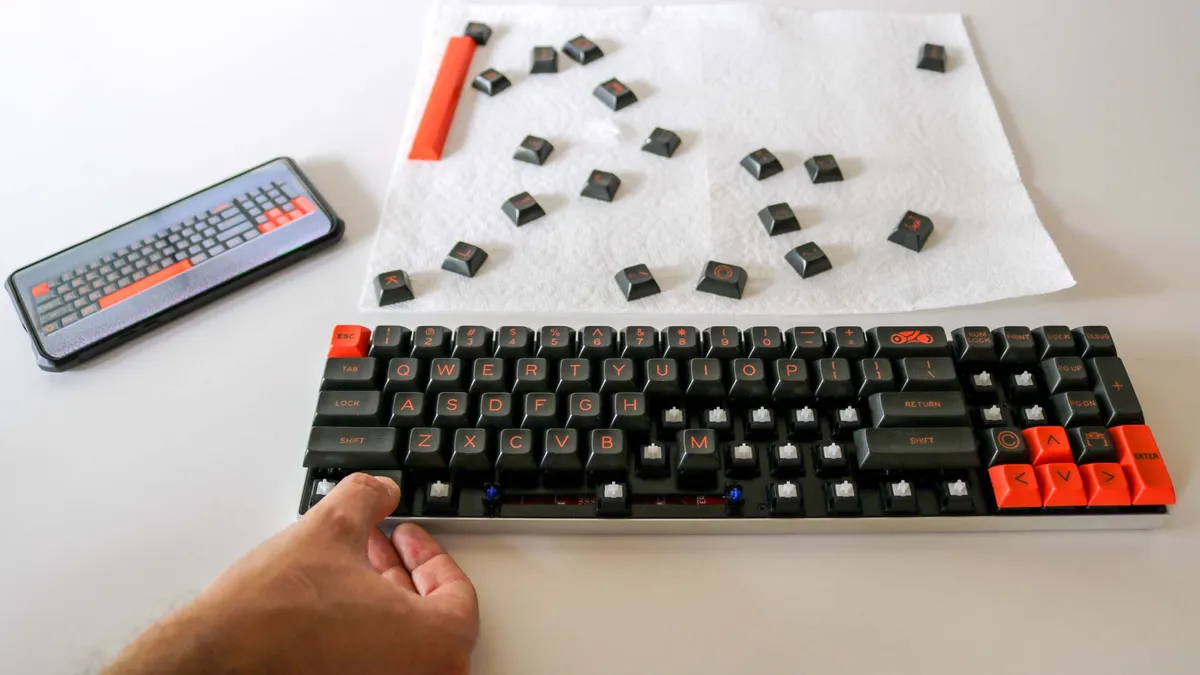
2. Remove all the keycaps

Most mechanical keyboard keycaps can be removed by pinching the sides and pulling straight up with gentle but firm pressure. Start from one corner and work your way across the keyboard methodically so you don't lose track of which keys go where
For faster removal and to avoid finger fatigue, consider using a keycap puller, which is an inexpensive tool specifically designed for this job. It hooks under the keycap edges and pulls evenly upward.
Be extra careful when removing the the spacebar or larger stabilized keys like Enter and Shift as they have wire stabilizers underneath that can be tricky to reattach correctly.

3. Give the keycaps a bath

Fill a bowl or sink with warm water and add a few drops of dish soap. Next, drop all your keycaps into the soapy water and let them soak for 5-10 minutes. Swish them around gently to loosen any oils or grime. If your keycaps are particularly dirty, you can use a soft toothbrush to scrub each one individually while they're in the water.
Once they've finished soaking, rinse all the keycaps thoroughly under running water to remove all soap residue. Lay them out on a towel to air dry completely. This is important — putting damp keycaps back on your keyboard can trap moisture against the switches and cause problems.
Let them dry for at least an hour, or speed up the process by patting them dry with a towel and spreading them in a sunny spot or near a fan.
4. Blow out loose debris with compressed air

With the keycaps off, you'll probably be horrified by how much stuff is hiding under there. Hair, crumbs, dust, and mysterious particles collect around the switches and in every corner. Hold your keyboard at an angle and use a can of compressed air or an electric duster to blast out all the loose debris.
Keep the compressed air can upright and use short bursts rather than long continuous sprays to avoid moisture buildup from the propellant. Work from one side of the keyboard to the other, tilting the keyboard so gravity helps loose particles fall out.
You might want to do this outside or over a trash can because a surprising amount of stuff will come flying out.
5. Reassemble the keyboard
Once everything is completely dry, it's time to put your keyboard back together. Pull up that reference photo you took earlier and start replacing keycaps one by one, matching them to the photo. Align each keycap over its switch stem and press down firmly until you hear and feel it click into place.
If you removed the spacebar or other stabilized keys, those might require a bit more finesse to reattach — you may need to hook the stabilizer wire under the keycap clips before pressing the keycap down onto the switch.
Once everything is reassembled, plug your keyboard back in and test every key to make sure it works. Your keyboard should now look and feel significantly cleaner.

Follow Tom's Guide on Google News and add us as a preferred source to get our up-to-date news, analysis, and reviews in your feeds. Make sure to click the Follow button!
More from Tom's Guide
- Your computer can get internet through USB — here's how to set it up
- Here's how you can speed up your PC's boot time
- This Gmail feature cuts down clutter in your inbox — and it's a huge time saver