Thieves hate this iPhone feature — how to enable Stolen Device Protection
Keep your identity and finances safe with this anti-theft iPhone feature
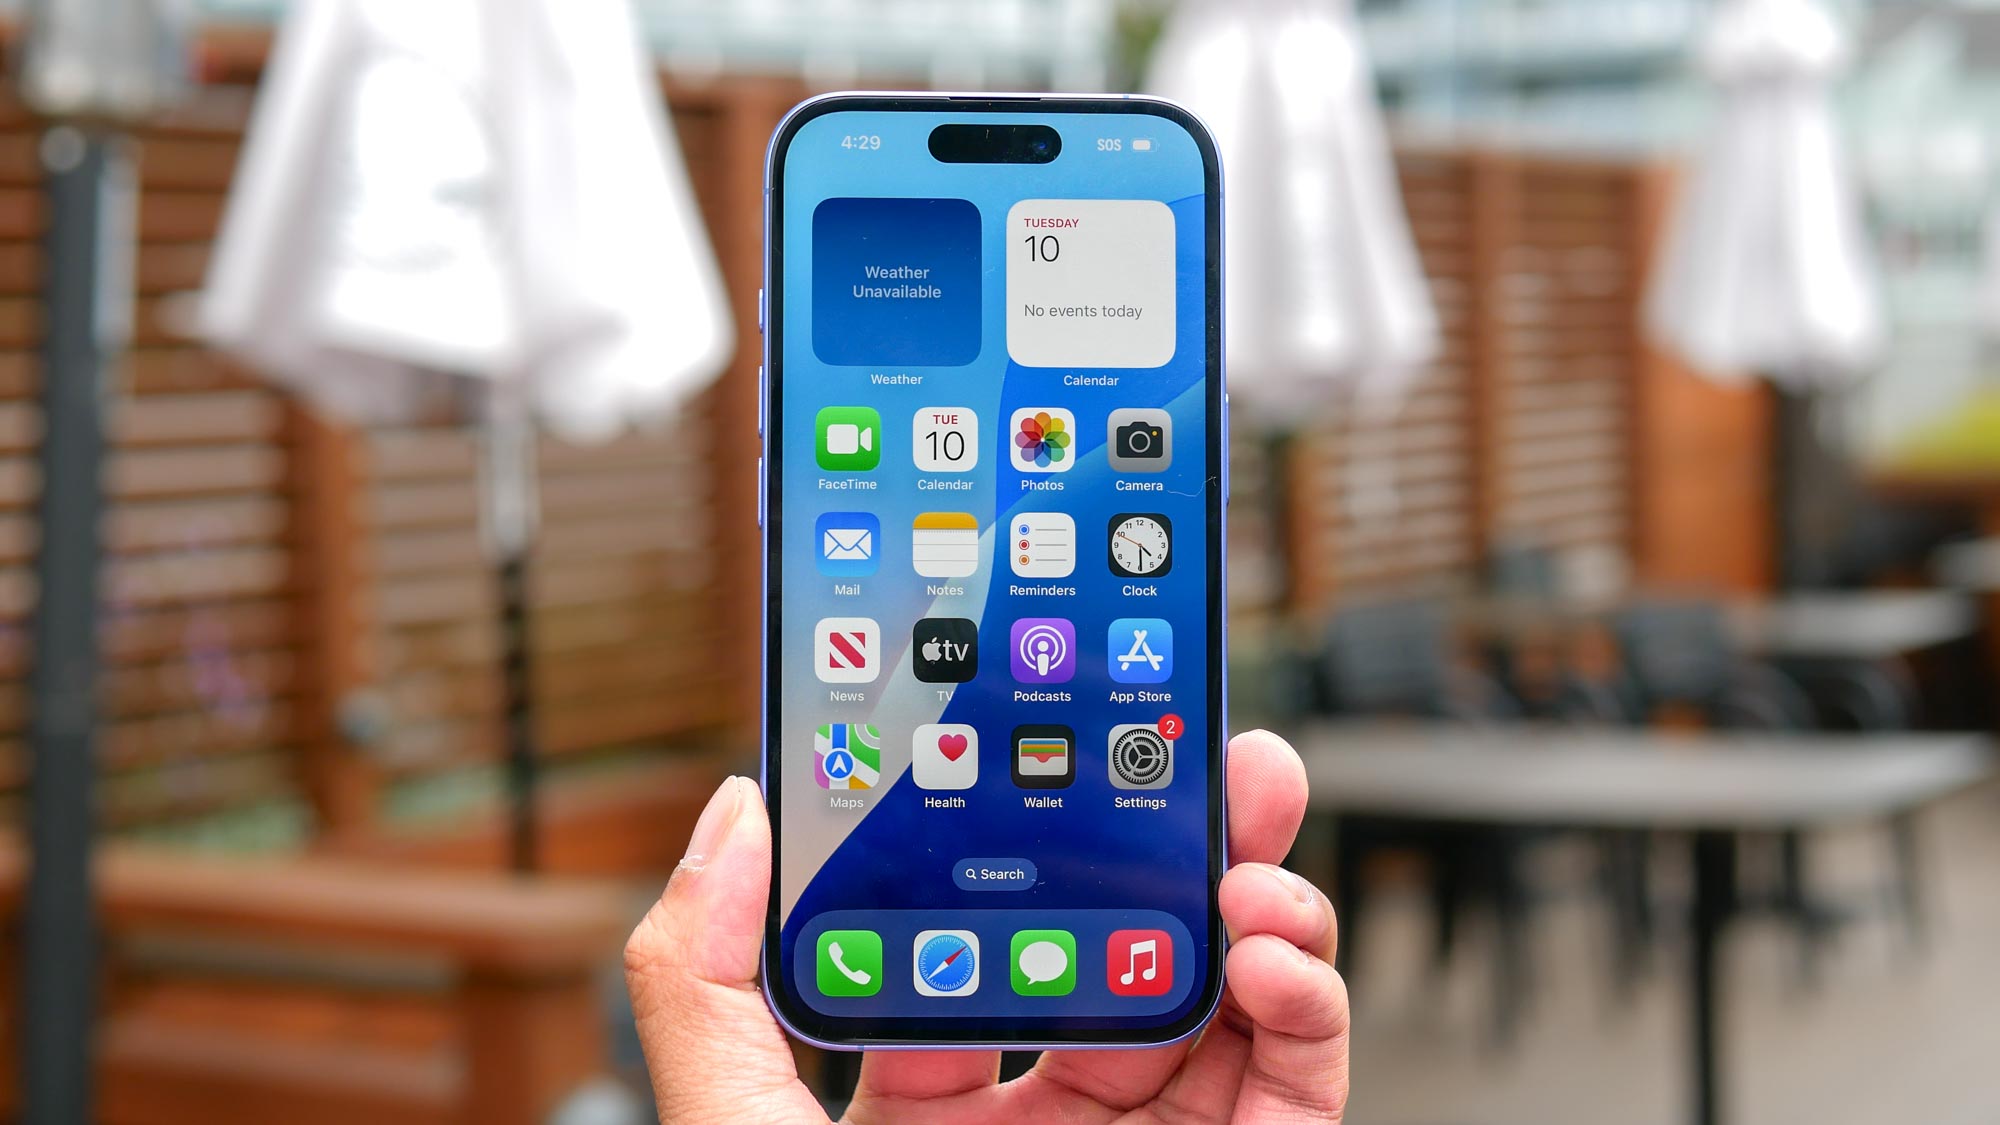
Thousands of iPhones are stolen every year, and the number of thefts is rising. These devices, along with Android phones, are highly valuable — not just because they’re expensive, but because of the apps and personal data they contain.
There have been reports of thieves draining users’ bank accounts, but that’s only the tip of the iceberg. With so much sensitive information stored on an iPhone, protecting it is essential.
Apple introduced Stolen Device Protection to make it harder for thieves to take control of a stolen device. If someone gets hold of your passcode, this extra safeguard can buy you time to act. Here’s how it works and why every iPhone user should turn it on.
What is Stolen Device Protection?
Stolen Device Protection was designed to combat thieves who have gained knowledge of your passcode. Even when you’re using FaceID or TouchID, a passcode can still enable a thief to access your handset and they can do severe damage, locking you out of the iPhone and Apple Account.
When you activate Stolen Device Protection, you will prevent the immediate changing of these settings by introducing a one-hour delay. Should a thief get hold of your iPhone, they will have to wait before they get a chance to make changes.
In that time, you can use Find My to locate, lock or erase a lost or stolen phone and take control of the situation. They may still end up with your device, of course, but, if you’re quick enough, they won’t be able to do much with your personal data.
1. Visiting your biometric settings
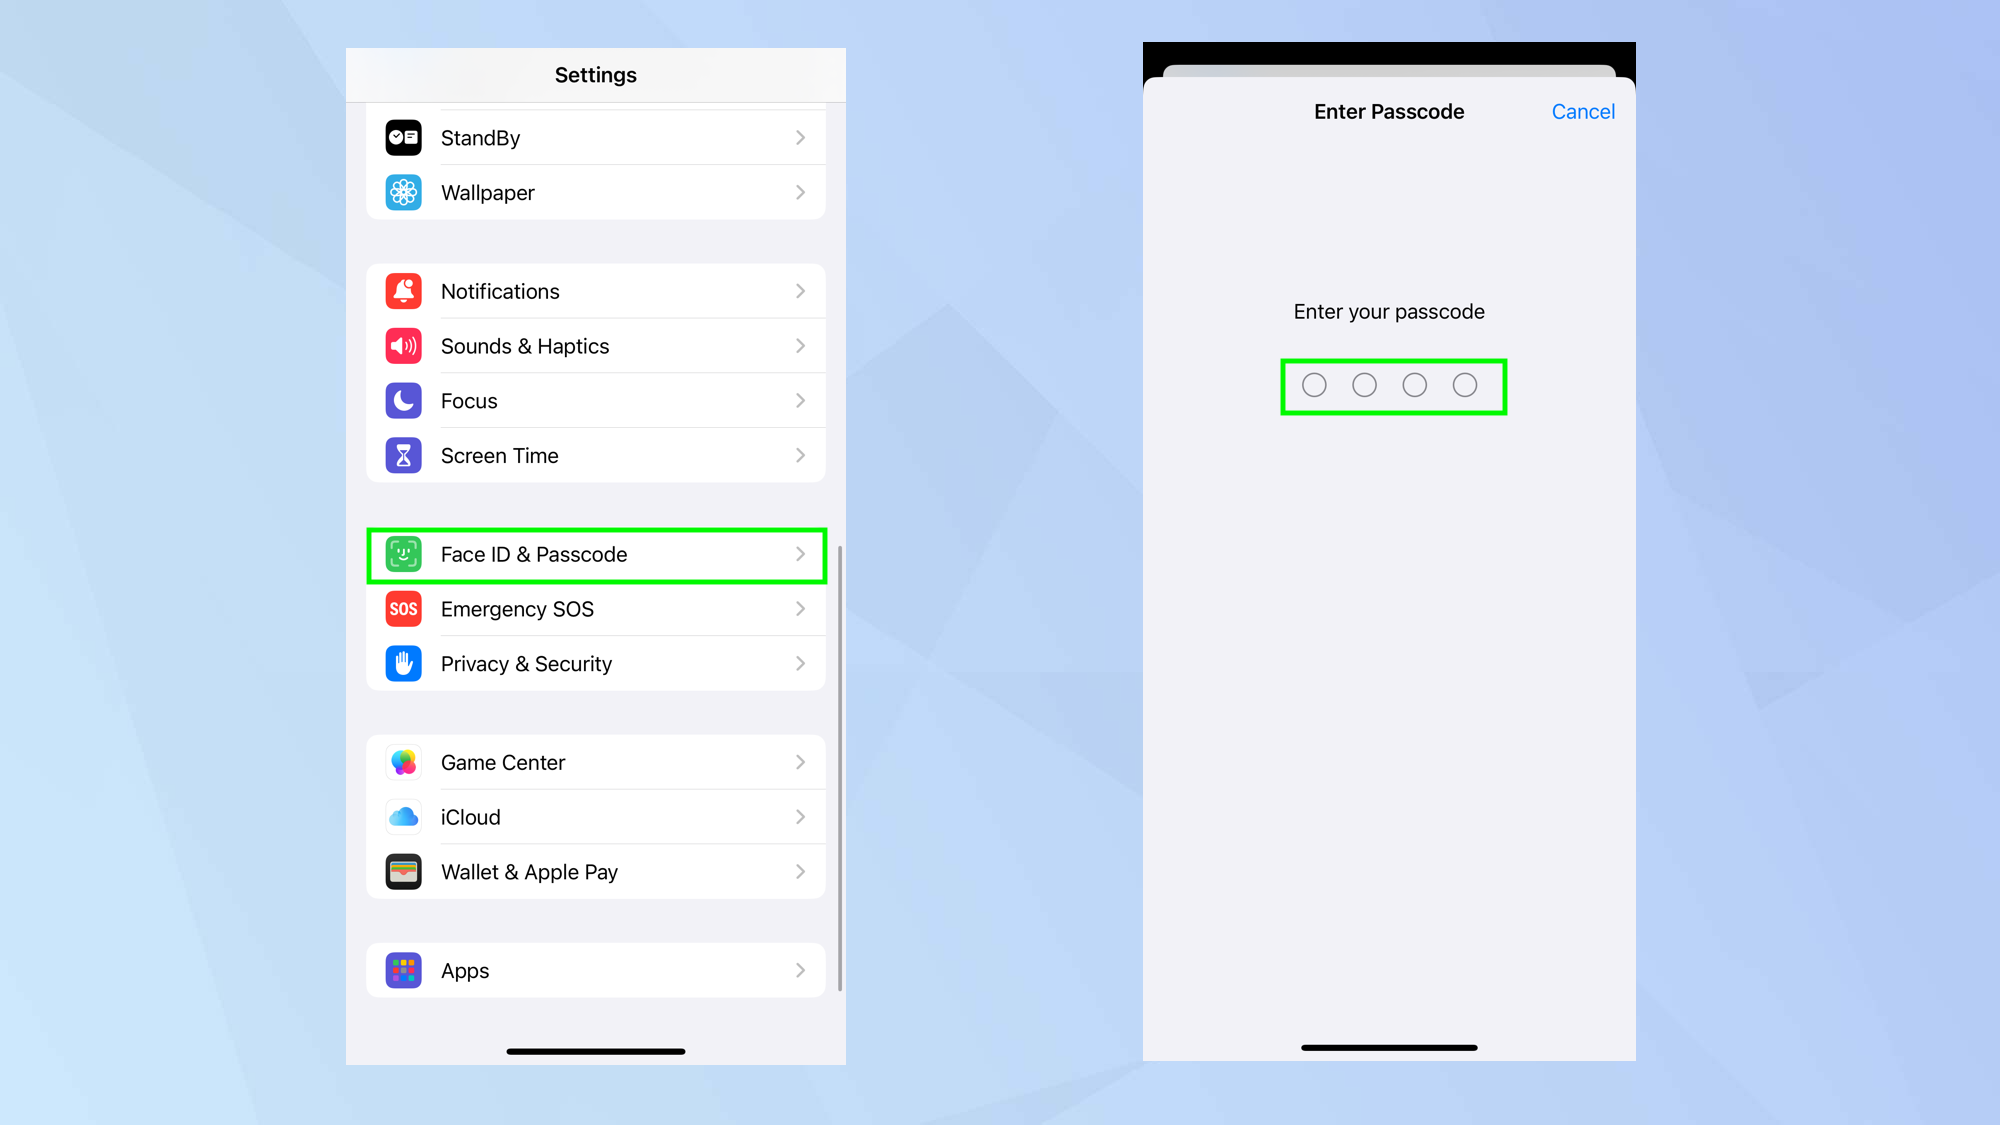
To activate (or deactivate) Stolen Device Protection, you will need to launch the Settings app and tap Face ID & Passcode (unless you have an older iPhone with Home button, in which case tap Touch ID & Passcode).
You will be asked to enter your iPhone’s passcode (the one you use to unlock the device).
2. Check Stolen Device Protection
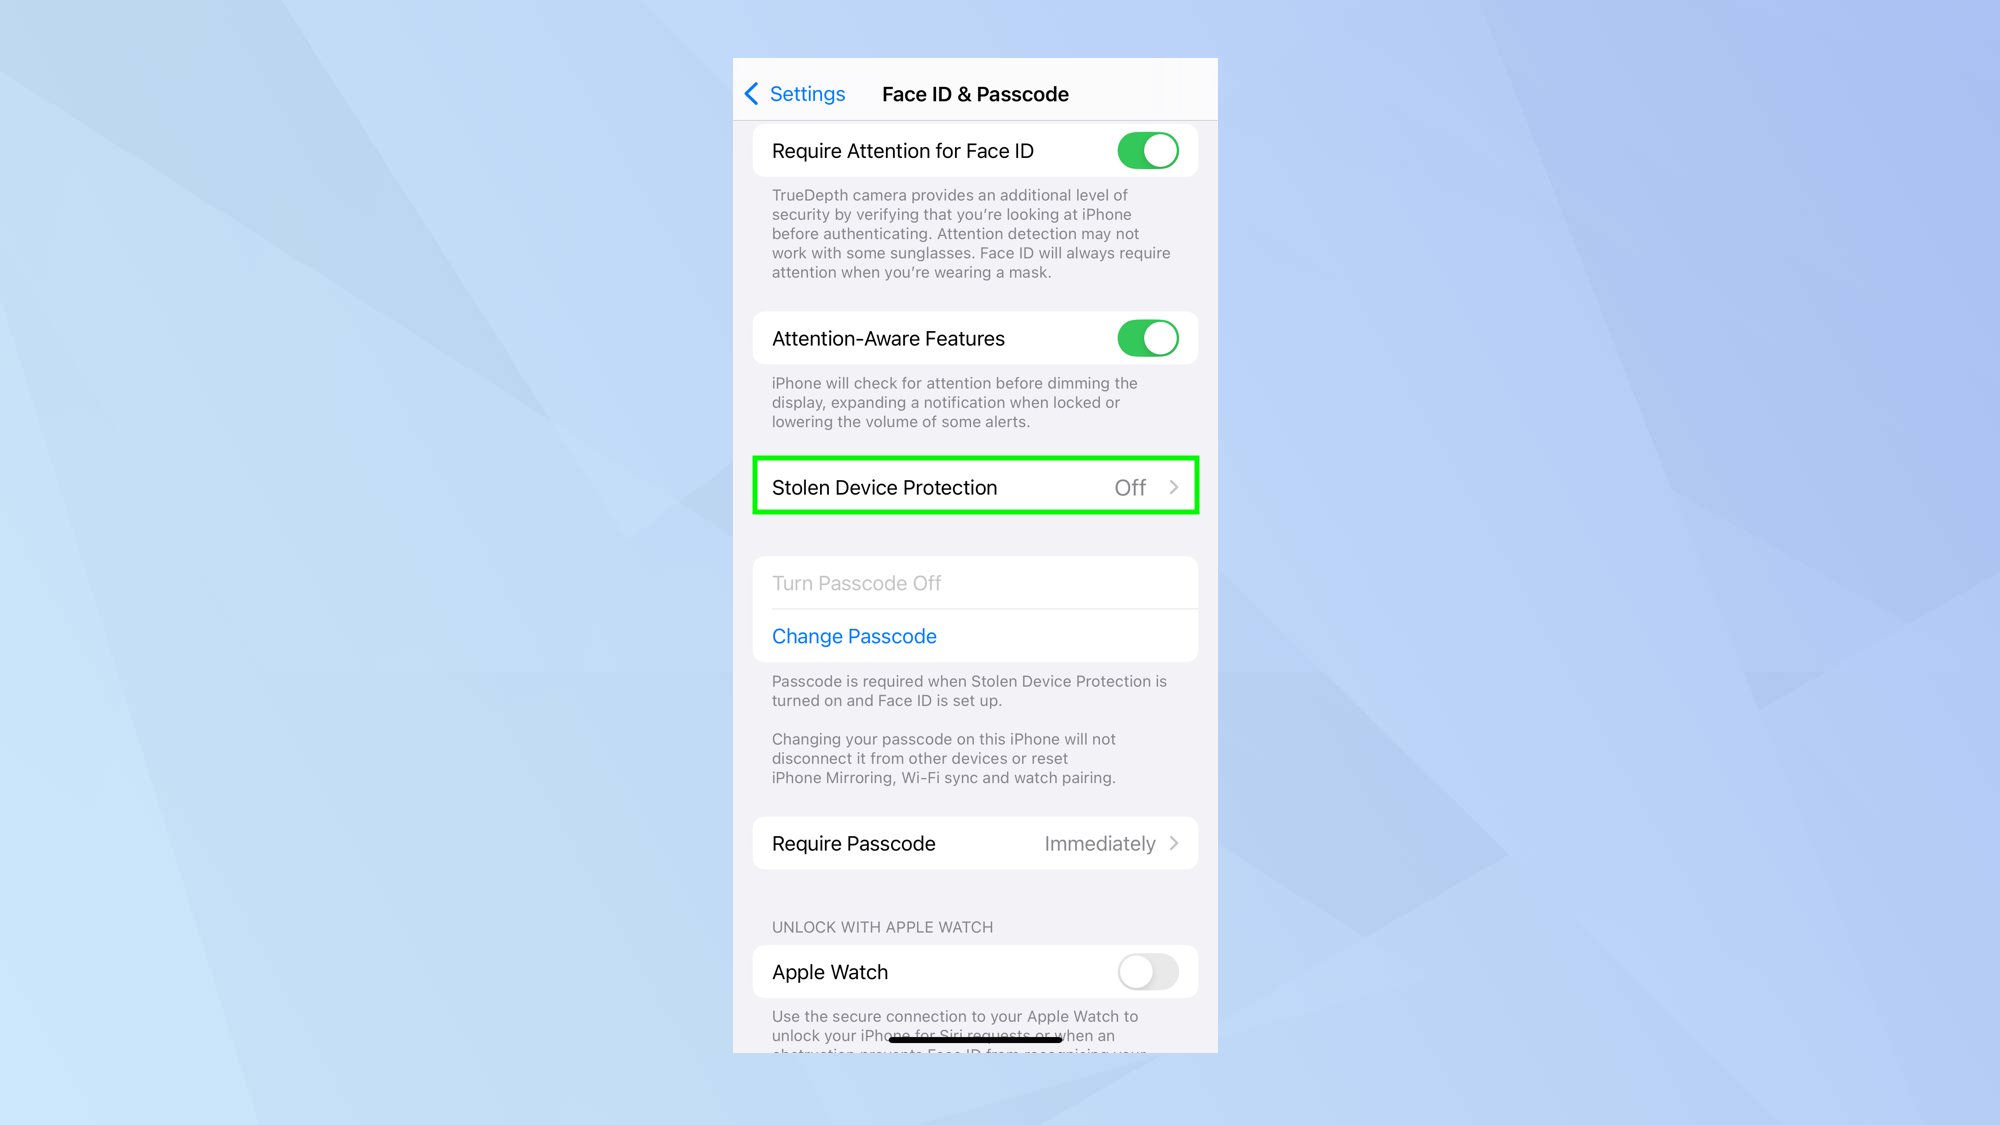
Next, scroll down the screen (to around half way) and tap Stolen Device Protection. It will be Off by default.
3. Turn it on
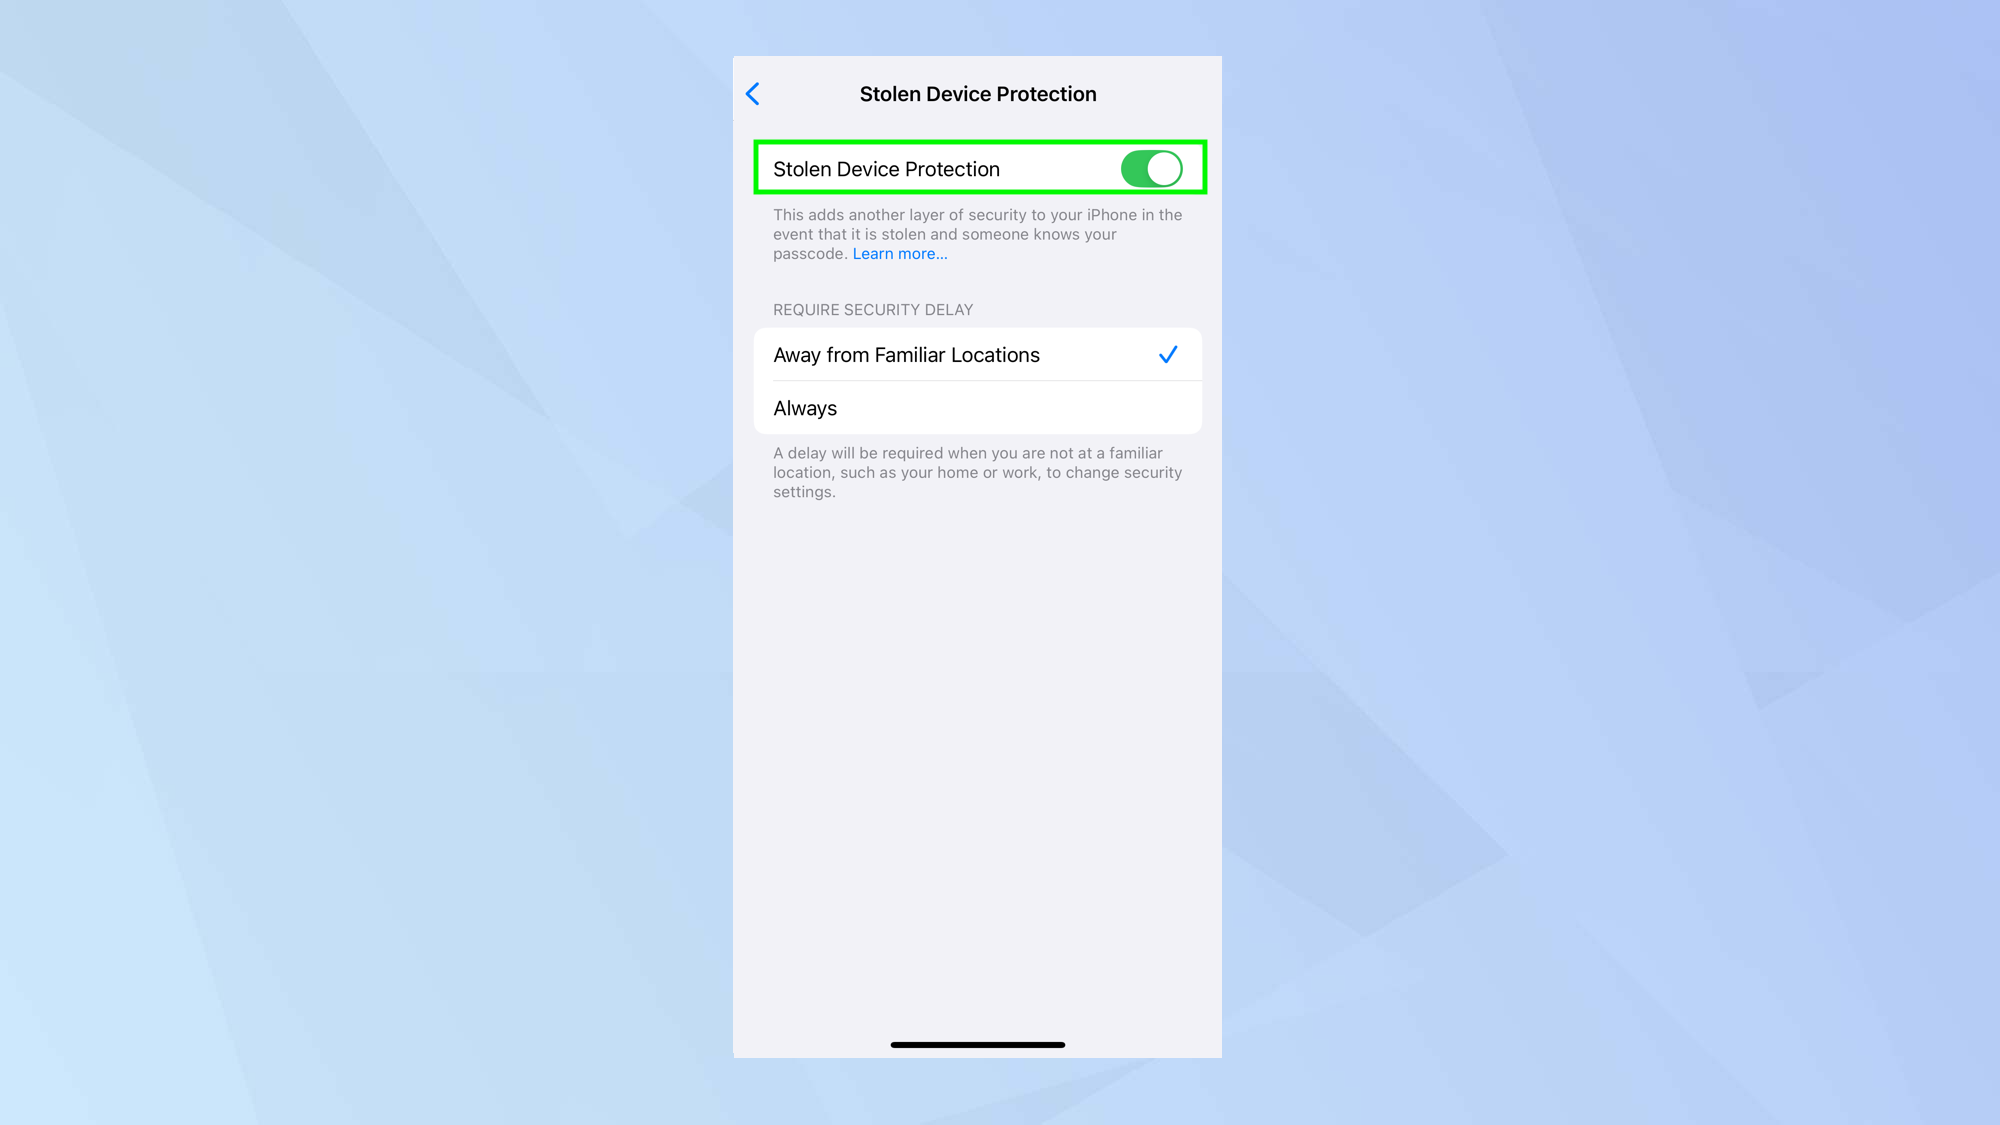
Tap the button next to Stolen Device Protection. The feature will be on when the toggle is green and off when it is gray.
4. Choose the security level
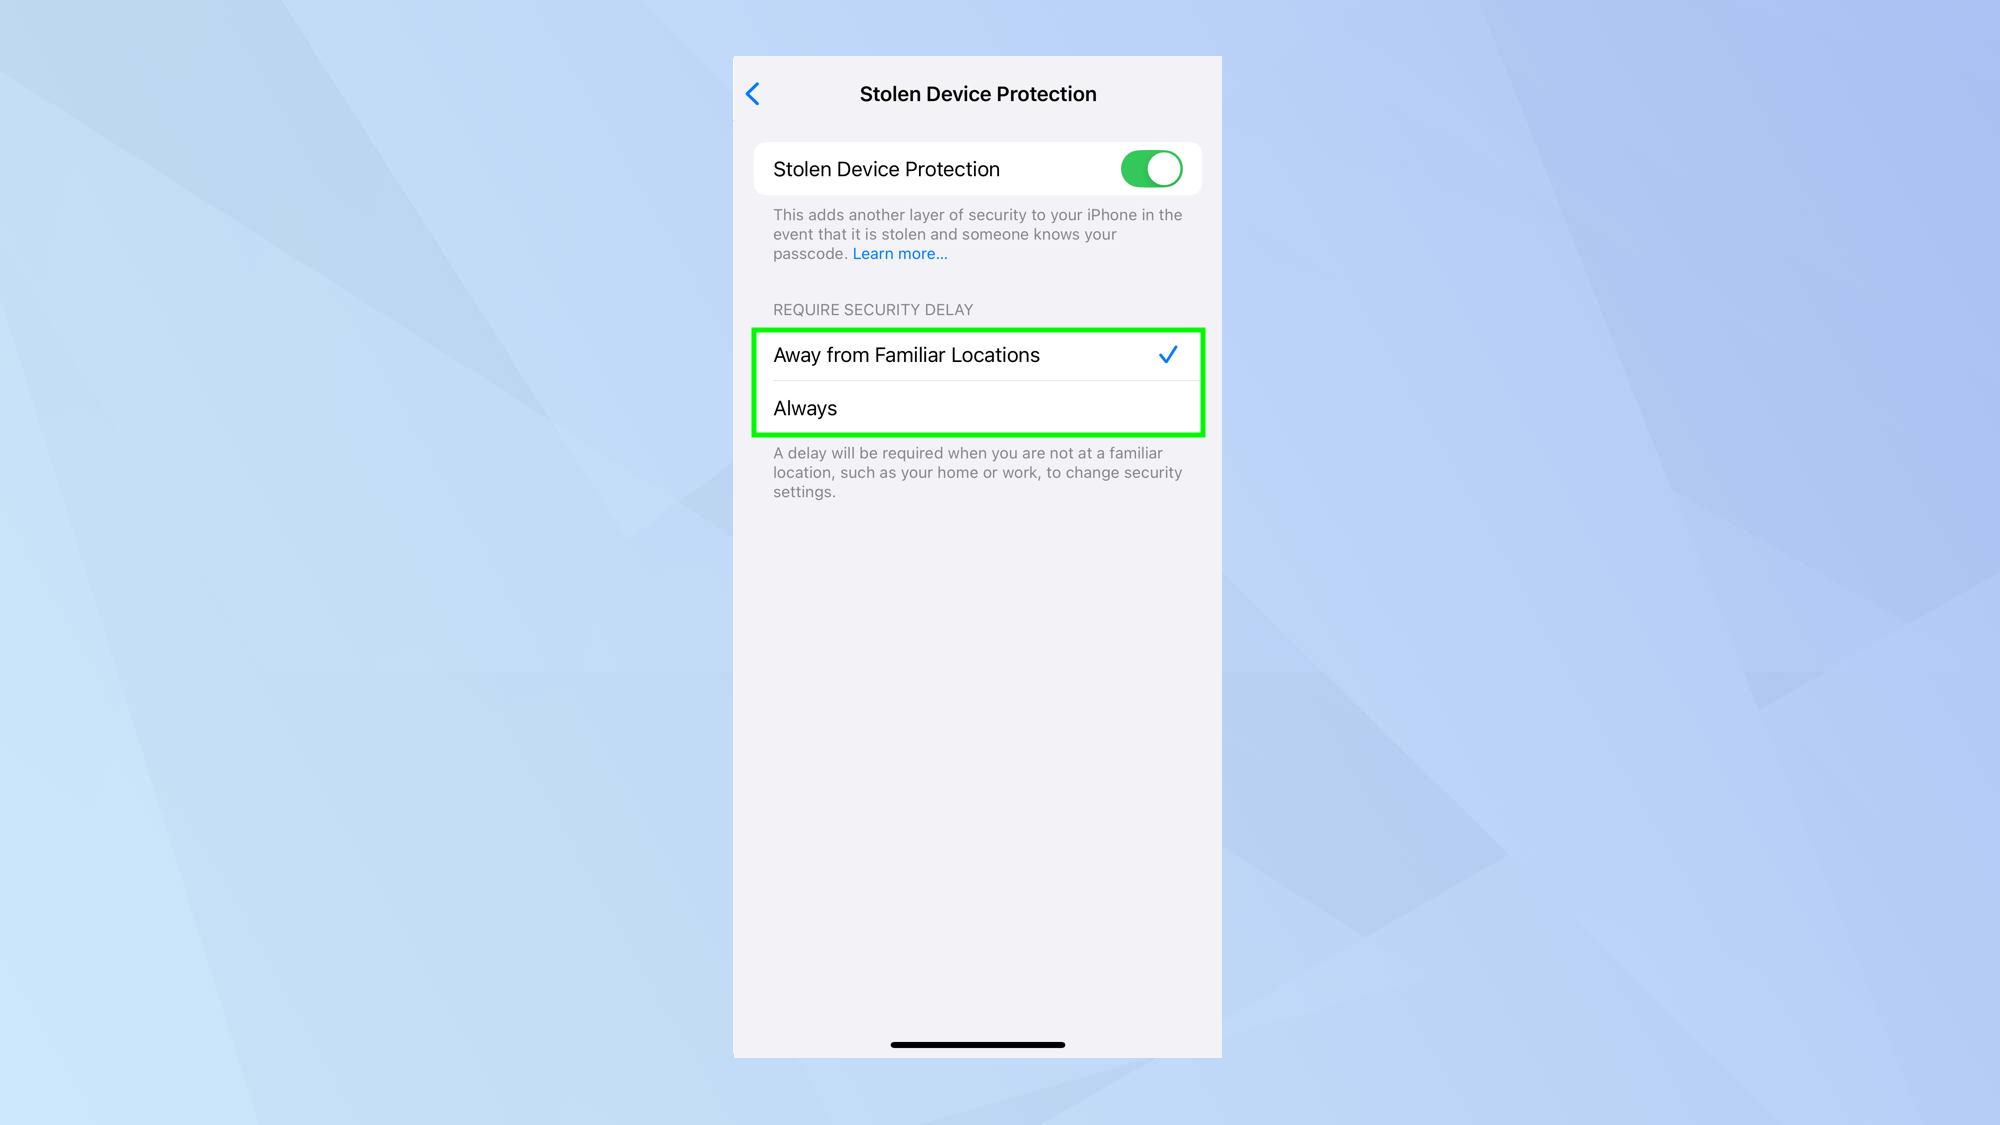
You can now select the protection you require.
You’re essentially choosing the conditions under which key iPhone settings can be changed — settings that, if misused, could lock you out of your device or Apple Account.
If you select Away from Familiar Locations, then you are telling your iPhone to block, for one hour, any attempt to change your device’s important settings if the handset is not at your home or place of work. Your iPhone is able to detect the places you visit most often.
If you select Always then it won’t matter where your handset is located. If an attempt is made to change important settings, it will be blocked for an hour.
5. Change a setting
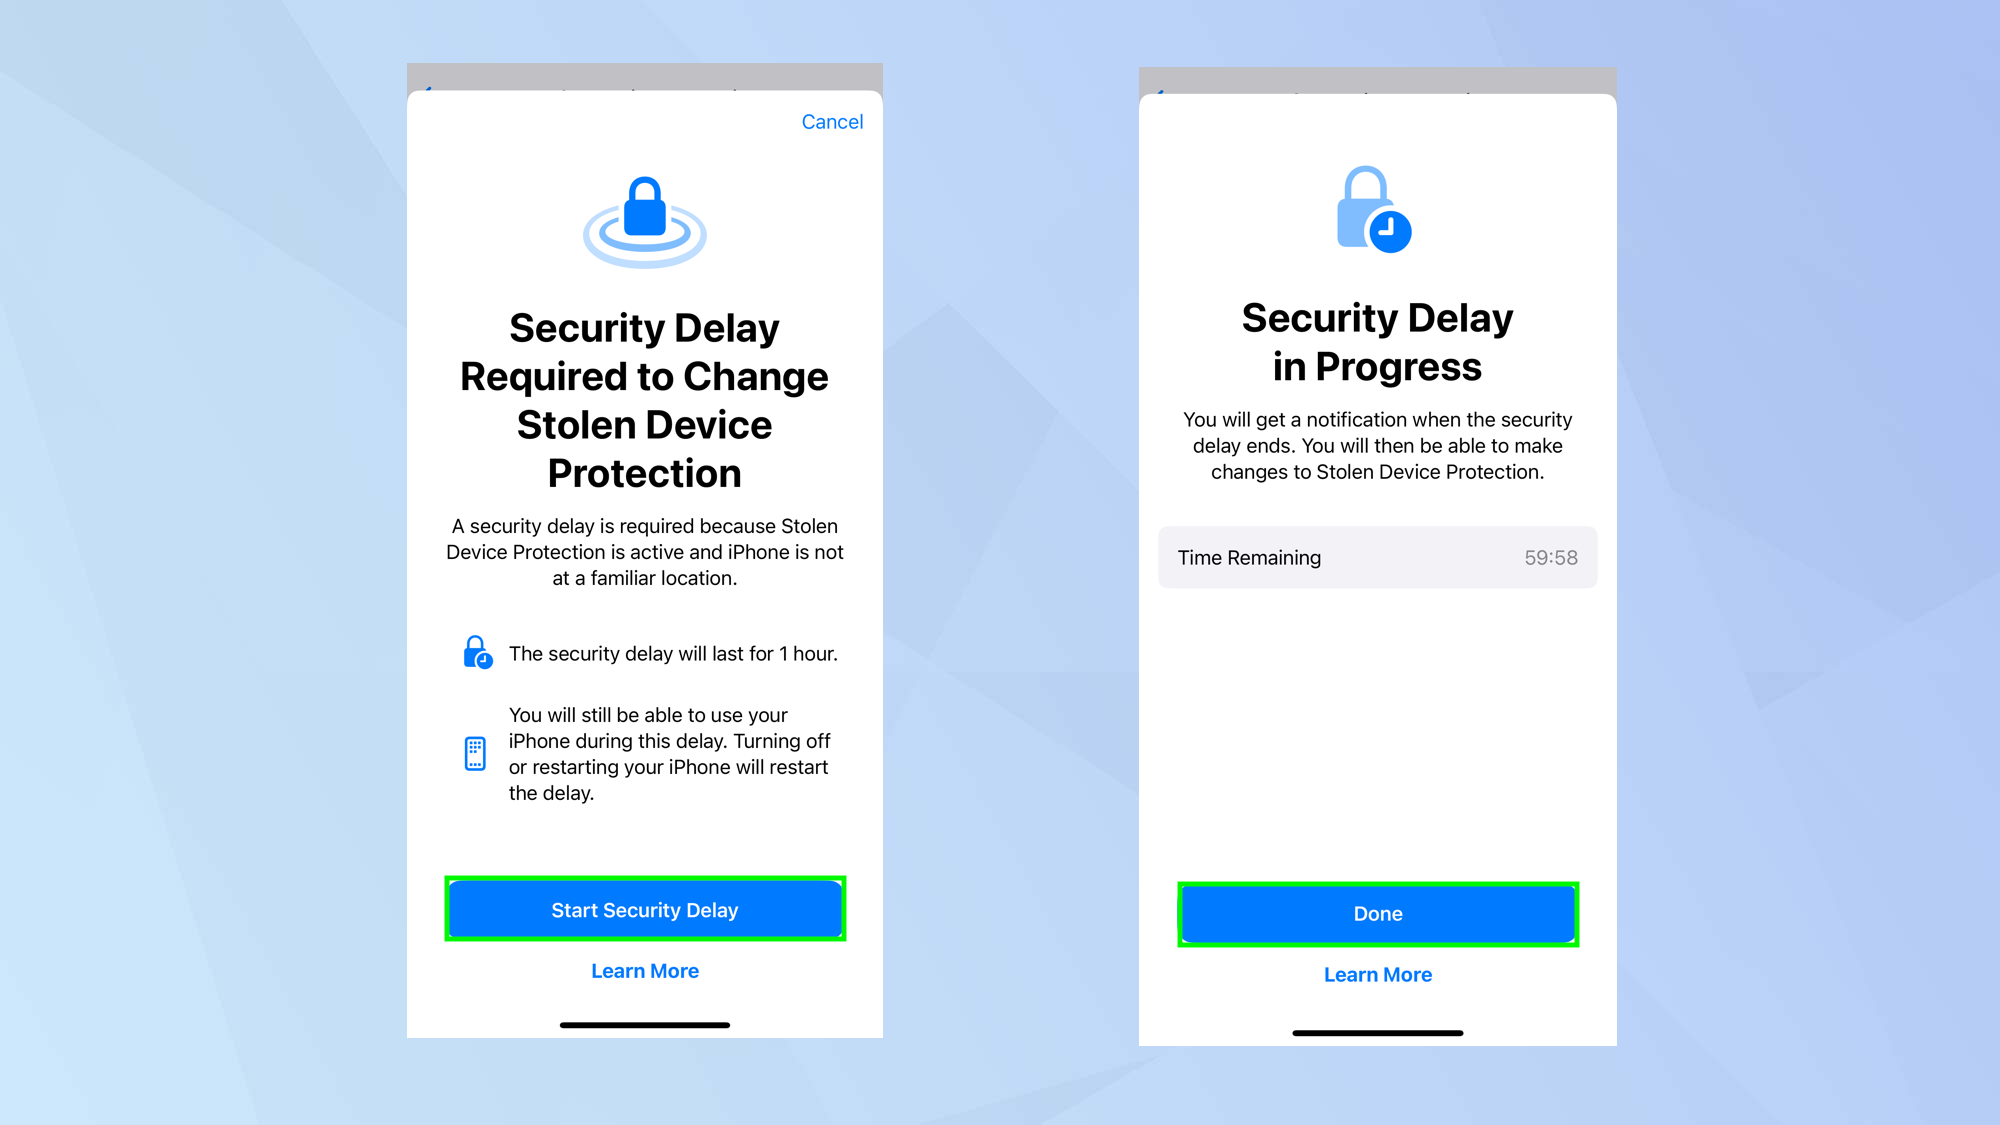
You can test this. Let’s say you are not in a familiar place and you want to change your passcode. You will be told Stolen Device Protection is active.
To be able to carry out the passcode change, you have to select Start Security Delay to start a one-hour timer and then Done to continue using the iPhone.
The setting will be changeable after that hour but, if the iPhone happened to be in the hands of a thief, this would give you sufficient time to take action.
6. Turn off Stolen Device Protection
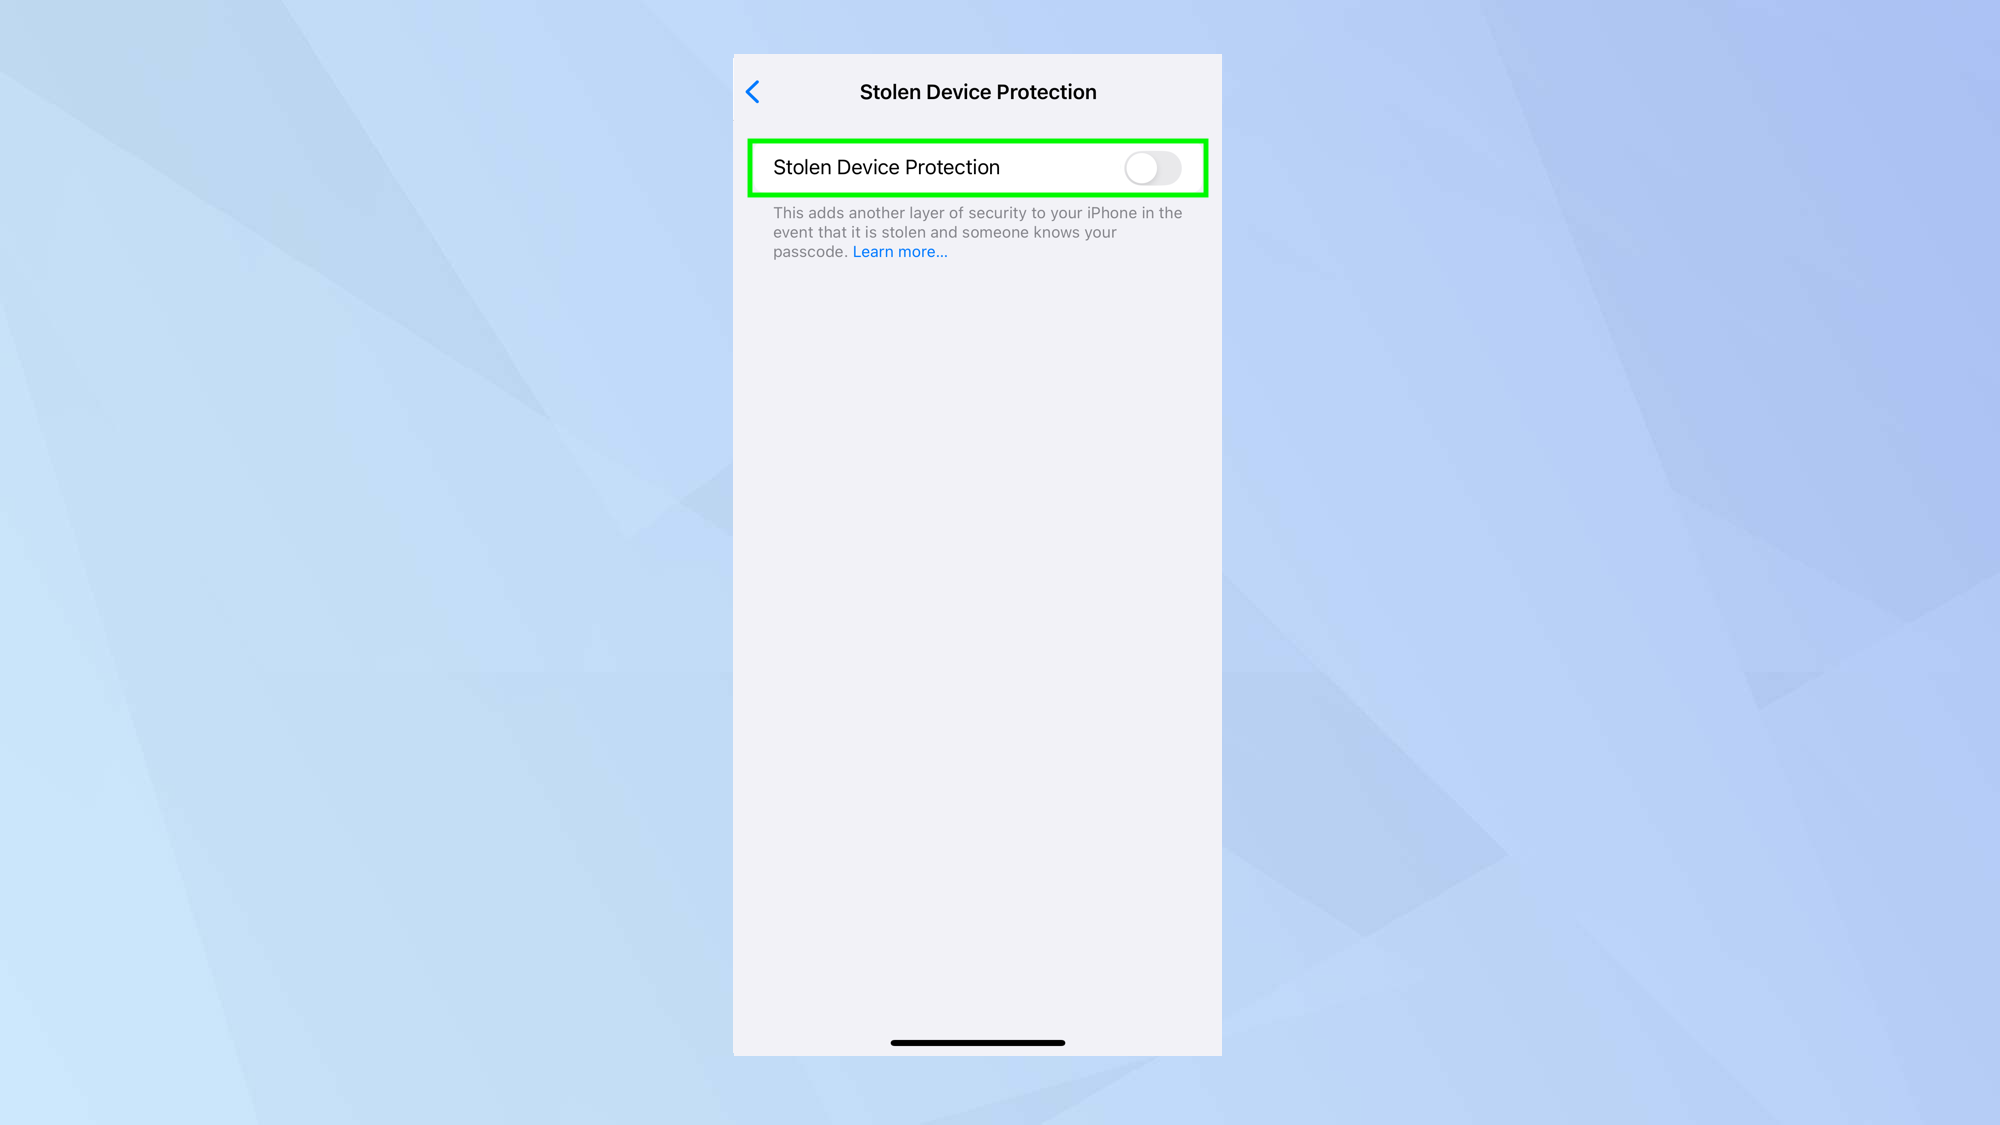
If you don’t want to use Stolen Device Protection any more, you just need to toggle Stolen Device Protection to off.
And there you go. You now know how to use Stolen Device Protection on iPhone. While you're here, why not take a look at our other useful guides?
Get instant access to breaking news, the hottest reviews, great deals and helpful tips.
It’s always worth familiarising yourself with 3 simple tricks to protect your iPhone from thieves and, if you’re buying a used phone, how to tell if it has a shady history.
And, if you have iOS 26 Beta installed, check out how to get Liquid Glass icons on your iPhone.
Follow Tom's Guide on Google News to get our up-to-date news, how-tos, and reviews in your feeds. Make sure to click the Follow button.

David Crookes is a freelance writer, reporter, editor and author. He has written for technology and gaming magazines including Retro Gamer, Web User, Micro Mart, MagPi, Android, iCreate, Total PC Gaming, T3 and Macworld. He has also covered crime, history, politics, education, health, sport, film, music and more, and been a producer for BBC Radio 5 Live.
You must confirm your public display name before commenting
Please logout and then login again, you will then be prompted to enter your display name.
 Club Benefits


