3 simple tricks to protect your iPhone from thieves
Find out how to protect your iPhone from thieves in just 3 steps
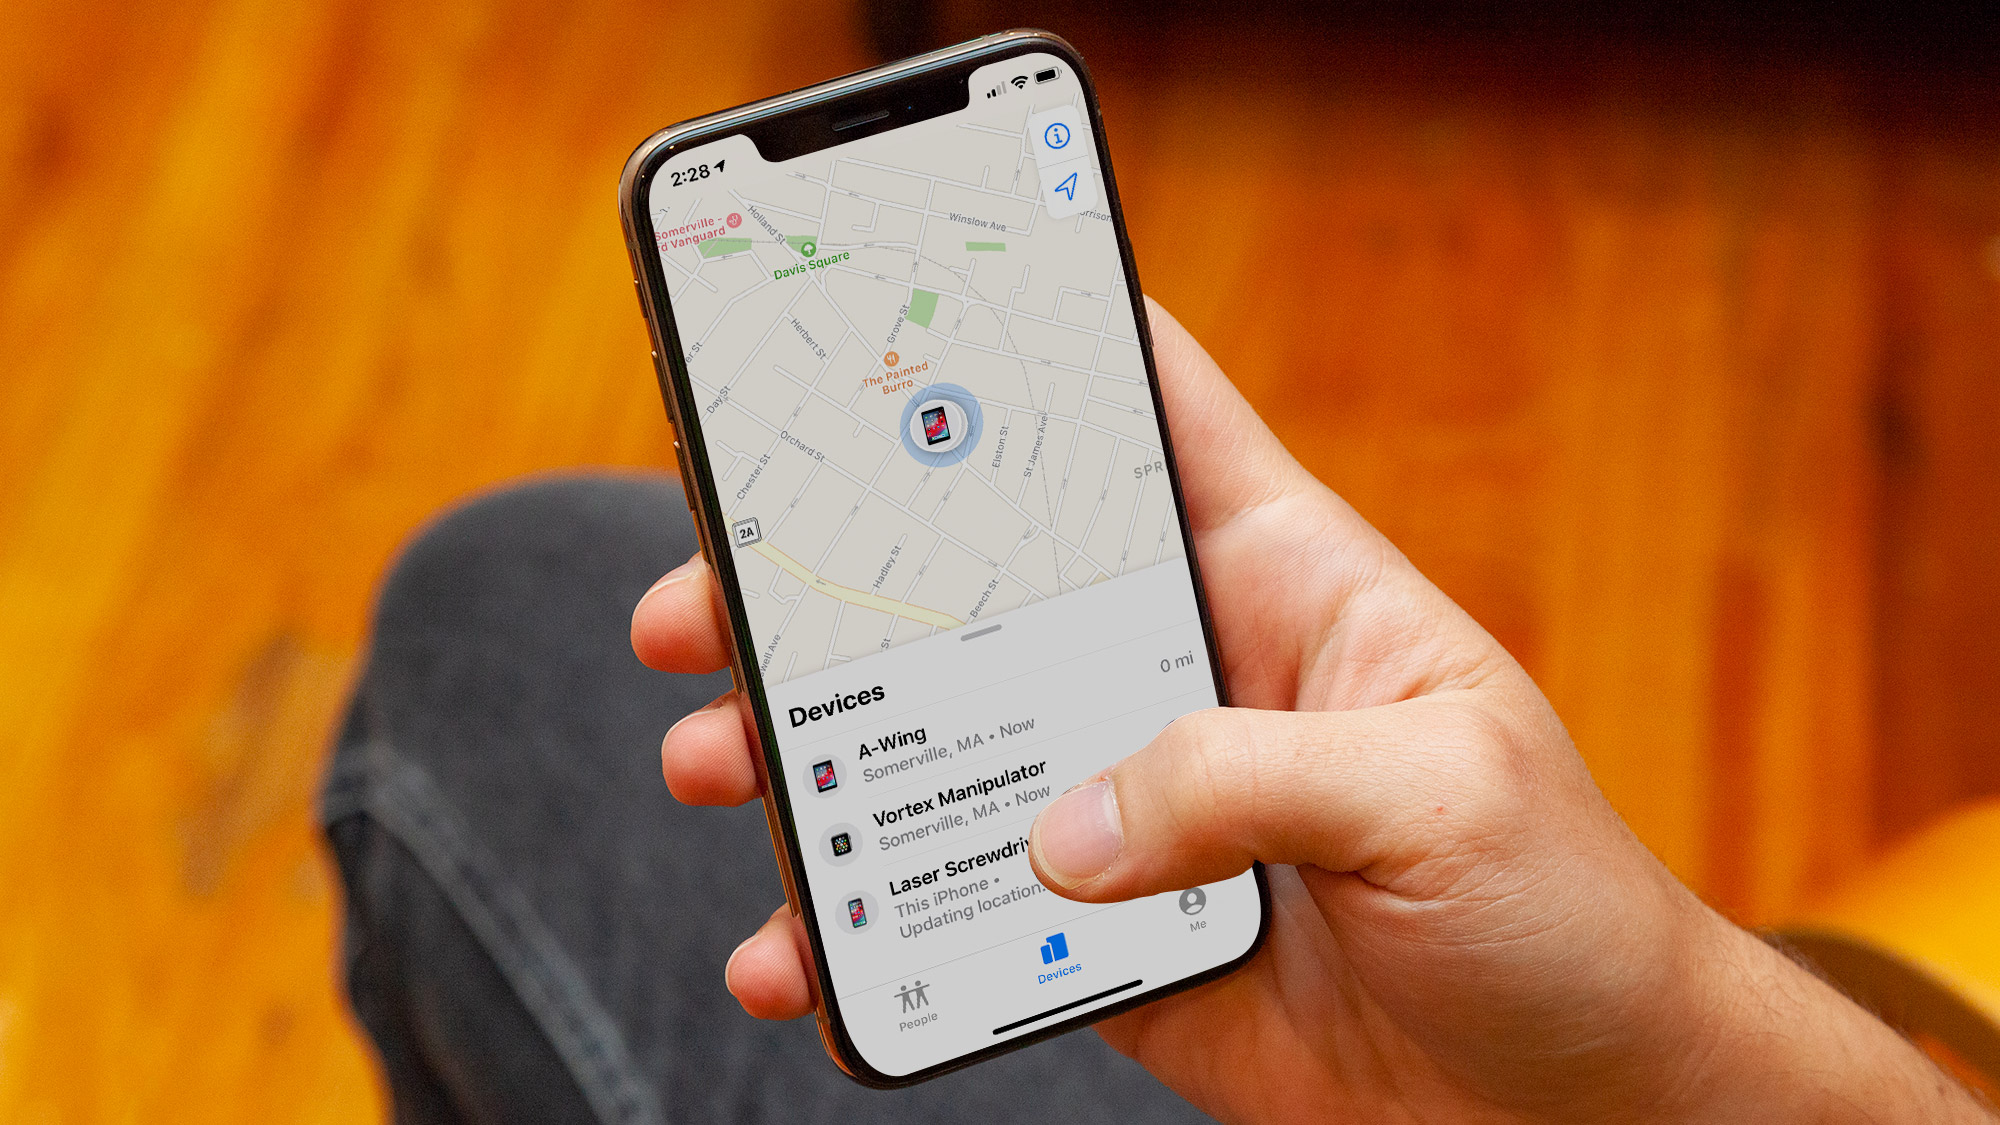
If it's ever happened to you, you'll know how stressful it can be to lose a phone. Of course, there are the financial implications of losing your iPhone — they aren't exactly cheap. But perhaps more important is the notion that your entire life is on that device.
If a thief manages to get into your phone, they'd have everything they need to do some serious damage, including access to email accounts, verification apps and banking apps. Then there are the personal areas, such as photos or the iOS Journal app.
Smartphone manufacturers, including Apple, aren't ignorant of this, which is why the best phones come with some pretty hefty security features to help ensure that, should the worst happen, all is not lost. In fact, if you take the correct steps, virtually nothing can be lost to thieves.
On top of the basic security features your iPhone possesses, such as Face ID, passcode and Find My, there are also a range of tweaks and features you can enable to ensure that, even if your iPhone was stolen, nobody is getting into it. Here's how to make your phone inaccessible to thieves.
Loss and theft aren't the only terrible things that can happen to your iPhone — dropping it can be just as bad. To make sure yours is always protected, check out our guides to the best iPhone 15 Pro Max cases, best iPhone 15 Pro cases and best iPhone 15 cases.
Here's how to protect your iPhone from thieves in just 3 steps
1. Turn off Control Center and USB accessories when locked
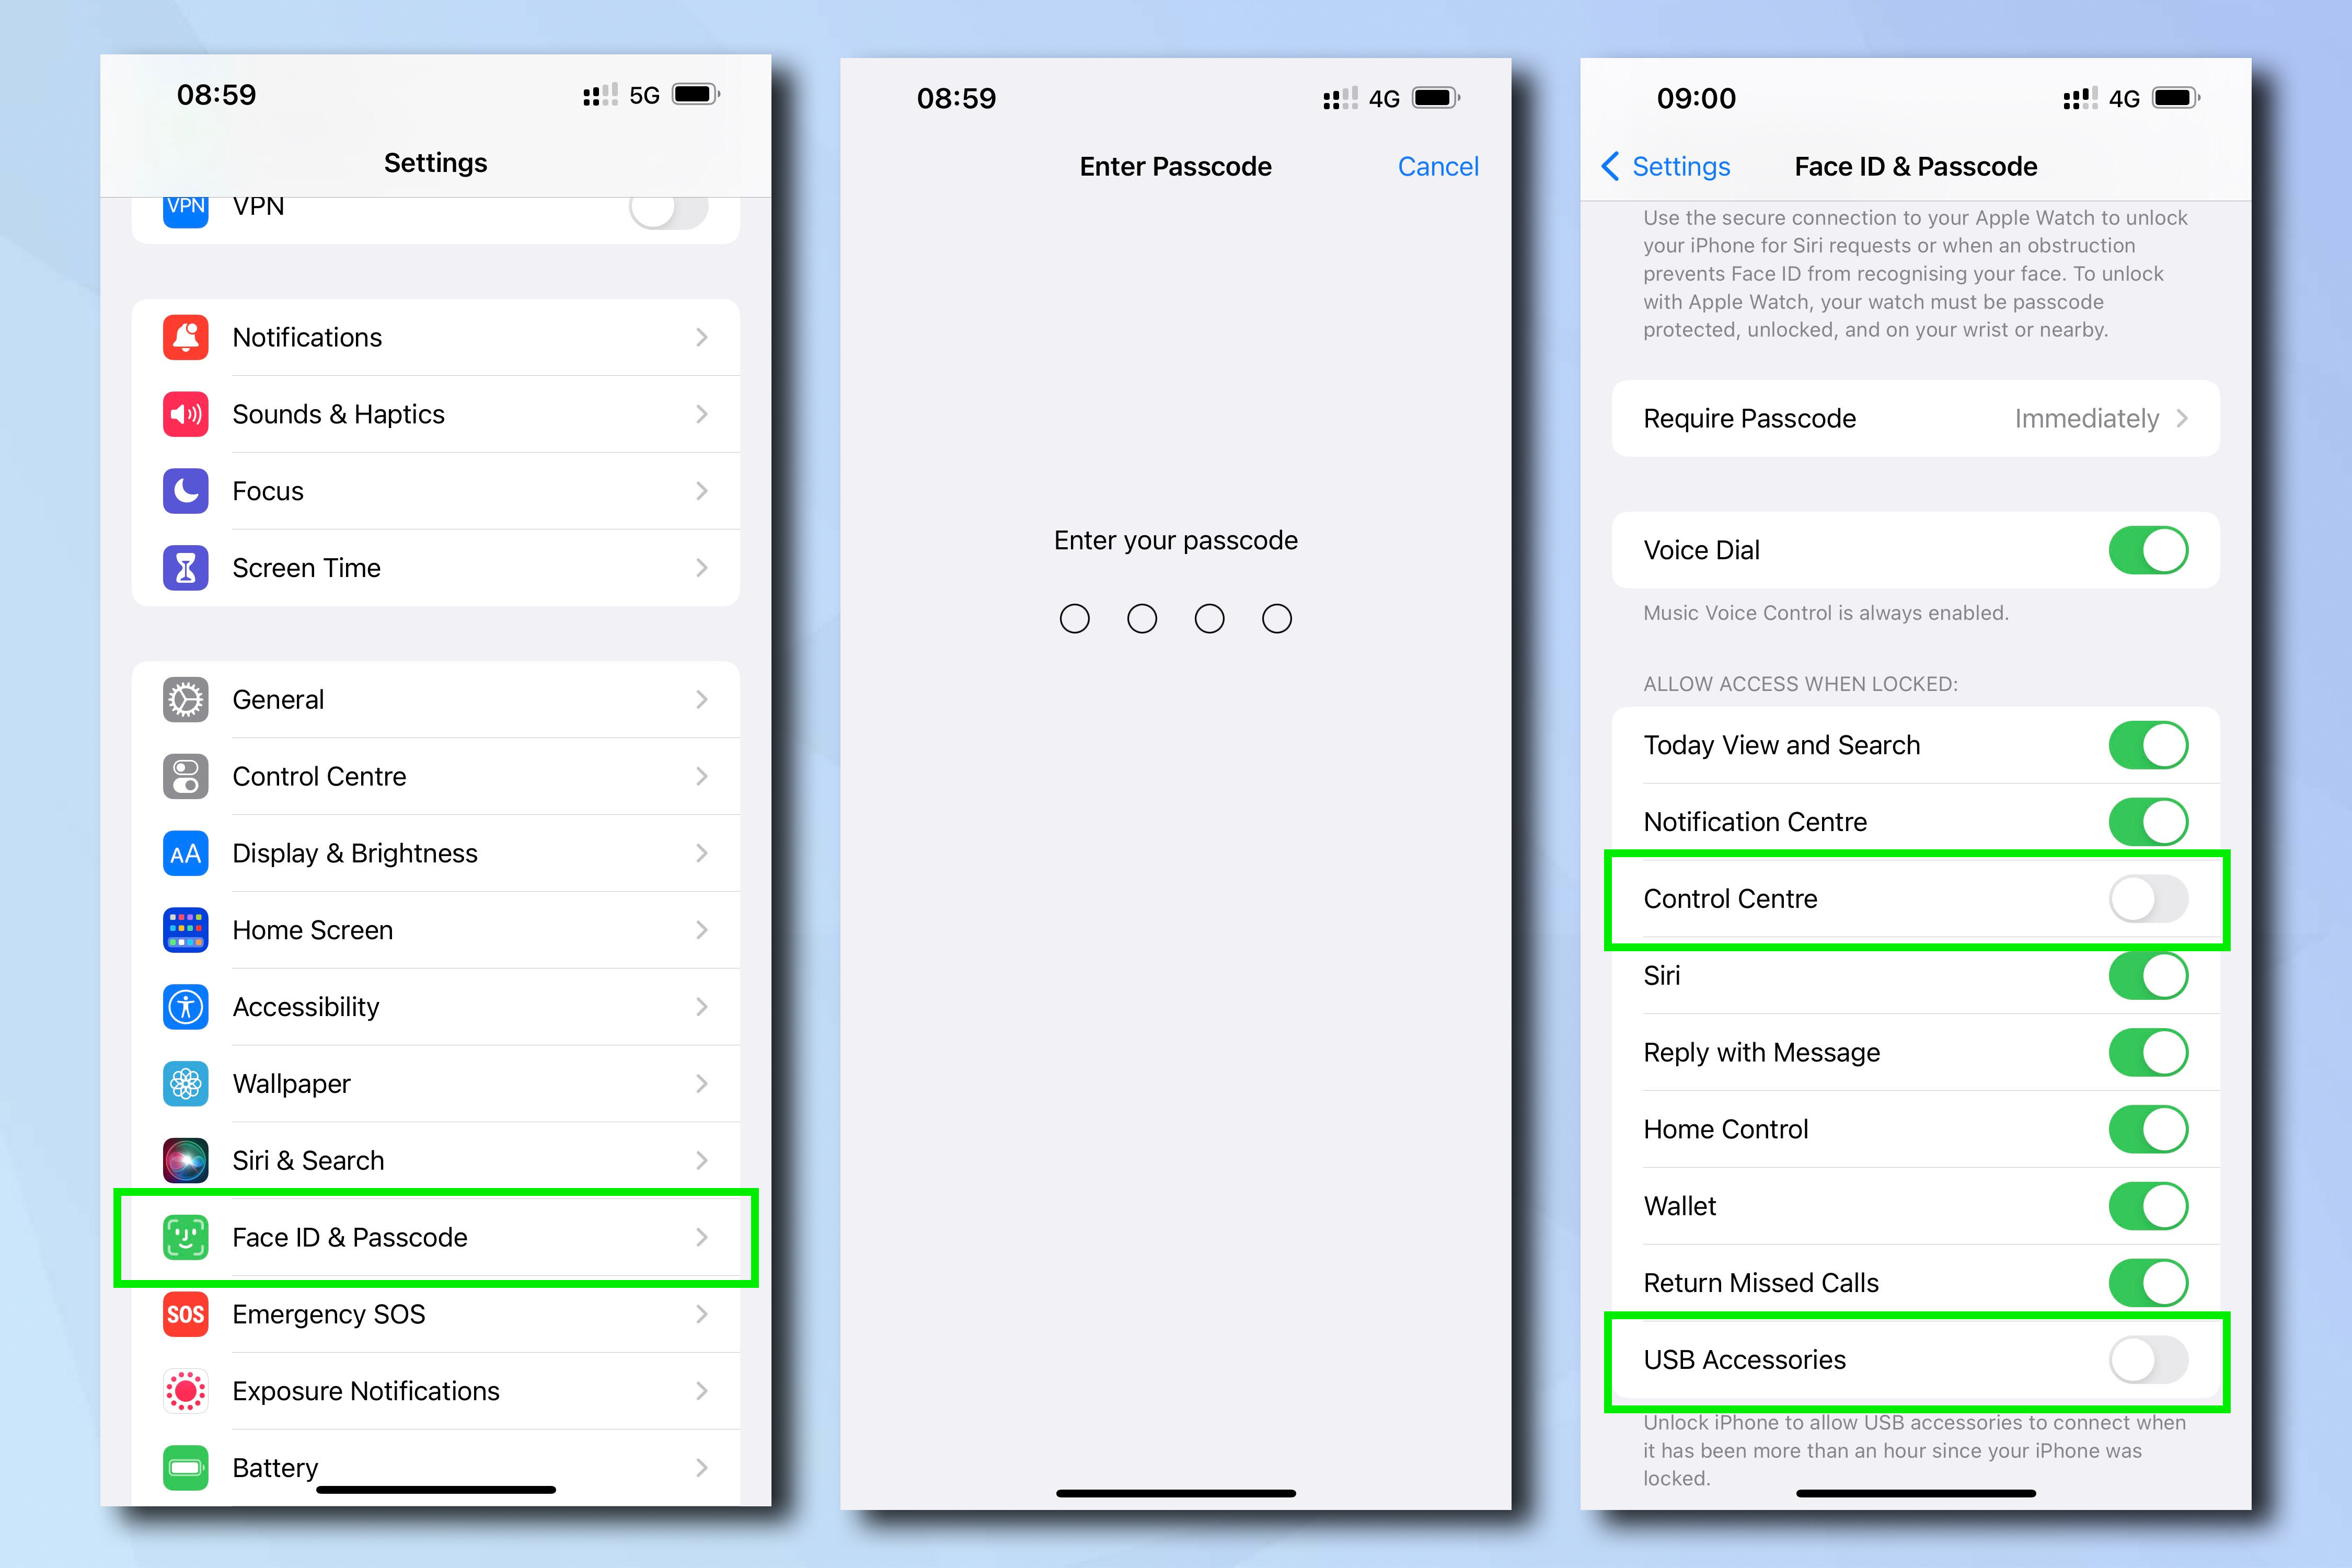
Control Center is one of my favorite iPhone tools — even when locked it gives me access to the core functions of my phone. However, a thief can use this to their advantage by using Control Center to switch your iPhone to Airplane Mode and stop it connecting to the internet, so the security conscious may wish to turn it off. Turning off USB accessories also stops any nefarious plug in devices being used on the phone while locked to control and even unlock it.
Get instant access to breaking news, the hottest reviews, great deals and helpful tips.
To disable Control Center and USB accessories when locked, go to Settings, then Face ID & Passcode. Enter your passcode and scroll down to Allow Access When Locked. Toggle off Control Center and USB Accessories.
2. Enable Erase Data after 10 unsuccessful passcode attempts
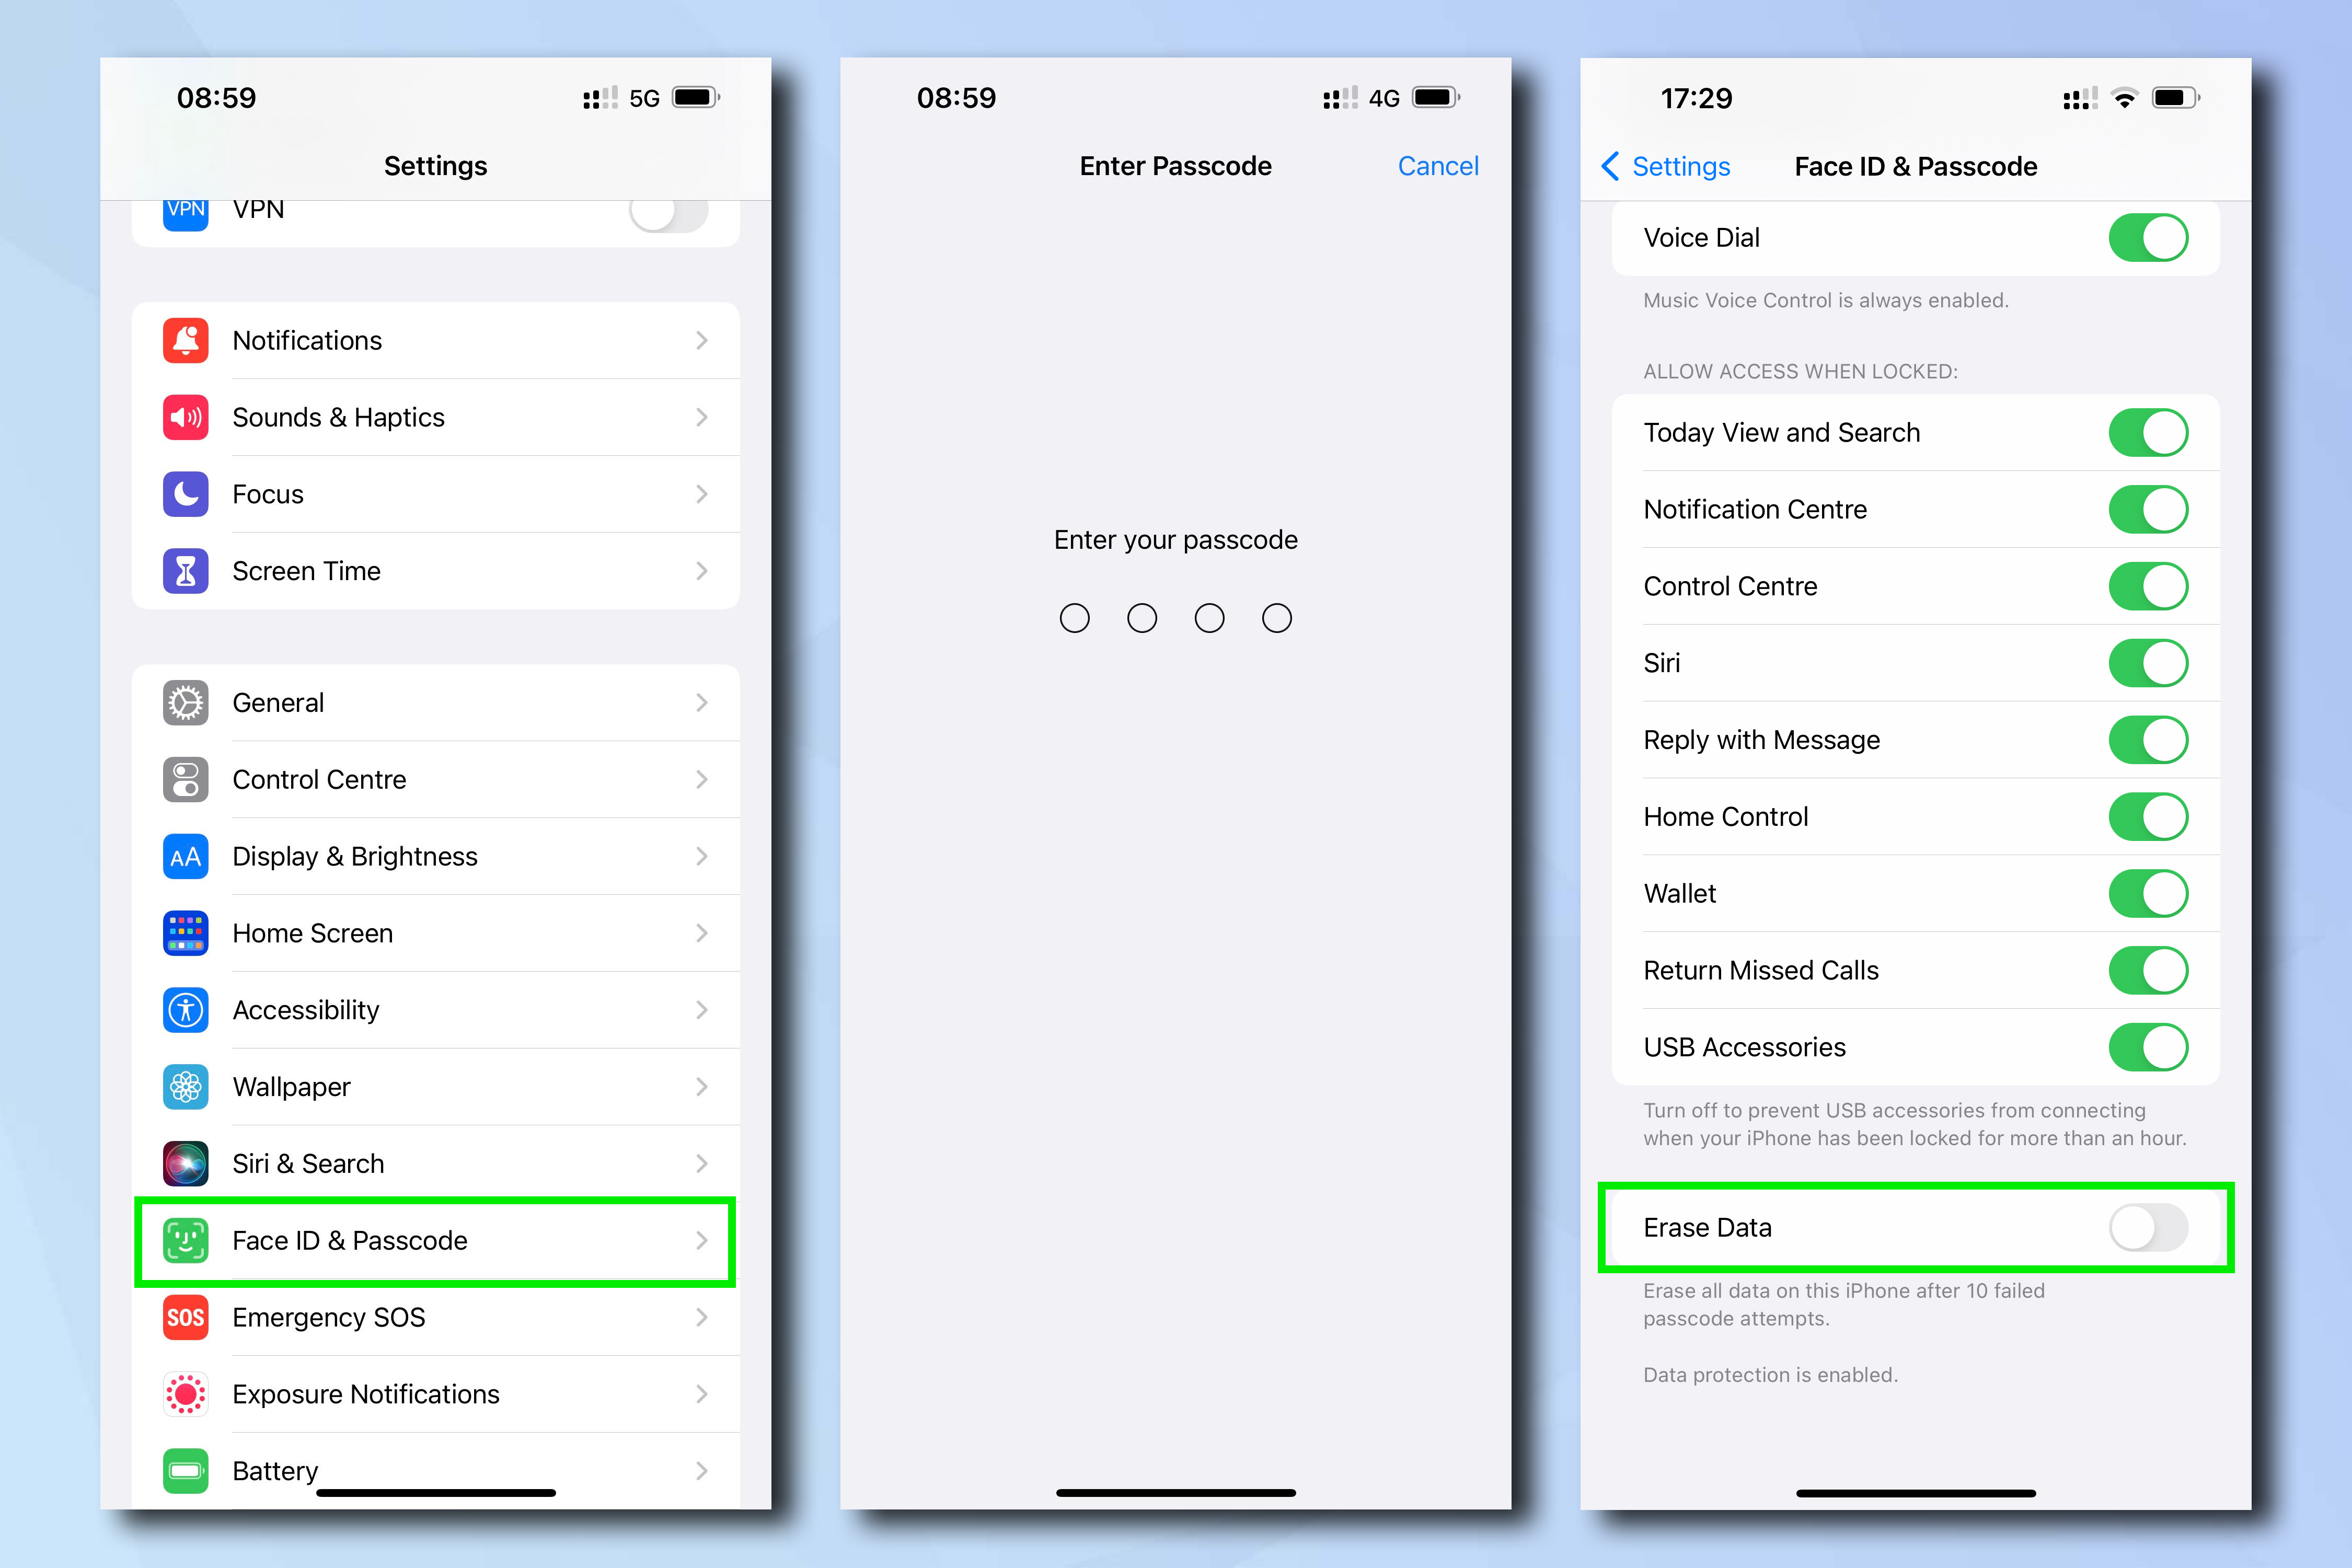
With Erase Data enabled, after 10 unsuccessful password attempts your phone will be completely erased, meaning nothing sensitive can be viewed on or shared from it. Using iCloud's Back Up feature (which backs up every 24 hours), your located or replacement iPhone can then be restored to exactly how it was with little loss of data, so you'll want this turned on before you enable Erase Data. If you don't use iCloud Back Up and/or don't have enough iCloud storage space for a full backup, leave Erase Data turned off.
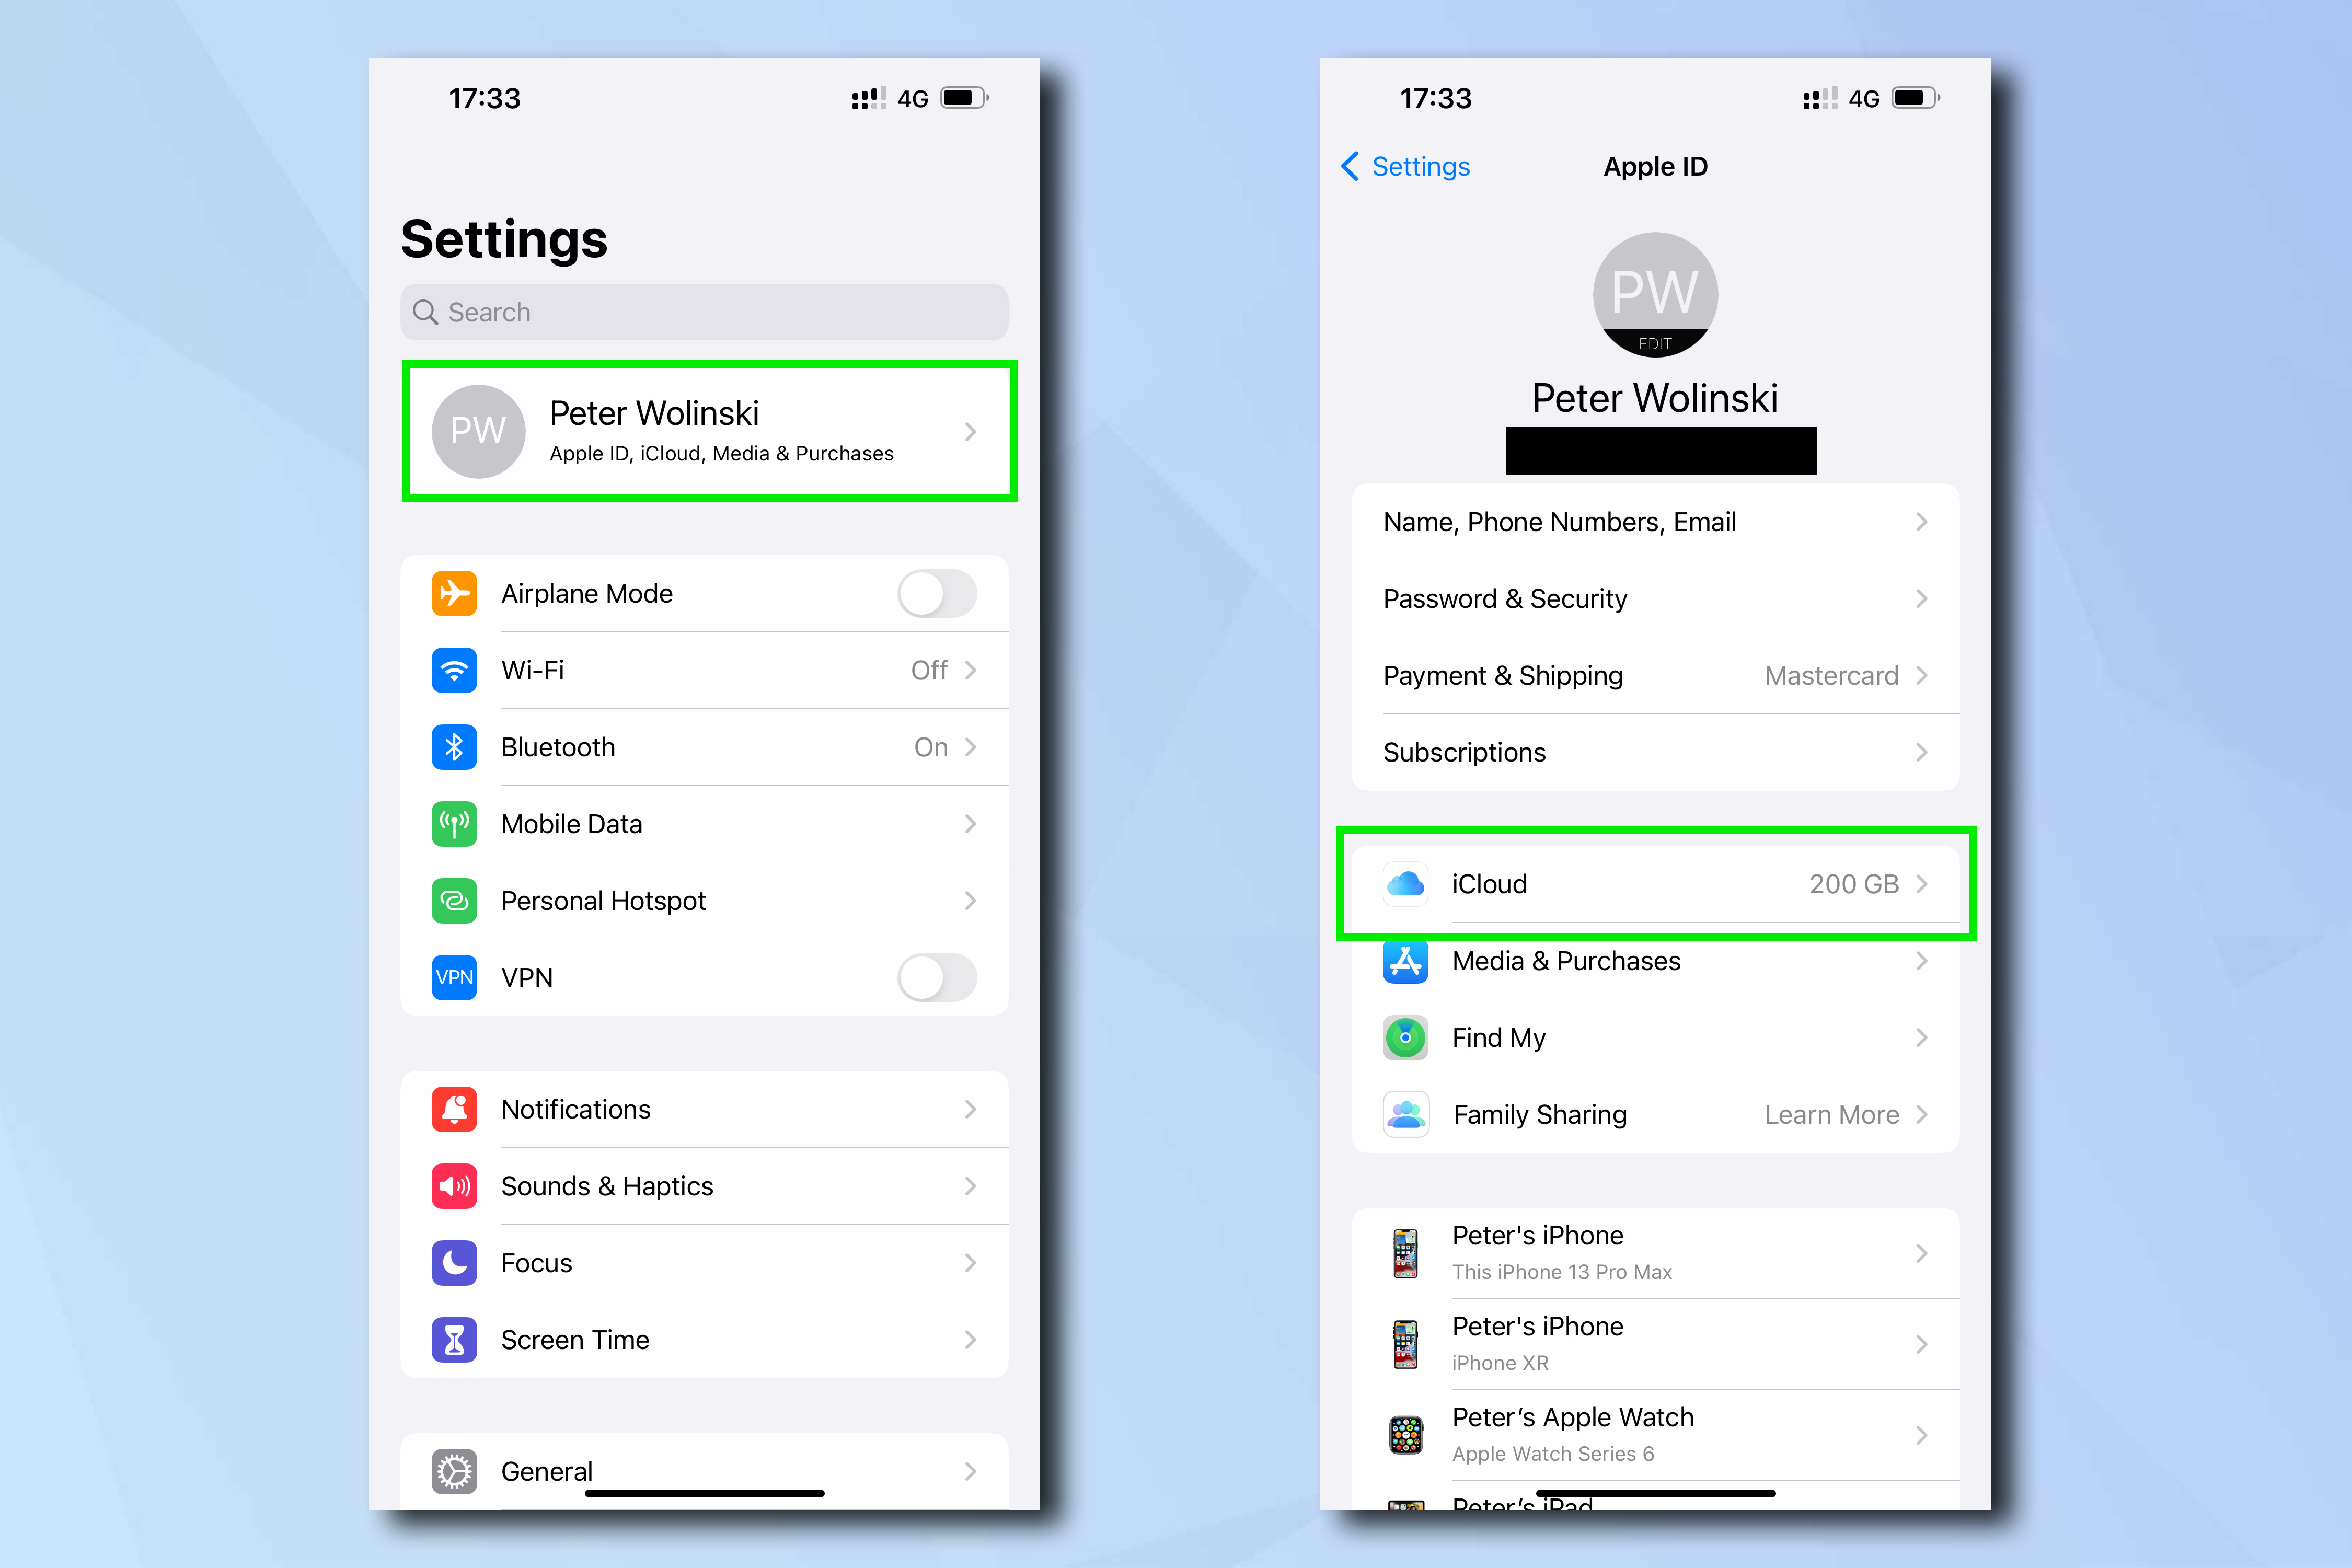
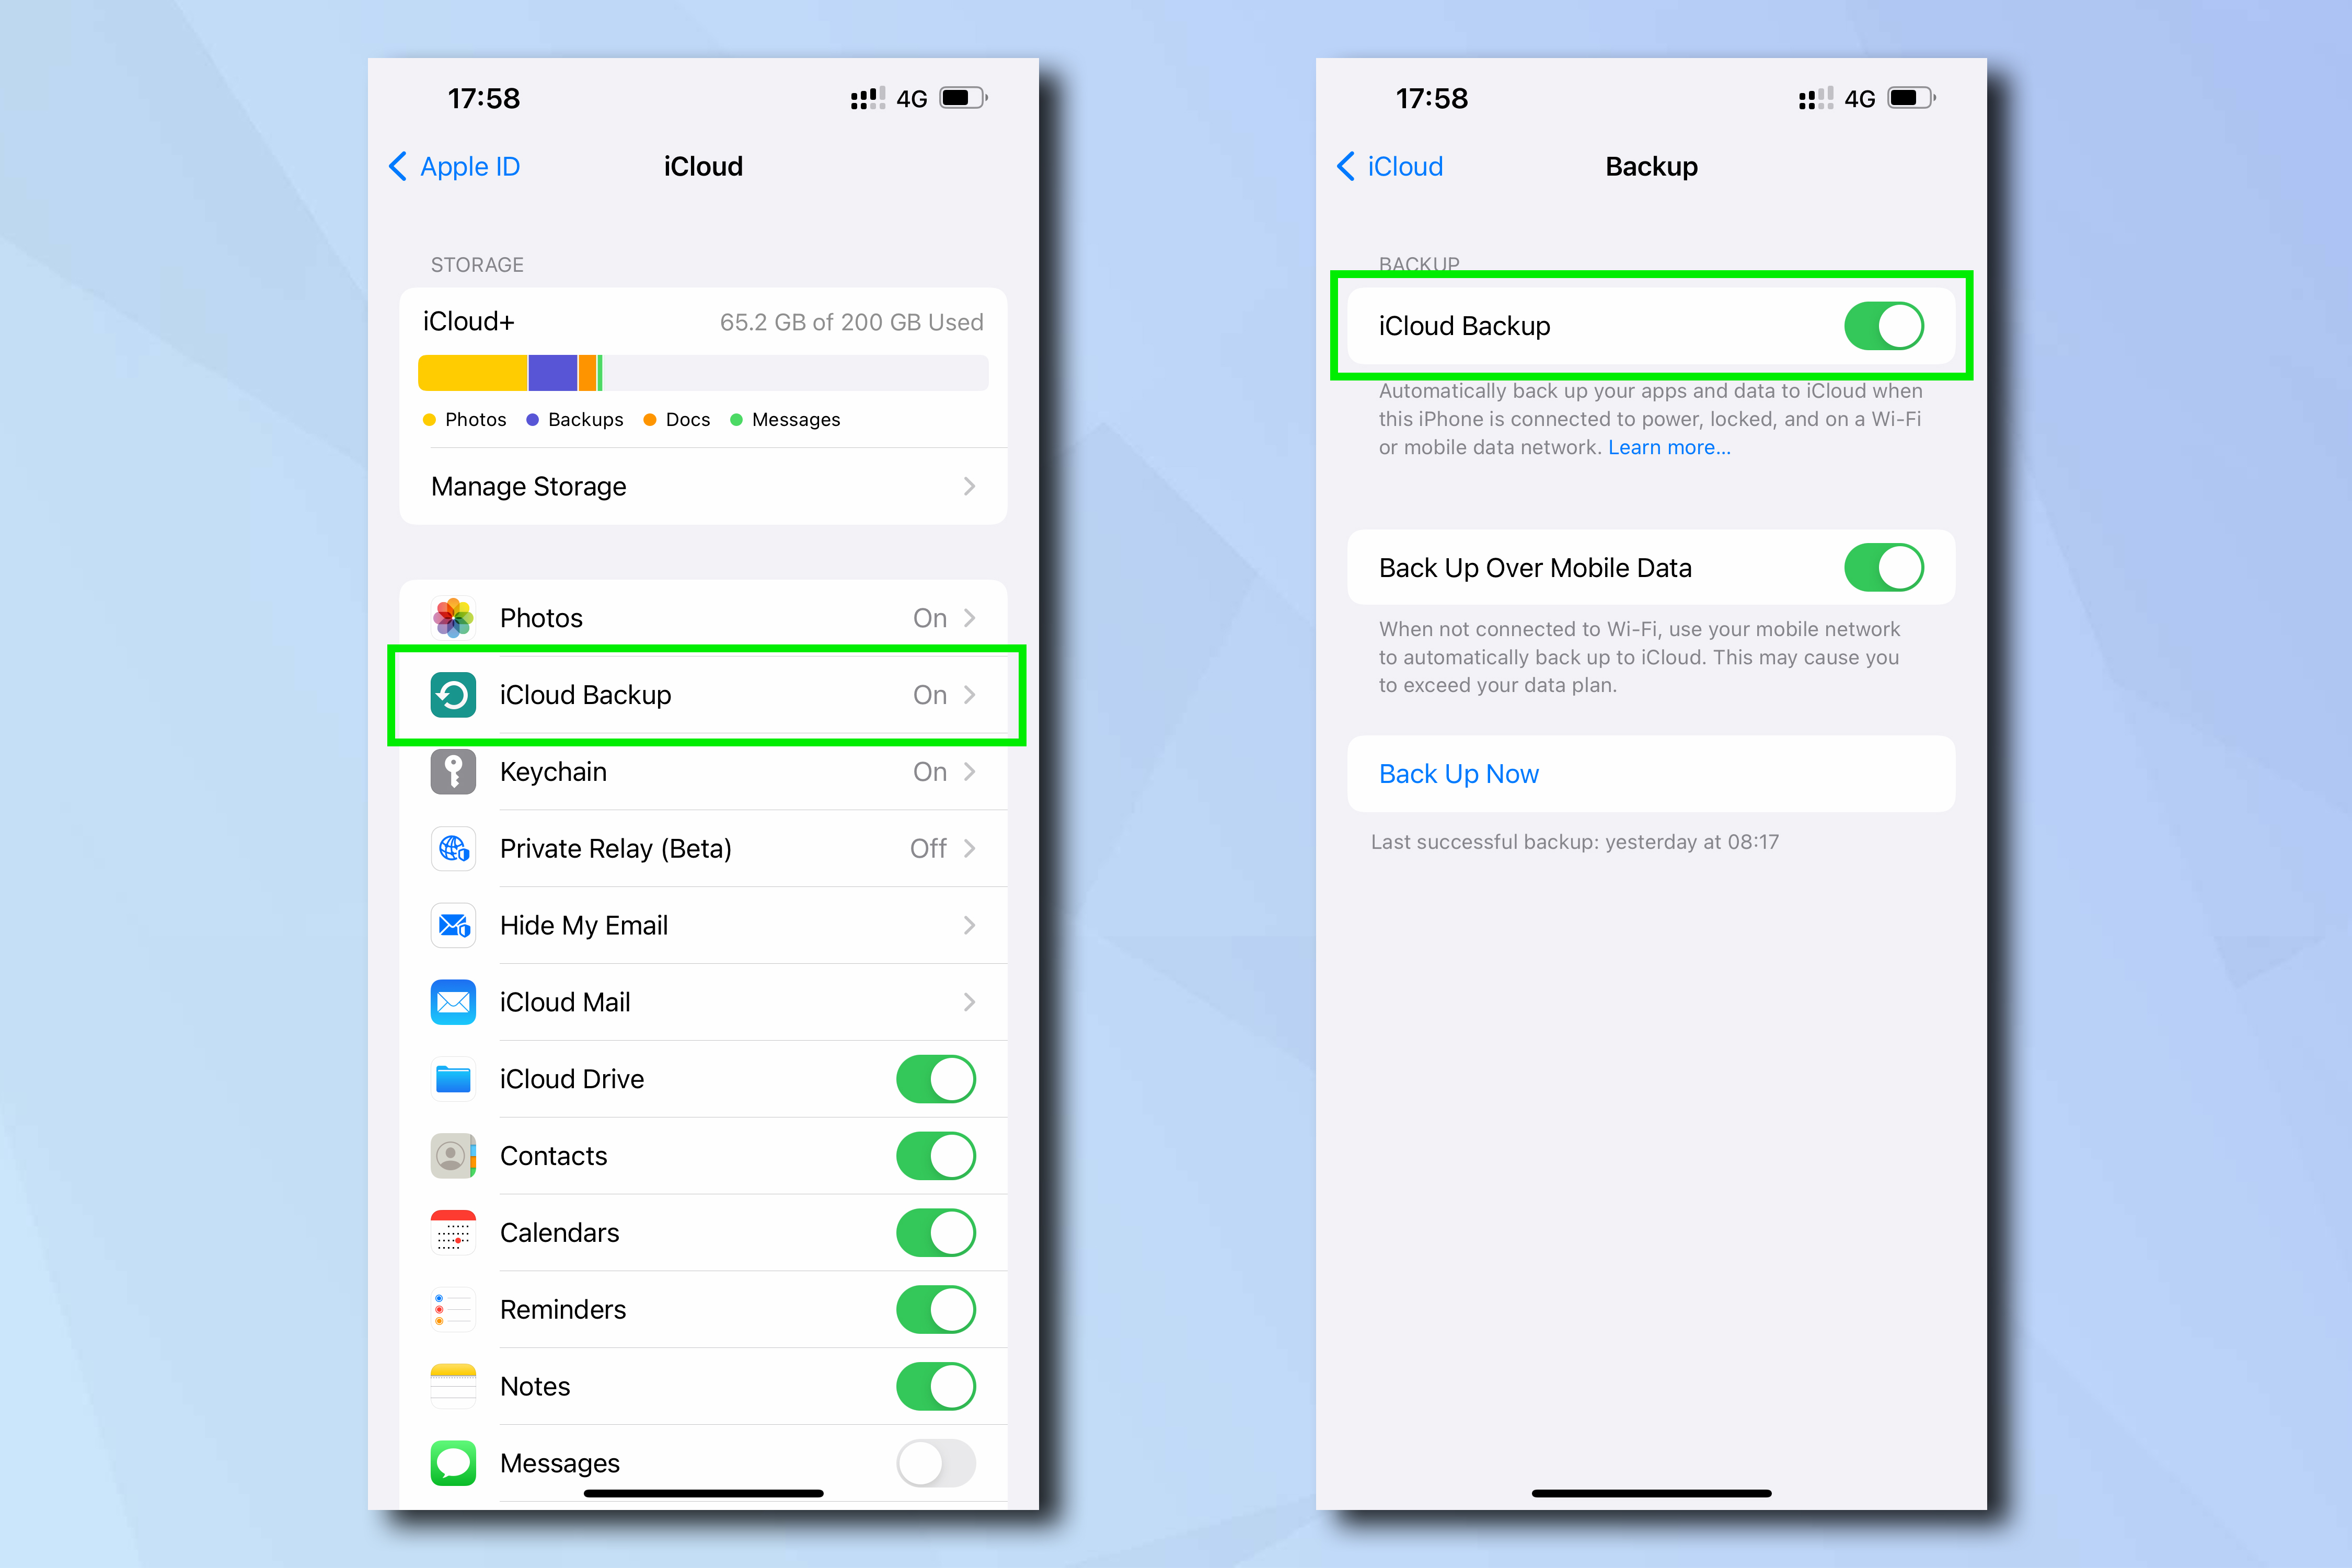
Firstly, turn on iCloud backup. Go to Settings, then tap your name.
Select iCloud, then tap iCloud Backup. Toggle iCloud Backup on.
Next, go to Settings, then Face ID & Passcode. Enter your passcode and scroll down to Erase Data and toggle it on.
3. Enable Find My iPhone, Find My network and Send Last Location
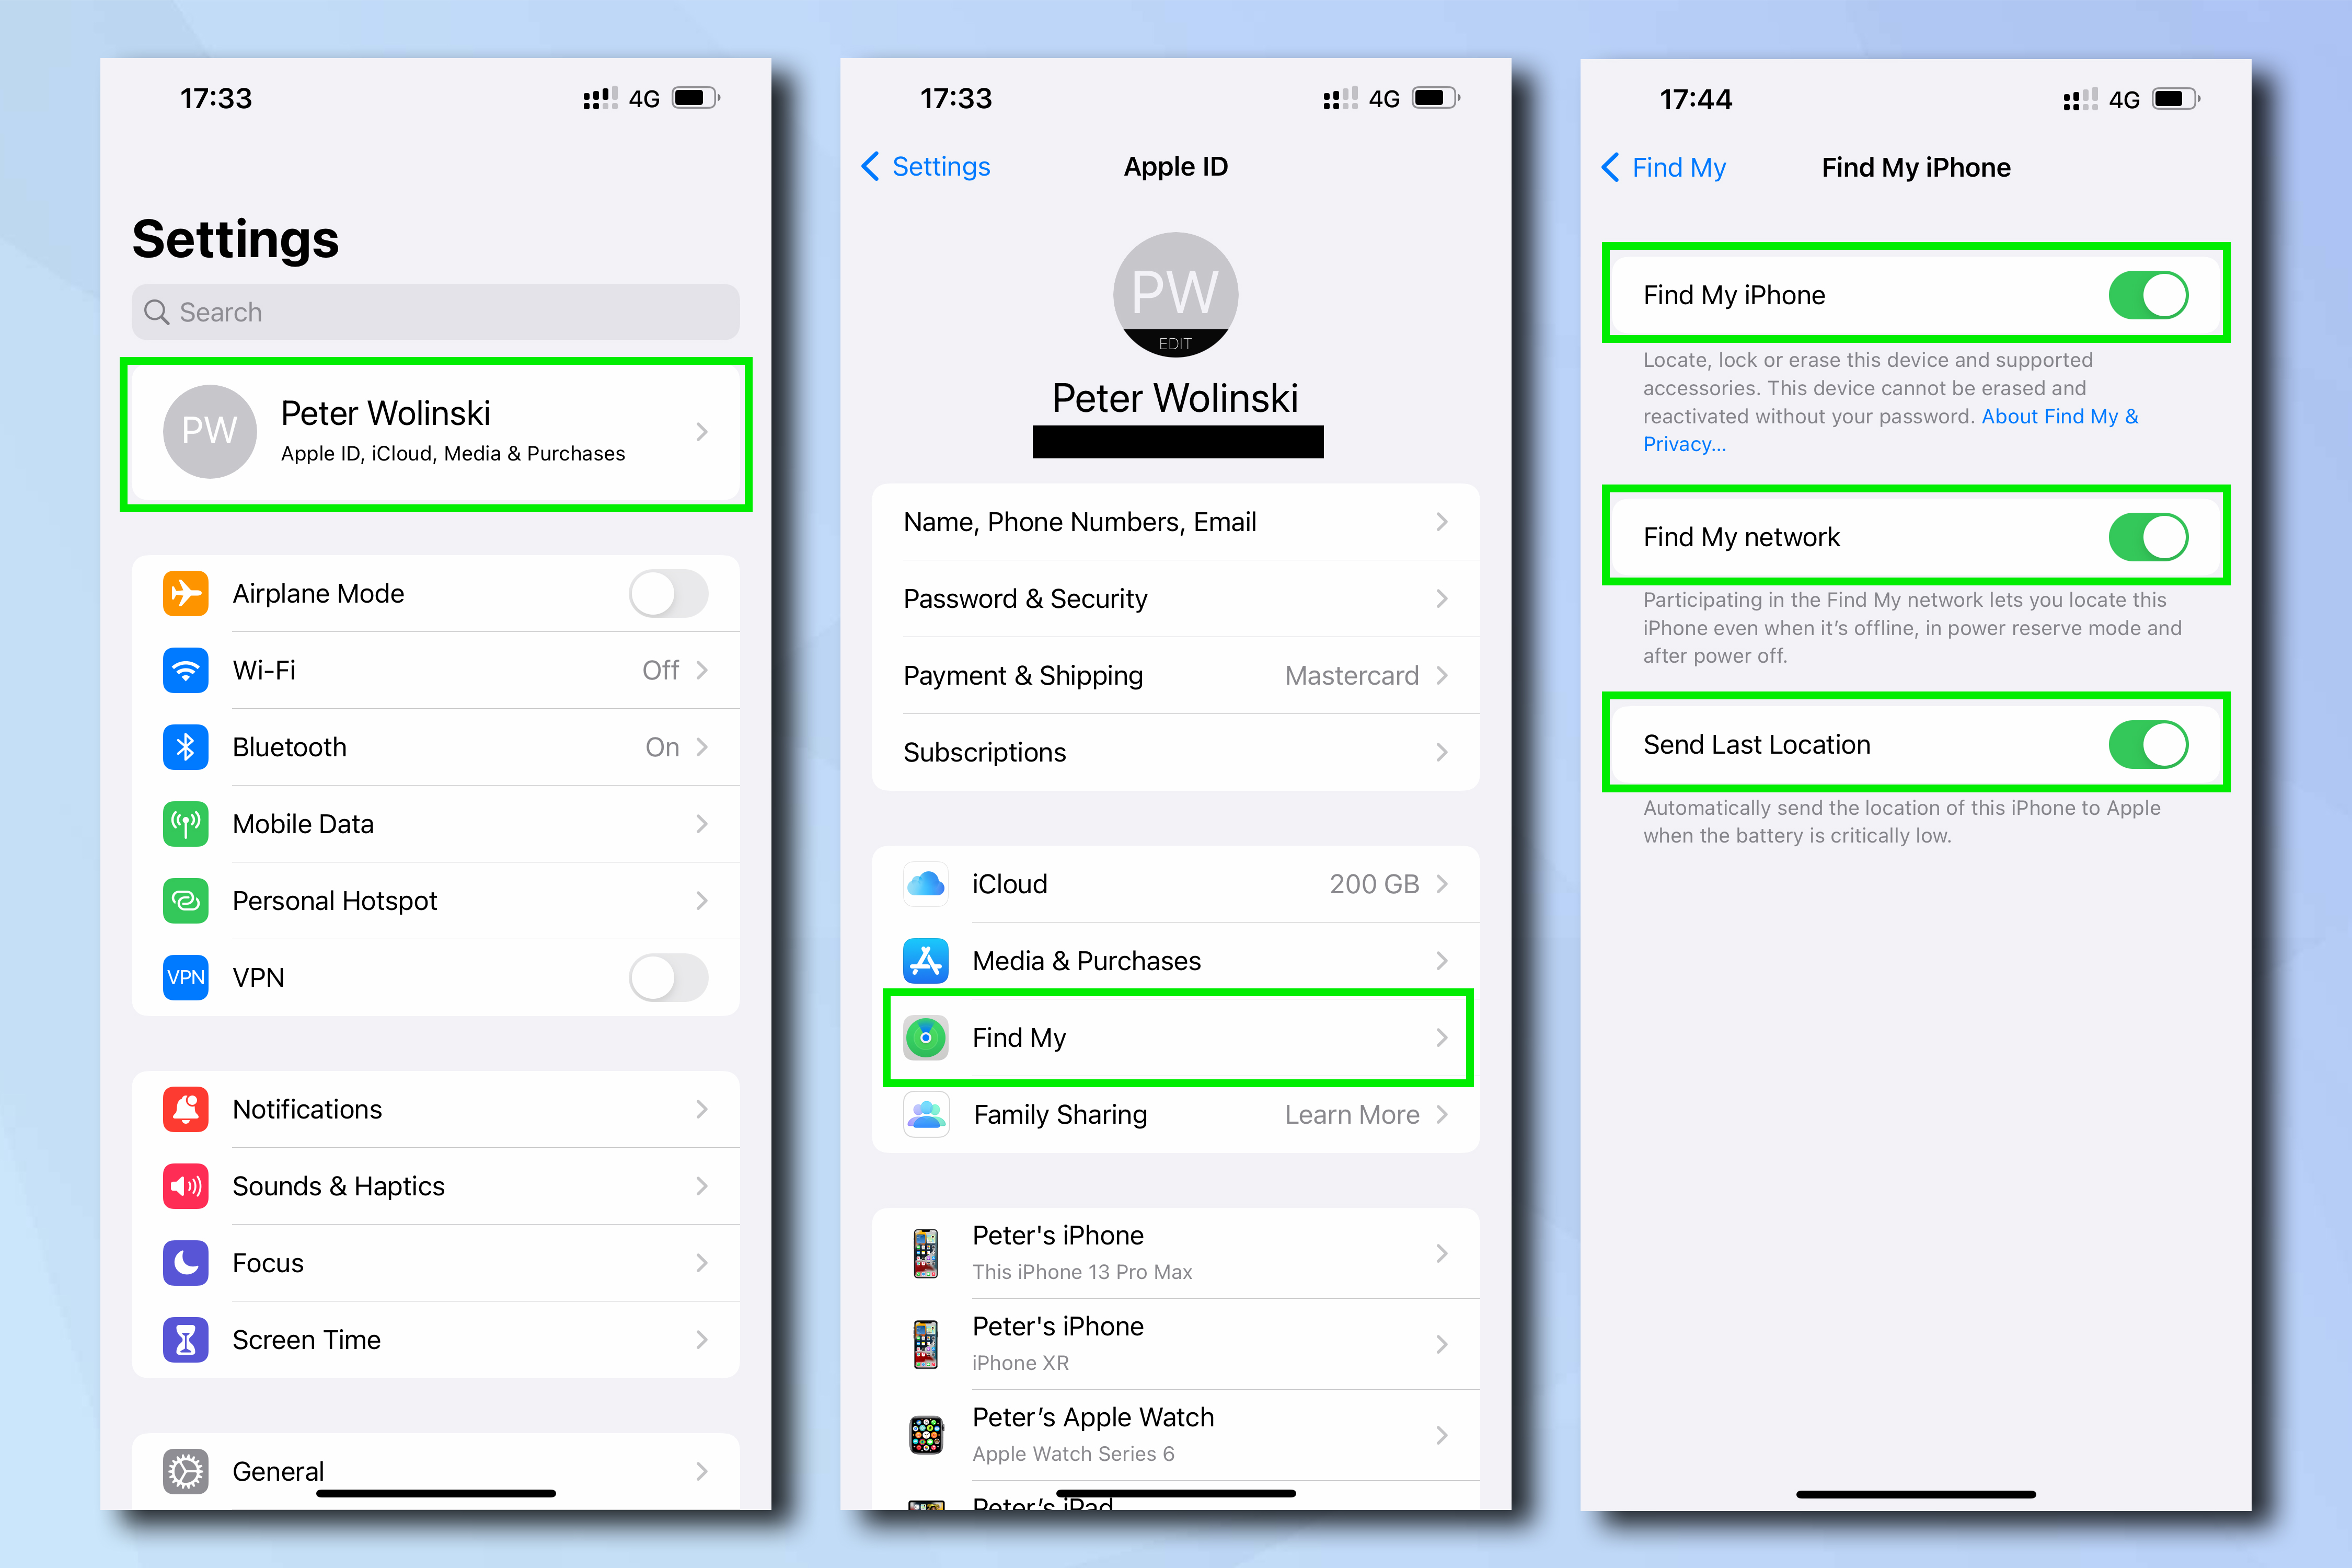
Find My iPhone allows you to track and remotely lock or erase your iPhone if it's been stolen or lost, while Find My network allows you to track the phone even when it's offline (for example, in Airplane Mode), or after it has been powered off. Send Last Location automatically pings Apple the location of your iPhone once the battery is critically low. These features mean your phone can potentially be found even if a thief powers down the device, so it's best to turn them on.
Go to Settings, tap your name and then select Find My. Select Find My iPhone, then toggle on all three settings.
These features obviously aren't going to prevent the heartache of losing a brand new iPhone 15 Pro Max, or protect you from new exciting ways to be hacked (including with your iPhone turned off) but they may help prevent any anxiety that you're going to lose anything more important.
For more security tips, start by checking out our guide on how to enable Stolen Device Protection on iPhone.

Peter is a Senior Editor at Tom's Guide, heading up the site's Reviews team and Cameras section. As a writer, he covers topics including tech, photography, gaming, hardware, motoring and food & drink. Outside of work, he's an avid photographer, specialising in architectural and portrait photography. When he's not snapping away on his beloved Fujifilm camera, he can usually be found telling everyone about his greyhounds, riding his motorcycle, squeezing as many FPS as possible out of PC games, and perfecting his espresso shots.
 Club Benefits


