Freezing temperatures and winter storms are hitting now, and if your pipes aren't protected, they could freeze and burst overnight during Winter Storm Fern. The damage can flood your home, destroy belongings, and lead to costly repairs. Dripping faucets can prevent this disaster, but only if you know which ones to drip and when to start, and whether you should leave your faucets open 24/7?
The critical threshold is 20°F — the temperature where pipe freezing becomes a real threat. With storms already bringing dangerous cold, you need to act fast. Here's how to drip your faucets correctly to protect your pipes from damage. When you're done here, see our Winter Storm Fern checklist for the 5 things you need to have when the snow and ice hit.
1. Know when to start dripping

The magic number to remember is 20 degrees Fahrenheit. When the forecast shows temperatures dropping to 20°F or below for several hours, especially overnight, it's time to drip your faucets.
Dripping serves two critical purposes: it keeps water moving through pipes, which makes it harder for ice to form, and it relieves pressure that builds up when water freezes. That pressure buildup is what actually causes pipes to burst.
When water freezes and expands inside a pipe, it creates an ice plug. If both ends of the pipe are sealed (no dripping faucet to release pressure), the expanding ice has nowhere to go and the pipe ruptures. A slow drip prevents this by giving that pressure an outlet.
2. Only drip faucets at risk

You don't need to drip every faucet in your home, which wastes water and drives up your utility bill unnecessarily.
Focus specifically on faucets connected to pipes that run along exterior walls, through unheated spaces like attics or garages, or in crawl spaces where cold air can reach them. These are the pipes most likely to freeze because they're exposed to cold temperatures.
Interior pipes surrounded by your home's heated air are generally safe. Walk through your house and identify which sinks are on outside walls — these are your priority faucets. Bathroom and kitchen sinks on exterior walls are common culprits.
If you have a utility sink in an unheated garage or basement, that's another one to drip. Ignore faucets on interior walls or in consistently heated areas of your home.
3. Get the drip amount right

The goal is a slow, steady trickle, not a stream. You're aiming for water flow about as thick as a pencil lead — just enough to keep water moving but not so much that you're wasting gallons unnecessarily.
If your faucet has separate hot and cold handles, crack both open slightly so water flows from both the hot and cold lines. Both sets of pipes need protection. For single-handle faucets, leave the handle in the middle position so it draws from both hot and cold water supplies.
Turn the faucet on just barely. You should see individual drops forming and falling rapidly, almost merging into a thin stream. If it's dripping one drop every few seconds, that's too slow. If it's a solid stream thicker than a pencil, that's too much. Find the sweet spot in between.
4. Open cabinet doors under sinks
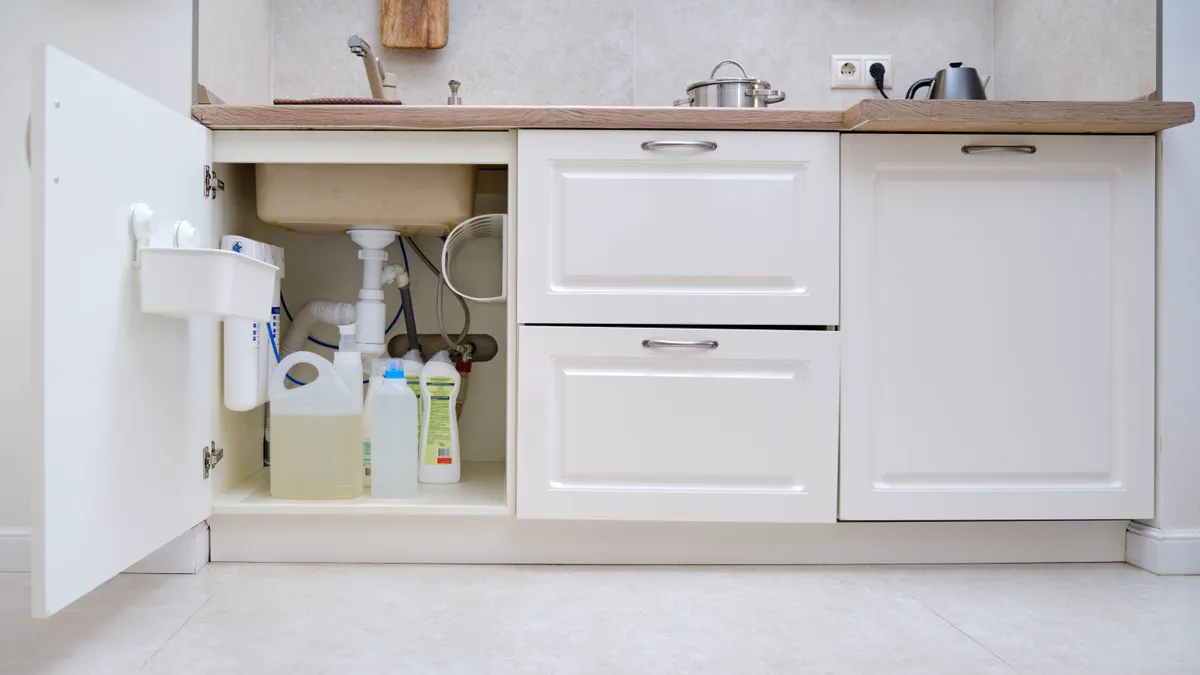
This simple step makes a surprising difference in preventing frozen pipes. Open the cabinet doors under any sinks on exterior walls to allow warm air from your heated home to circulate around the pipes. Normally these cabinets act as barriers that trap cold air around the pipes, especially if the wall behind the sink is poorly insulated.
By opening the doors, you're letting your home's heat reach the pipes and keep them above freezing temperature. This is especially important for bathroom and kitchen sinks on outside walls. If you have small children or pets, make sure to move any cleaning products or other hazardous materials out of reach before leaving cabinet doors open.
This technique works in combination with dripping faucets — do both for maximum protection.
5. Protect outdoor faucets separately

Outdoor spigots (also called hose bibs) require different protection than indoor faucets. If your home has a shutoff valve dedicated to outdoor faucets (typically located in your basement or utility room), turn it off before temperatures drop, then go outside and open the outdoor faucet to drain any remaining water from the line.
Disconnect all garden hoses from outdoor faucets, as trapped water in the hose connection can freeze and damage the spigot. If you don't have a shutoff valve for outdoor faucets, wrap each spigot with old towels, rags, or newspapers, then cover the insulation with plastic to keep it dry.
You can also buy foam faucet covers at any hardware store that slip over the faucet and provide insulation.

Follow Tom's Guide on Google News and add us as a preferred source to get our up-to-date news, analysis, and reviews in your feeds. Make sure to click the Follow button!

More from Tom's Guide
- Winter storms are coming — drain your sprinkler system before it freezes
- How to start a snow blower the right way — step by step
- Snow on your roof weighs more than you think — here's how to remove it