How to sign a Word document
Find out how to sign a Word document, complete with a digital security certificate

In this guide, we’ll show you how to sign a Word document and give its recipients the peace of mind that it’s the genuine article.
By signing a Word document, we don’t just mean writing your name at the end: That both looks amateurish and leaves open the possibility of forgery. By following these steps and using the dedicated signature feature in Word, you can add a professional touch while backing your signature with a certificate of authenticity.
- Learn how to delete a page in Microsoft Word
- How to convert a PDF to Word for free
- Find out how to track changes in Word
- Discover how to change line spacing in Word
- See how to use VLOOKUP in Excel
These digital certificates act as confirmation to the document’s reader that the included signature is genuine. For maximum assurance that you really signed a certain document yourself, you can buy digital certificates from trusted Microsoft partners — but these are expensive, and take time to process. In this guide, we’ll instead show you how to create a digital certificate on your own Windows PC.
This might not offer enterprise-level assurance that your signature is the real deal, but it’s free, and can at least confirm to recipients that your signed documents are coming from the same source. So, here’s how to create a digital certificate, and how to sign a Word document using it.
How to sign a Word document
1. Open Windows Explorer and navigate to C:\Program Files (x86)\Microsoft Office\root\, or C:\Program Files\Microsoft Office\root\Office16 if you’ve installed the 64-bit version of Microsoft Office.
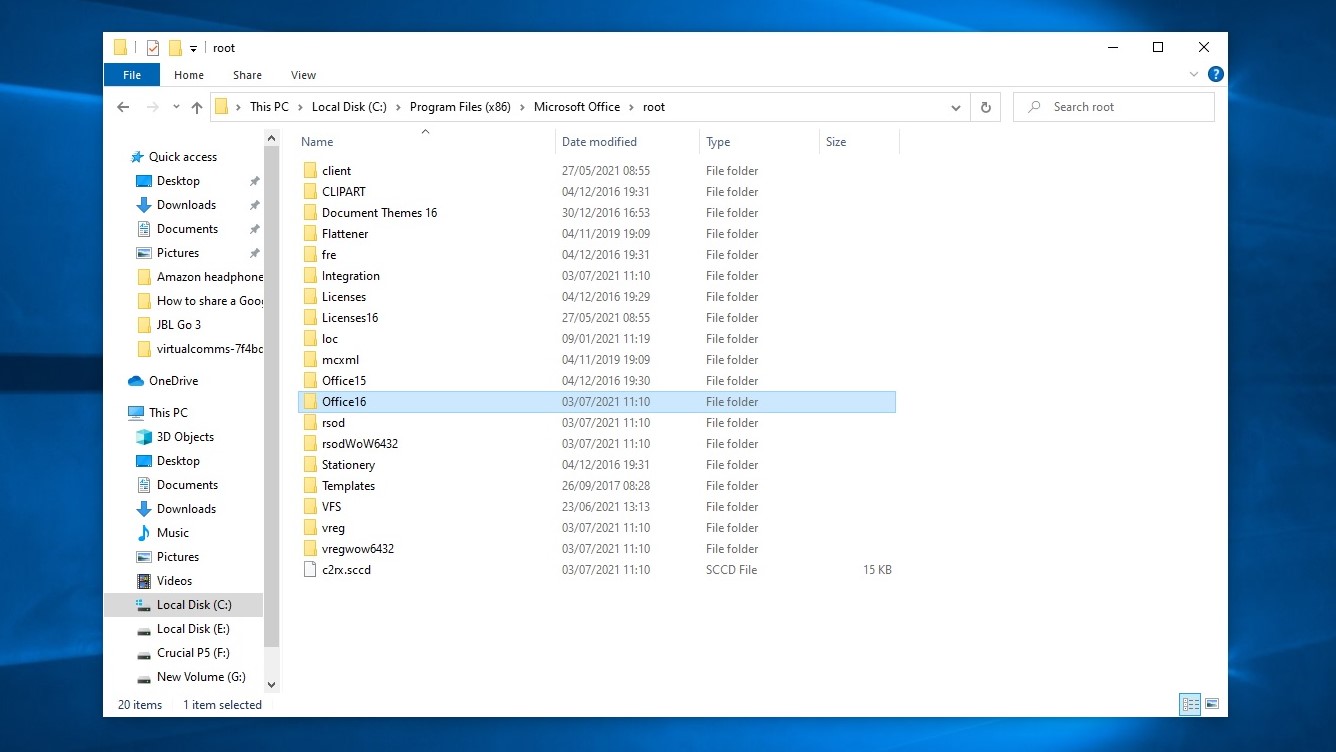
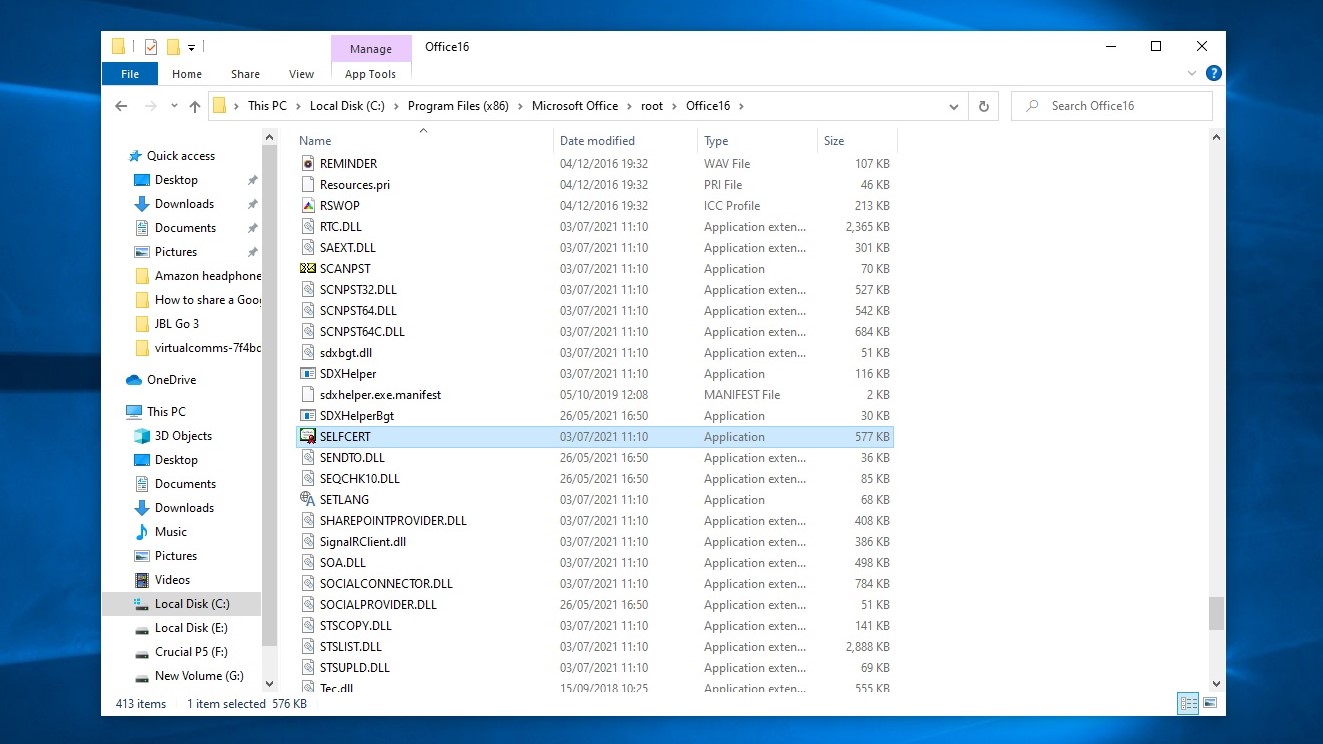
2. Scroll down to find the “SELFCERT” executable file and open it.
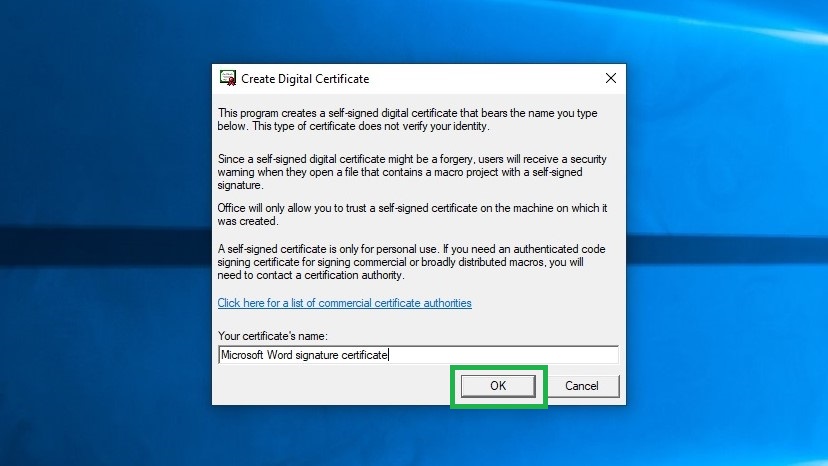
3. The “Create Digital Certificate” dialogue box will appear. Type a name for your certificate and click “OK.”
Get instant access to breaking news, the hottest reviews, great deals and helpful tips.
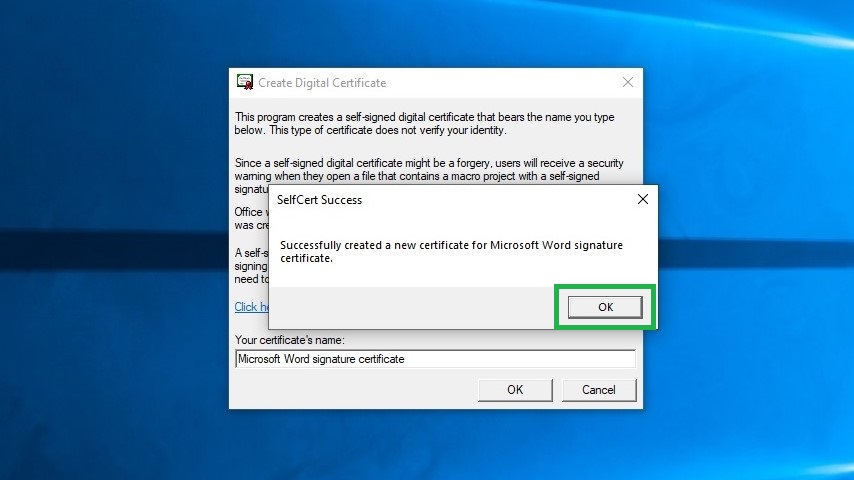
4. A “SelfCert Success” dialogue box will appear. Click “OK.”
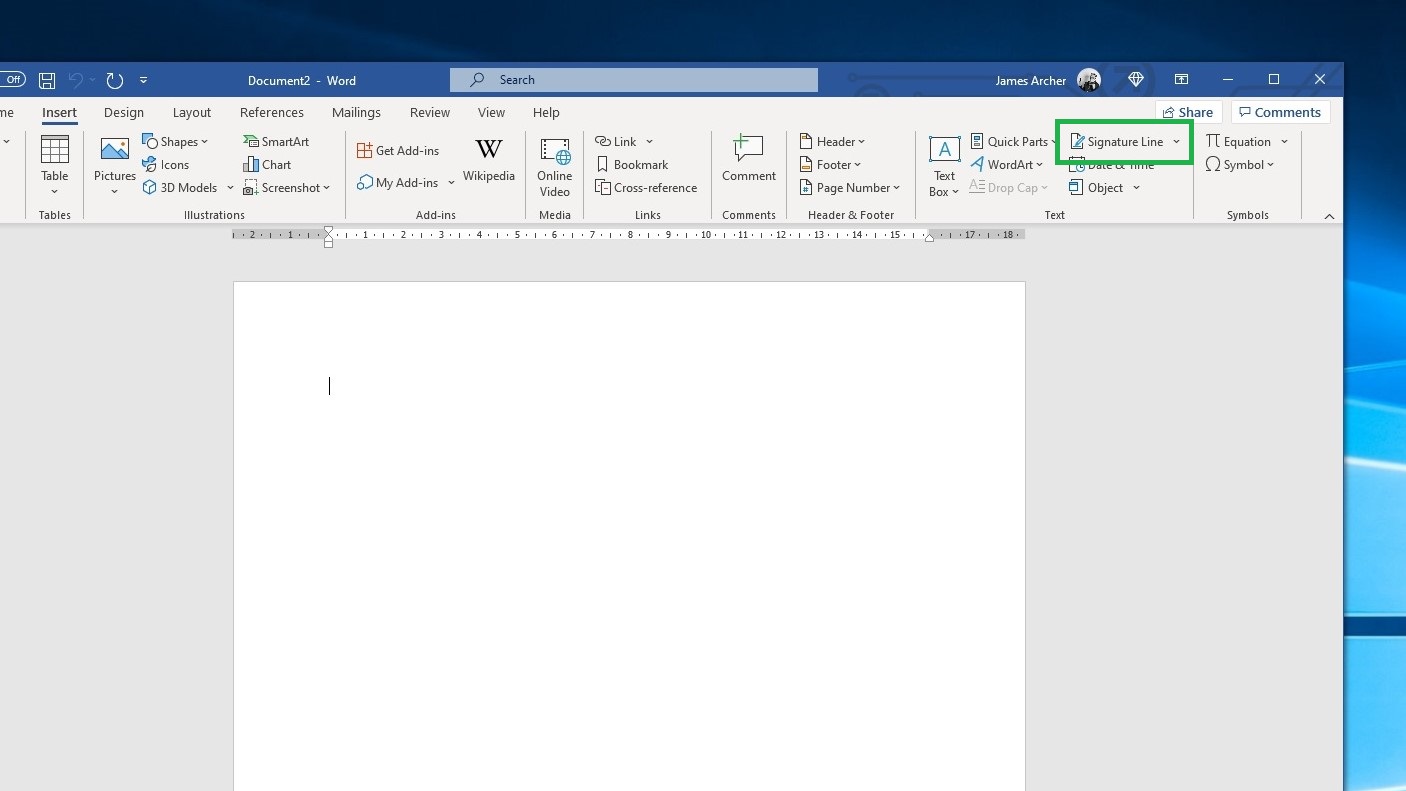
5. Open the document you want to sign in Word, or if you’re currently working on one, save it. In the “Insert” toolbar tab, click on “Signature Line.”
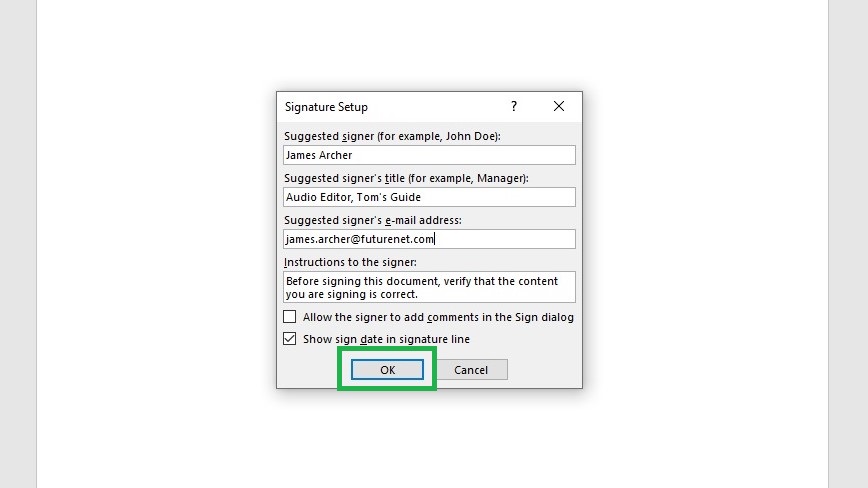
6. Enter the details you’d like to see under your signature, such as your printed name, job title and/or contact information. Then, click “OK.”
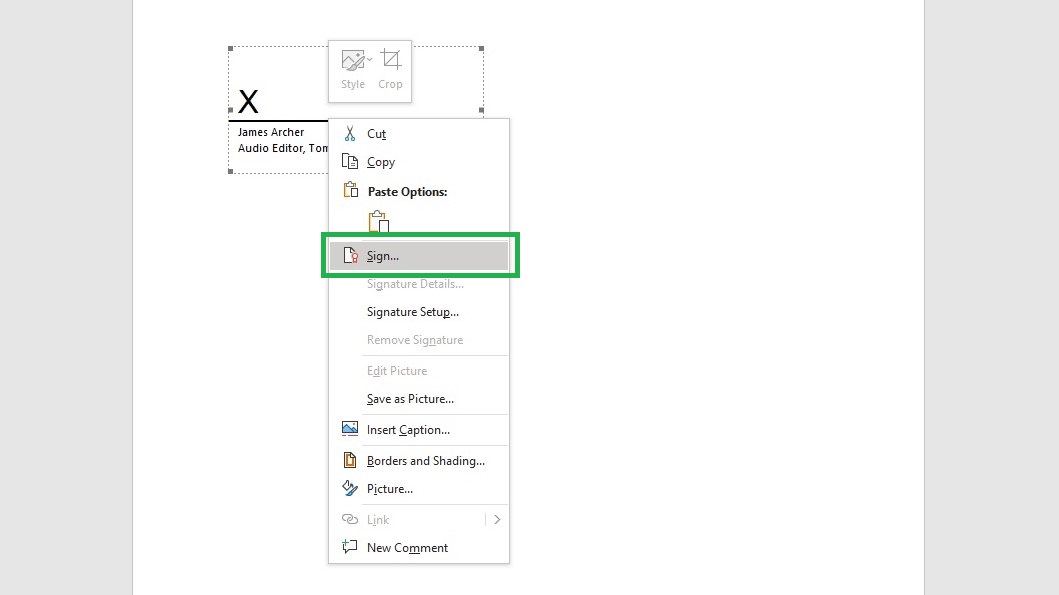
7. A black signature line will appear in the document. Right-click on the line, then click “Sign.”
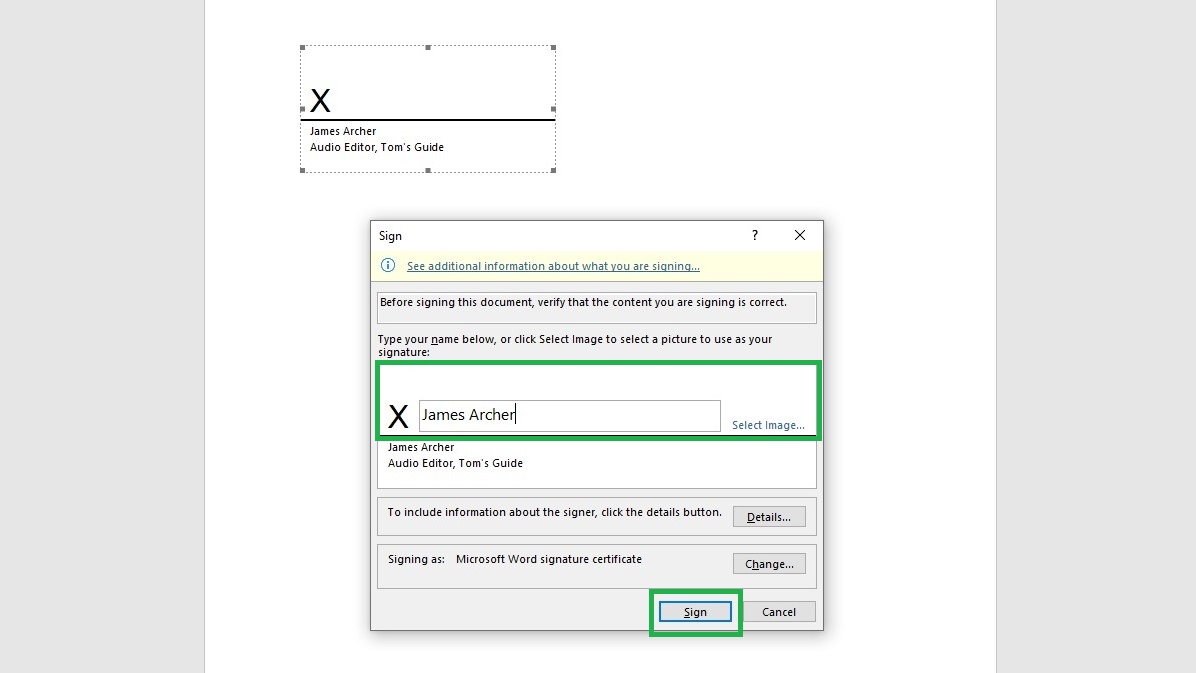
8. You have two options for signing your Word document: you can simply type your name next to the “X” symbol, or click “Select Image” to insert a digital image of your handwritten signature. Either way, click “Sign” once your signature has been entered.
Note also that your digital certificate is already selected near the bottom of this dialogue box — this confirms your signature will be backed by this certificate.
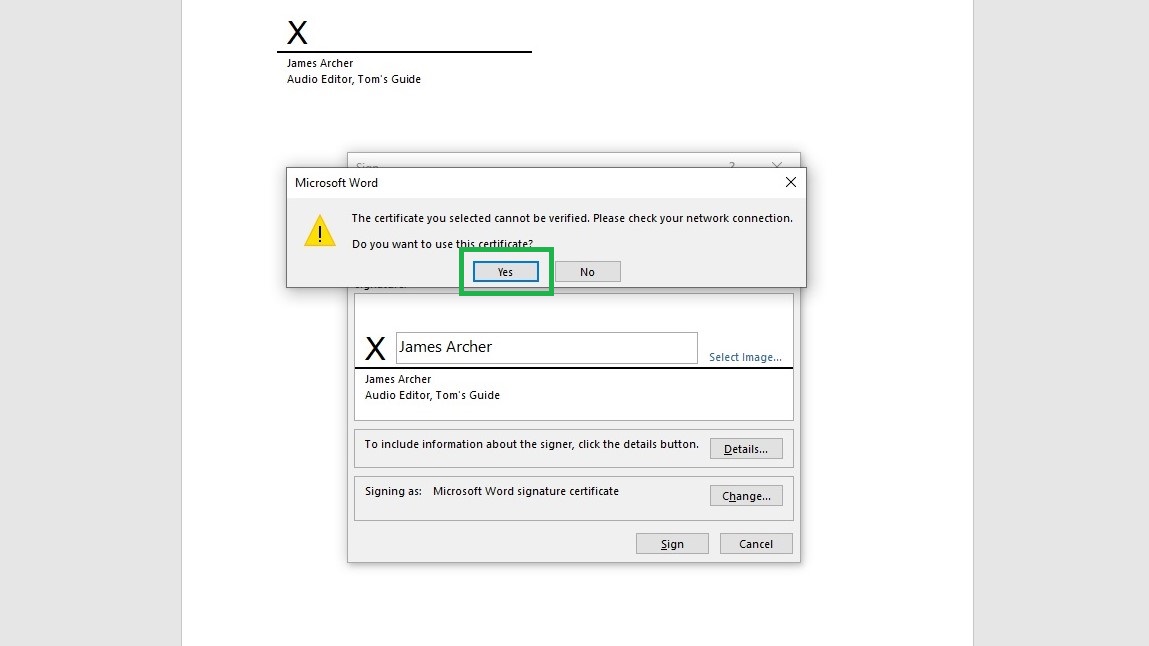
9. If a dialogue box informs you that your certificate cannot be verified, click “Yes” to sign the document anyway.
This will sign your Word document and save it as “final,” meaning any further edits you make to the document will remove your signature. You can simply add it again by repeating steps 7 through 9, but it’s easiest to only sign once you’re fully happy with the completed document.

James is currently Hardware Editor at Rock Paper Shotgun, but before that was Audio Editor at Tom’s Guide, where he covered headphones, speakers, soundbars and anything else that intentionally makes noise. A PC enthusiast, he also wrote computing and gaming news for TG, usually relating to how hard it is to find graphics card stock.
 Club Benefits


