How to recover data from a hard drive
Here's how to recover data from a hard drive on Windows and macOS

Here at Tom’s Guide our expert editors are committed to bringing you the best news, reviews and guides to help you stay informed and ahead of the curve!
You are now subscribed
Your newsletter sign-up was successful
Want to add more newsletters?

Daily (Mon-Sun)
Tom's Guide Daily
Sign up to get the latest updates on all of your favorite content! From cutting-edge tech news and the hottest streaming buzz to unbeatable deals on the best products and in-depth reviews, we’ve got you covered.

Weekly on Thursday
Tom's AI Guide
Be AI savvy with your weekly newsletter summing up all the biggest AI news you need to know. Plus, analysis from our AI editor and tips on how to use the latest AI tools!

Weekly on Friday
Tom's iGuide
Unlock the vast world of Apple news straight to your inbox. With coverage on everything from exciting product launches to essential software updates, this is your go-to source for the latest updates on all the best Apple content.

Weekly on Monday
Tom's Streaming Guide
Our weekly newsletter is expertly crafted to immerse you in the world of streaming. Stay updated on the latest releases and our top recommendations across your favorite streaming platforms.
Join the club
Get full access to premium articles, exclusive features and a growing list of member rewards.
Knowing how to recover data from a hard drive is a skill you'll hopefully never have to use. But if you accidentally delete some critical files, or suddenly discover the drive they're on isn't working correctly, you'll be glad you know how.
In this step-by-step guide we'll show you a few reliable ways to try and recover those deleted files from your hard drive, on both Windows and Mac PCs. You have a much better chance of being able to recover missing files on a hard disk drive (HDD) than on a solid-state drive (SSD), since physical HDDs don't automatically overwrite data as soon as you delete it.
If the hard drive recovery methods outlined in this article don't work for you, it's probably time to consider taking your drive to a data recovery expert like DriveSavers. While such third-party assistance can be costly, sometimes it's the only way to recover your data.
Of course, if you were wise enough to back up your data there's a good chance that whatever you're looking for is safe and sound in your backup. If you didn't back anything up, this is a good reminder of how valuable regular backups can be — so consider signing up for one of the best cloud backup services to avoid headaches like this in the future.
Without further ado, here's some hard disk data recovery strategies you can use to try and reclaim your lost or deleted data! We also have a guide on how to fix an external hard drive that's not showing up that you may want to consult if you're trying to pull files off an external drive that your PC can't detect.
How to recover data from a hard drive
Recover deleted data from a hard drive in Windows
Windows has a great utility called System Restore, which creates a system image on a regular basis (if you have it enabled — unfortunately, it's disabled by default). Restoring to a system image is a great way to recover files you may have accidentally deleted. However, any files you've added since you made the last restore point will be wiped when restoring to it, so it's good practice to enable System Restore and create restore points regularly. We've covered all of this in our guide on how to use System Restore in Windows.
1. First, double-check your files to ensure that the one(s) you're looking for aren't lurking somewhere in the bowels of your PC.
Get instant access to breaking news, the hottest reviews, great deals and helpful tips.
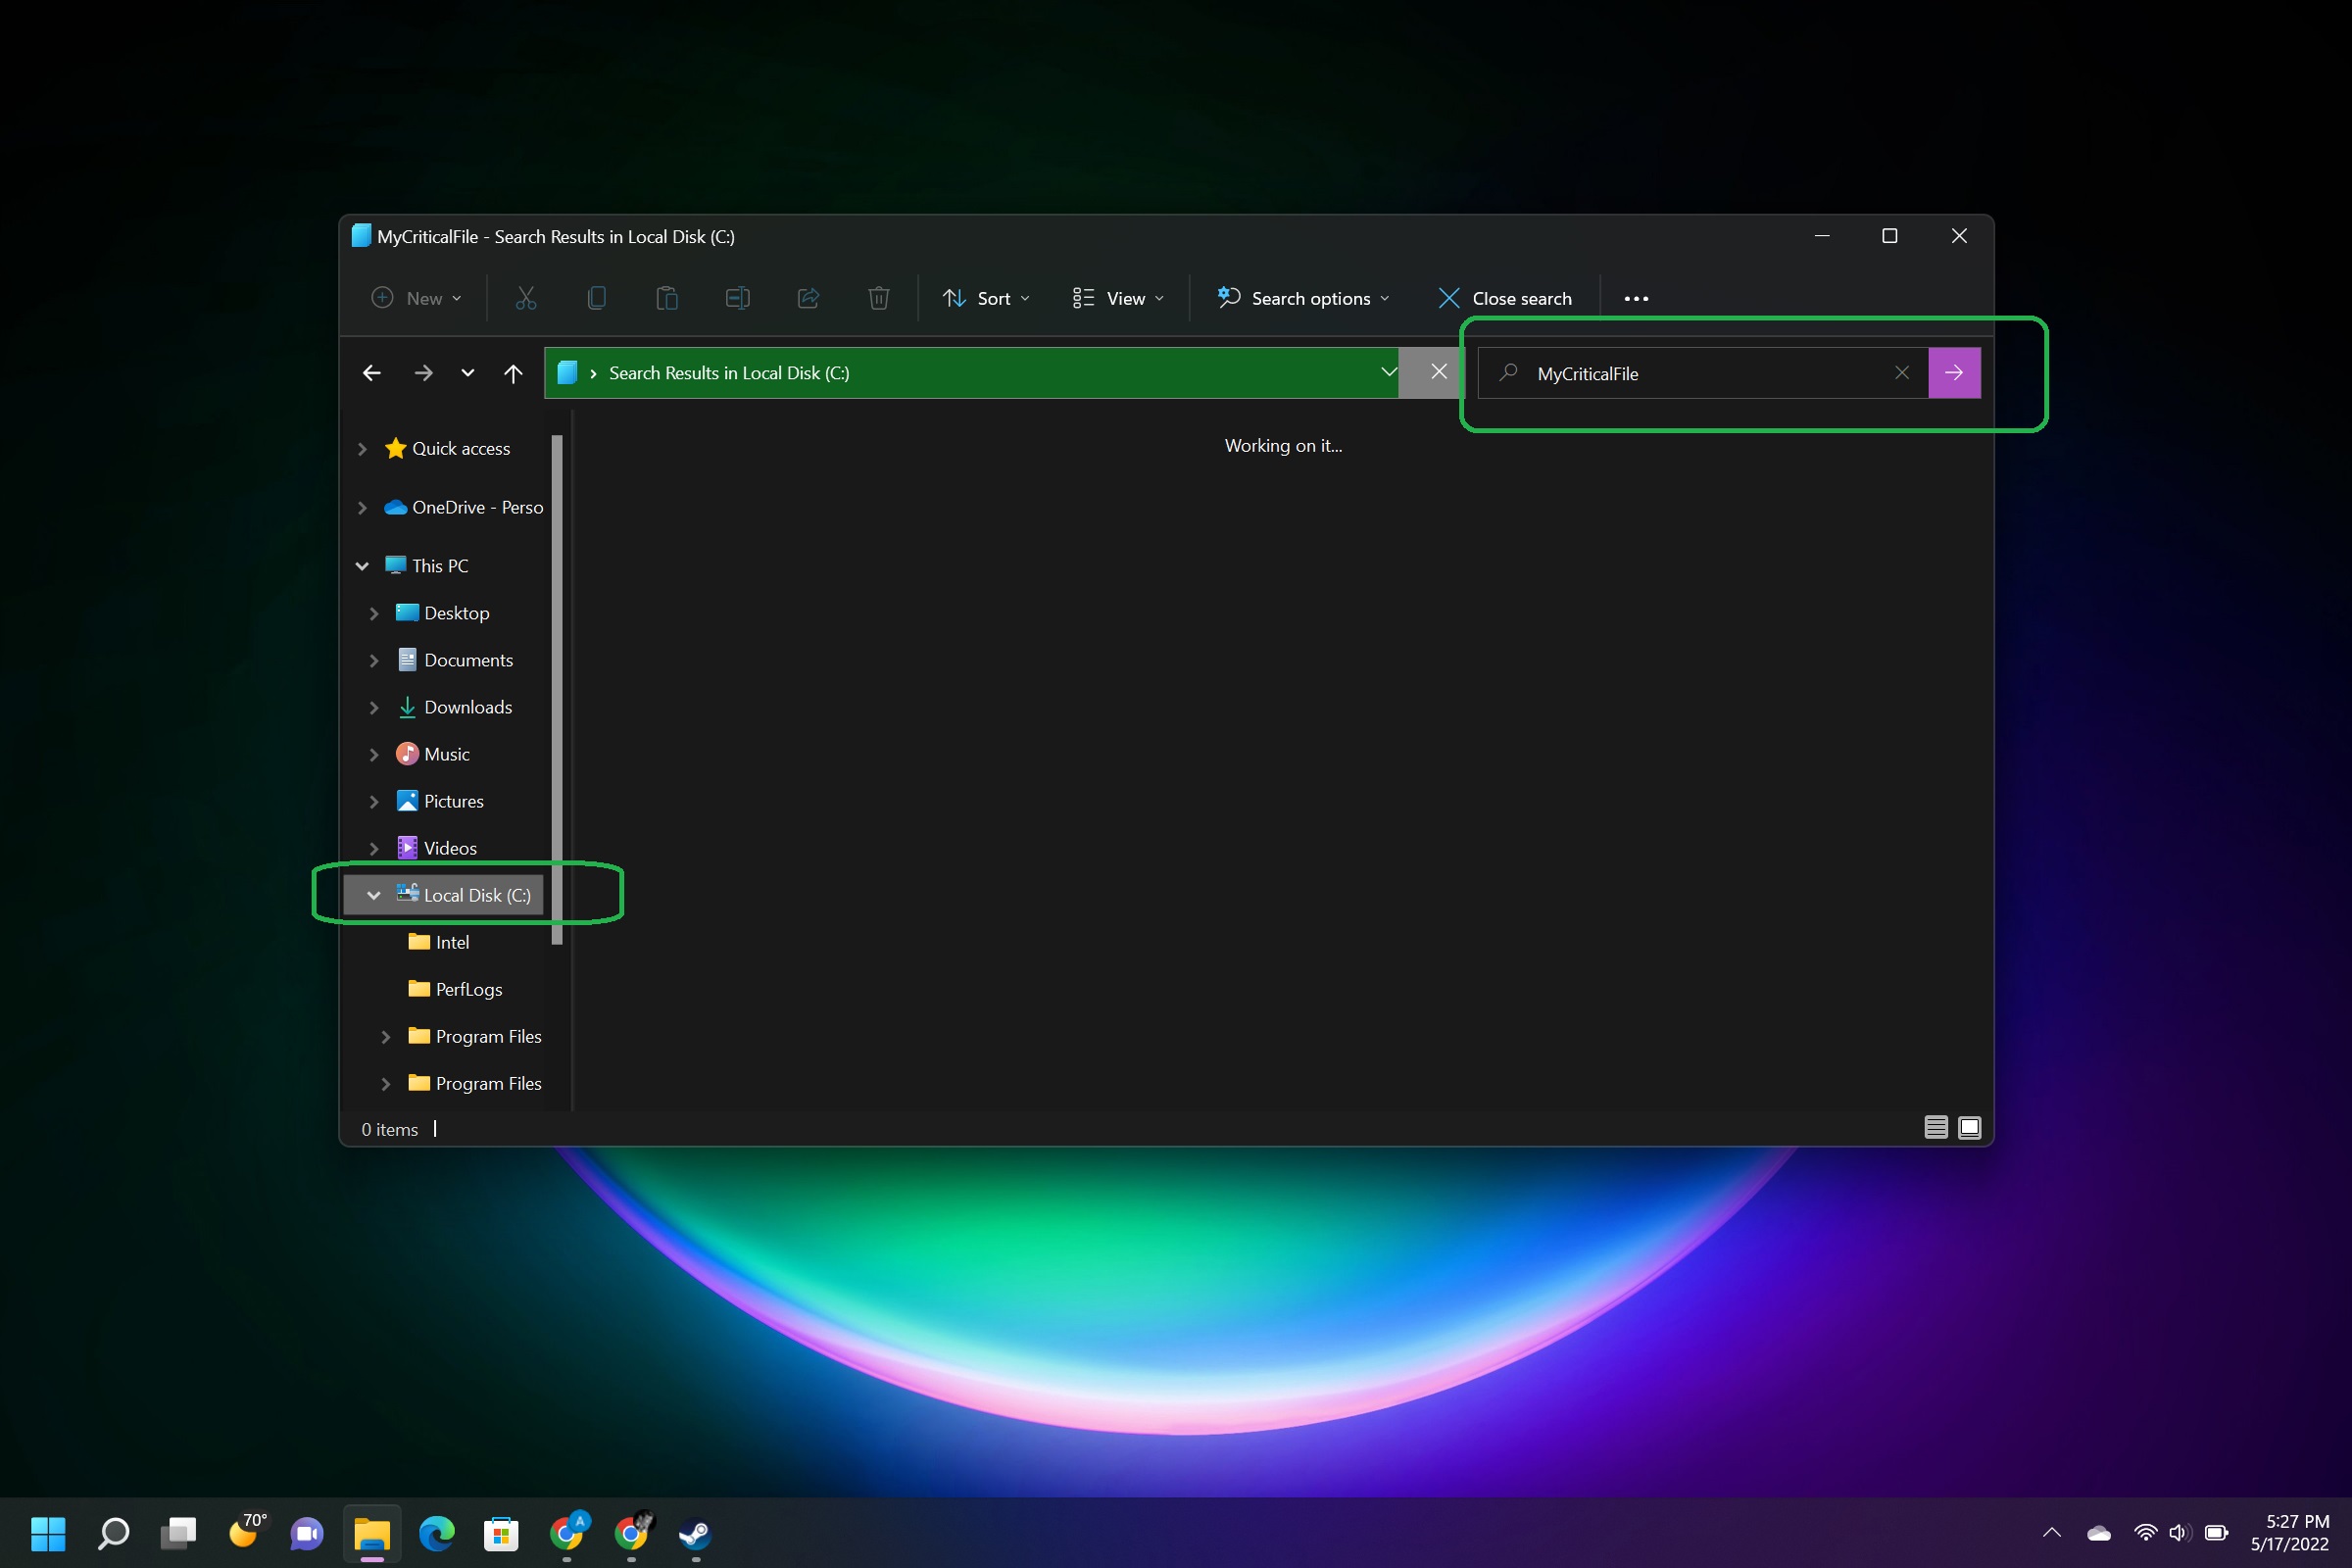
Open the Recycle Bin (hit the Windows key and type "recycle bin", then hit Enter when it appears in the search results) and look around to make sure the the file(s) you're after aren't there. Next, open File Explorer (it's on your taskbar by default, but you can also find it by pressing Win + E), type the name of the file you're looking for in the search field in the upper-right corner and hit Enter.
Note that you need to make sure your PC's hard drive is selected in the left-hand sidebar. Your hard drive(s) are usually listed under the "This PC" menu, and if you have multiple drives you'll want to run a search on each one!
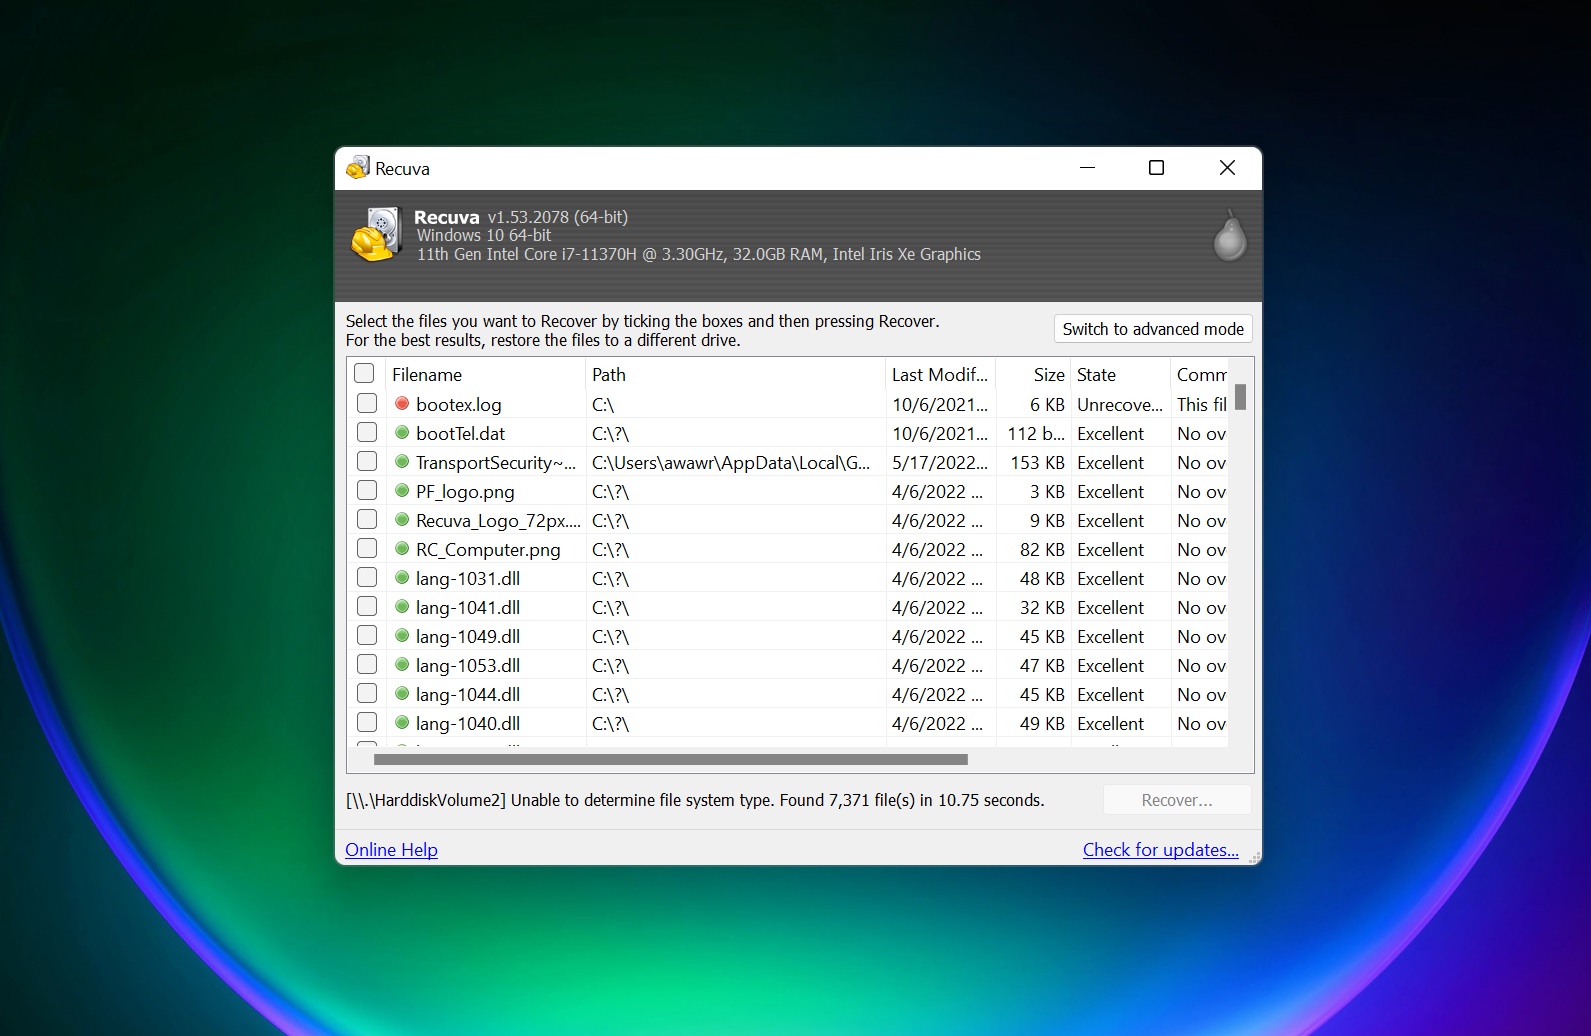
2. If your file(s) are well and truly deleted, don't panic — there's a chance you could still see them again. Try downloading a free file recovery tool and seeing if you can get your file(s) back that way. One good tool is Recuva, which gives you a simple interface for recovering lost files. It's also portable, which means you can download and install the utility to a flash drive, then plug the drive into the PC that's having trouble and run the app directly from the flash drive.
Recover data from a faulty hard drive in Windows
If your laptop or desktop PC has a hard drive that seems to be having problems, either because you're seeing strange error messages, you're experiencing crashes or Blue Screens of Death in Windows that you think are drive-related, or you can simply no longer boot the machine, there's a chance your hard drive is corrupted or failing. You need to act fast if you want to save or recover data from it.
Importantly, before you start, minimize how much you use the PC or write data to the hard drive. By that I mean stop everything except your data recovery effort, and ideally read this guide on a separate PC or phone. If your PC and/or hard drive is failing, you want to minimize your usage to maximize your odds of getting your critical data off before it dies. Then follow these steps.
1. If you can still boot the laptop/desktop and can access the data you want to preserve, try to copy it over to an external drive or a cloud backup service. If you're not sure which to choose, check out our guide to cloud storage vs external hard disk drives. If using another external drive, make sure to read our guide on how to clone a hard drive. Prioritize the most important data first, as you don't know how long your drive will last if it's on its last legs.
2. If you can't boot your PC or the drive your data is on can't be accessed (say, because of a data corruption error), you still have a chance of recovering the data --but you'll need to remove the drive and place it into either another PC or an external drive enclosure.
If you have a desktop PC and don't know how to get inside the case to remove the drive, consult your PC's manual or contact the manufacturer.
If you have a laptop, you may not be able to remove the drive without professional assistance. Consult your laptop's manual or reach out to the manufacturer to see if there's an easy way to remove the drive from the laptop (many of the best Windows laptops are designed to make removing the storage drive or memory relatively straightforward, but not all). If there isn't, you'll need to take it to a qualified repair service or try and get it repaired by the manufacturer.

3. If you're able to successfully remove the drive, place it into another PC and see if you can access the drive to pull the data off that way. If that doesn't work (or you don't have a second PC handy), consider investing in a USB hard drive enclosure. These are external devices designed to let you slot a drive into them and read/extract the data on another PC via USB.
To find the right enclosure for your needs, you need to figure out the physical size of your faulty hard drive (hard disk drives are often 2.5 - 3.5 inches wide, while SSDs are smaller and require special enclosures) and what connector it uses to communicate with your PC. You should be able to get this information either directly off the drive itself (it's often printed somewhere) or from the drive manufacturer. Many modern hard disk drives connect via SATA, and some SSDs do as well, but many also connect via PCIe. You need to make sure the enclosure you buy will both fit your drive and be able to connect to it, so make sure you have the right model before you click buy!
4. If you still can't access the data you're after with the drive hooked up to another PC via an external enclosure, you're running out of reasonable ways to retrieve it. Your next best bet is probably to take the drive to a qualified data recovery specialist and see if they can help. Dedicated data recovery experts often have the tools and experience to recover more data from a dead drive than you might expect, so don't give up hope!
Recover deleted data from a hard drive in macOS
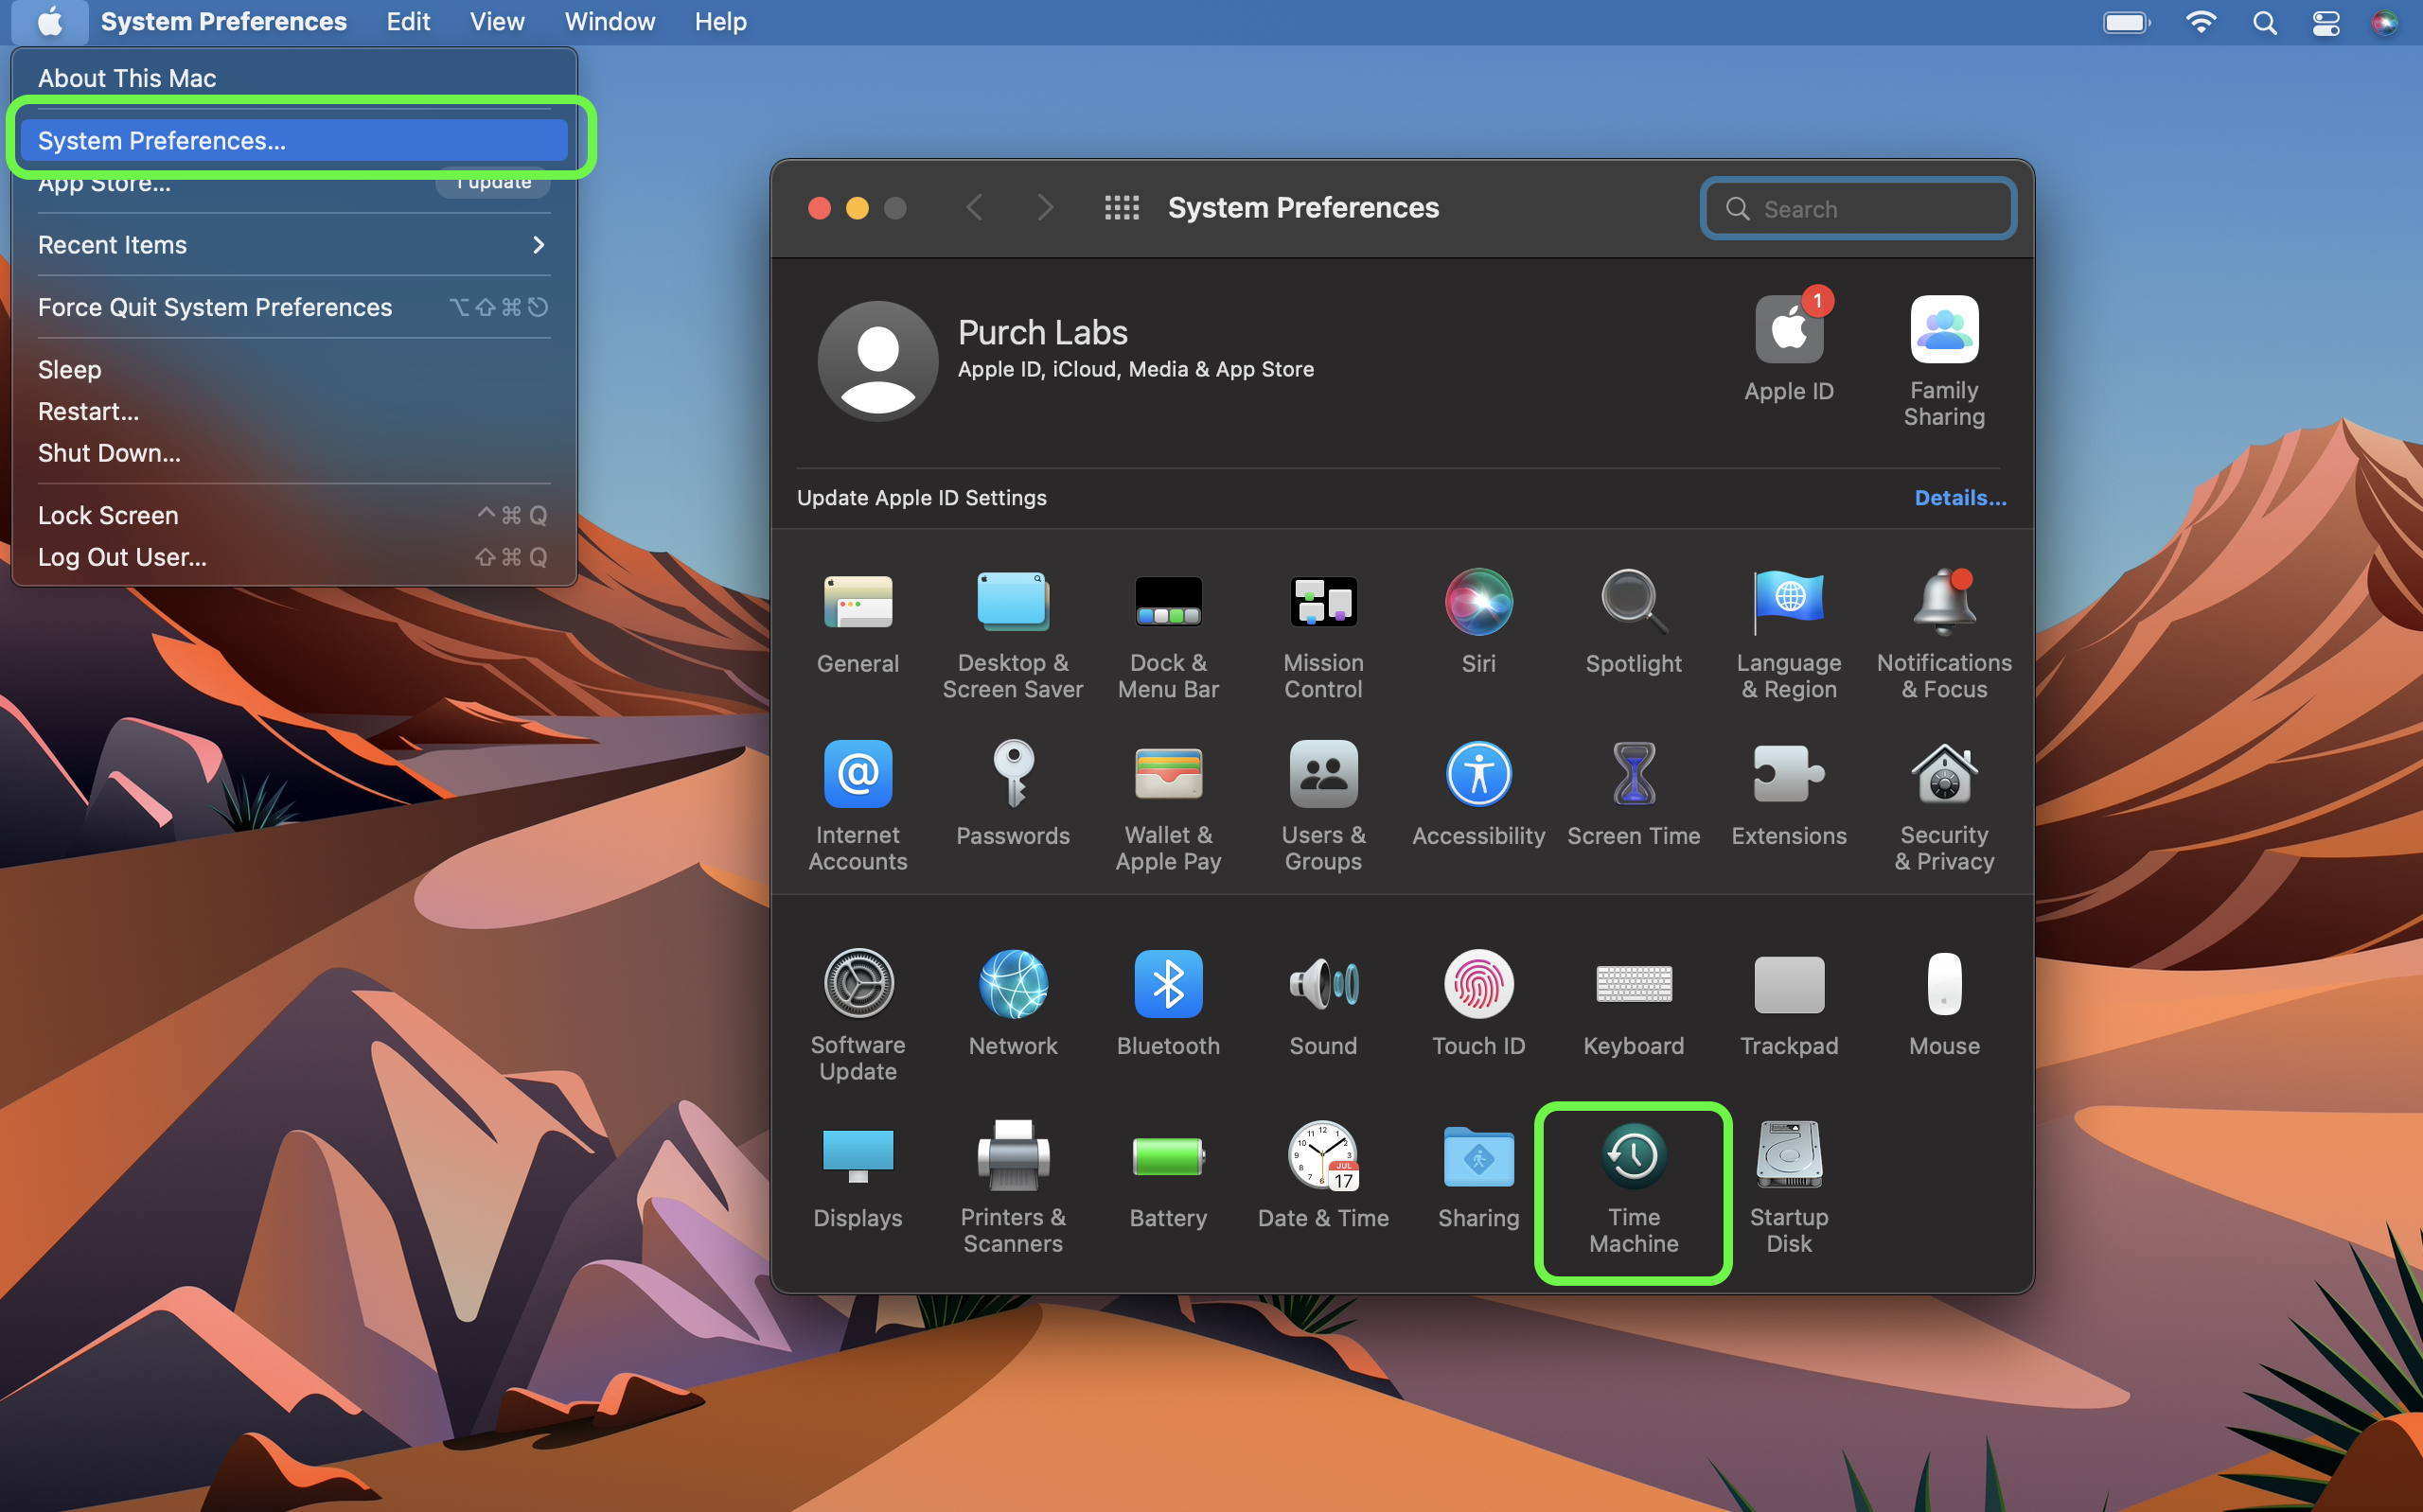
Macs have a fantastic backup utility called Time Machine that makes it easy to regularly back up the files on your hard drive(s). If you've been using Time Machine already, you can likely find the deleted data you're looking for by restoring an older Time Machine backup.
But of course, if you're reading this article, you probably don't have a backup of your deleted data handy. So what can you do? Well, let's start with the simple solutions, which turn out to be effective more often than you might think.
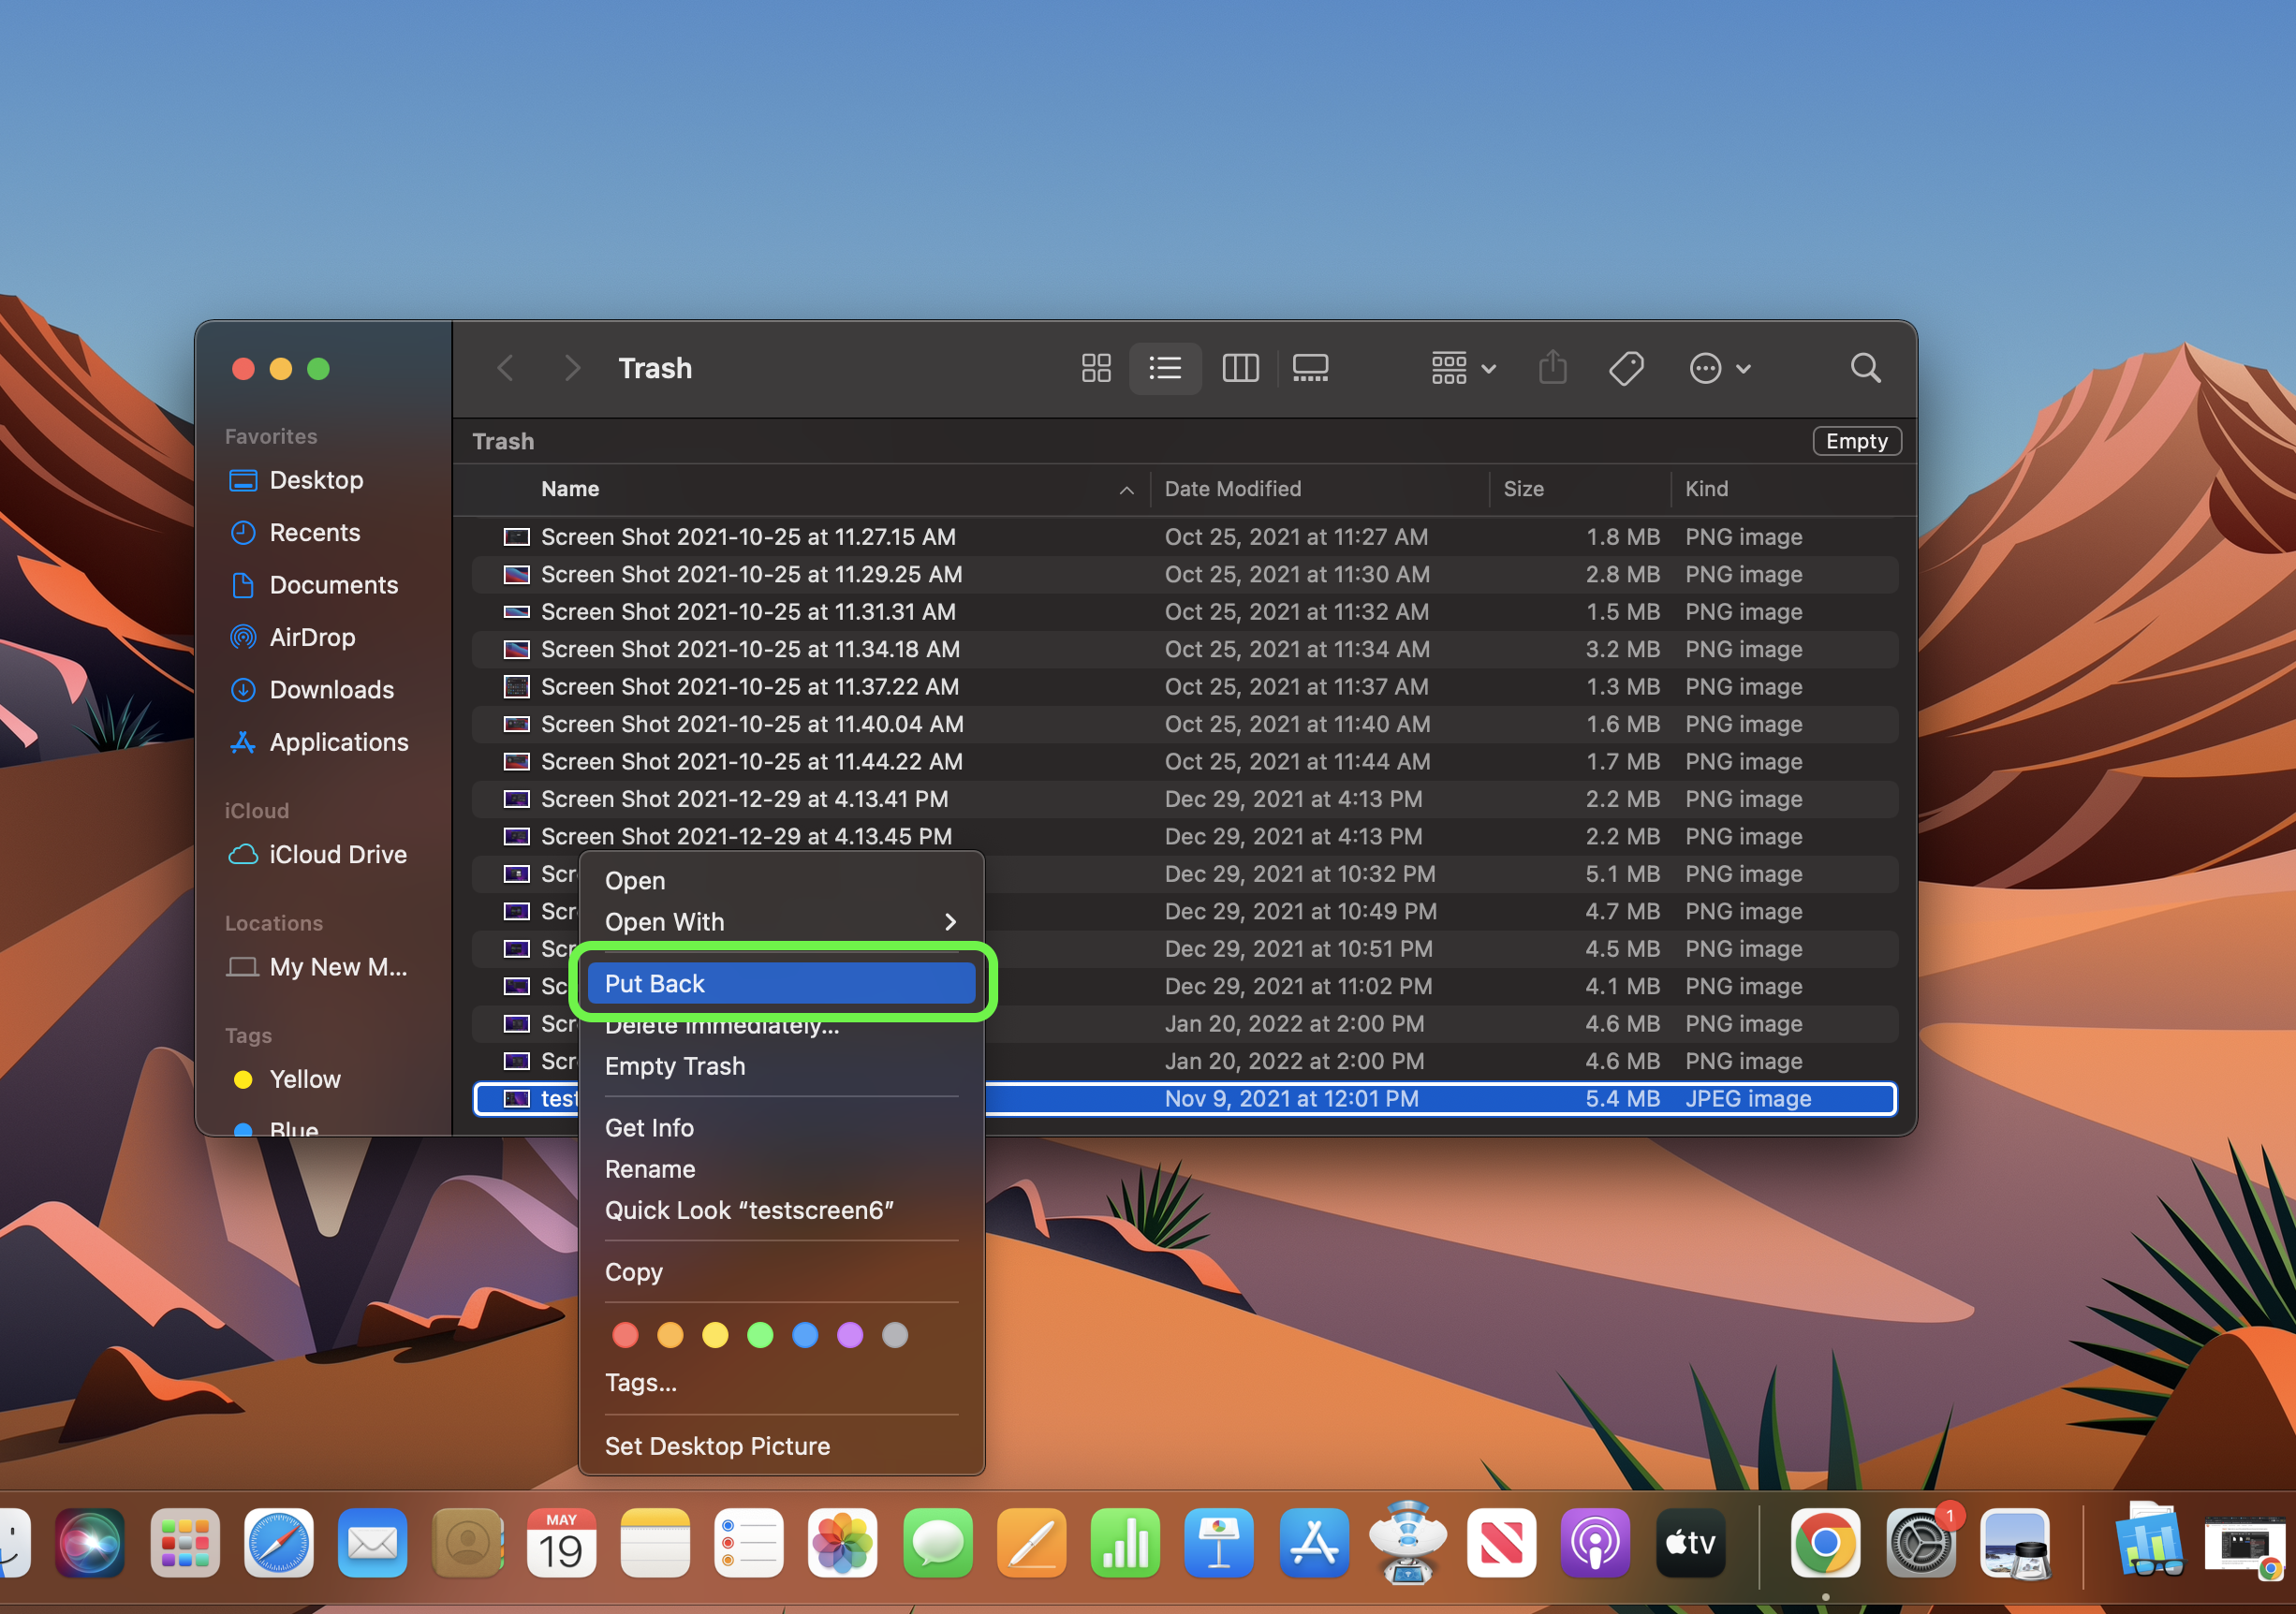
1. The first thing to do, as simple as it may seem, is to look in the Trash. To do this, click the trash can icon (typically found on the right-hand side of your macOS Dock) and check for the file(s) you're looking for. If they're there, you can simply Ctrl + Click on the files and select Put Back from the context menu to return them to their rightful place.
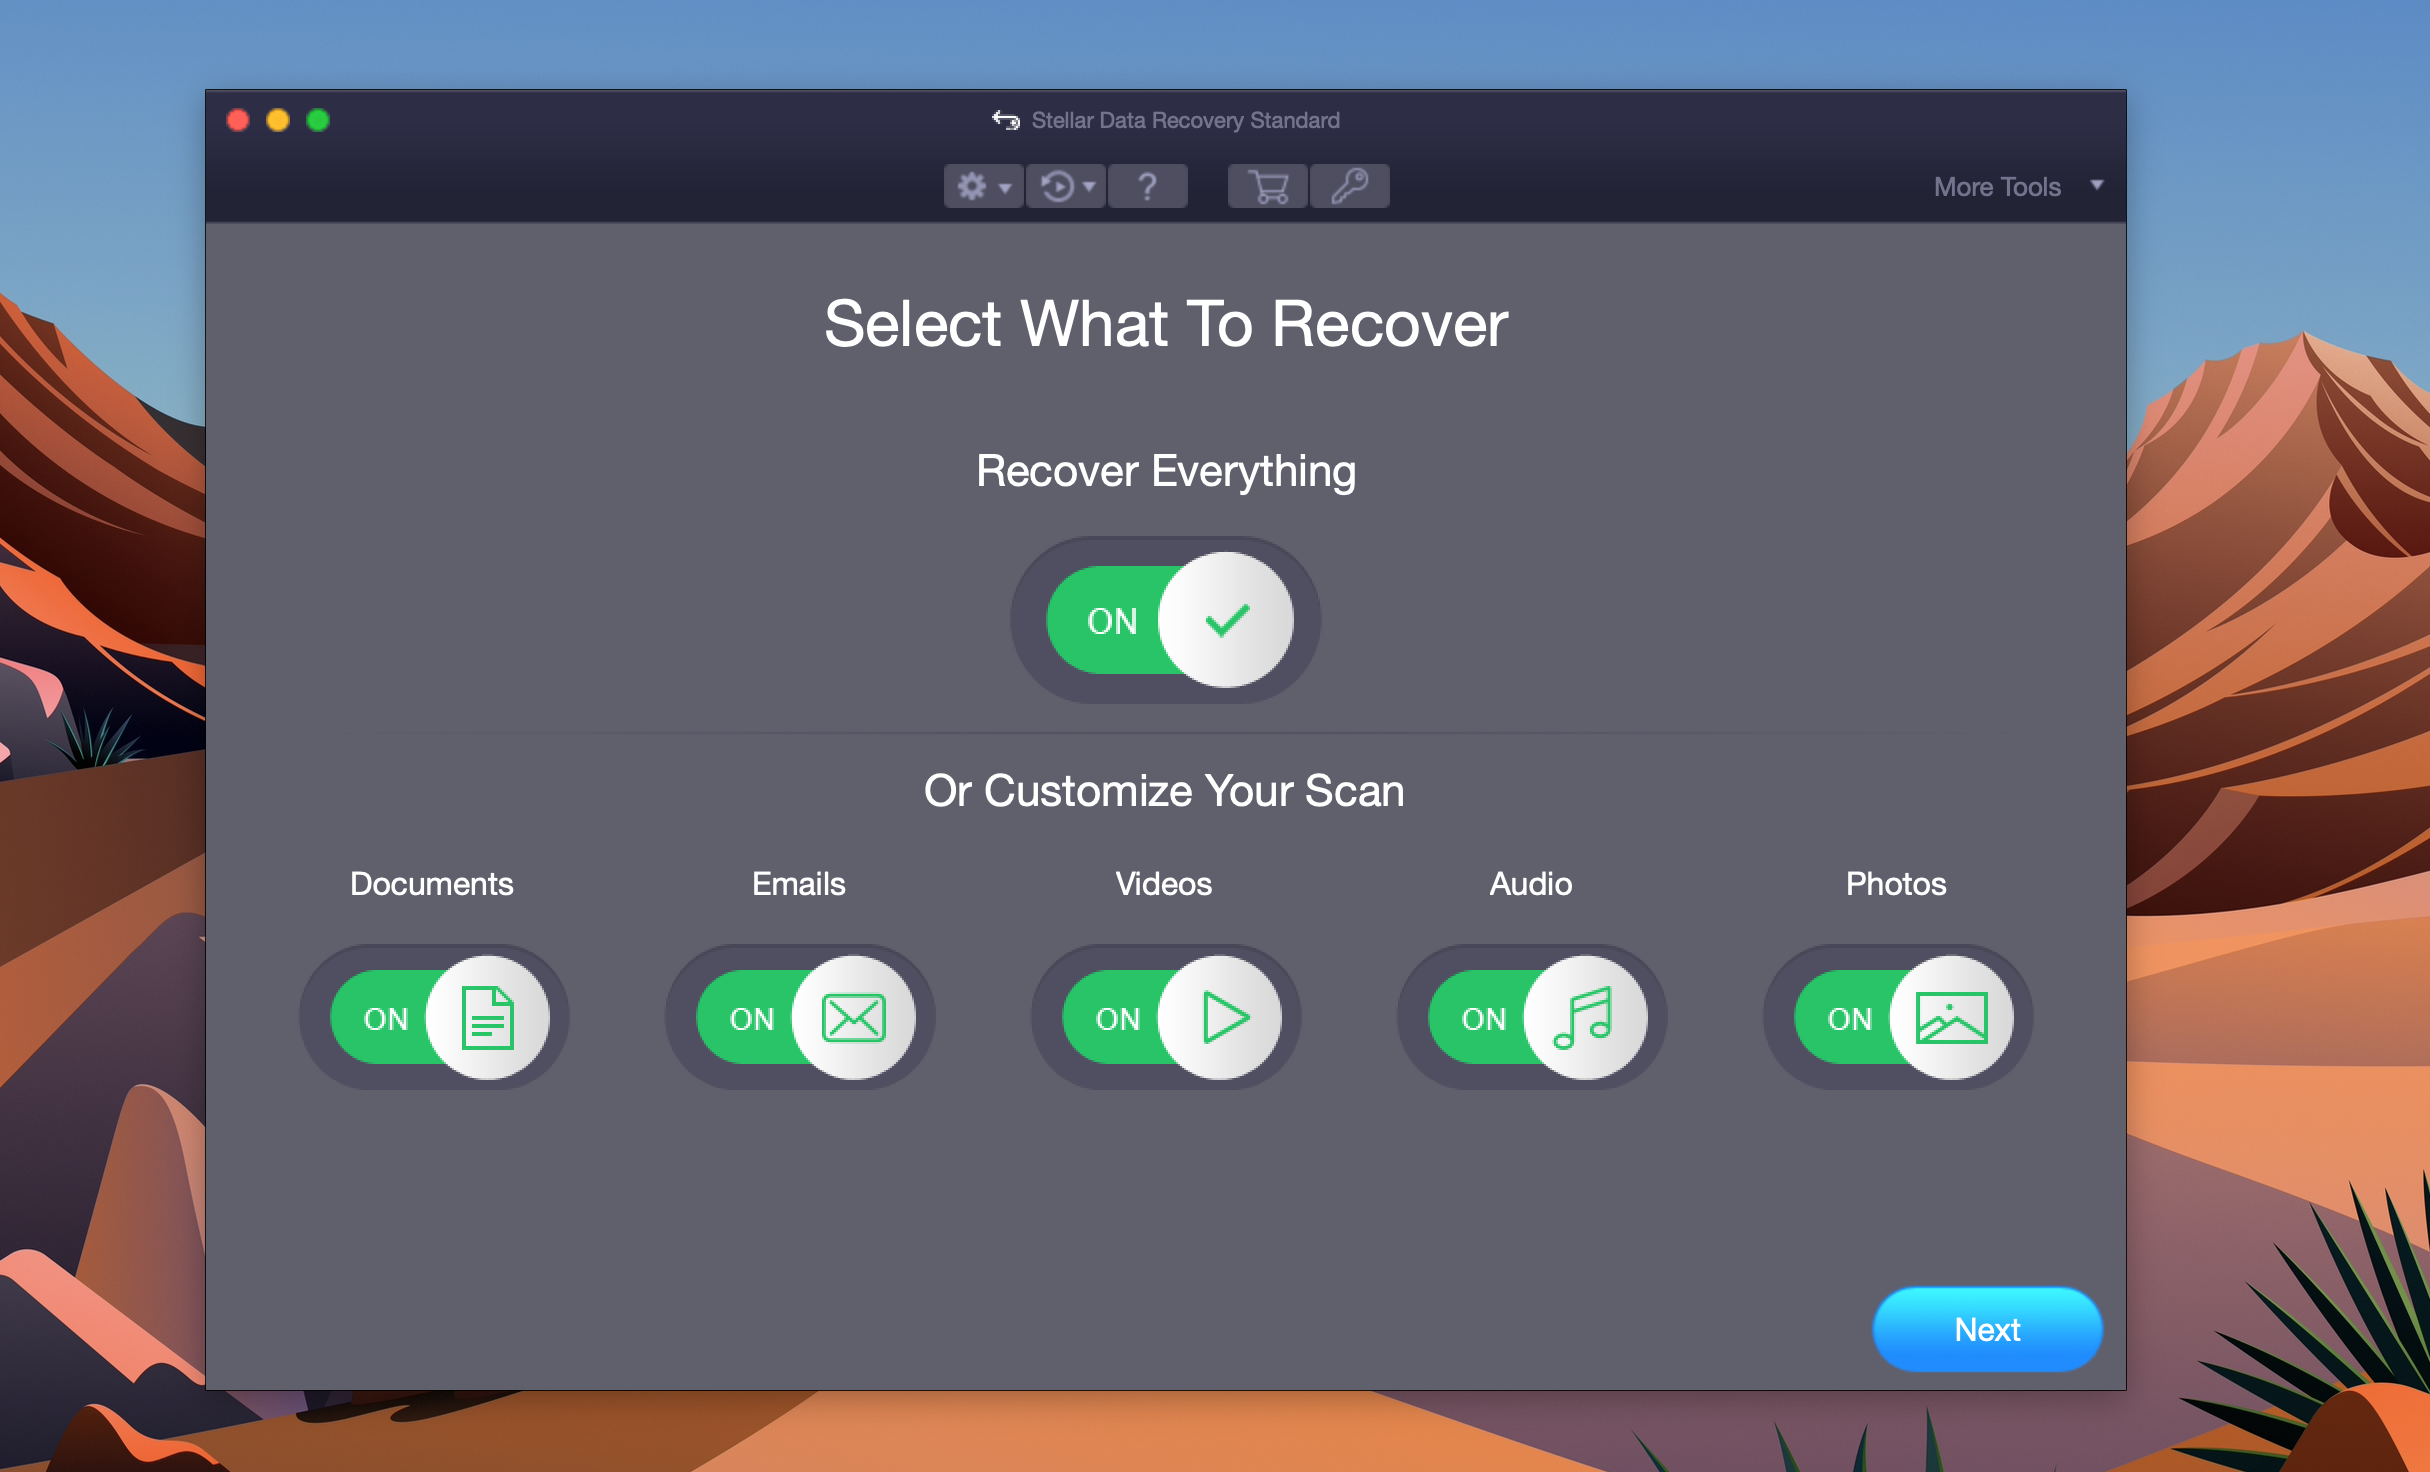
2. If your file(s) are truly deleted, you might still be able to recover them using data recovery software. Some cost money but others offer at least some functionality for free, including Stellar Data Recovery for Mac, which lets you preview what file(s) it can recover for free but requires you to pay for a copy in order to actually recover them. This at least gives you some confidence the utility can recover what you're looking for before you pay for it, and it affords you a simple interface for recovering lost files from Intel-based or M1/M2 Macs. Simply download and install it, then follow the initialization process and choose what file(s) you want the utility to try and recover.
However, if you're having issues with the hard drive itself, even third-party software will have a hard time accessing the data you're after -- and you may need to try another option: The macOS Disk Utility.
Recover data from a faulty hard drive in macOS
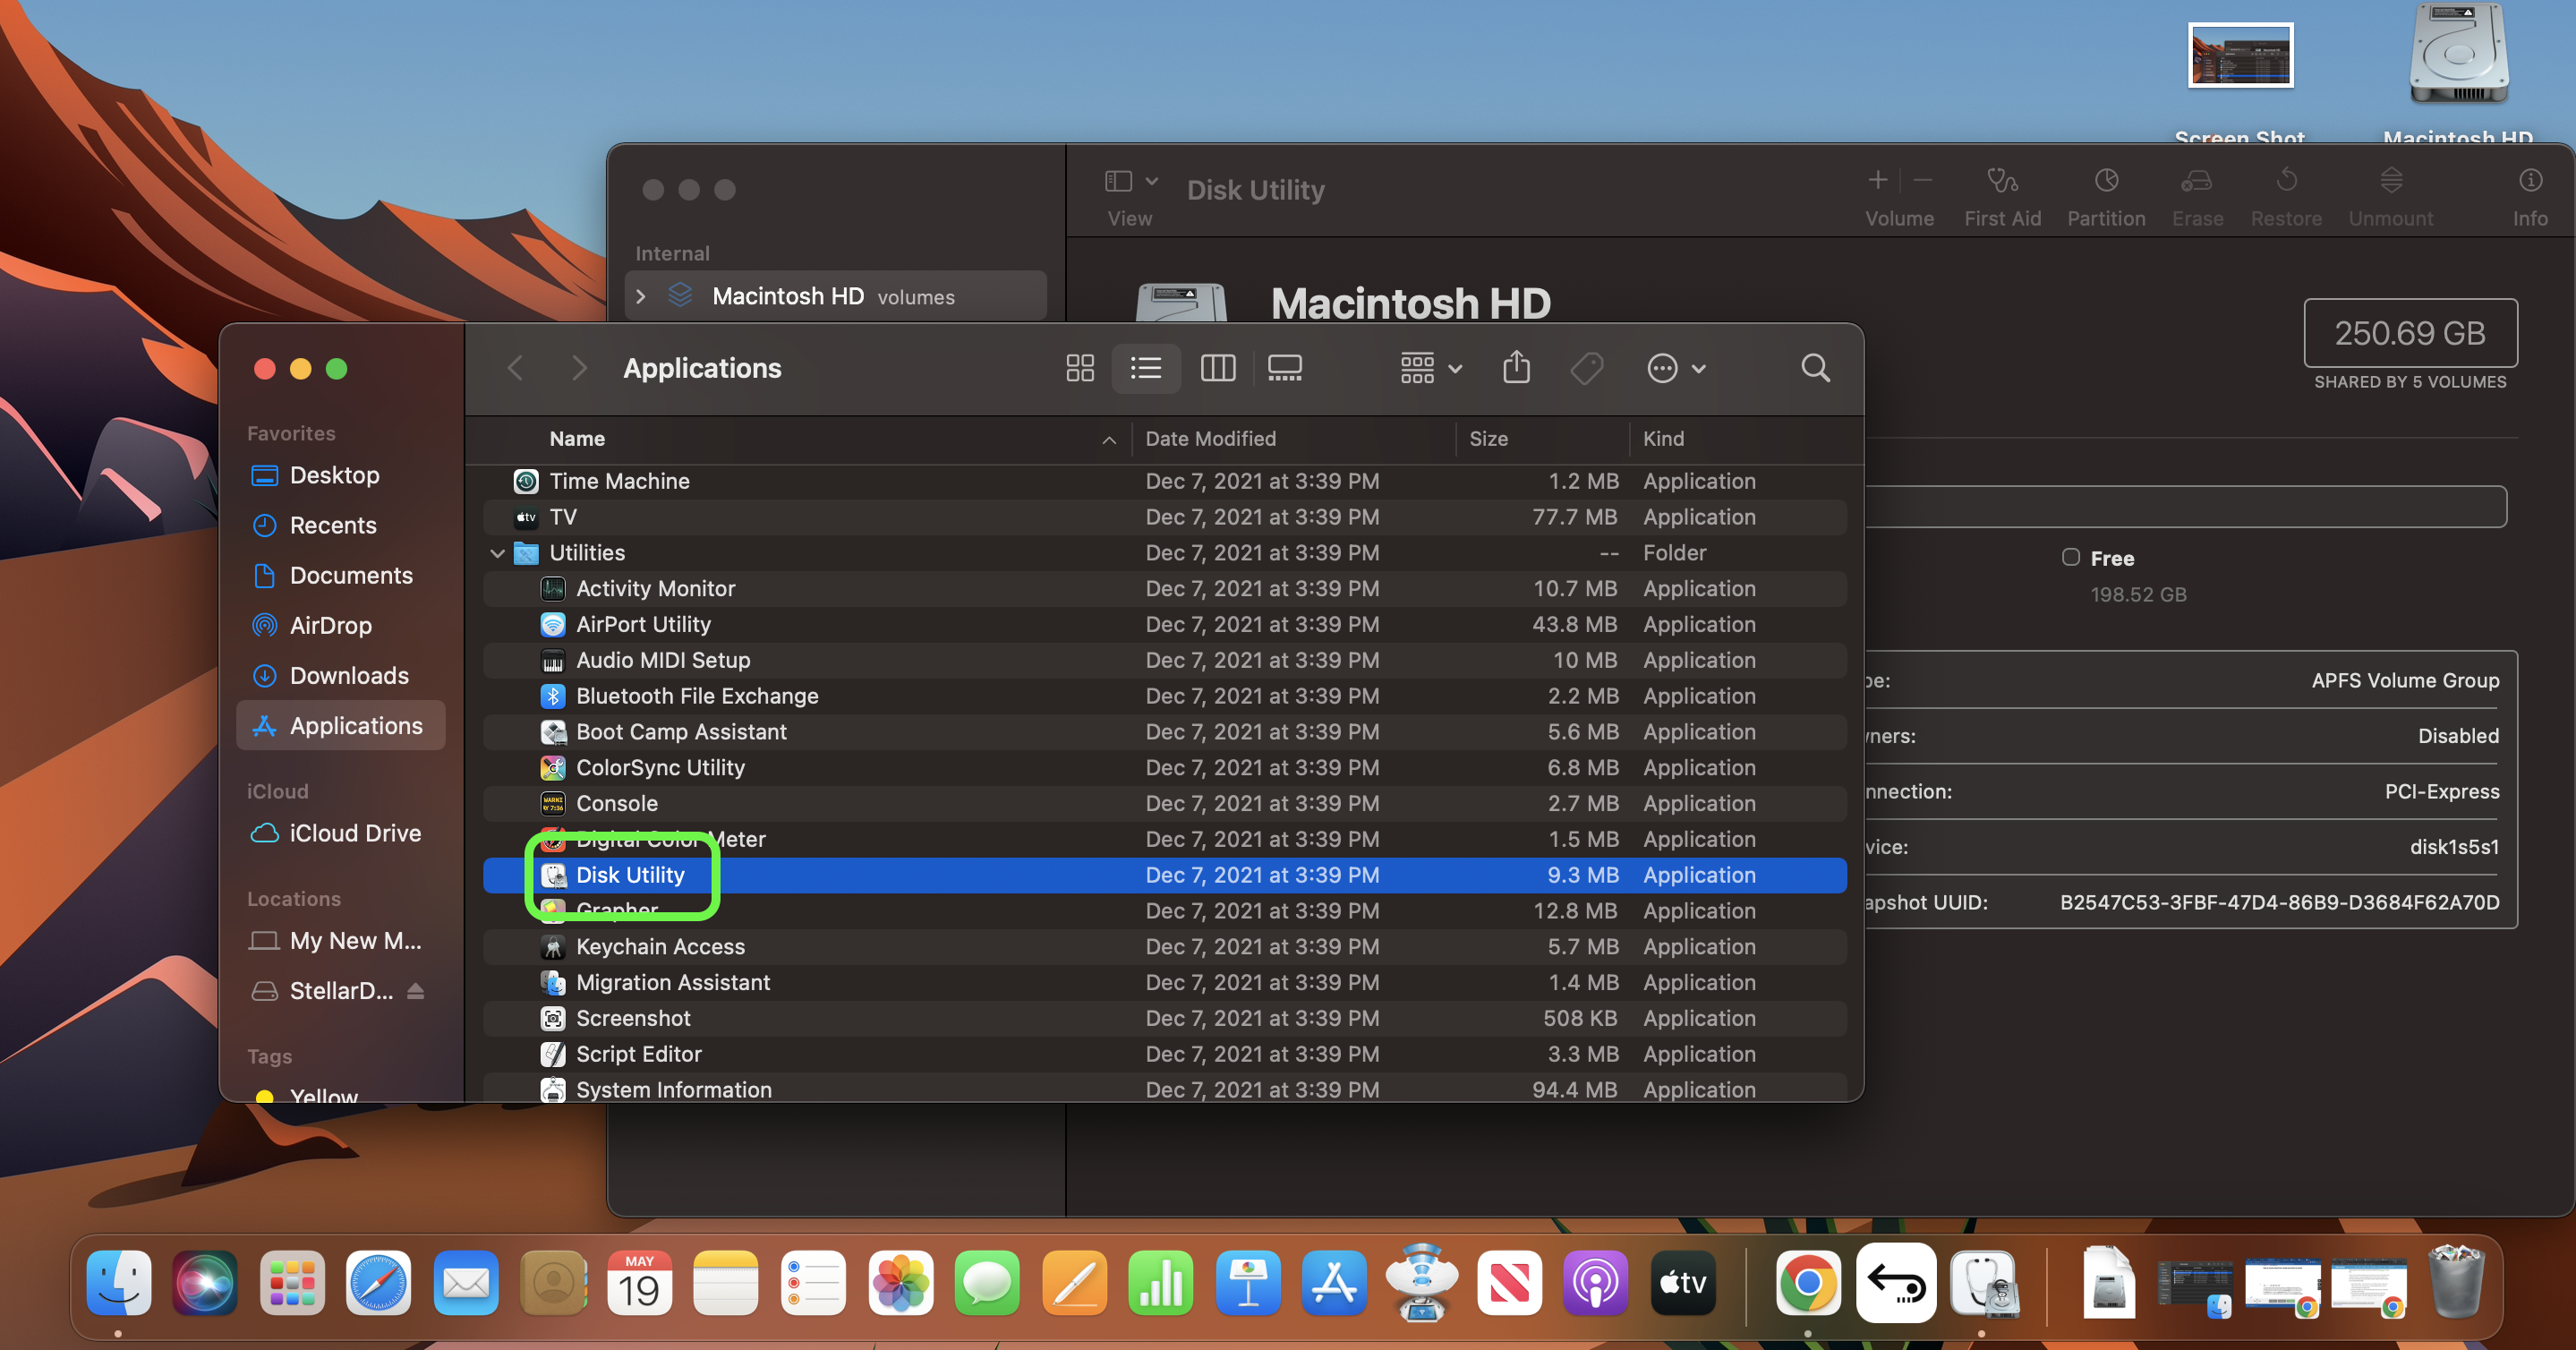
1. If you think your Mac's hard drive is faulty or damaged (you'll often get error messages about the storage drive before it fails completely), you still have a chance to recover data from it if you use the macOS Disk Utility. To find it, head to the Utilities folder inside your Applications folder. If you're having trouble, simply search for it using Spotlight Search, accessible via hitting Command + Space.
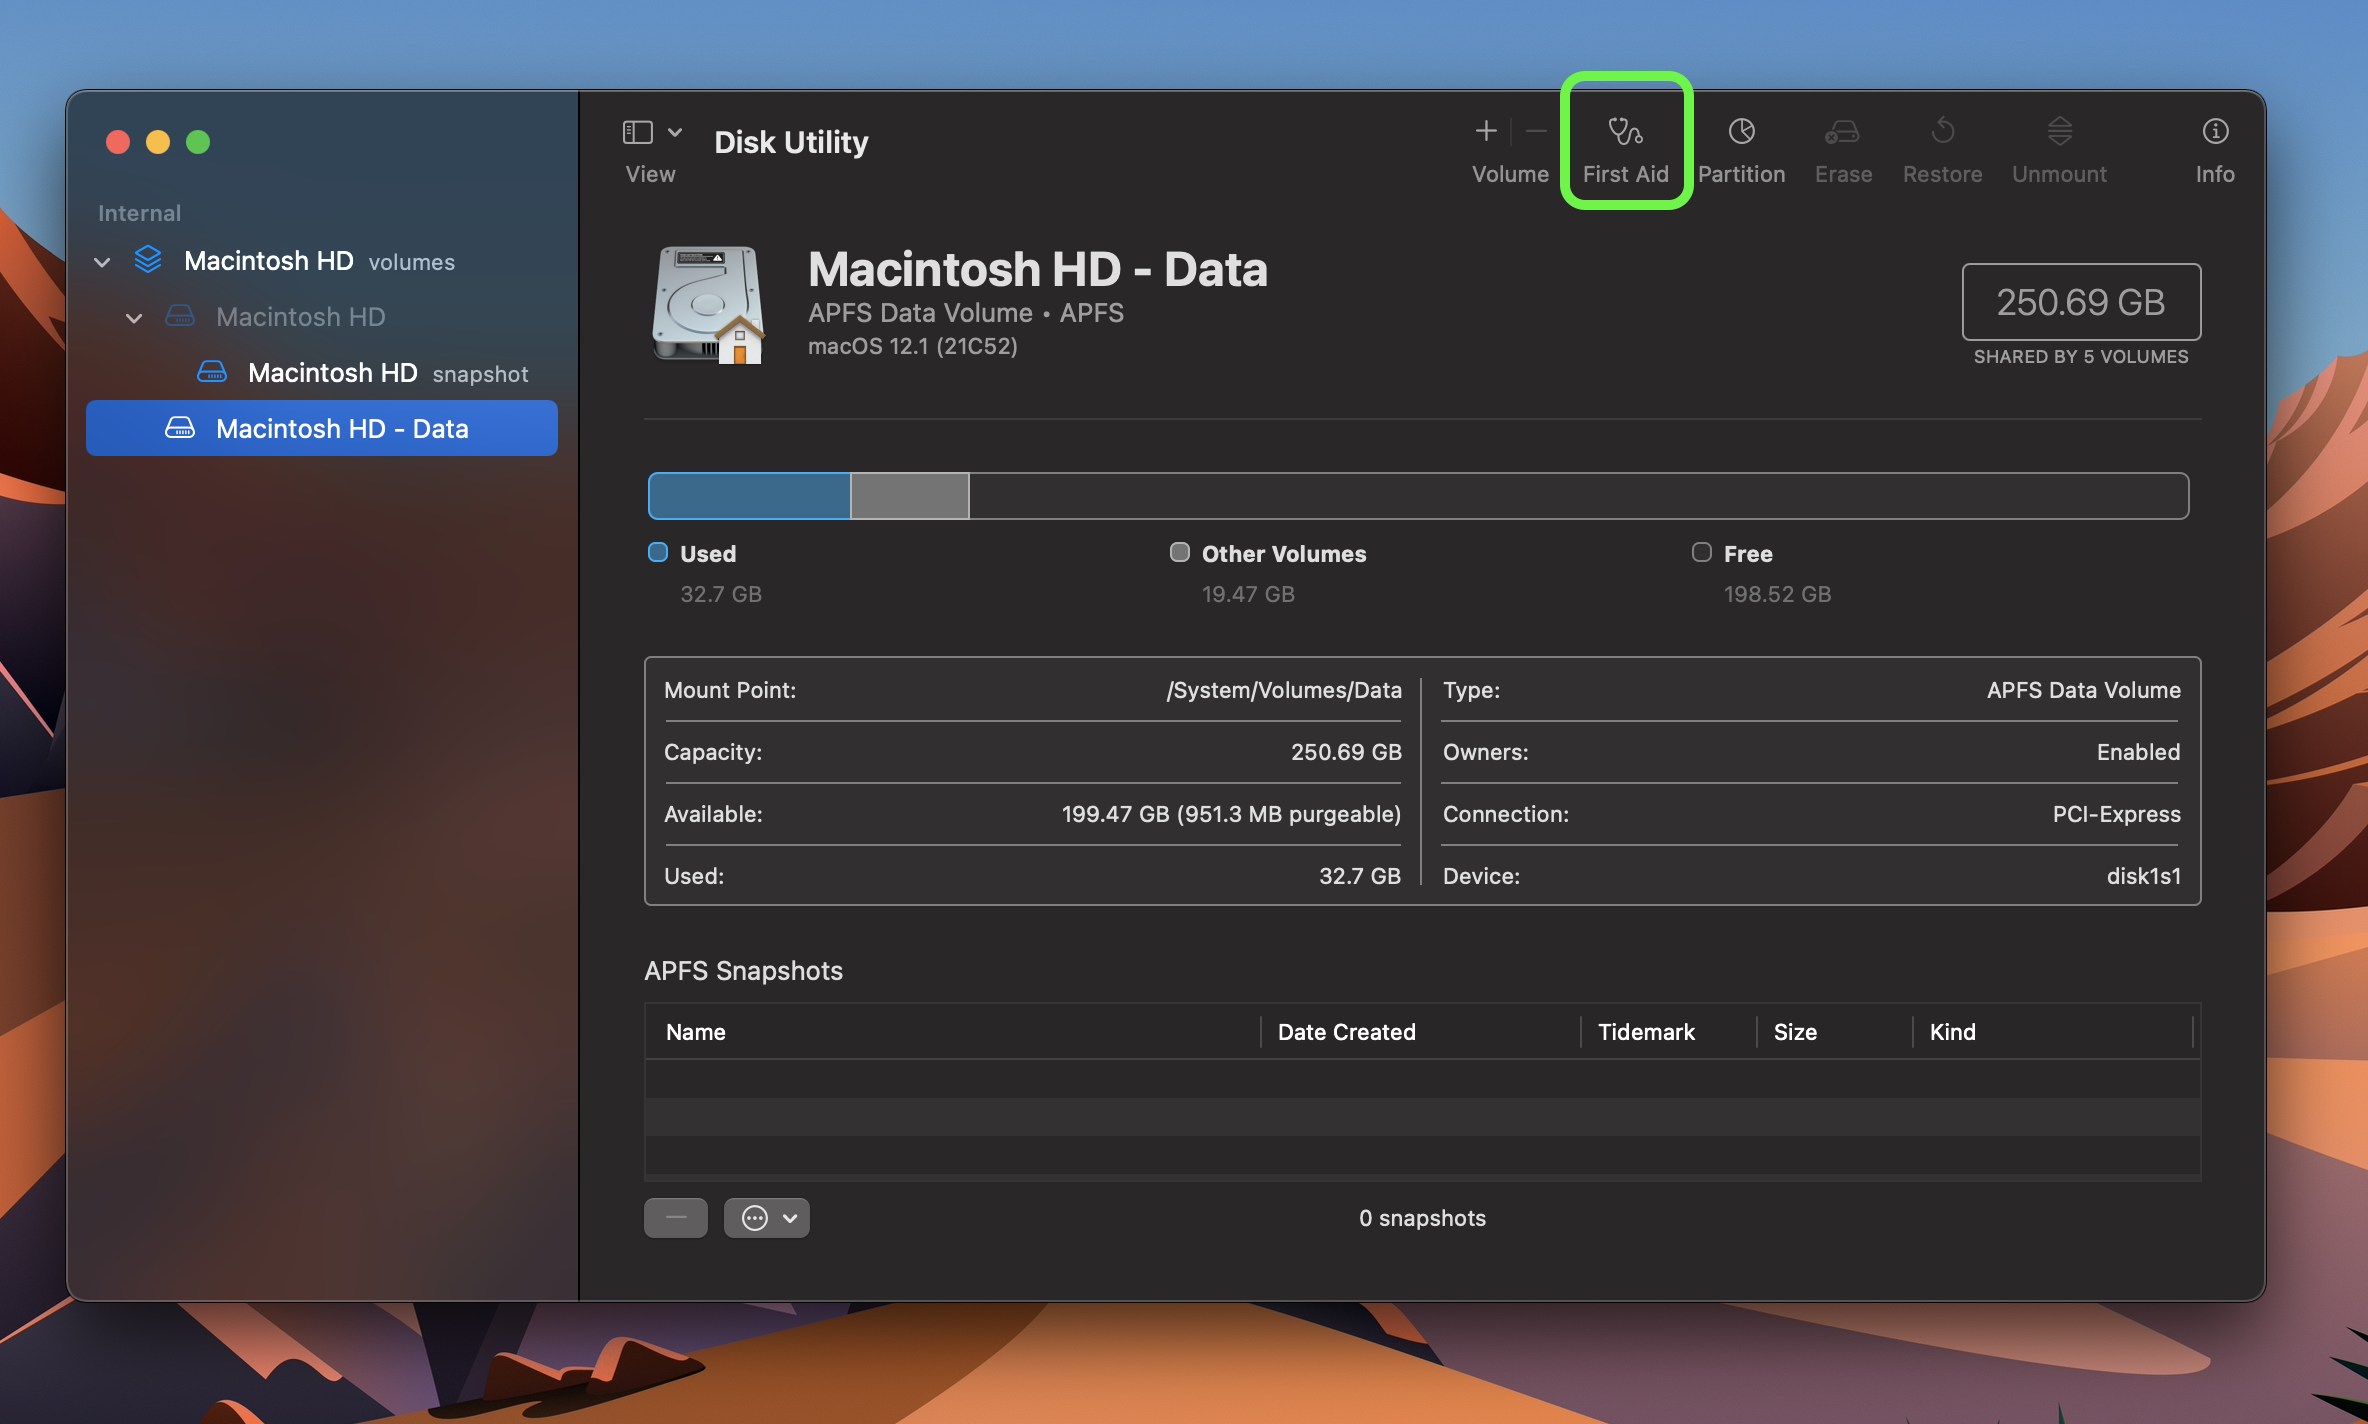
2. Once you have Disk Utility running, click the disk you're having issues with and select First Aid from the top-right corner of the Disk Utility window. You'll get a pop-up notifying you that Disk Utility will search for errors and repair them if it can, so let it do its thing. Note that it will give you a warning that the drive will be locked and that you will be unable to access the drive while Disk Utility is working on it, so plan accordingly!
3. If you're in luck, the macOS Disk Utility will be able to find and repair the fault or corruption in your storage drive. If you run into trouble running it, you can also try rebooting into Recovery Mode and running it from there, which may solve the issue. You can also use Recovery Mode to revert to an earlier Time Machine backup, or revert back to an earlier version of macOS. There are two different ways to access Recovery Mode, depending on whether you're using one of Apple's older Intel-based Macs or a newer Mac (like the MacBook Pro 2021) powered by a variant of Apple's M1 chip.
If you're on an older Intel-based Mac, restart your system by clicking the Apple logo (top left of your screen). Select Restart then, once your machine powers up, hold down Command+R until you see the Apple logo.
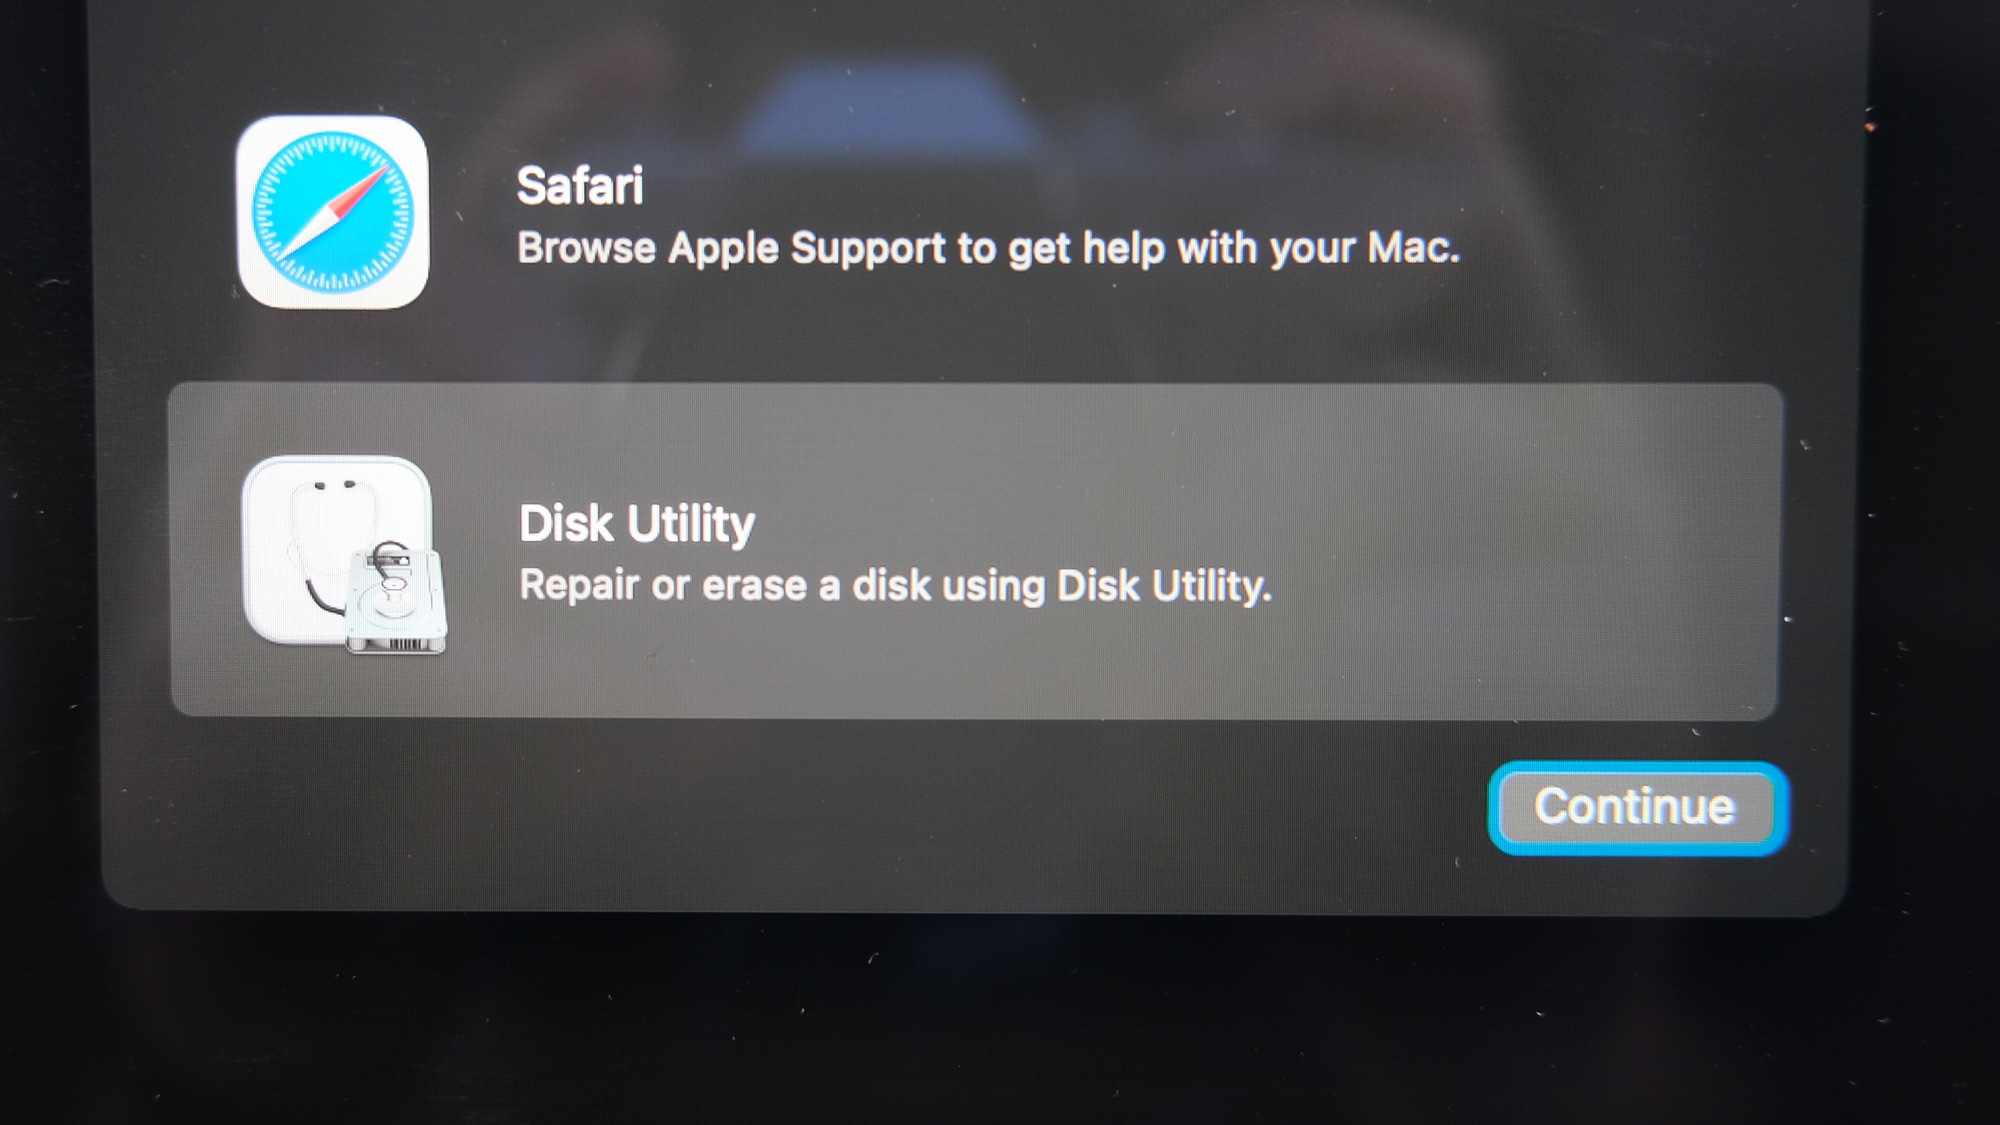
If you're on a newer M1-based Mac, shut it down by clicking the Apple logo (top left of your screen). Select Shut Down and then, Once it's completely off, hold the power button down until you see the prompt to "Continue holding for startup options. Once you see "Loading startup options", release the power button. Next, Select Options and click Continue and to enter Recovery Mode.
Choose an account with administrator privileges and enter the account password.
You should now have access to a number of options in Recovery Mode, including Disk Utility and Time Machine. From here you can try running Disk Utility again, or attempt to restore an old backup from Time Machine. While restoring a backup won't fix a failing hard drive, it may help you recover deleted data.
You should also see options to reinstall macOS or seek help from Apple, and you may have some luck taking the latter tack if nothing else seems to be working.
4. If you can't salvage data from your Mac's hard drive using the method outlined above, it may be time to think about removing the drive and trying to pull data from it directly. Unfortunately, the method for doing this (and whether or not it's even feasible) depends heavily on what Mac you're trying to repair. Most MacBooks and iMacs are notoriously difficult to open, so your best bet is to contact Apple and set up an appointment to get your Mac serviced by a specialist (here are Apple's instructions for sending a Mac in for repair in the U.S. and Europe).

You can also try taking your Mac to a third-party repair shop or data recovery specialist, and the widespread popularity of Apple computers means there's usually a business in your area that offers such services. Doing so may void your warranty, but it can be worth it when all else fails and you absolutely, positively must recover those critical files.
If you're looking for more computing guides, we also have a tutorial on how to use Task Scheduler on Windows, how to use hot corners on Mac, what to do when AirDrop isn't working, how to split your screen on Mac and how to set Chrome flags.

Alex Wawro is a lifelong tech and games enthusiast with more than a decade of experience covering both for outlets like Game Developer, Black Hat, and PC World magazine. A lifelong PC builder, he currently serves as a senior editor at Tom's Guide covering all things computing, from laptops and desktops to keyboards and mice.
 Club Benefits


