How to edit images in Microsoft Paint
Need a quick and easy way to edit images? Here’s how to edit images in Microsoft Paint
If you need a picture edited in a hurry, we’ll show you how to edit images in Microsoft Paint.
You might be tempted to pay for Photoshop, or other high-end expensive editing software. But in most cases, there’s no need — Microsoft Paint is great for basic image editing jobs and, best of all, it’s free and comes pre-installed in Windows 10, so there's no need to download anything.
- The best free photo editing software
- How to delete a page in Microsoft Word
- How to convert HEIC to JPEG
Microsoft Paint may be regarded as a simple tool, but the current version in Windows 10 is a vast improvement on the old one in previous editions of Windows. It's packed with useful features to help you perfect your pictures, and it's easy to use.
We’ll show you how to get the most out of MS Paint, from resizing and cropping images to adding backgrounds and text, and other useful editing tips.
How to edit images in Microsoft Paint - Resize images
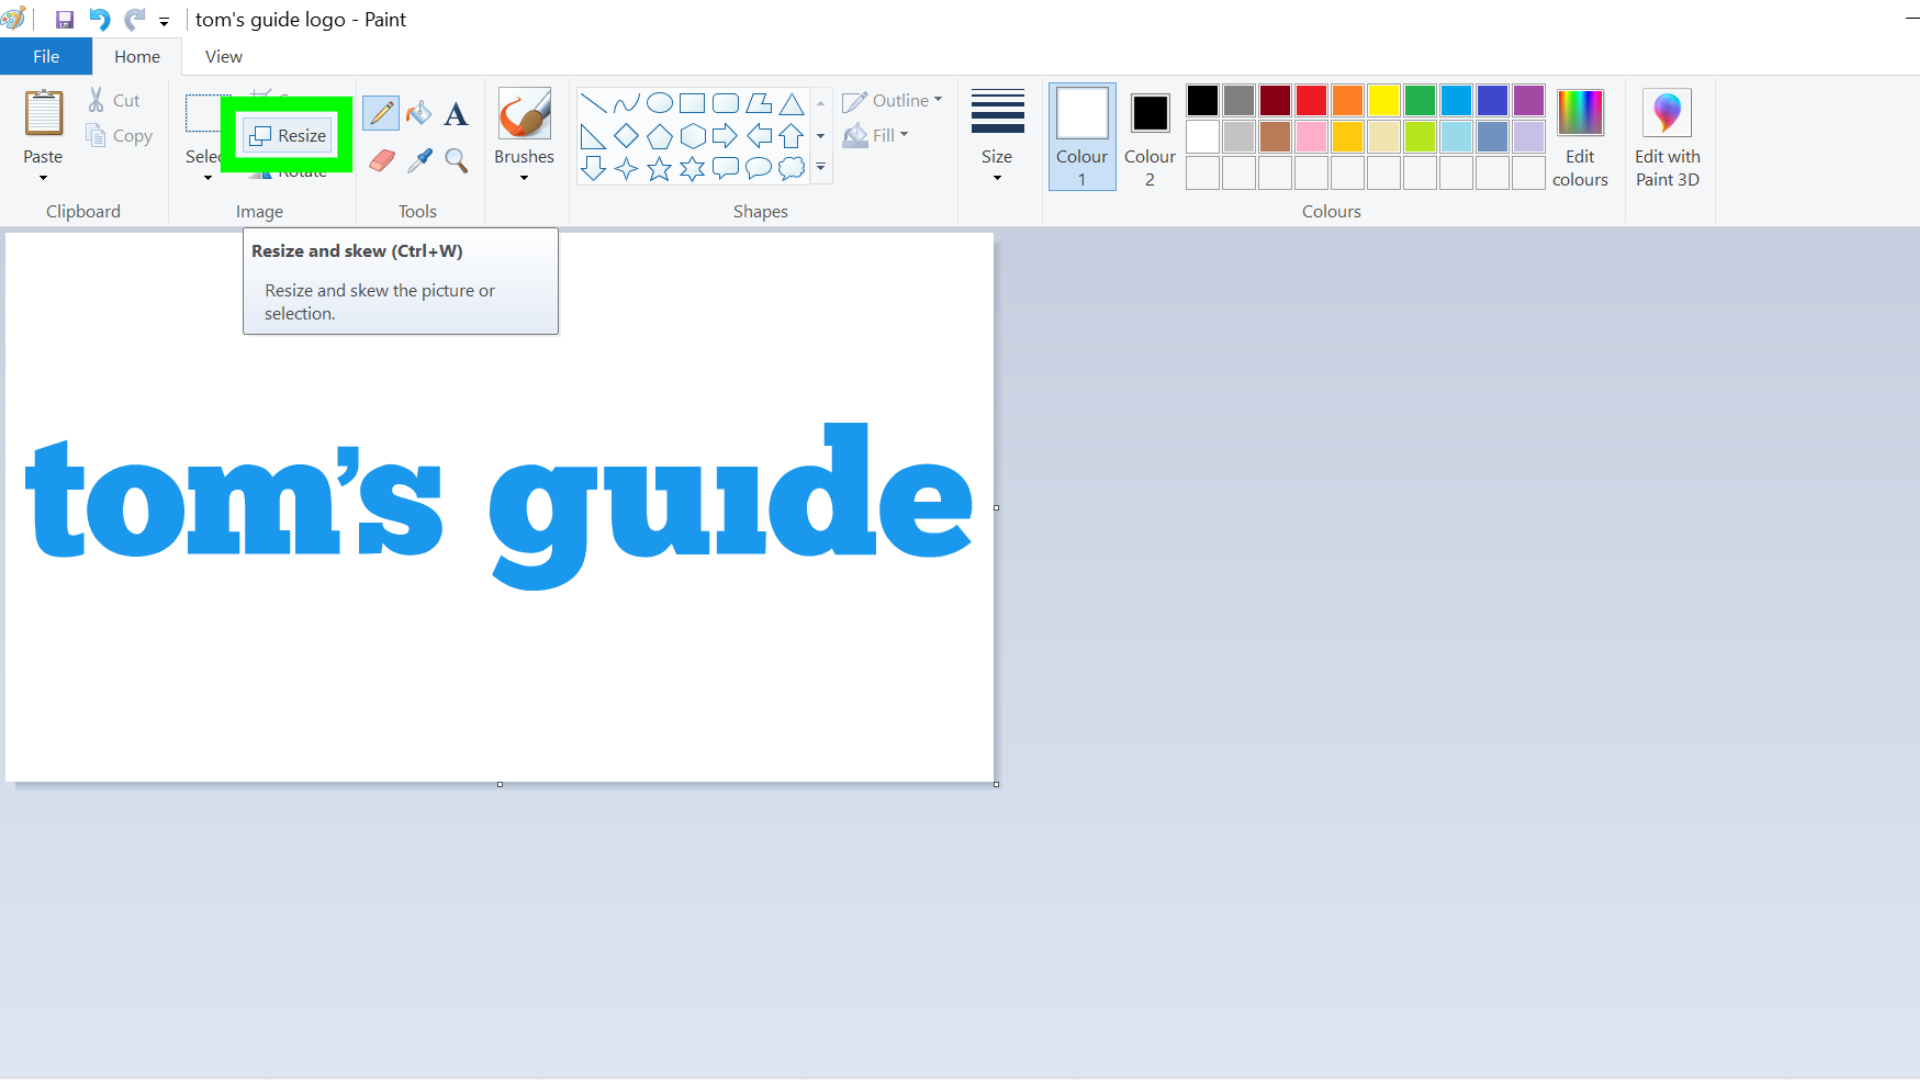
1. In the toolbar at the top of the window, select “Resize” from the image-editing tools.
2. The “Resize and skew” window will appear. Select whether you want the dimensions to be in pixels or percentages, and whether you’d like to maintain the aspect ratio (aka scale both the length and the width by the same amount.)
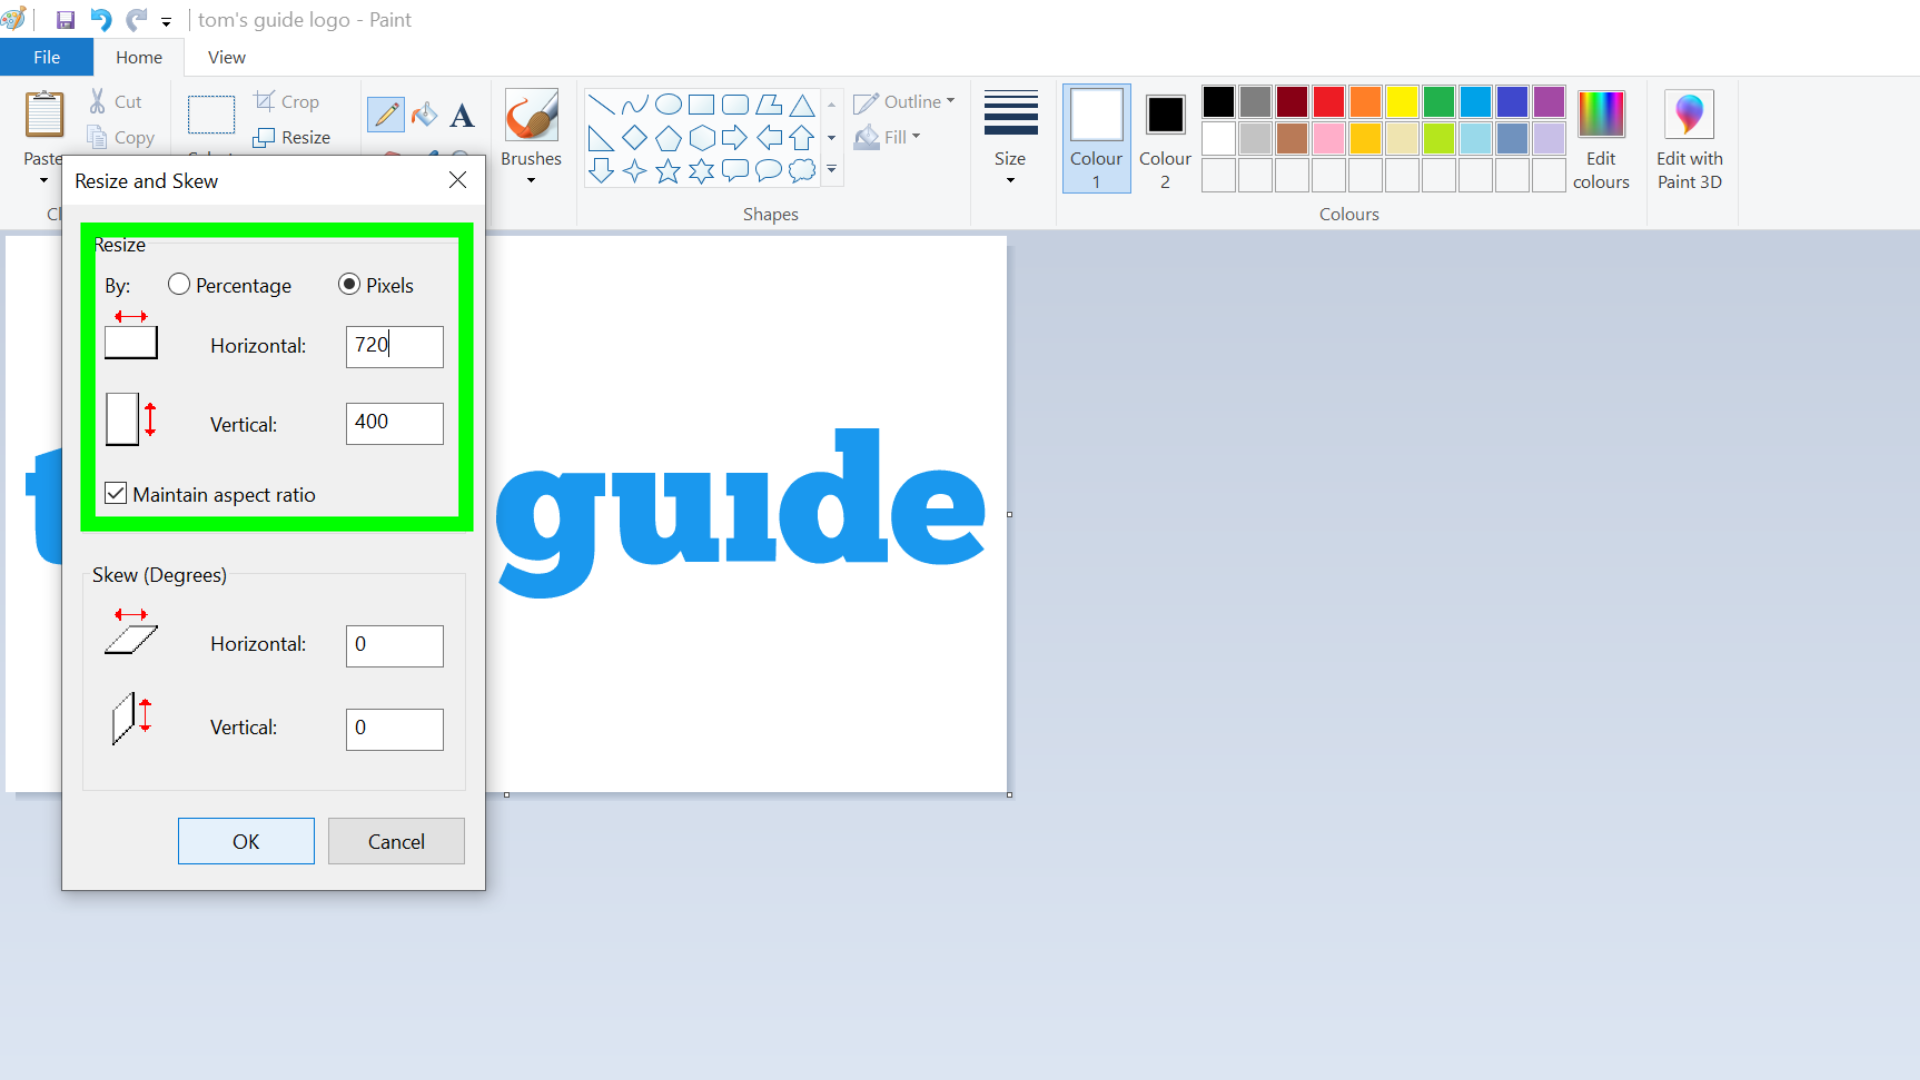
3. Enter the new dimensions, and then click “OK.”
Get instant access to breaking news, the hottest reviews, great deals and helpful tips.
How to edit images in Microsoft Paint - Crop images
There are two ways to crop images in MS Paint, either selecting the part of the image you want to keep and clicking “Crop” or by dragging the borders of the image to the right size.
Here’s the first way:
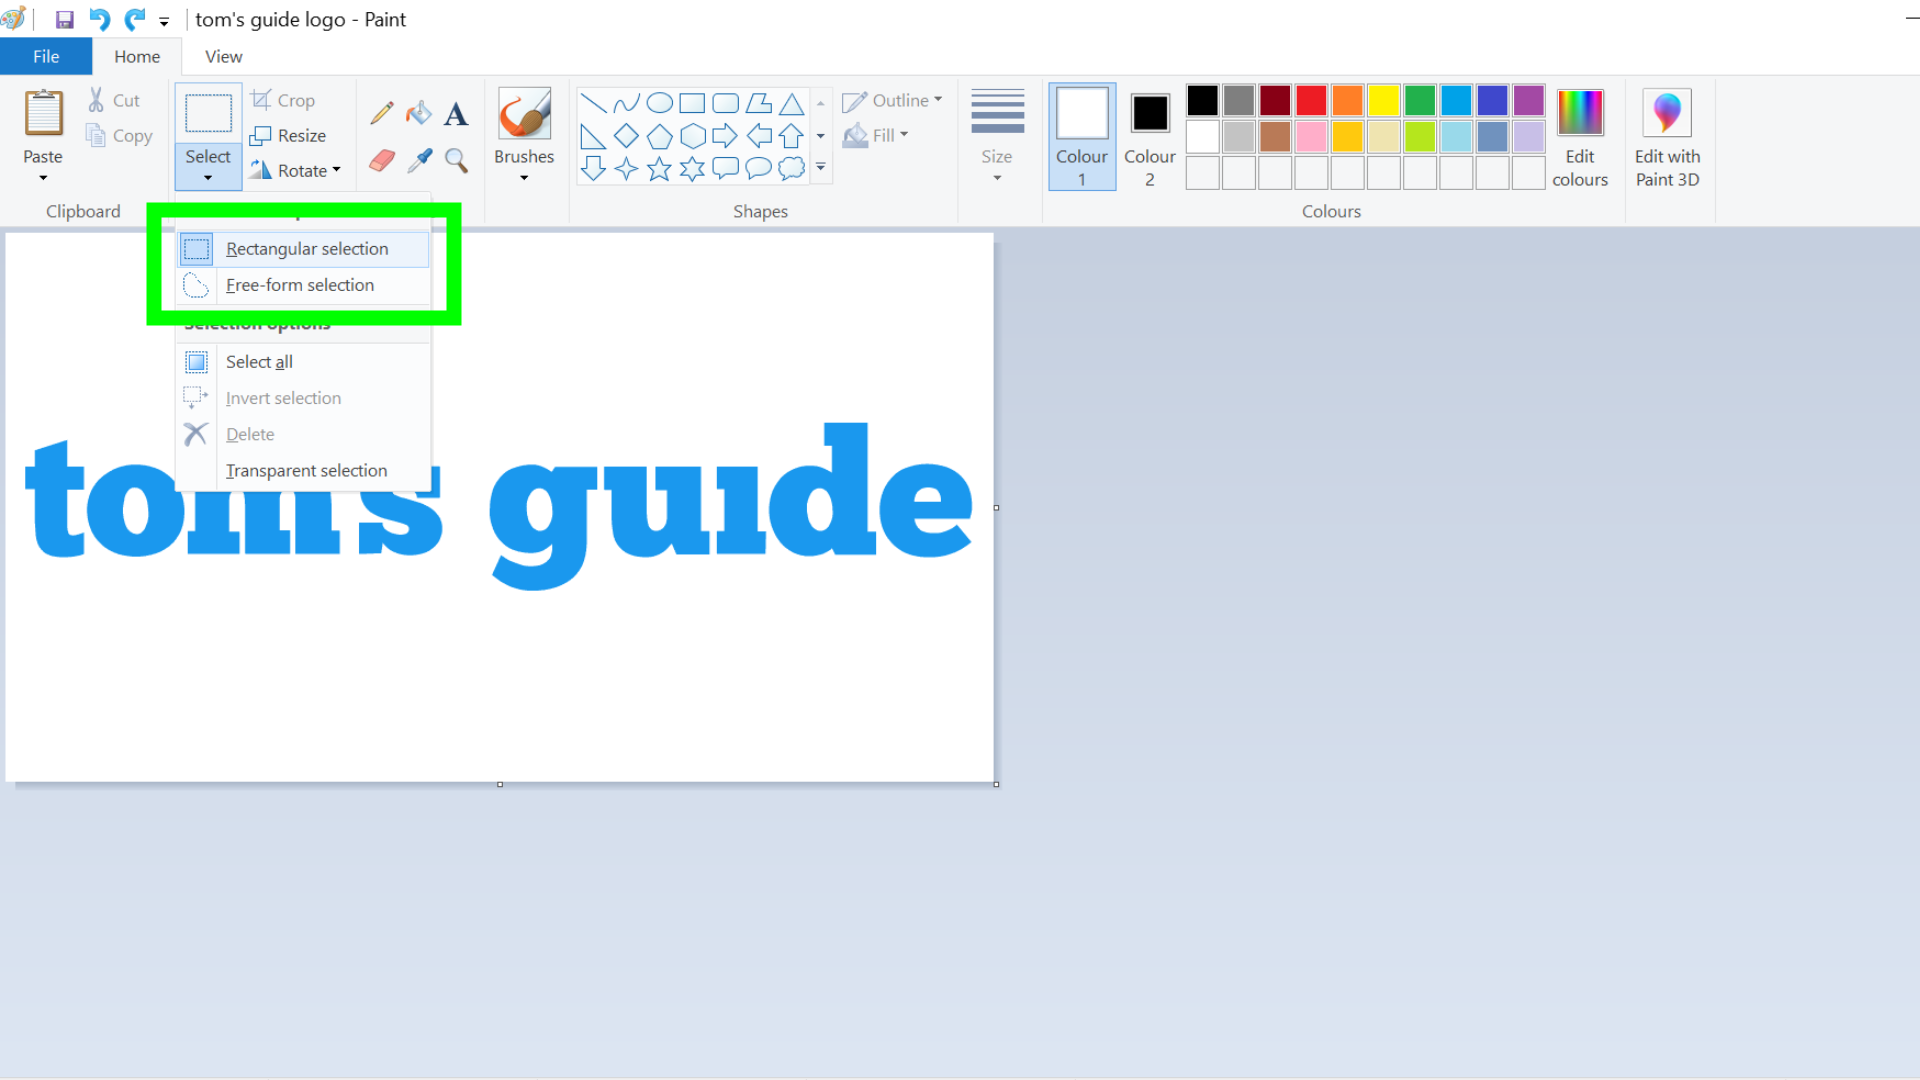
1. In the toolbar at the top of the window, choose “Select” and then either “Rectangular selection” or “Free-form selection.” Free-form will let you draw freehand the shape you wish to crop to, whereas rectangular lets you crop the image to a rectangle or square.
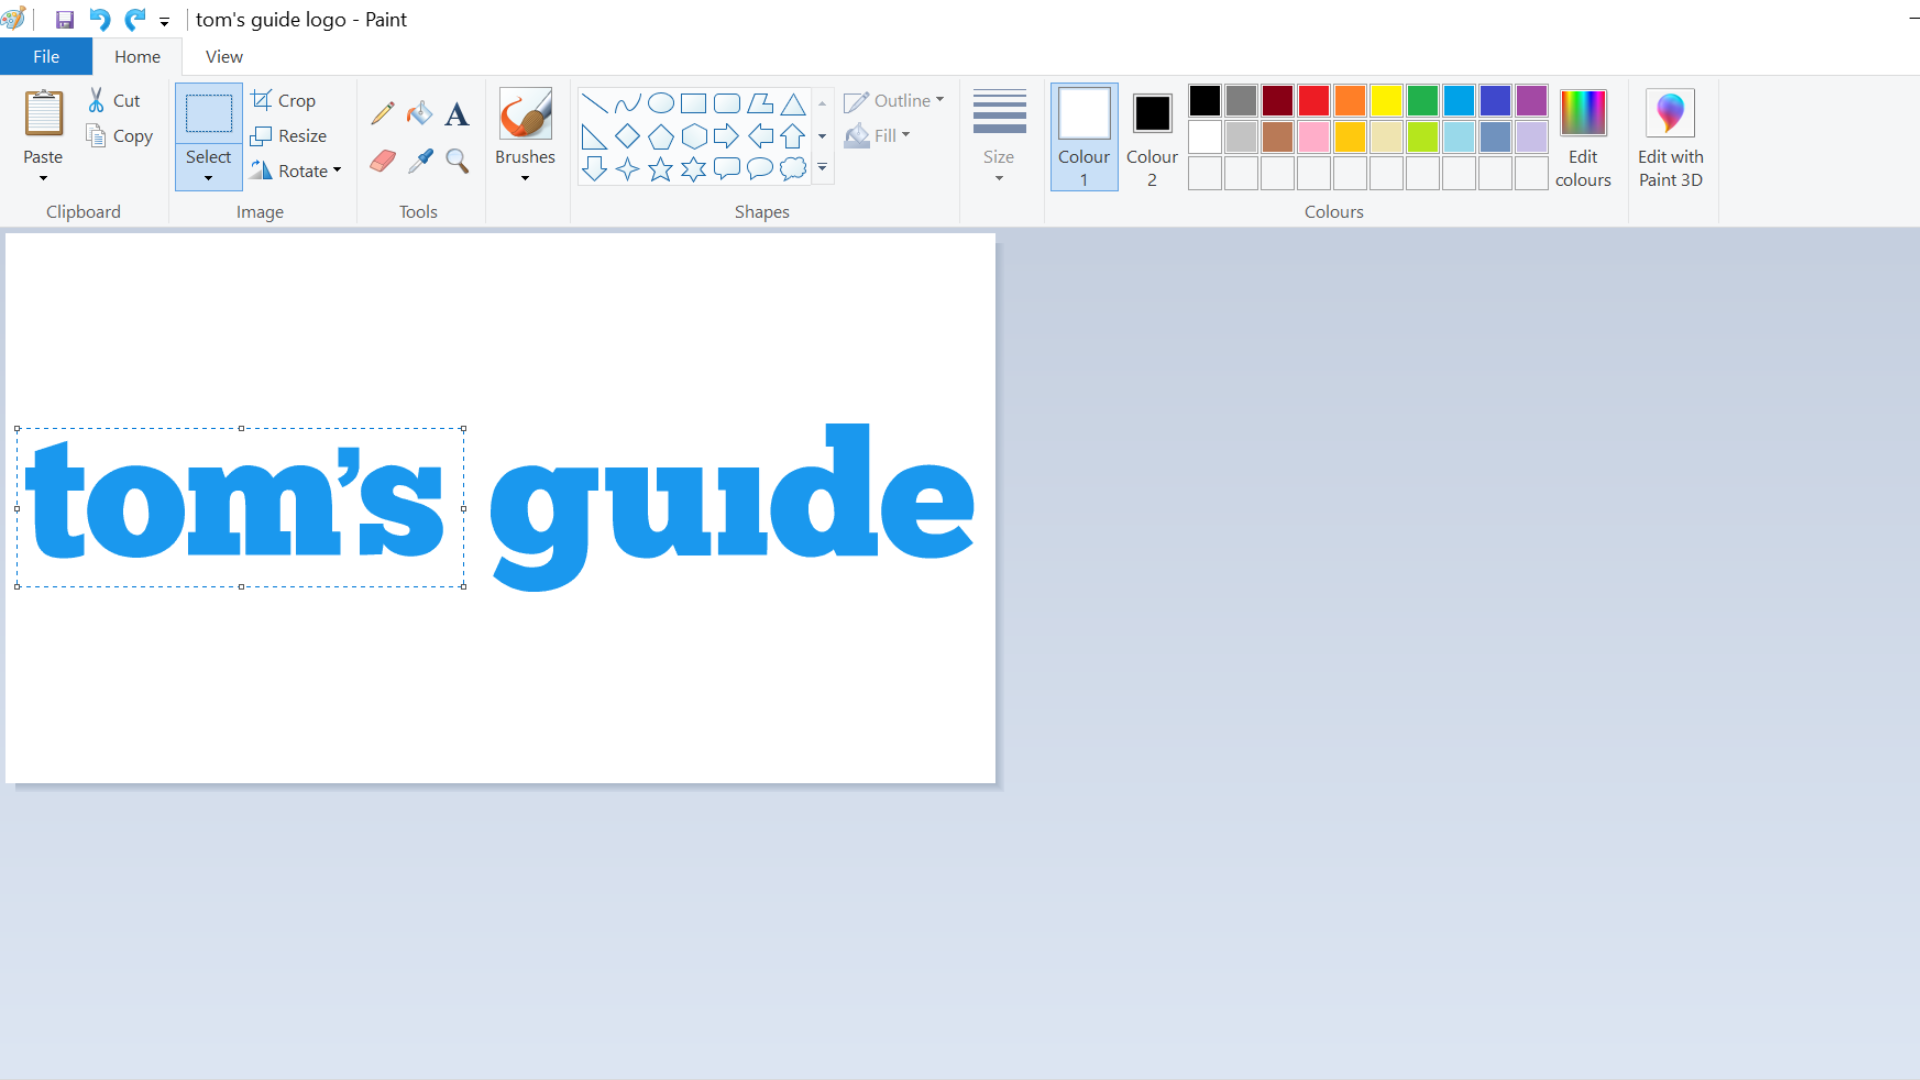
2. Select the area you would like to crop by holding down the mouse button as you draw.
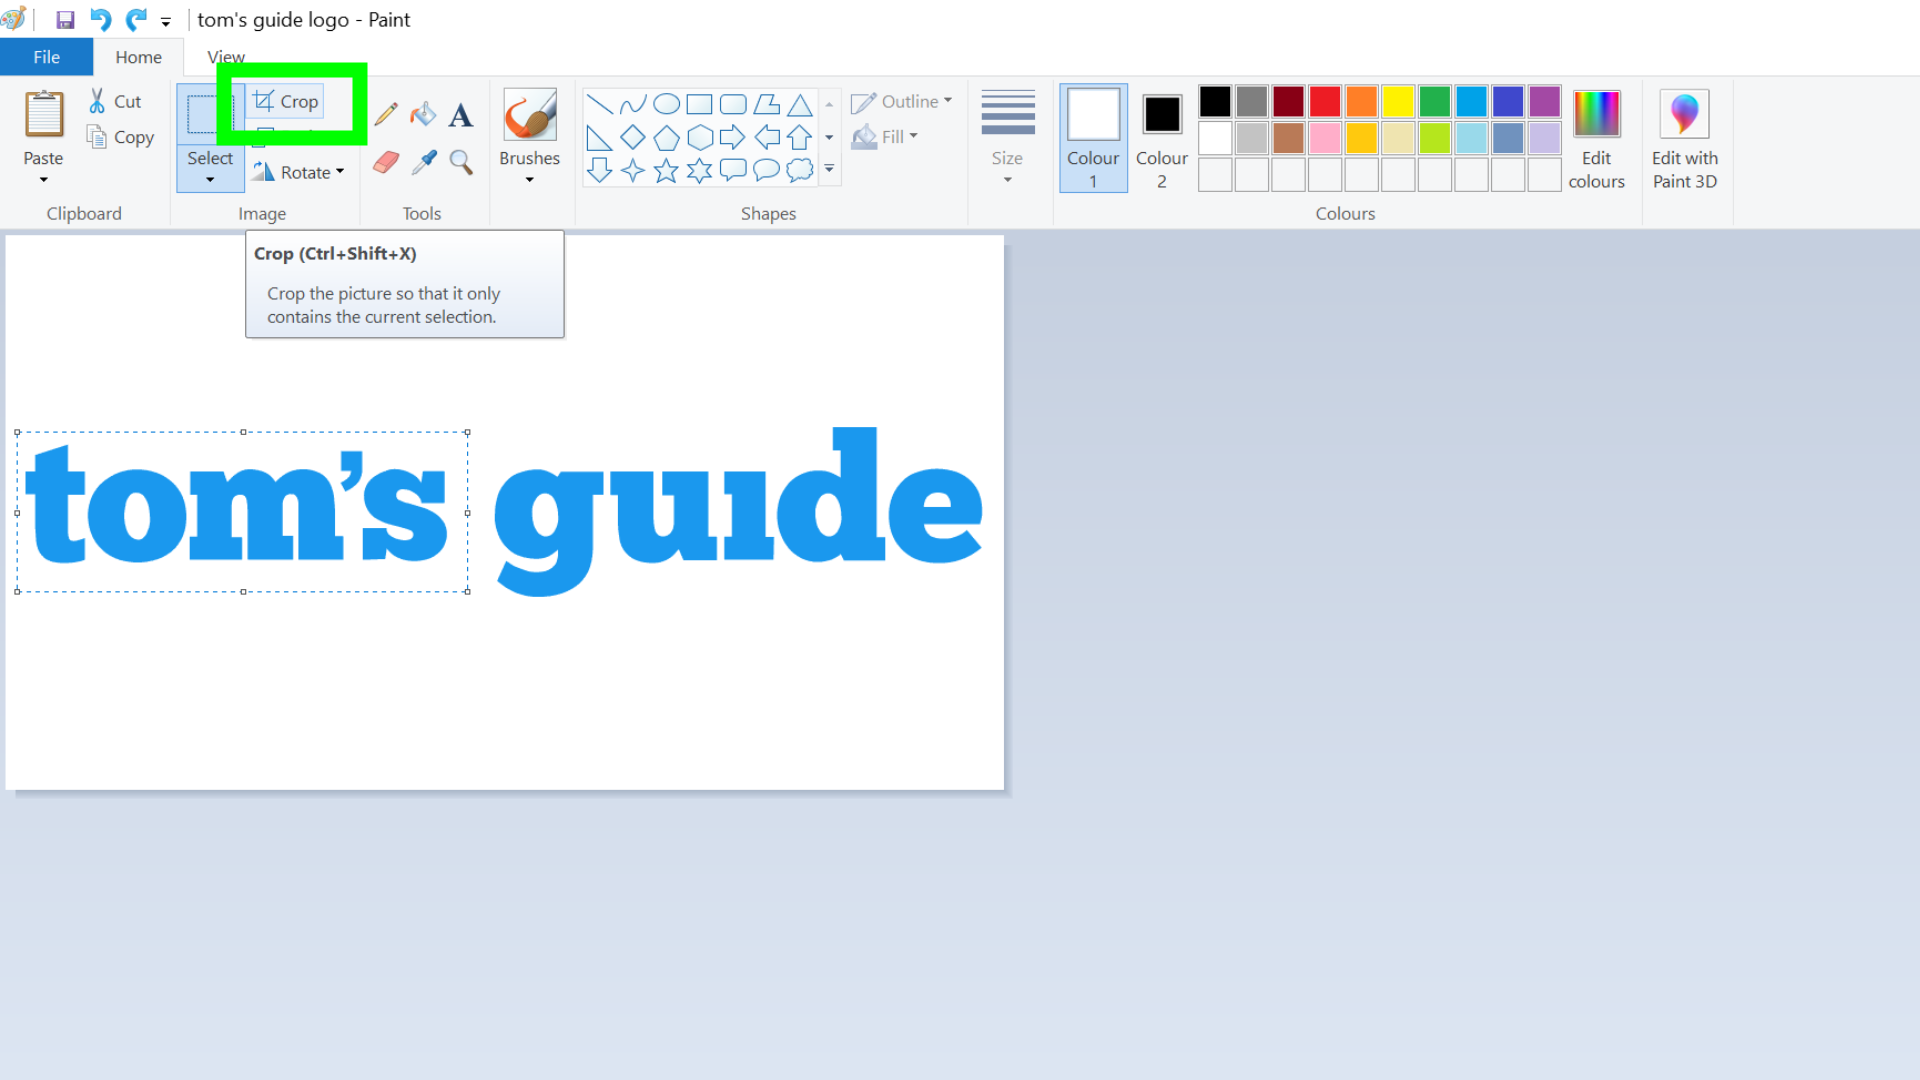
3. Then select “Crop” in the image toolbar at the top.
And the second way:
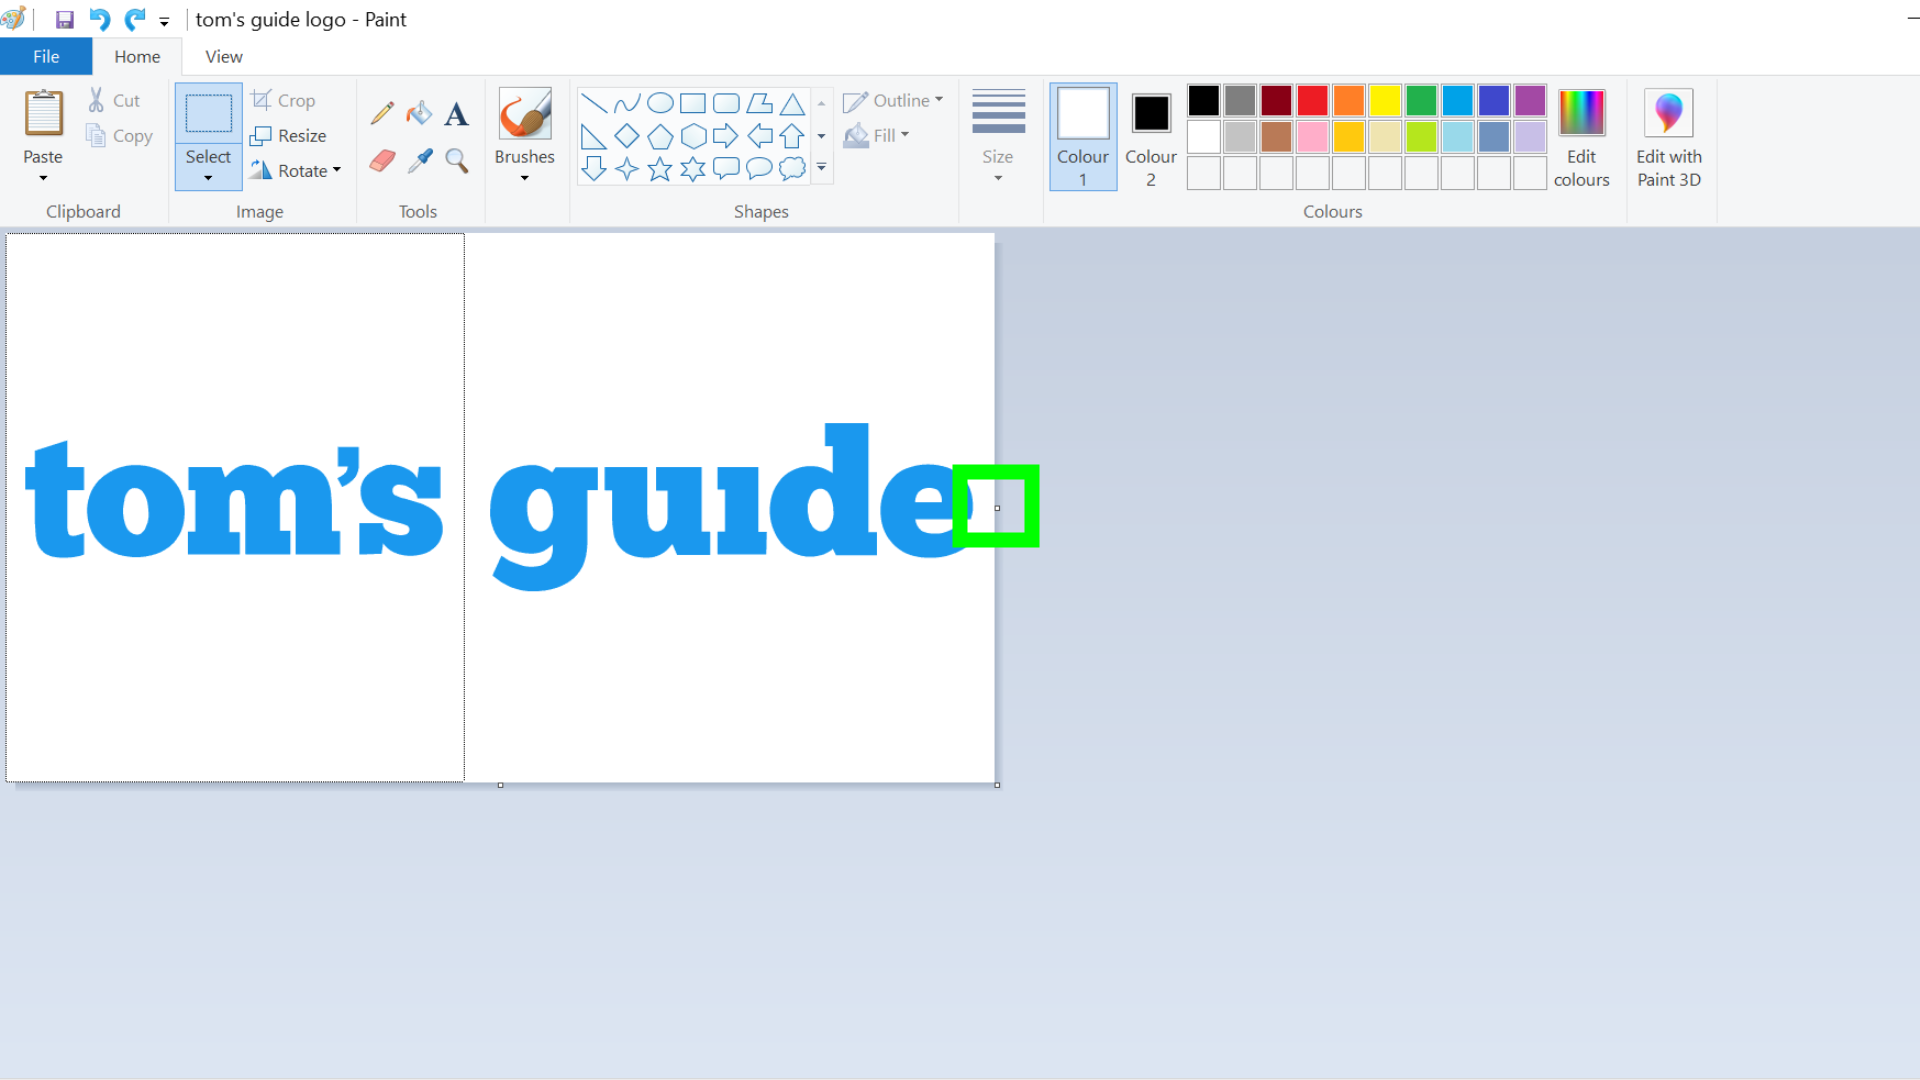
1. Click and drag the white boxes below and to the right of the image to crop out the parts you don’t need.
Keep in mind that after you let go of your mouse, you won’t be able to undo the crop by dragging the boxes back to where they were — you’ll have to click “Undo” at the very top of the window.
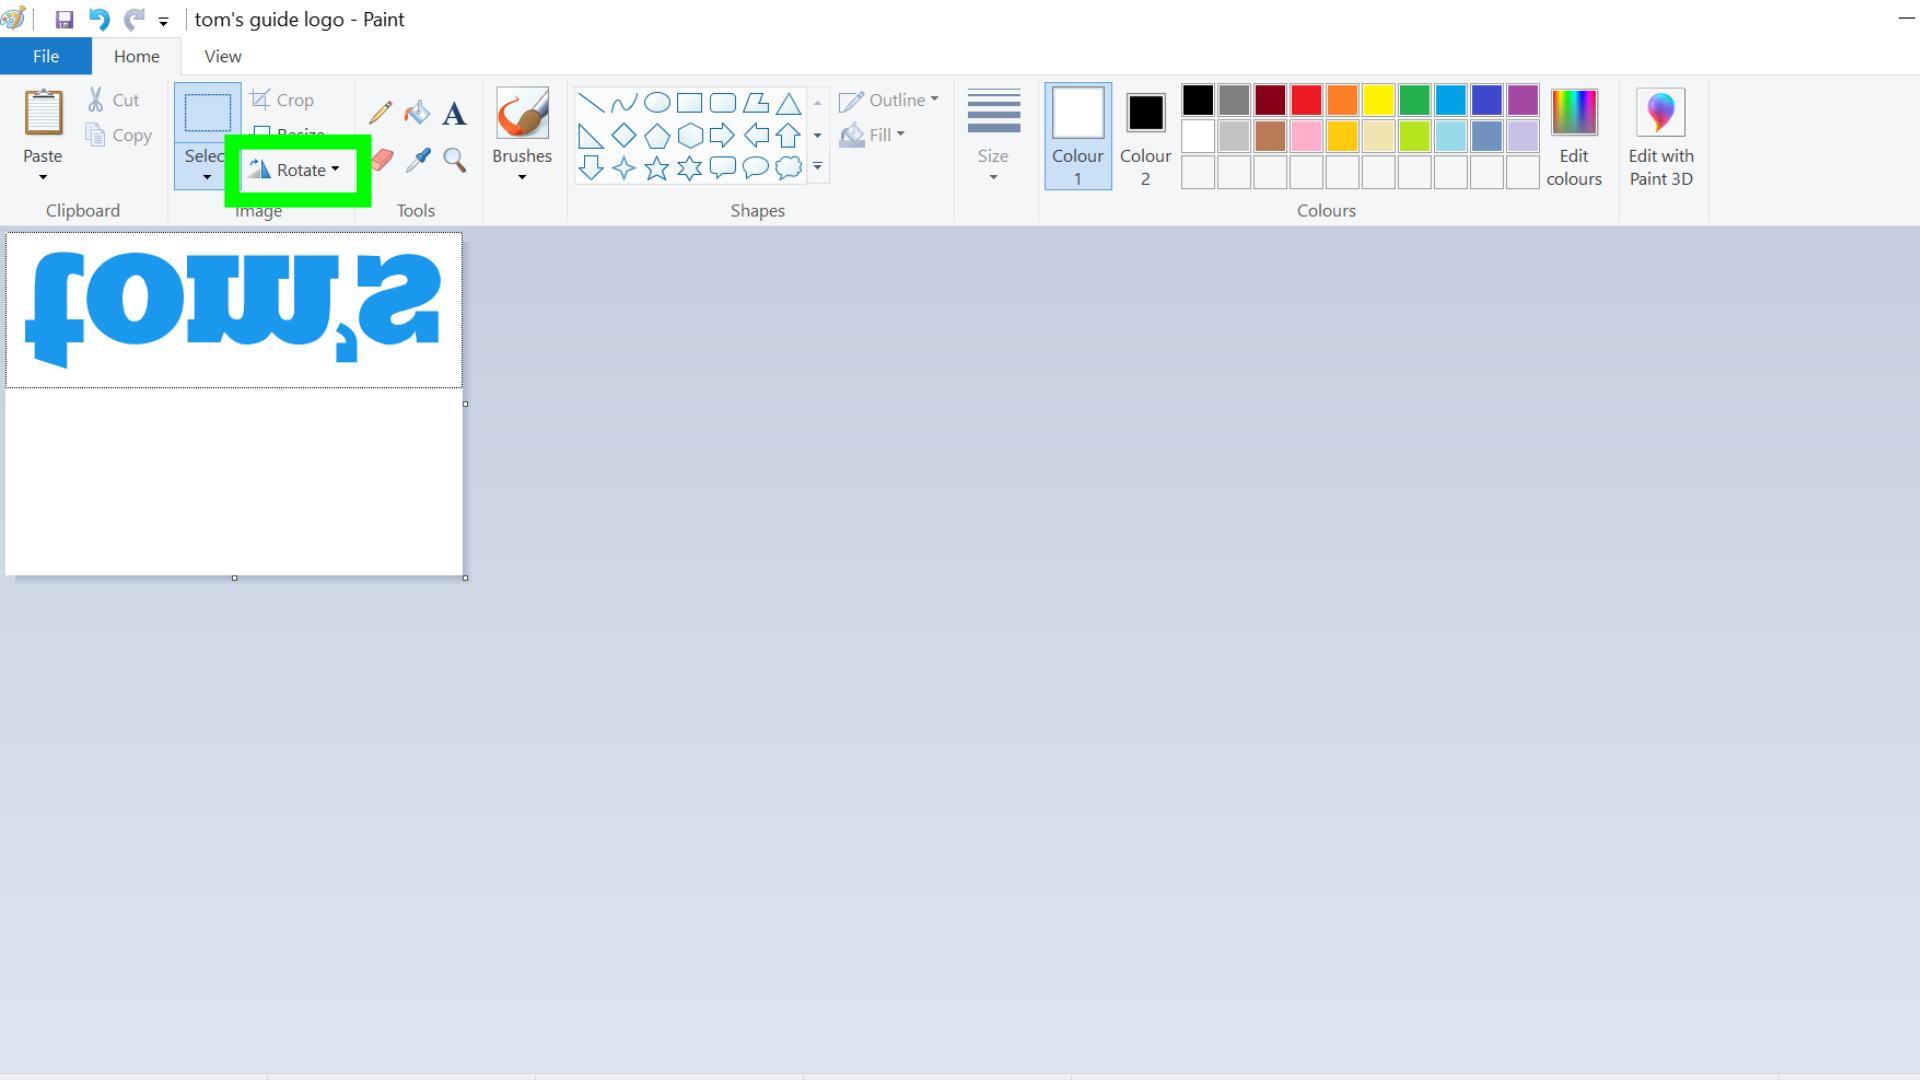
2. To crop the left and top sides of the image, you’ll have to flip the image — click “Rotate” in the image toolbar, and flip the image horizontally or vertically to be able to crop the right and top sides. Don’t forget to flip the image back to normal when you’re done.
How to edit images in Microsoft Paint - Add text
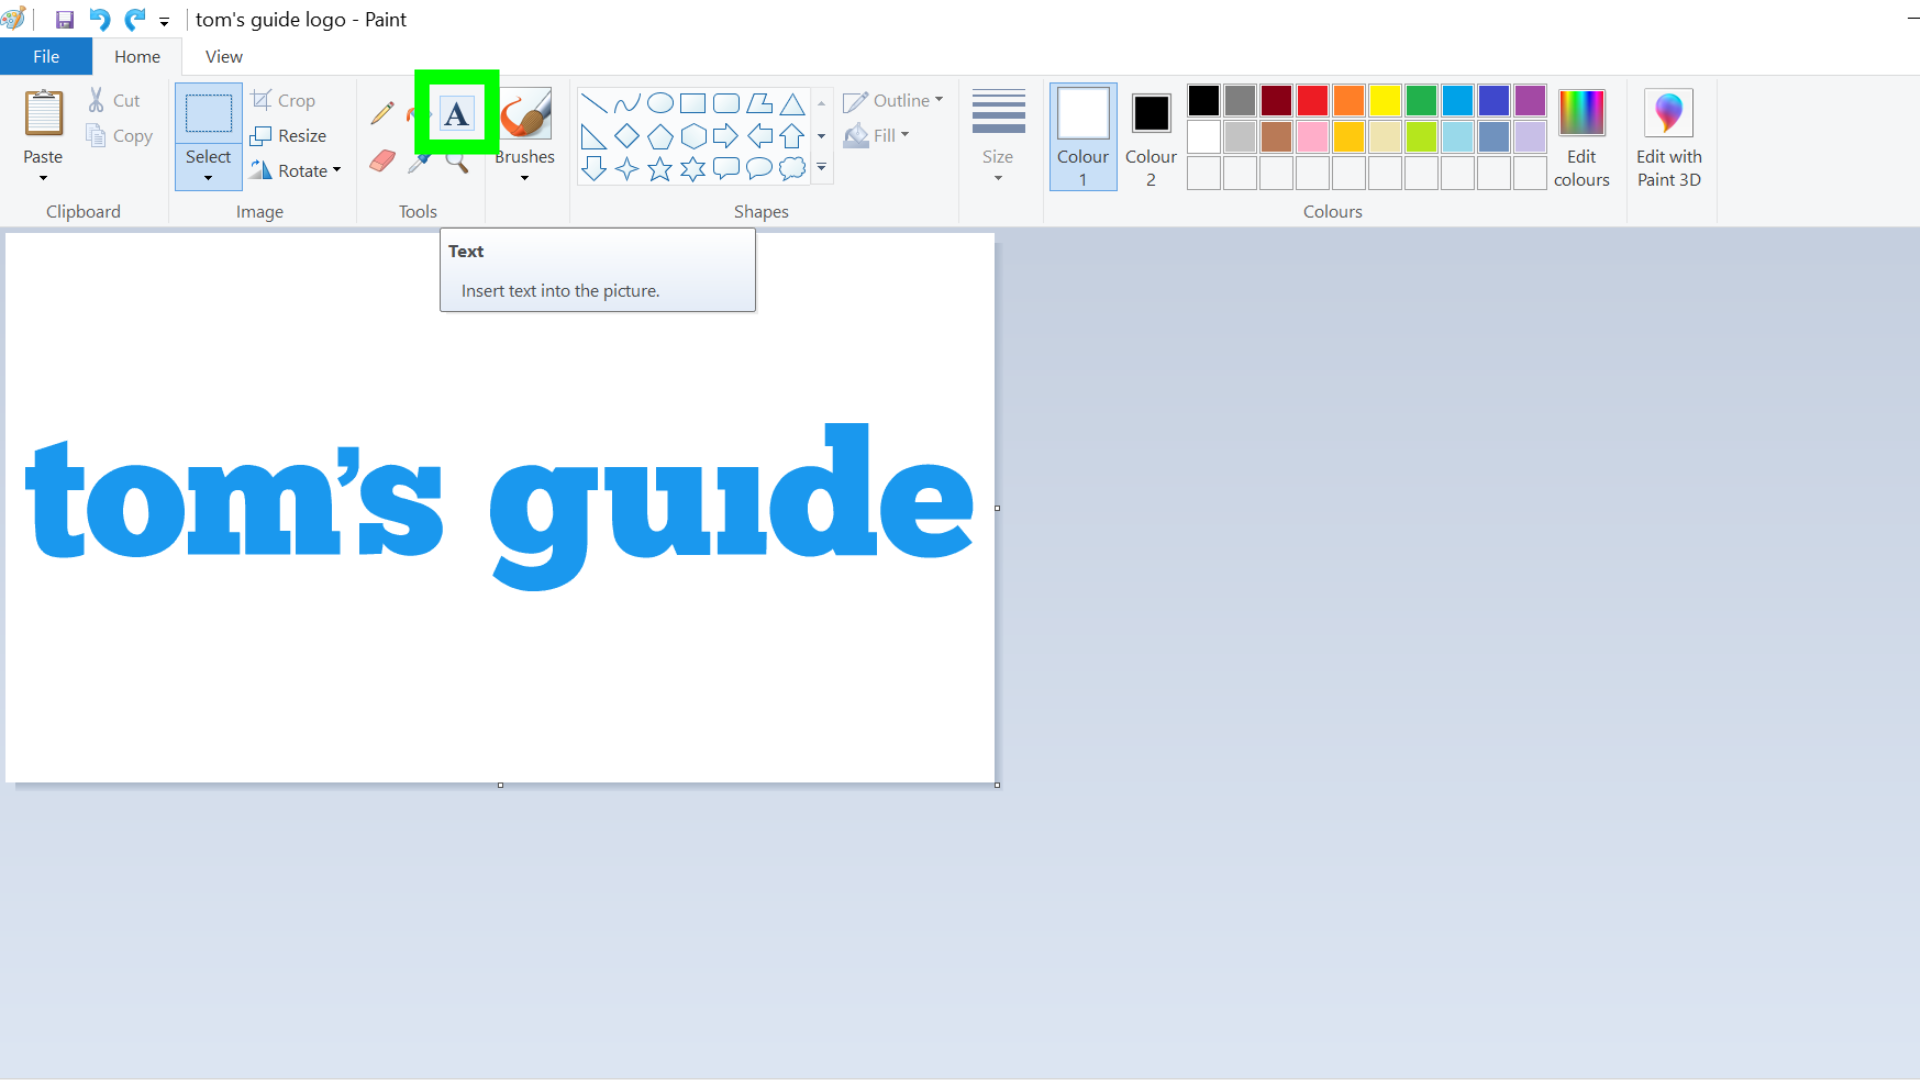
1. In the “Tools” section at the top of the window, select the “A” (text) icon.
2. Click where you want the text to appear.
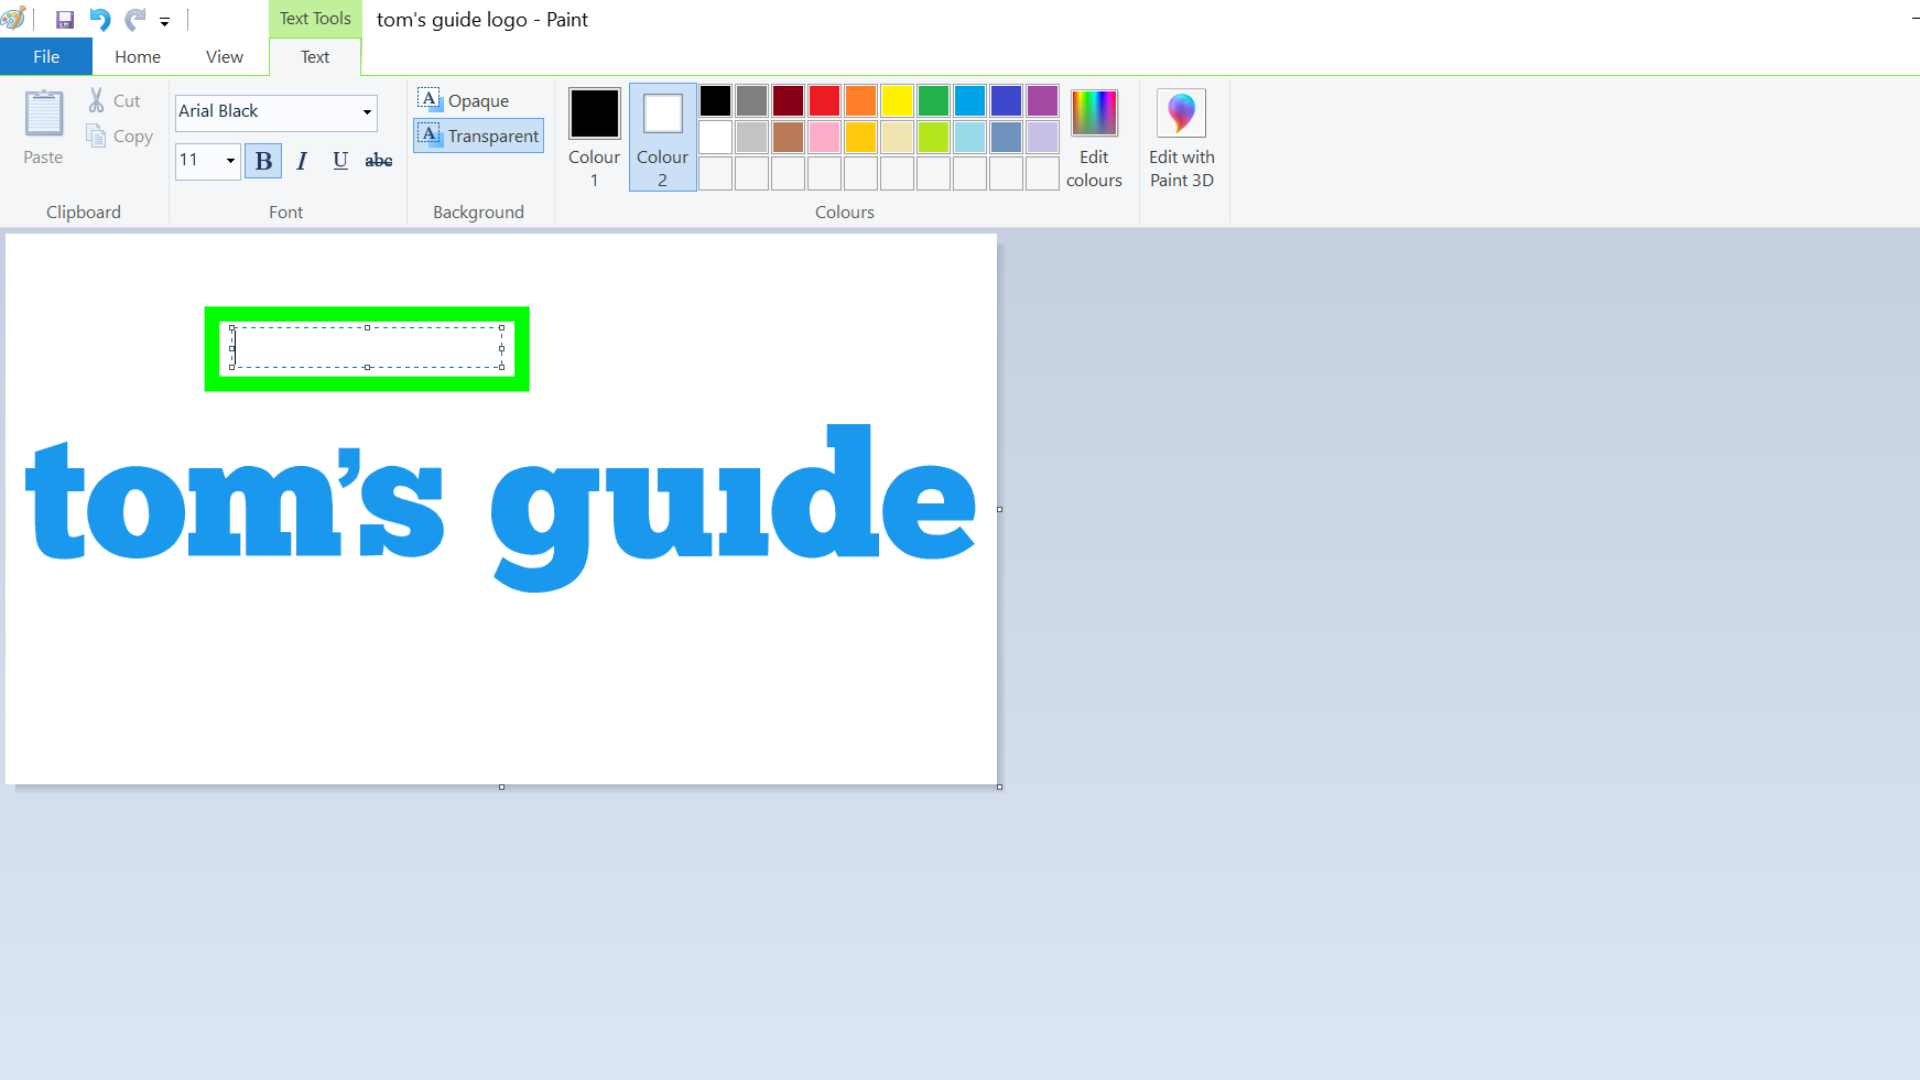
3. Choose the font, size, and color of the text using the icons at the top of the window.
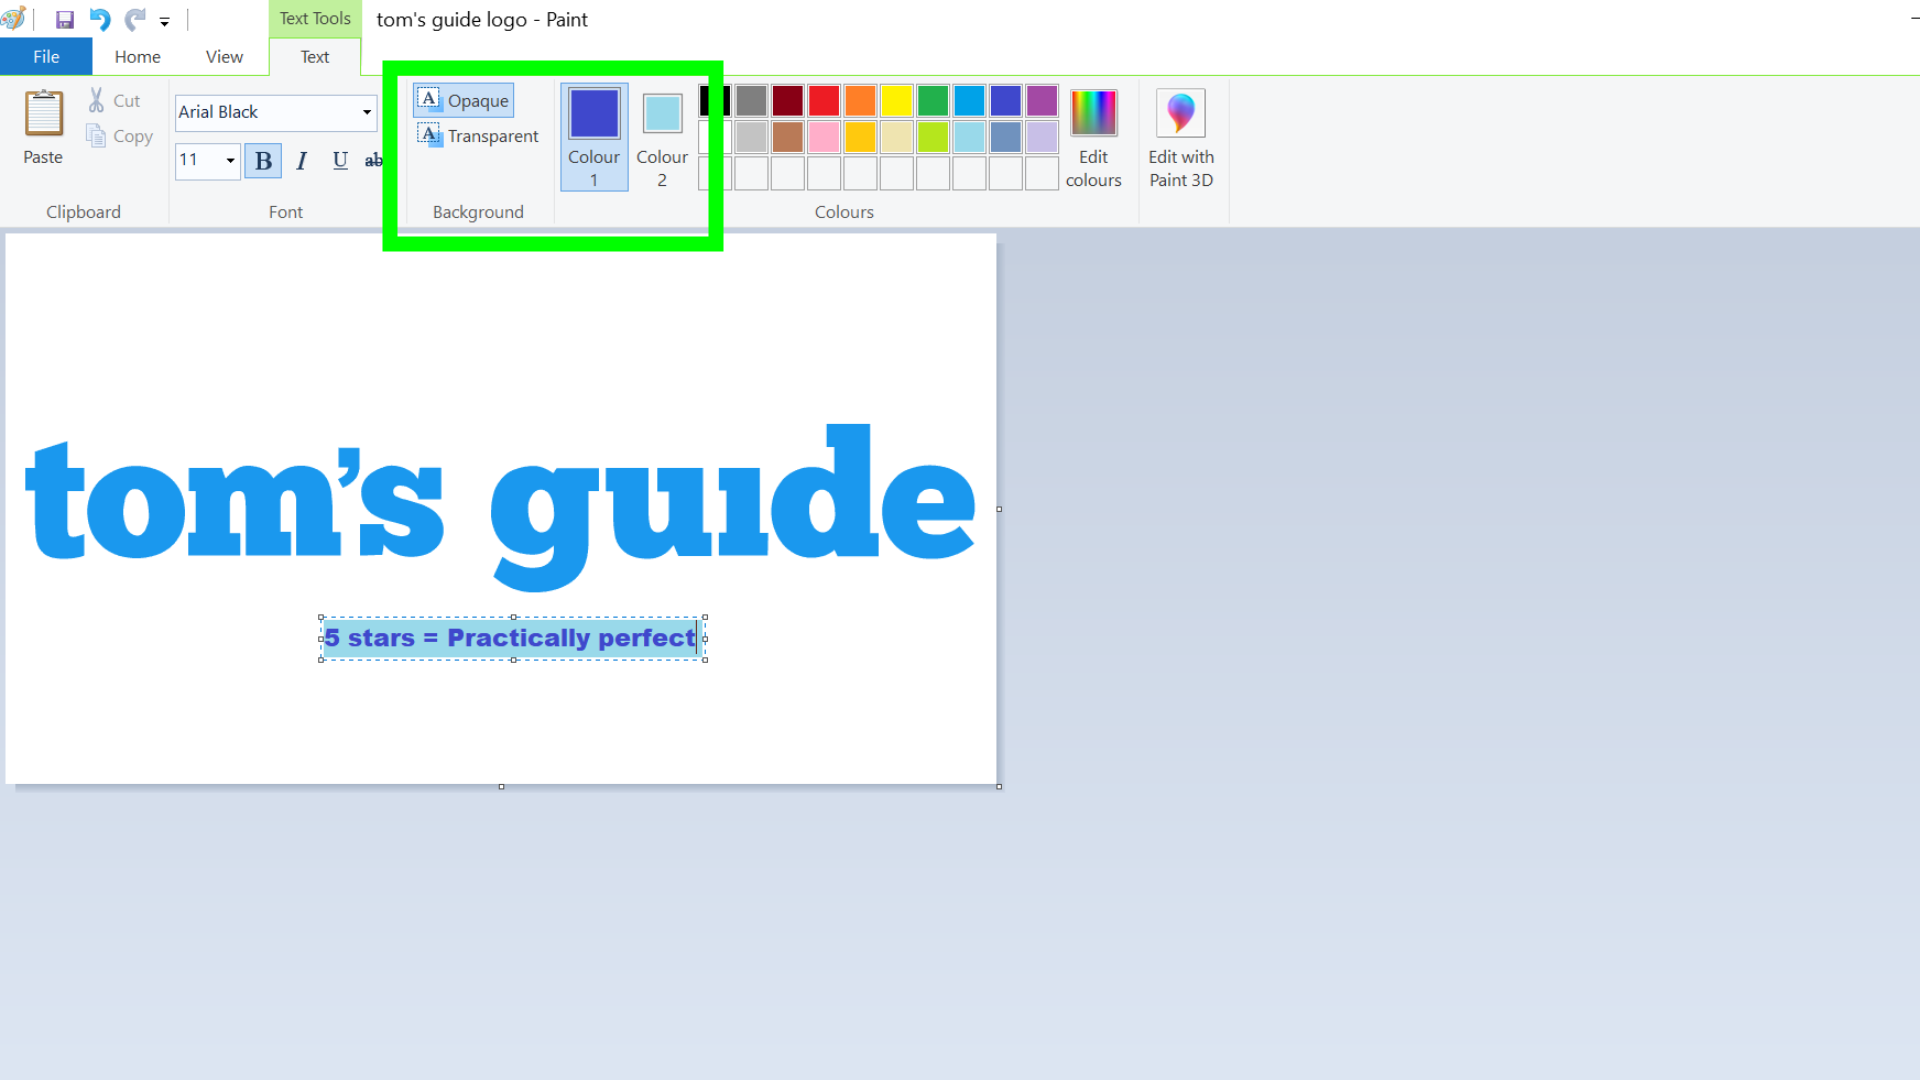
4. If you want the text to be on a colored background, select “Opaque” from the background tools. Click “Color 1” to change the color of the text, and “Color 2” to change the color of the background.
How to edit images in Microsoft Paint - Change the colors
Once you’ve mastered the basics, here’s a more advanced editing tip for you — you can select multiple areas at once that are all the same color, and change them to a new color, rather than repeatedly using the fill tool.
This can be handy if you need to change multiple areas that are all one color to another color, but keep in mind that it works best with simple images rather than photos where the amount of different colors in the image are very high.
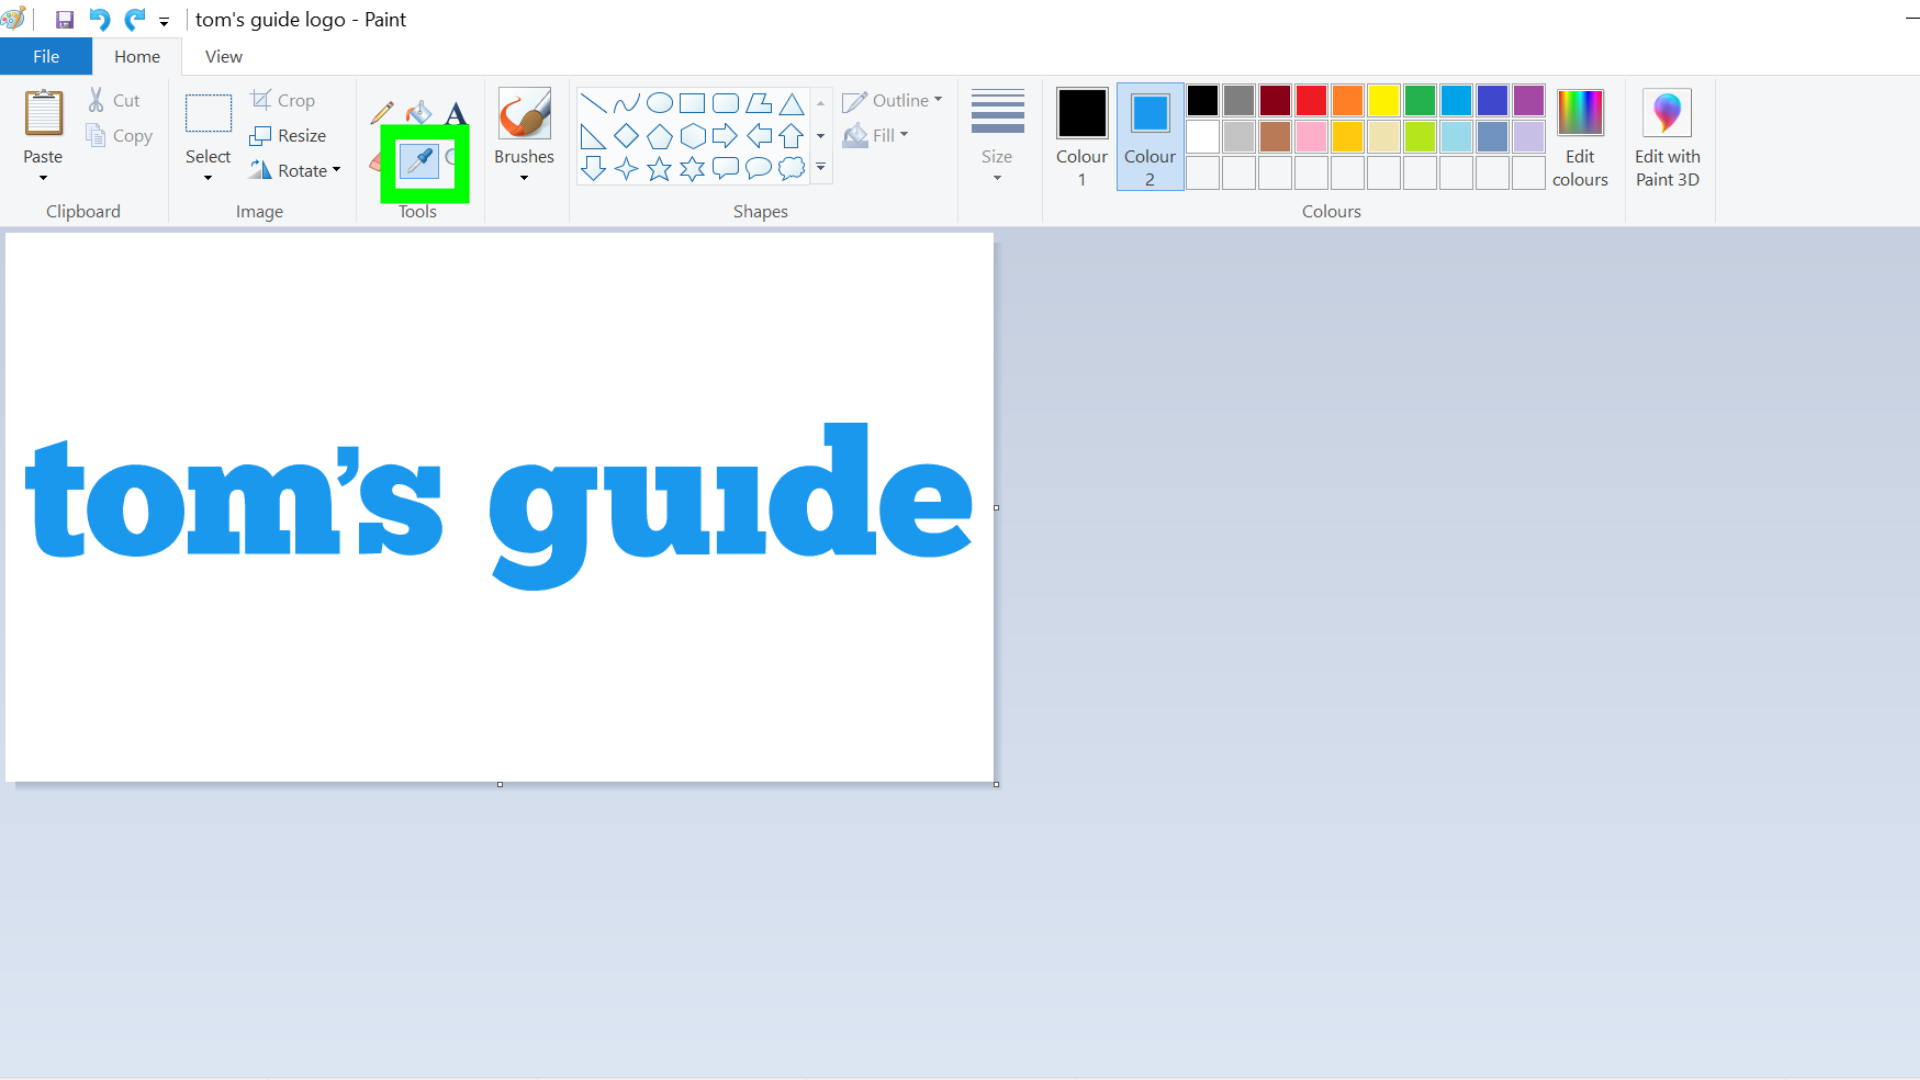
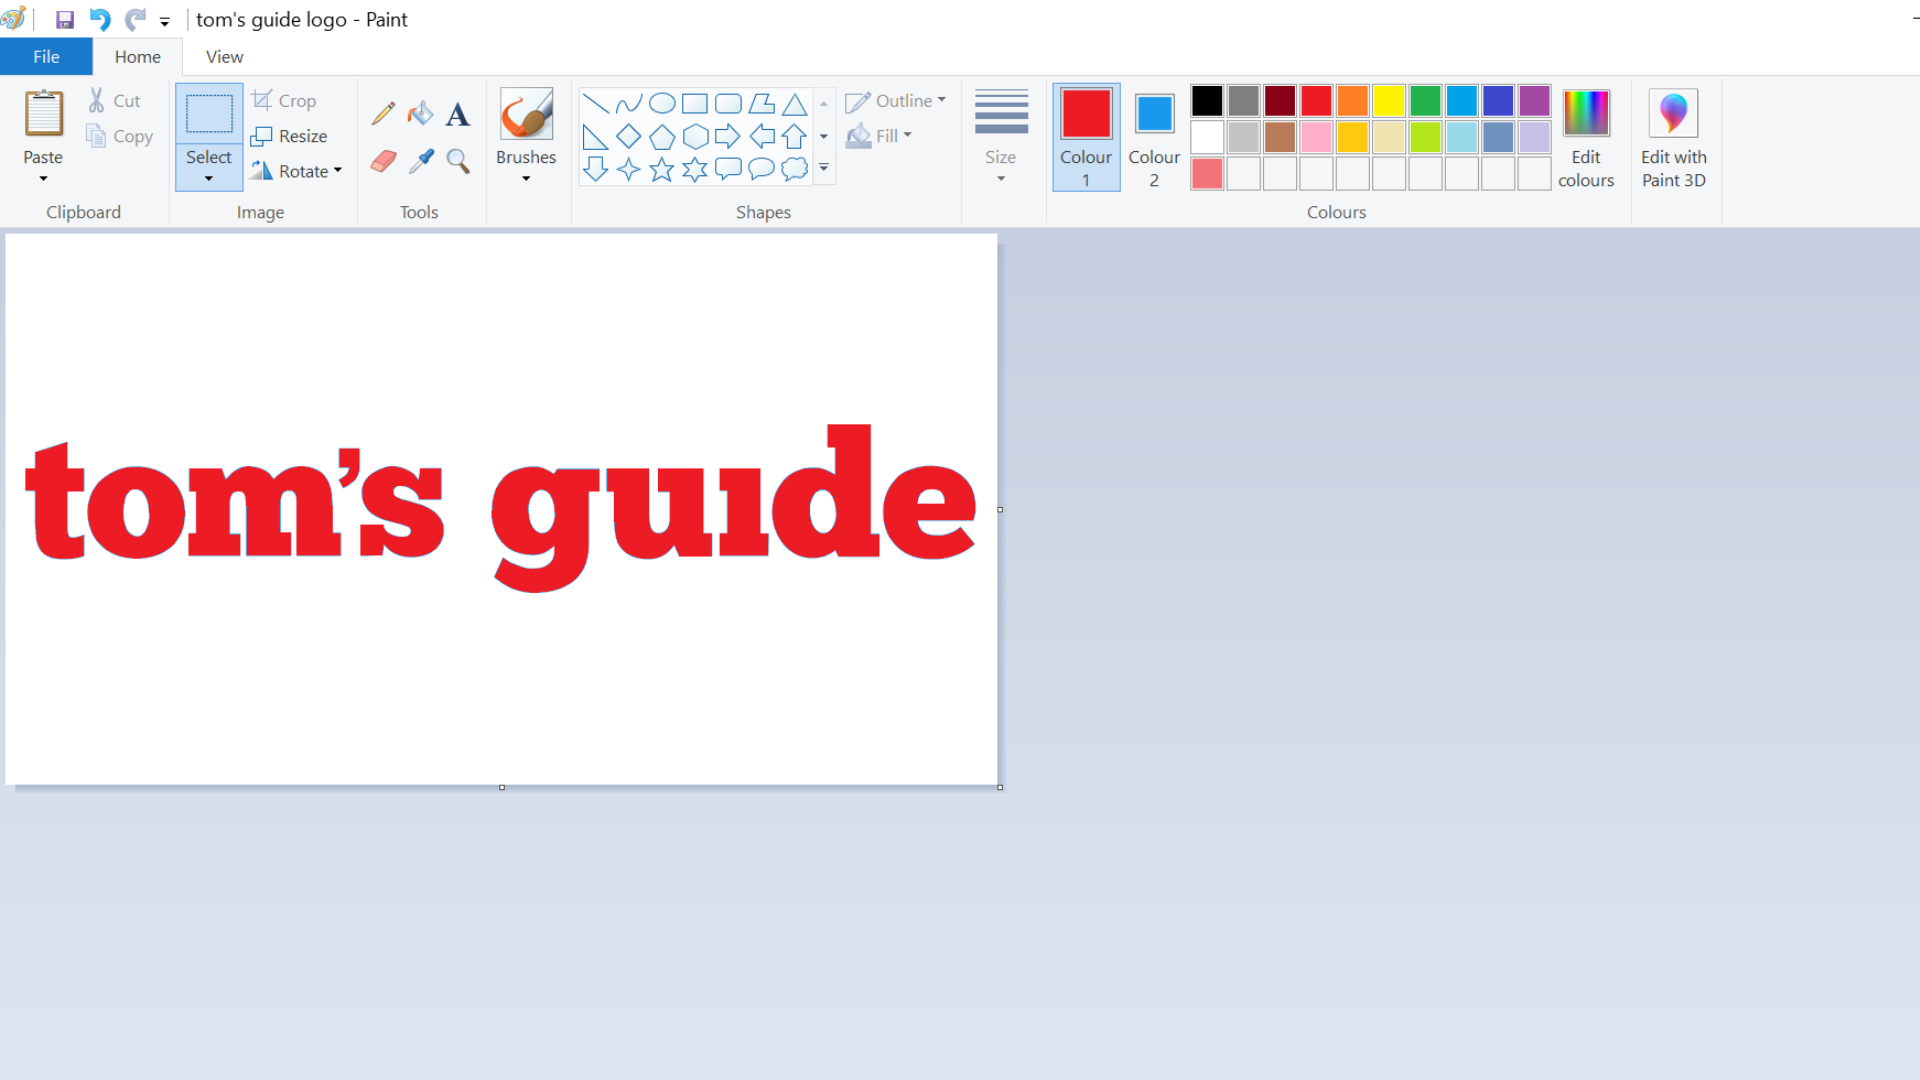
1. Use the eyedropper in the “Tools” section, and right-click the color you would like to change. This will set the color you would like to change as “Color 2."
2. Click “Color 1” and set it to what you want the new color to be.
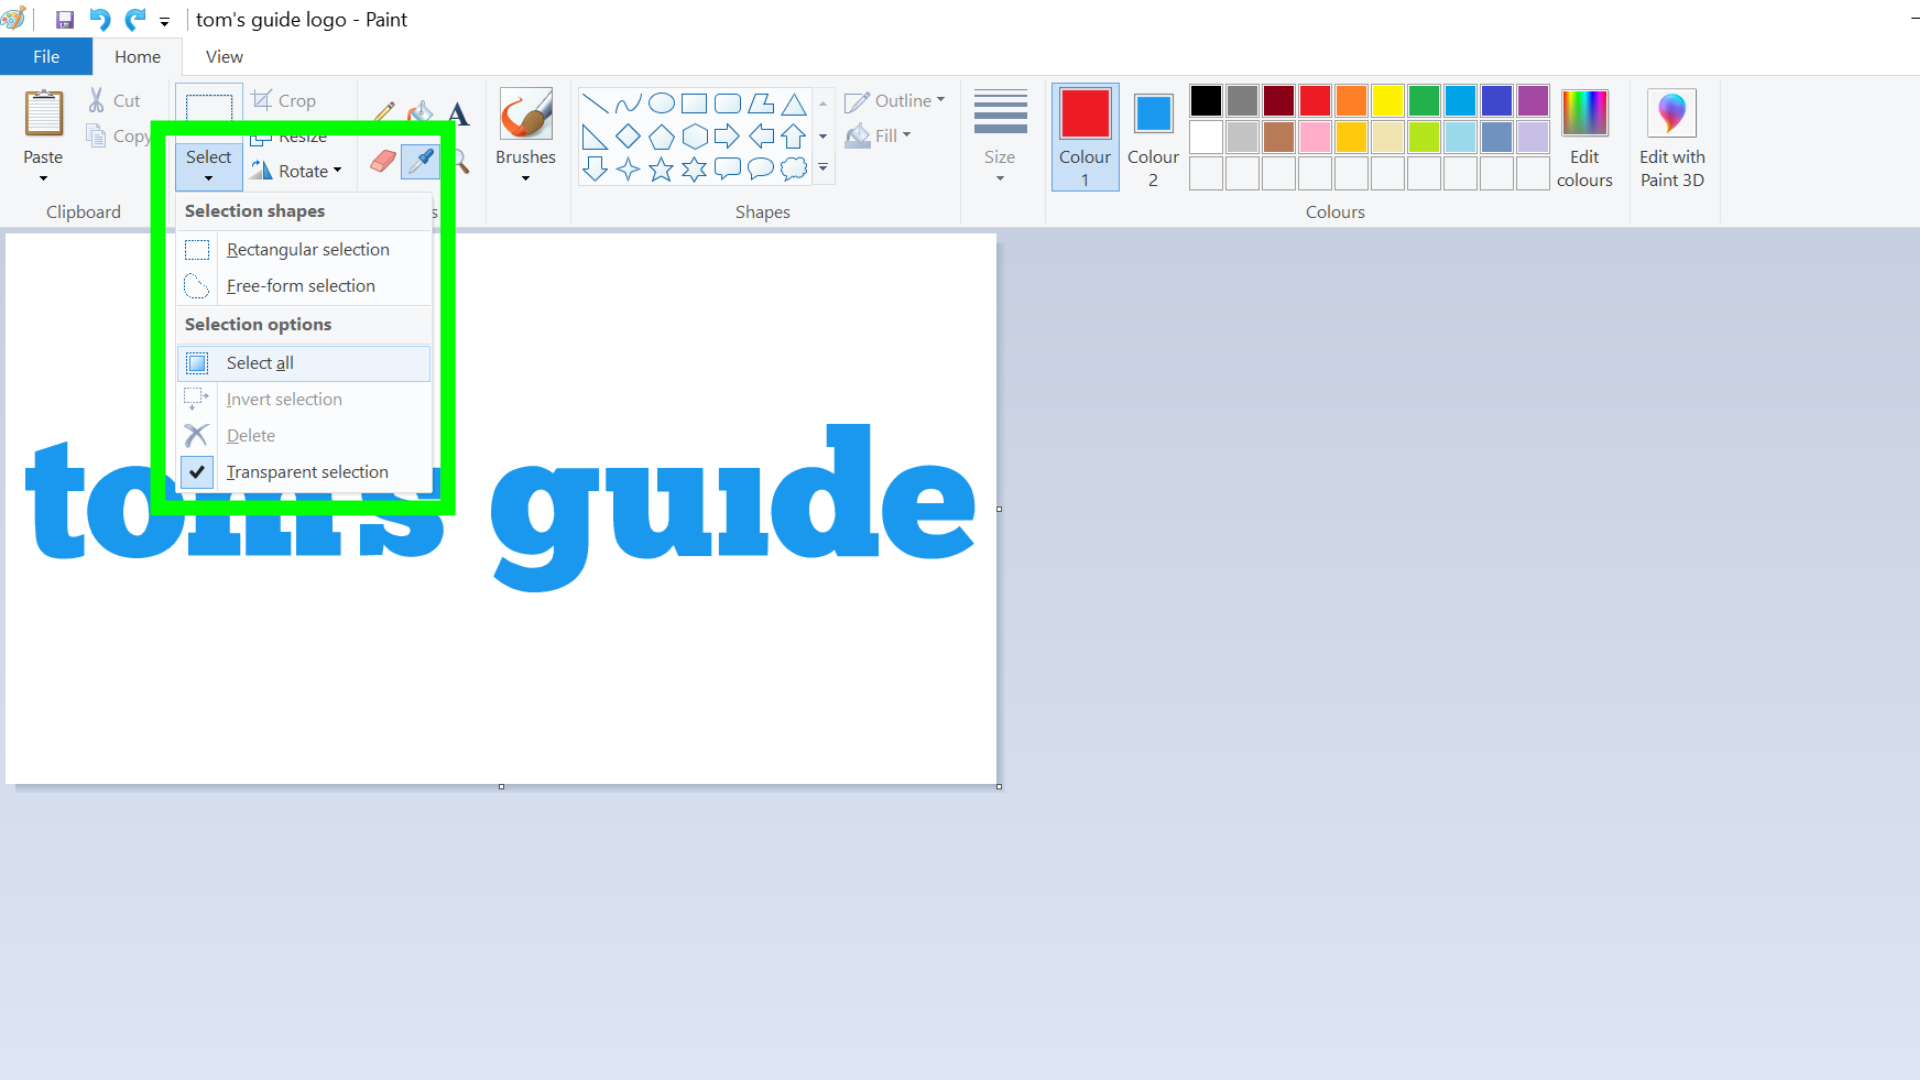
3. Open the “Select” drop-down menu, and make sure “Transparent selection” is turned on. Then click “Select all”.
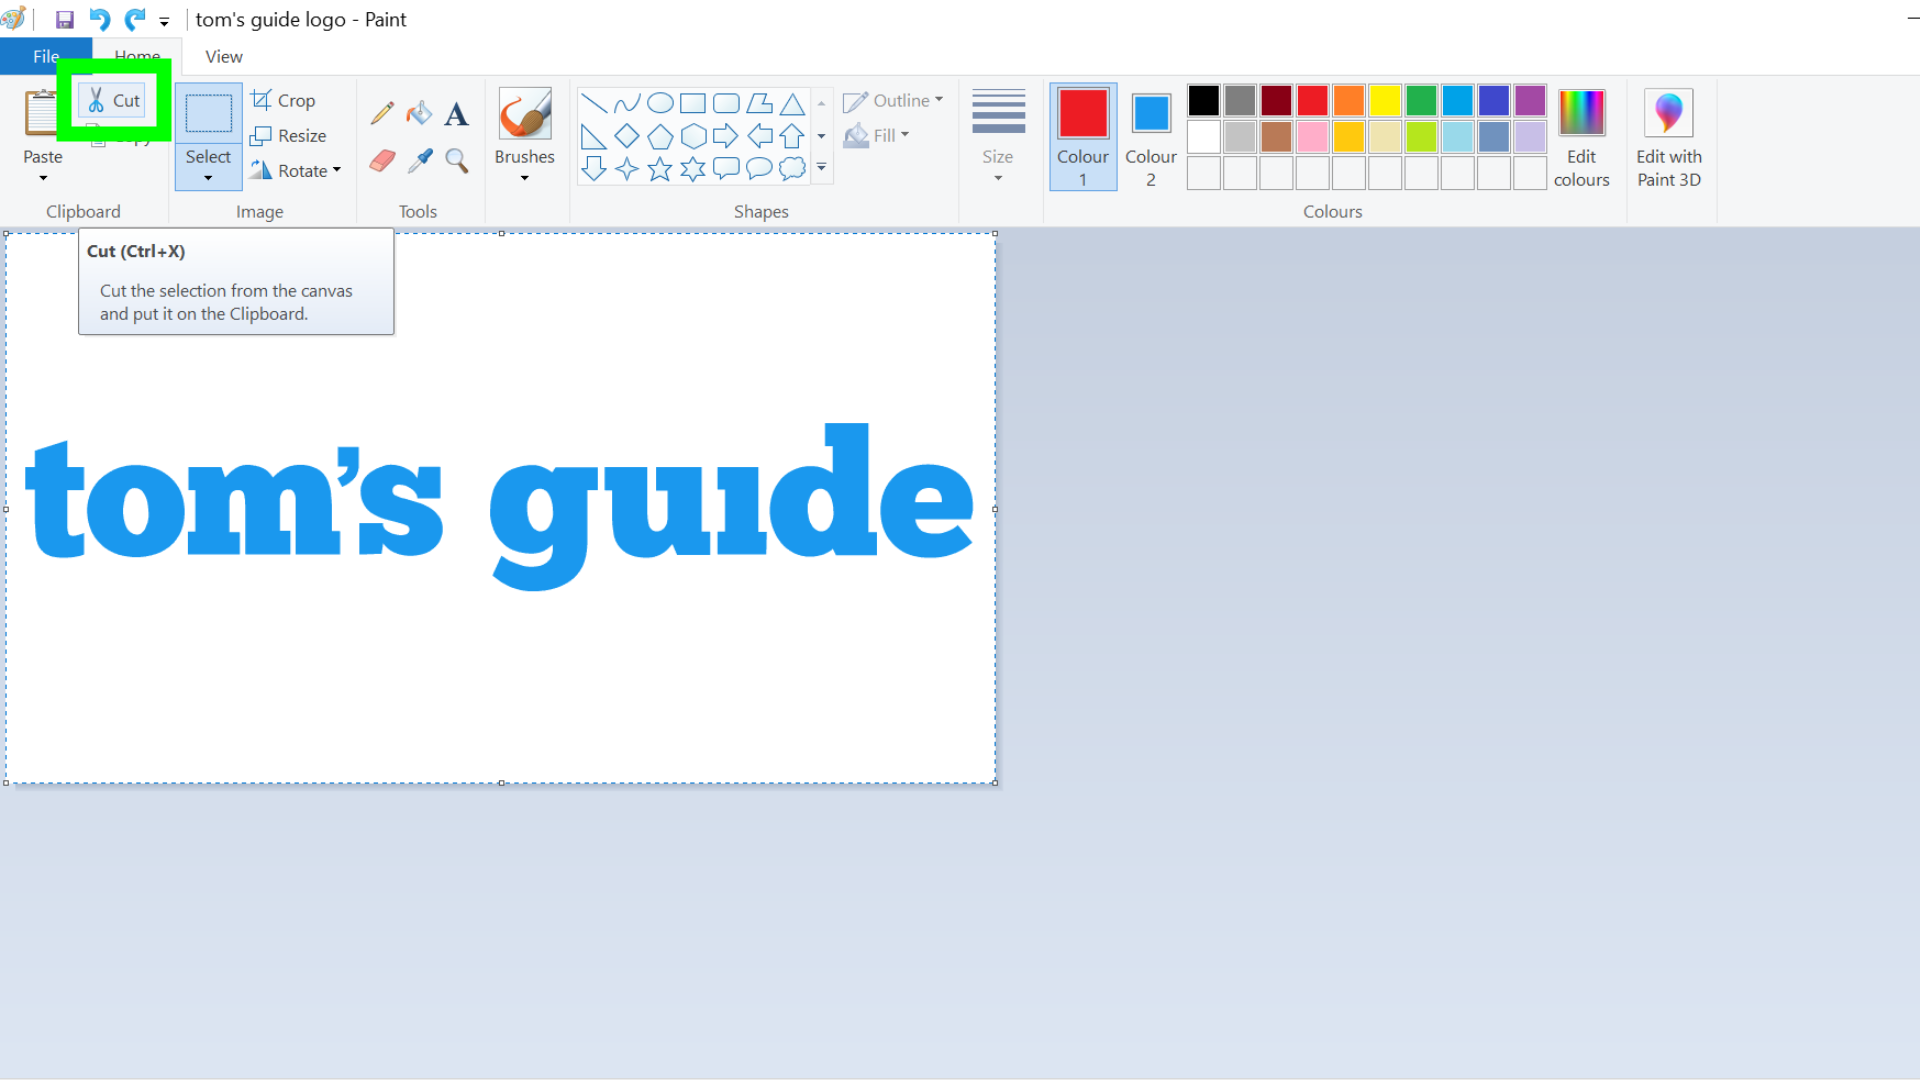
4. In the “Clipboard” section at the top of the window, select “Cut." This will turn the image to a solid background of whatever color you had “Color 2” set as.
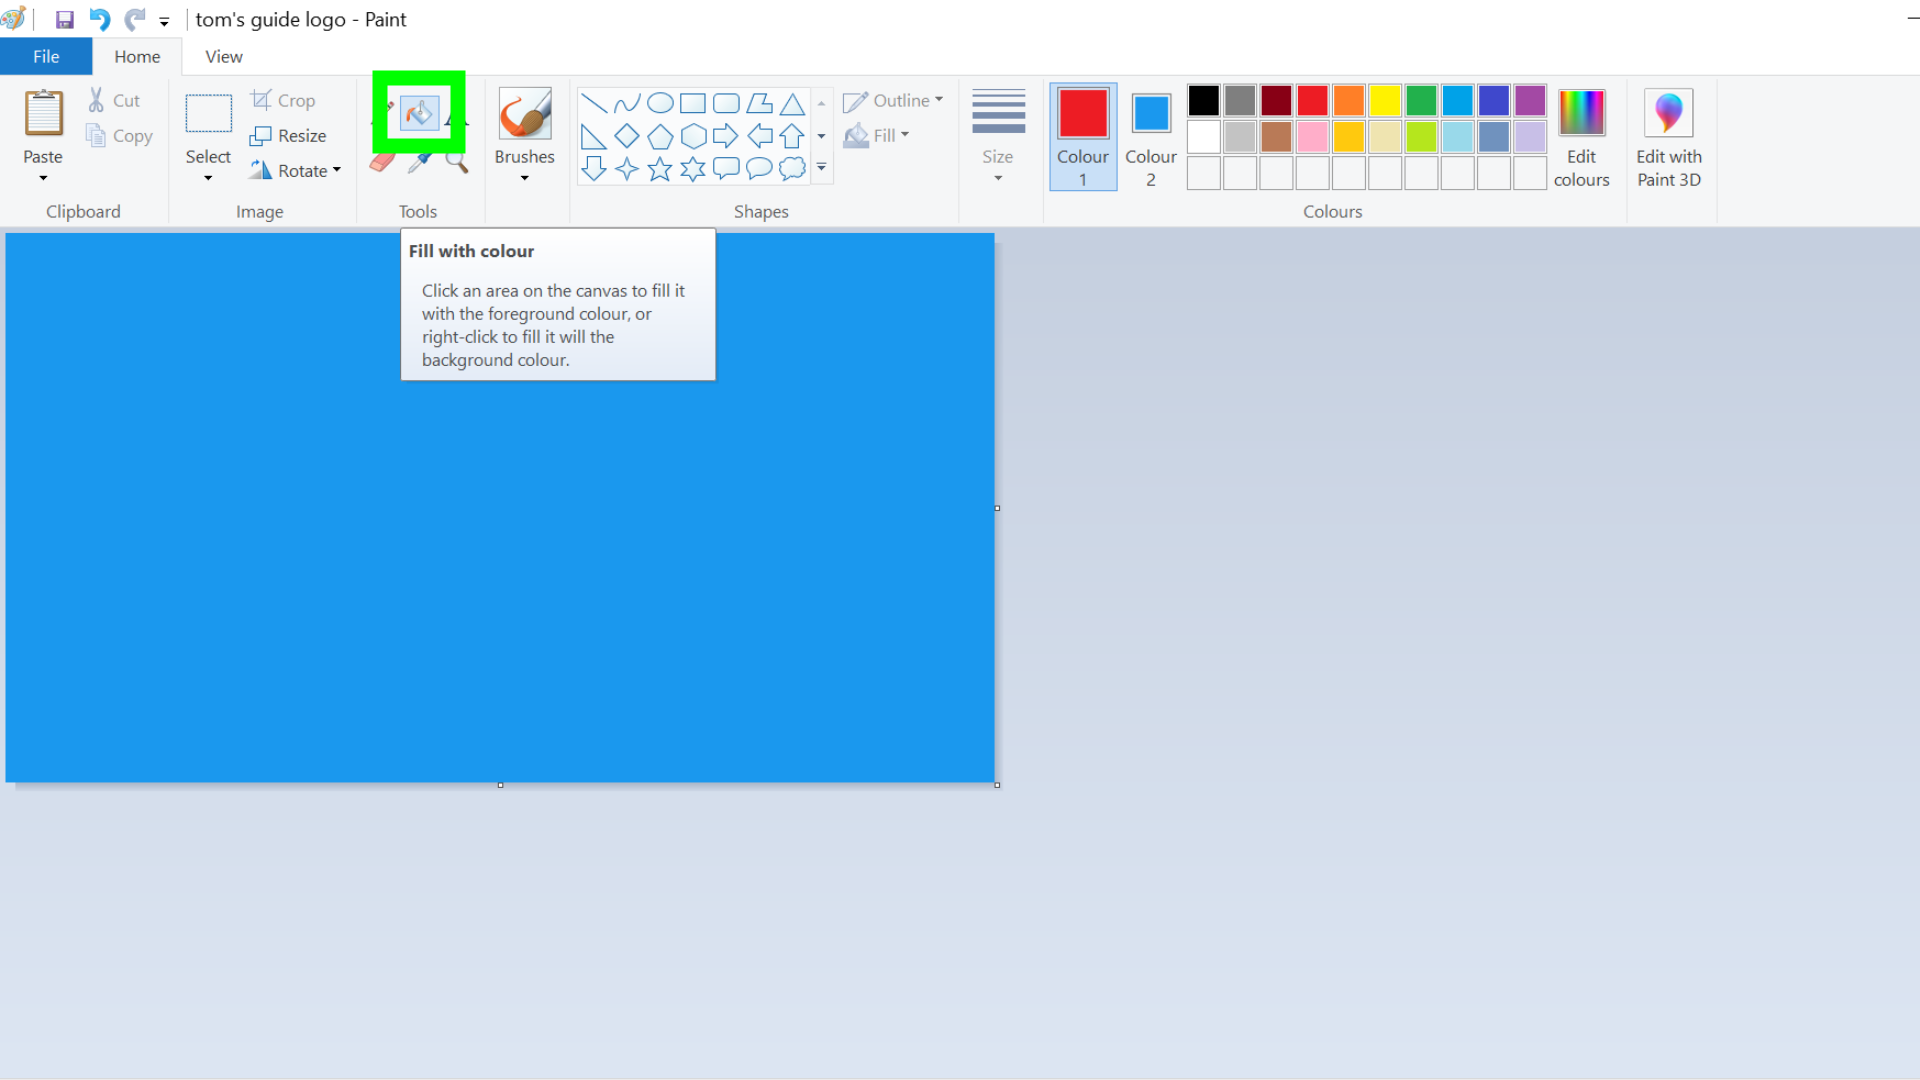
5. In the “Tools” section, select the paint bucket tool, and left-click the canvas to fill it with the color you set as “Color 1”.
6. Now, in the “Clipboard” section, click “Paste” to bring your image back onto the canvas. The color you had set as “Color 2” will be replaced with “Color 1”.
If you need more help using Microsoft software, we have plenty of tutorials that will help you. Check out how to track changes in Microsoft Word, how to sign a Microsoft Word document, and how to convert a PDF to Microsoft Word.
We’ll also show you how to convert a PDF to Excel, and how to use VLOOKUP in Microsoft Excel.
- More: How to remove the background from an image
- The best free video editing software in 2021
- The best photo editing apps in 2021
- How to delete Google Photos permanently

Millie is a Deals Editor at Tom's Guide specializing in deals content. She also covers the latest tech news and and creates how-to articles about everything from phones, streaming devices, and headphones to apps and video games. In her spare time, she enjoys reading, gaming on her Nintendo Switch and creating digital art.
 Club Benefits


