Here at Tom’s Guide our expert editors are committed to bringing you the best news, reviews and guides to help you stay informed and ahead of the curve!
You are now subscribed
Your newsletter sign-up was successful
Want to add more newsletters?
Daily (Mon-Sun)
Tom's Guide Daily
Sign up to get the latest updates on all of your favorite content! From cutting-edge tech news and the hottest streaming buzz to unbeatable deals on the best products and in-depth reviews, we’ve got you covered.

Weekly on Thursday
Tom's AI Guide
Be AI savvy with your weekly newsletter summing up all the biggest AI news you need to know. Plus, analysis from our AI editor and tips on how to use the latest AI tools!

Weekly on Friday
Tom's iGuide
Unlock the vast world of Apple news straight to your inbox. With coverage on everything from exciting product launches to essential software updates, this is your go-to source for the latest updates on all the best Apple content.

Weekly on Monday
Tom's Streaming Guide
Our weekly newsletter is expertly crafted to immerse you in the world of streaming. Stay updated on the latest releases and our top recommendations across your favorite streaming platforms.
Join the club
Get full access to premium articles, exclusive features and a growing list of member rewards.
There was a time when the idea that you could take a photo with your phone was an outlandish absurdity. These days, our phones usually are our only cameras, and we use them day in, day out. While the best iPhones are all capable of delivering outstanding snapshots, there's still more you can do to make them better.
But while many of us might simply snap a photo and share it (or, if you're like me, forget about it until an algorithm some day pops it up and you try to remember why you took it in the first place), sometimes you want to take that extra step to adjust an image after the fact, whether it's to make it look closer to what you'd envisioned or to fix something that went wrong.
You don't have to look far. Apple's Photos app in iOS 26 boasts a whole world of tools to turn that image from "almost there" to, well, picture perfect. I'd argue they're just as effective as the best photo editing apps. They range from simple tricks for even the most novice photo editor — myself included — to more advanced features that allow the kind of detailed adjustments professionals employ.
Find your signature look with Photographic Style

Style is a personal thing, and that's why Apple offers a slew of its photographic styles to choose from. While this feature has been around since the iPhone 13, Apple updated it for the iPhone 16 to make styles editable after the fact. Although you can set a default Photographic Style (Settings > Camera > Photographic Style), you can also change any individual photo if you feel a different style would suit it better — or simply adjust the style you're already using.
Just know that on the iPhone 16 and later, Apple's Photographic Styles replaces its previous Filters option, but if you view a photo taken on an earlier iPhone, you'll see Filters instead.
To do so, select any snapshot in the Photos app and tap the edit button in the toolbar (the one with three horizontal sliders). Your default style is already selected; if you want to just adjust the intensity of that effect, tap on the square of dots. You'll get an interface where you can both adjust the tone and color by dragging around the highlighted dot, as well as the "palette" (or how strongly the effect is applied to your image) by using the slider at the bottom. If you ever want to jump back to your original settings, just hit the Undo button at the top.
If you'd like to change the style altogether, the main Styles editing interface lets you swipe to the left or right to choose a different one, whether it's an option that highlights the undertones like Bright or Cool Rose, or one that conveys a more striking mood like Vibrant or Stark Black & White. Any of those can be tweaked in the same way, by tapping on it and adjusting the tone, color, and palette.
Get instant access to breaking news, the hottest reviews, great deals and helpful tips.
If all of that seems overwhelming, just remember what I said: style is a personal thing. There's no wrong answer, just make your image look the way you like it.
A memory with Live Photos
Having a small kid in my house, I find Live Photos to be one of Apple's secret joys. It takes a static moment in time and brings it to life, reminding you of the context of those moments and adding an entirely new dimension of animation and sound.
But this feature has an extra benefit because it captures before and after what you see as the photo. Apple's algorithm attempts to pick the best frame to show as the photo itself, but you can choose any frame from the Live Photo if there's another where you prefer the composition or maybe just get a better expression from your subject.
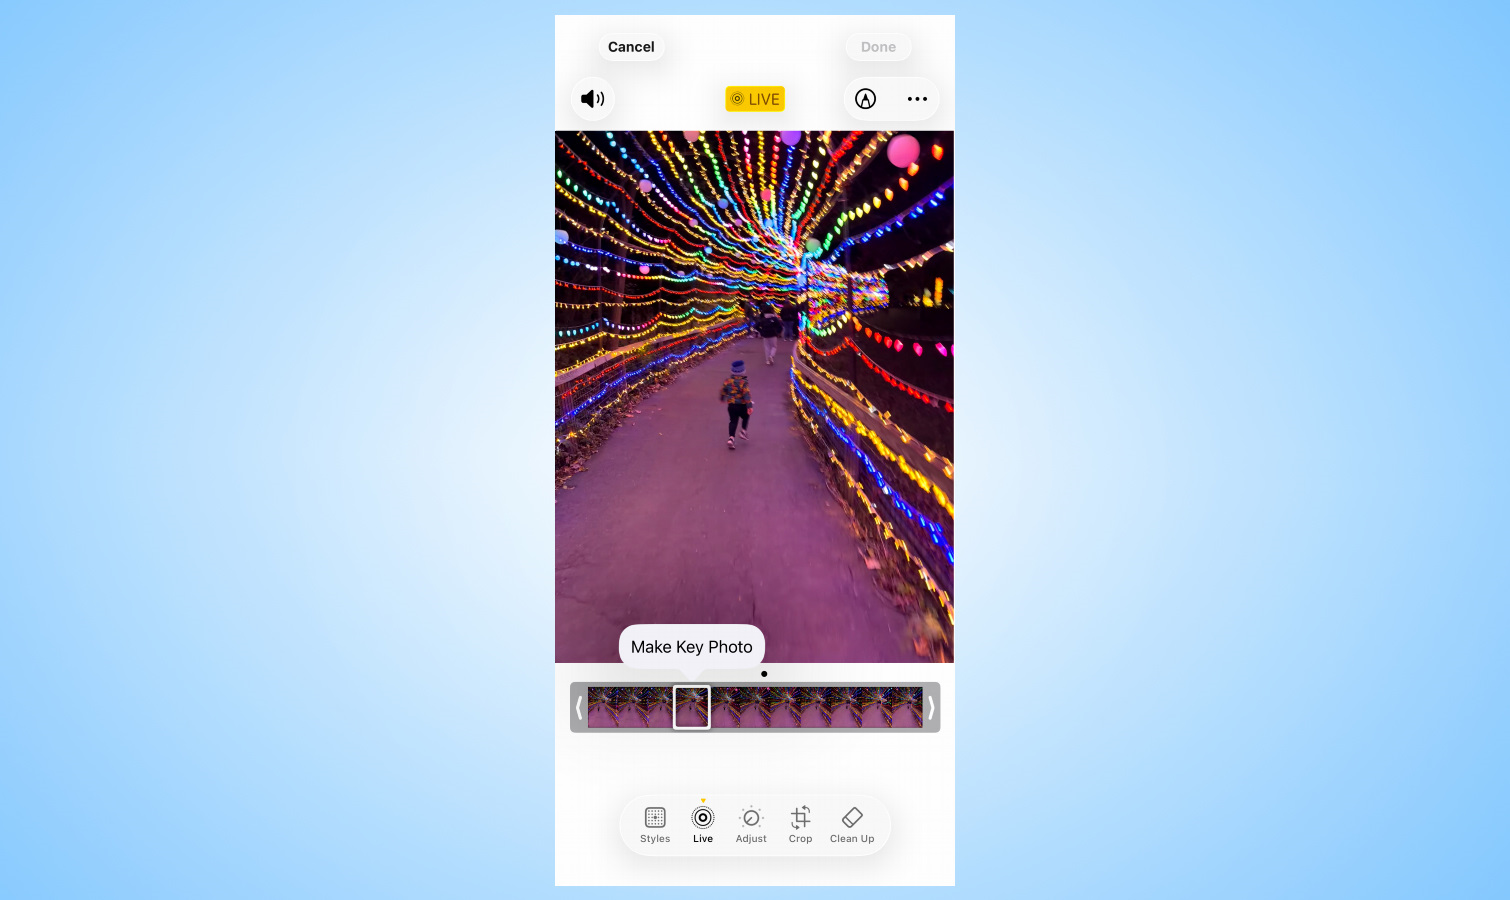
In the photo editing interface, tap the Live button on the bottom toolbar and you'll see a timeline of the entire Live Photo. Dragging the handles on either side of the timeline lets you trim the video, if you want, but what you're actually looking for here is the little dot over the timeline, showing which frame is being used as the key photo.
If there's another frame you prefer, scrub through the video using your finger until you find it. When you lift your finger you'll see a button pop up labeled "Make Key Photo." Tap that and whatever frame you've selected will now be displayed as the photo in your library instead.
Using loop, bounce, and long exposure
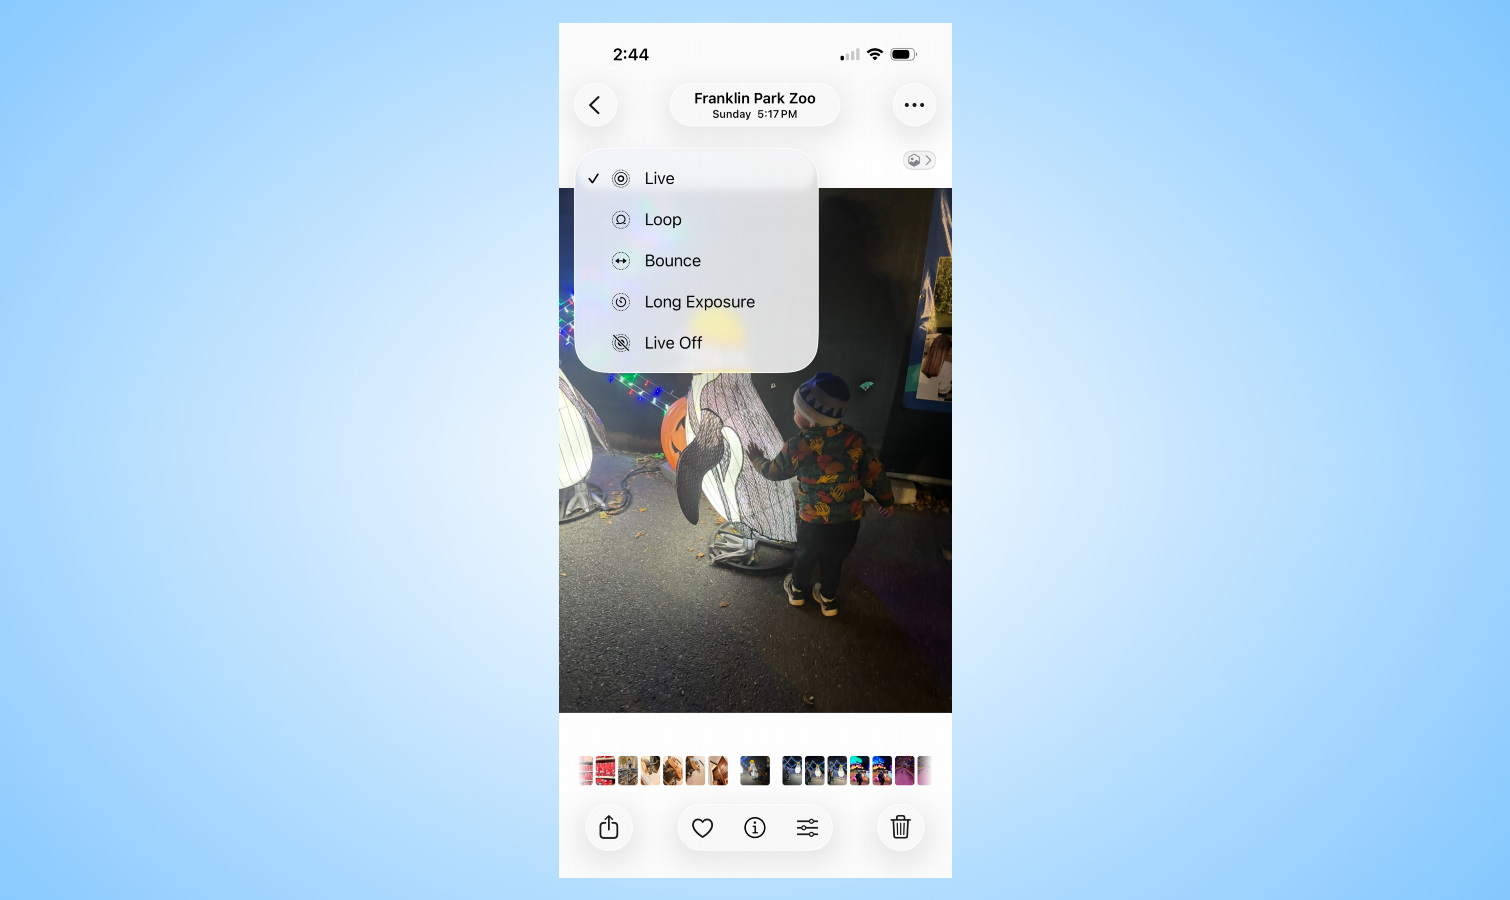
Speaking of Live Photos, Apple actually offers several different types of animation for the feature. The default version simply plays the video from start to finish (how linear!). But there are also other options like looping or bouncing, as well as a nifty long exposure mode.
This is one of the few features not accessible within the editing screen of the iOS 26 Photos app. Instead, while viewing any Live Photo, just find the button at the top left that says Live. Tap it to get the full set of options, and choose whichever one you like.
Be aware, however, that doing so may change what other aspects of the image you can change. For example, choosing the bounce style won't let you include the audio, and neither it nor the loop mode lets you edit the timeline, or choose a different key photo. However, thanks to Apple's focus on non-destructive editing, you should always be able to switch back to the standard Live Photo mode and get those options back.
Get the perfect frame, every time
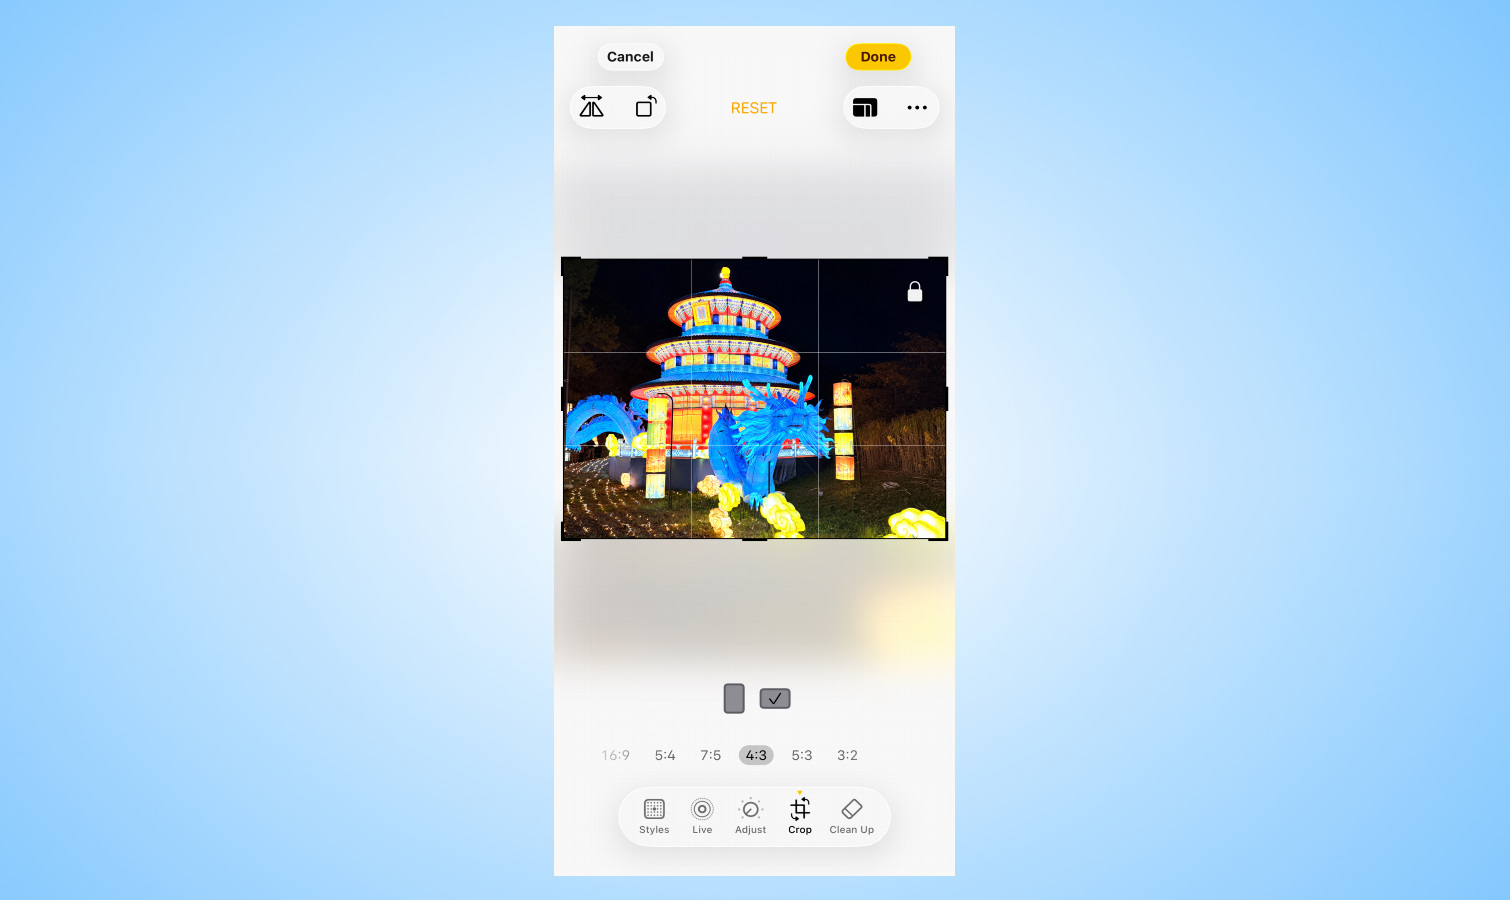
Most of us have cropped a photo to try and fix the framing, maybe to remove something on the edges or zoom in on a subject. But sometimes that leaves you with a picture that's an awkward size.
Photos can help by letting you pick a specific size and locking the crop to that aspect ratio. In the editing interface, tap the Crop button and then select the aspect ratios button at the top right, next to the three dots button. It looks like a divided up rectangle.
Below the image, you'll now see a swipeable menu of options for various sizes, from original and freeform options to square, wallpaper sized, and a variety of common aspect ratios like 9:16, 3:5, and more. For those latter ratios, you can even choose from portrait or landscape orientations, particularly helpful if you plan on printing out photos.
Clean up your act

We've all been there: you catch the perfect moment, snap a picture, and gahhh, someone has wandered into the background of the shot! Once upon a time that might have meant some painstaking time with Photoshop and some knowhow, but now you can clip them out without anyone ever being the wiser, thanks to some help from Apple Intelligence.
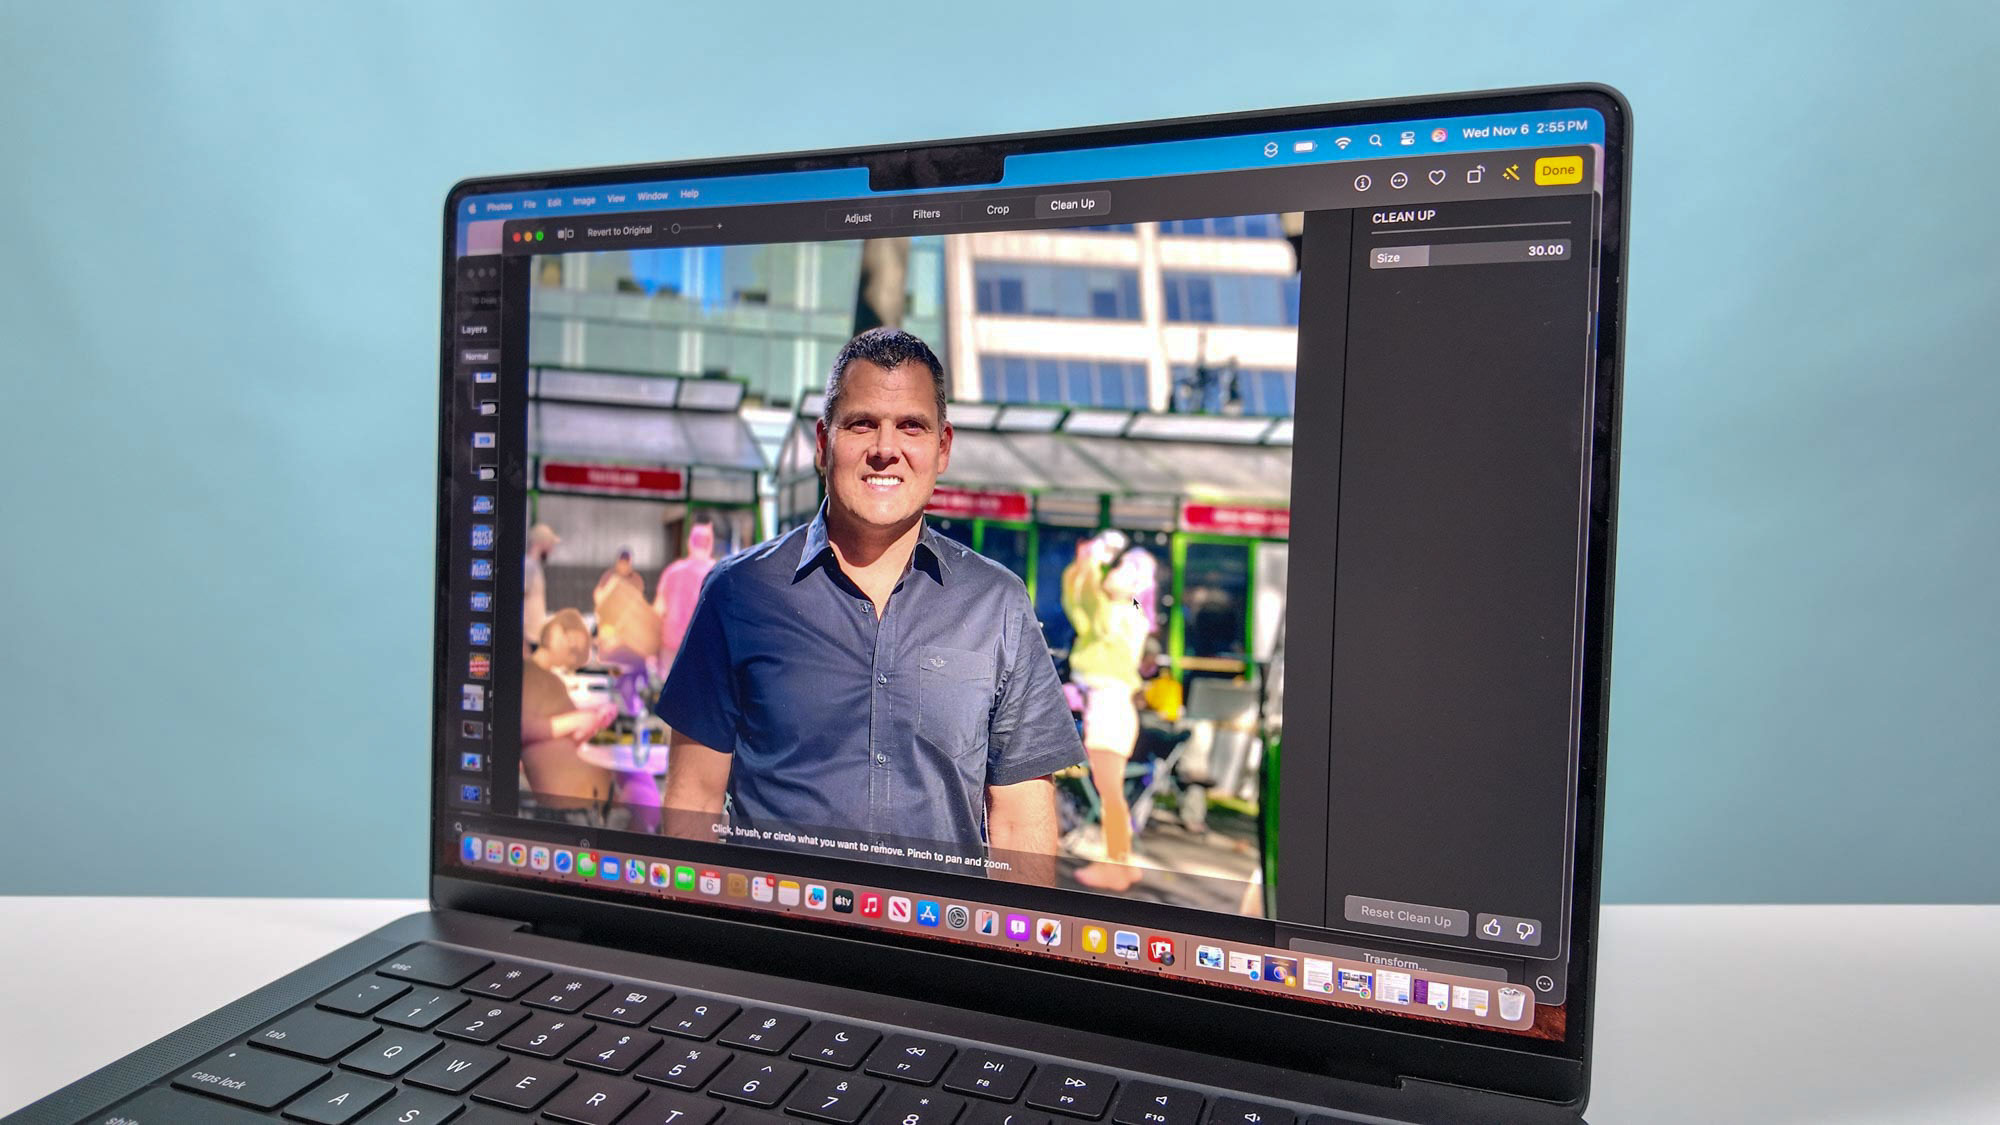
In Apple's Photos app this feature is referred to Clean Up and it's available in the editing interface for devices that support Apple Intelligence (those include the iPhone 15 Pro and better, most recent iPads, and Apple Silicon-powered Macs). Just tap the Clean Up icon on the toolbar at the bottom and your device will take a moment to analyze the image. Once it's done so, certain parts of the image might be highlighted with a glowing effect as things you may wish to remove. But you can also tap, circle, or draw over parts of the image to ask for them to be excised.
Keep in mind, that since the way this feature works is looking at the surrounding image, it works best with uniform backgrounds: for example, removing an errant person in a beach photo is going to end up with a more natural looking result than doing so in a busy city scene, where you could end up with some odd artifacts.
Adjust the levels like a pro
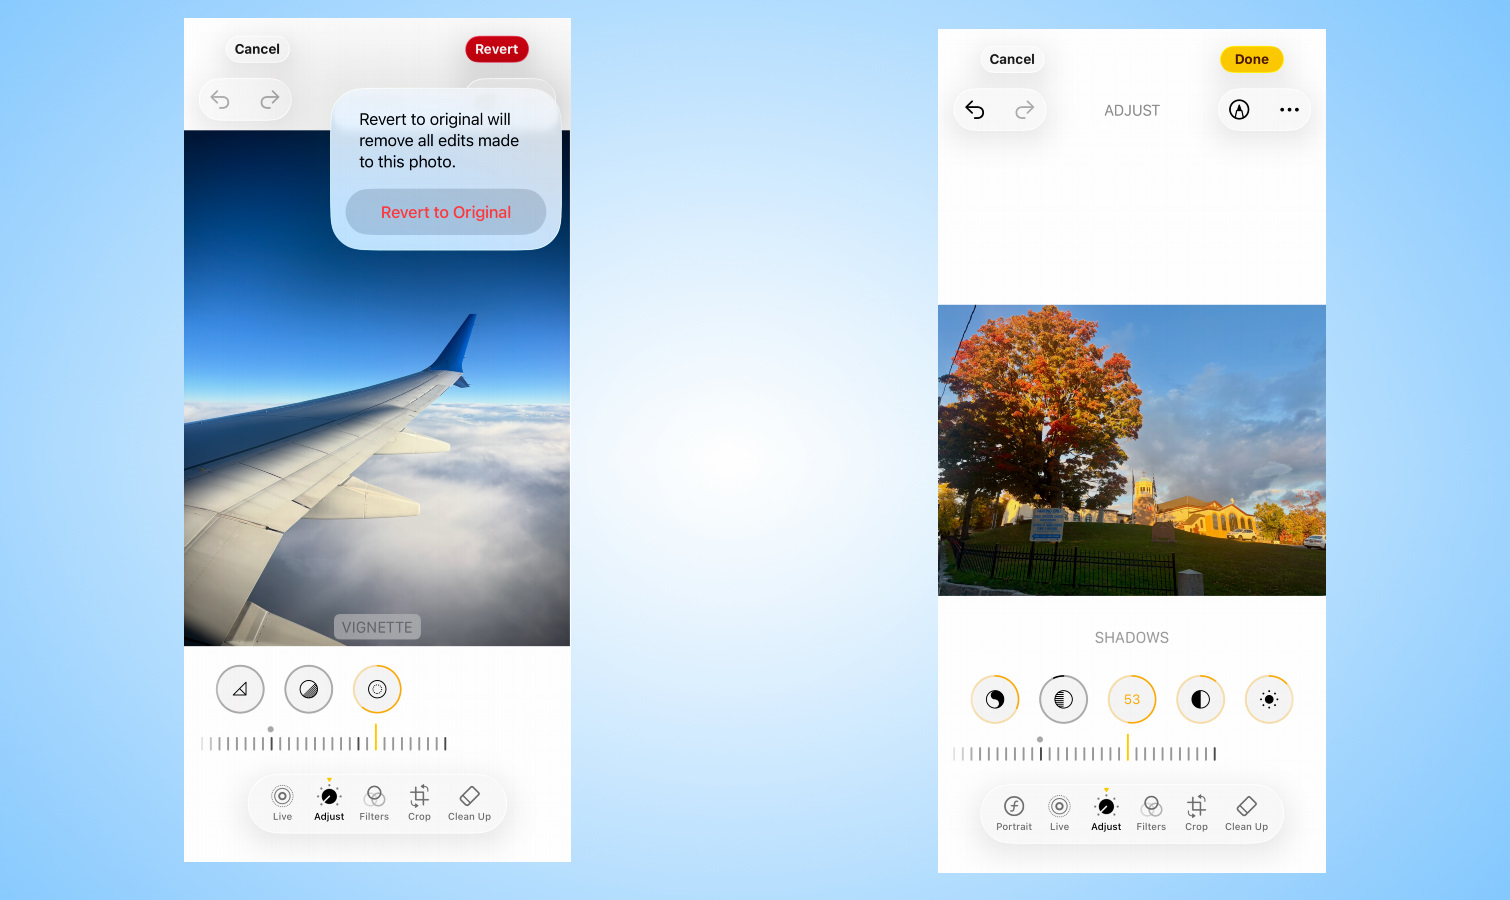
If all of this seems kind of basic, don't worry, Photos can do nitty-gritty too. In the editing interface, tap the Adjust button and you'll get direct access to sliders for everything from exposure to vibrance to a vignette effect. Want to up the saturation and reduce the contrast? No problem. Have no idea what you're doing? There's an Auto button that will do its best to make your photo look its best.
Personally, my favorite part about this entire interface is that Apple makes it as easy as possible to undo any damage you've done. Each slider has a small dot indicating the original starting point (which you can even feel with some slight haptic feedback as you scroll past it). There are Undo and Redo buttons that let you correct any mistaken choices, and if all else fails, the big red Revert button will toss all your edits and bring you back to square one.
But wait, there's more
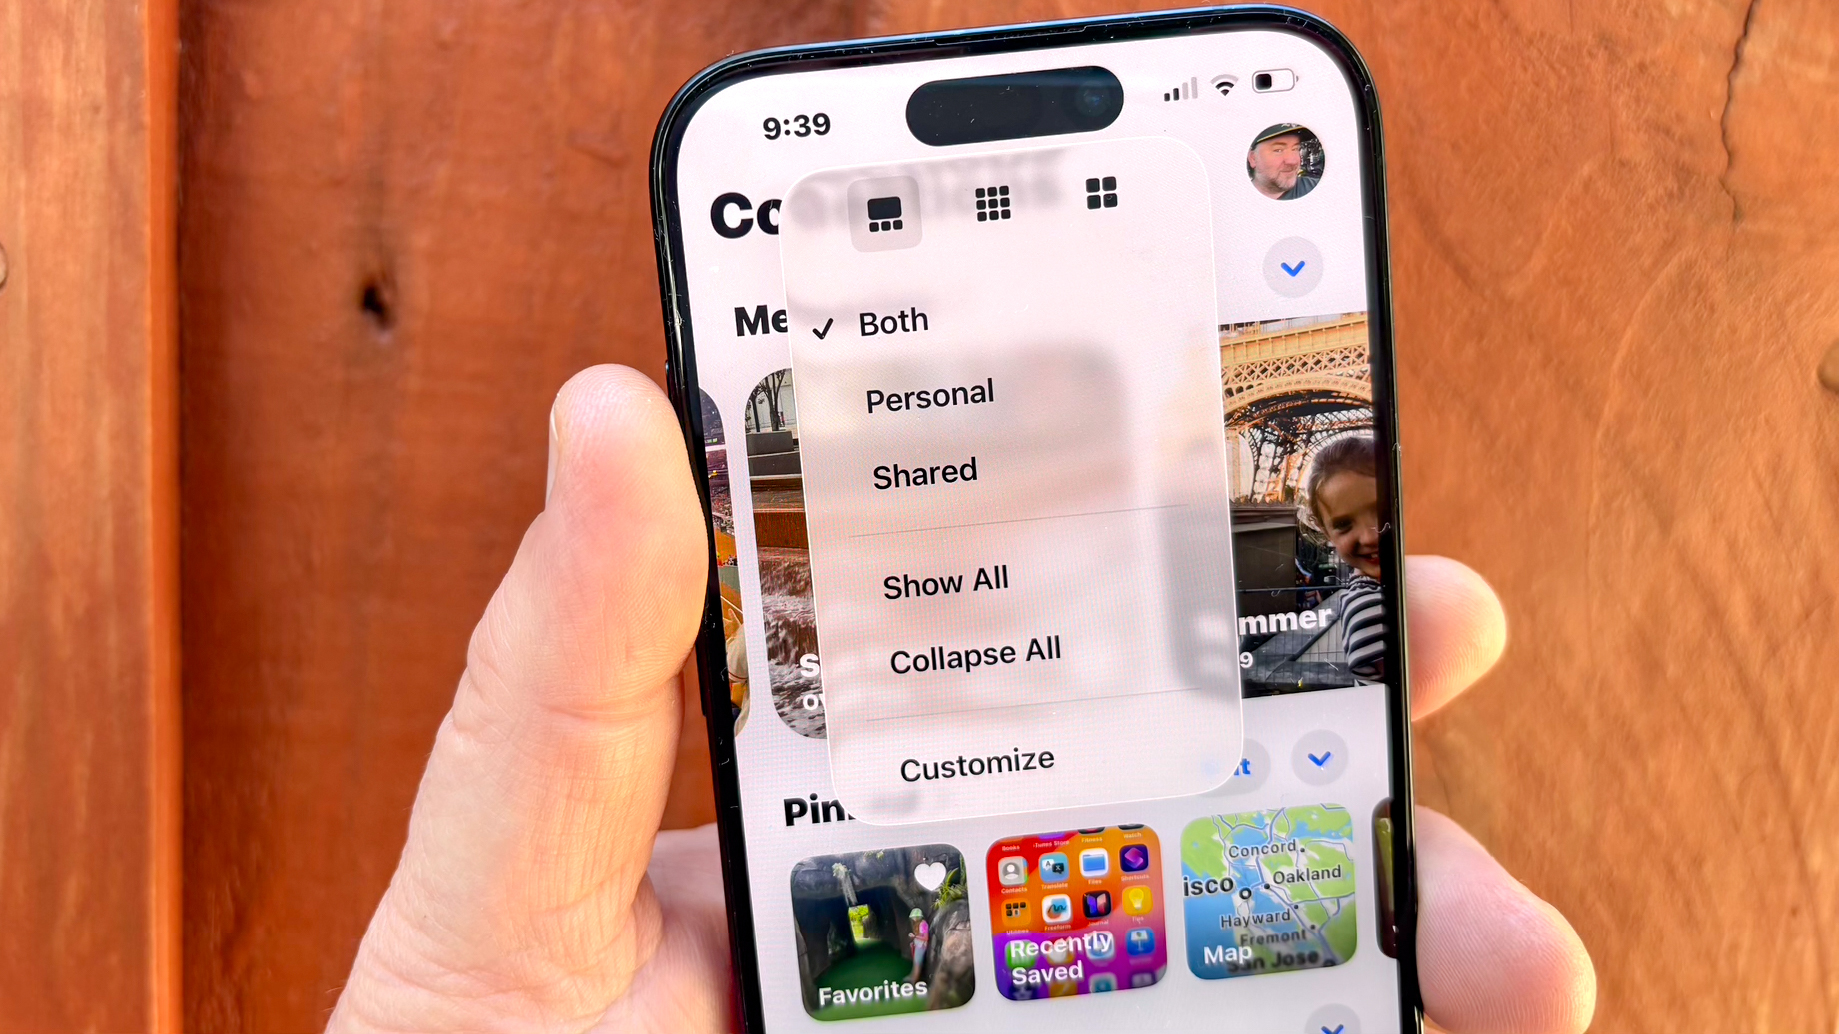
With all of Photos many tools at your disposal, there's a lot you can do, and I didn't even touch on adjusting image depth, copying and pasting edits, or marking up an image.
While there are still some cases where you might need to turn to third-party software in order for some complex alterations, for most smartphone photographers, Photos has all the tools you need — and then some. It's certainly transformed my ordinary photography to something much more carefully crafted.

Follow Tom's Guide on Google News and add us as a preferred source to get our up-to-date news, analysis, and reviews in your feeds.
More from Tom's Guide
- 9 hidden iOS Messages features I use to text like a pro — try these now
- Apple Intelligence could soon integrate more AI apps beyond ChatGPT — here’s what Tim Cook just said
- I test ChatGPT vs Claude for a living — and this is the one feature that blows away OpenAI's chatbot
Dan Moren is the author of multiple sci-fi books including The Caledonian Gamibt and The Aleph Extraction. He's also a long-time Mac writer, having worked for Macworld and contributed to the Six Colors blog, where he writes about all things Apple. His work has also appeared in Popular Science, Fast Company, and more
You must confirm your public display name before commenting
Please logout and then login again, you will then be prompted to enter your display name.
 Club Benefits


