How to back up your local files for free
This free tool simplifies the process of automatically backing up your local files

Here at Tom’s Guide our expert editors are committed to bringing you the best news, reviews and guides to help you stay informed and ahead of the curve!
You are now subscribed
Your newsletter sign-up was successful
Want to add more newsletters?

Daily (Mon-Sun)
Tom's Guide Daily
Sign up to get the latest updates on all of your favorite content! From cutting-edge tech news and the hottest streaming buzz to unbeatable deals on the best products and in-depth reviews, we’ve got you covered.

Weekly on Thursday
Tom's AI Guide
Be AI savvy with your weekly newsletter summing up all the biggest AI news you need to know. Plus, analysis from our AI editor and tips on how to use the latest AI tools!

Weekly on Friday
Tom's iGuide
Unlock the vast world of Apple news straight to your inbox. With coverage on everything from exciting product launches to essential software updates, this is your go-to source for the latest updates on all the best Apple content.

Weekly on Monday
Tom's Streaming Guide
Our weekly newsletter is expertly crafted to immerse you in the world of streaming. Stay updated on the latest releases and our top recommendations across your favorite streaming platforms.
Join the club
Get full access to premium articles, exclusive features and a growing list of member rewards.
In the same way that you should regularly change your passwords, you should also back up your local files periodically to prevent losing them due to hardware failure or other unexpected incidents like a fire, flood or even a break-in.
Even if you store your files online using one of the best cloud storage services, it always pays to have an extra, physical copy of your most important data. This also applies when using a cloud backup service to store a separate copy of your files in the cloud.
In fact, many experts including the Cybersecurity and Infrastructure Security Agency (CISA) recommend employing the 3-2-1 backup rule which entails creating a primary backup and two copies of your data. However, the rule goes a step further by suggesting you also save your backups on two different types of media and keep at least one backup offsite. This way you won’t need to turn to one of the best data recovery software solutions should a disaster strike.
Sure, you can manually move a copy of your important files to another hard drive on your PC or even to an external hard drive but why not automate the process instead? Fortunately, IDrive has created an excellent local backup tool that’s extremely easy to use and can be scheduled to run on its own at a time that’s convenient for you. Besides allowing you to back up your files to an external drive or even a USB flash drive, you can also back up your files to network-attached storage (NAS) devices.
In this step-by-step guide, we’ll walk you through the process of getting IDrive’s tool set up and show you how to back up and recover data from your local storage so that you can rest easy knowing your pictures, documents and other important files are safe no matter what.
How to back up your local files for free using IDrive
- Head to IDrive’s website
- Create an account or sign in with Google
- Download IDrive
- Install IDrive
- Login to your account
- Choose your backup location
- Backup your files
- Schedule backups in advance
Read on to view detailed instructions for each step.
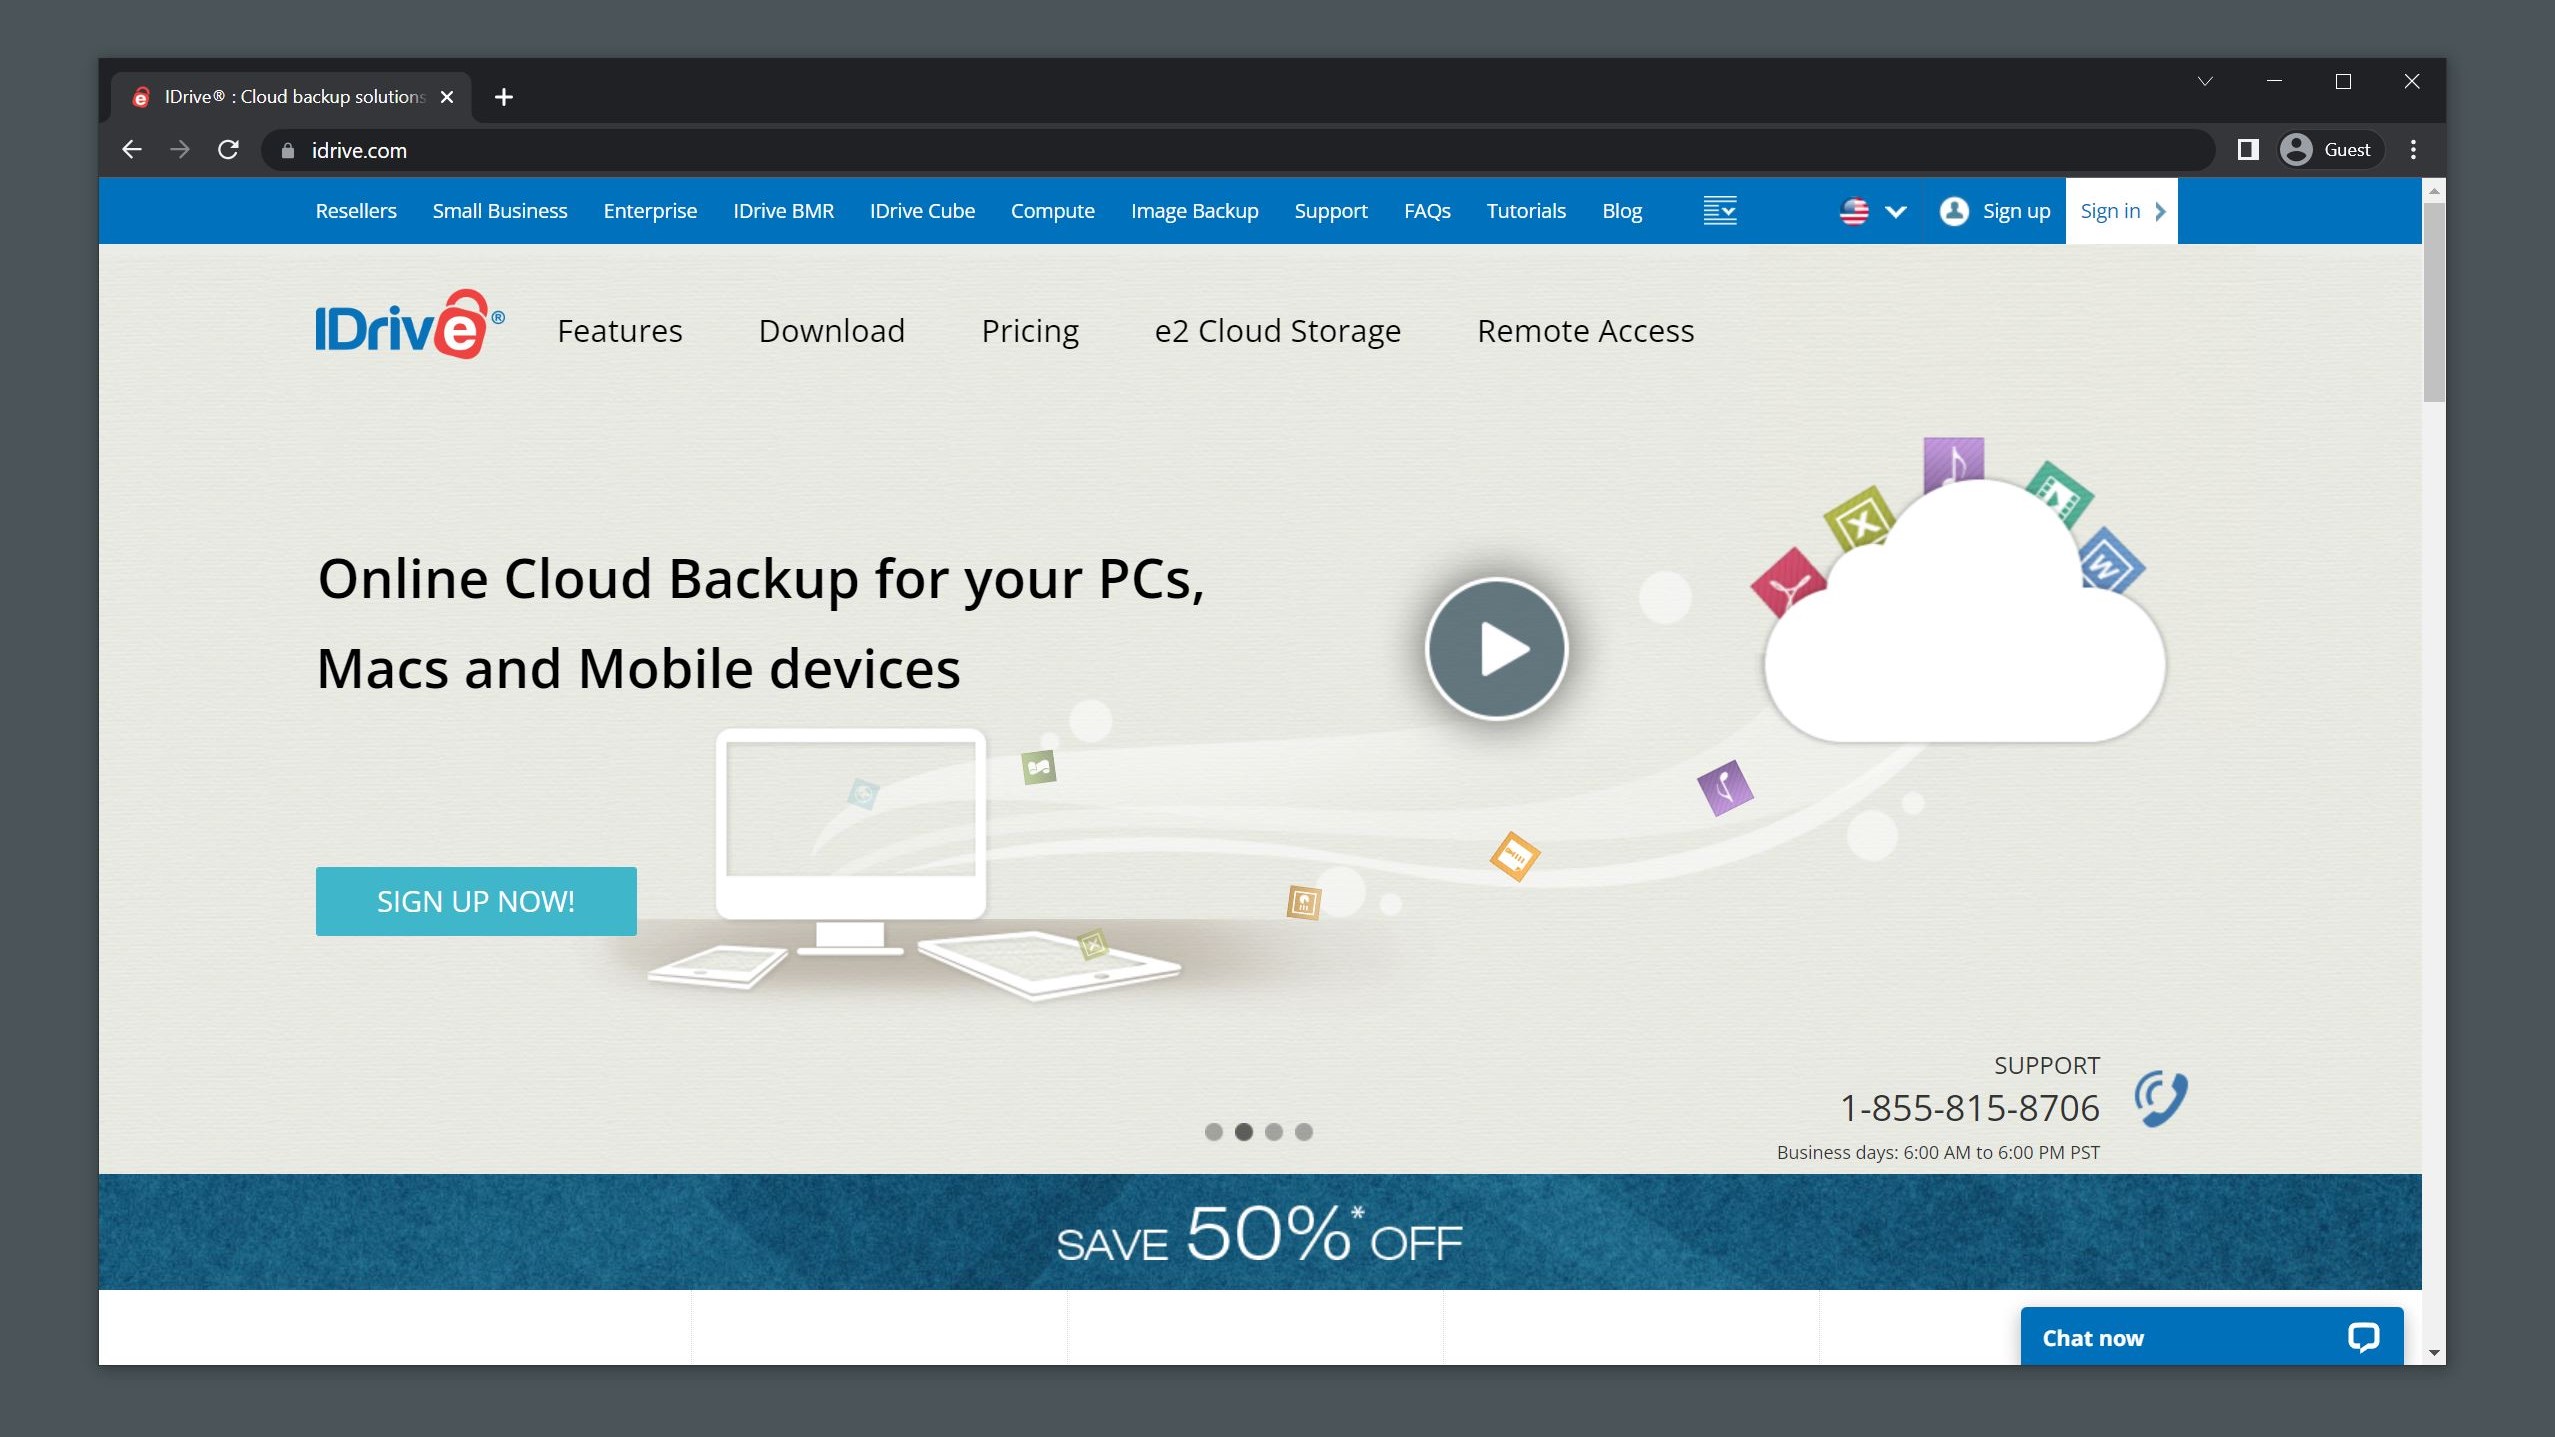
1. Head to IDrive’s website. Open your browser and navigate to https://www.IDrive.com/. At the top right corner of the page, click on Sign up if you need to create an account or Sign in if you already have one.
Get instant access to breaking news, the hottest reviews, great deals and helpful tips.
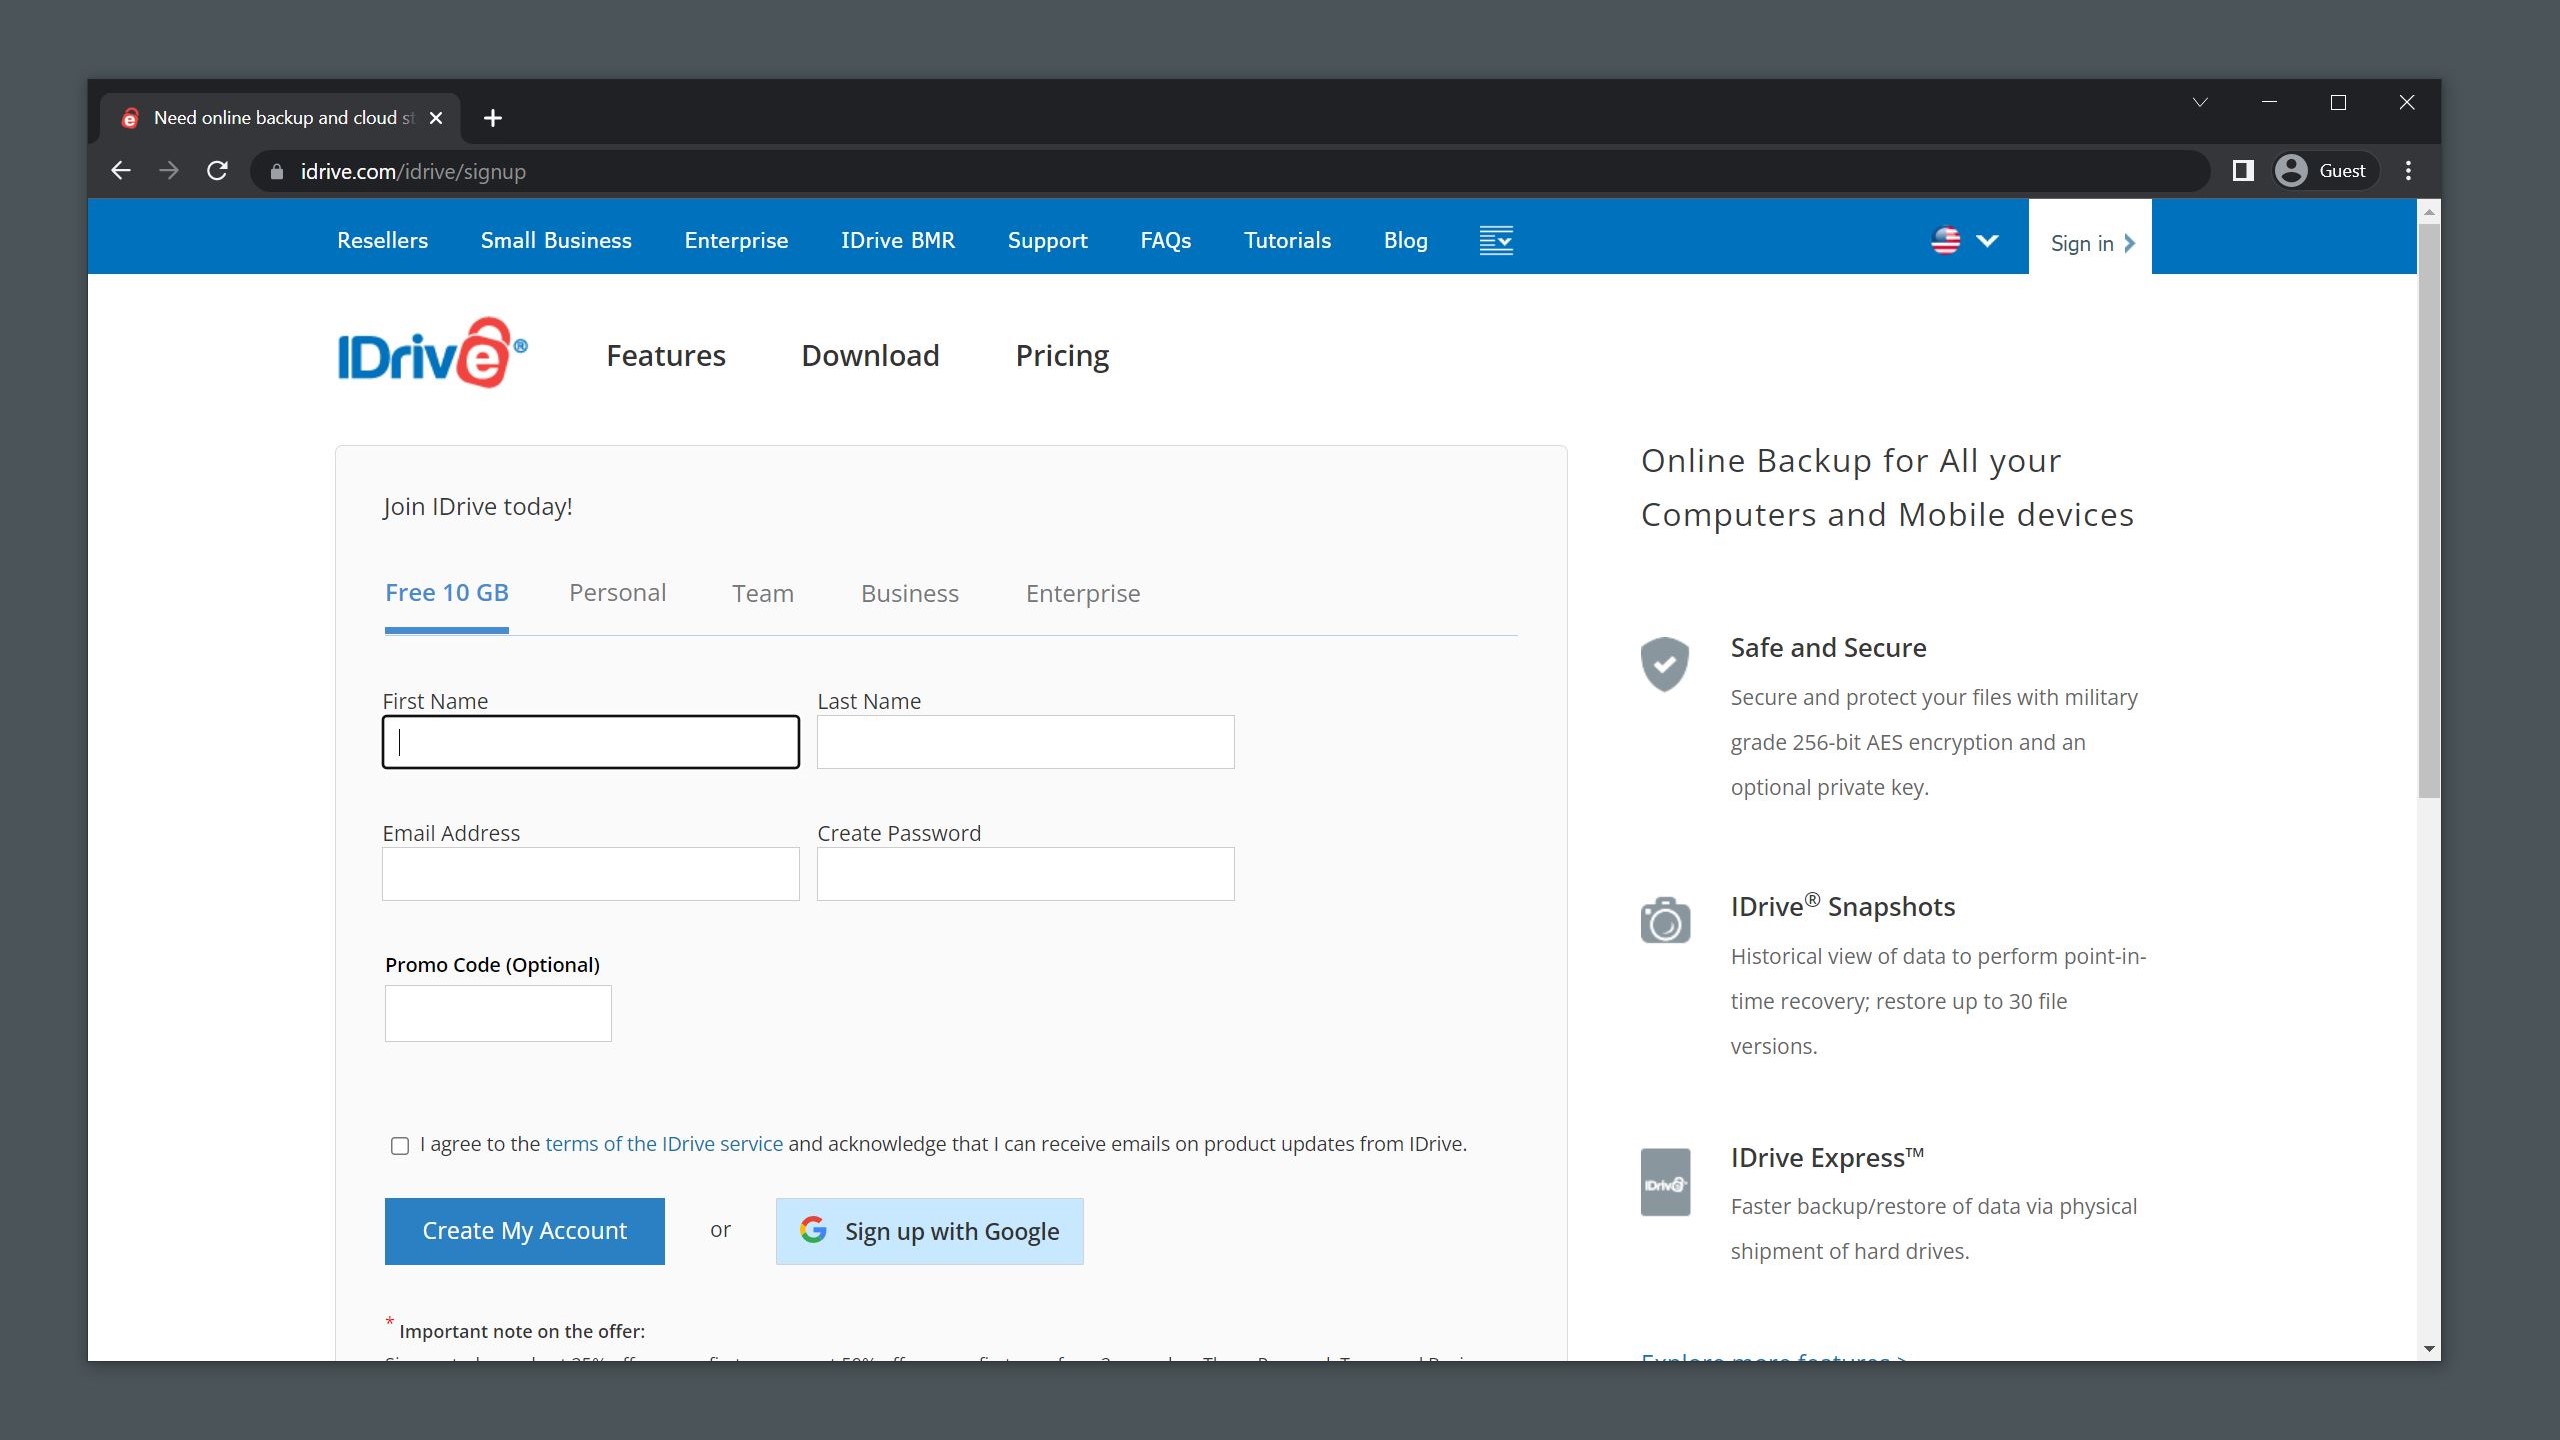
2. Create an account or sign in with Google. Here you have the option to Sign up with Google or create a new account. If you do the latter, you’ll need to enter your first name, last name, email address and a new password for your account. (Although this guide is focused on backing up your local storage, you also get 10 GB of cloud storage space for free when you create an account.)
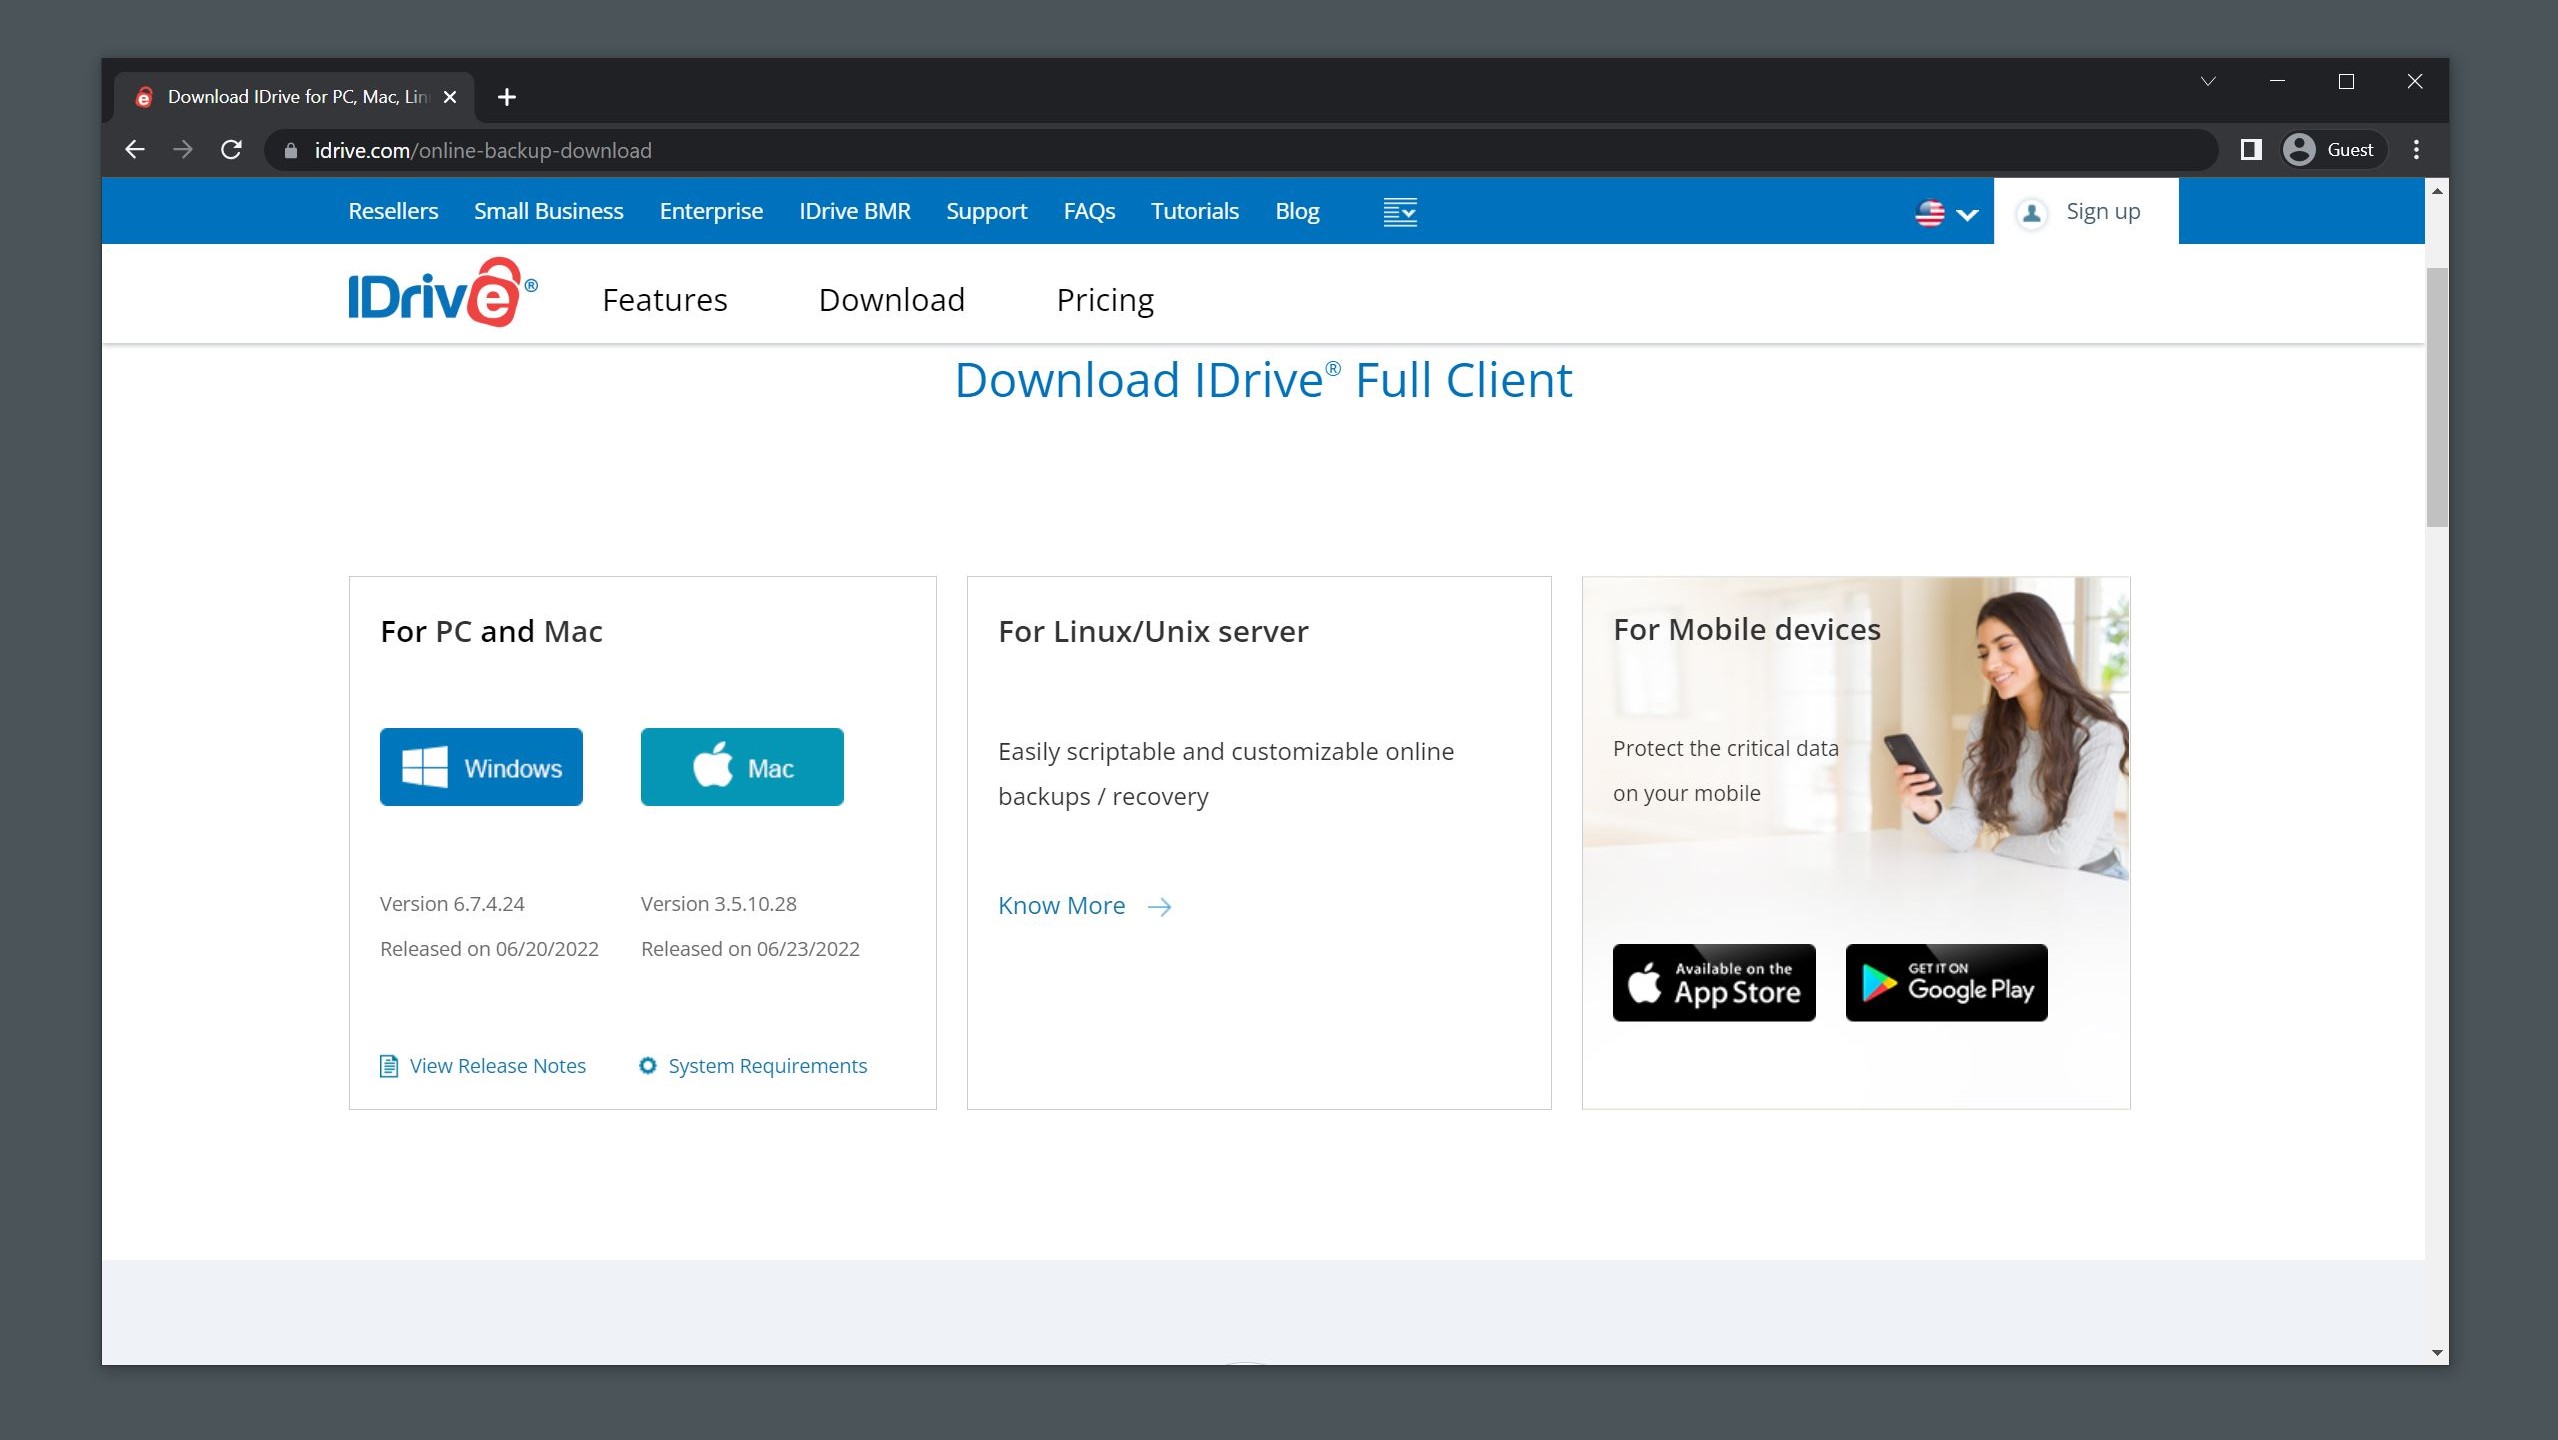
3. Download IDrive. From here you’ll need to download the IDrive client and install it on the computer you want to back up. While IDrive is available for PC, Mac, Linux, Android and iOS, we’ll be covering how to use the company’s software on PC.
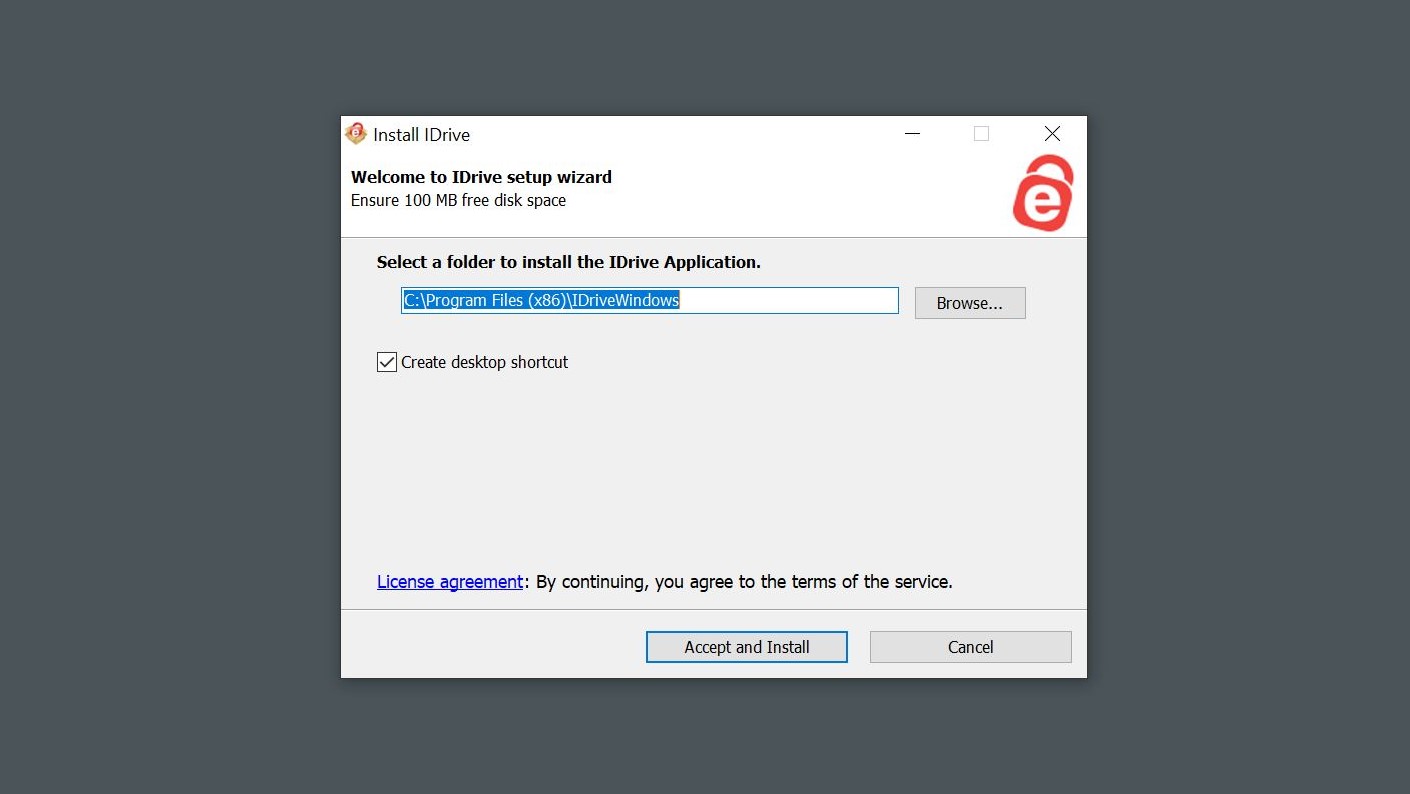
4. Install IDrive. IDrive downloads as an executable which you’ll need to find in your Downloads folder and double click to begin the installation. A window will appear asking you where you want to install the application and then you’ll need to click Accept and Install.
5. Login to your account. Once IDrive is finished installing, the program will open automatically and you will need to login with your username and password.
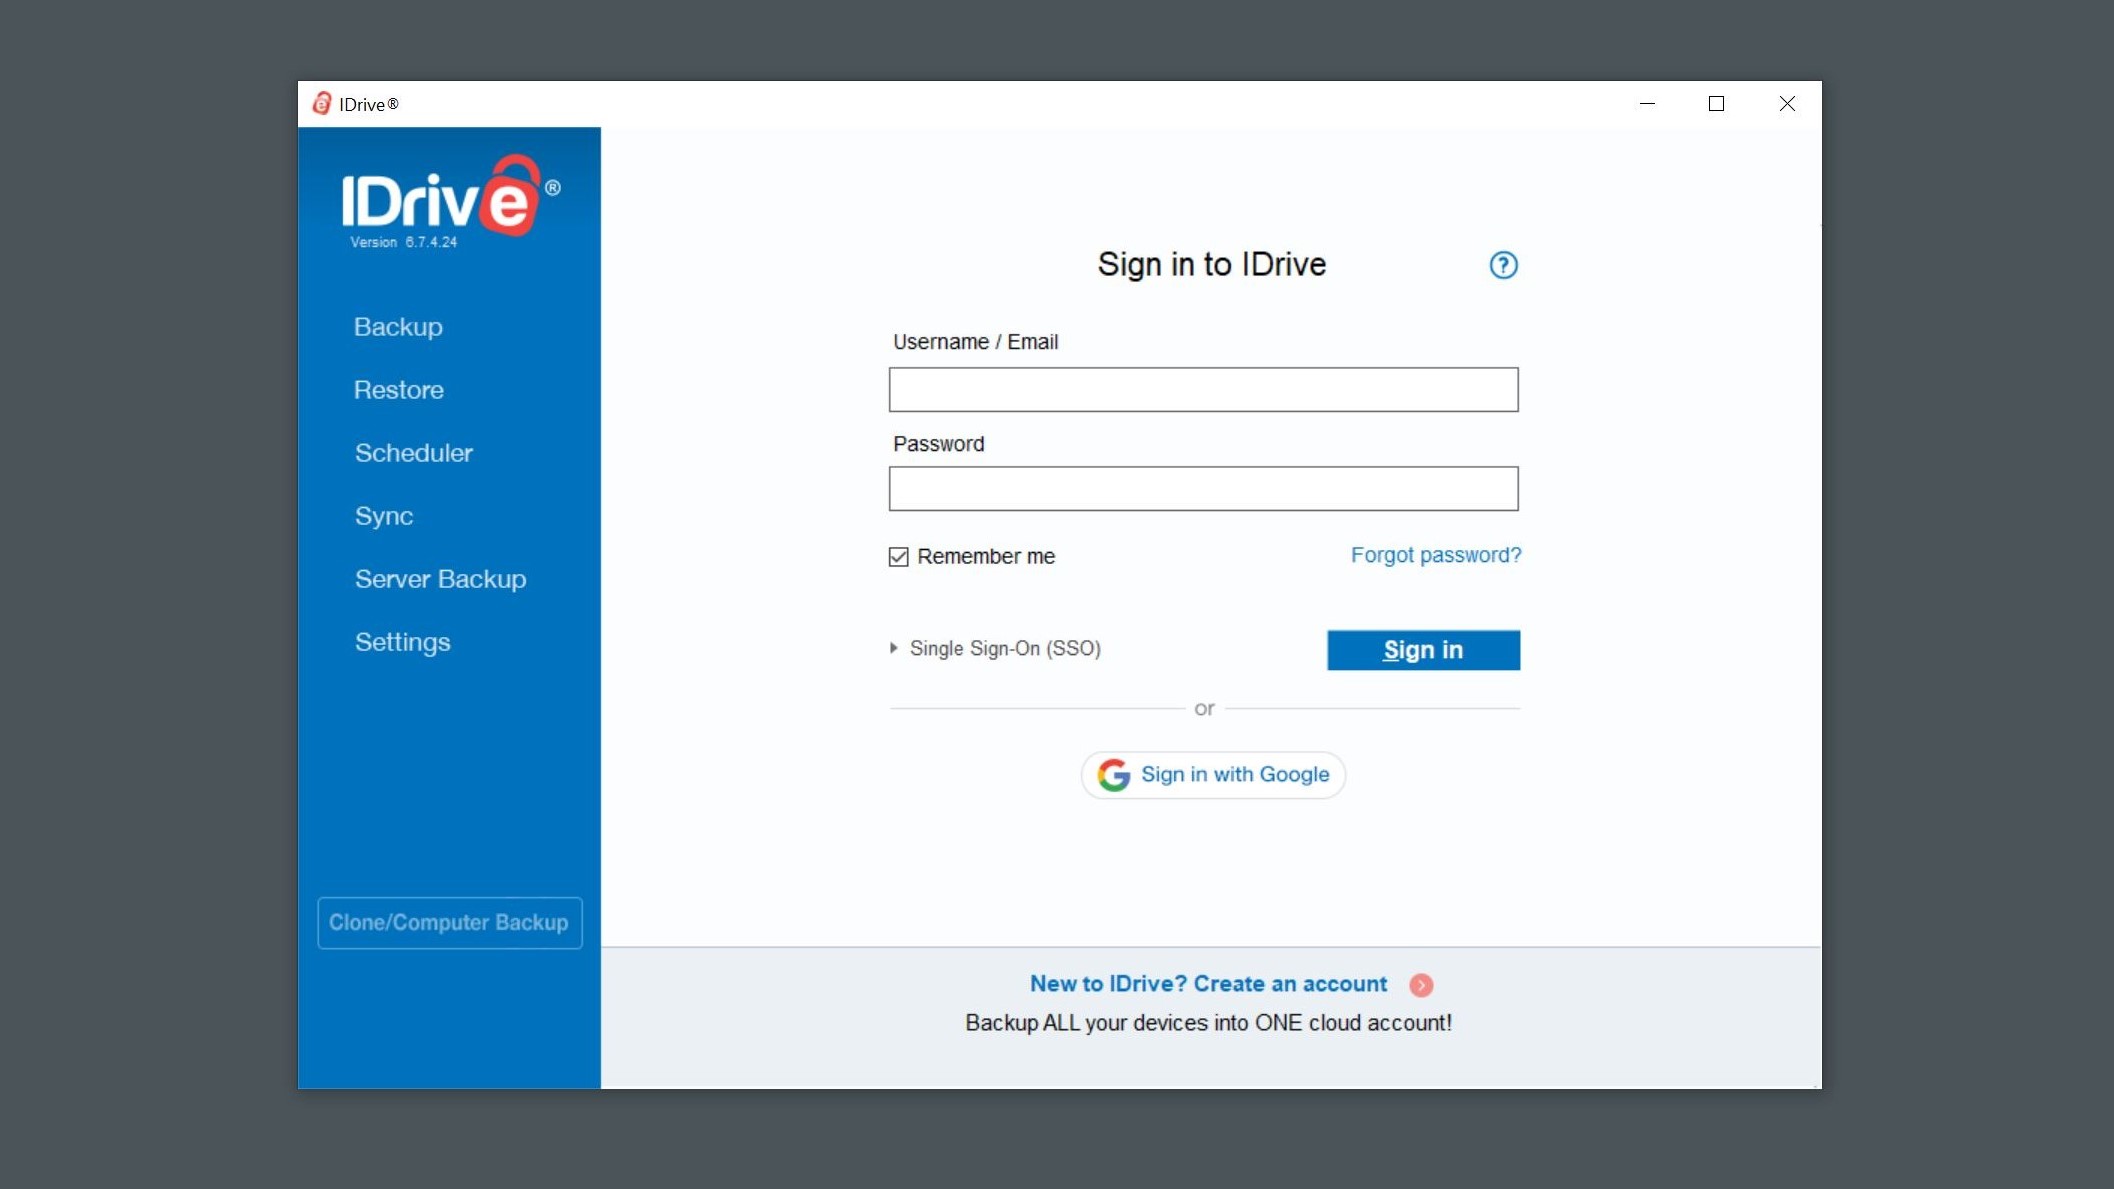
6. Choose your backup location. At the top of the page, you want to make sure Backup files to Local, Wi-Fi or Express device is selected in order to avoid using your 10 GB of cloud storage space. You then need to click on the blue box with three dots underneath this option to choose your backup location.
While you can choose to back up your files to any hard drive or SSD on your computer, you can also back up your files to a USB flash drive, an external hard drive or a NAS device instead.
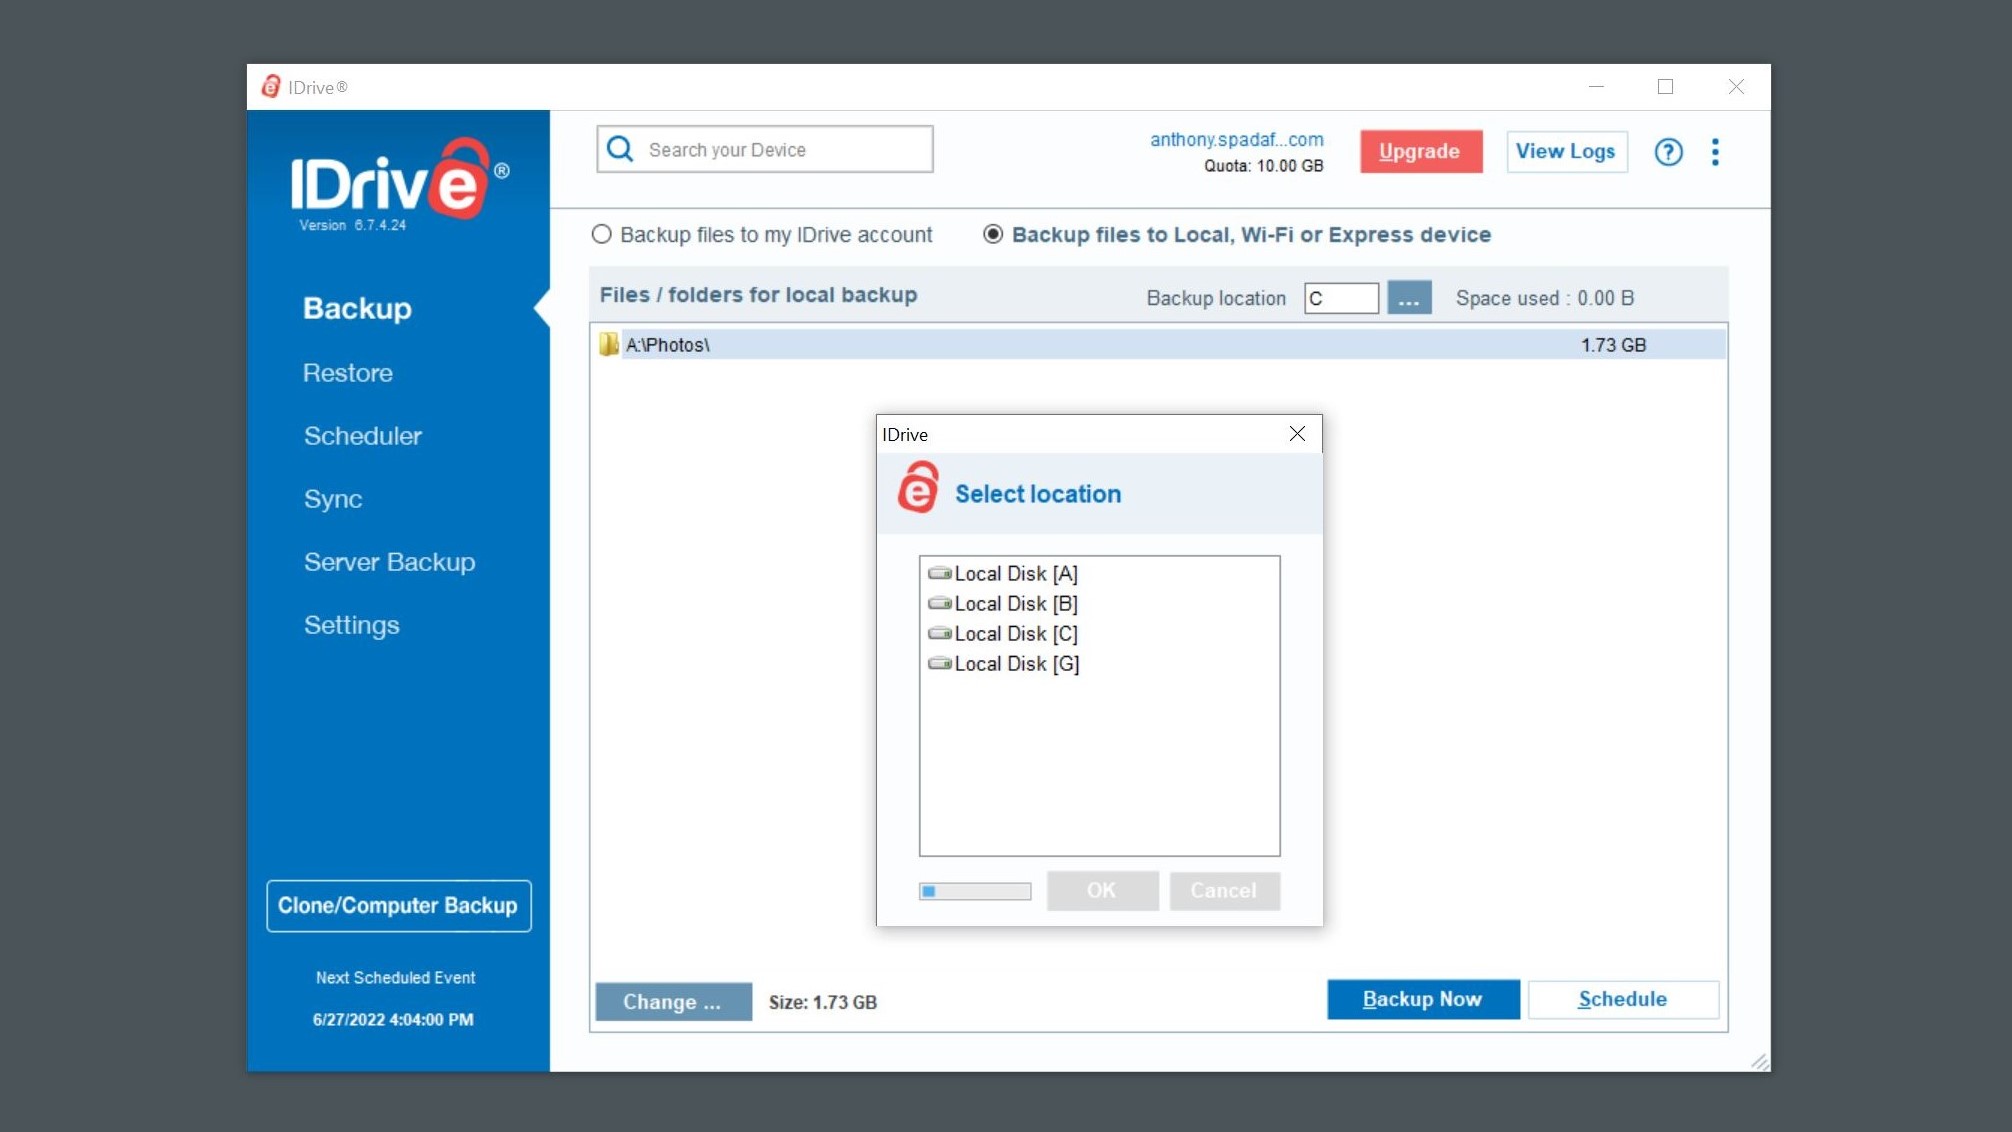
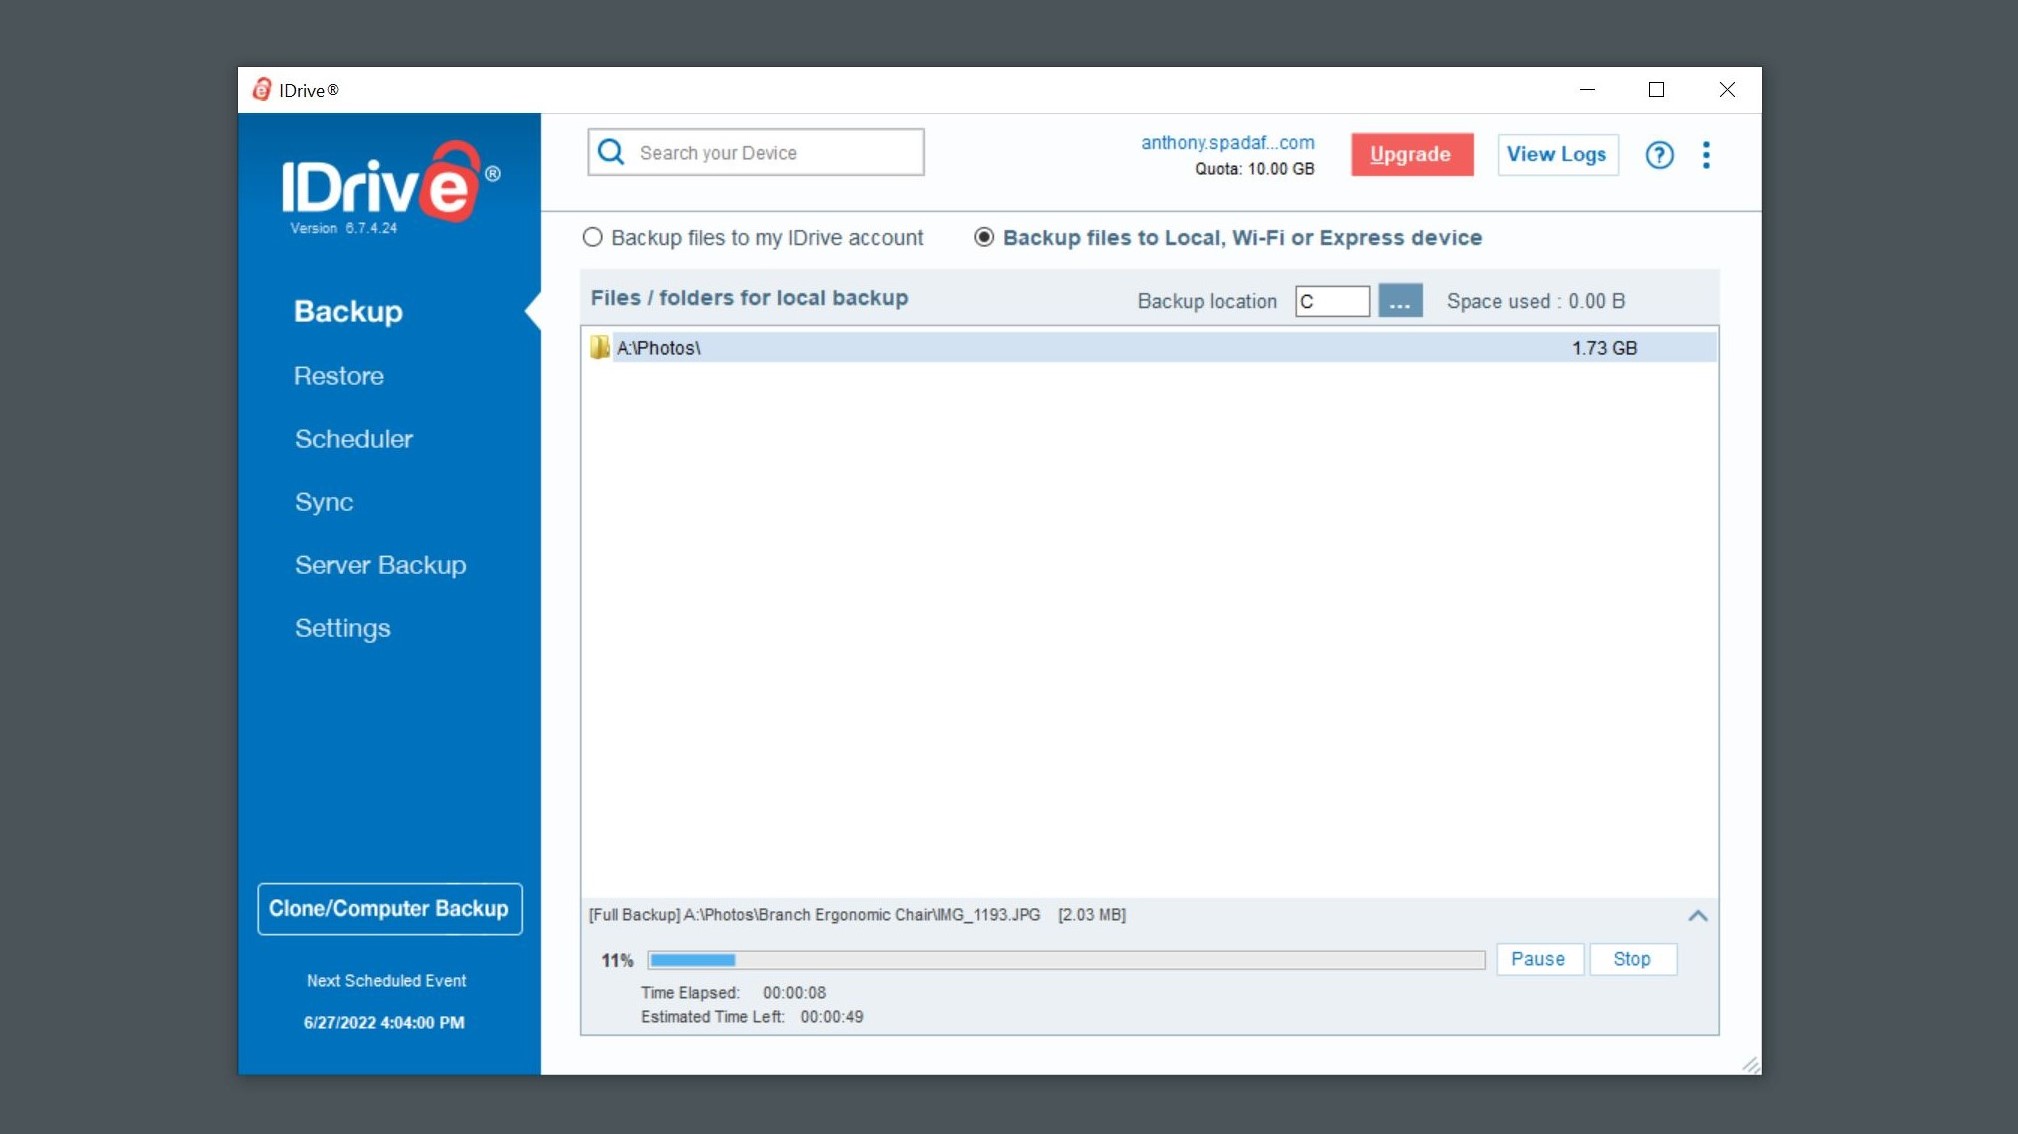
7. Backup your files. After choosing which files you want to back up and where you want them to be saved, you then need to click the Backup Now button in the bottom right corner. This will start the backup process which can vary in the amount of time it takes depending on the size of the files you want to backup.
Once the operation is complete, a window showing a Backup operation summary will appear showing you when the backup started, when it ended, the number of files being backed up and the size of those files. You can also click View Log for additional details.
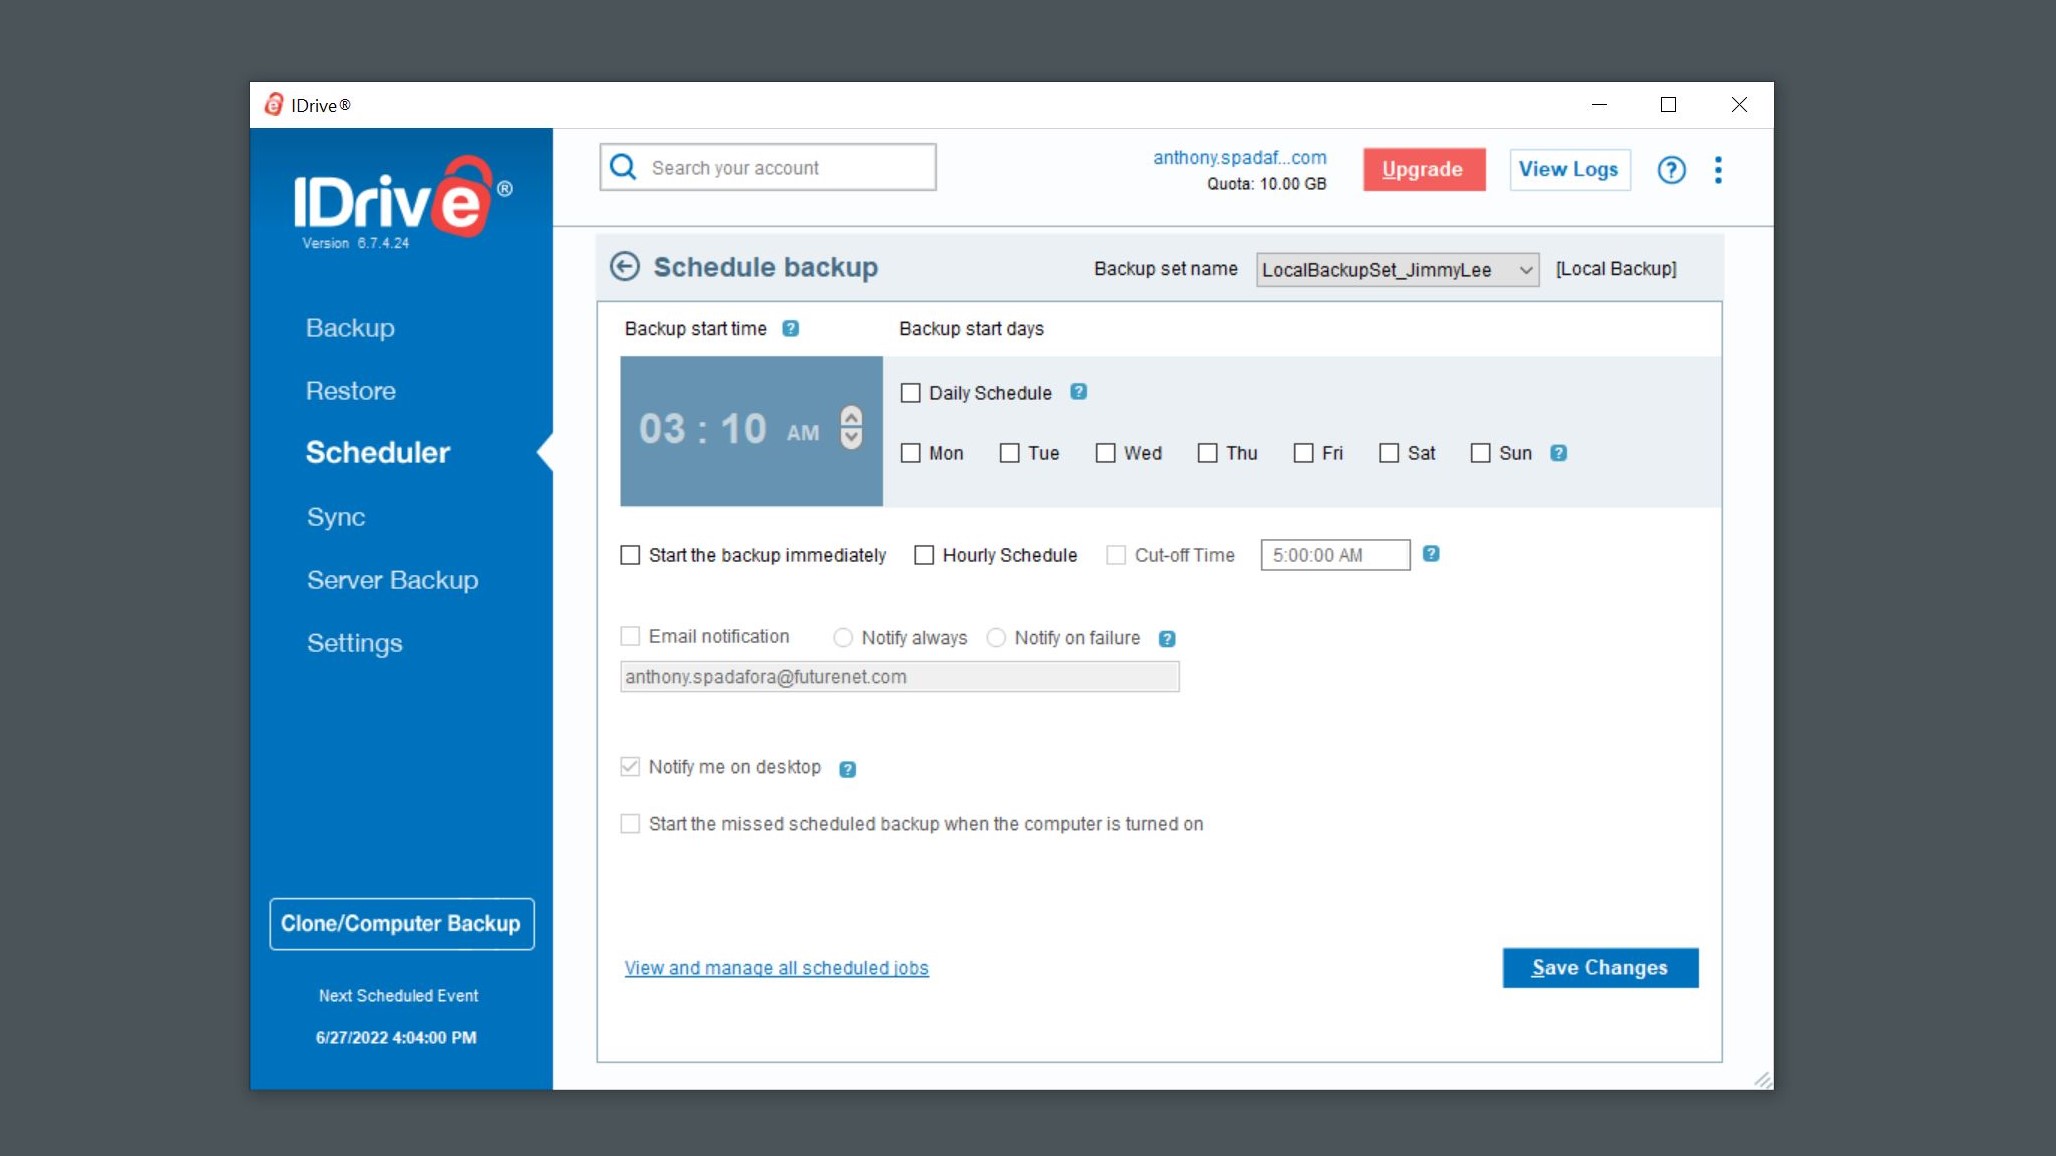
8. Schedule backups in advance. In order to schedule backups in advance you need to click on Scheduler in the menu on the left under Restore. Here you’ll be able to pick particular days of the week for IDrive to back up your files though you can also check the Daily Schedule box to have your files backed up each day. On this screen, you can also check the Email notification box to receive a notification in your email every time IDrive backs up your files.
How to restore your local files using IDrive
- Open the Restore tab
- Choose where you want your files to be restored
- Restore your files
- View your restored files
Read on to view detailed instructions for each step.
1. Open the Restore tab. To recover the files you’ve backed up, click on the Restore tab in the menu on the left. Here you will see all of your backups. Check the box next to the folder icon to choose the backups you want to restore.
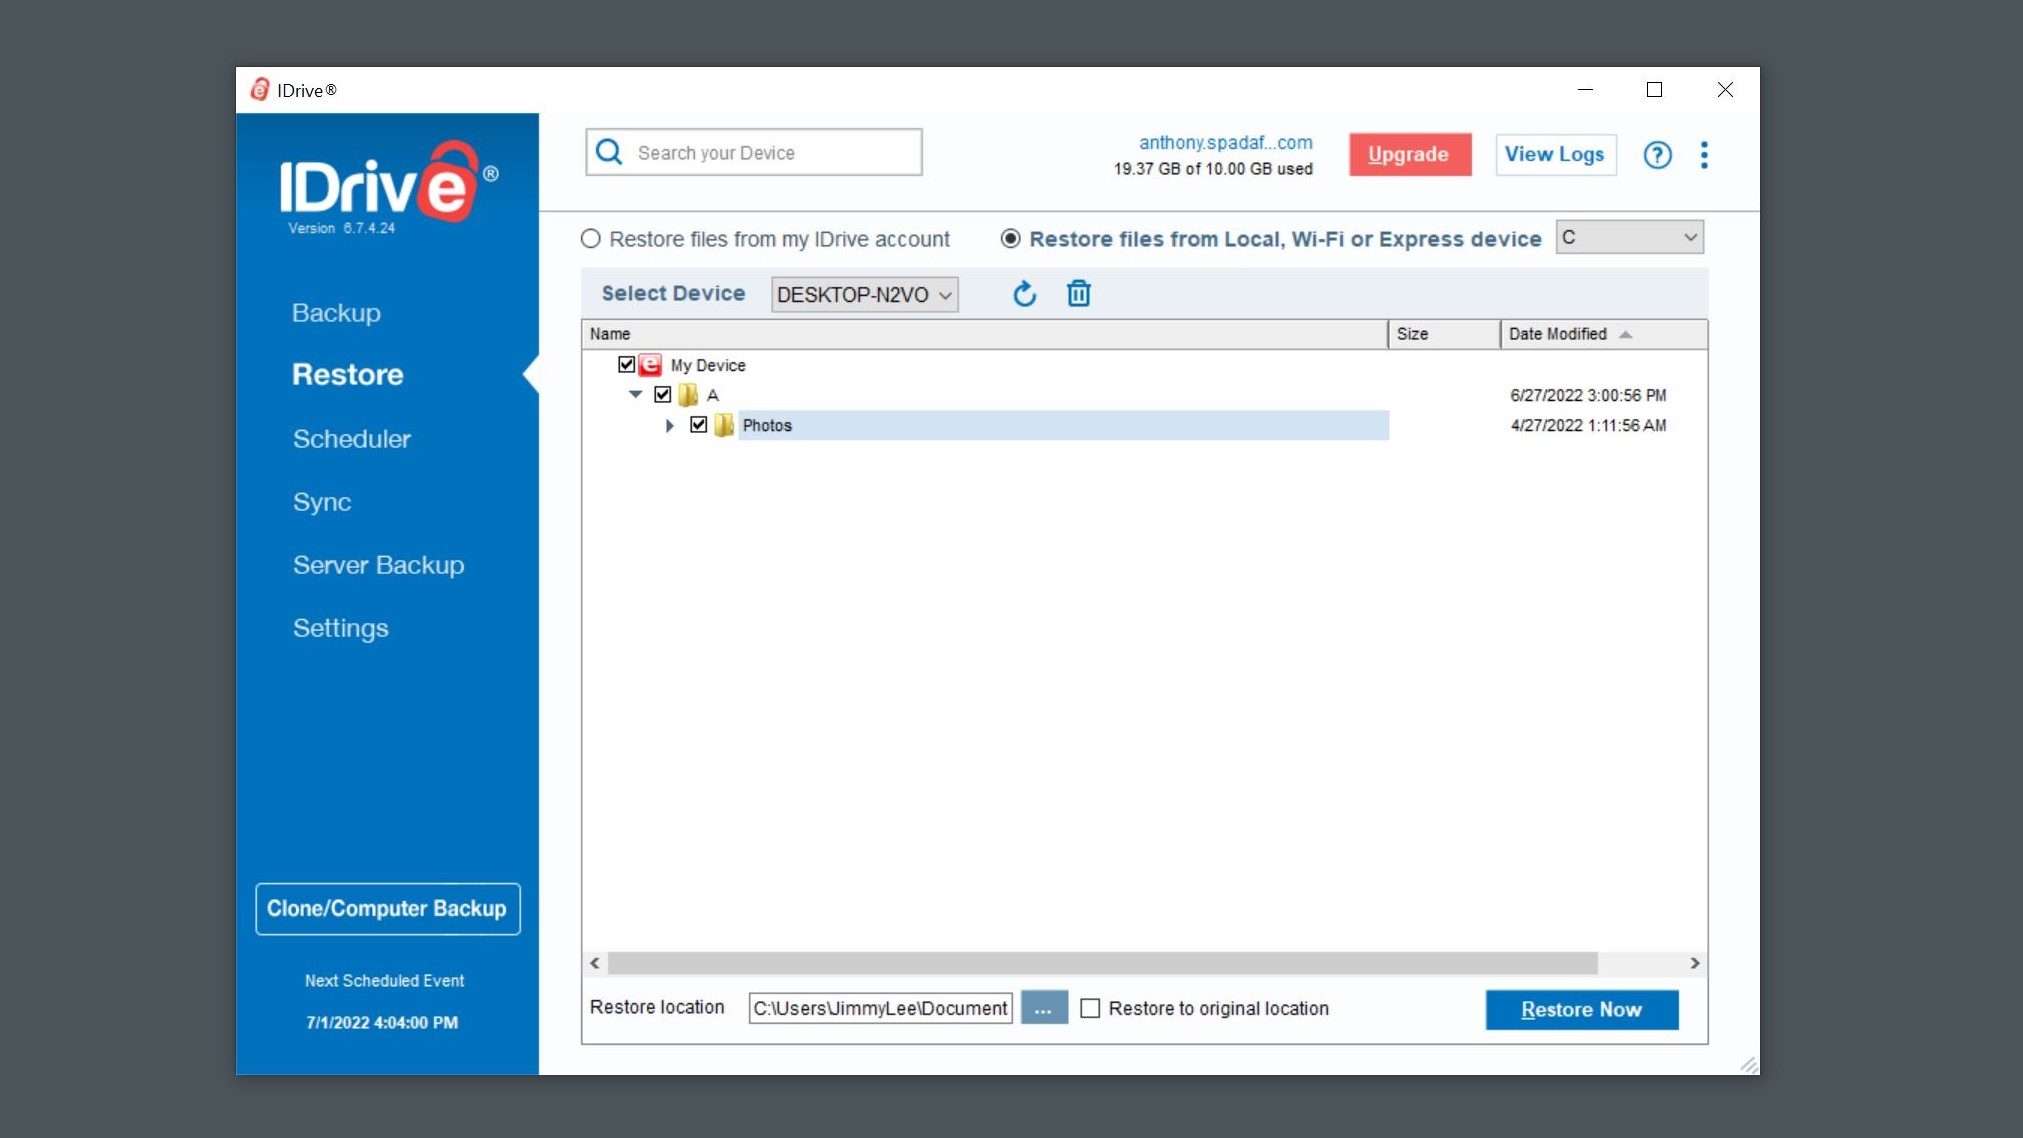
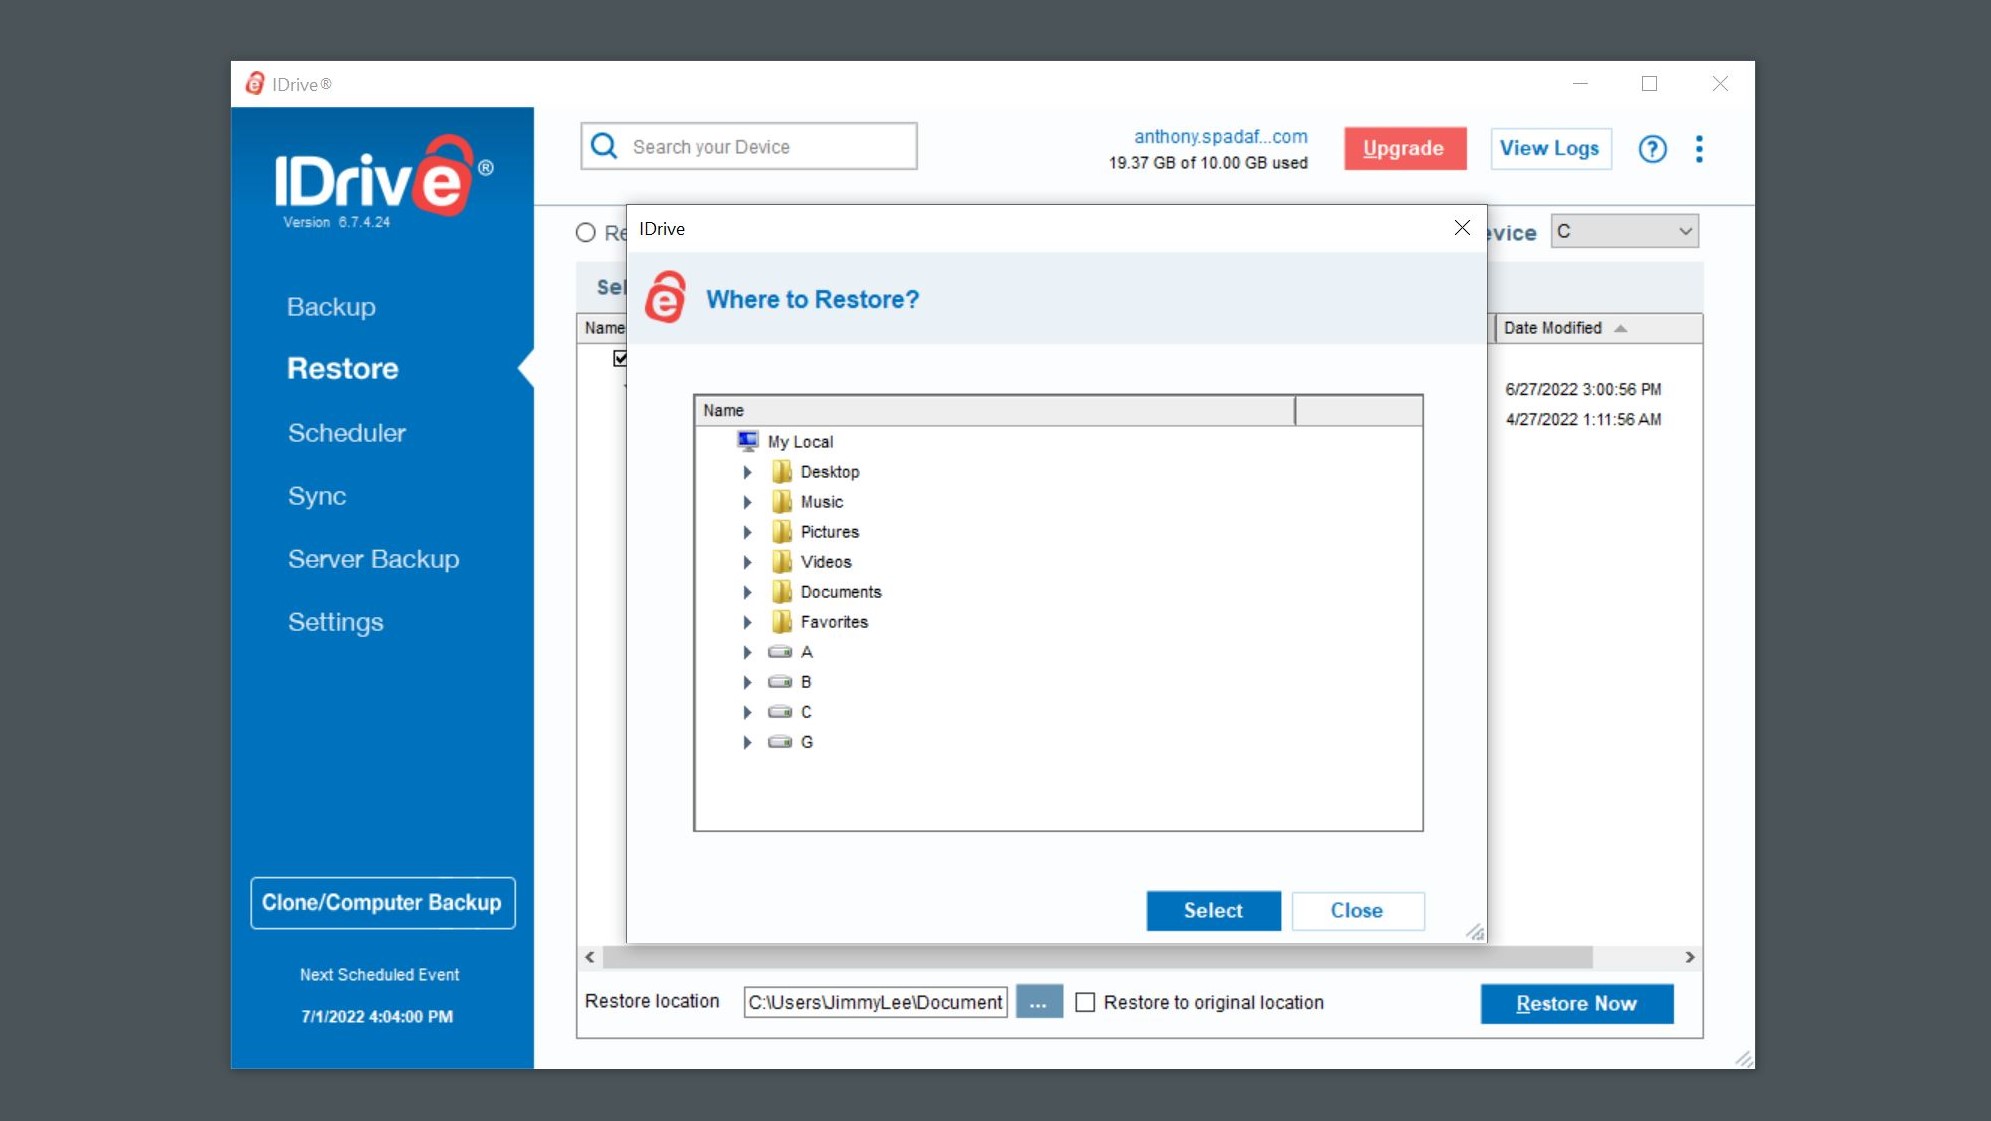
2. Choose where you want your files to be restored. Although you have the option to restore your files to their original location, you can also have them restored on your desktop or on any other drive on your computer. To pick another location, click on the blue box with three dots, and here you can choose where to restore your files.
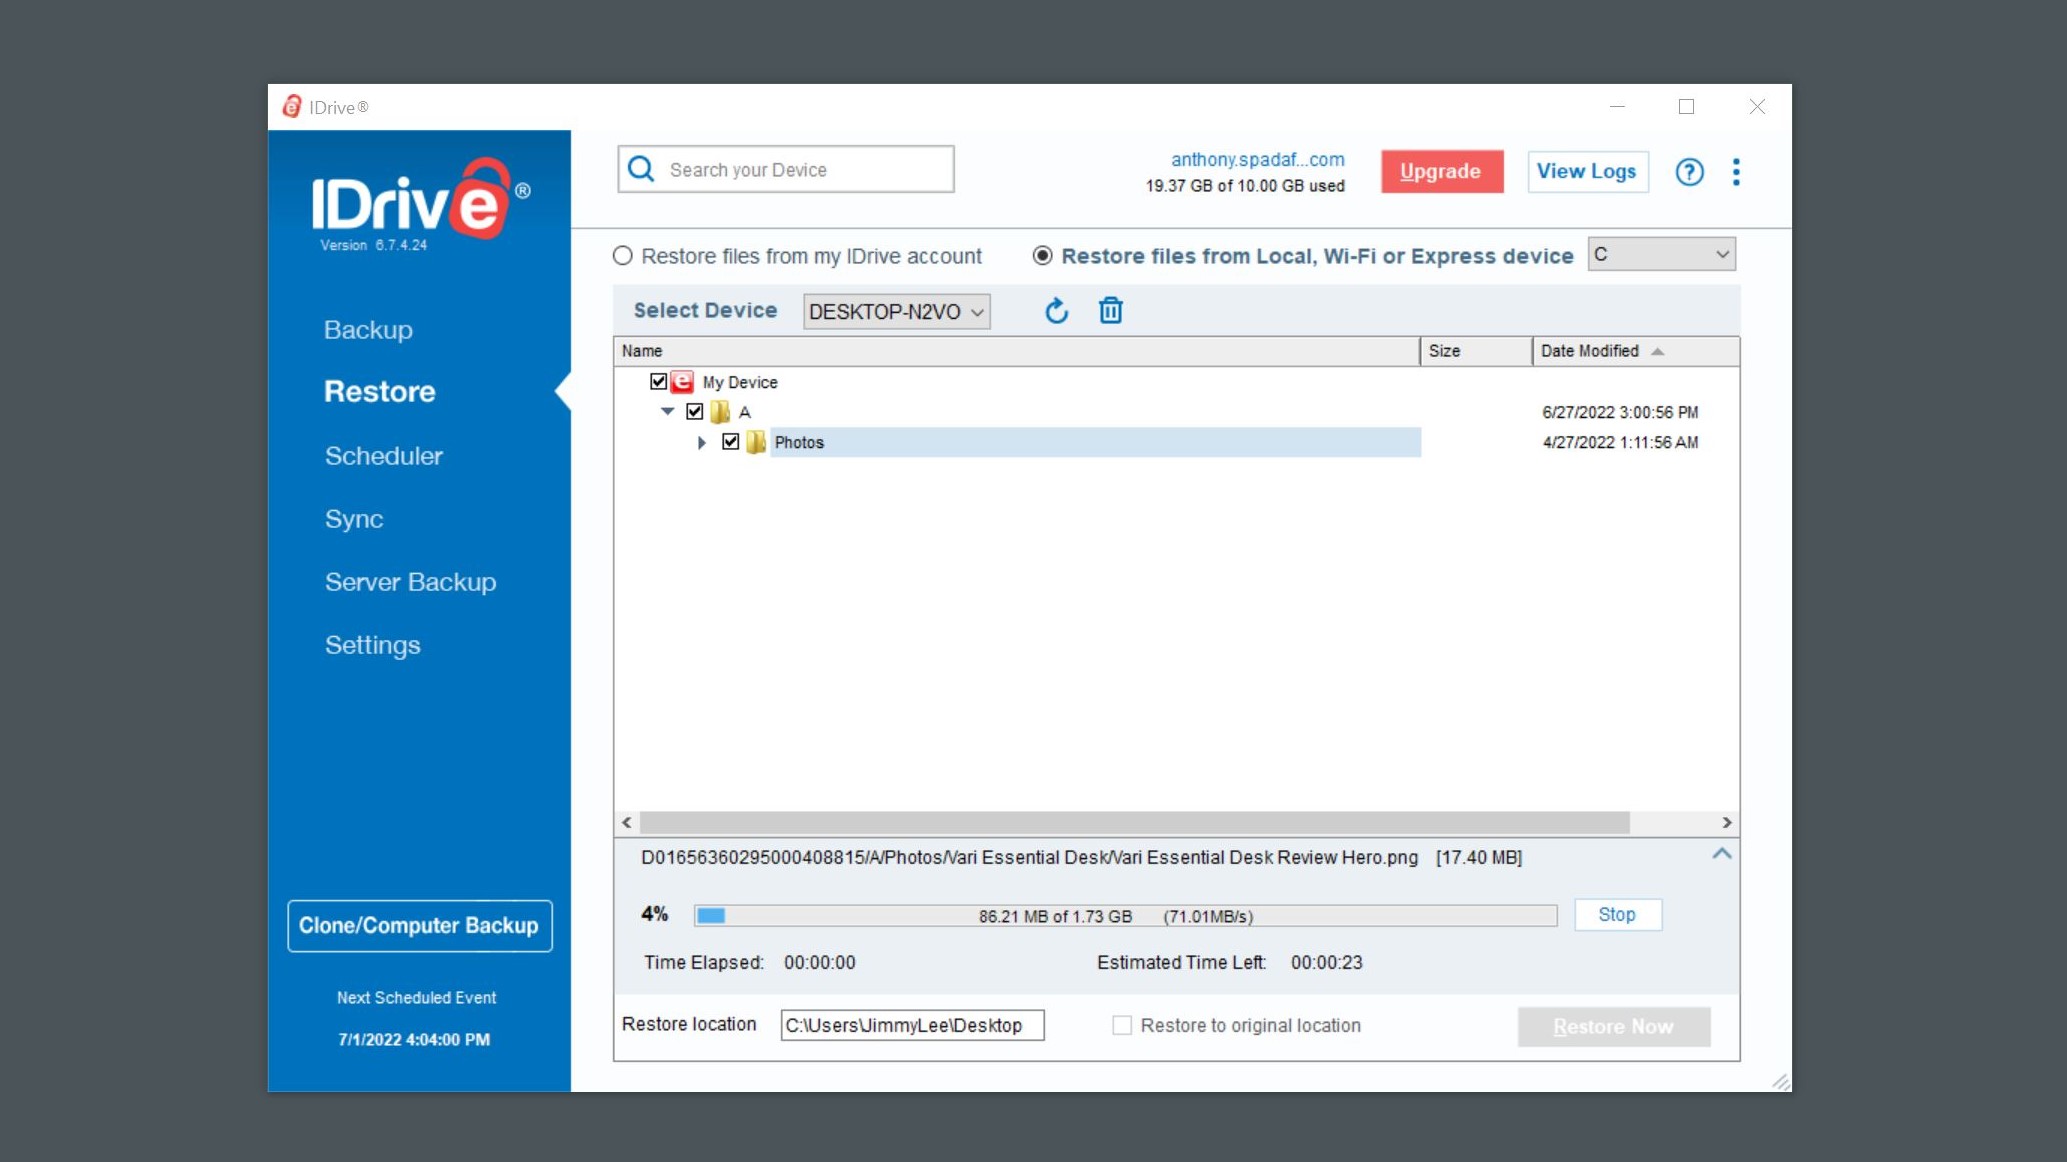
3. Restore your files. When you're ready to restore your files, simply click on the Restore Now button on the bottom left. The program will begin restoring them and you can see how much time has elapsed and the Estimated Time Left underneath the progress bar.
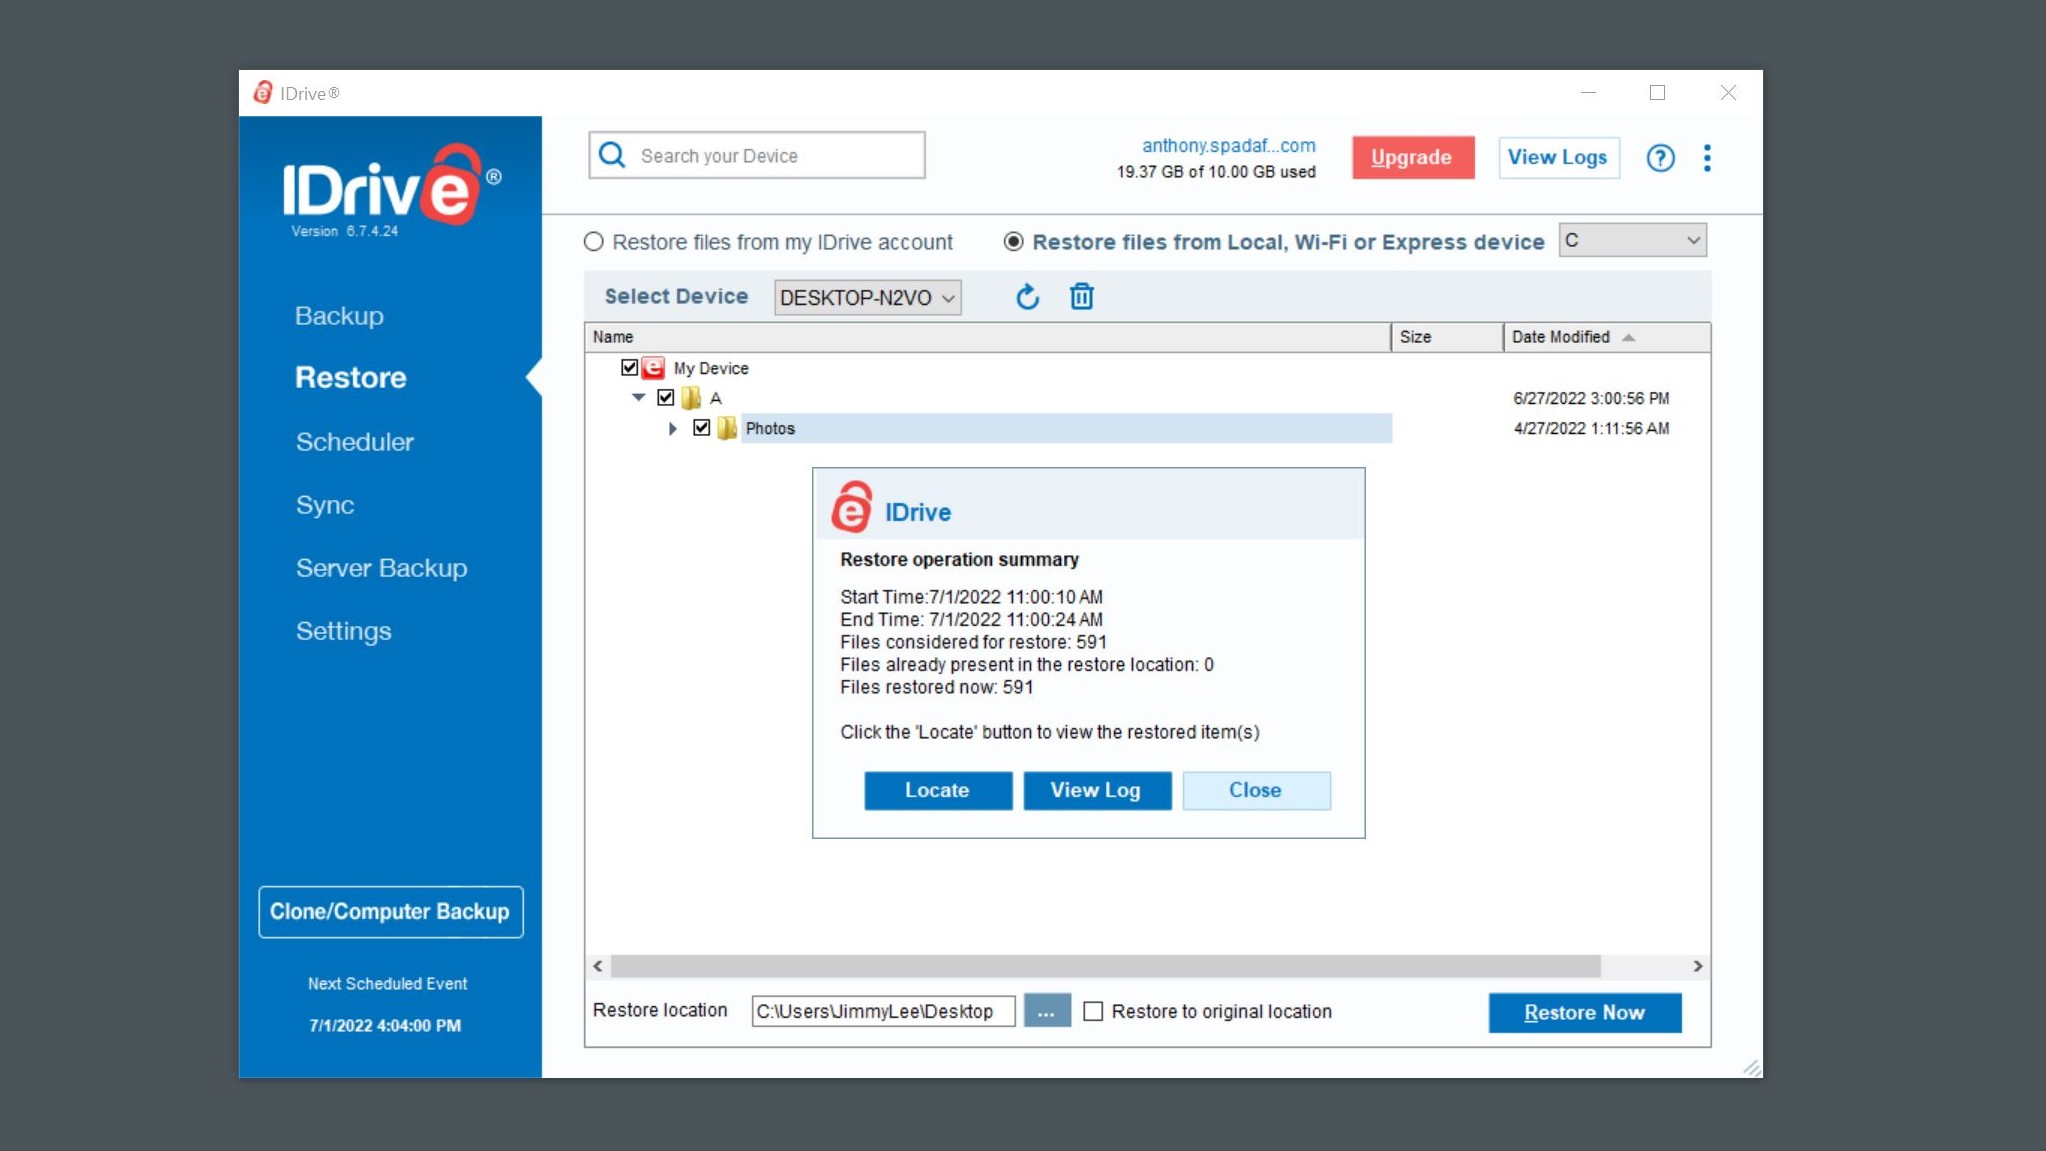
4. View your restored files. Once the operation is complete, a Restore operation summary window will appear just like after a backup. Here you can click on View Log to see more information about the restore process or find the files on your computer by clicking Locate.
Now you know exactly how to back up and restore your local files using IDrive. This way you can rest easy knowing that you have an encrypted backup of your most important documents for safekeeping. As we mentioned before, it’s also a good idea to create multiple backups and store them on different types of physical media as well as in the cloud to follow the 3-2-1 backup rule.

Anthony Spadafora is the managing editor for security and home office furniture at Tom’s Guide where he covers everything from data breaches to password managers and the best way to cover your whole home or business with Wi-Fi. He also reviews standing desks, office chairs and other home office accessories with a penchant for building desk setups. Before joining the team, Anthony wrote for ITProPortal while living in Korea and later for TechRadar Pro after moving back to the US. Based in Houston, Texas, when he’s not writing Anthony can be found tinkering with PCs and game consoles, managing cables and upgrading his smart home.
 Club Benefits


