How to transfer photos from Android to a computer
Here’s how to transfer photos from Android to a computer
There are endless reasons why you should know how to transfer photos from Android to a computer. Maybe you've just picked up one of the best unlocked Android phones or best Android tablets and want to back up the gallery from your old device. Or perhaps you want to test out the display of one of the best Windows laptops by viewing your snaps on your computer's bigger screen.
Whatever your motivation, knowing how to transfer photos from Android to PC will allow you to view, share, and edit your precious pics on your Windows PC with ease, as well as provide a place for you to physically backup your photographs if you'd prefer not to use a cloud storage service.
Thanks to Microsoft's handy Phone Link app (formerly known as Your Phone), you can instantly view your gallery on your Windows computer wirelessly, allowing you to save pics to your computer with just a couple of clicks. Or if you'd prefer to do things the old-fashioned way, hooking your phone up by USB is just as easy.
The process to set up Phone Link is slightly different depending on whether you have a Samsung phone or not, since Microsoft and Samsung have a partnership which means Phone Link functionality is baked into recent Samsung Galaxy devices in certain regions. However, it's still just as easy to set up Phone Link with non-Samsung devices, or those without Phone Link built in.
So, if you want to know how to transfer photos from Android to PC, follow this guide to learn all about it.
How to transfer photos from Android to a computer
Transfer photos from Android to a Windows PC wirelessly: Samsung phone
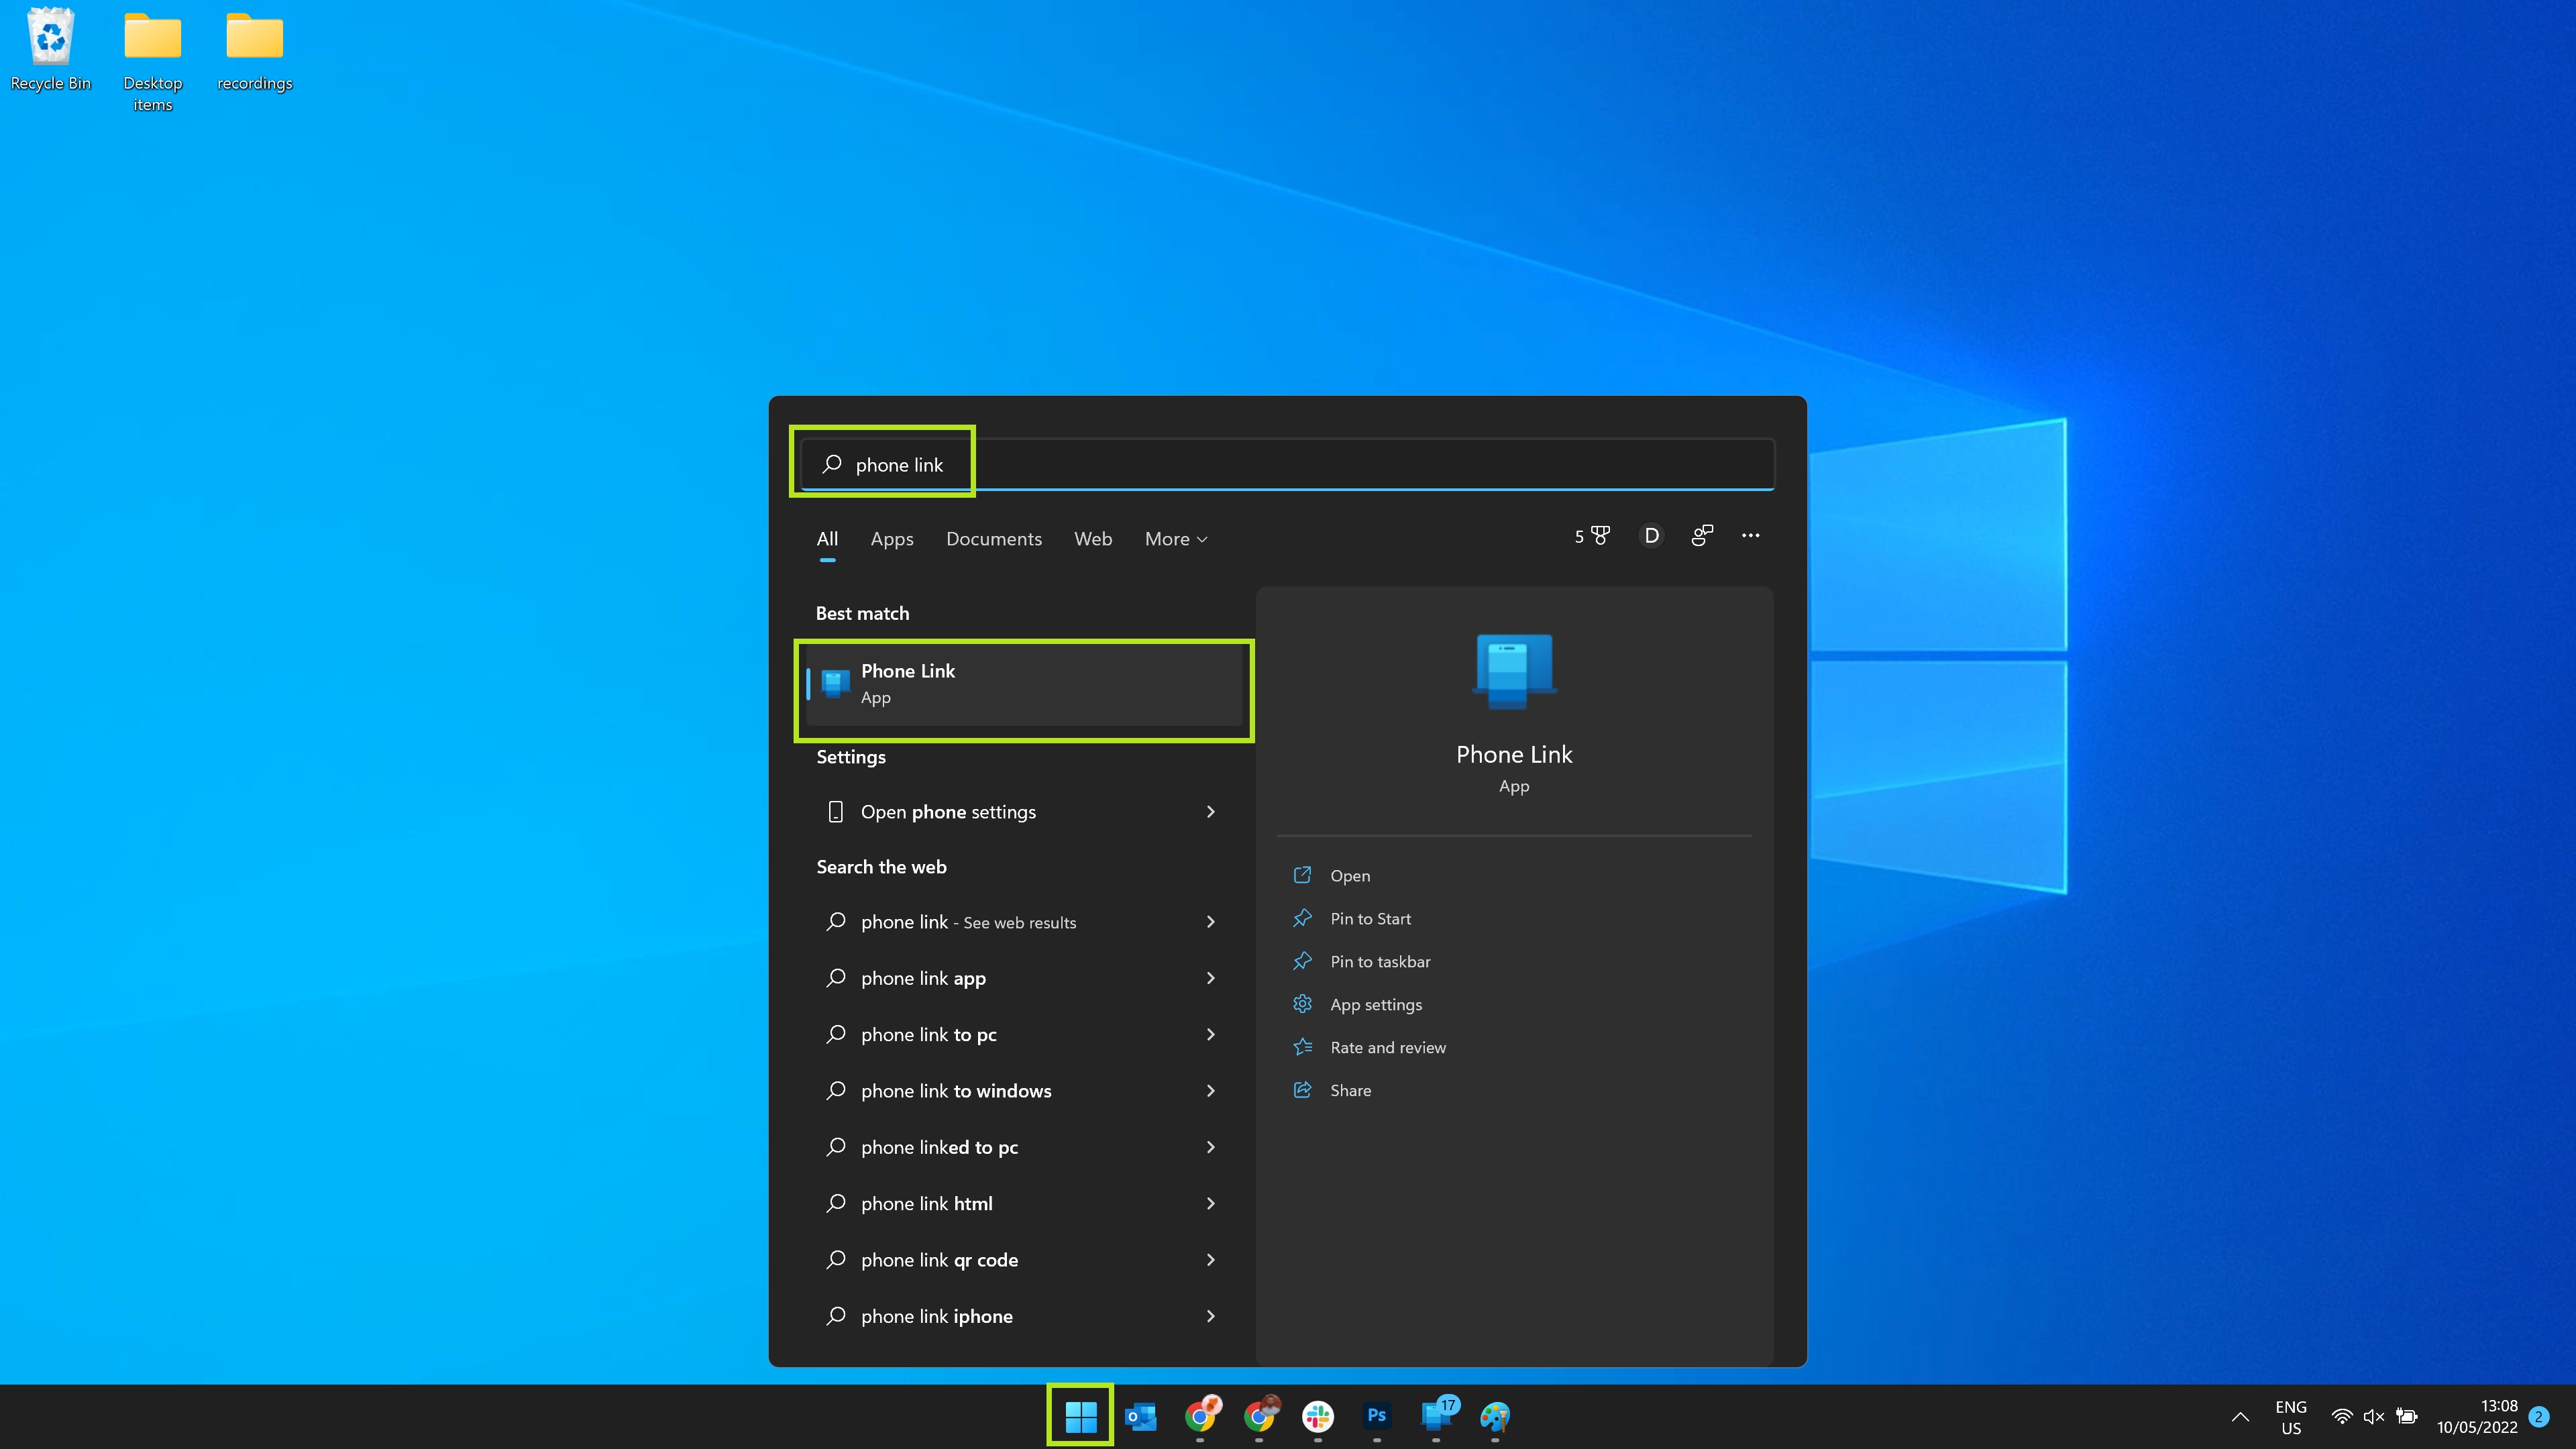
1. Open the Phone Link app on your PC by launching the Start menu and typing "Phone Link" until it appears, before clicking the app icon. If you don't see the app, you can install it from the Microsoft Store.
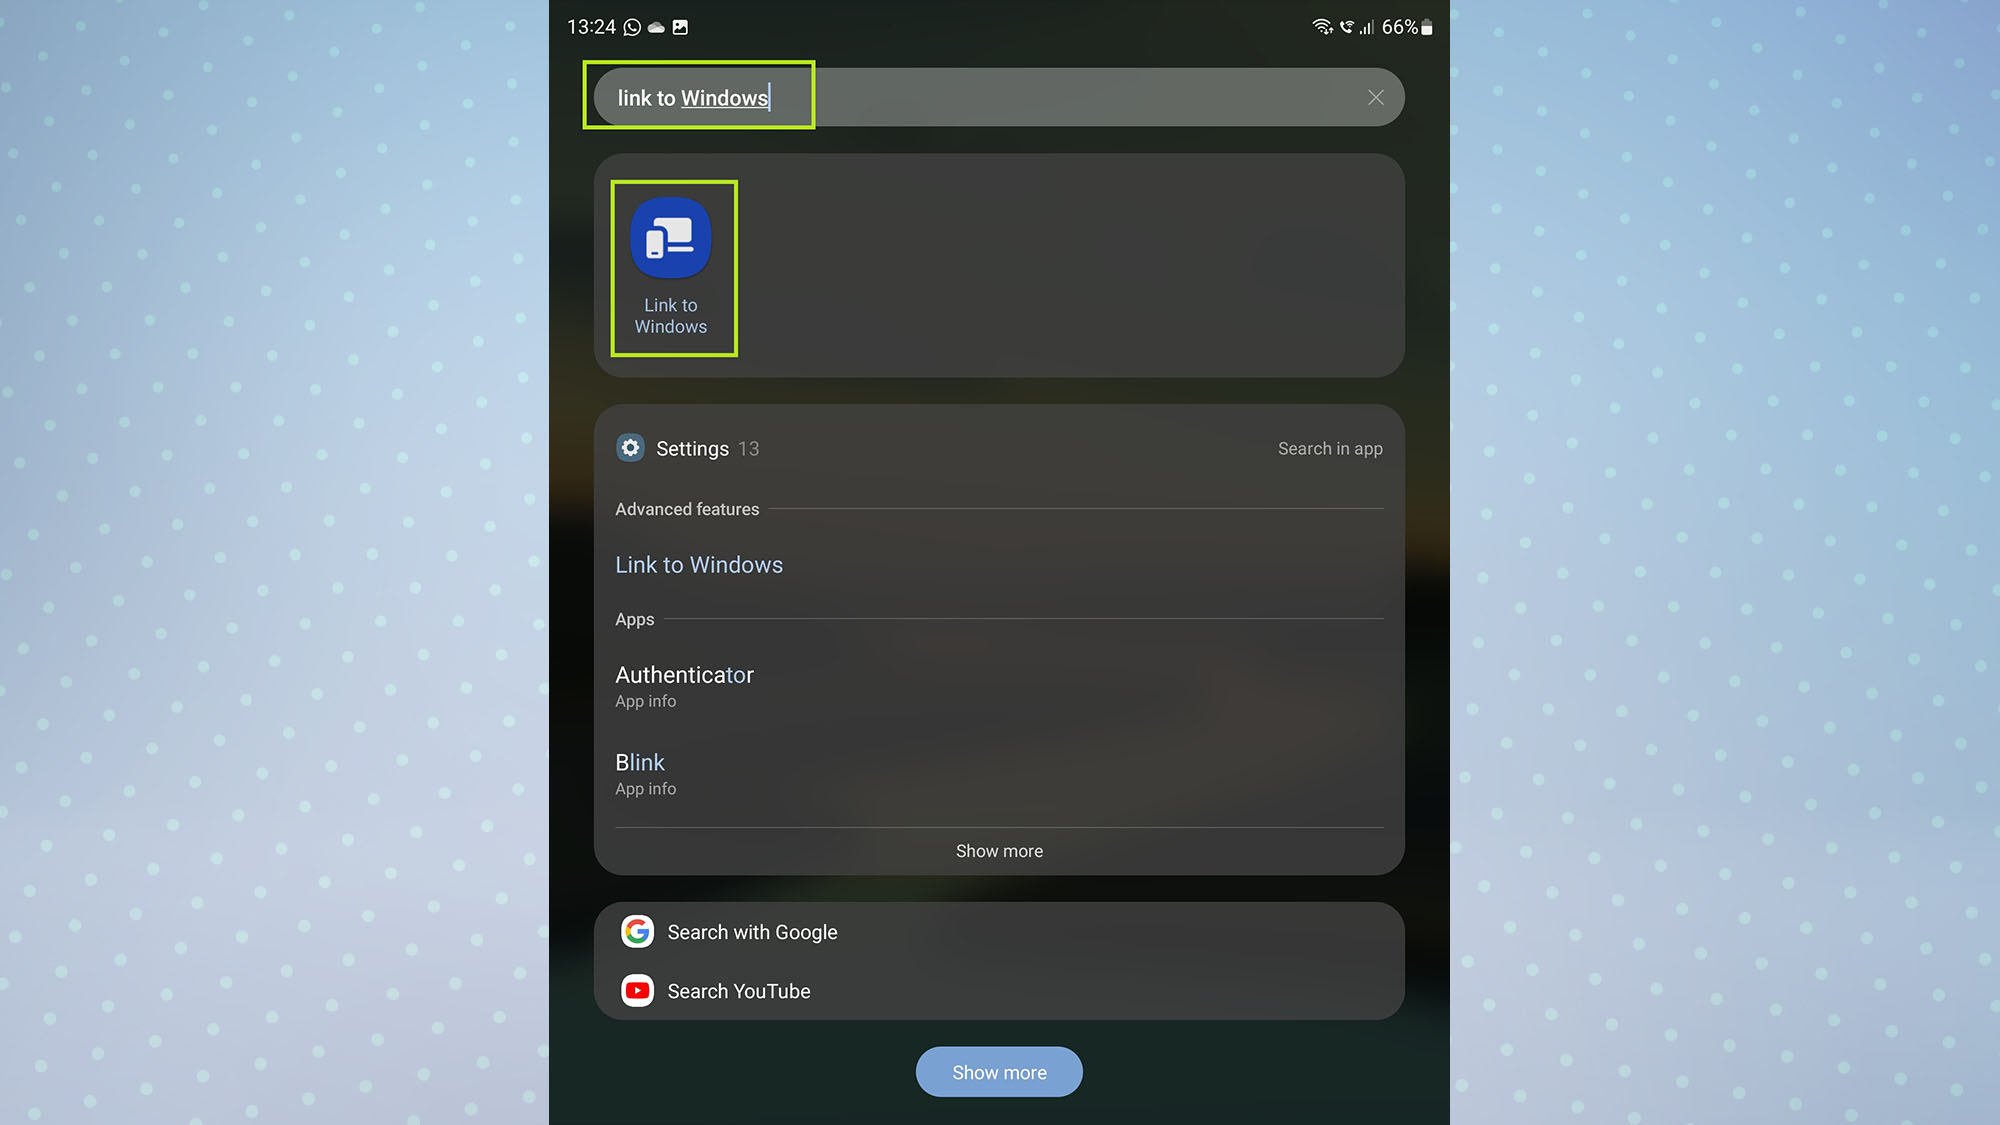
2. Open the Link to Windows app on your Samsung phone by opening your app drawer and searching "Link to Windows". Tap the Link to Windows app icon to open it.
Get instant access to breaking news, the hottest reviews, great deals and helpful tips.
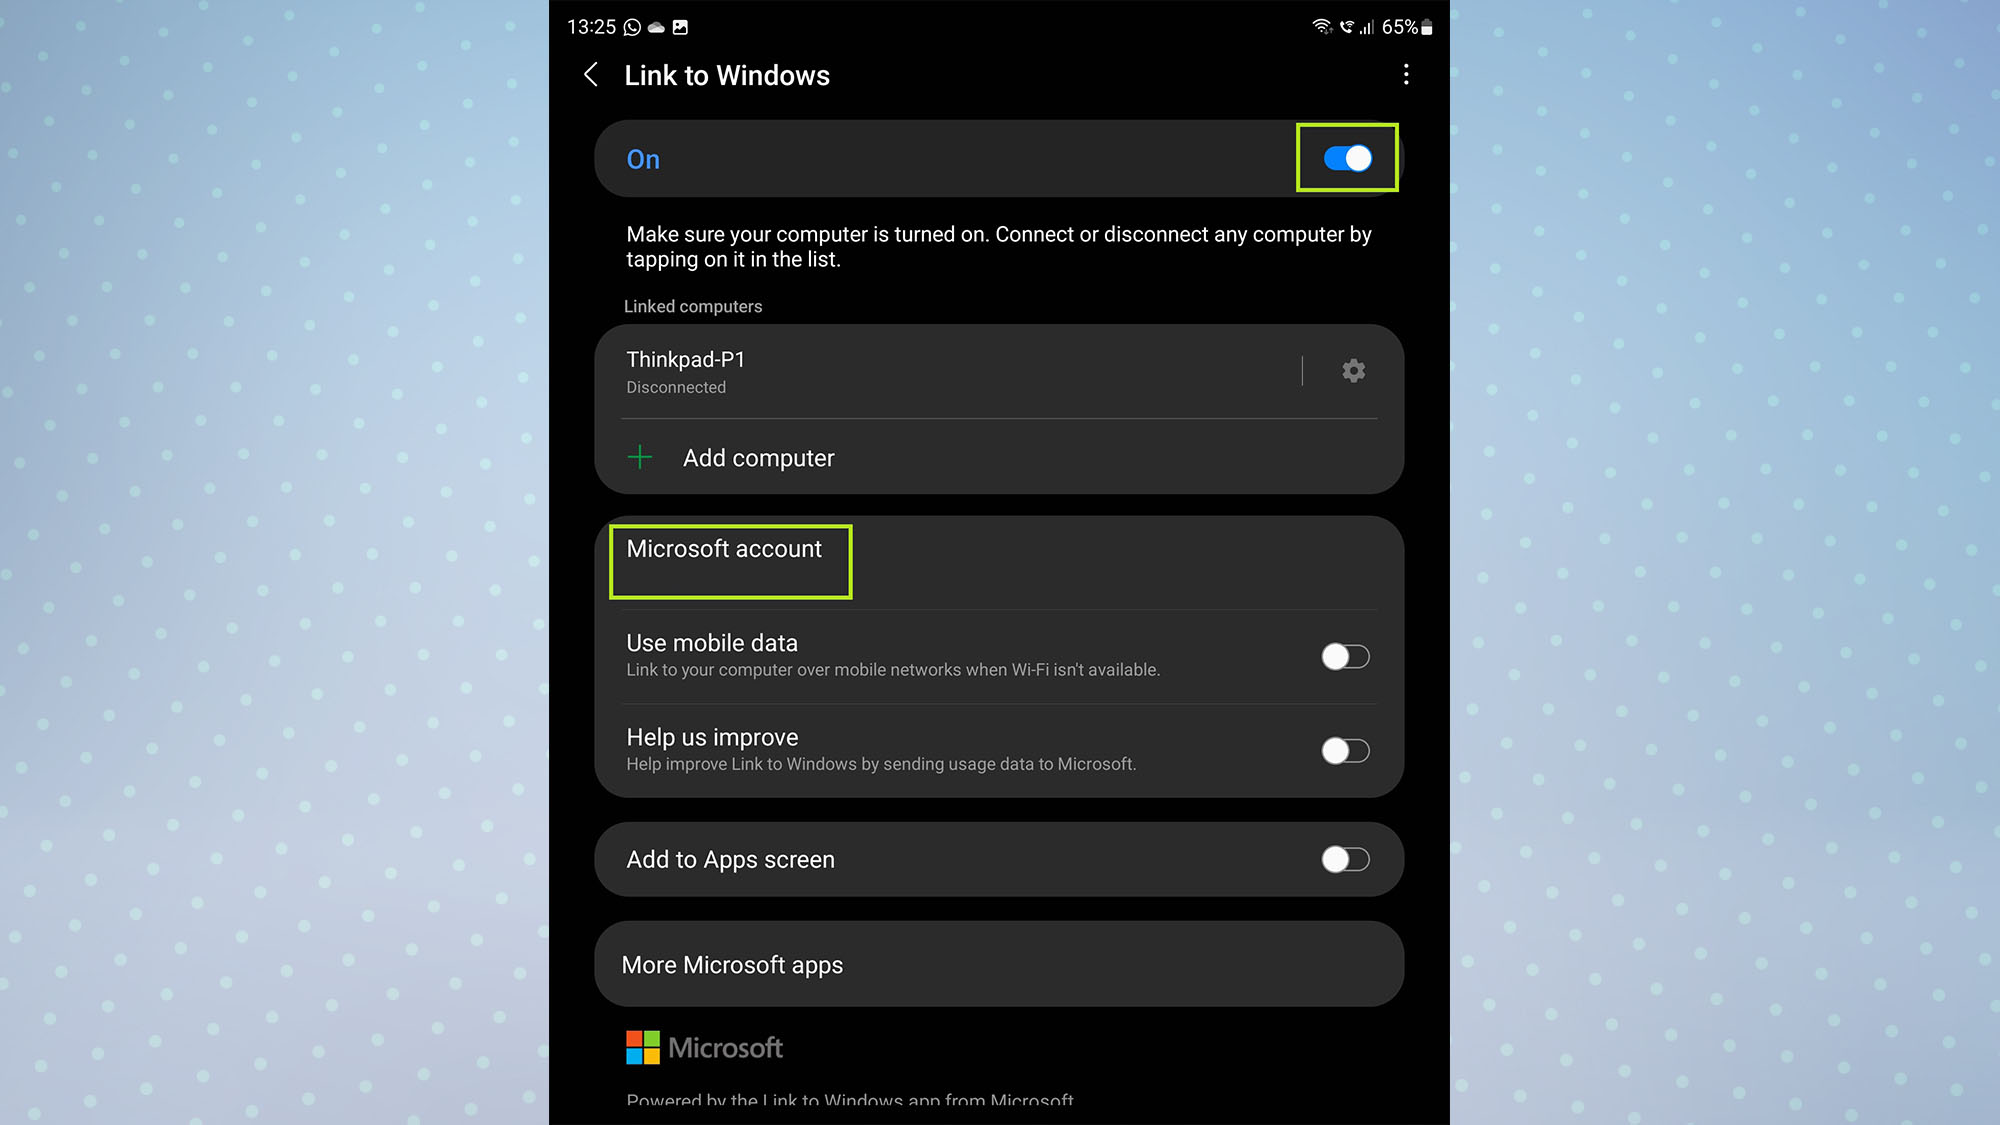
3. You'll now see the Link to Windows settings page. Tap the toggle next to On to switch the feature on. Next, add your Microsoft account to your phone if you haven't already by tapping Microsoft account.
Note: The Microsoft account you use must also be signed in on the Windows PC you want to sync your photos to.
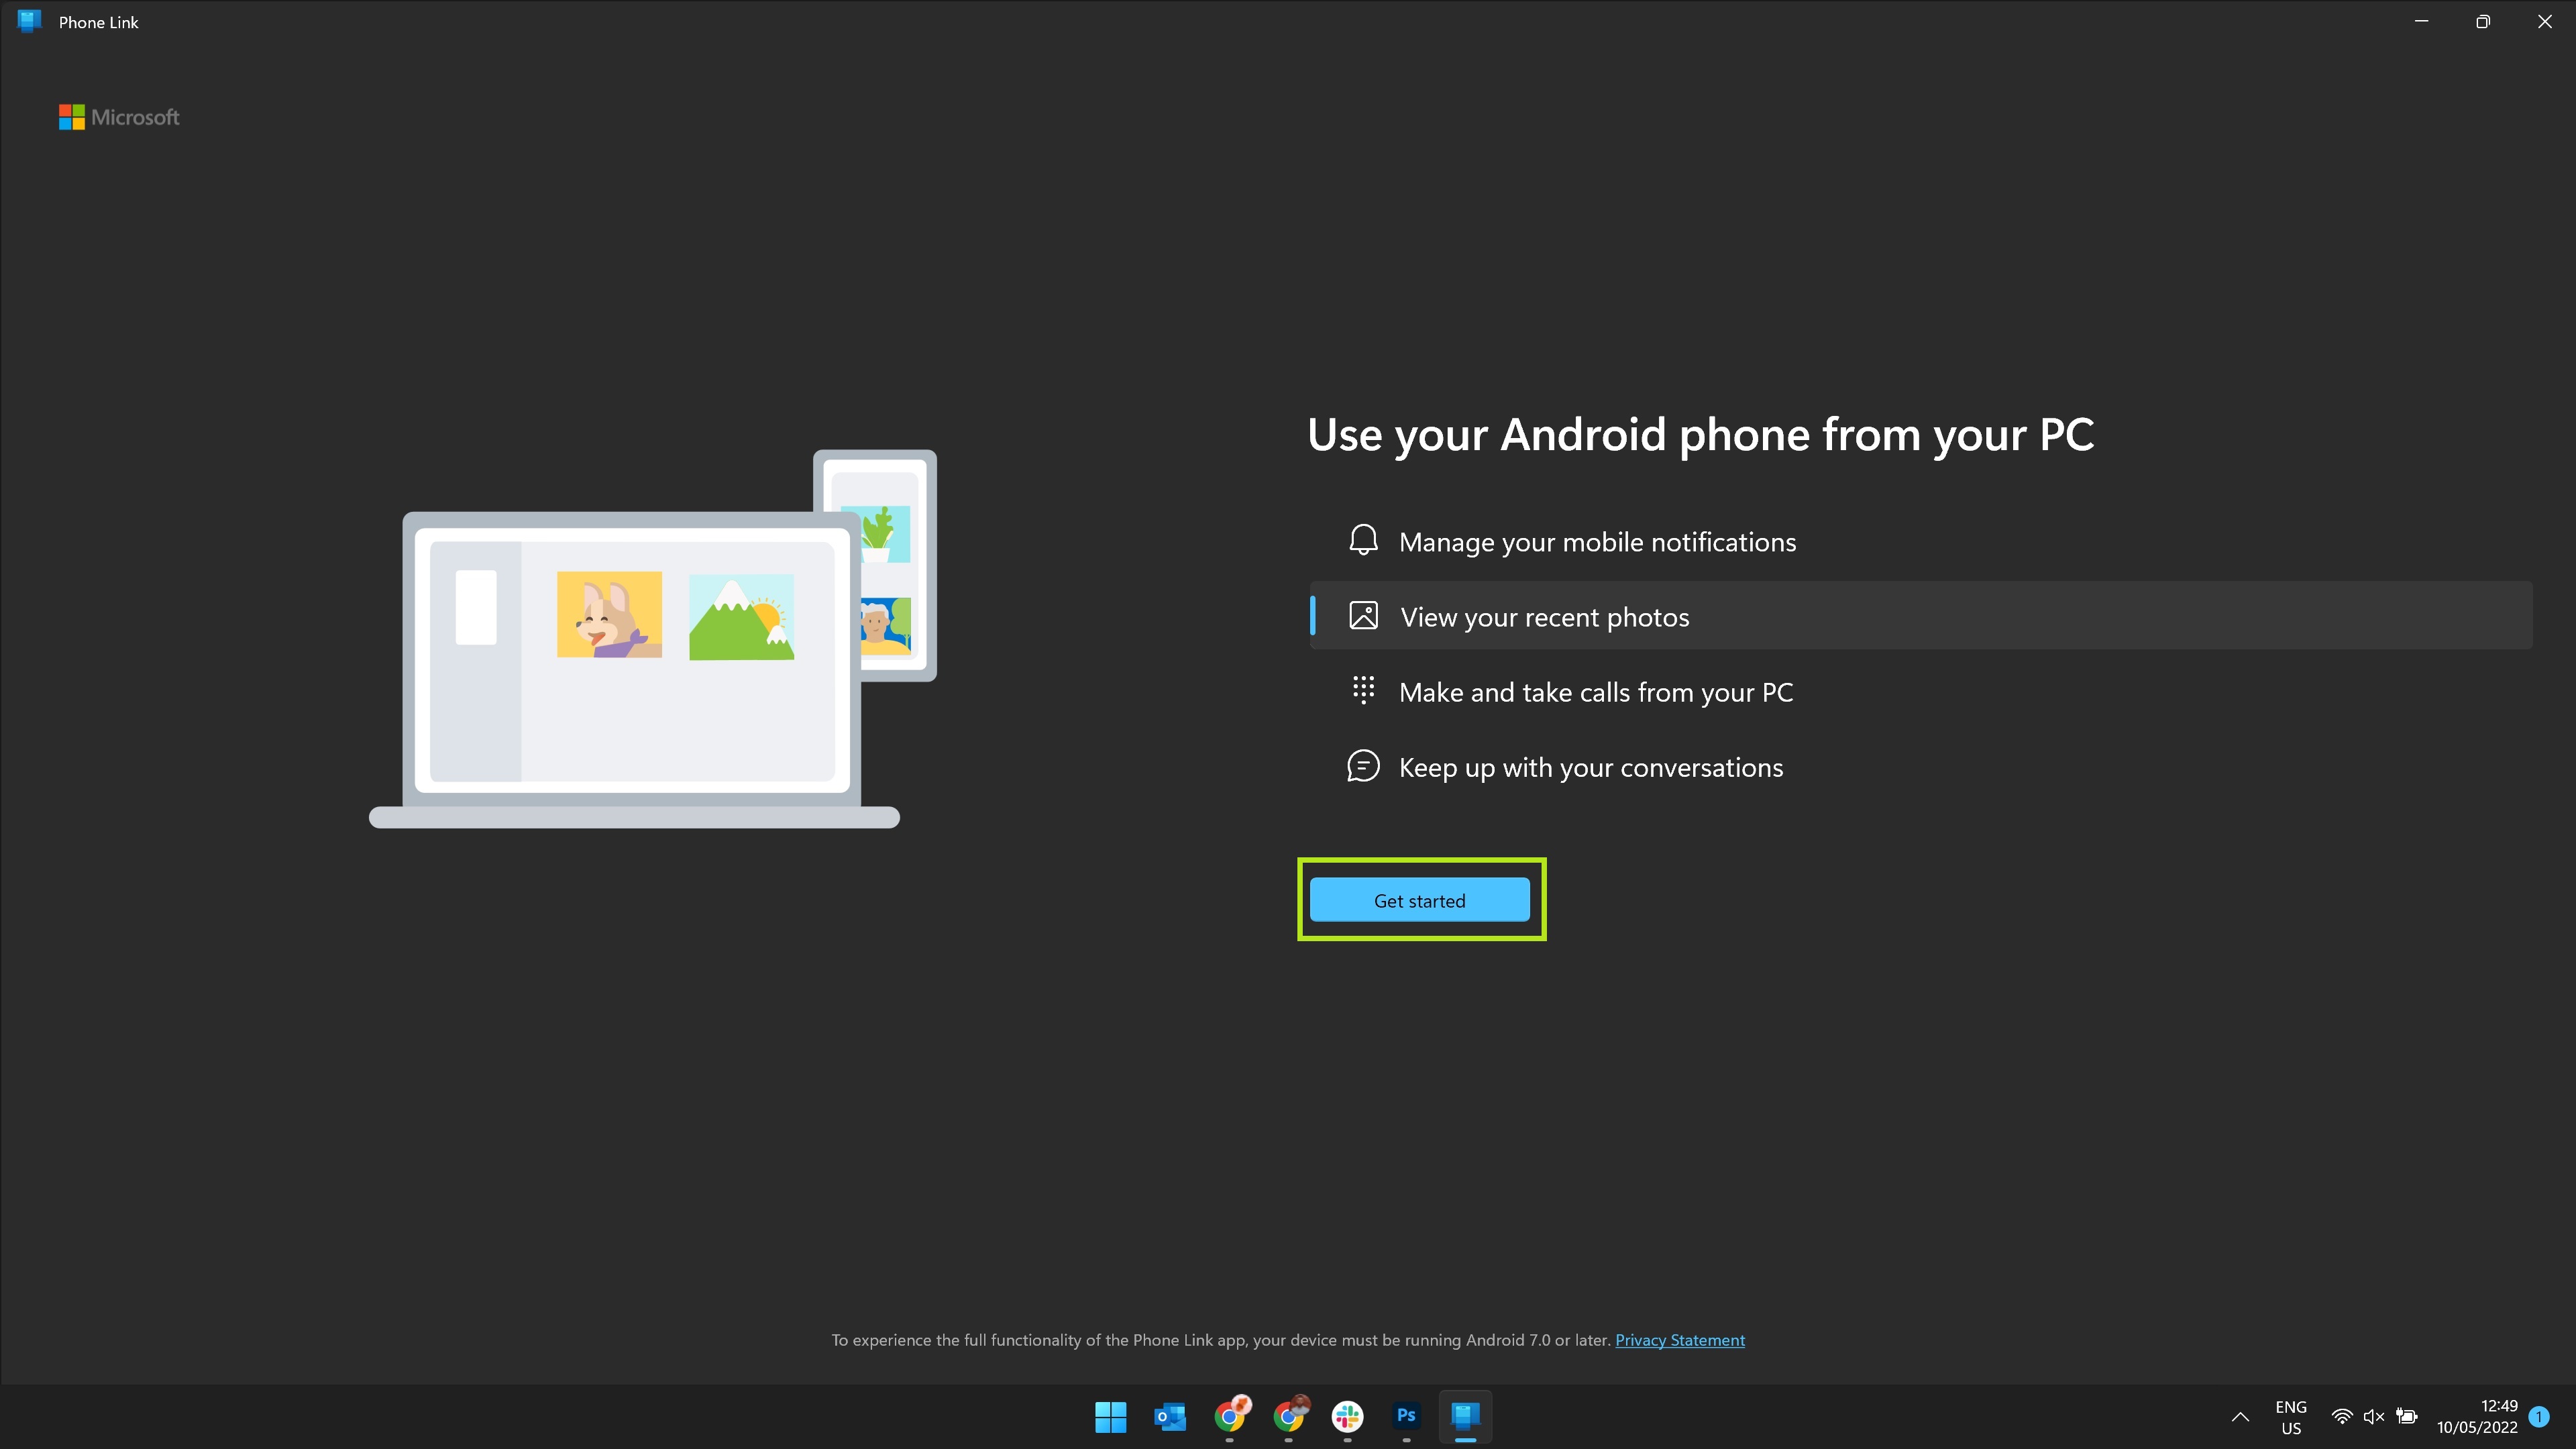
4. Open the Phone Link app on your PC and click Get started.
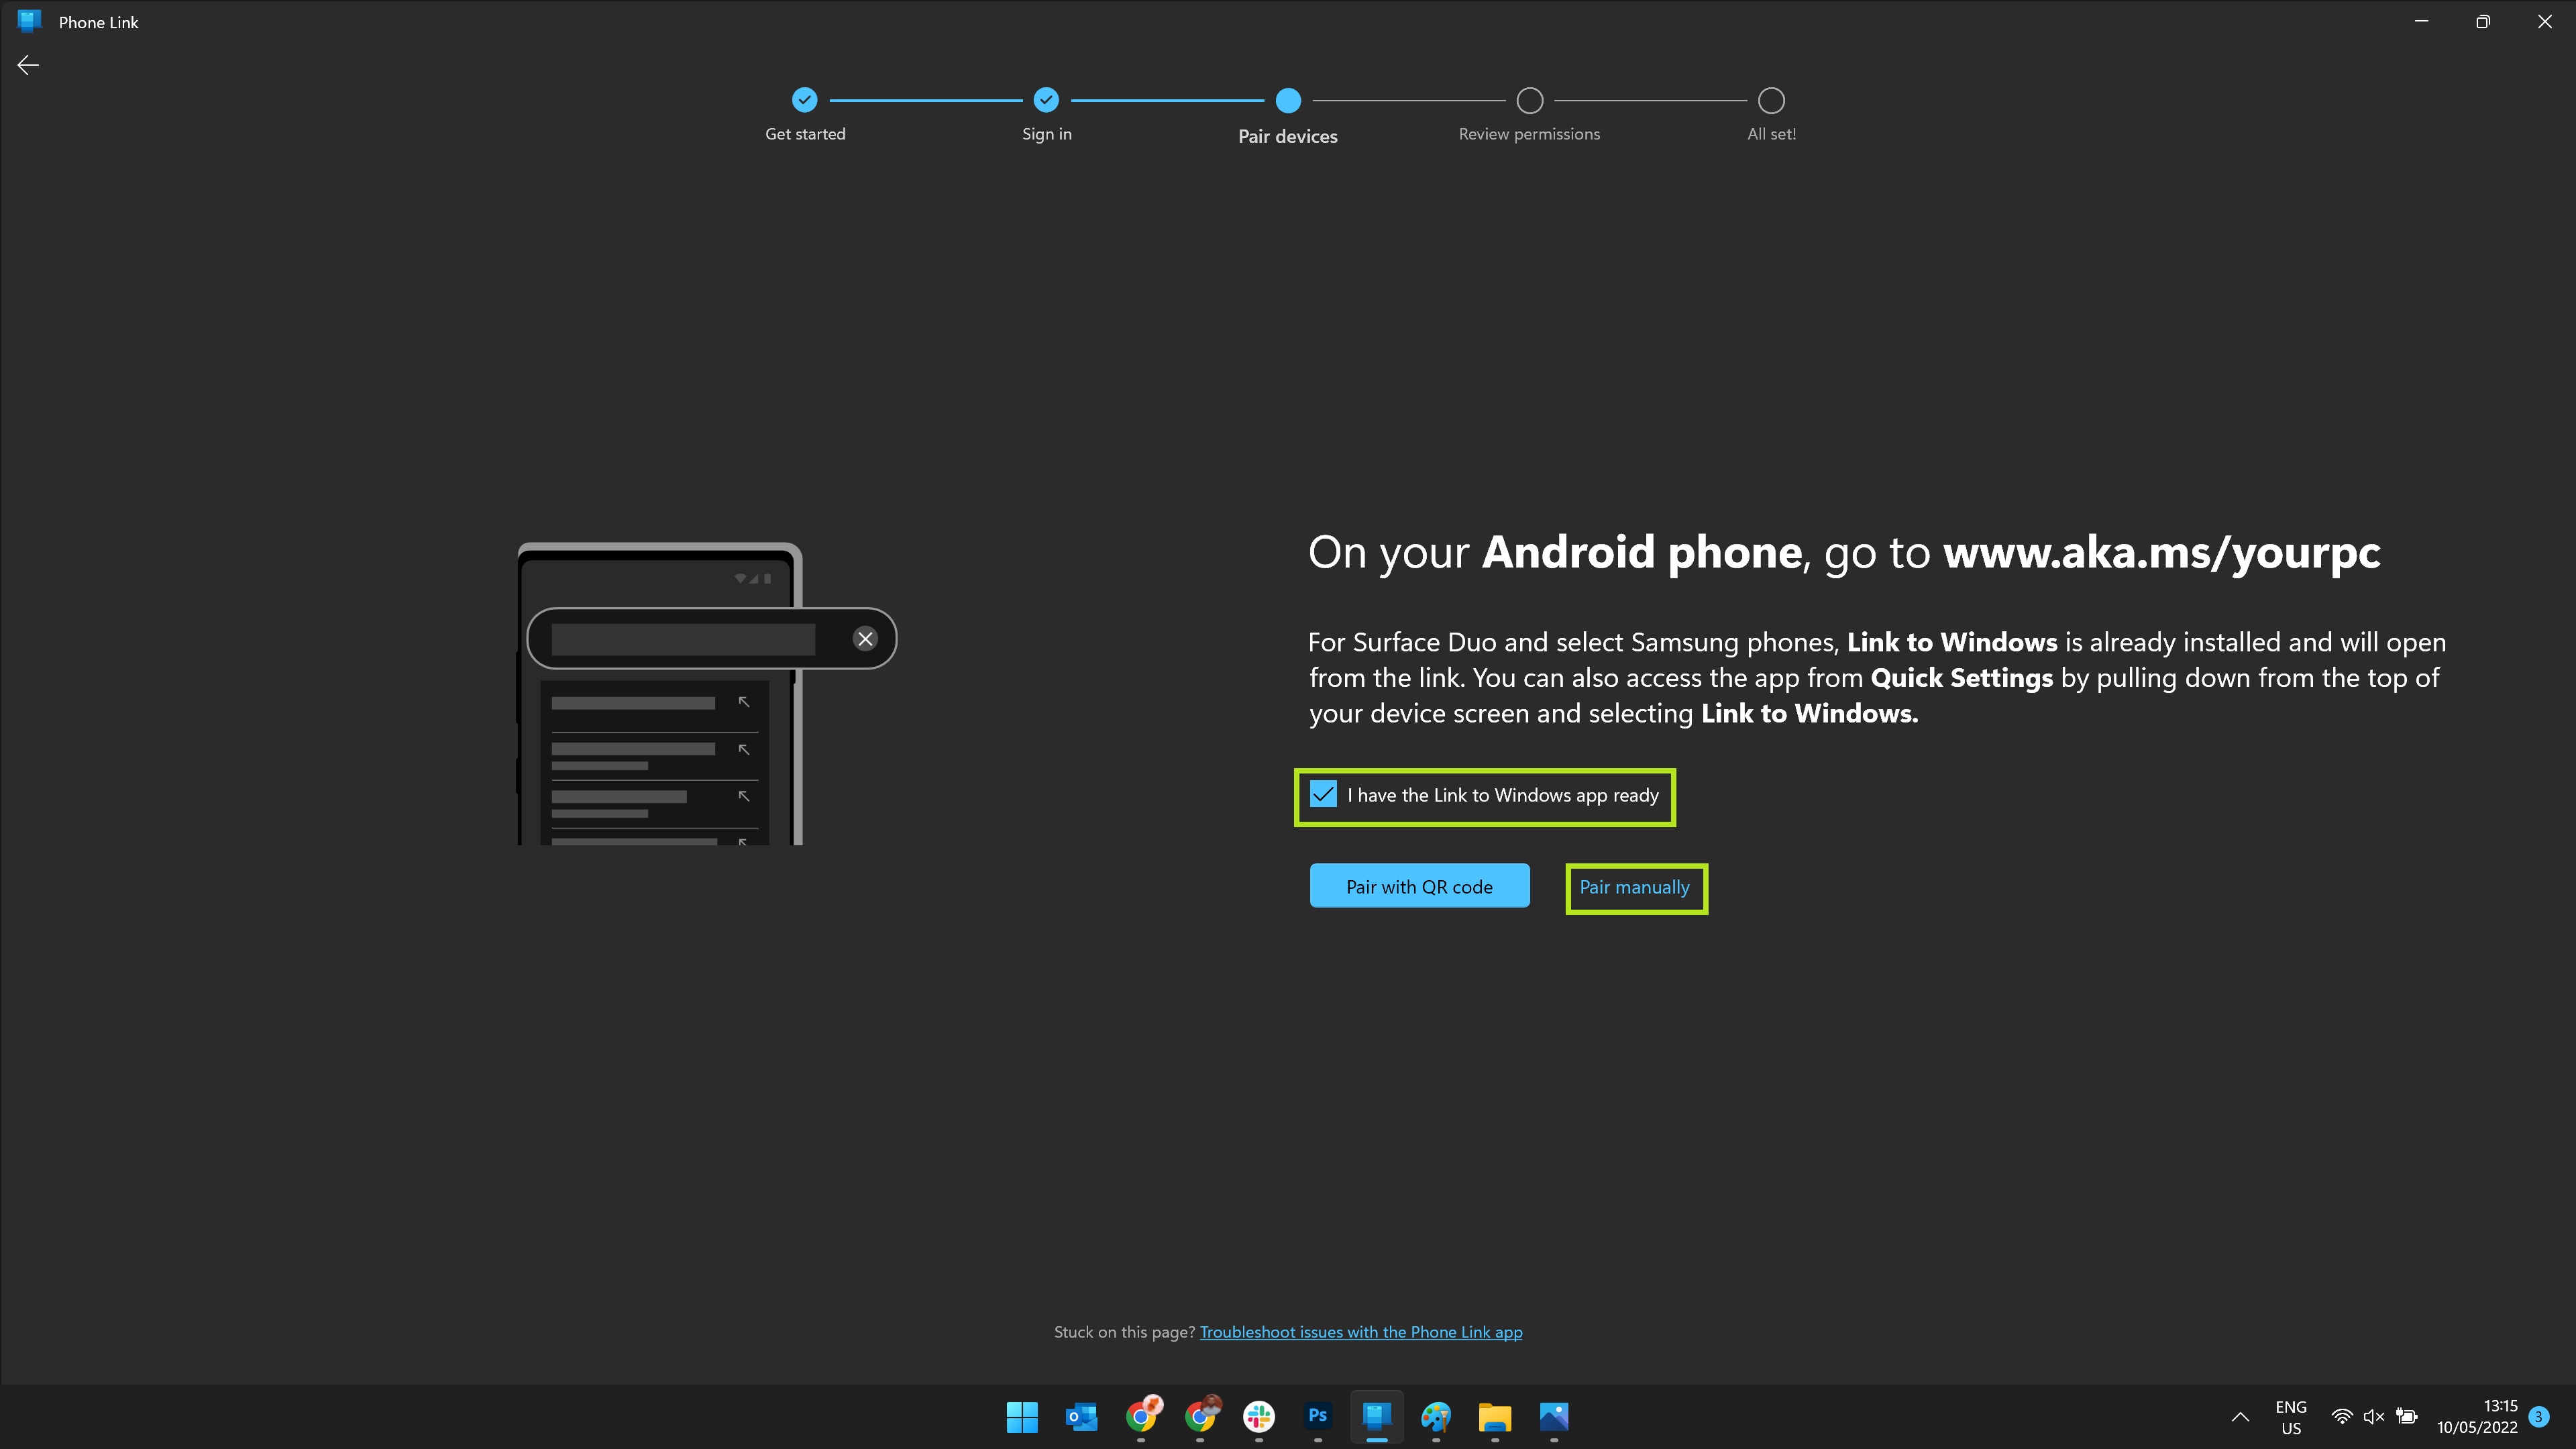
5. Check the box next to "I have the Link to Windows app ready", then click Pair manually.
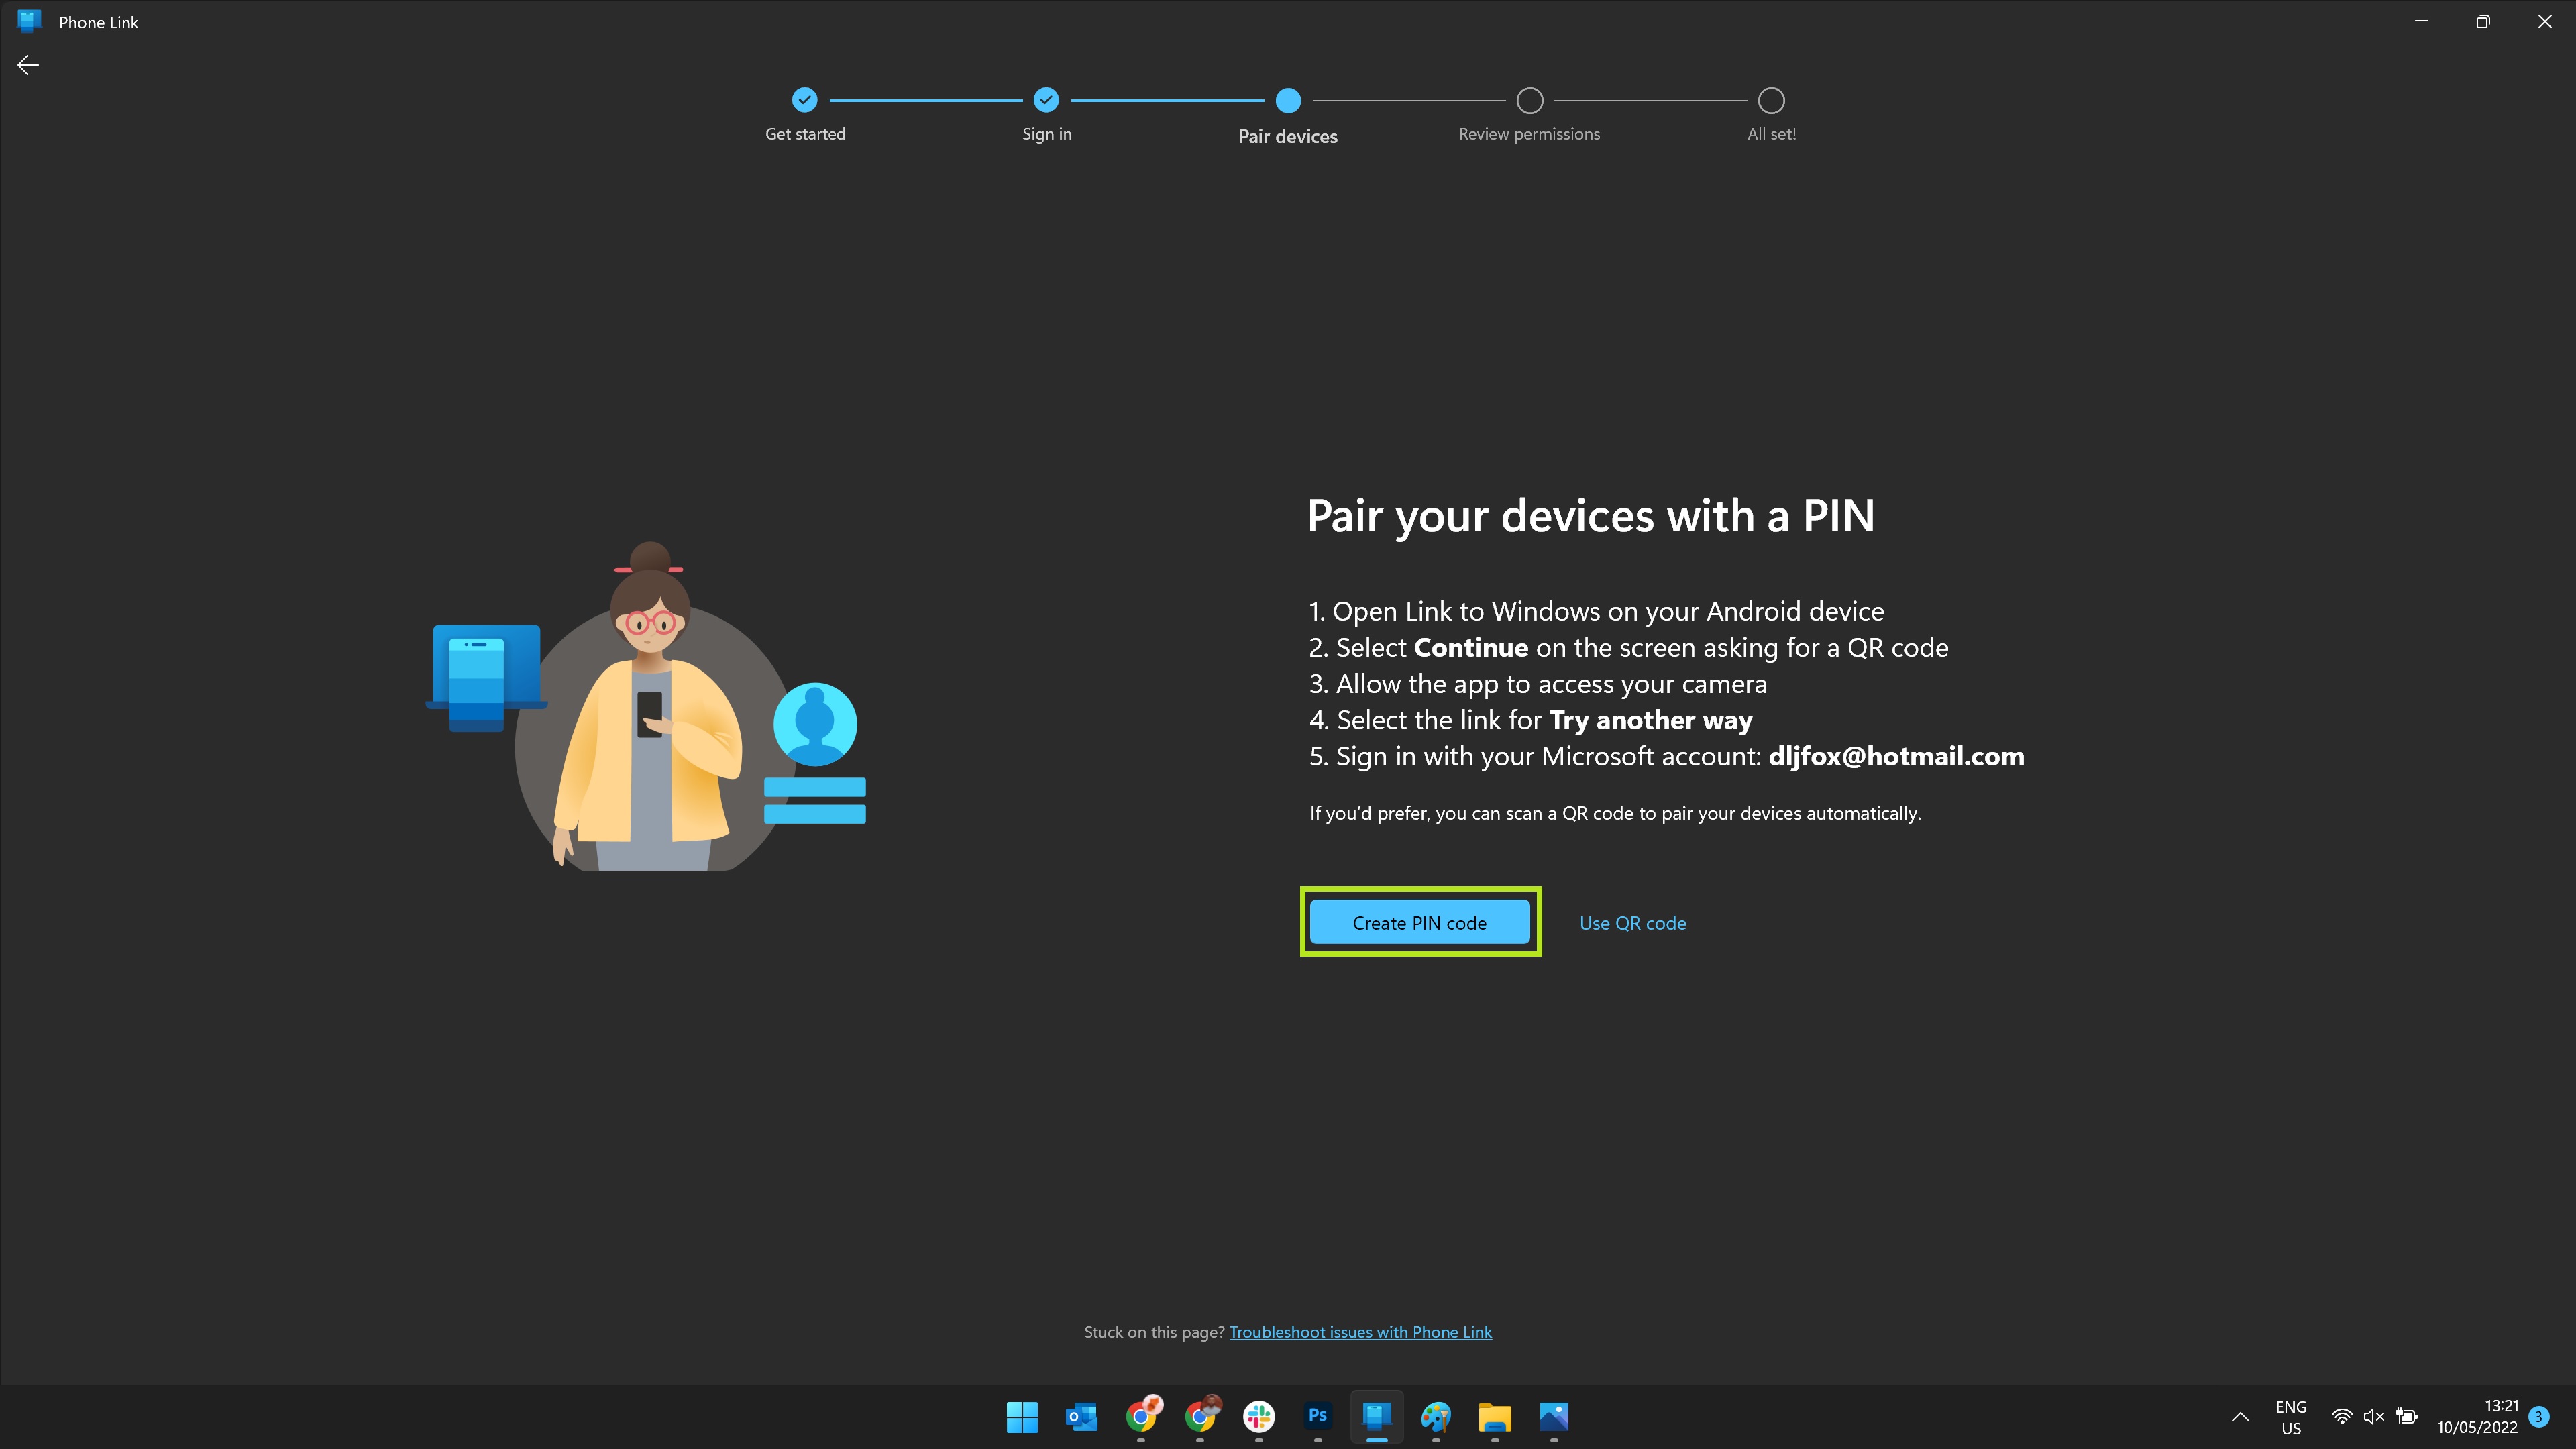
6. Click Create PIN code, then a PIN will appear on the next screen.
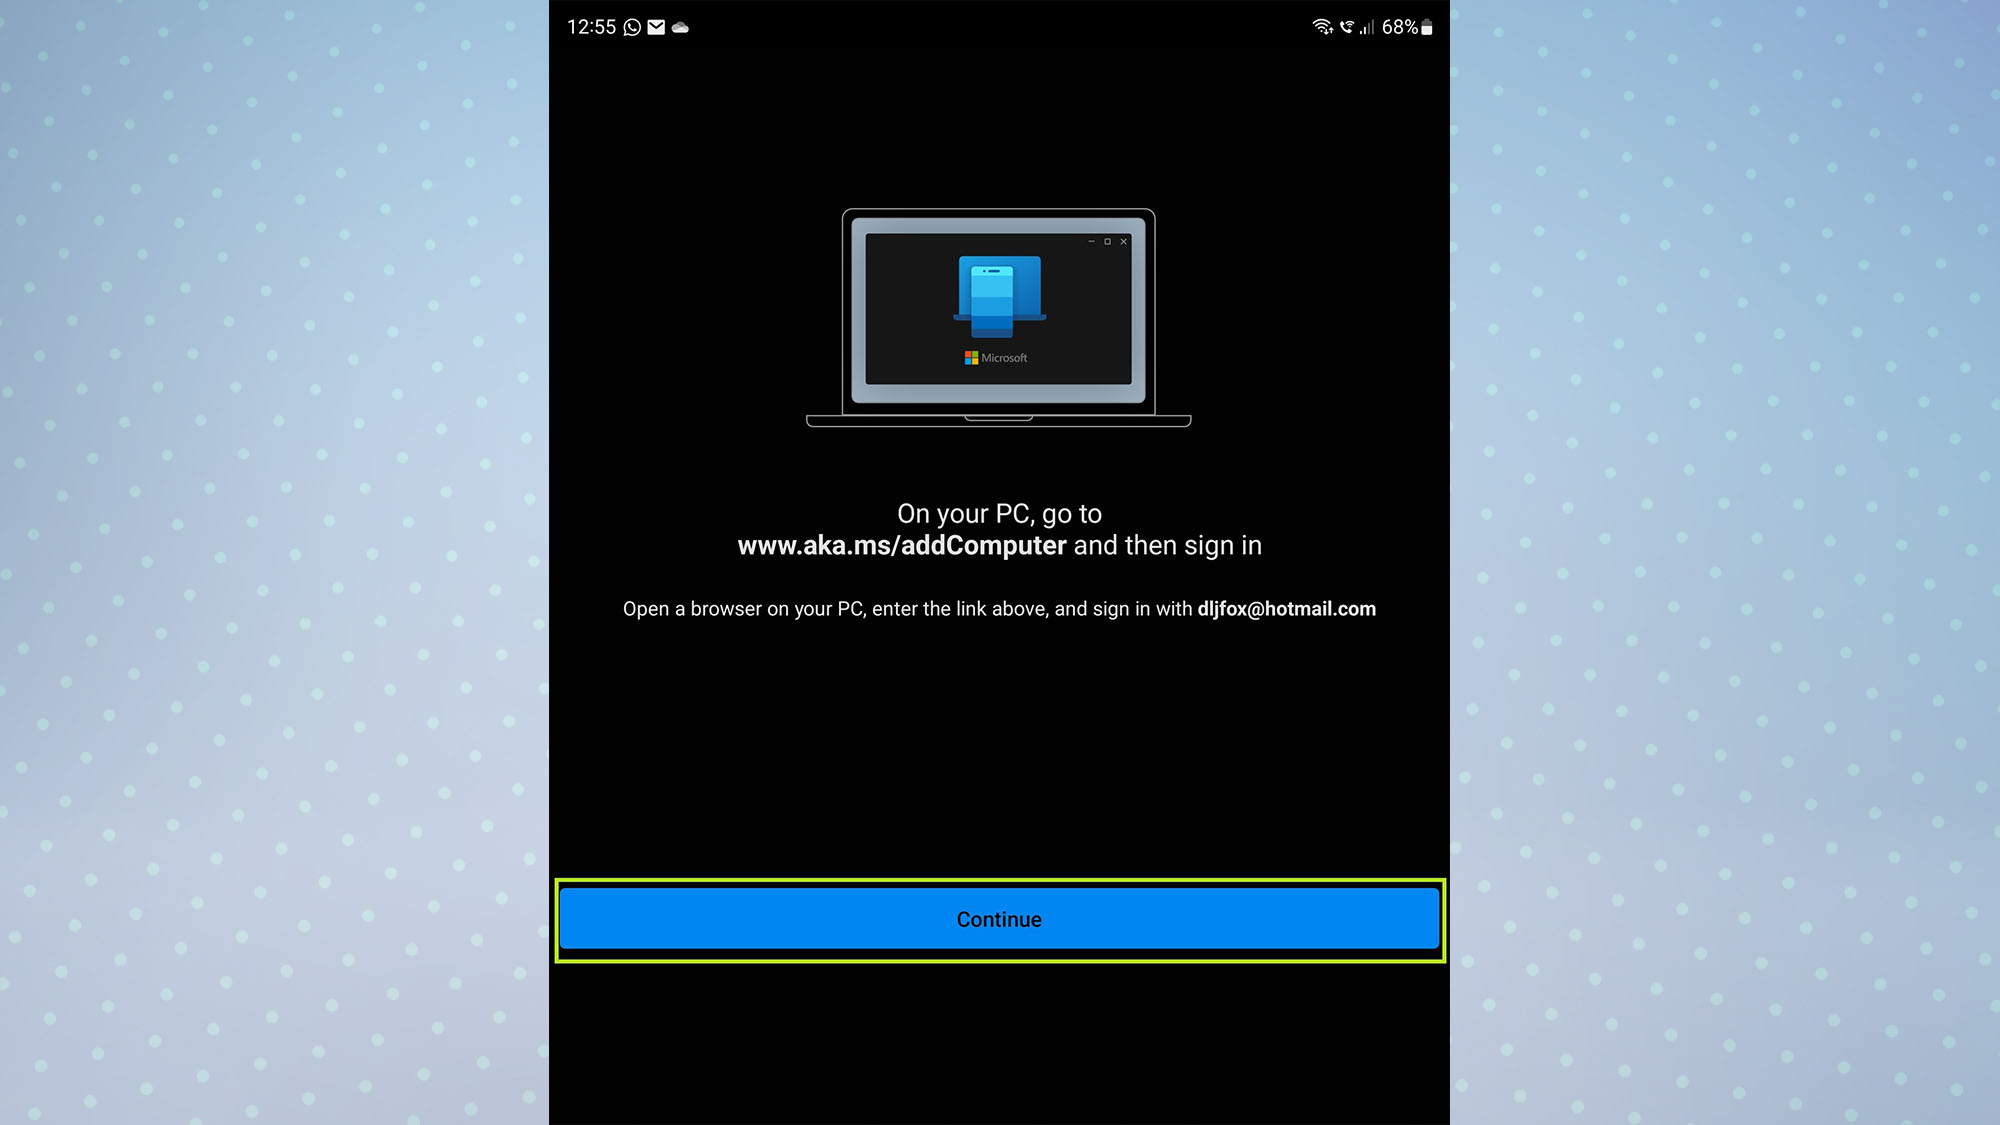
7. Open the Link to Windows app on your Samsung phone and tap Continue on this screen.
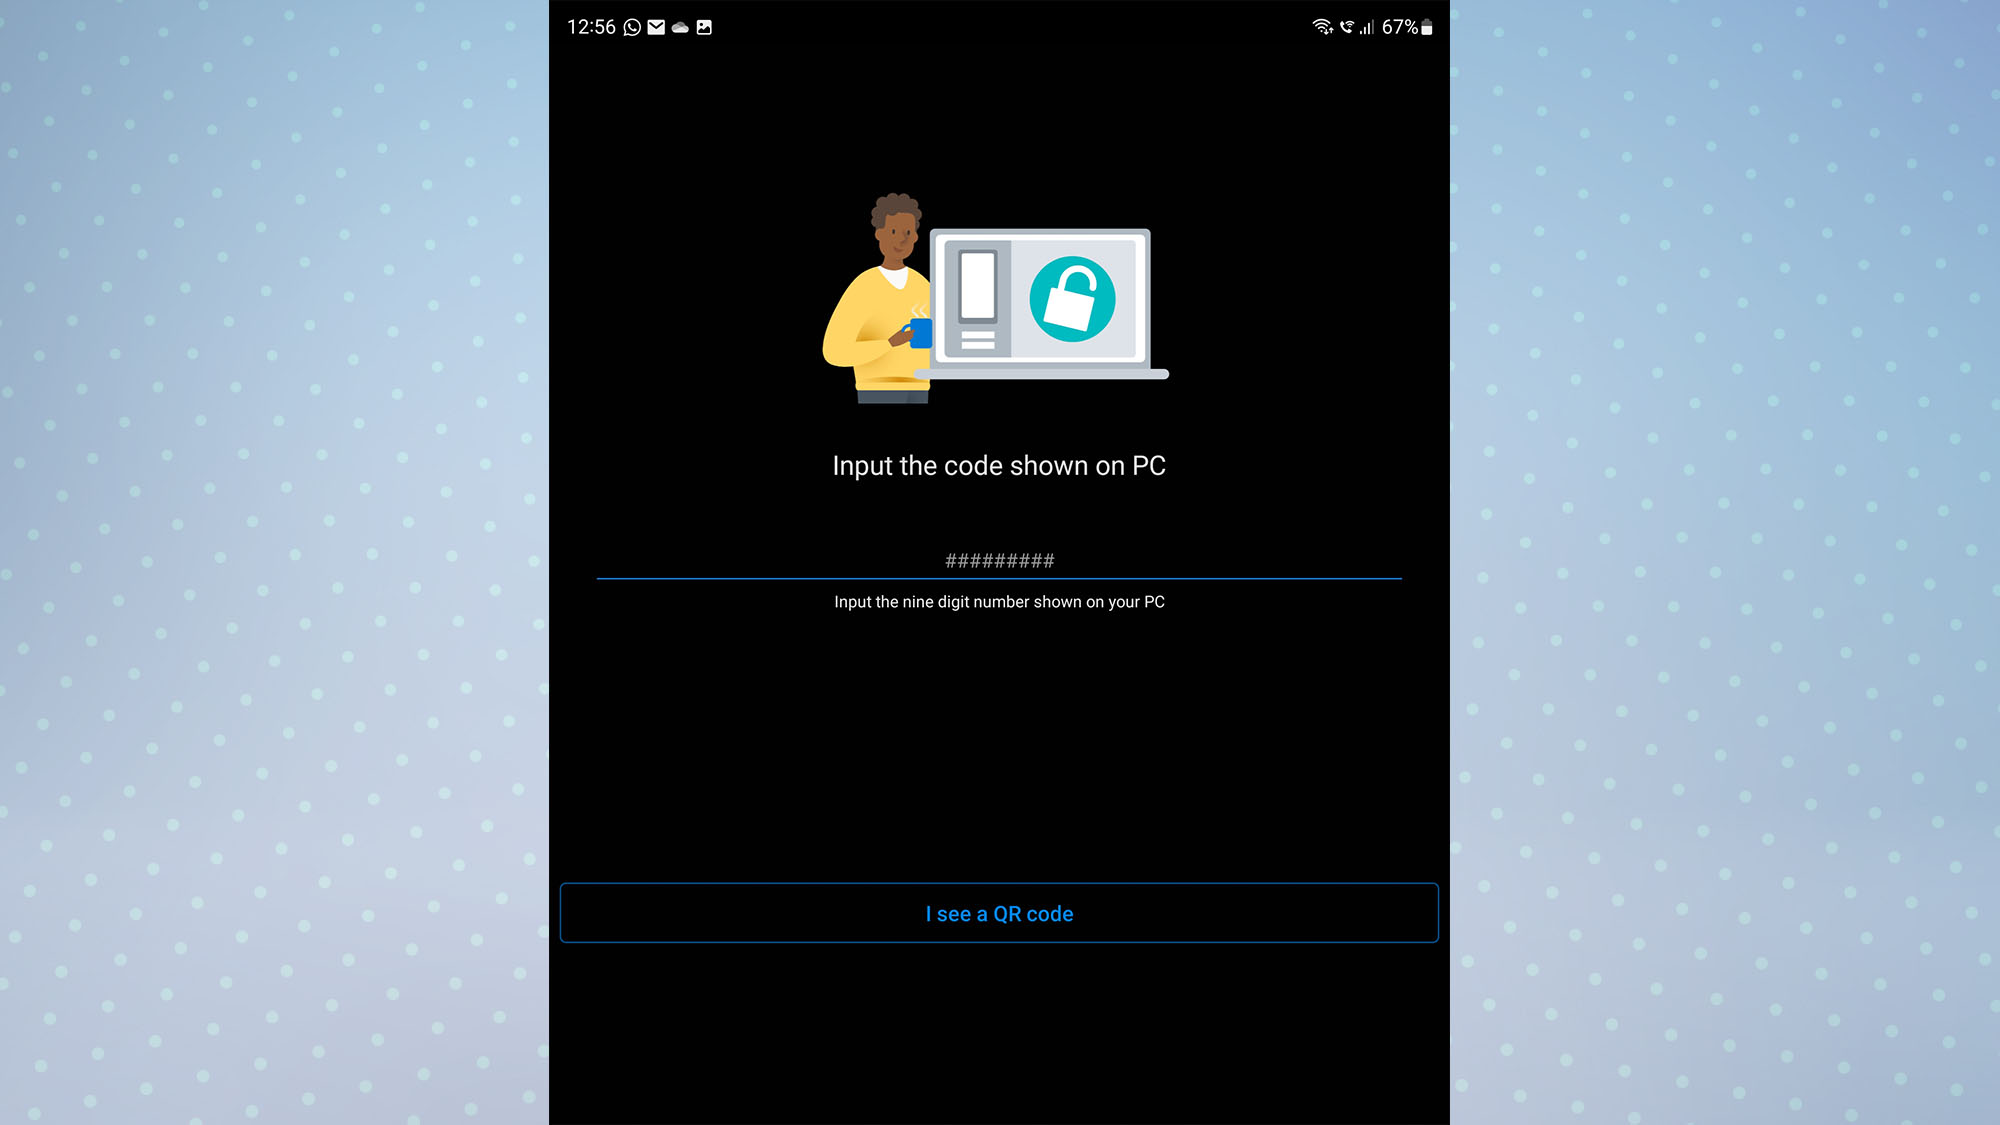
8. Type the PIN shown on your PC's Phone Link app into the Link to Windows app on your Samsung phone.
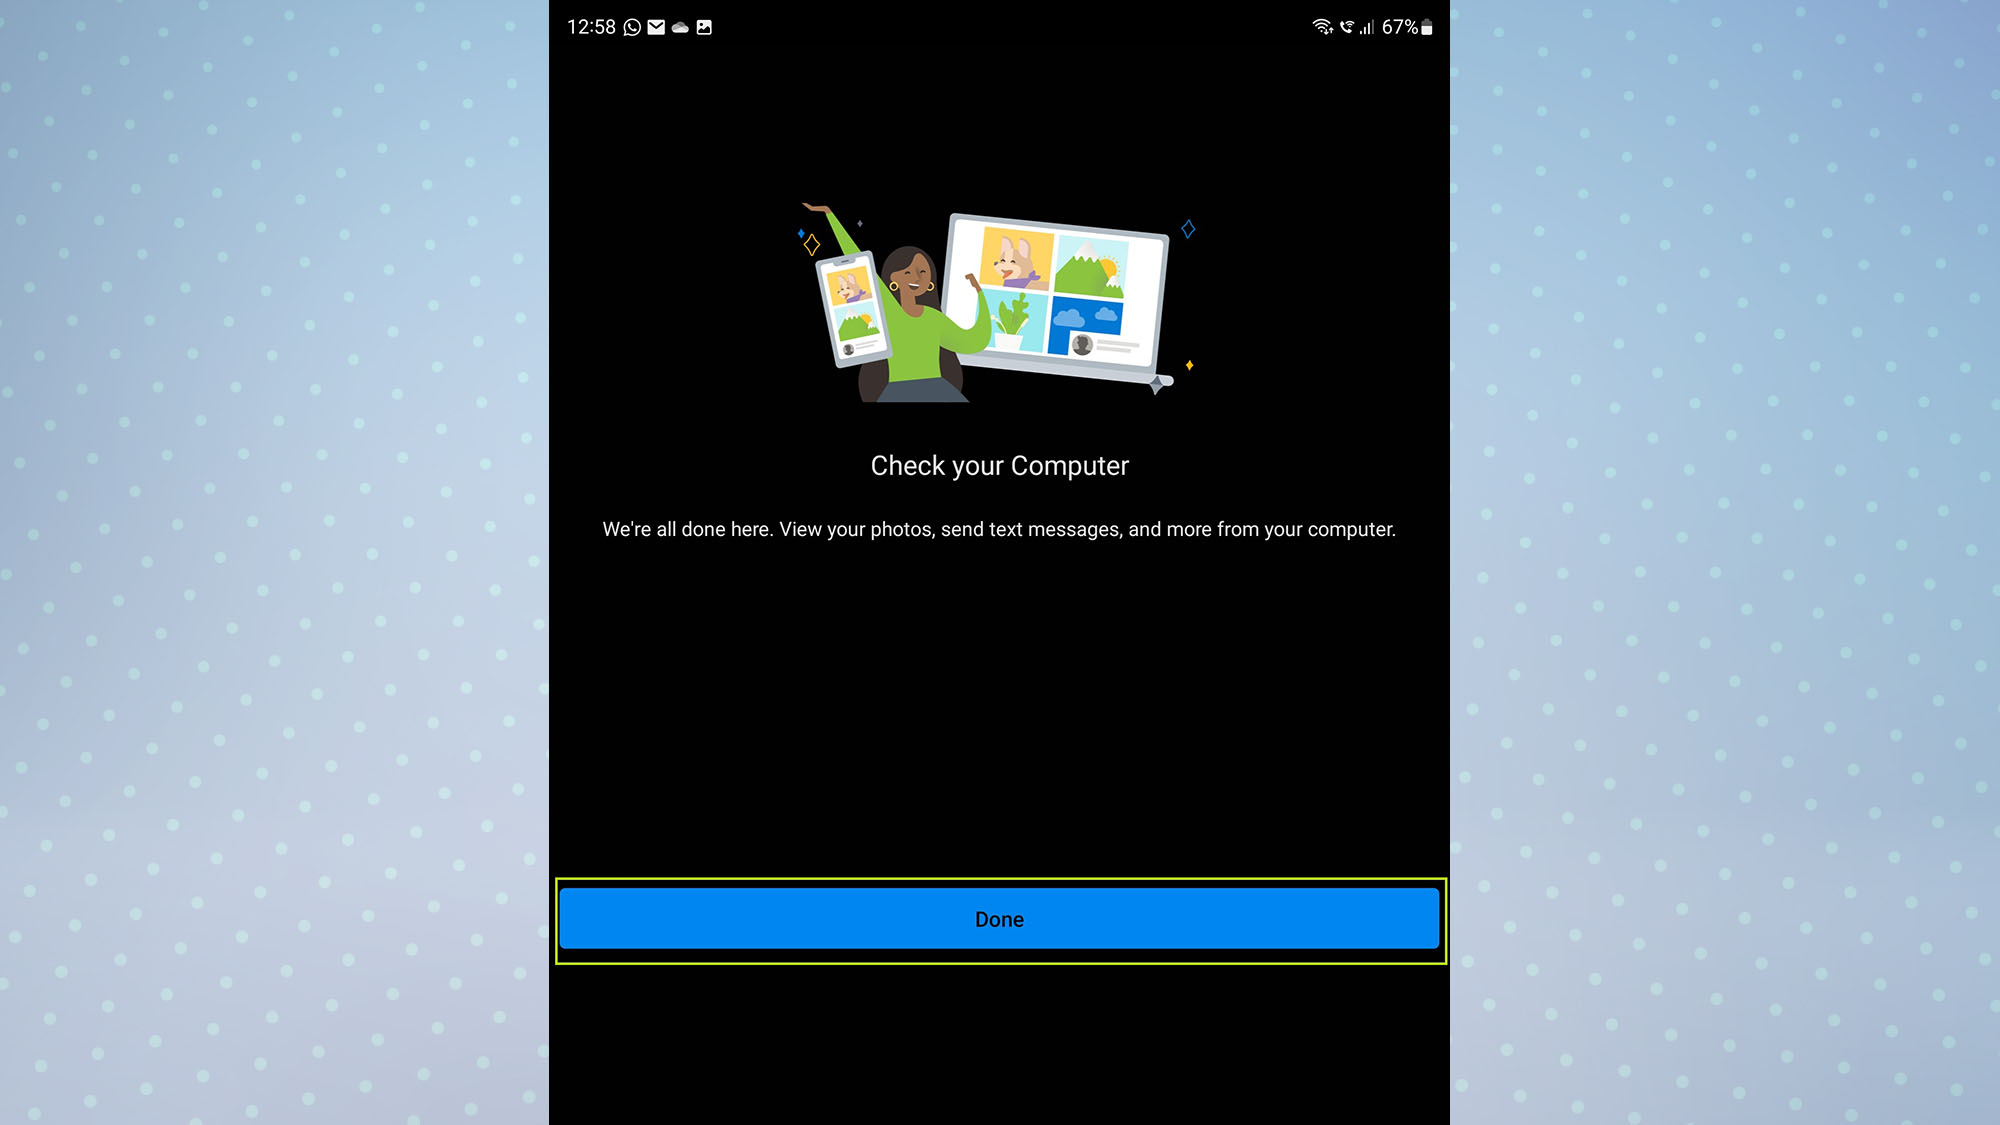
9. Tap Done on the Link to Windows app on your Samsung phone to complete the pairing process on your phone.
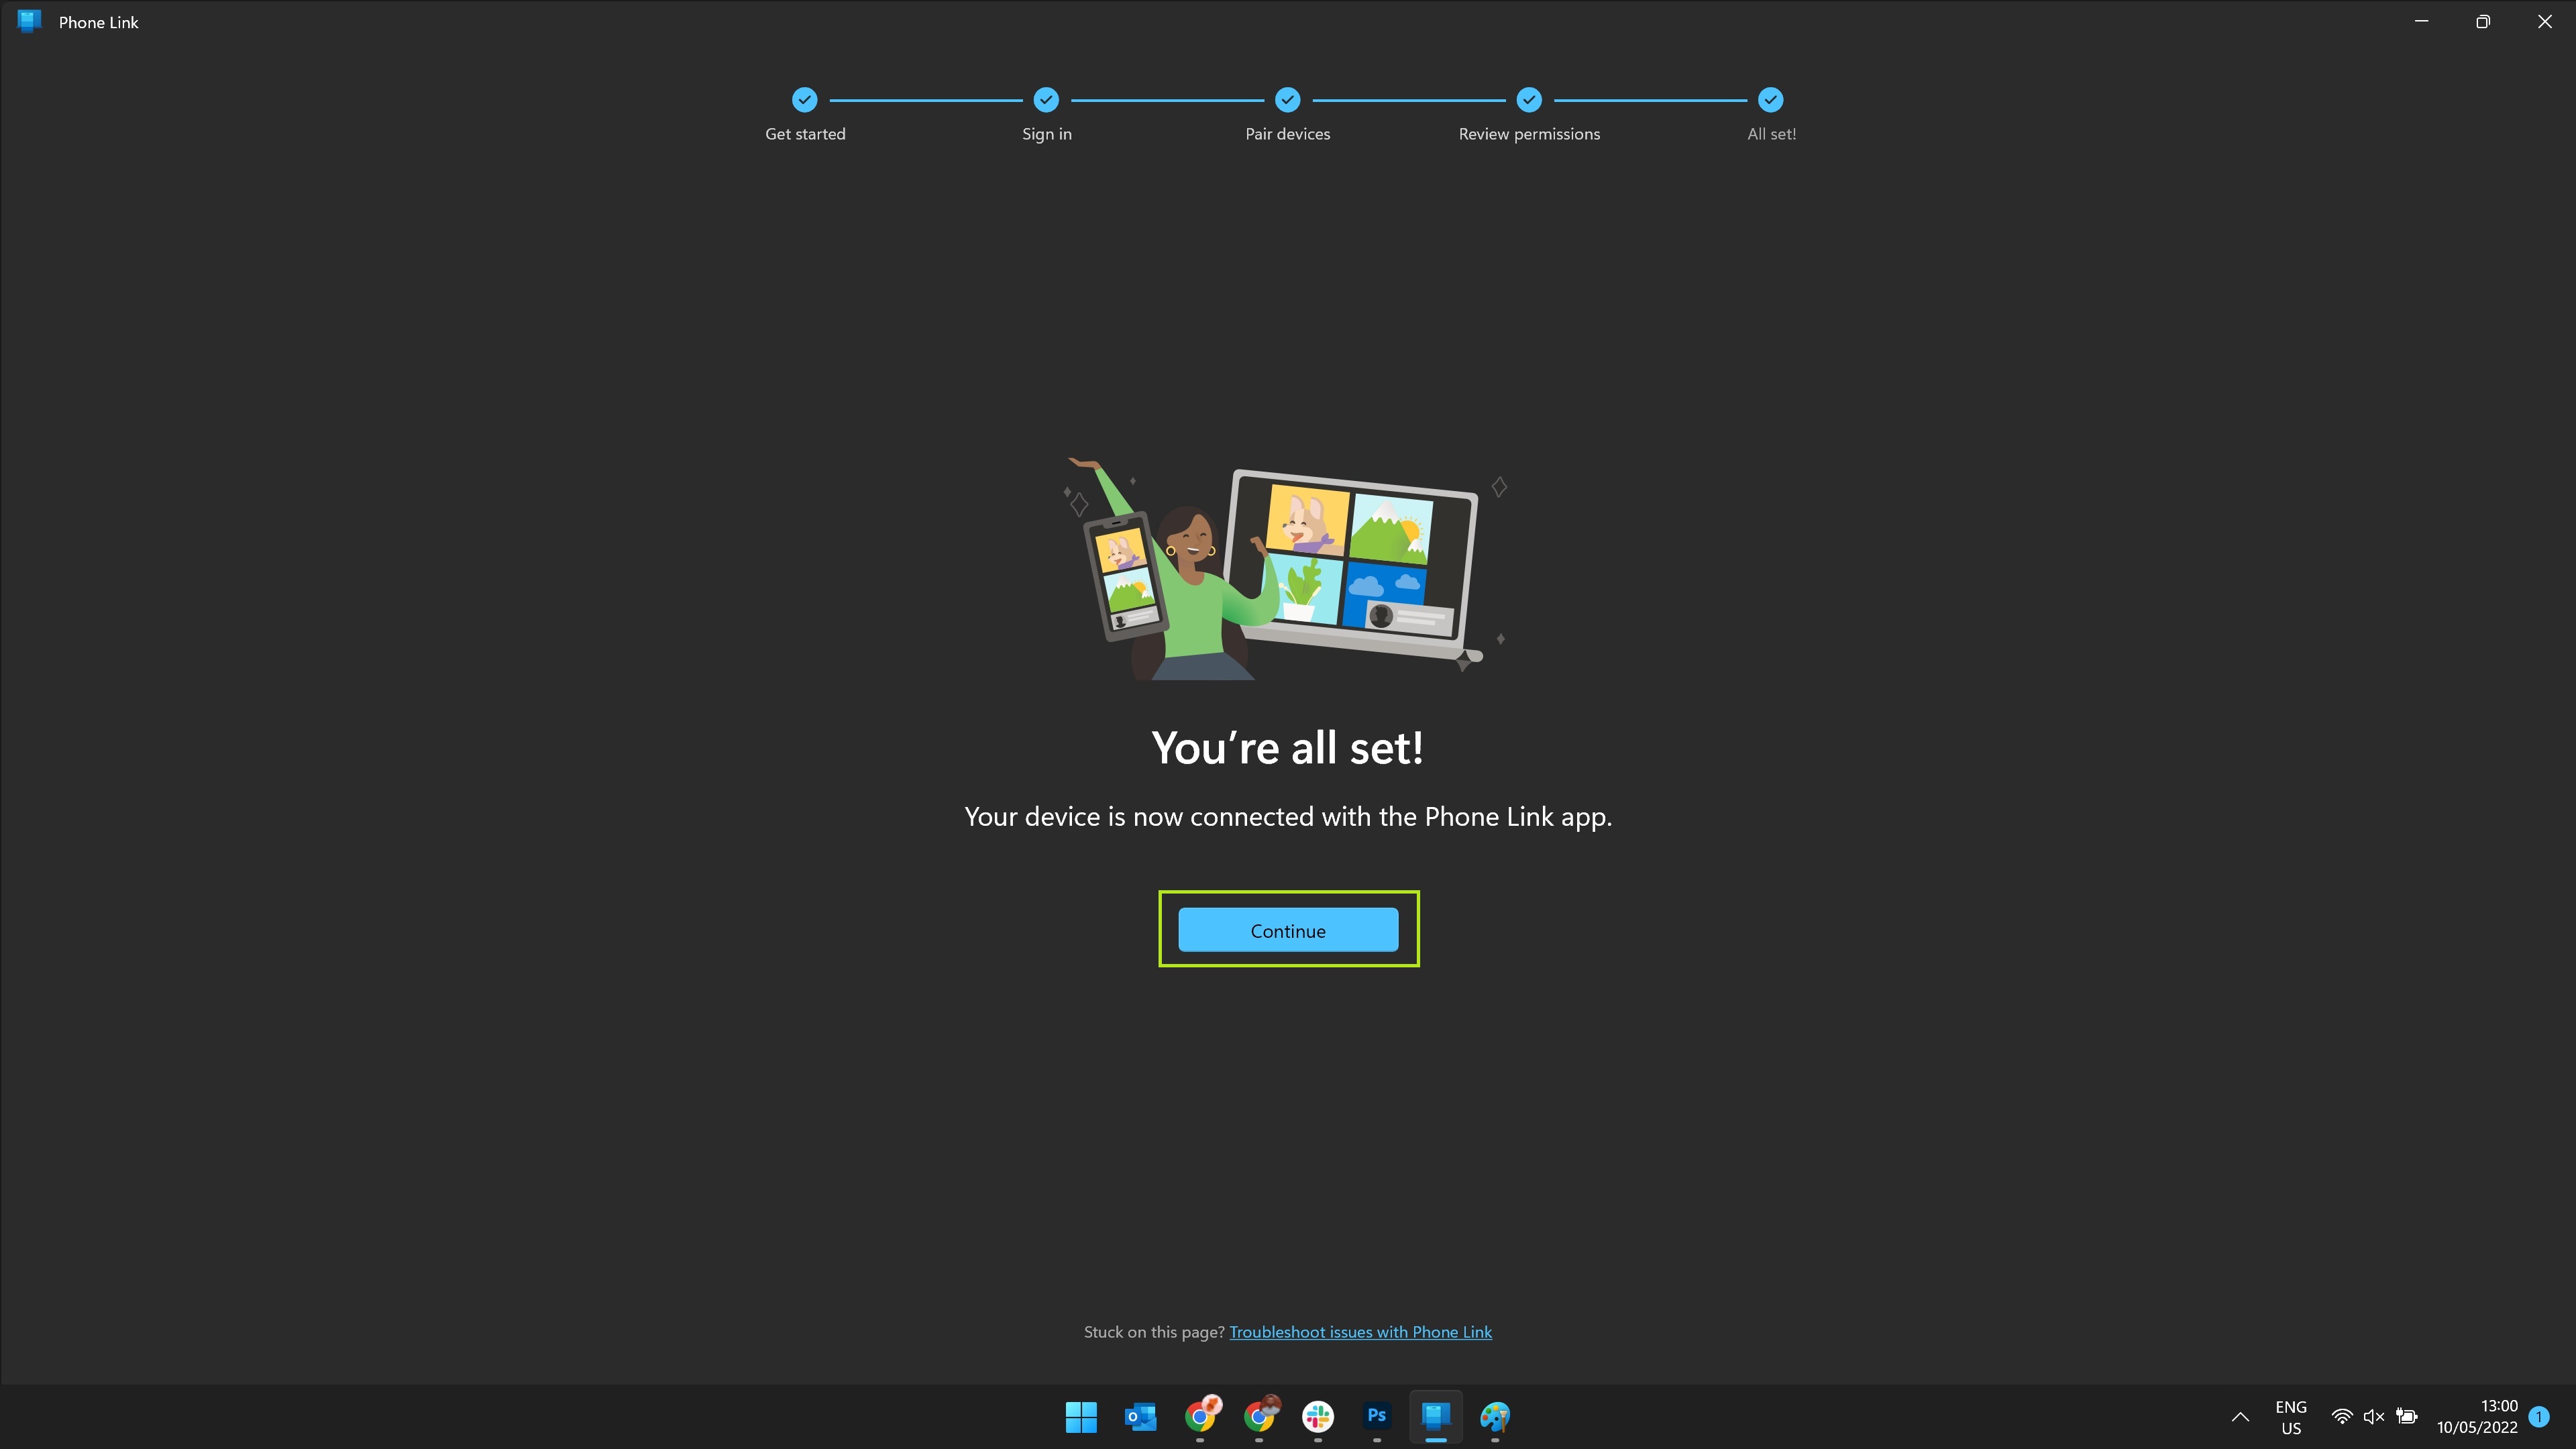
10. Open the Phone Link app on your PC and click Continue to complete the pairing process on your computer.
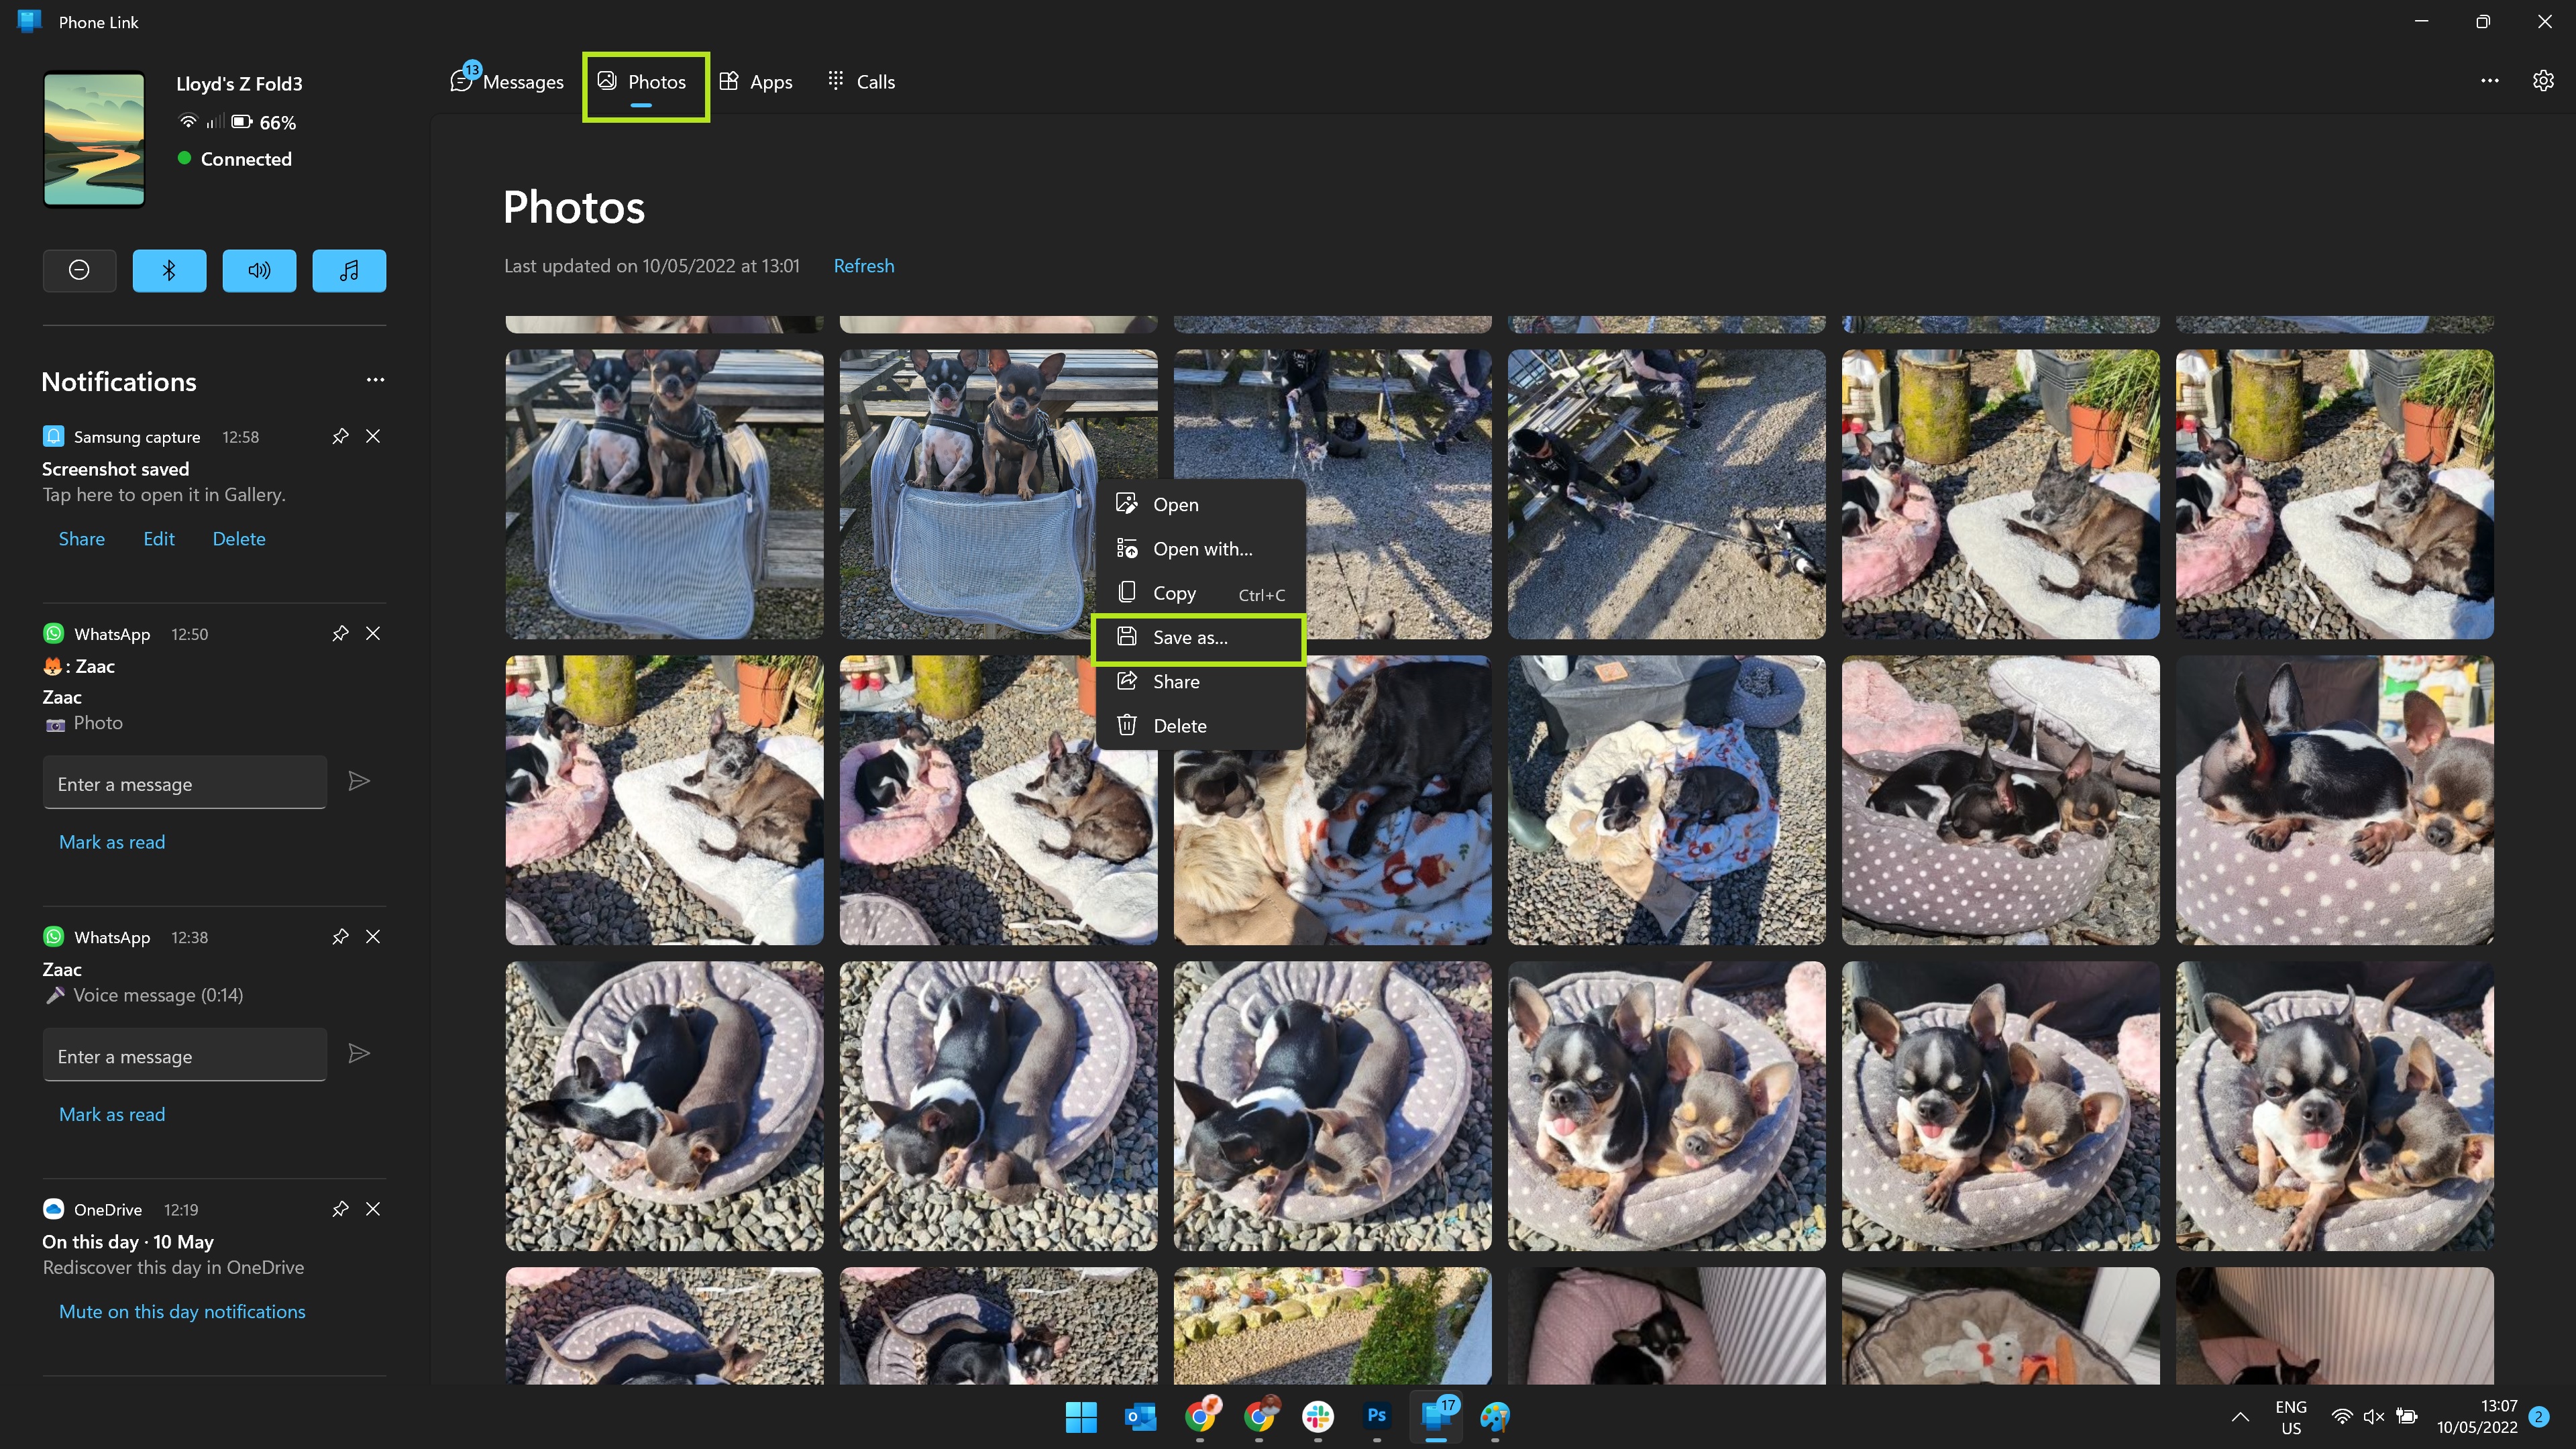
11. Now your Samsung phone and PC are linked up, you can view your photos on your PC by clicking the Photos tab on the Phone Link app. To save a photo to your PC, right-click on it then click Save As.
Transfer photos from Android to a Windows PC wirelessly: non-Samsung phone
1. Open the Phone Link app on your PC by launching the Start menu and typing "Phone Link" until it appears, before clicking the app icon. If you don't see the app, you can install it from the Microsoft Store.
2. Install the Link to Windows app on your phone by downloading it from the Play Store. Once installed, open the app drawer and search for "Link to Windows." Tap the Link to Windows app icon to open it.
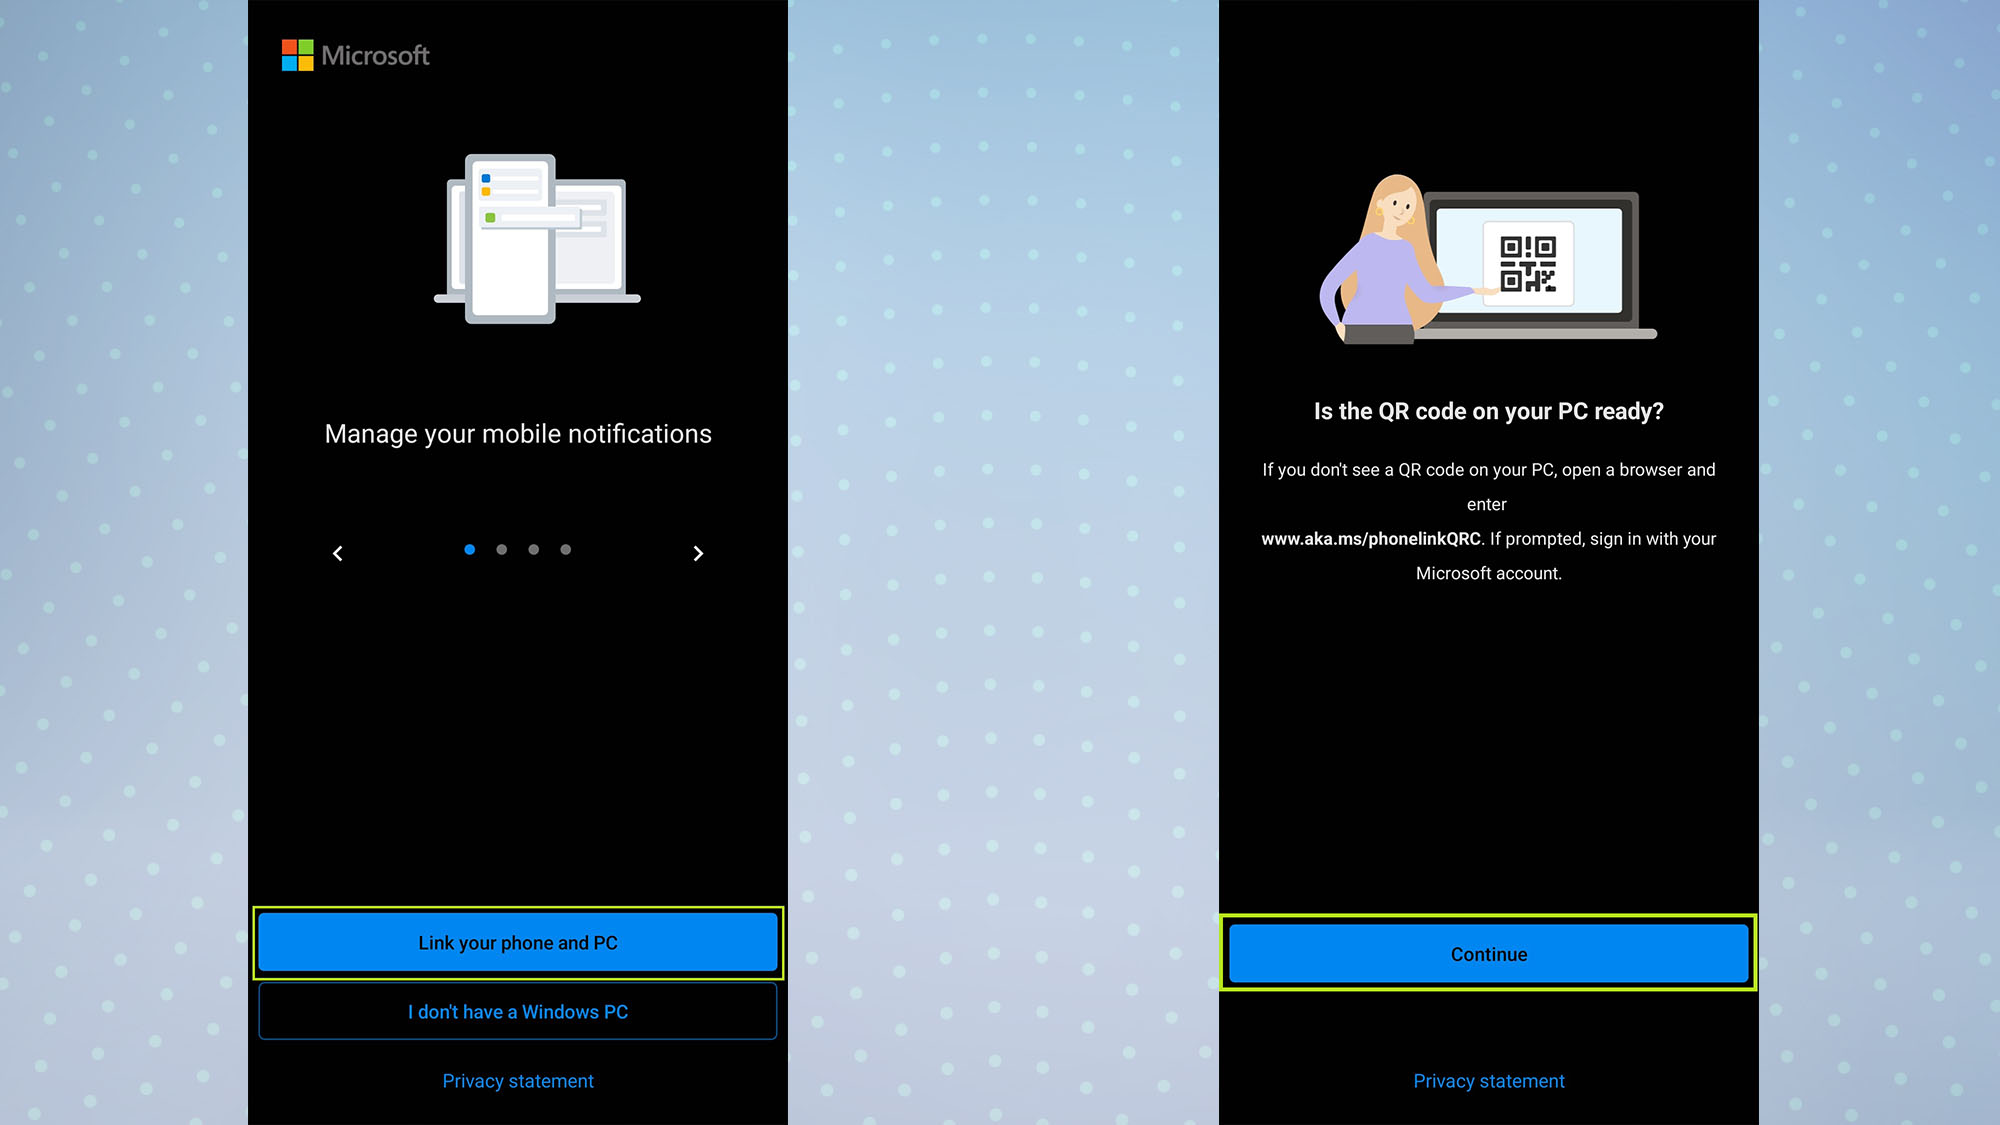
3. Tap Link your phone and PC, then tap Continue on the next page.
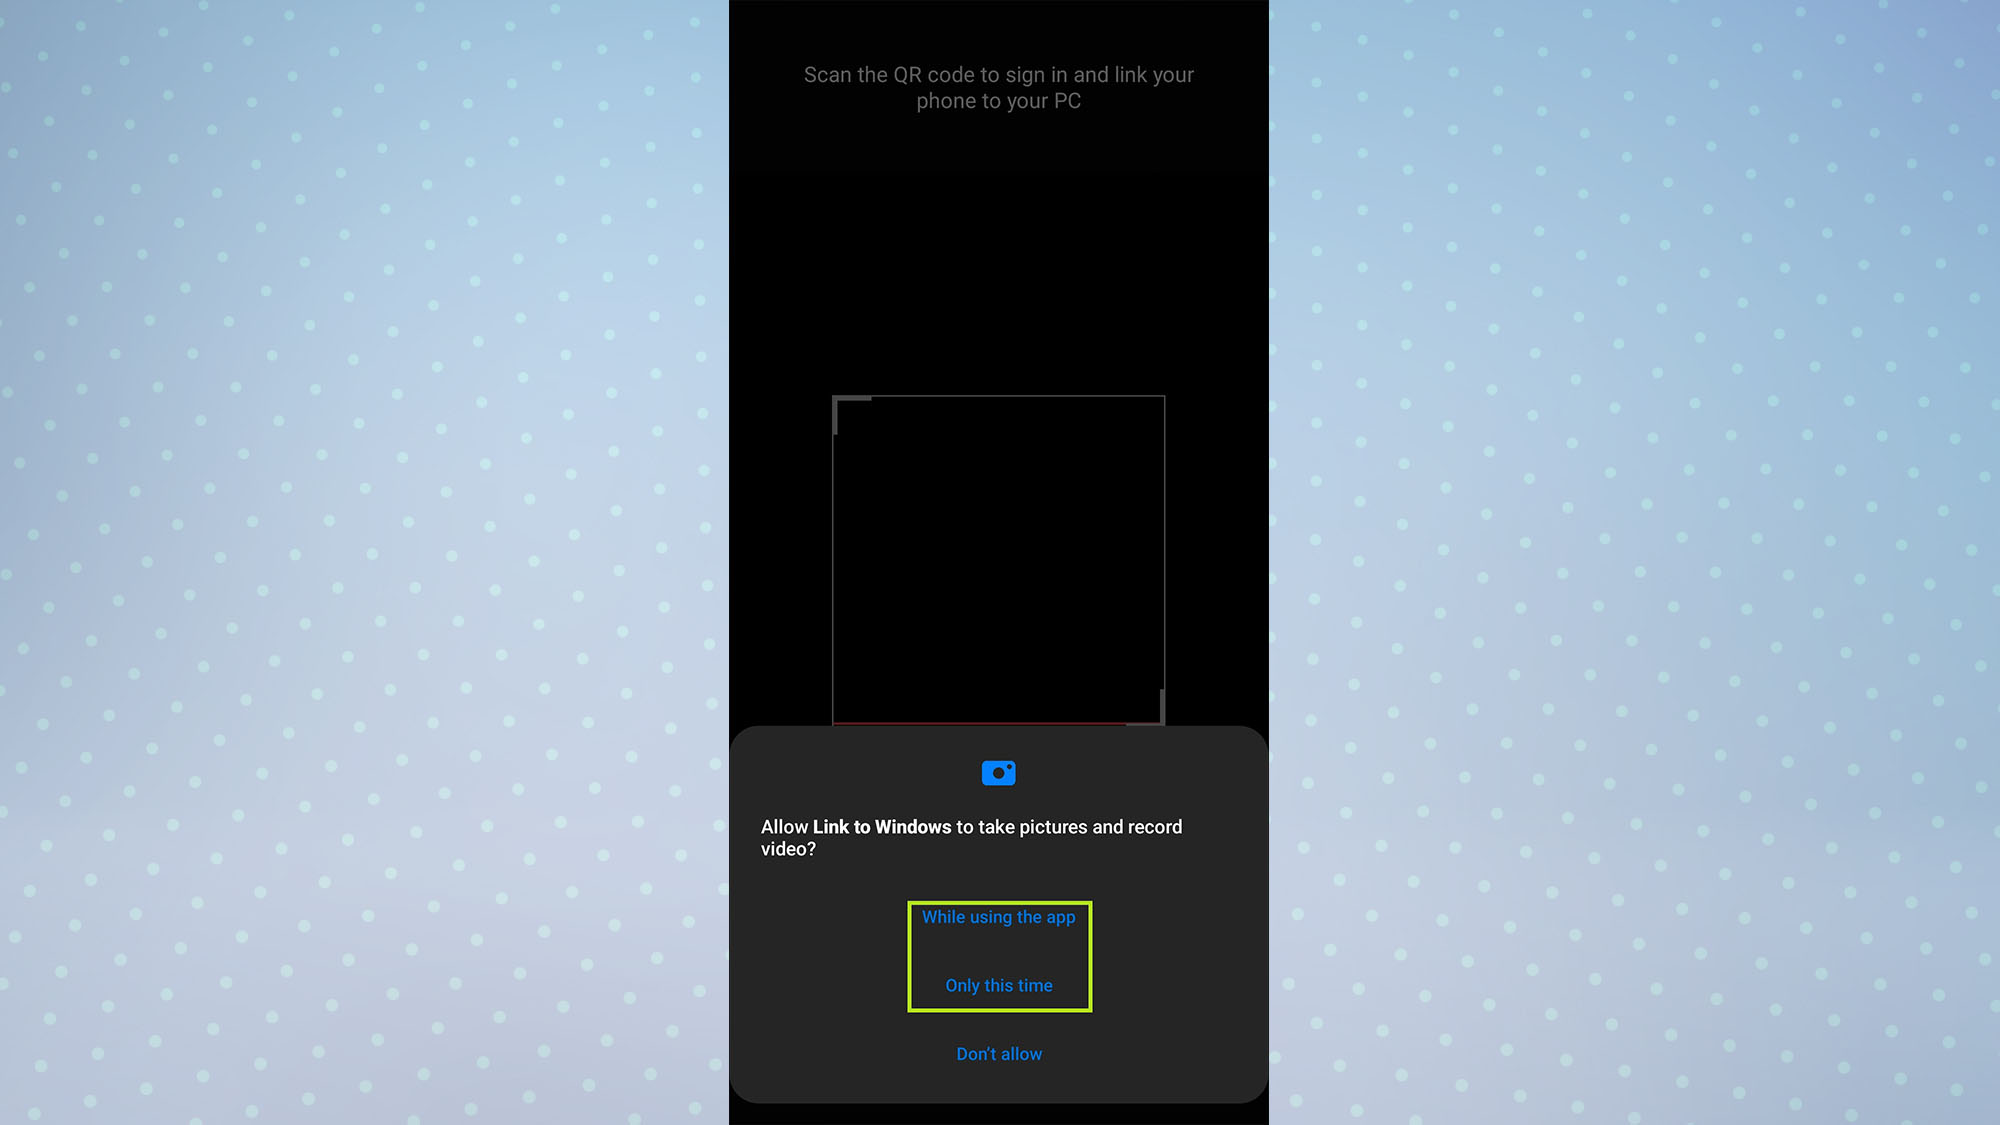
4. The app should now open a QR code scanner. Allow the permissions on this page to continue by tapping Only this time or While using the app, depending on your preference. Keep the app running with the QR code scanner open, as you'll need to use it soon.
5. Open the Phone Link app on your PC and click Get started.
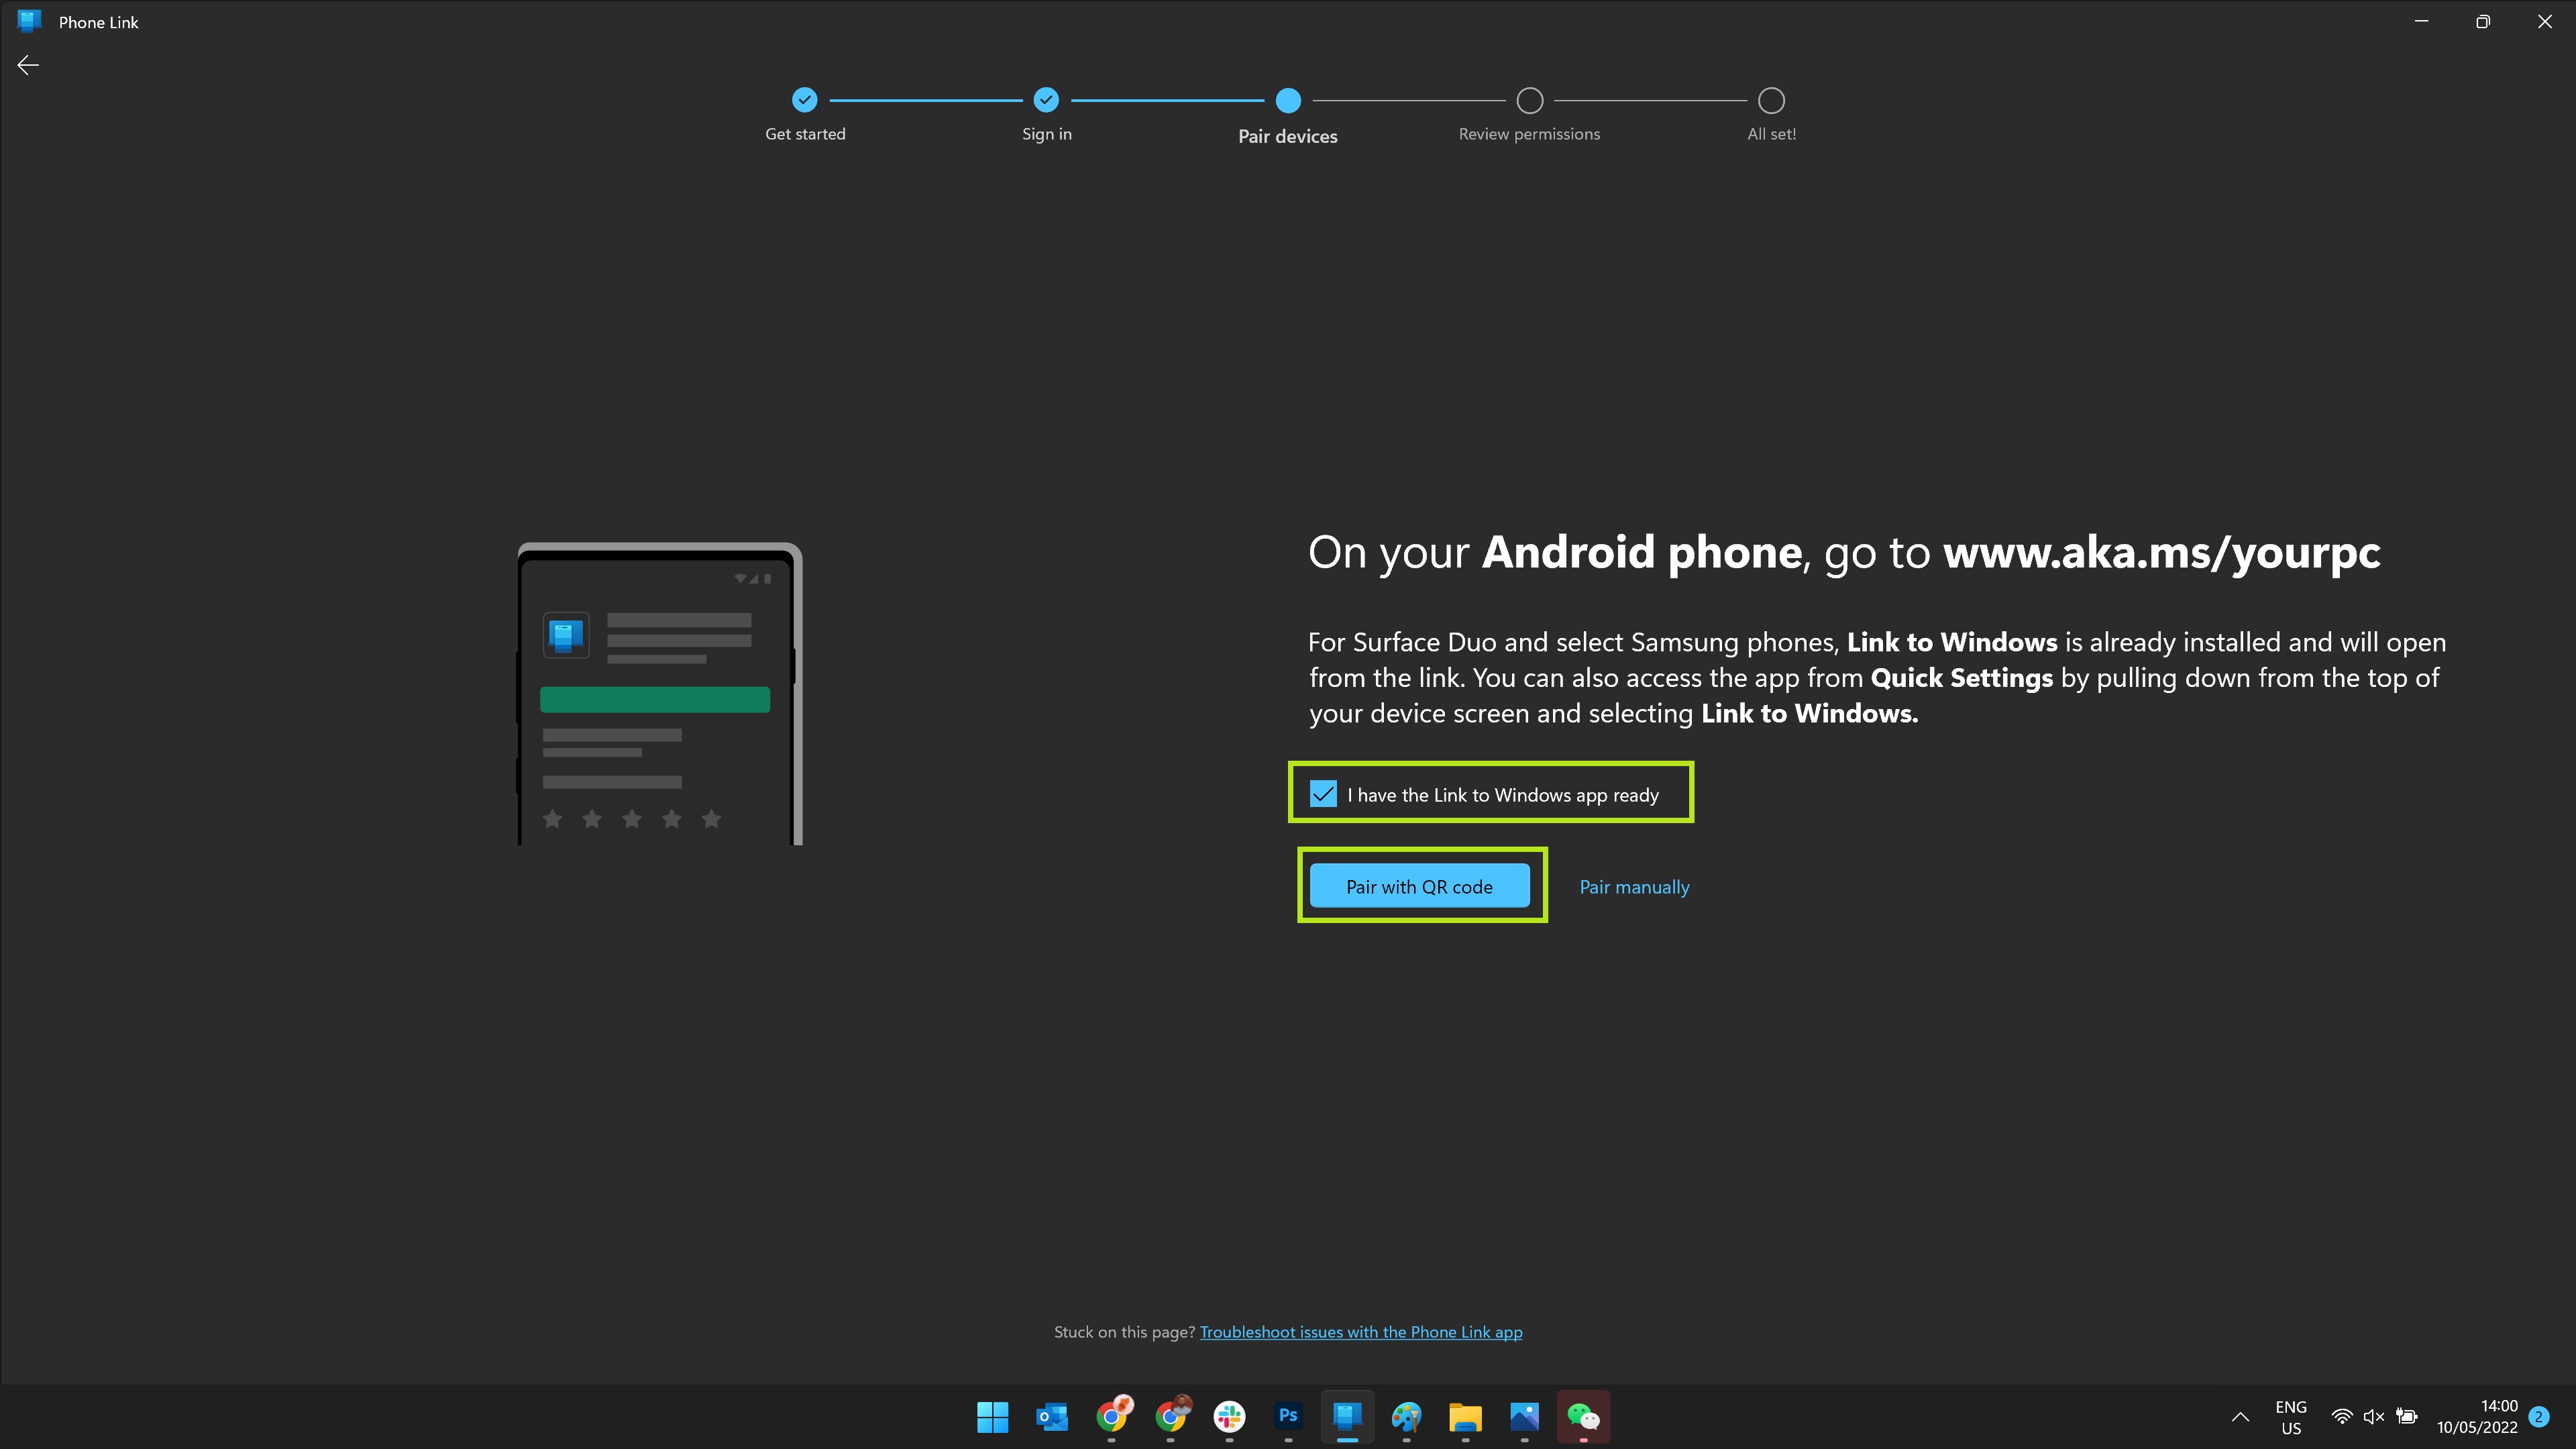
6. Check the box next to I have the Link to Windows app ready, then click Pair with QR code.
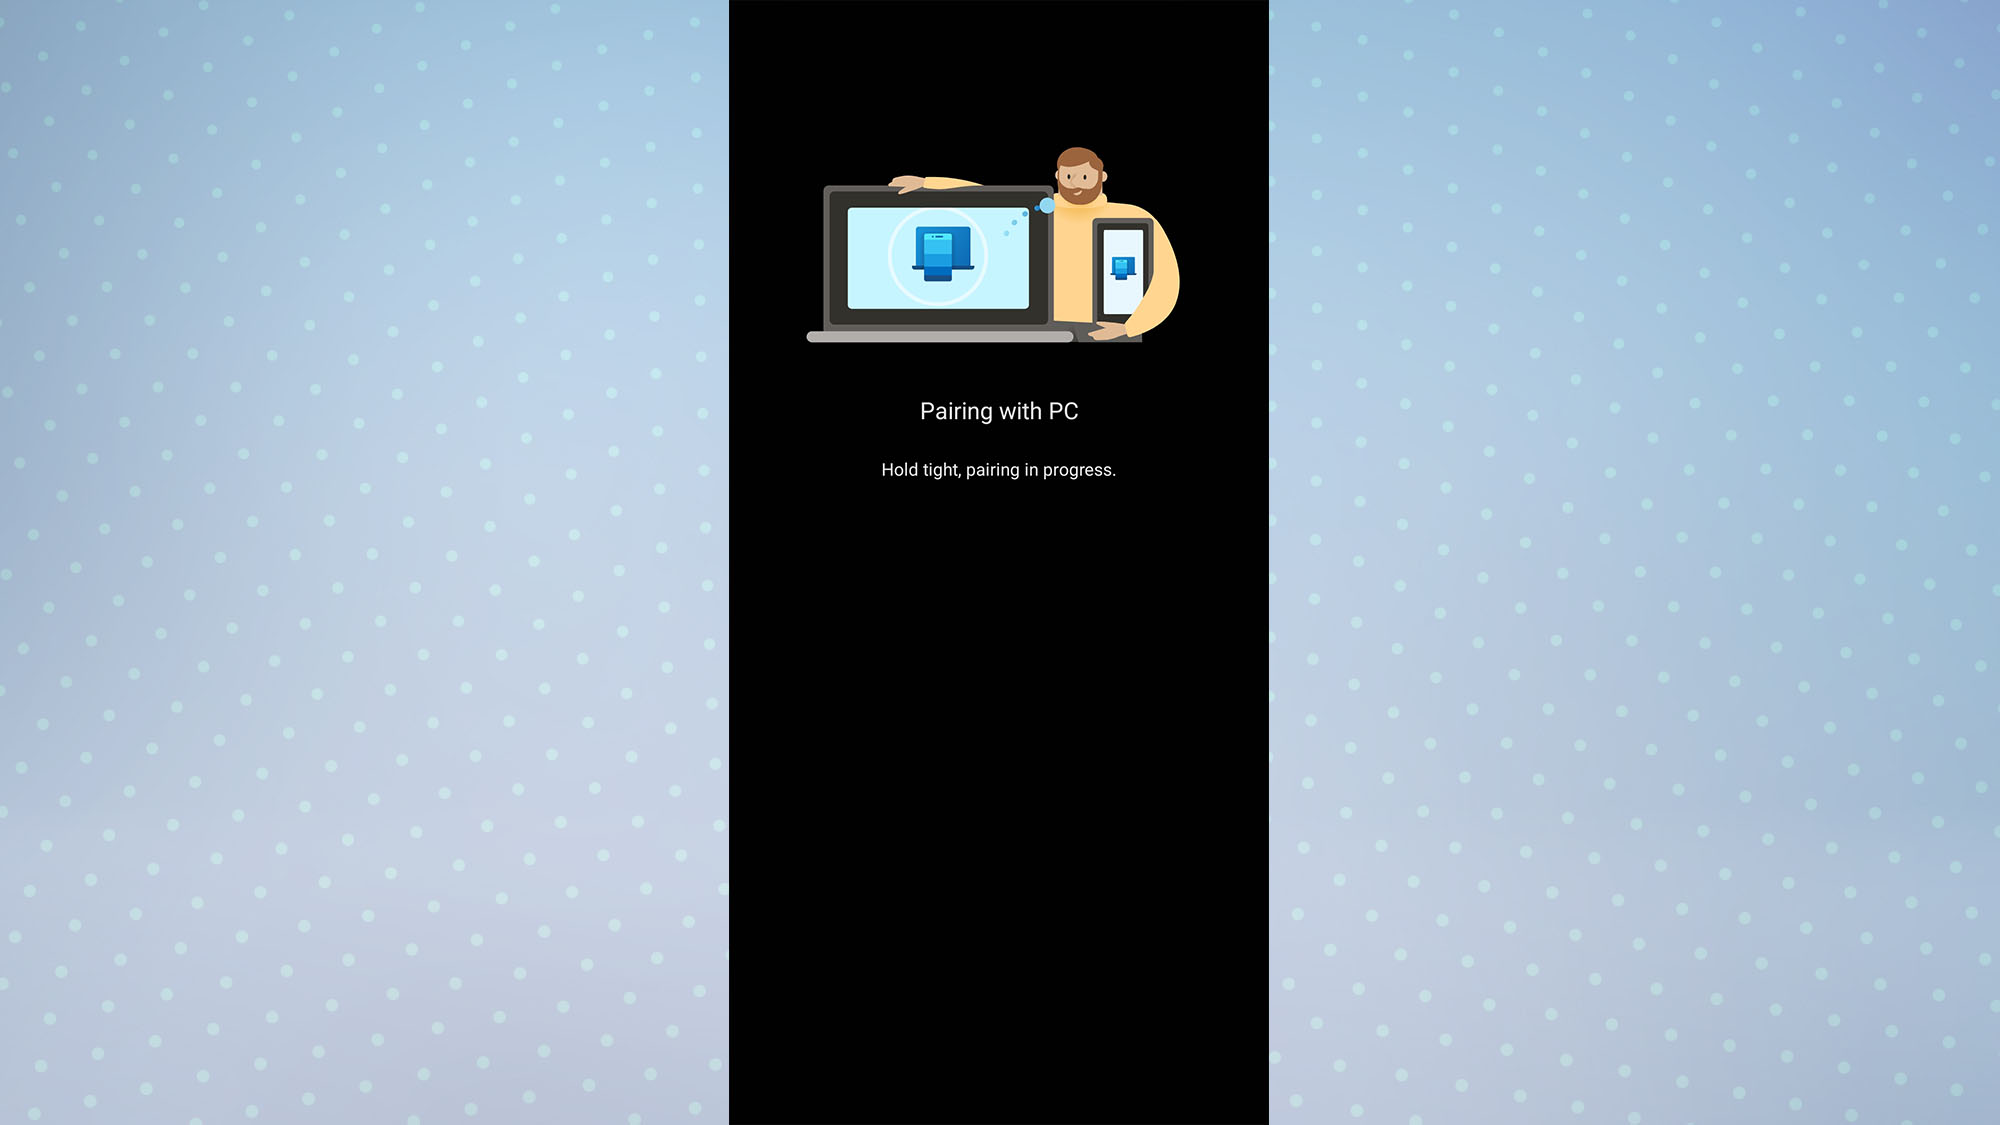
7. Open the Link to Windows app on your phone and hold it to your computer's screen to scan the QR code. Your phone's QR code scanner should still be open from the previous step. You'll see the message "Pairing with PC" while your phone and PC sync up.
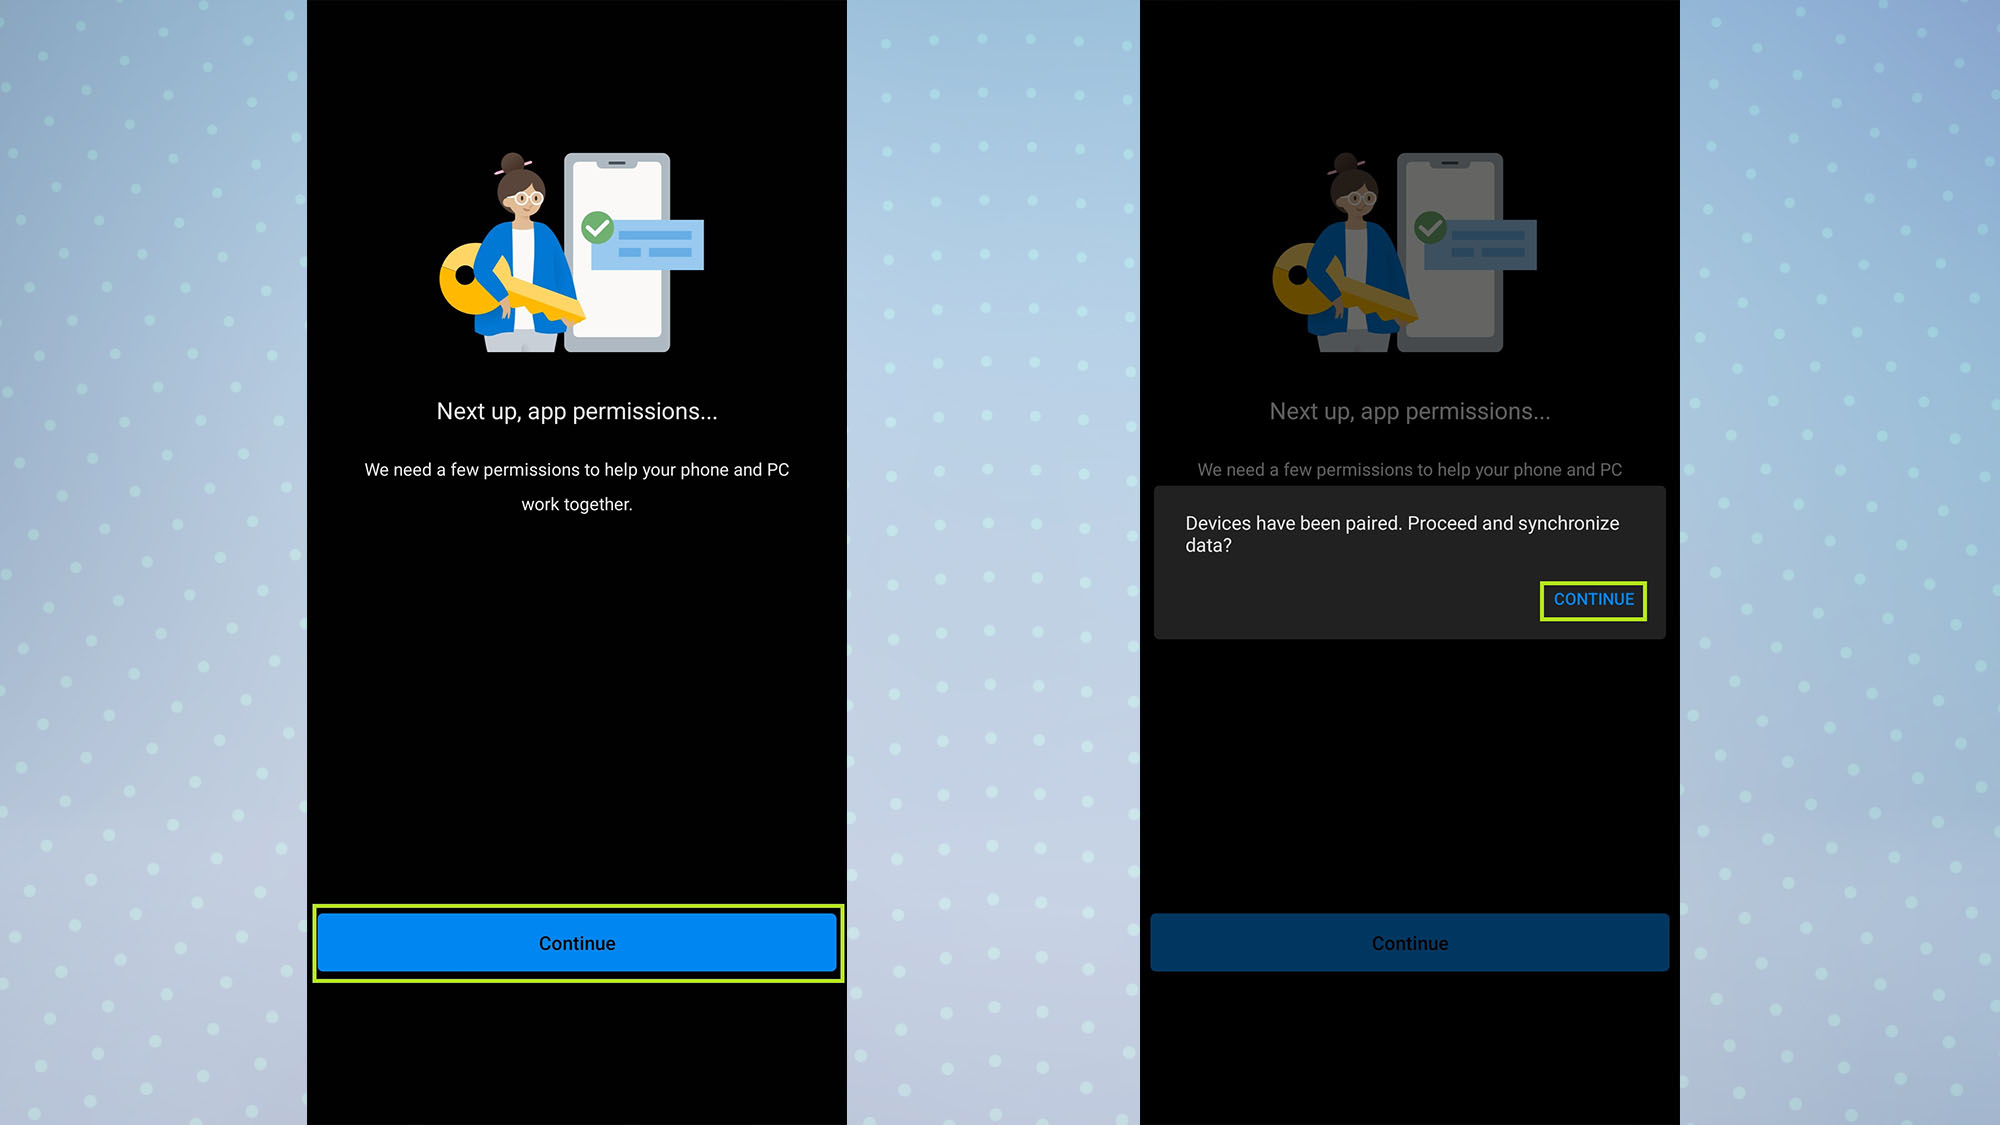
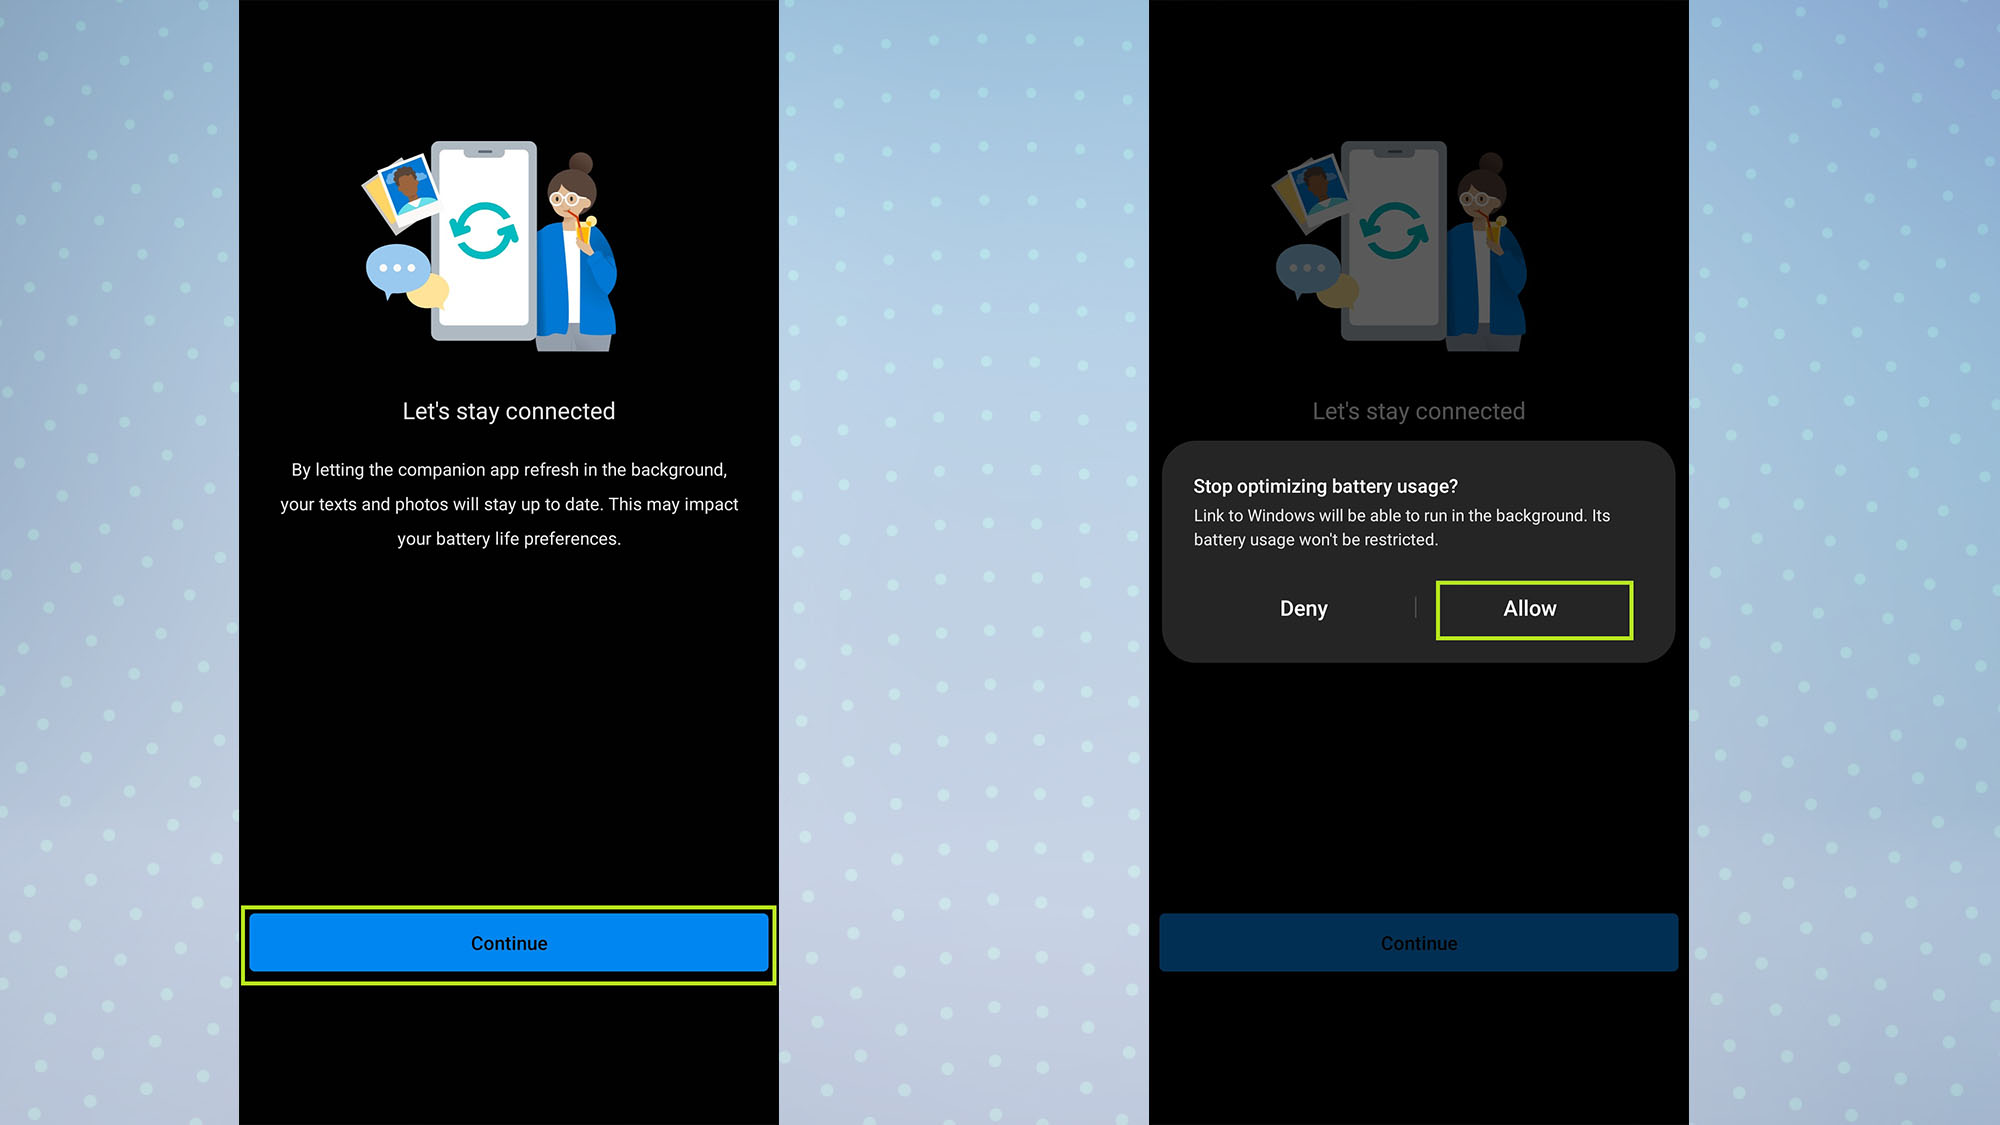
8. Tap Continue, then tap CONTINUE to configure permissions.
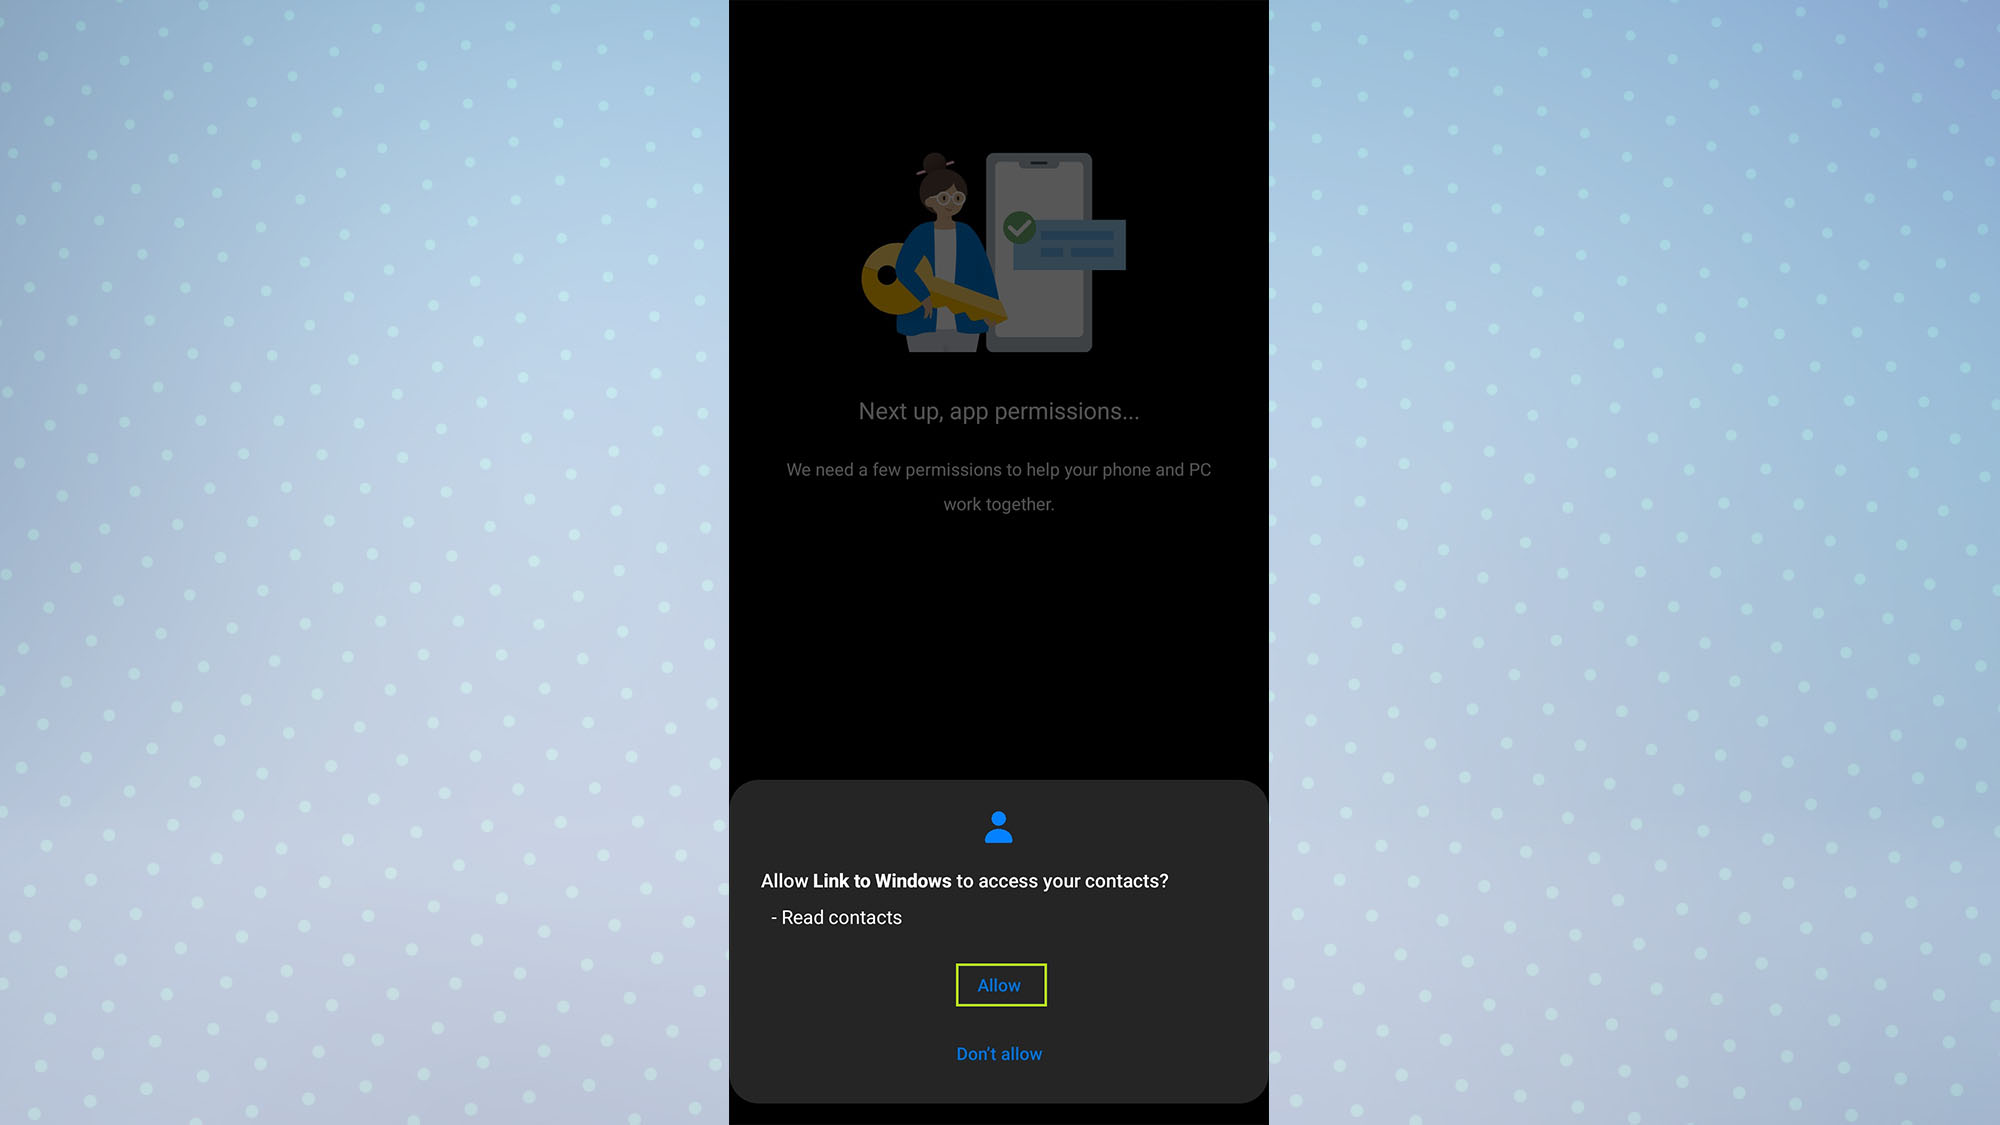
9. Tap Allow on each of the permission requests that appear.
10. Tap Continue then Allow. Finally, tap Done to finalize the setup.
11. Open the Phone Link app on your PC and click Continue to complete the pairing process on your computer.
12. Now your phone and PC are linked up, you can view your photos on your PC by clicking the Photos tab on the Phone Link app. To save a photo to your PC, right-click on it then click Save As.
Transfer photos from Android to a Windows PC over USB
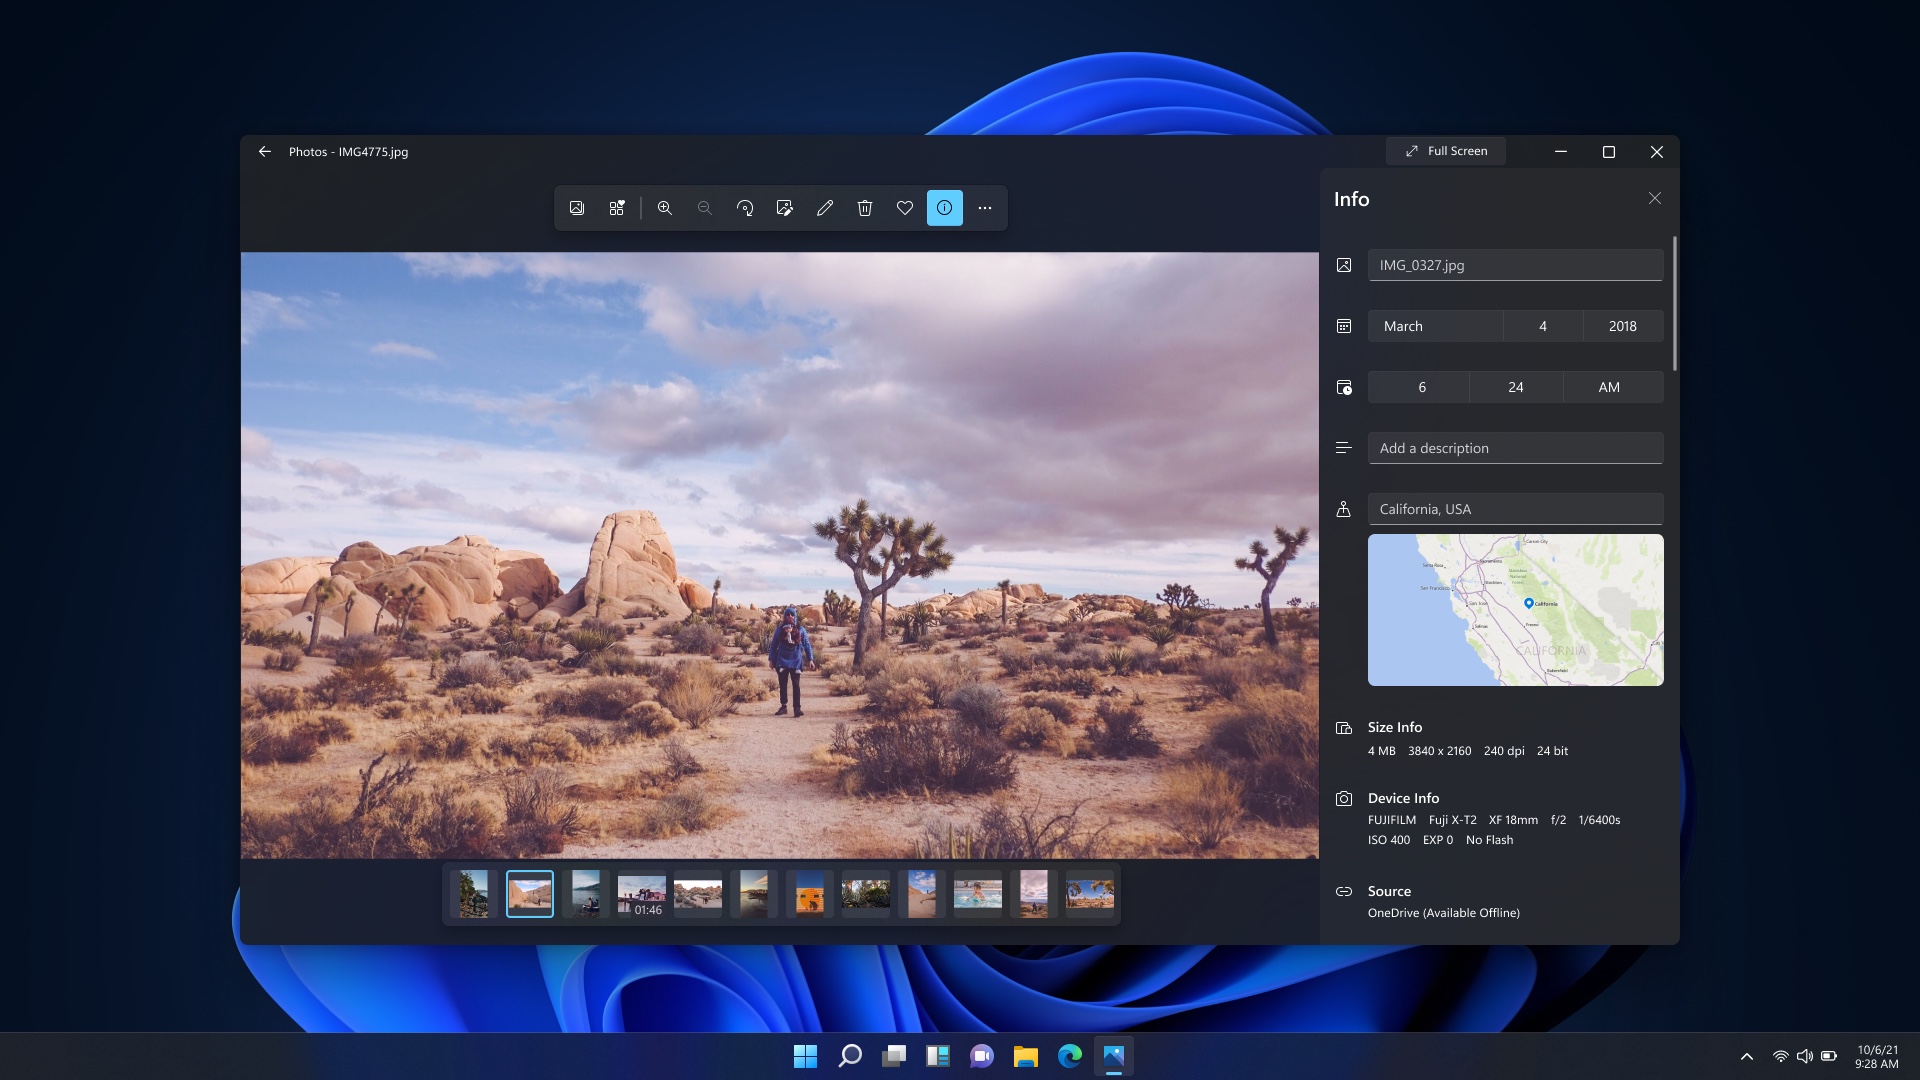
If you have a huge bunch of photos you want to transfer to your PC, doing so over USB is the quickest and most efficient way to do this. Thankfully, Windows' built-in Photos app makes it really easy to import photos from your Android phone.
Note: This guide is based on a Samsung Galaxy device. On a non-Samsung device the process is almost identical, but can differ slightly. We have detailed where the steps differ and have provided steps for those using a Google device.
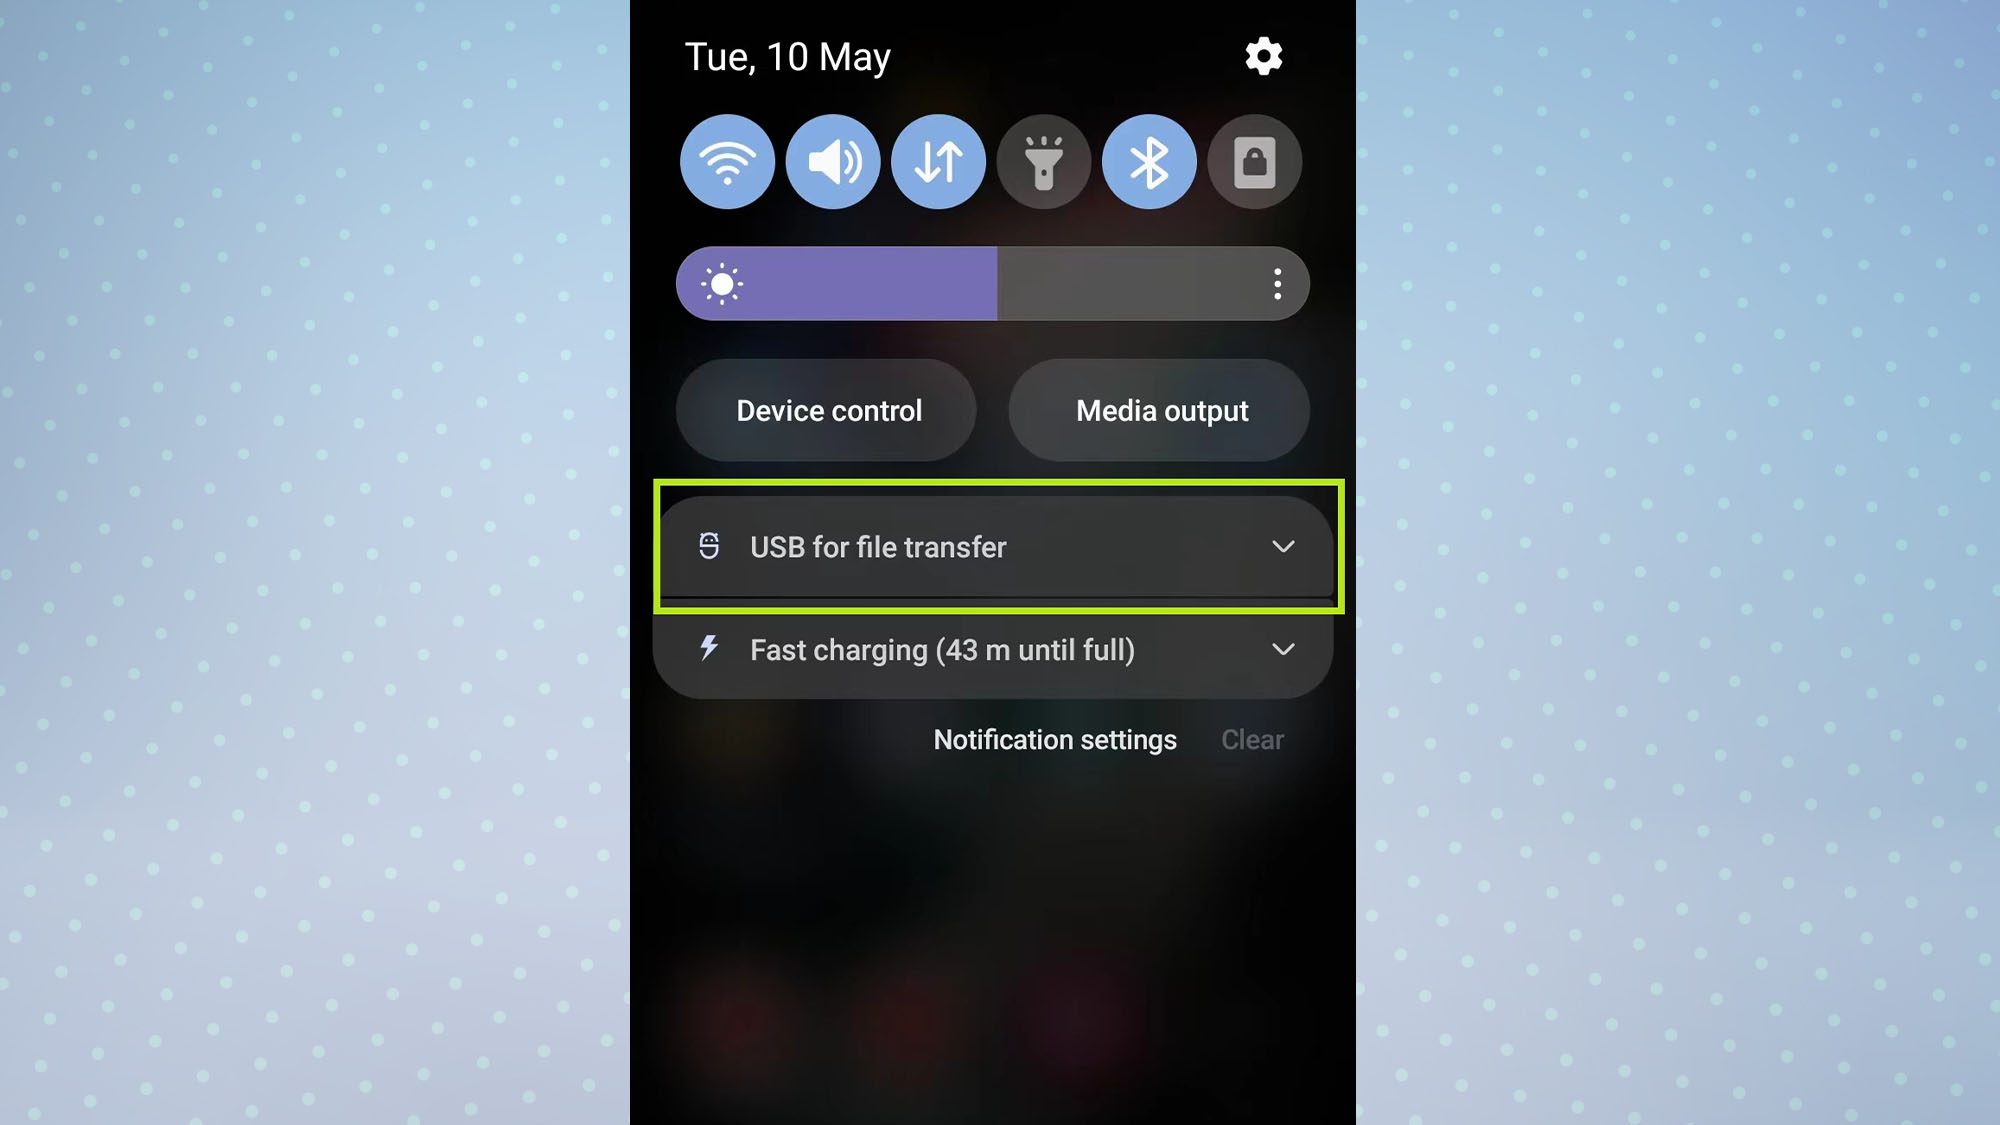
1. Connect your phone and PC using a USB cable — preferably the one that your phone came with. Now, swipe down from the top of your phone's screen to open the notification shade, then tap USB for file transfer to open the USB settings menu.
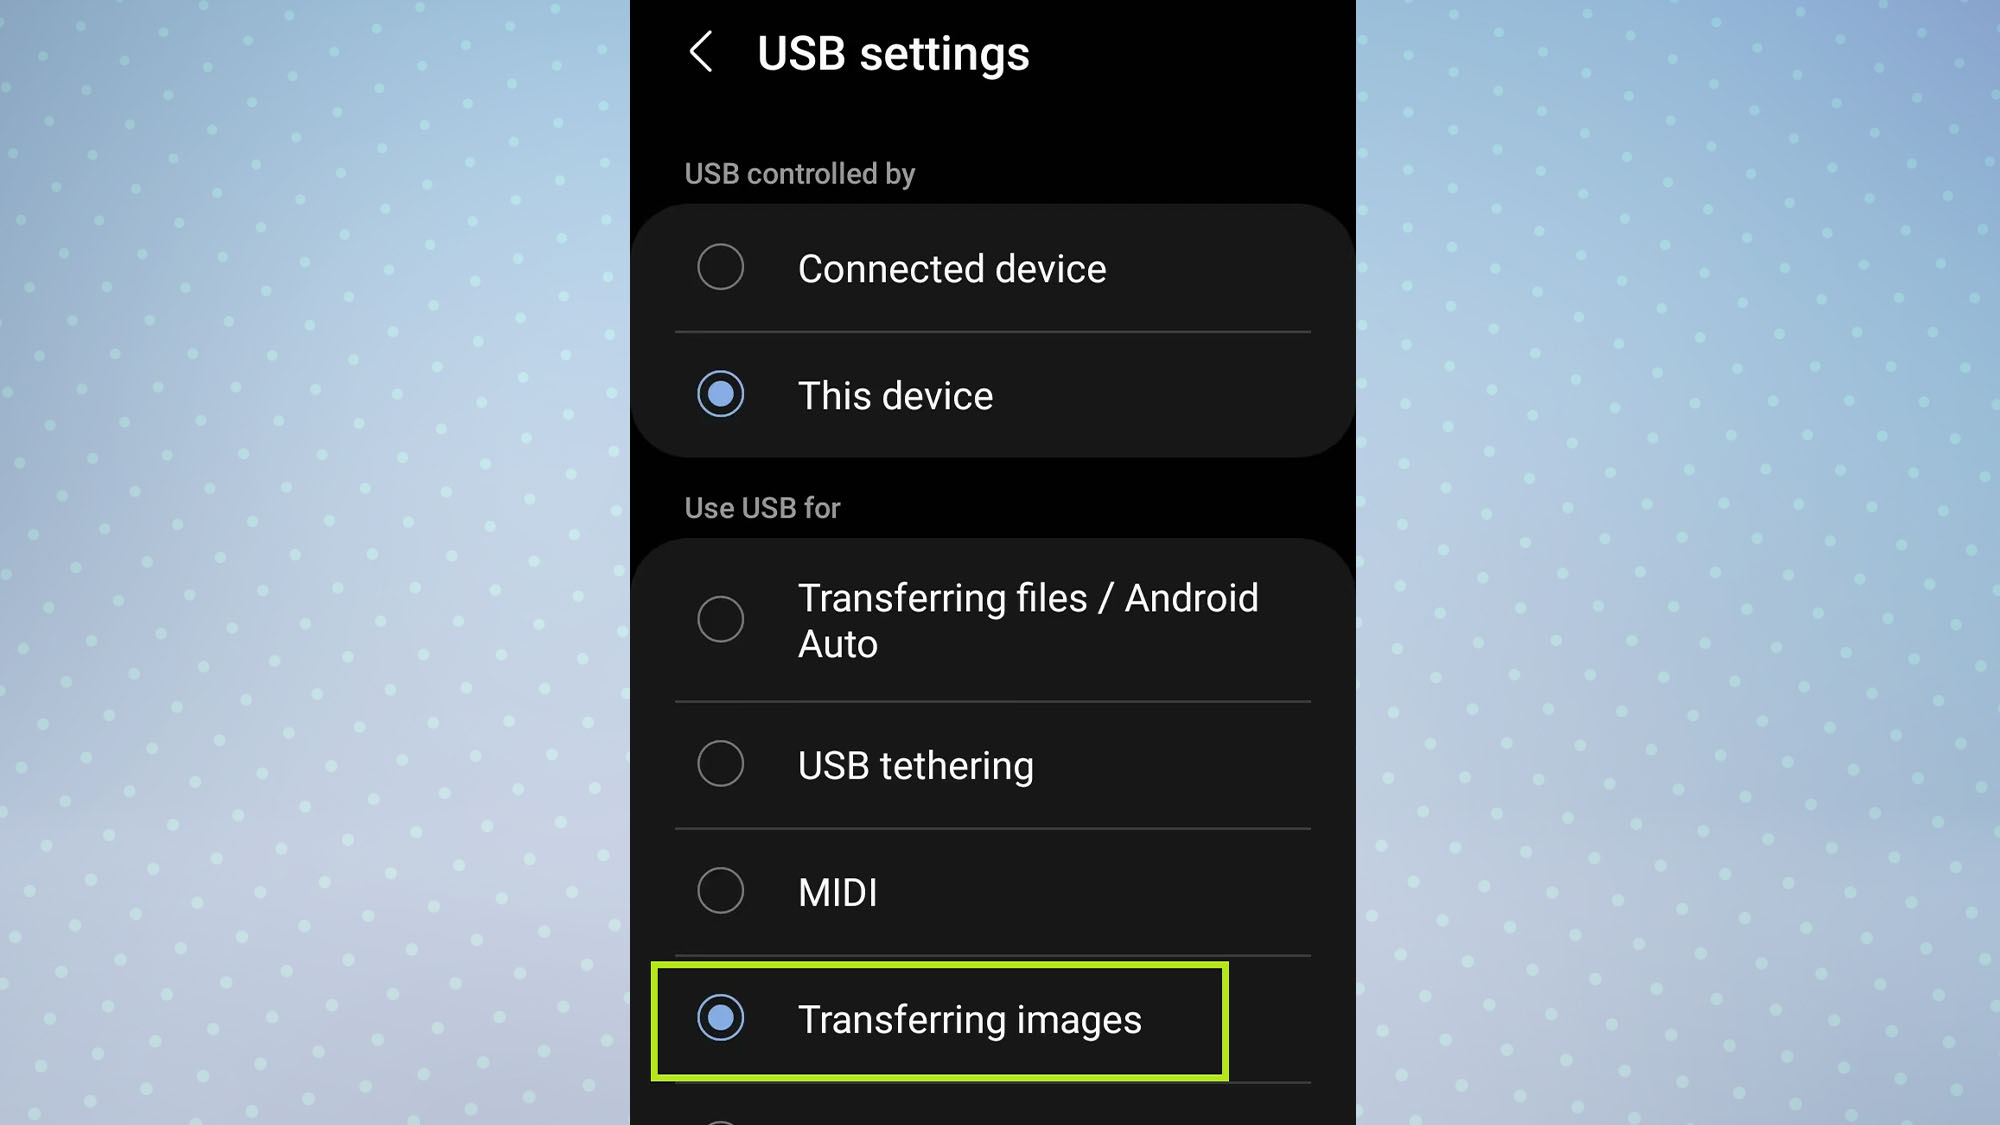
2. Tap Transferring images to put your phone into image transfer mode.
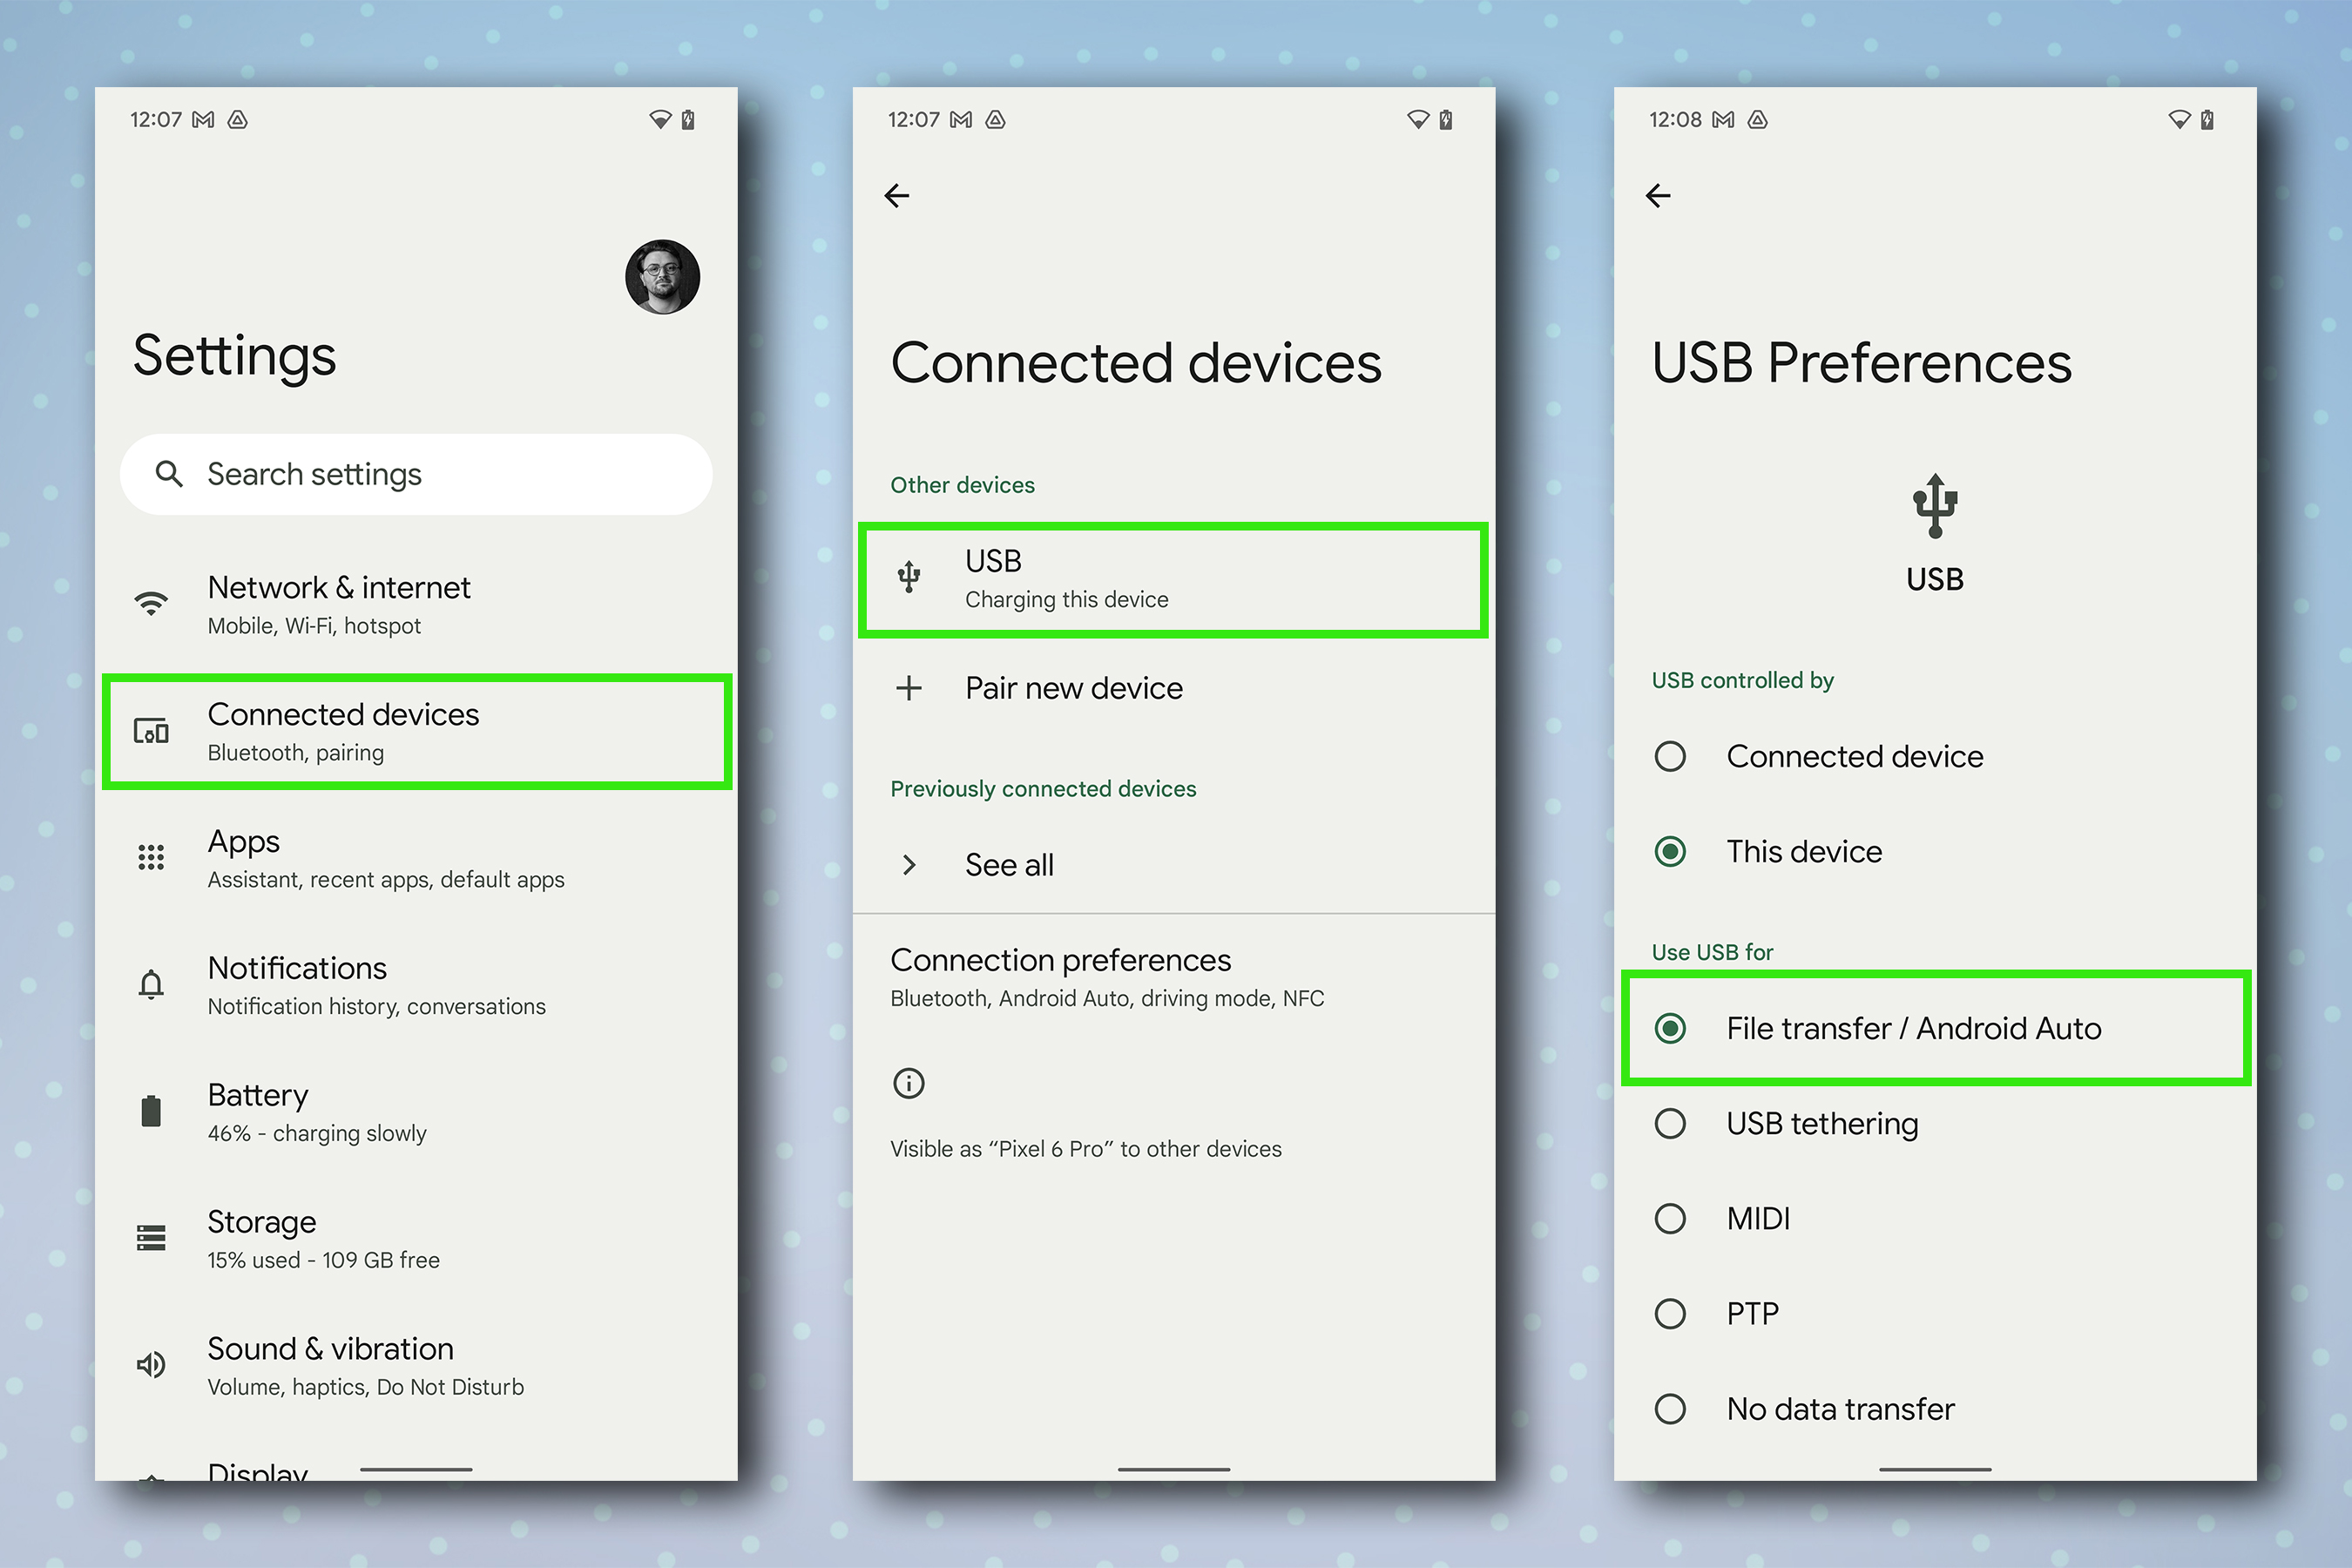
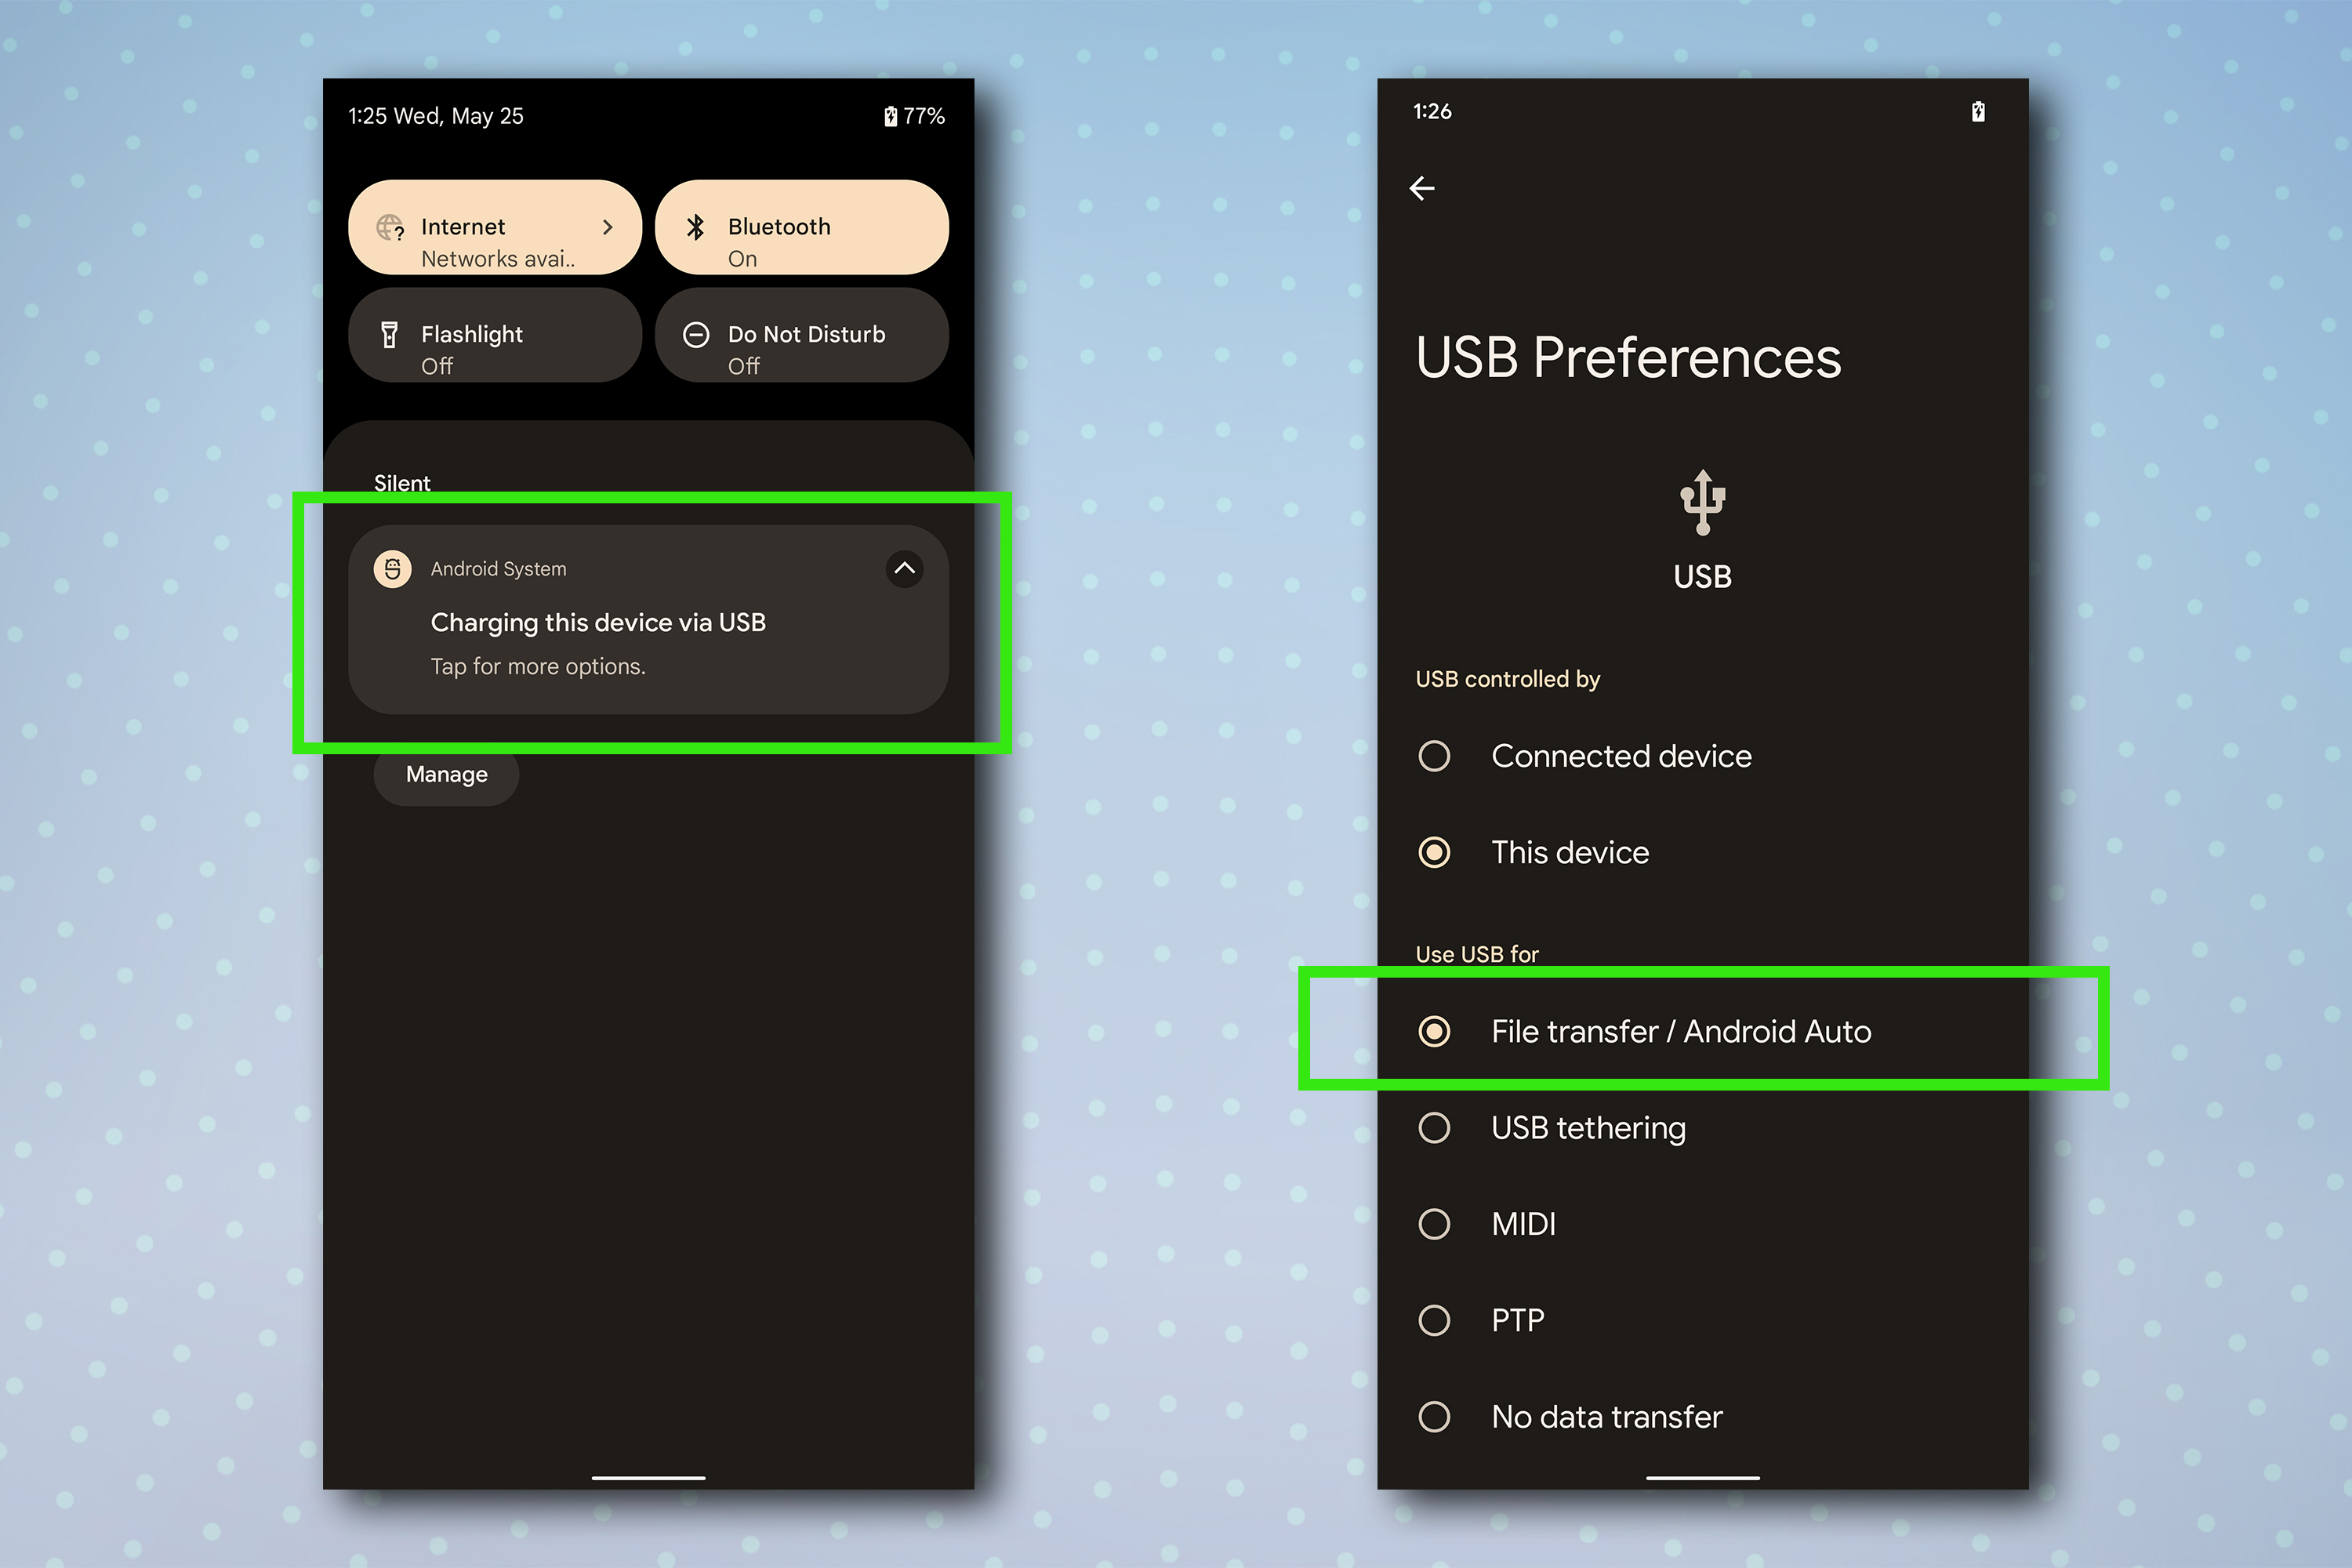
On a non-Samsung device, such as a Google Pixel, go to Settings and tap Connected devices. Tap USB and then select File transfer / Android Auto under Use USB for to put your phone into image transfer mode.
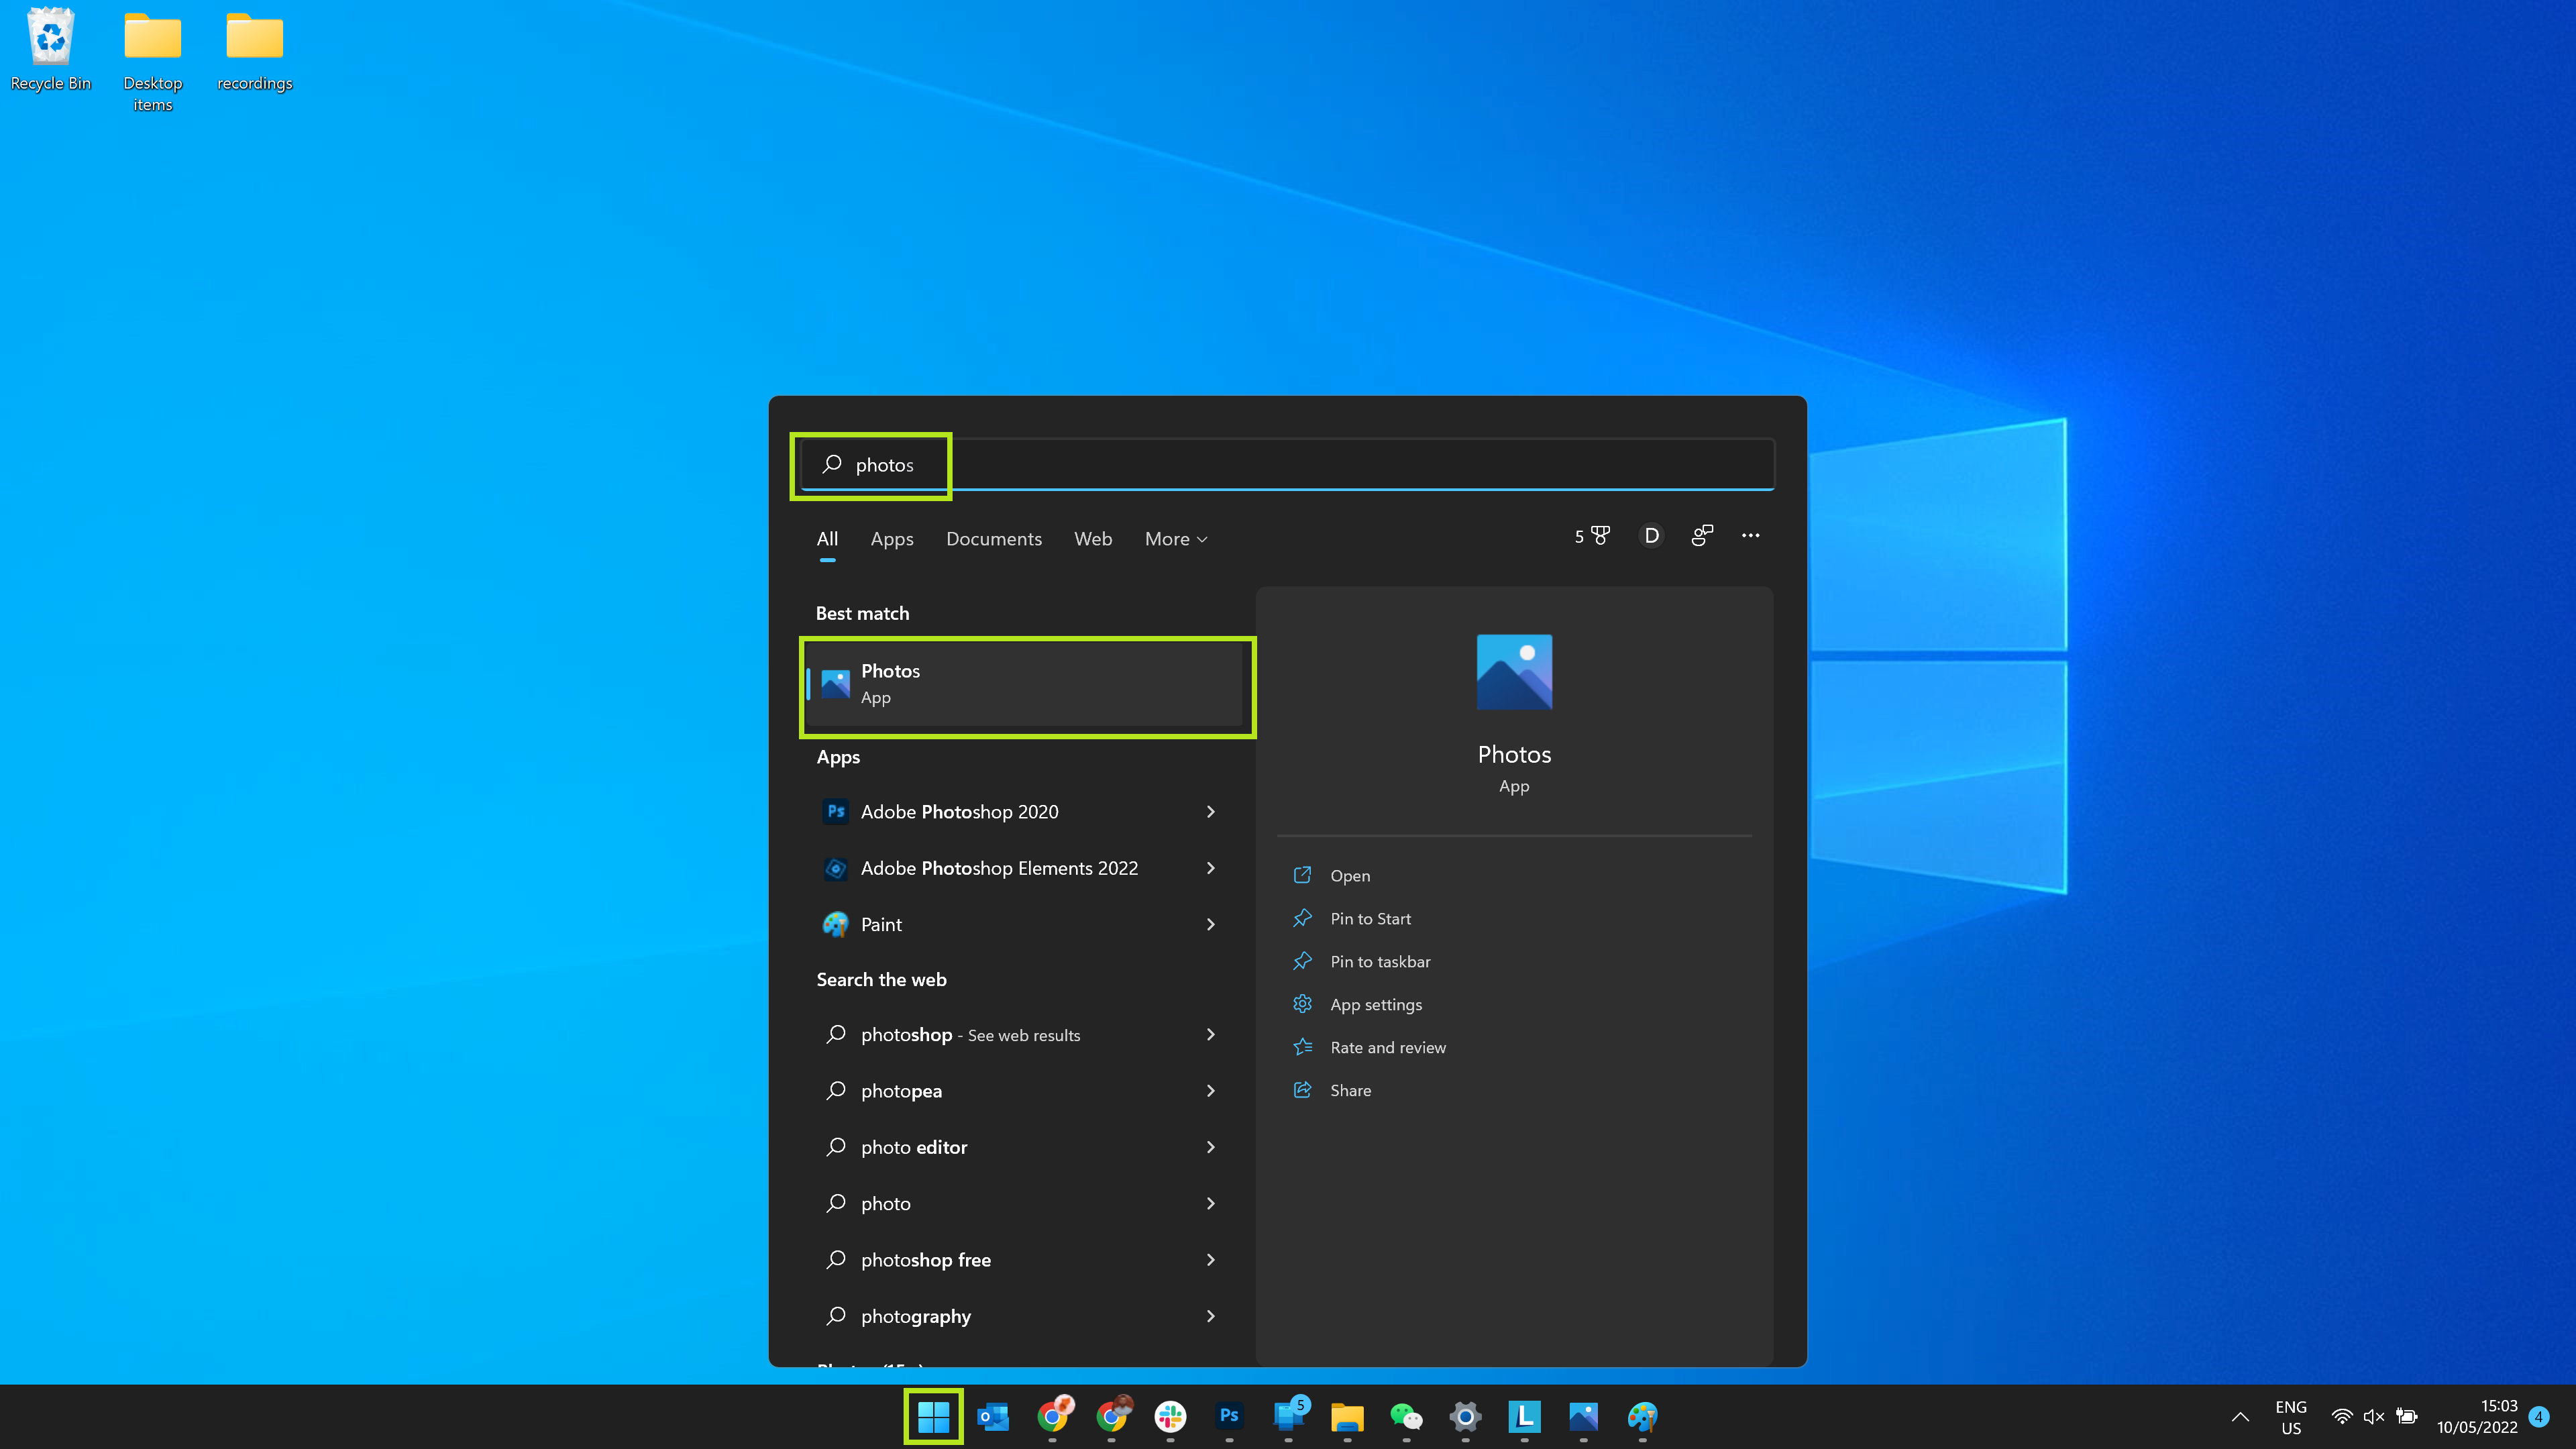
3. Open the Photos app on your PC by opening the Start menu and typing "Photos" until the app appears, before clicking the app icon.
4. Click the import icon in the top-right, then click From a connected device.
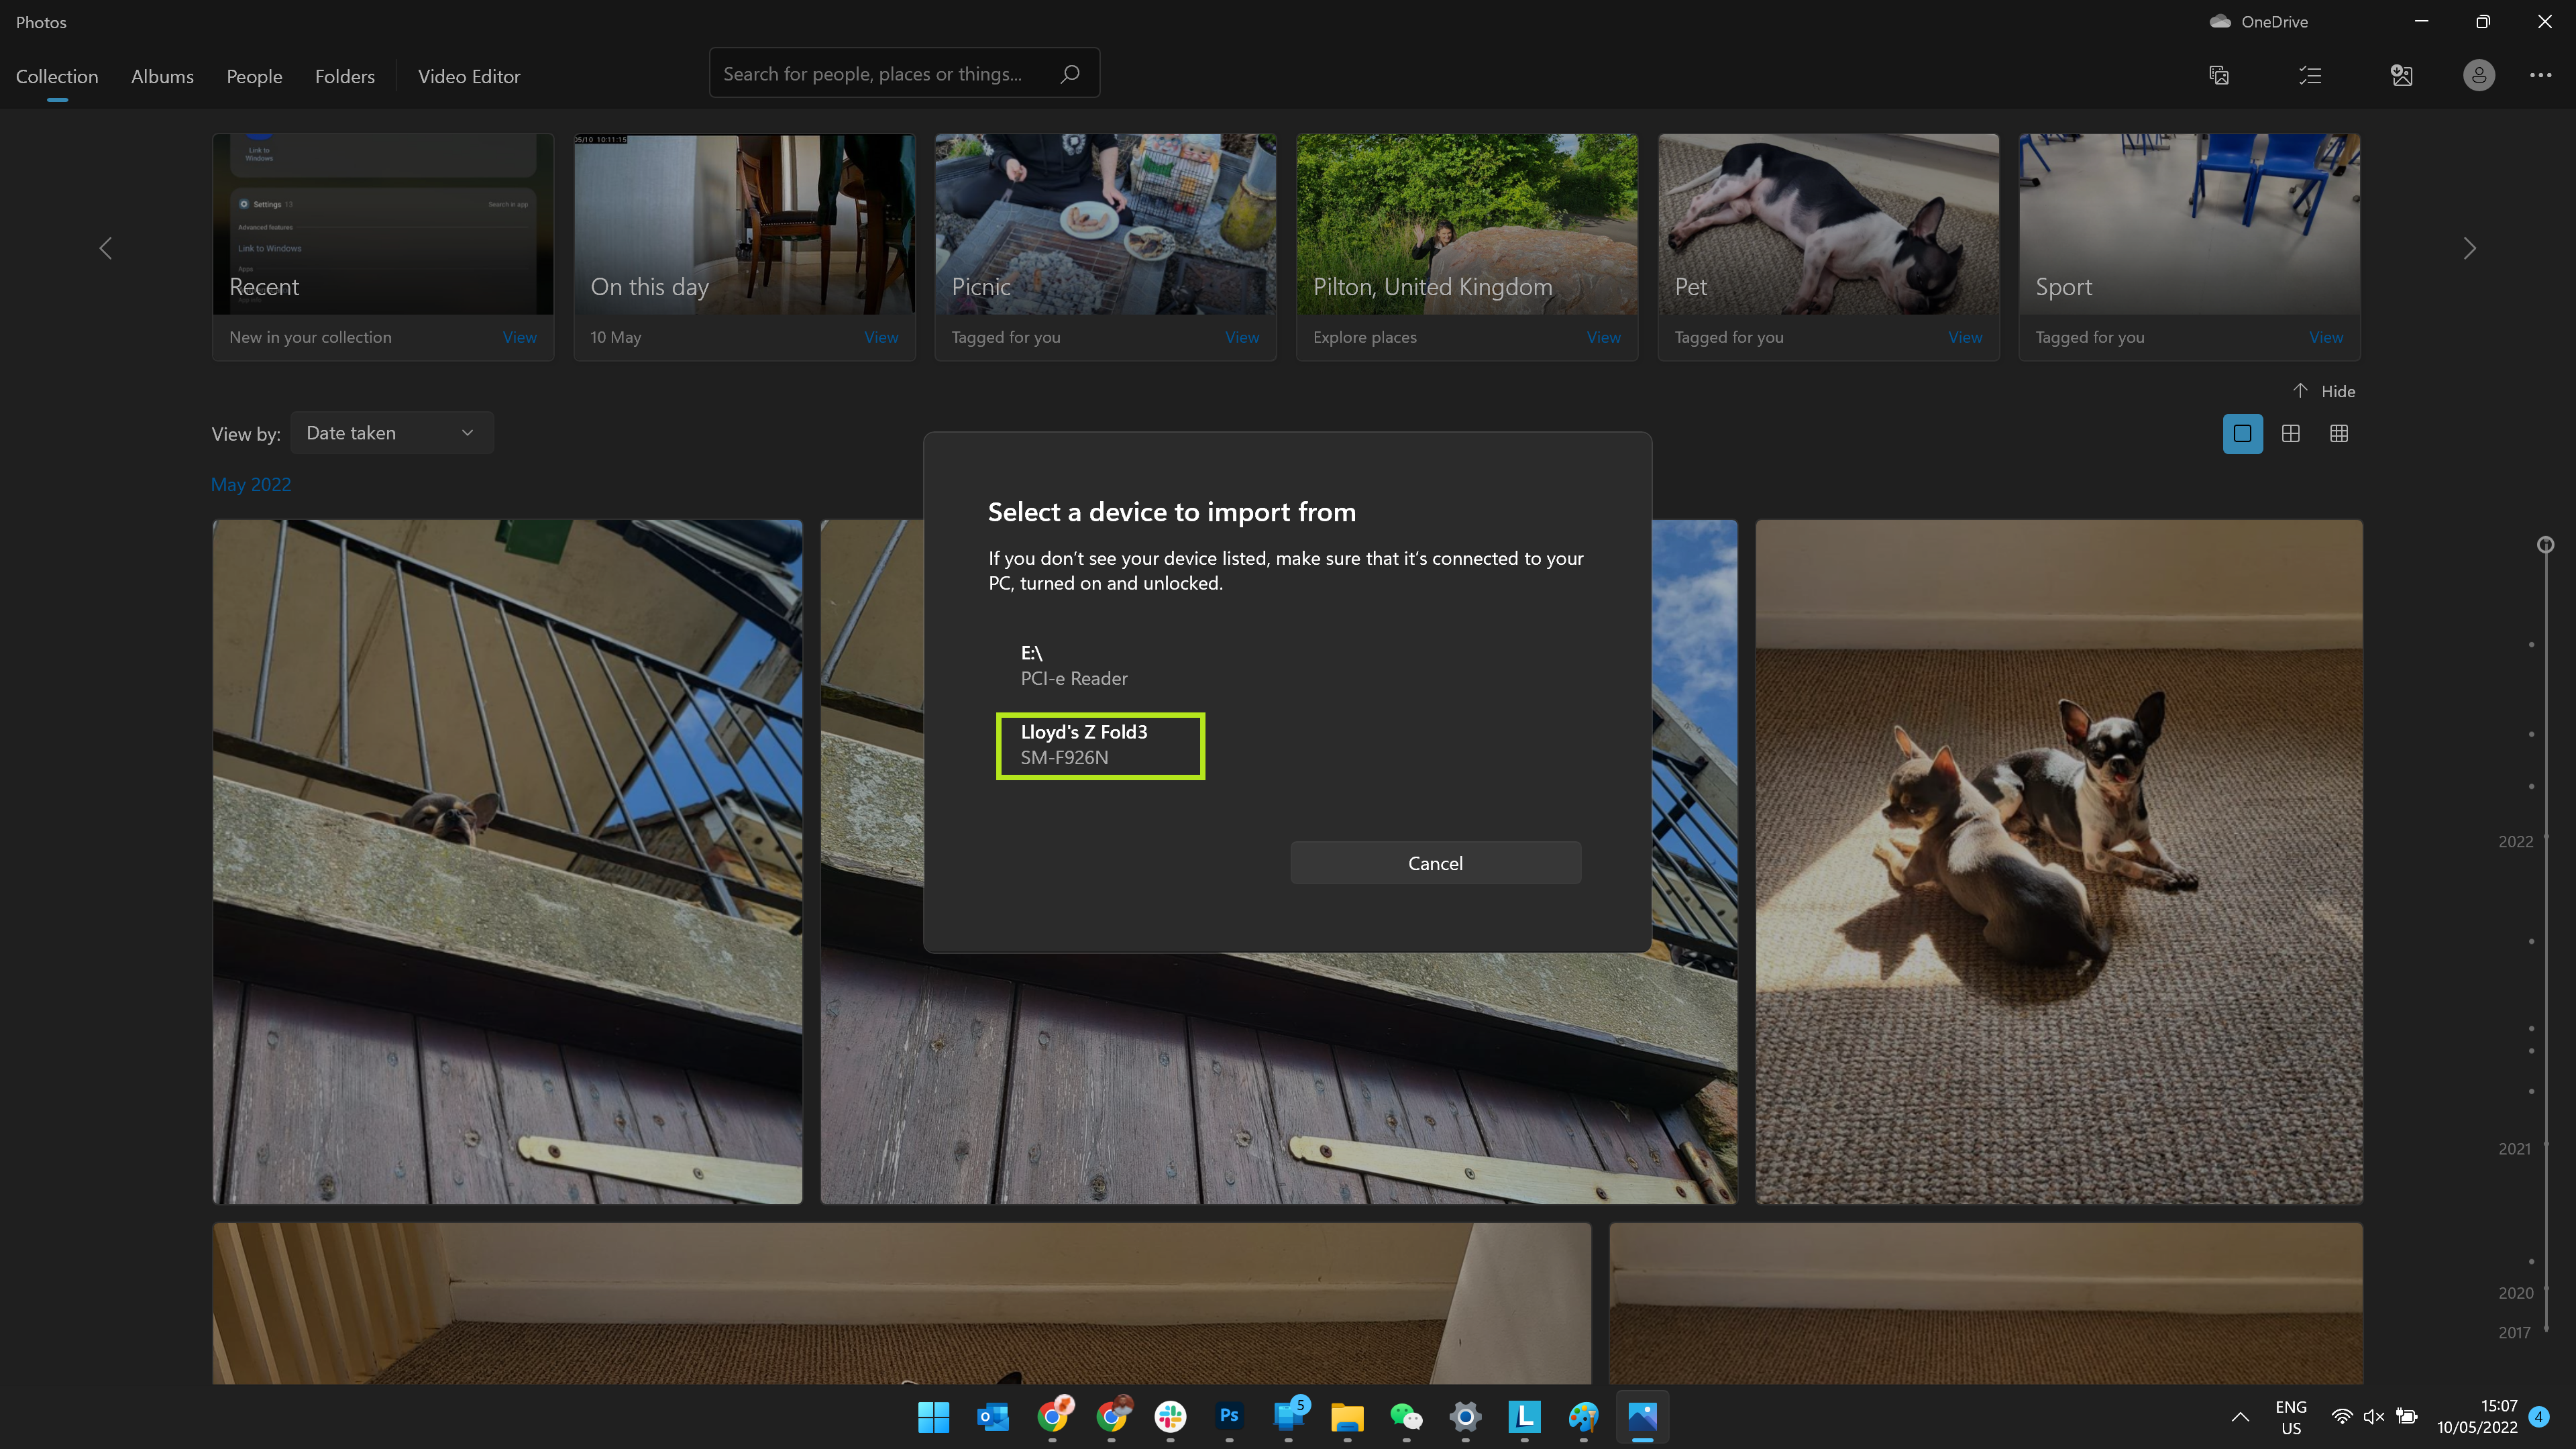
5. Click on your device's name to continue.
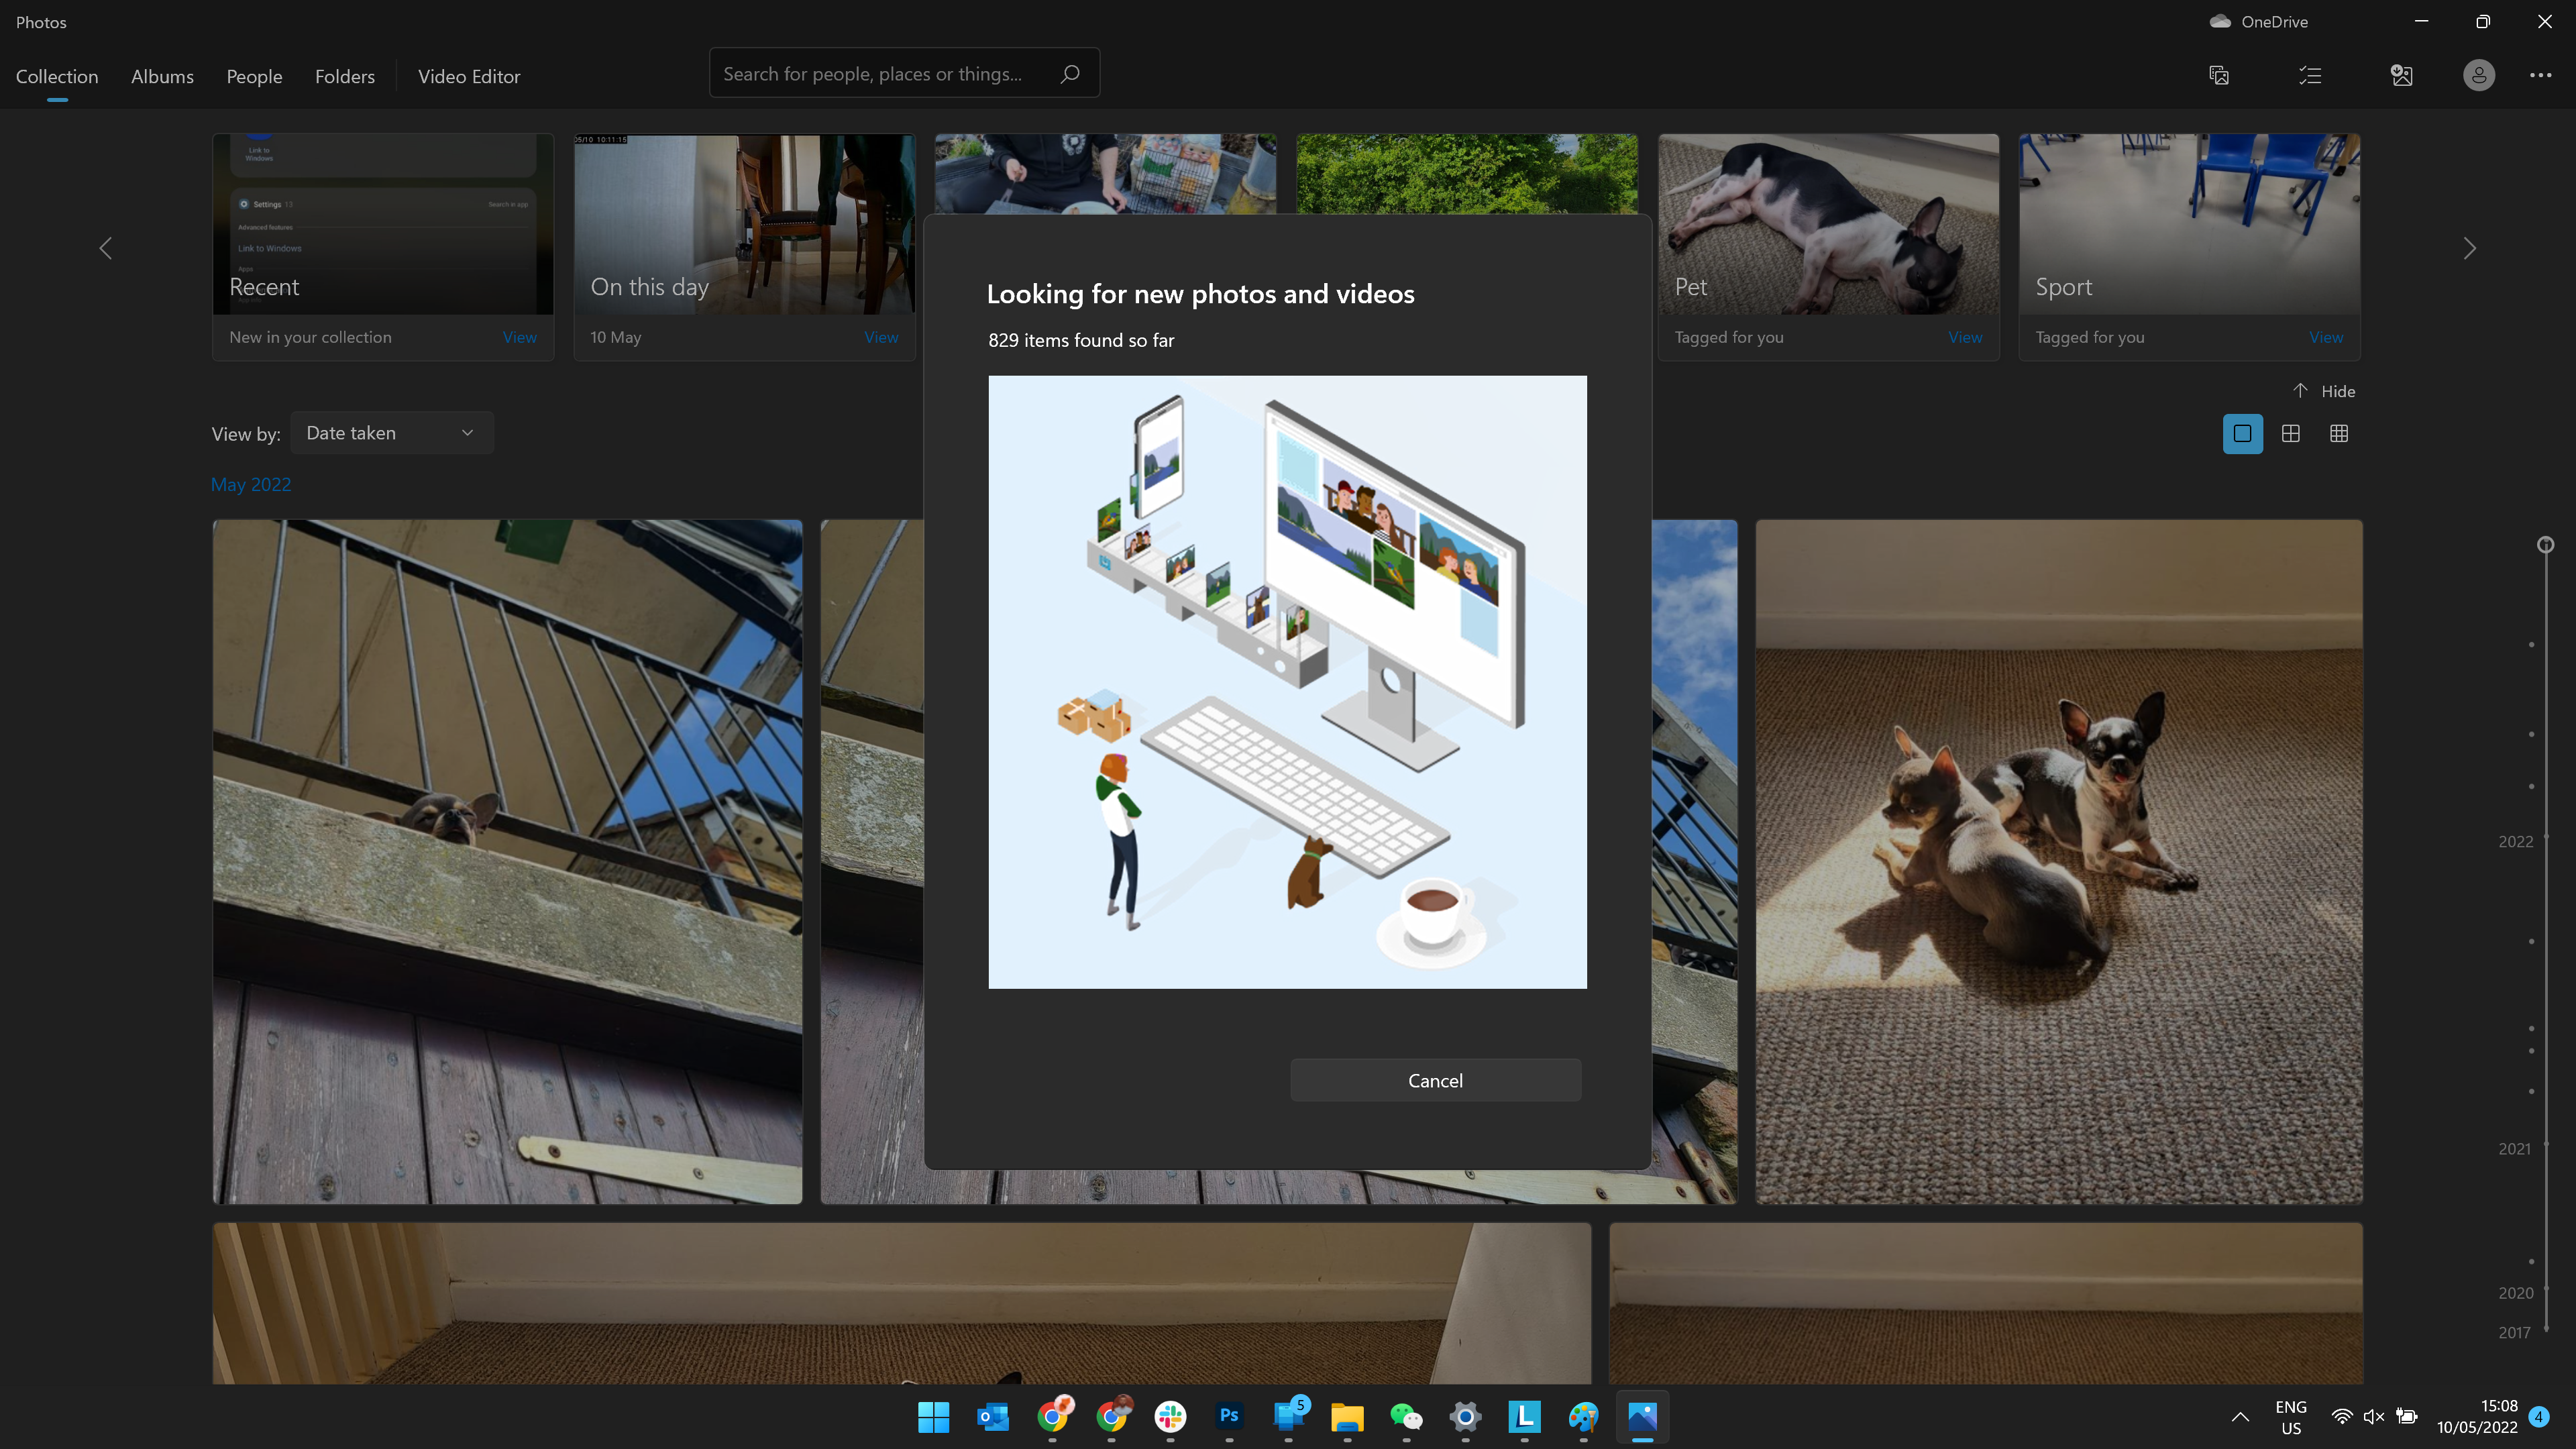
6. Your PC will now scan your phone for photos and videos. This may take a while, depending on how many pictures and videos you have on your phone.
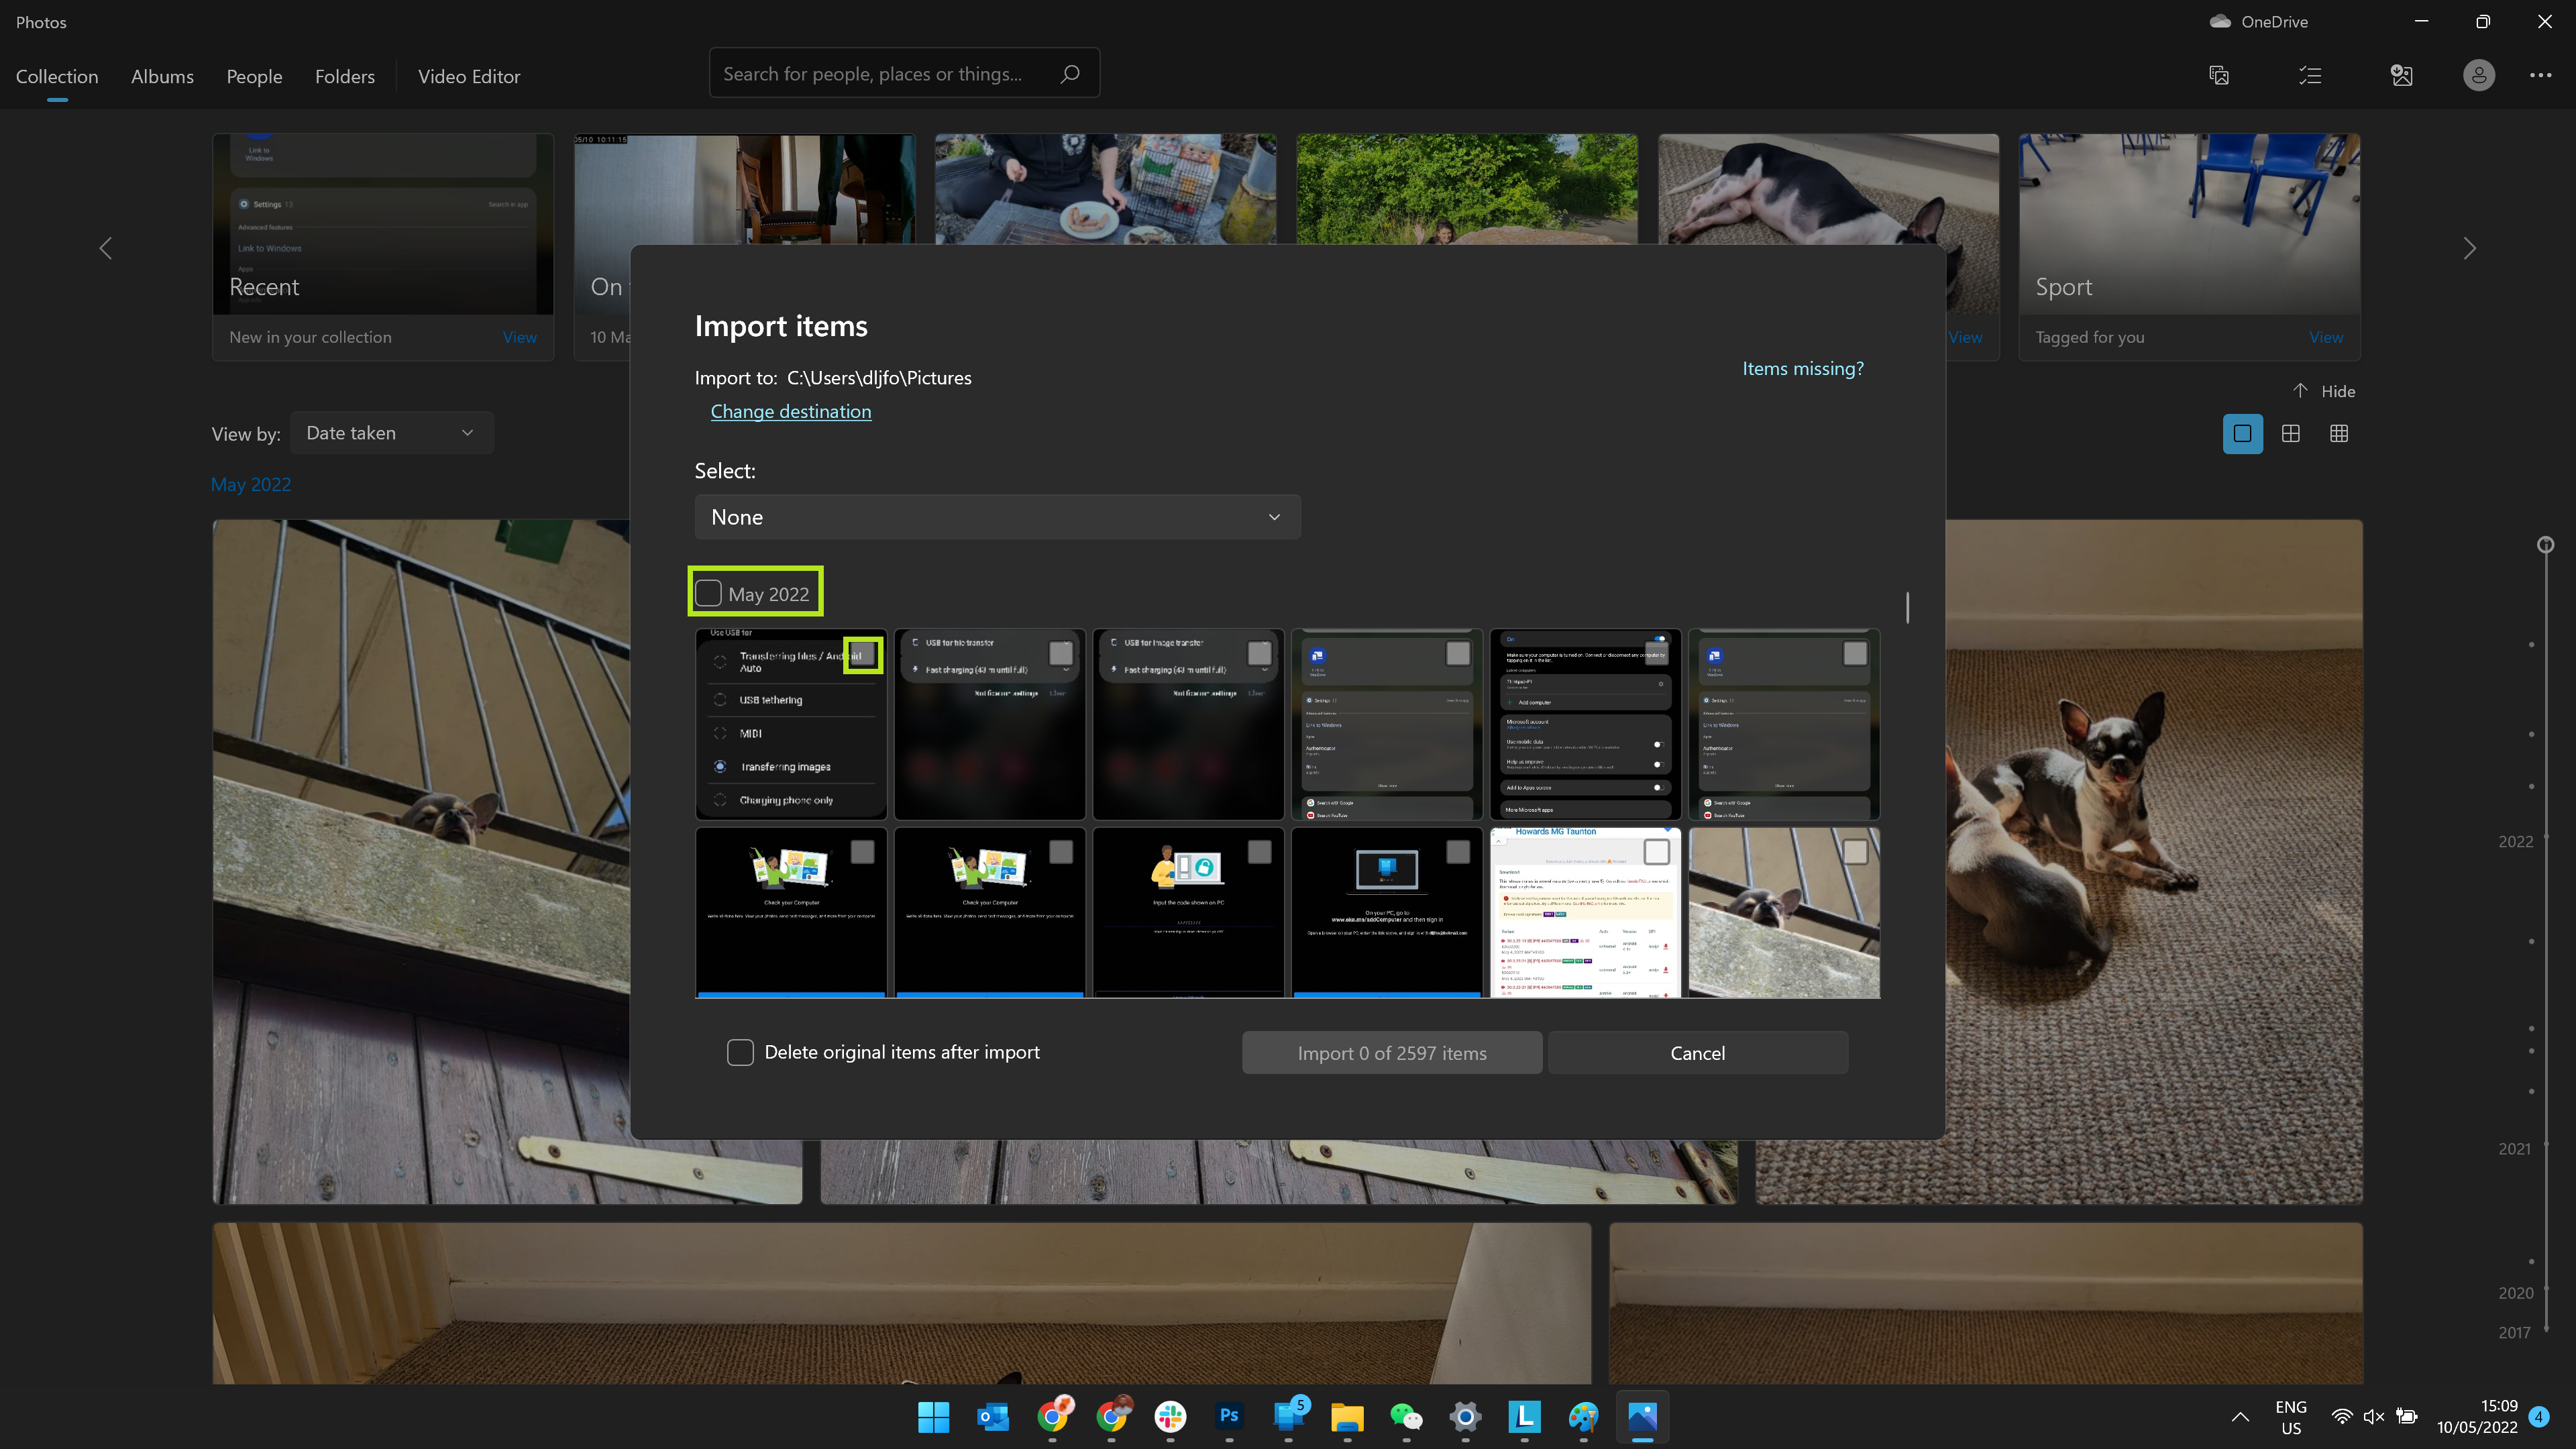
7. Once your phone has been scanned, you'll see your photos and videos appear in the Photos app. You can select the files you want to import by clicking the check box on individual photos, or clicking the check box on individual months if you want to import your files in larger batches.
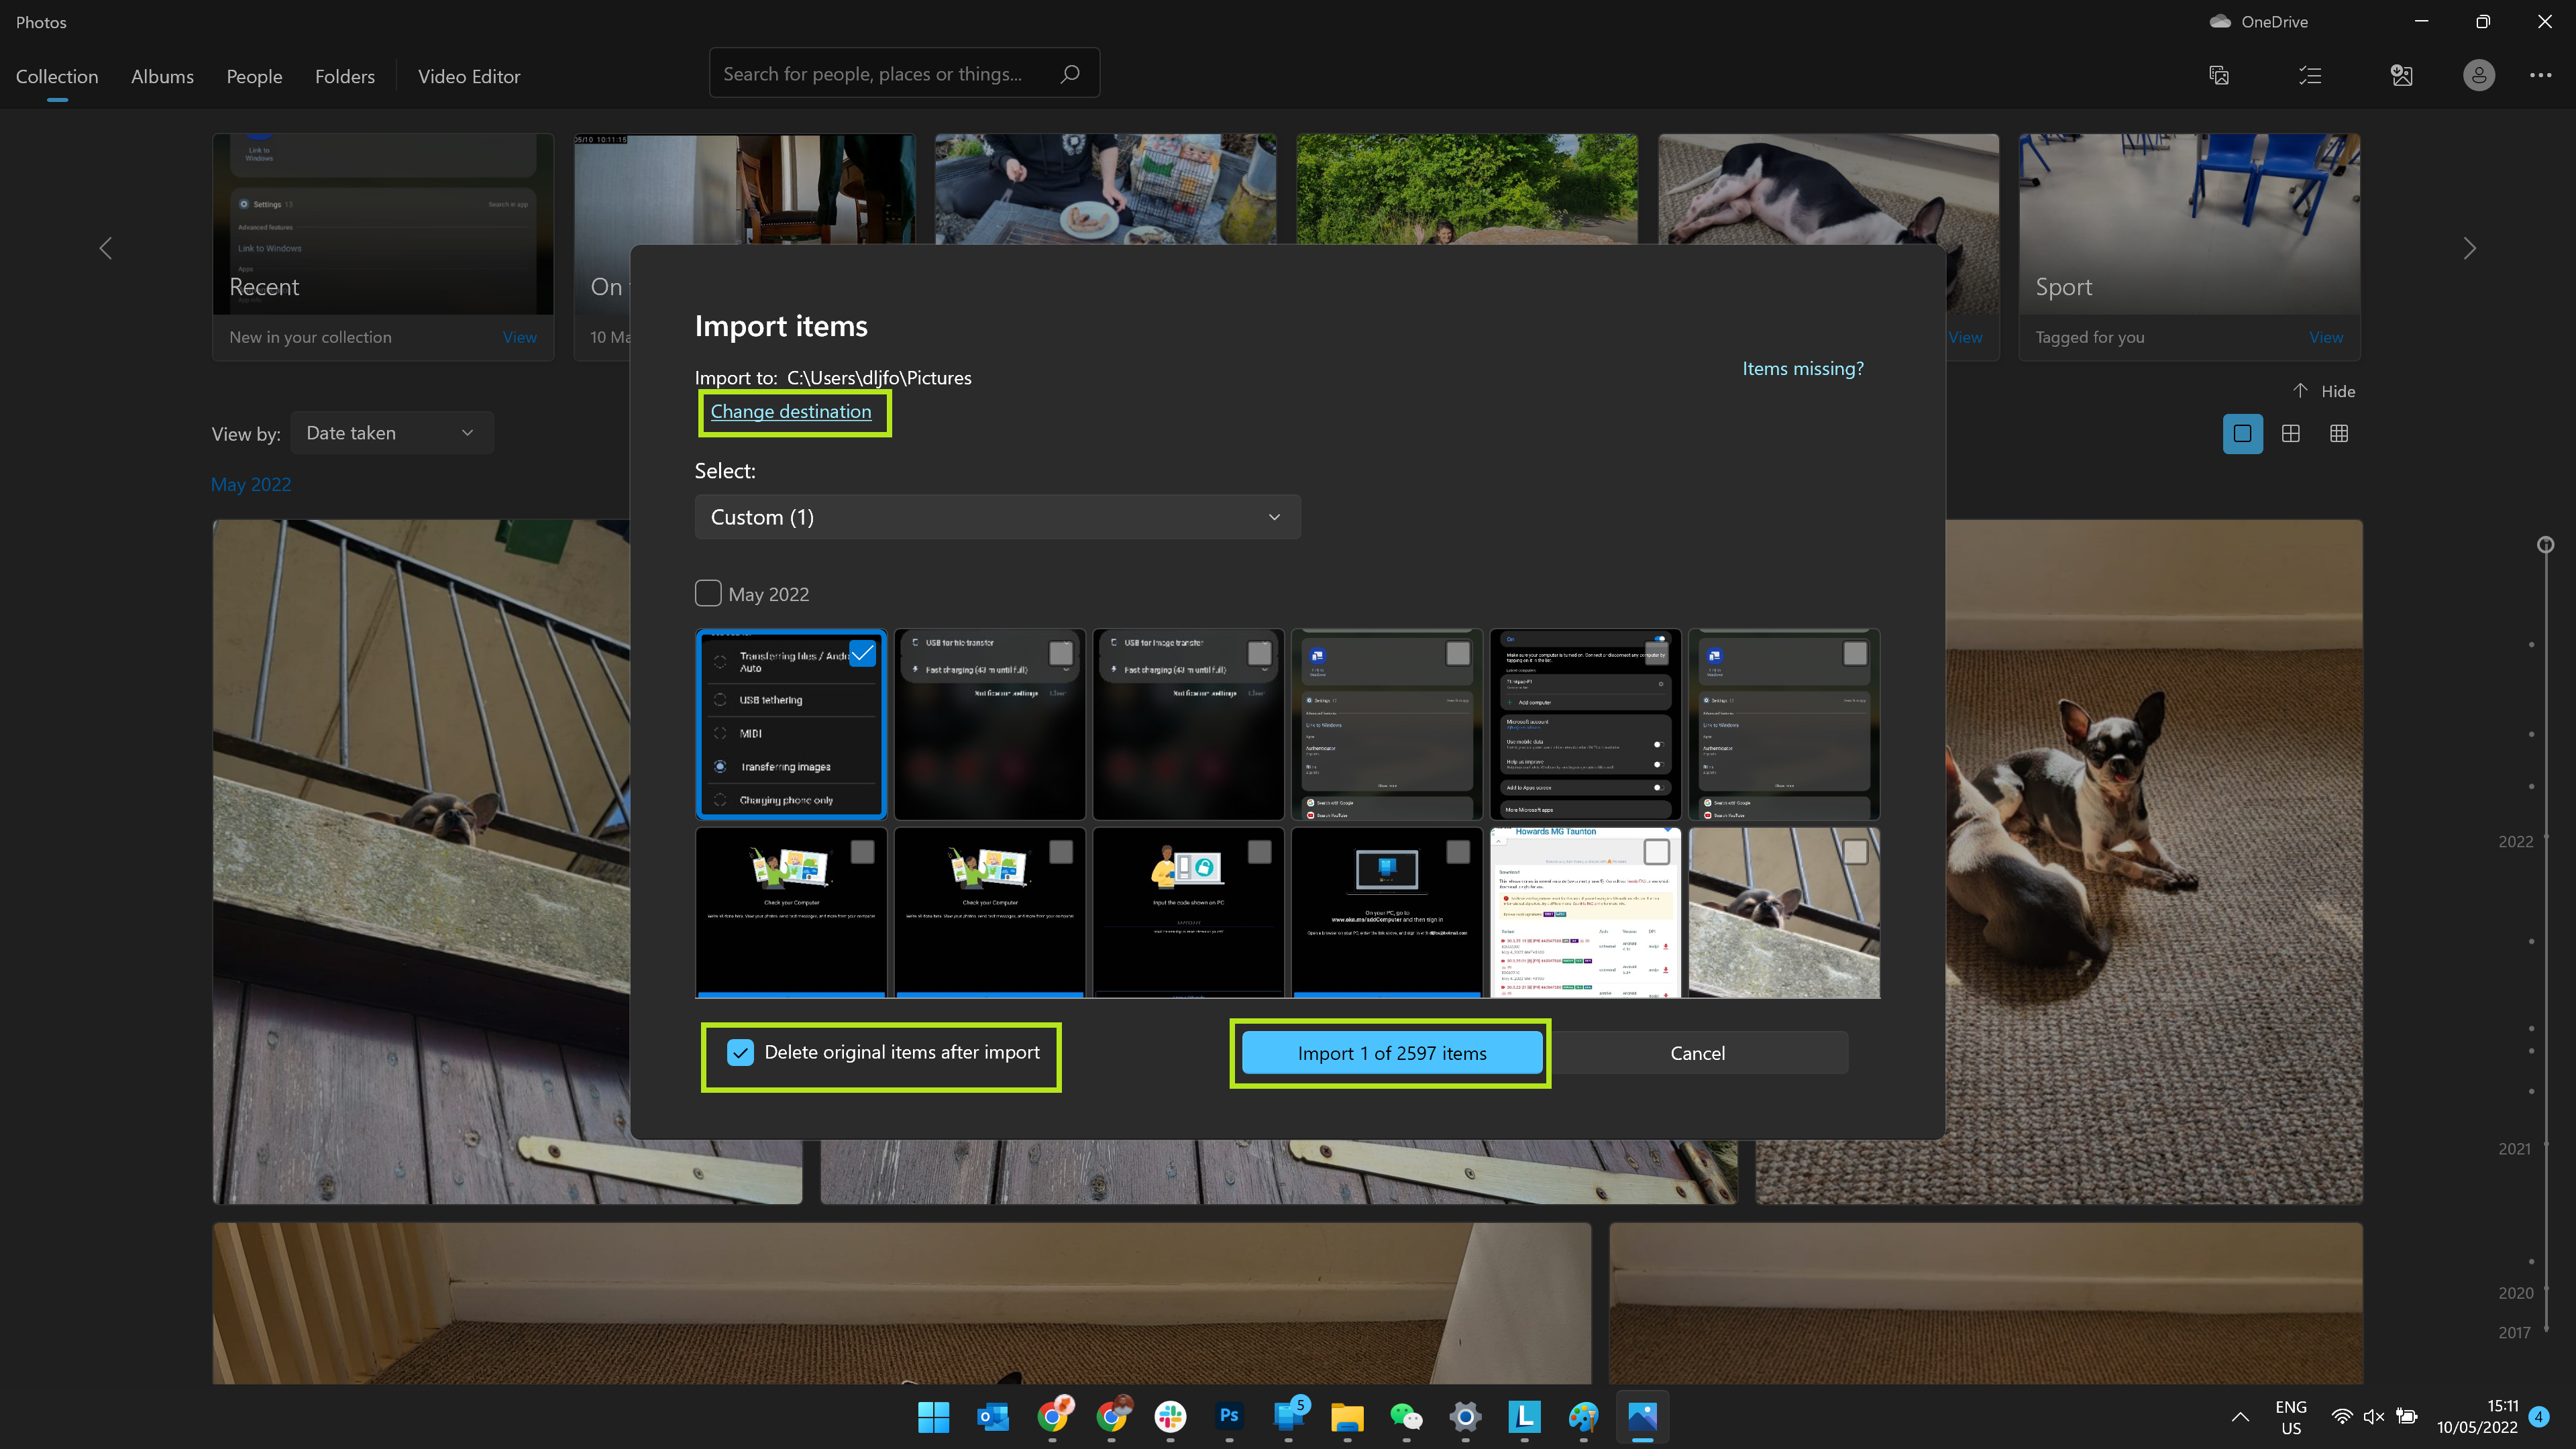
8. When you're done selecting, choose the location on your PC where the imported files will be saved by clicking Change destination. If you want to delete the original files from your phone after you've imported them, check the box at the bottom. Once you're ready to import, click Import [X] of [X] items at the bottom.
How to transfer photos from Android to a Mac
The easiest way to transfer photos from your Android phone to a Mac is by using a USB cable. If you just plug your phone into your Mac however, you'll notice that nothing will happen. By default, you cannot simply transfer files between an Android phone and a Mac as you would with an external storage device. Thankfully, however, there is a free piece of software which takes care of this issue.
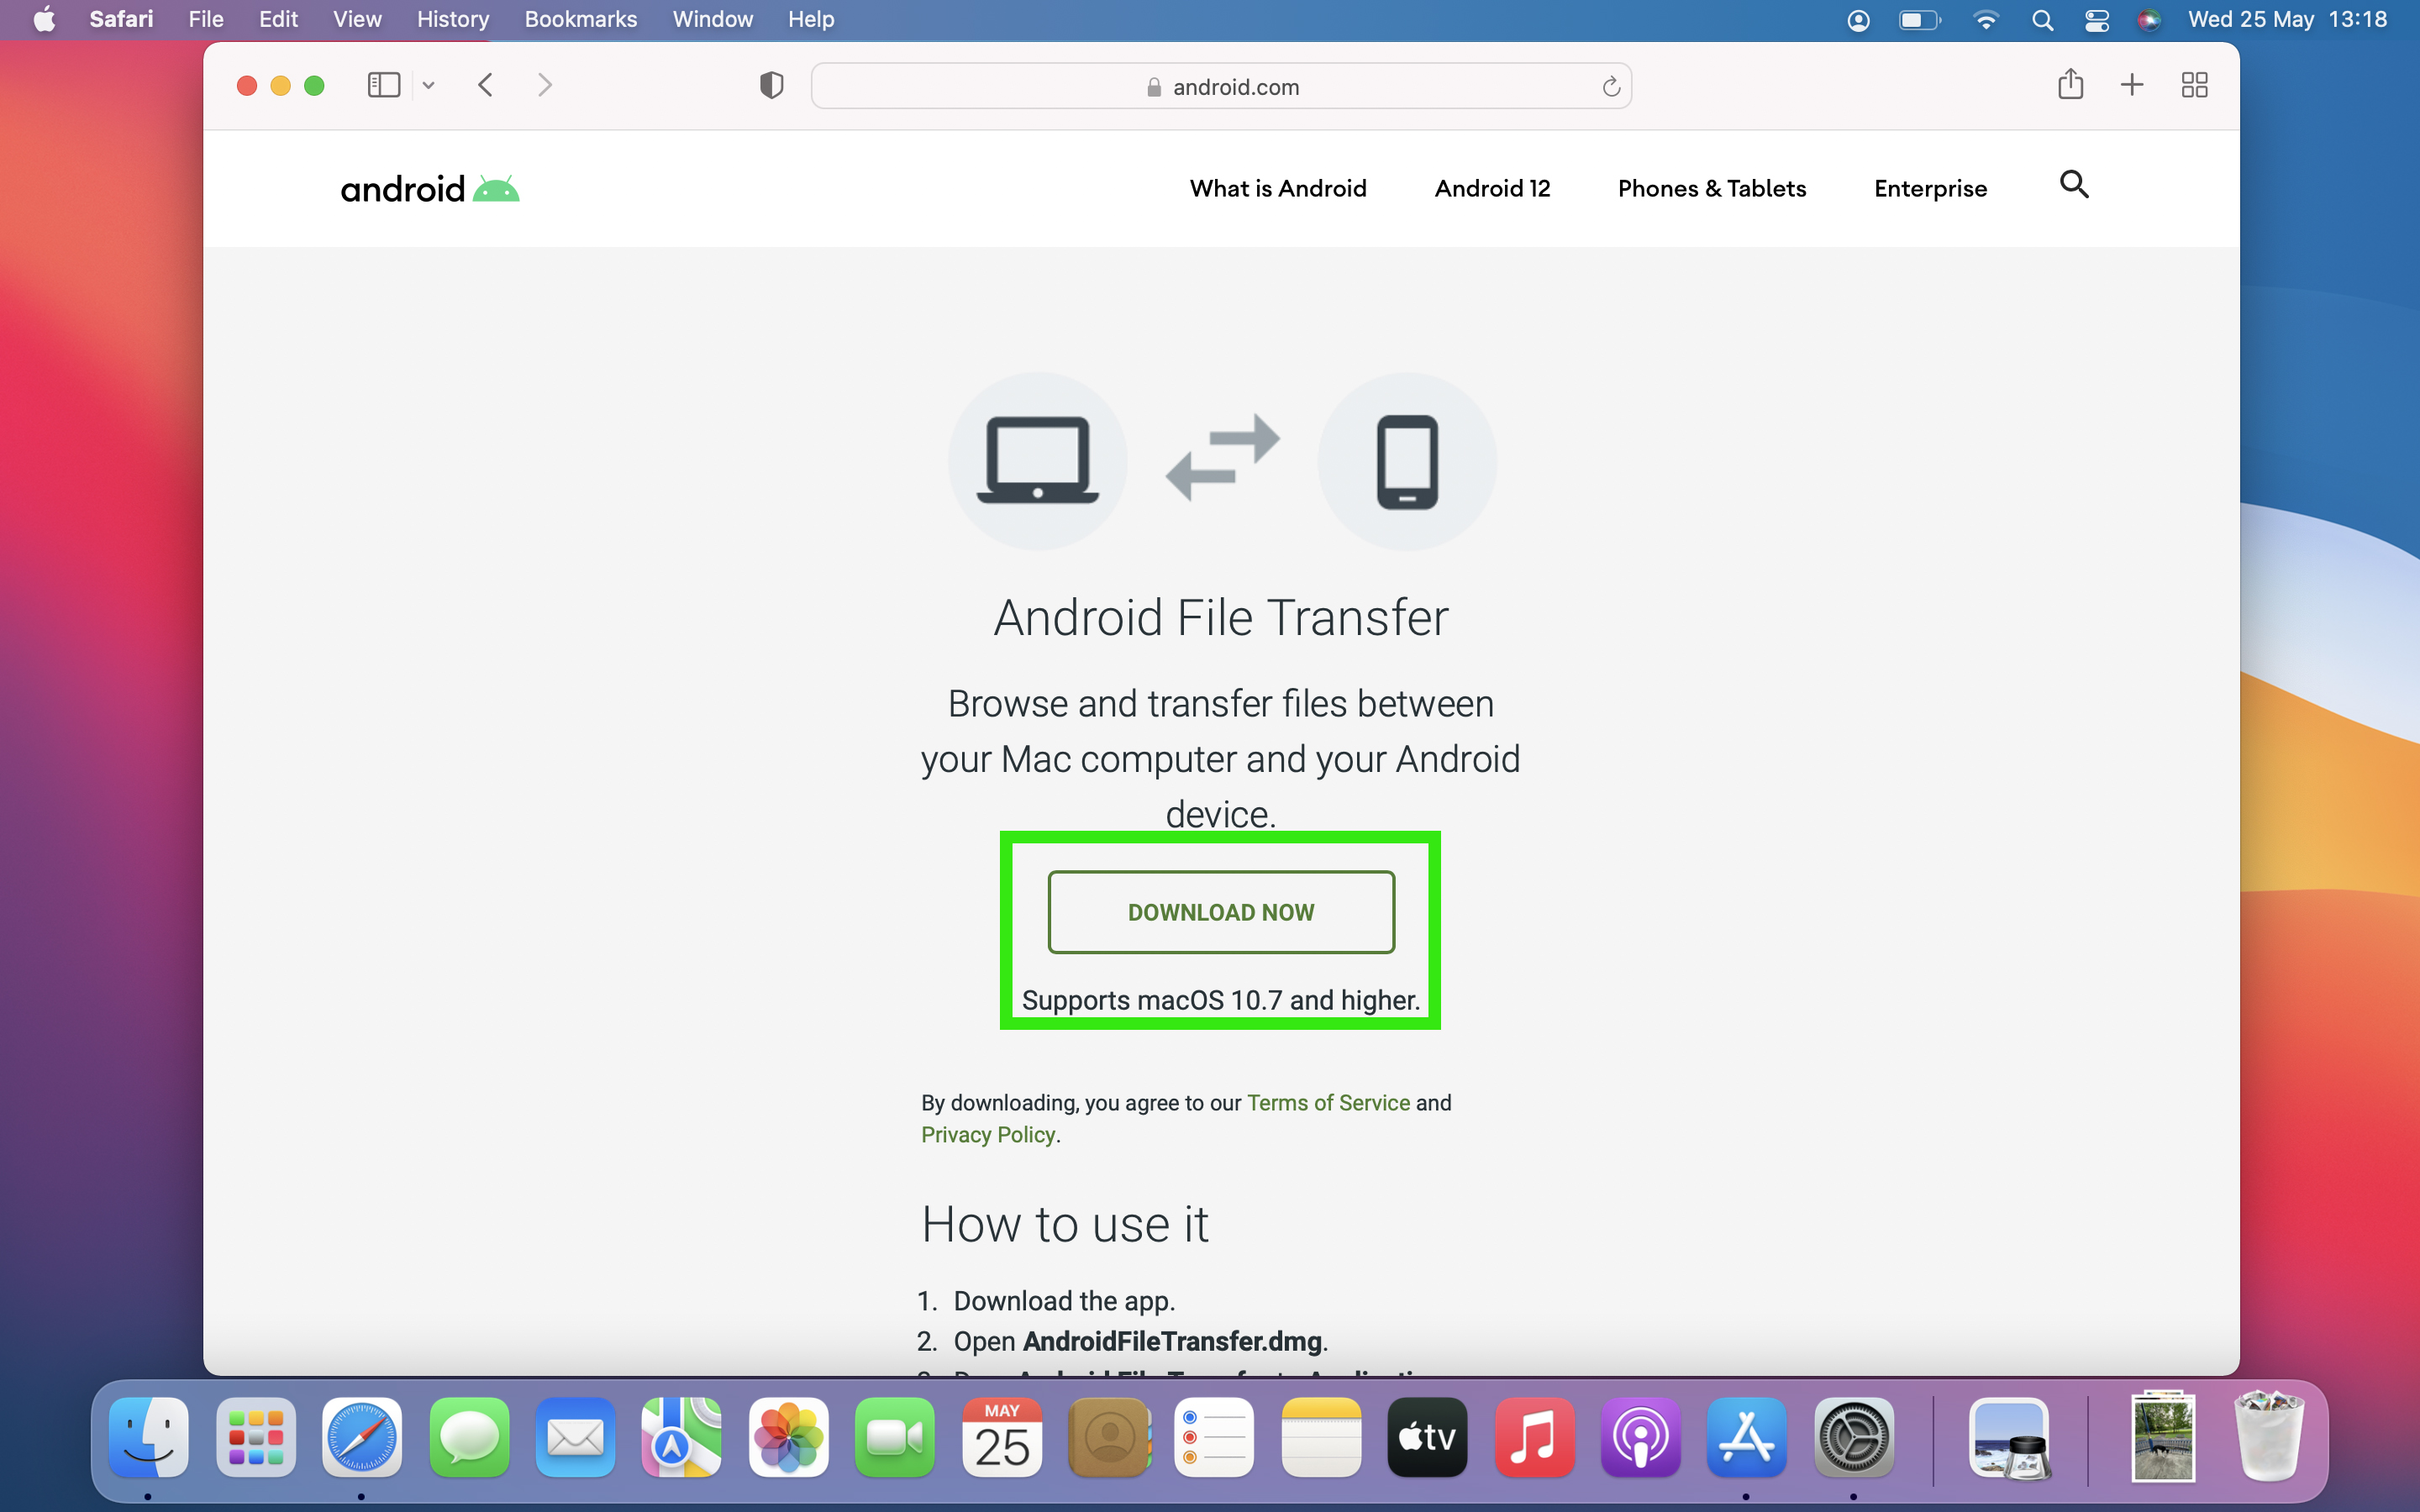
1. Go to Android File Transfer and hit DOWNLOAD NOW.
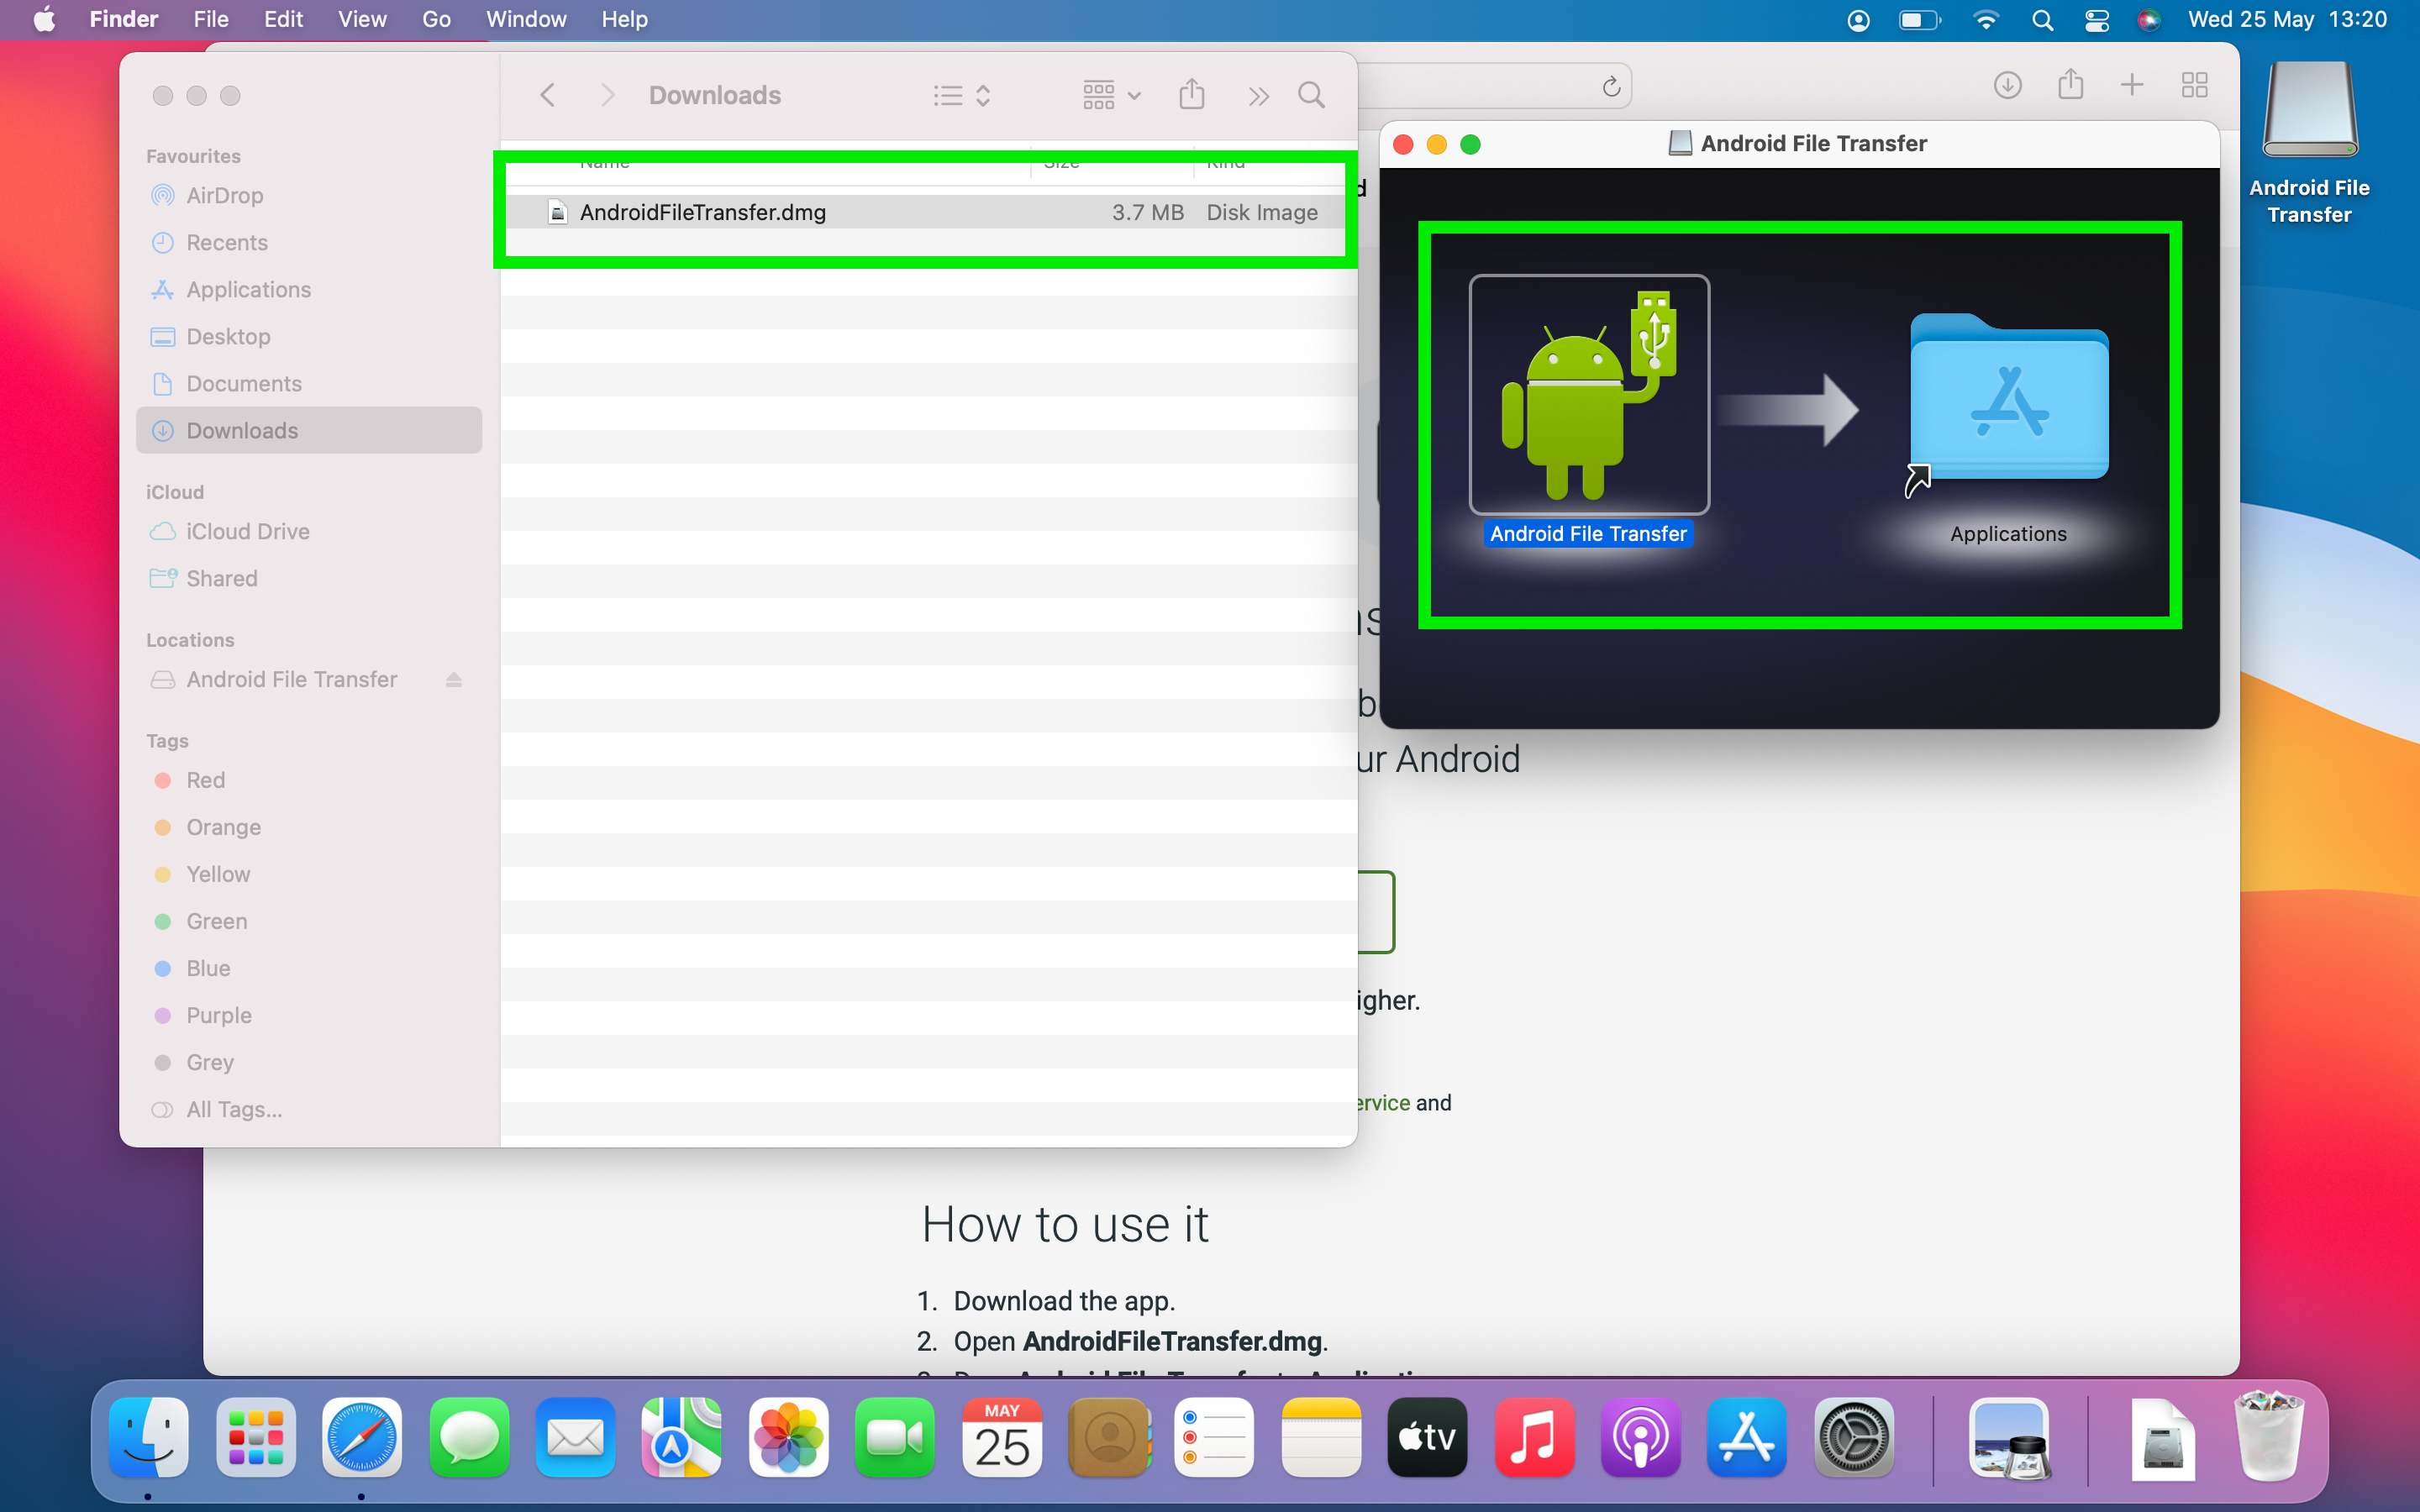
2. Once you’ve downloaded the software, go to your Downloads folder and double click on the .dmg file. When prompted, drag the Android File Transfer icon into your Applications folder.
3. Plug your Android phone into your Mac using a USB cable. Unlock your phone, swipe down from the top of the screen to open your notifications and tap the Android System USB notification. Select File Transfer / Android Auto.
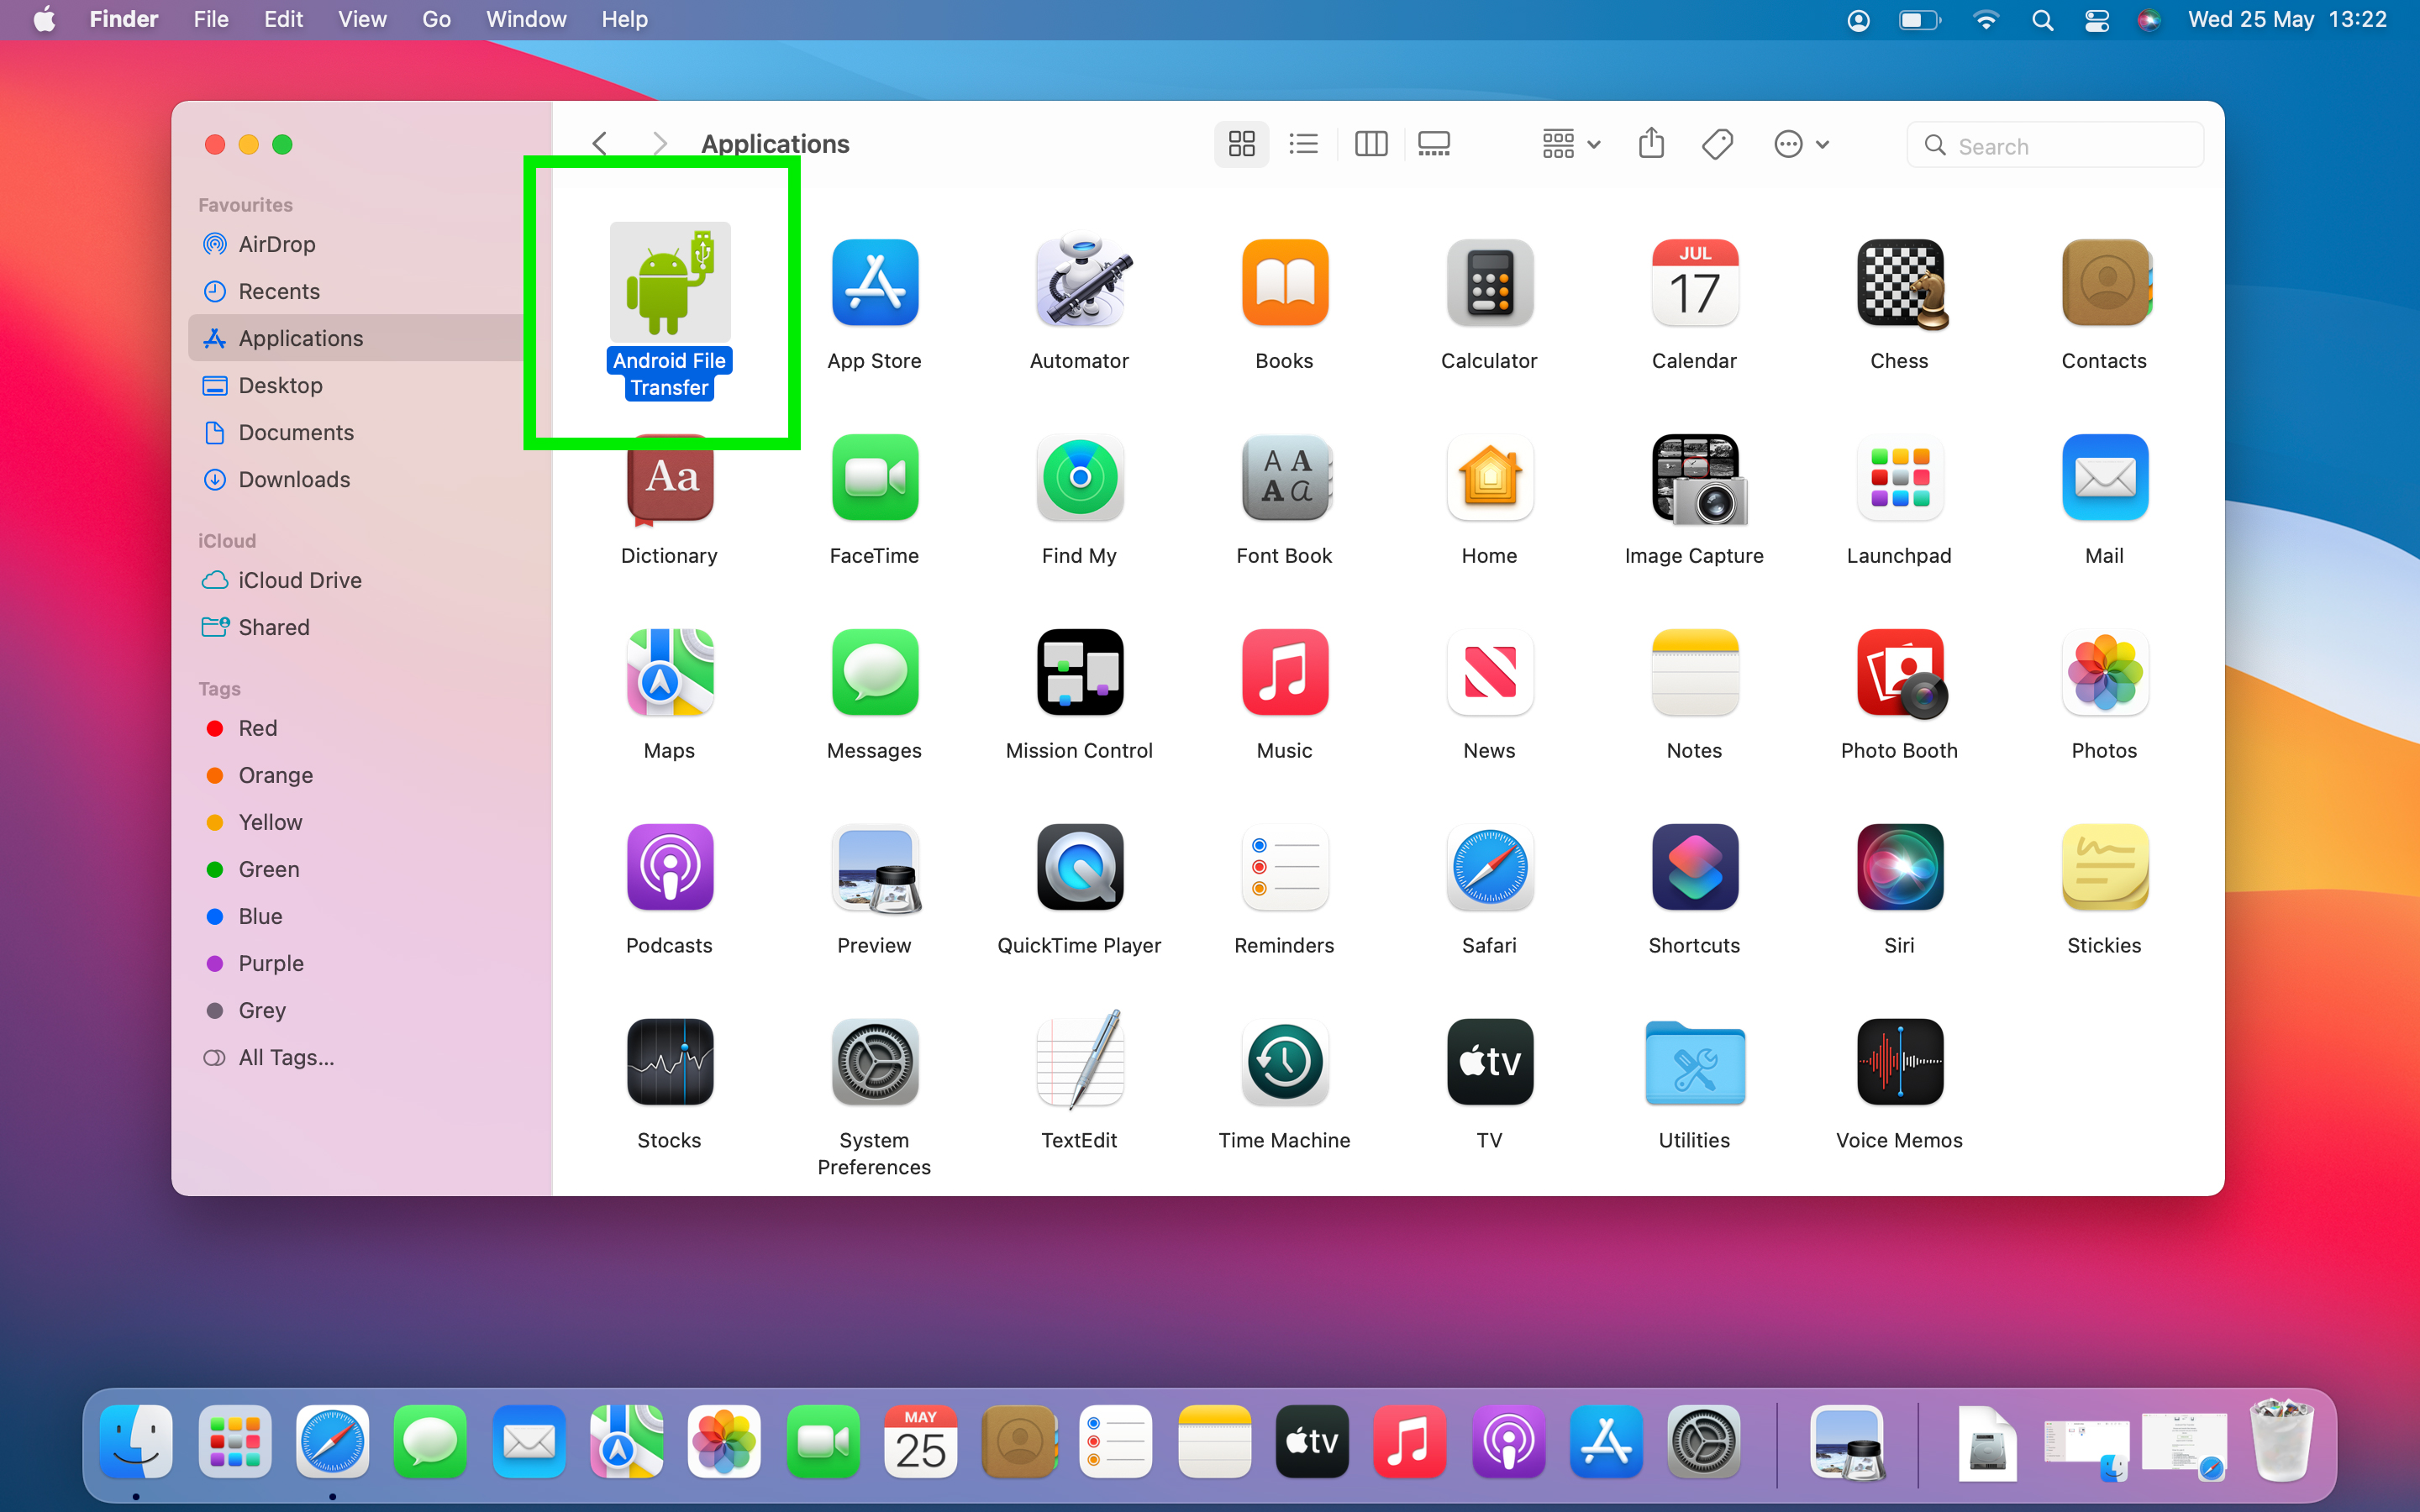
4. On your Mac, go to Applications and double click Android File Transfer.
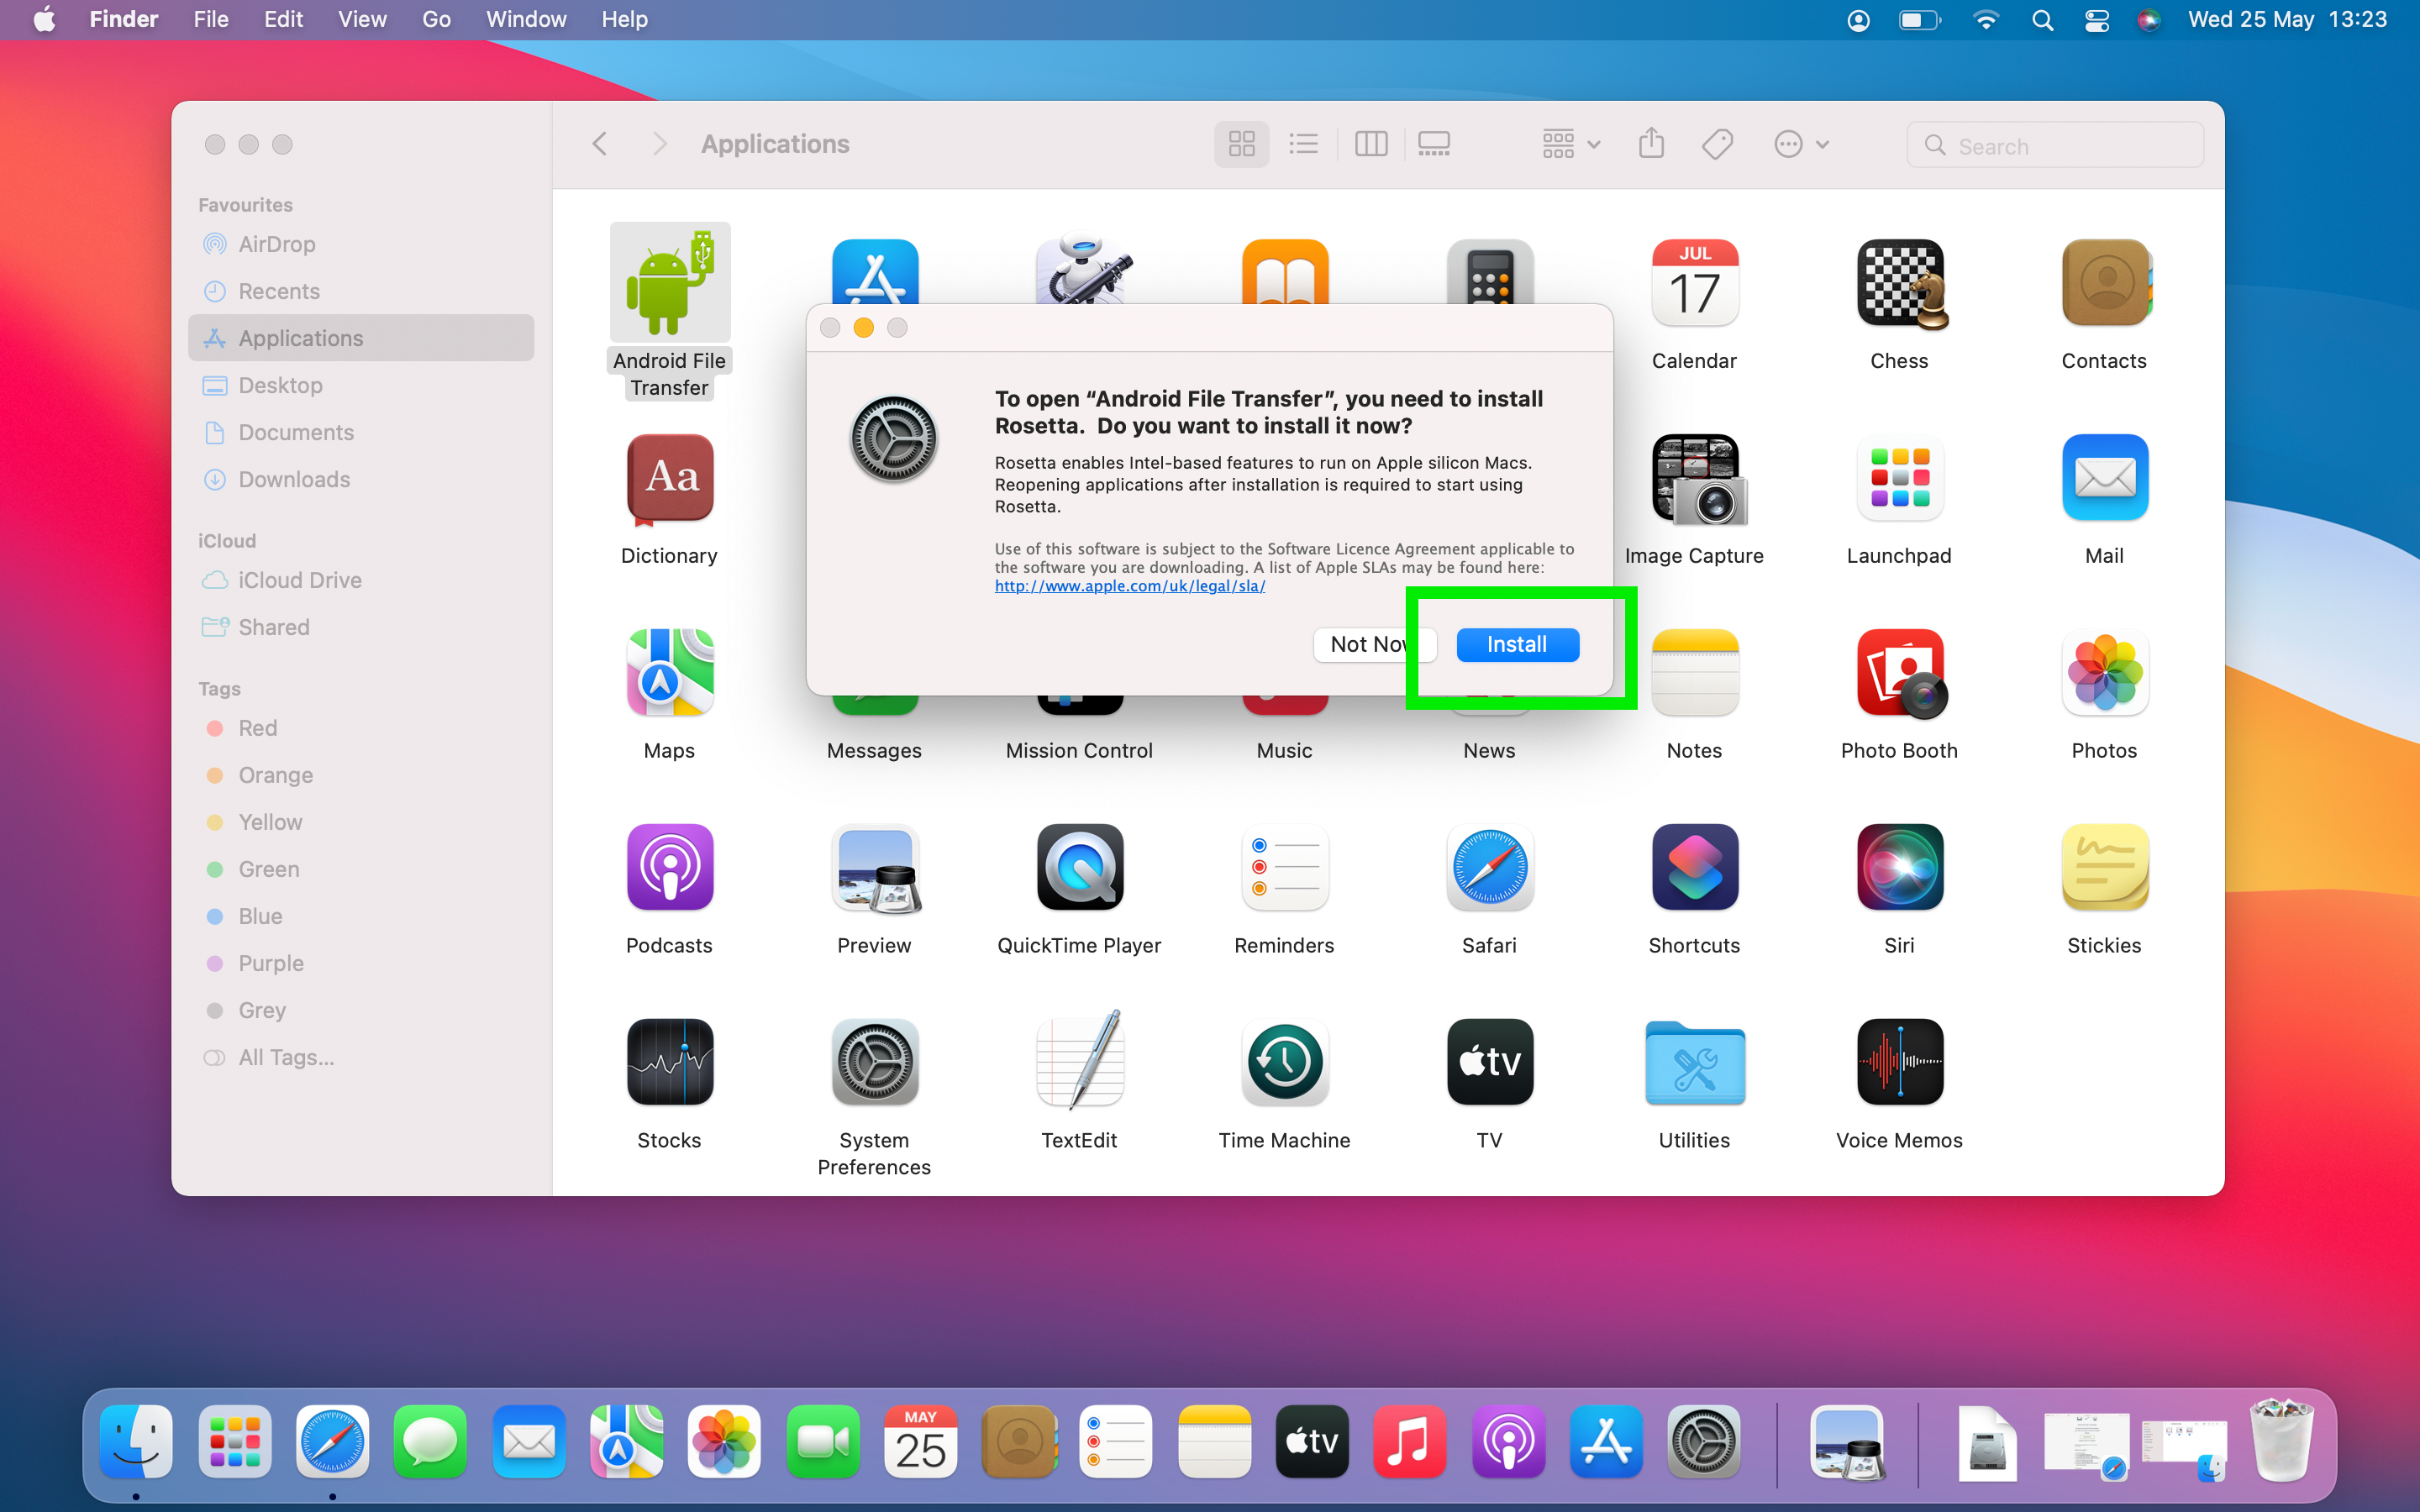
5. If you're using an Apple silicon Mac, you will need to install Rosetta, which allows programs written for Intel-based Macs to run on Apple silicon based machines. When prompted, select Install. Once Rosetta has installed, reopen Applications and double click on Android File Transfer again.
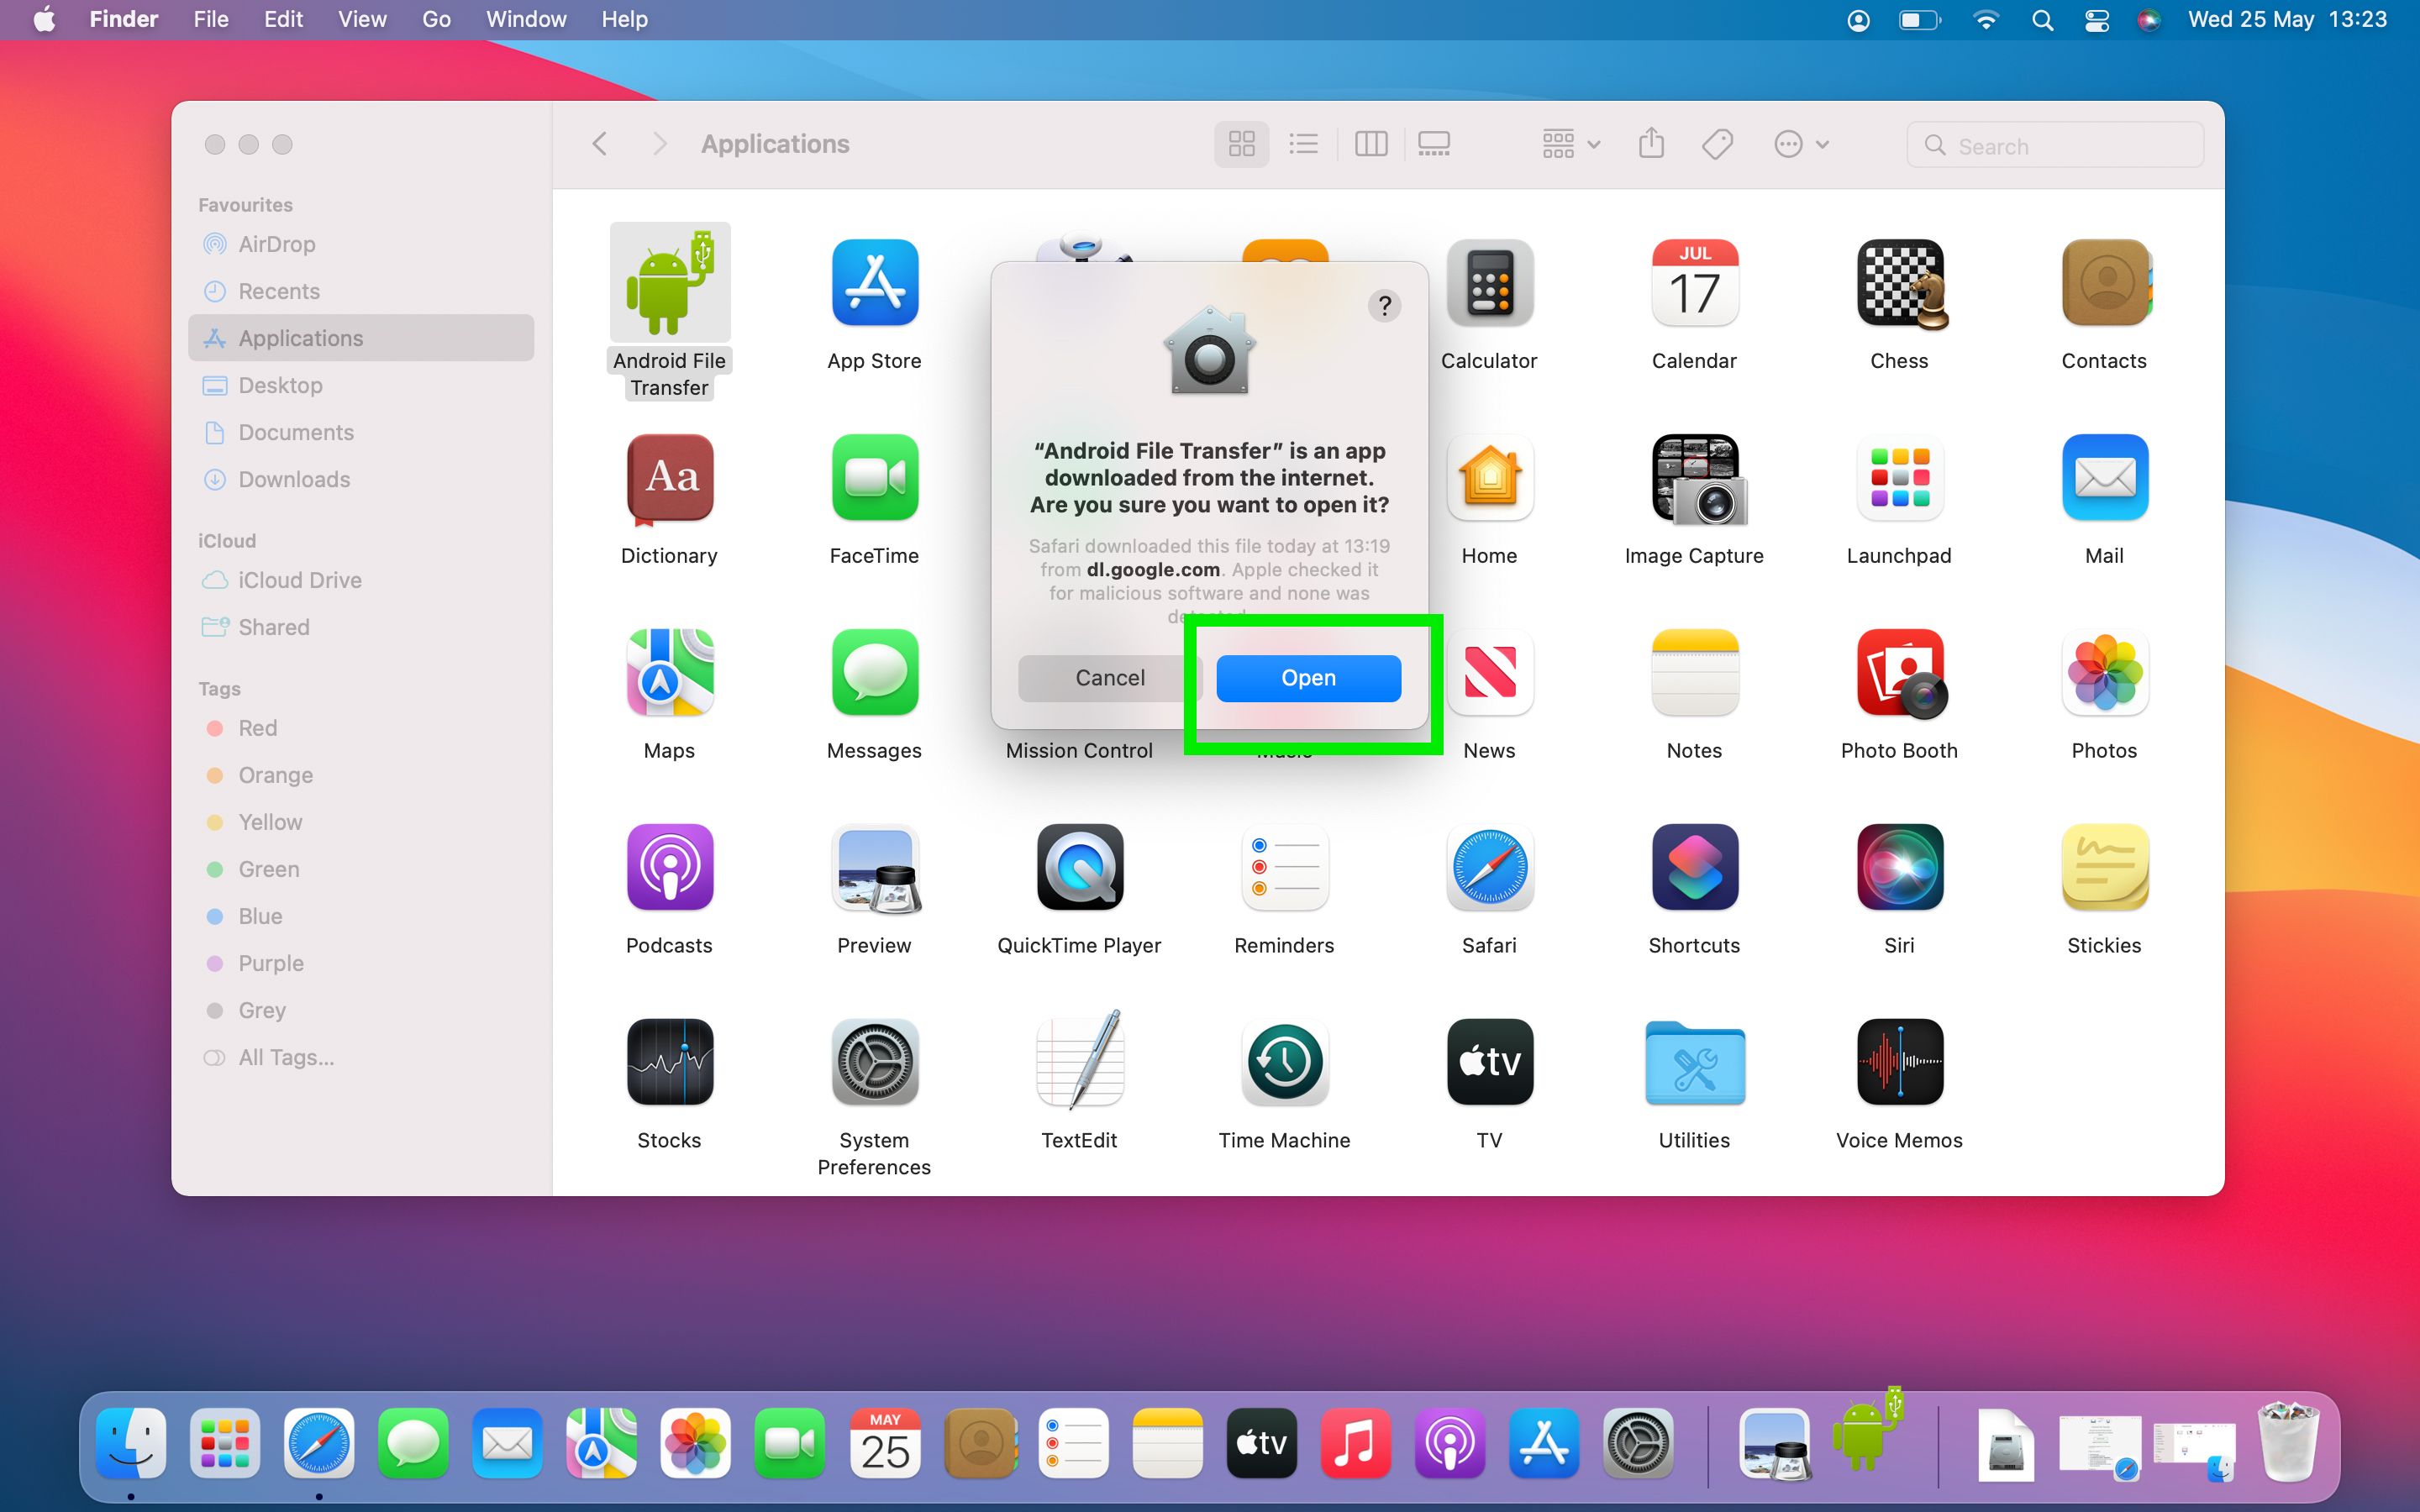
6. If this is your first time opening the software, you may receive a system security pop up asking whether you are sure you want to open a program downloaded from the internet. Click Open.
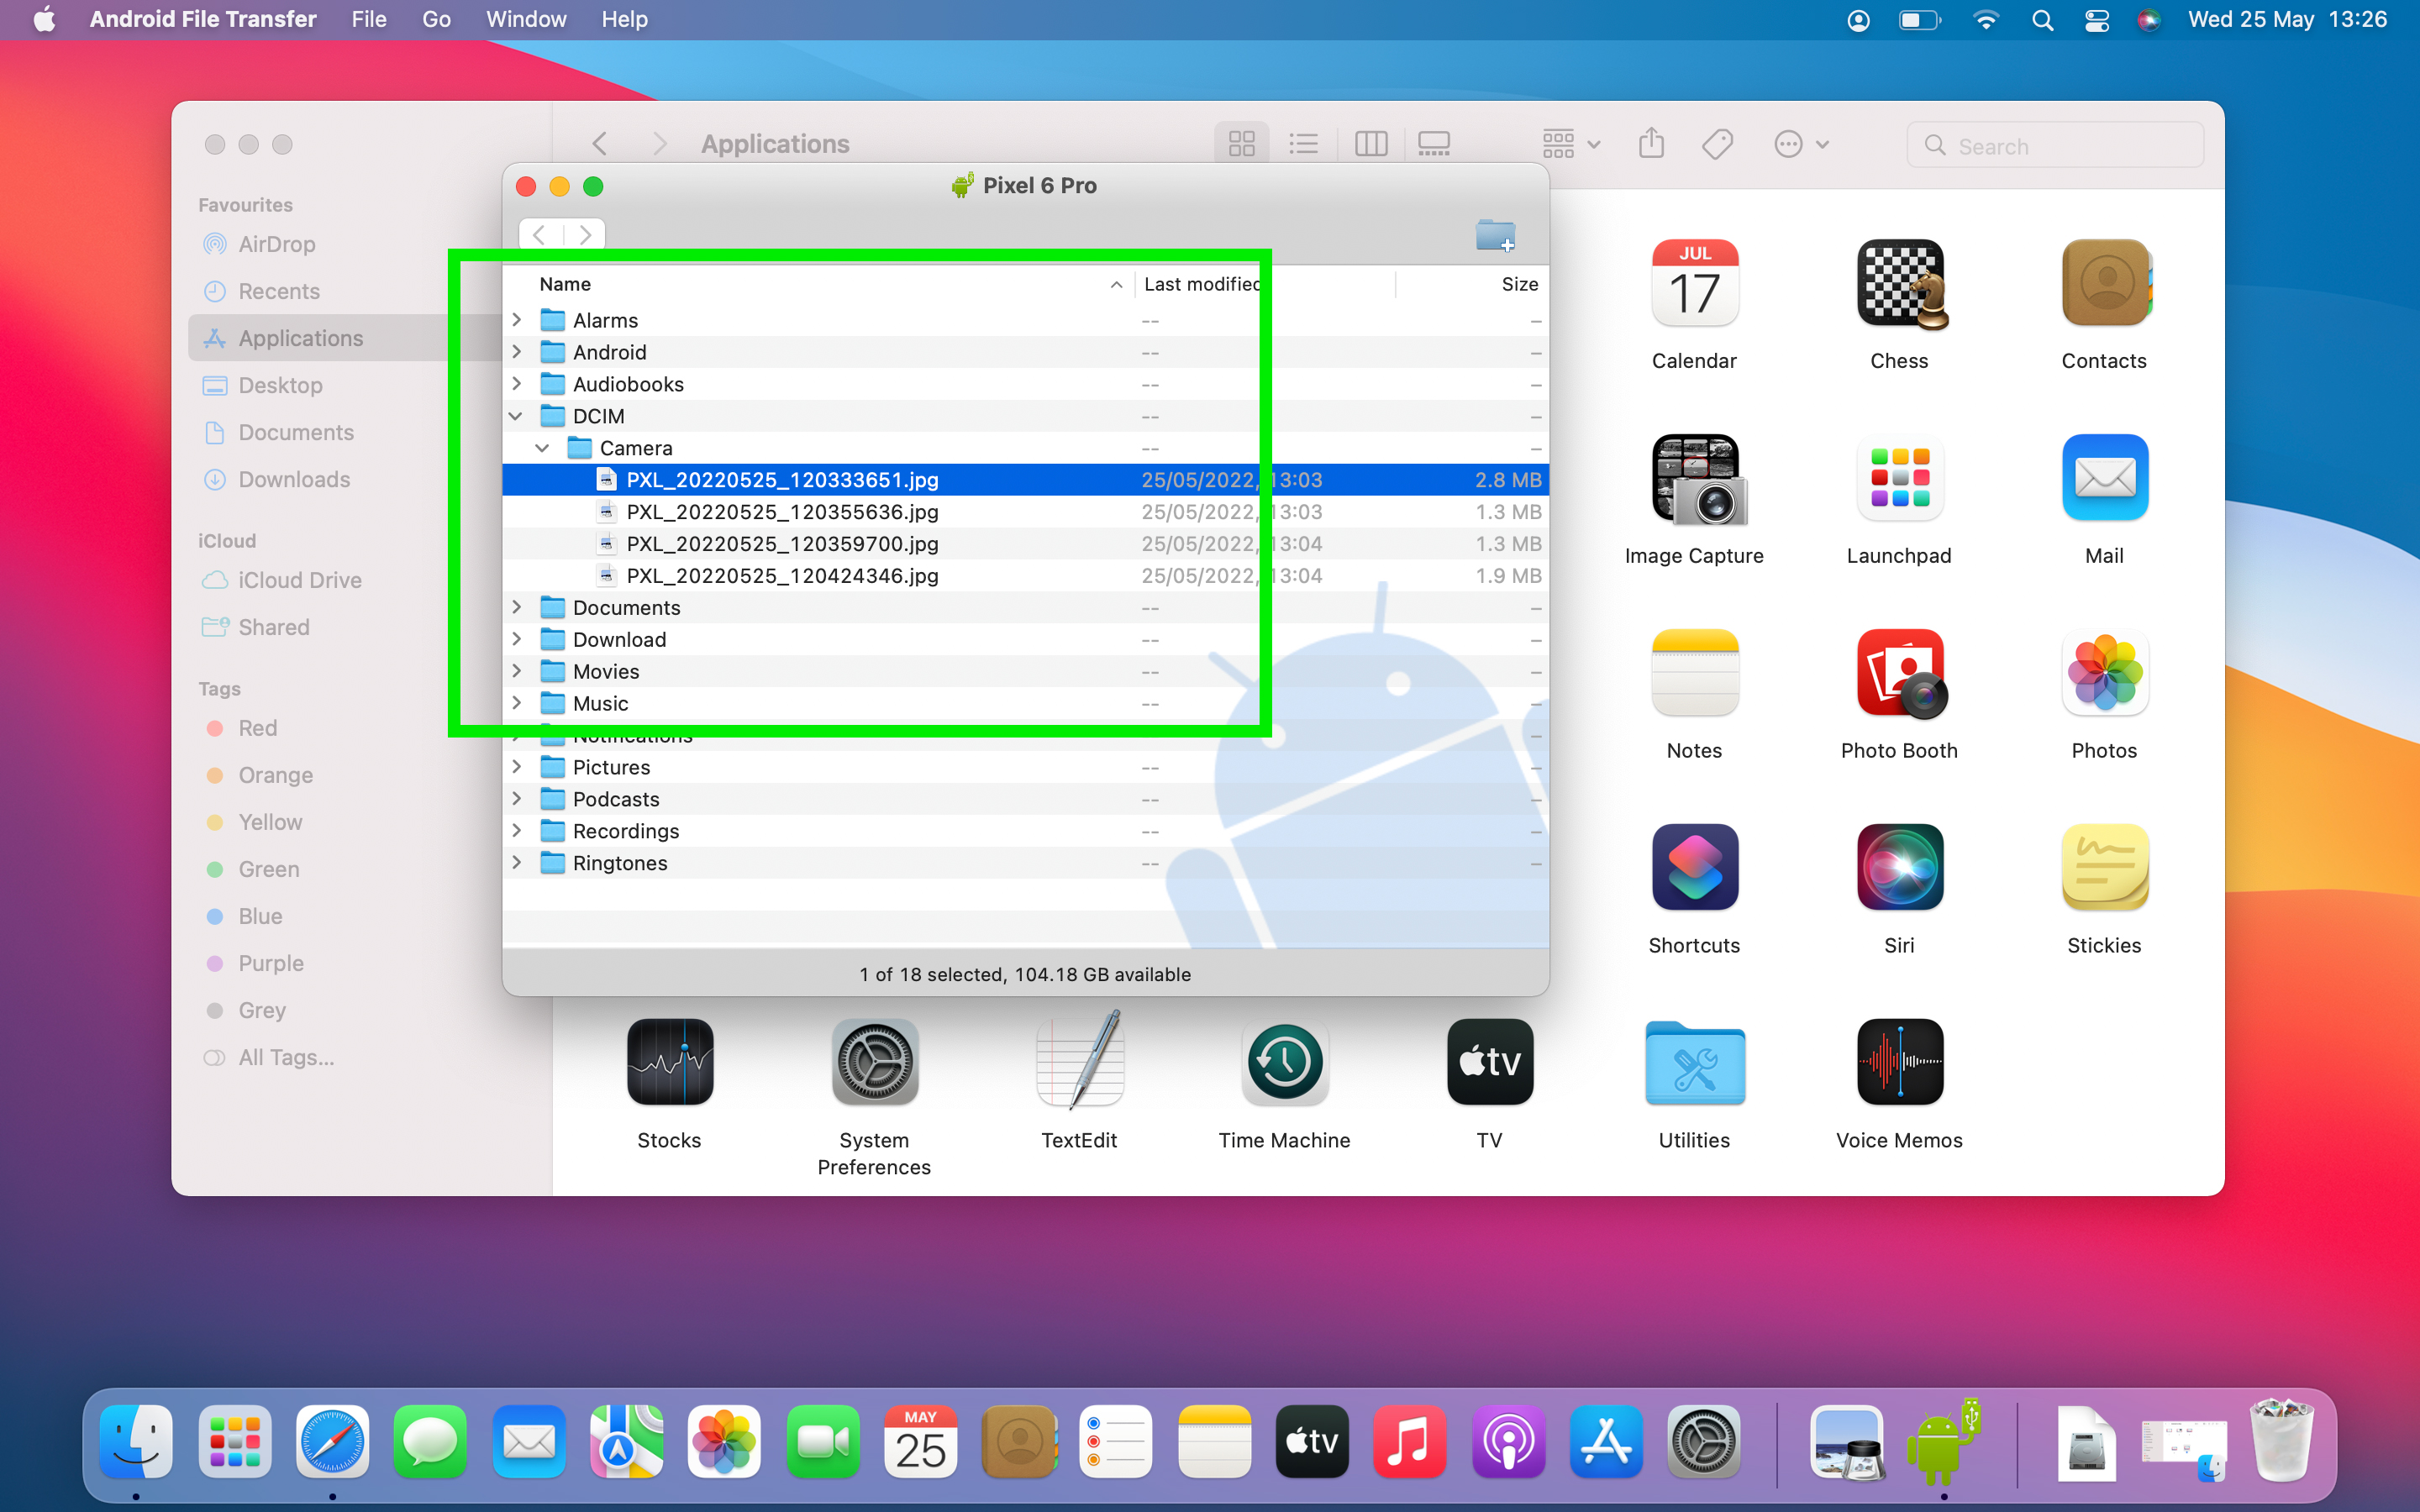
7. The Android File Transfer app will open a window, giving you access to your Android phone just like a removable storage device. To get to the photos on your phone, click DCIM, then click Camera in the drop down file menu.
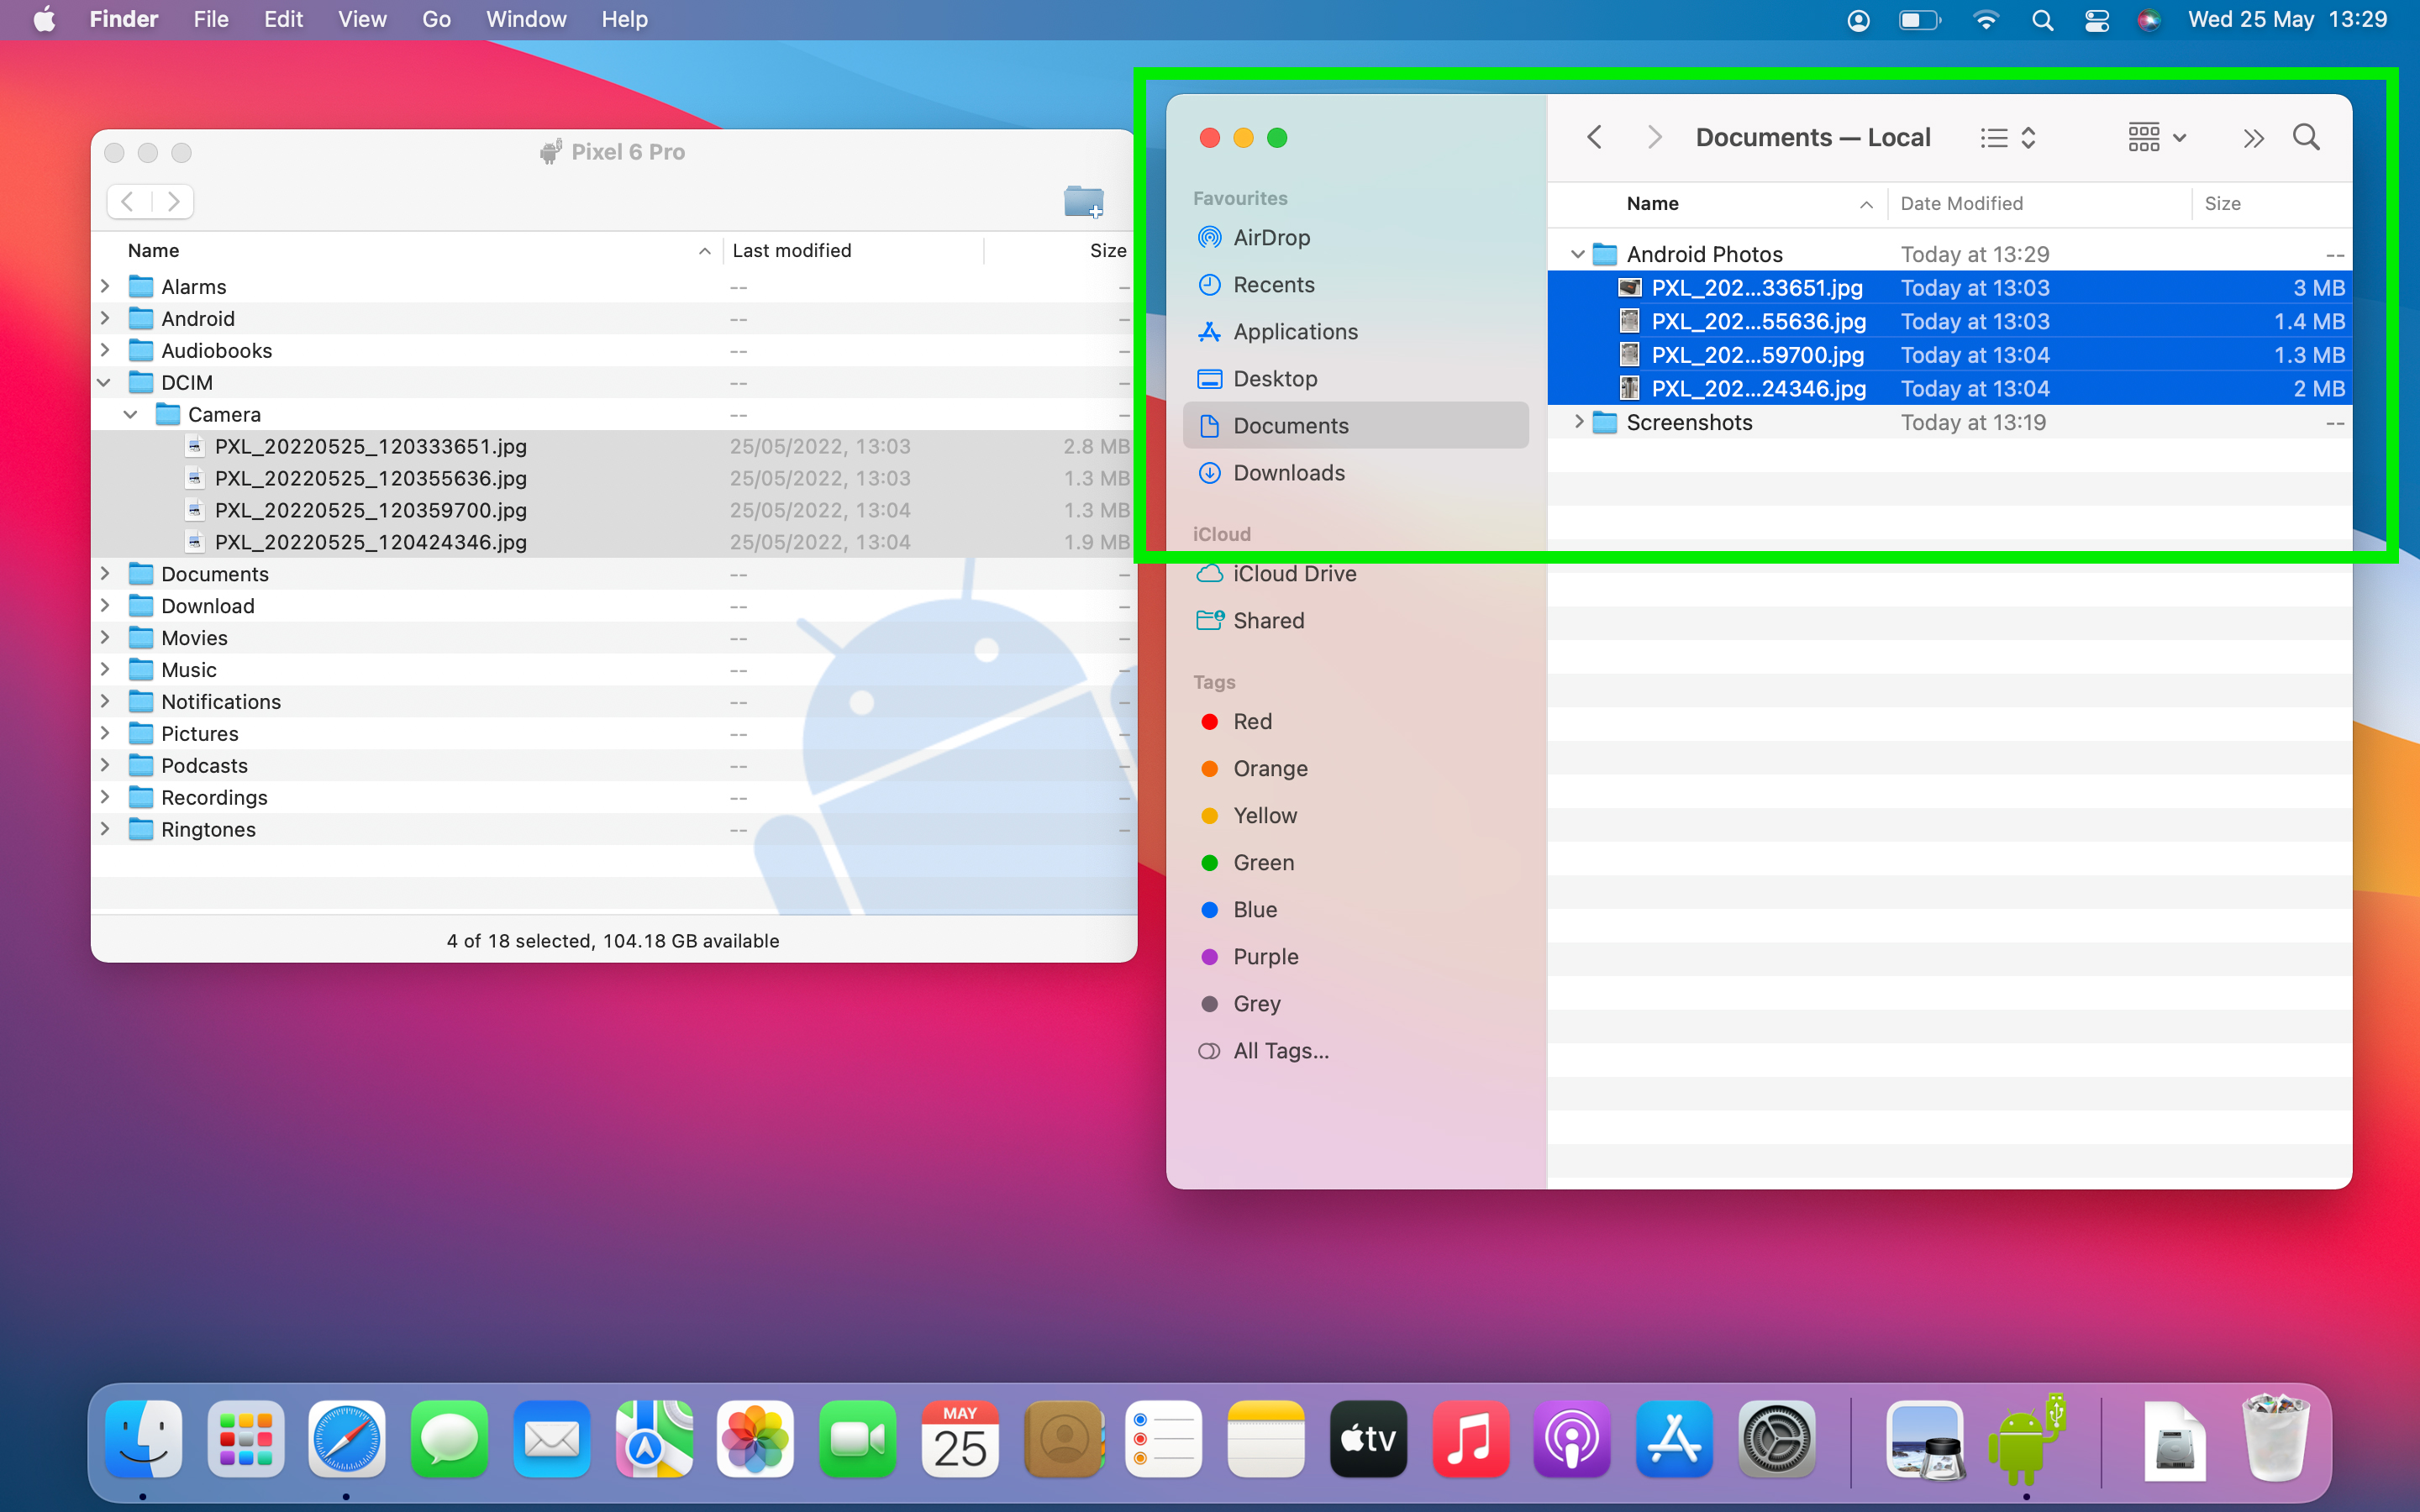
8. Open a Finder window and navigate to where you want the photos to go on your Mac. Then, select the photos you want to move in the Android File Transfer window before dragging and dropping them into Finder.
And we're done. Now you know how to transfer photos from Android to PC, check out how to uninstall programs on Windows 11, how to install Android apps on Windows 11 and how to enable clipboard history on Windows. We also have plenty of Android-themed guides, including how to reset an Android phone, how to clear cache on the Samsung Galaxy S22 and how to share files between Android and iPhone.

Dale Fox is a freelance journalist based in the UK. He's been a tech nerd ever since childhood, when he used the money from his first job as a paperboy to buy a subscription to GamesMaster magazine. Dale was previously a presenter and editor in China, where he also worked as a copywriter for OnePlus at its Shenzhen HQ.
- Peter WolinskiSenior Editor, Reviews & Cameras
