Here at Tom’s Guide our expert editors are committed to bringing you the best news, reviews and guides to help you stay informed and ahead of the curve!
You are now subscribed
Your newsletter sign-up was successful
Want to add more newsletters?

Daily (Mon-Sun)
Tom's Guide Daily
Sign up to get the latest updates on all of your favorite content! From cutting-edge tech news and the hottest streaming buzz to unbeatable deals on the best products and in-depth reviews, we’ve got you covered.
Weekly on Thursday
Tom's AI Guide
Be AI savvy with your weekly newsletter summing up all the biggest AI news you need to know. Plus, analysis from our AI editor and tips on how to use the latest AI tools!

Weekly on Friday
Tom's iGuide
Unlock the vast world of Apple news straight to your inbox. With coverage on everything from exciting product launches to essential software updates, this is your go-to source for the latest updates on all the best Apple content.
Weekly on Monday
Tom's Streaming Guide
Our weekly newsletter is expertly crafted to immerse you in the world of streaming. Stay updated on the latest releases and our top recommendations across your favorite streaming platforms.
Join the club
Get full access to premium articles, exclusive features and a growing list of member rewards.
The Apple TV 4K is one of the best streaming devices, and it just got a big update at WWDC that will take tvOS to new heights.
As much as we like it, however, it's still not a perfect system right out of the box. There are a few settings you might want to consider changing for optimal performance.
Luckily, Apple has made it pretty easy to sift through the settings on this device, with many of the options we need right in the Video and Audio section. Here's which ones you need to change, and which ones you can leave alone.
4K SDR Format
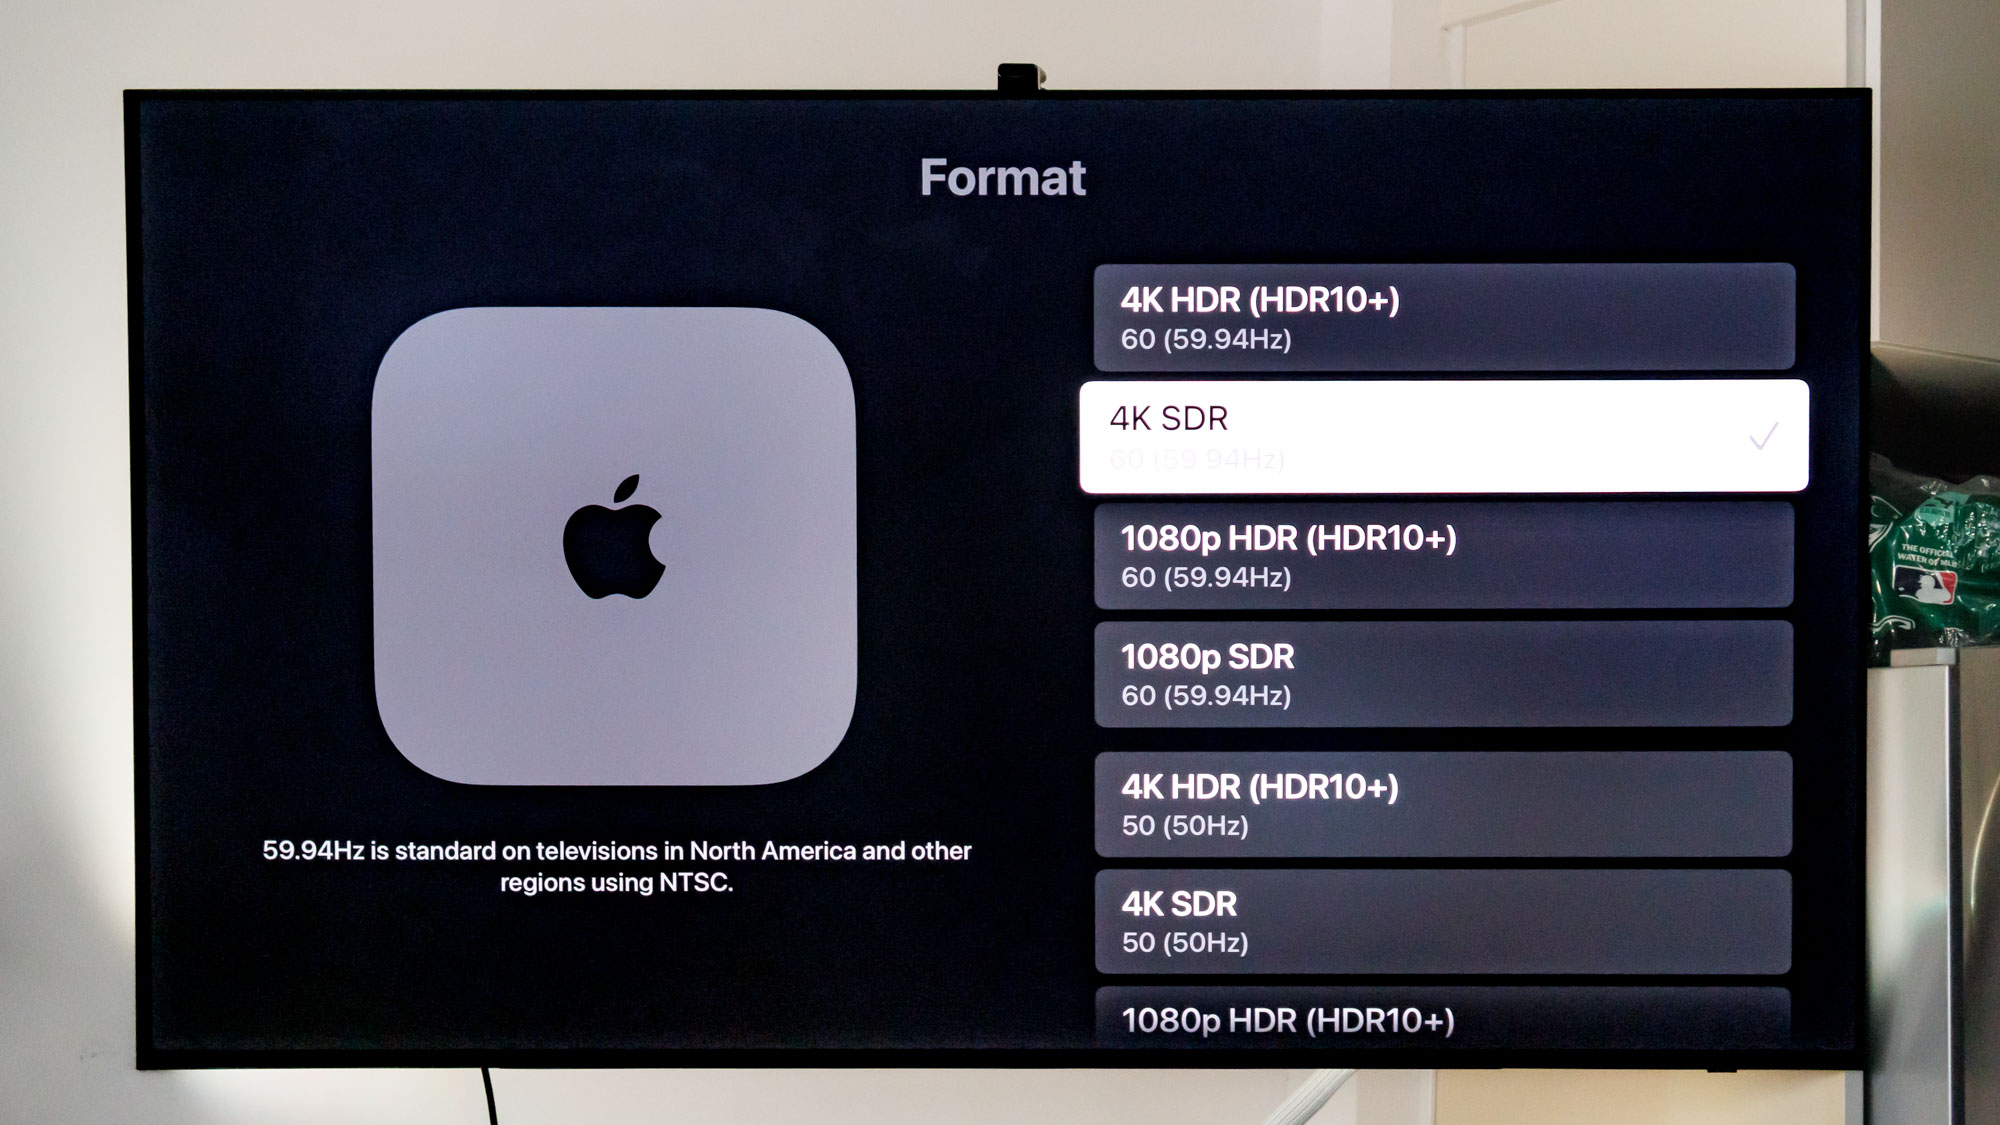
Let's start with the most obvious setting: Video Format. This might surprise you, but I usually recommend setting this to 4K SDR.
Once this is set properly, you don't have to see that annoying black flash when content switches from SDR to HDR formats. It's pretty prevalent on YouTube and other platforms, and it might make you think there's a problem with the device.
Thus, it's best to keep the main video format to 4K SDR (or 1080p SDR if you aren't using a 4K TV). This won't diminish quality by any means. In fact, it could make menus and other content that's being force-converted into HDR look a little better.
Chroma settings
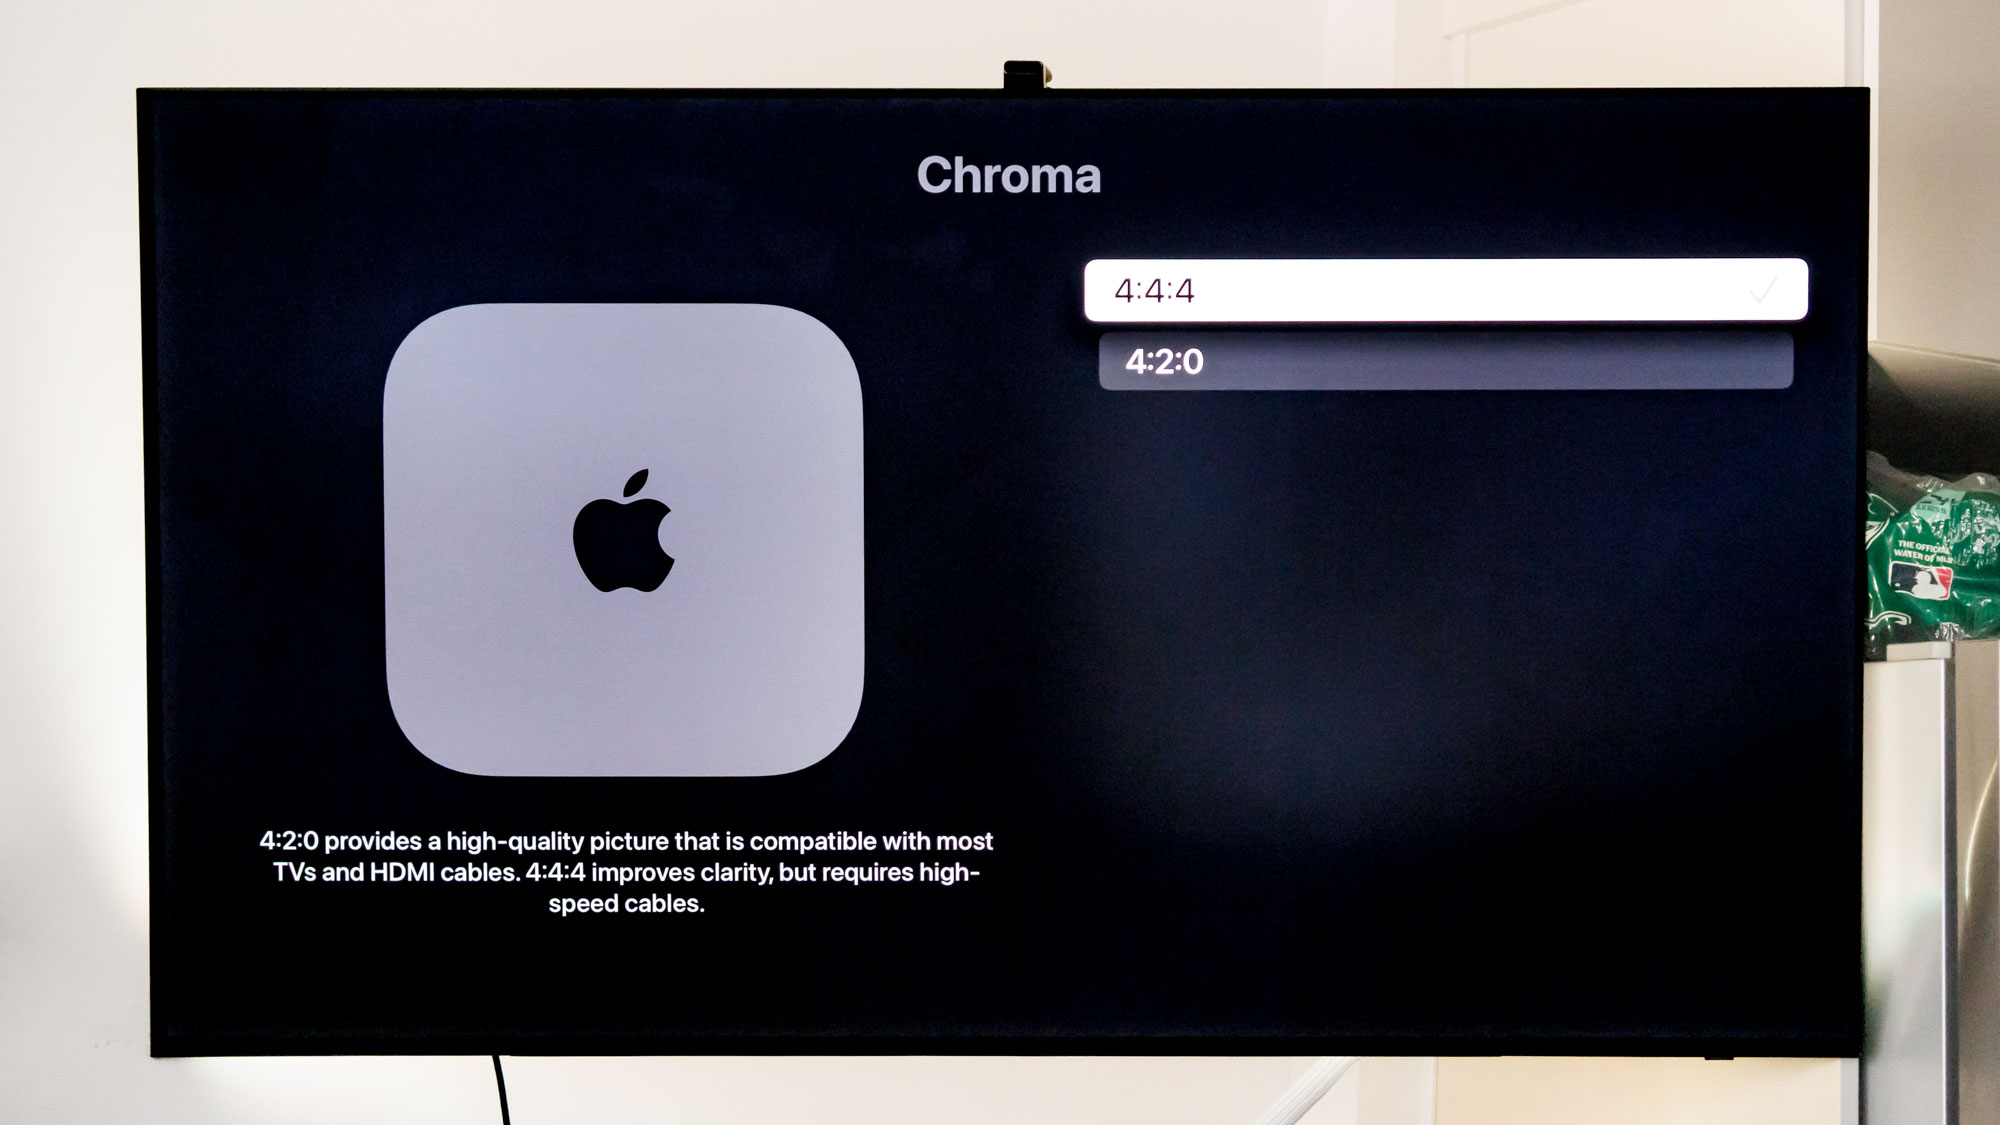
Chroma subsampling refers to the way color is transmitted via compressed video data, and in the case of the Apple TV 4K, you have a couple options to choose from depending on the TV that you're using.
Get instant access to breaking news, the hottest reviews, great deals and helpful tips.
Chroma 4:4:4 is the way to go if your TV supports it and if you're using an applicable HDMI cable. Switching to 4:4:4 essentially gives you access to the full color array and will make menus a bit more vibrant. You'd be hard-pressed to see any noticeable changes in general content, though.
You also might have to change your HDR settings first before you can get the full benefits of any chroma tweaks (and this setting will revert back to 4:2:0 if you adjust video output at all).
Unfortunately, my TV only supports Chroma 4:2:2, but it's better than 4:2:0 — even if the latter is largely favored for its increased reliability. If you do run into any signal failures, like flickering or black screens, you can always switch back to 4:2:0, which I'd recommend if you're using an overly long HDMI cable or one of the best projectors.
HDMI output
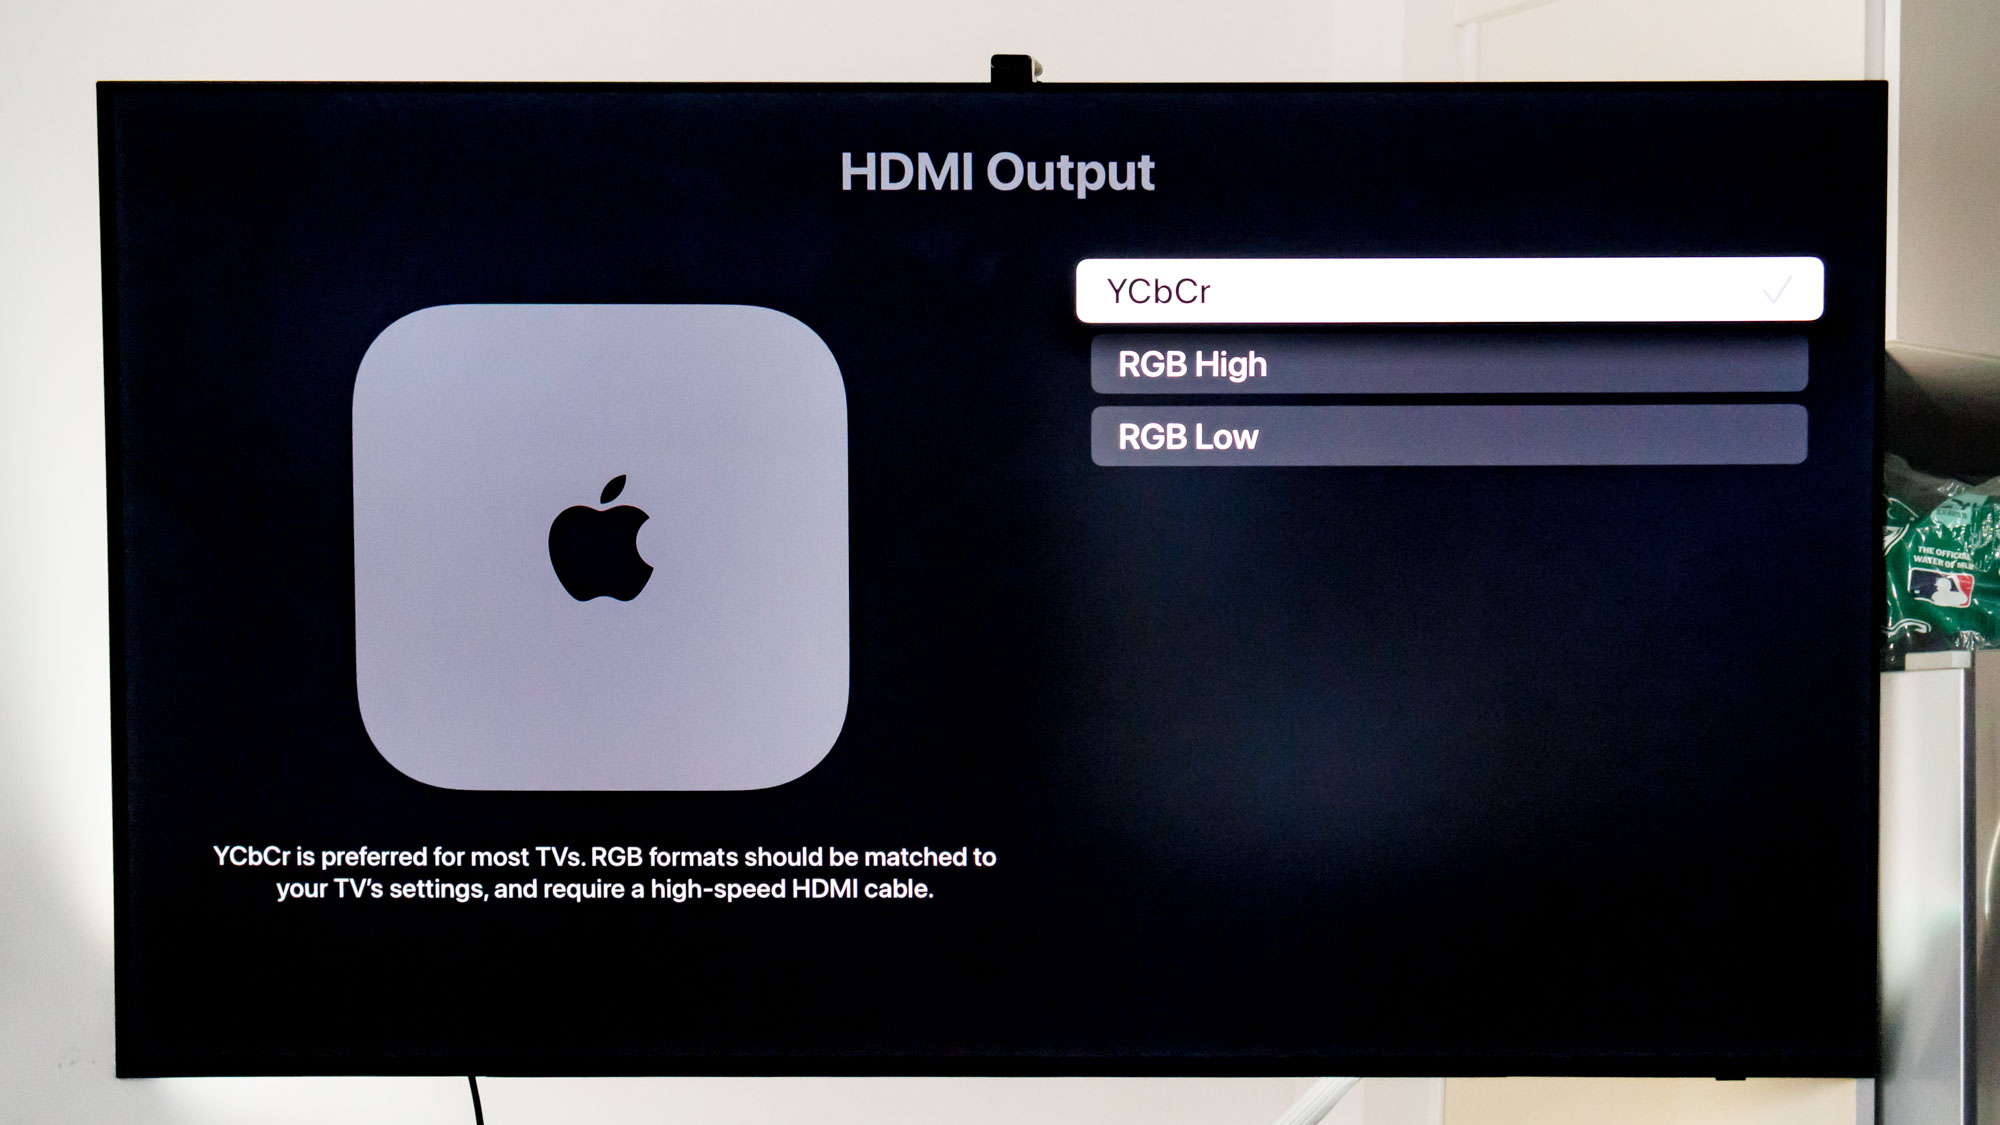
The HDMI setting on the Apple TV 4K controls the color space in digital video content, which goes hand-in-hand with chroma and brightness. There's really no need to change this setting unless it's not already set to YCbCr.
You will have three total options to choose from, including RGB High, RGB Low, and the aforementioned YCbCr. The latter is your best bet to obtain the best possible performance on the Apple TV 4K, whereas RGB might be better if you were running a different type of device.
You could also consider RGB High or Low if you were using one of the best monitors with your Apple TV 4K, but I'm not sure there's a huge audience for that.
There are also some TVs that might look slightly better with RGB enabled, but for our purposes we're going to stick with YCbCr.
Match Content
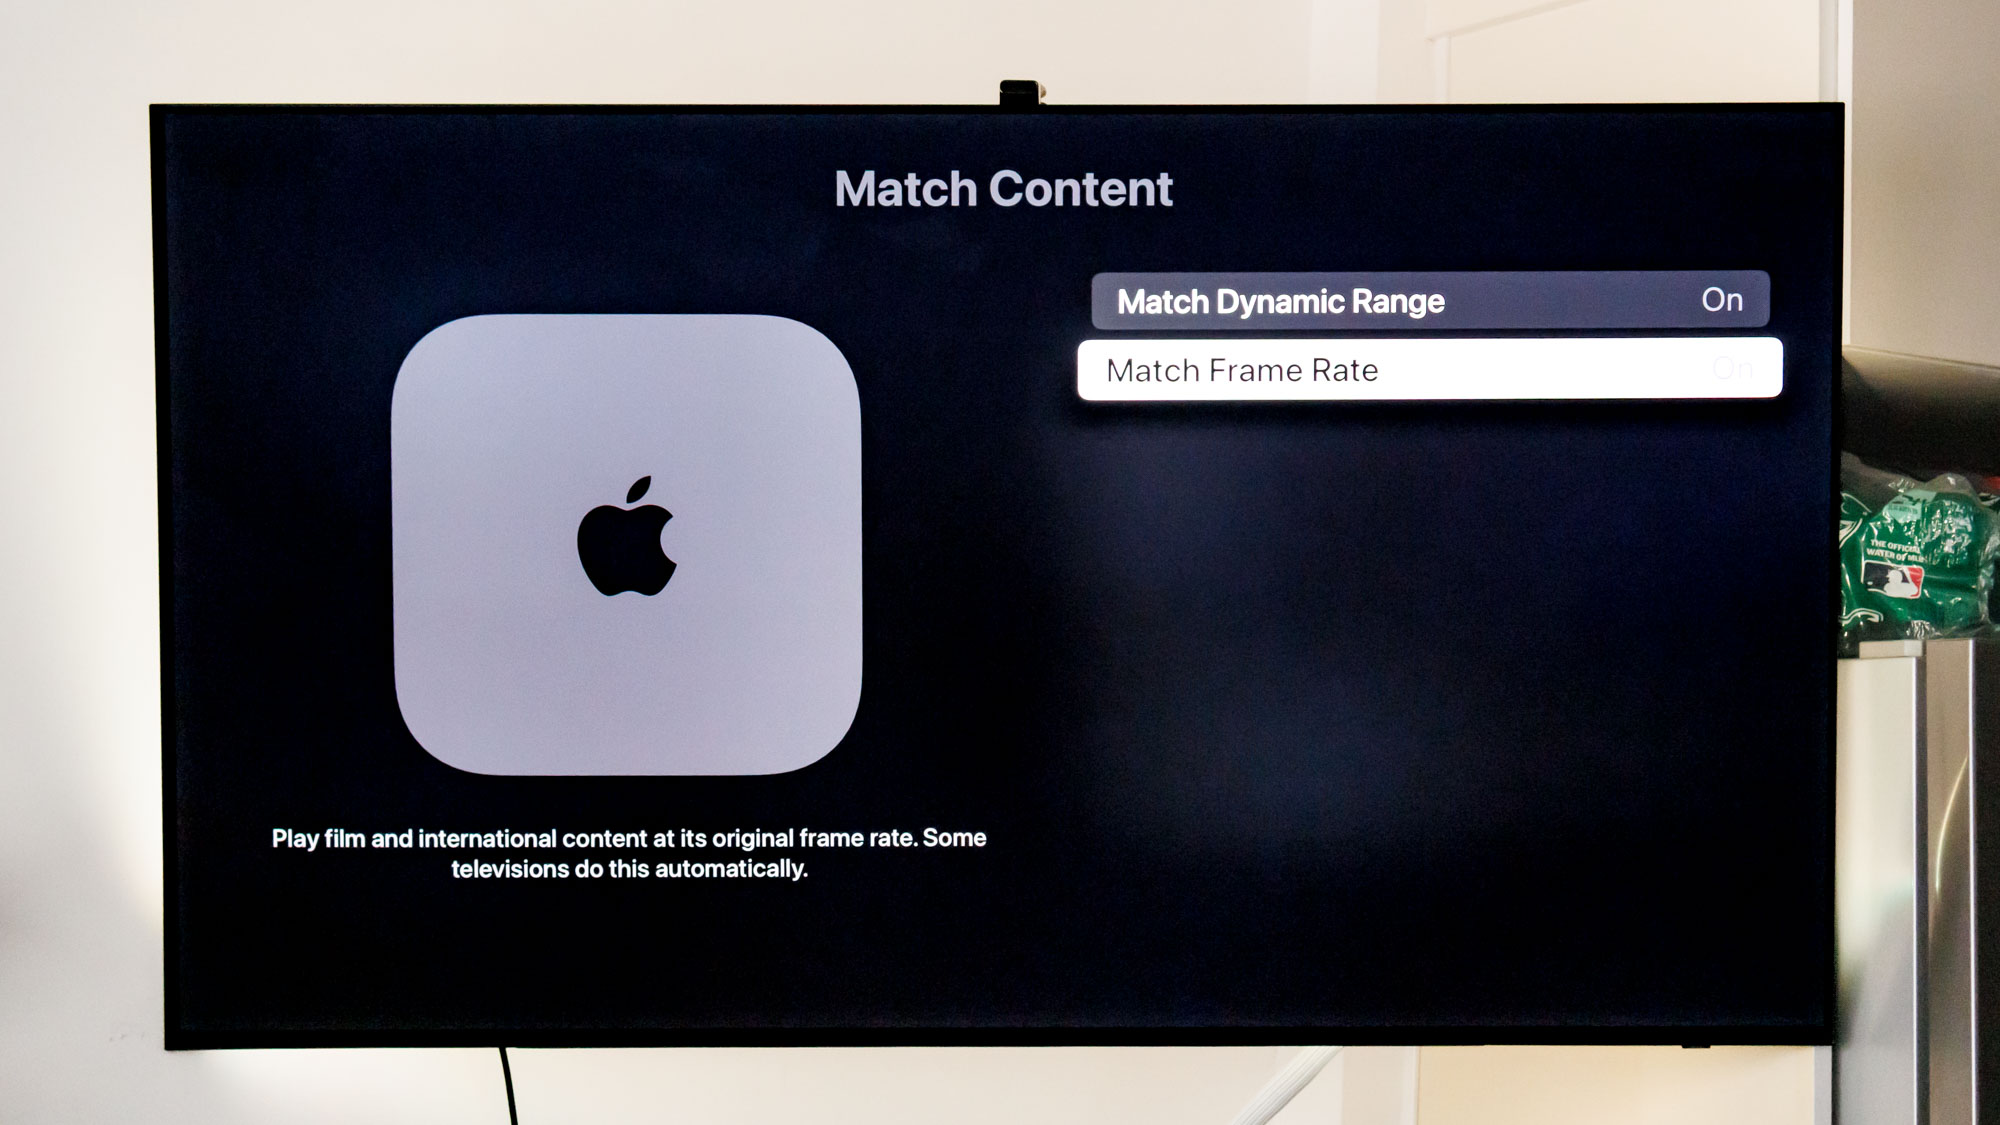
Right below the chroma setting you'll find the "Match Content" setting, which will allow the Apple TV 4K to automatically switch from SDR to HDR and from 24Hz to 30Hz depending on what's playing on the screen. Thus, you'll want to enable both Range and Frame Rate.
Once enabled, you don't have to worry if your device is setup correctly for when a Dolby Vision movie is playing at 24Hz. The Apple TV 4K will simply set itself to the right settings to get that crisp cinematic feel without any extra fiddling on your part.
"Range" in this case not only refers to HDR, but also other factors like motion clarity. It largely depends on the content you're watching, but it's highly recommended to change this right out of the box.
Audio tweaks
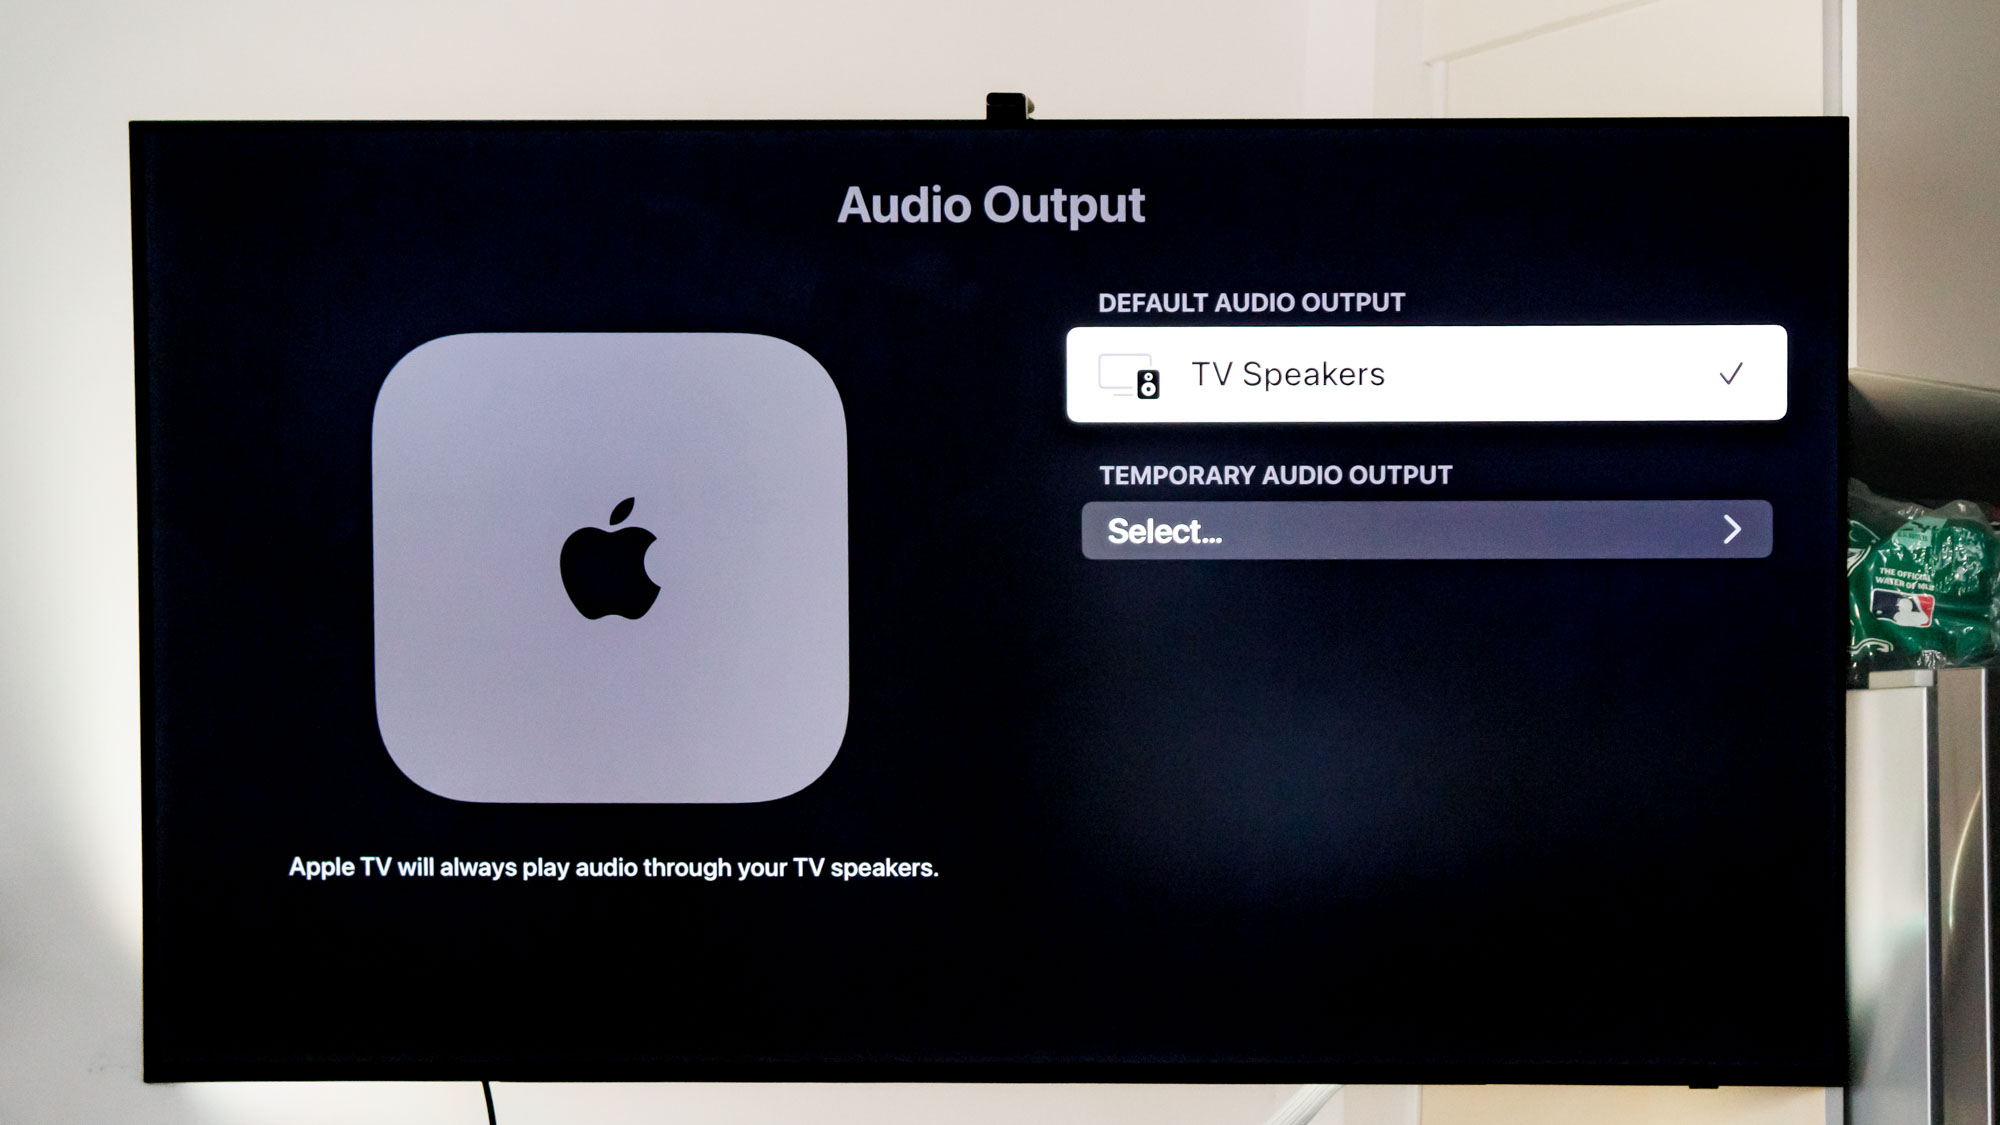
At the bottom of the Video and Audio section, you'll find all the audio settings we need to change. From here, you can set it so that your audio output will play from other connected speakers if you'd like, or just rely on the TV speakers if you'd prefer that.
You can also check to see if your TV has any surround sound functionality built into it under the Audio Format section. Given that the Samsung S90D OLED TV I'm using has Dolby Atmos support, it's listed among available formats, but most users should just leave it set to Auto.
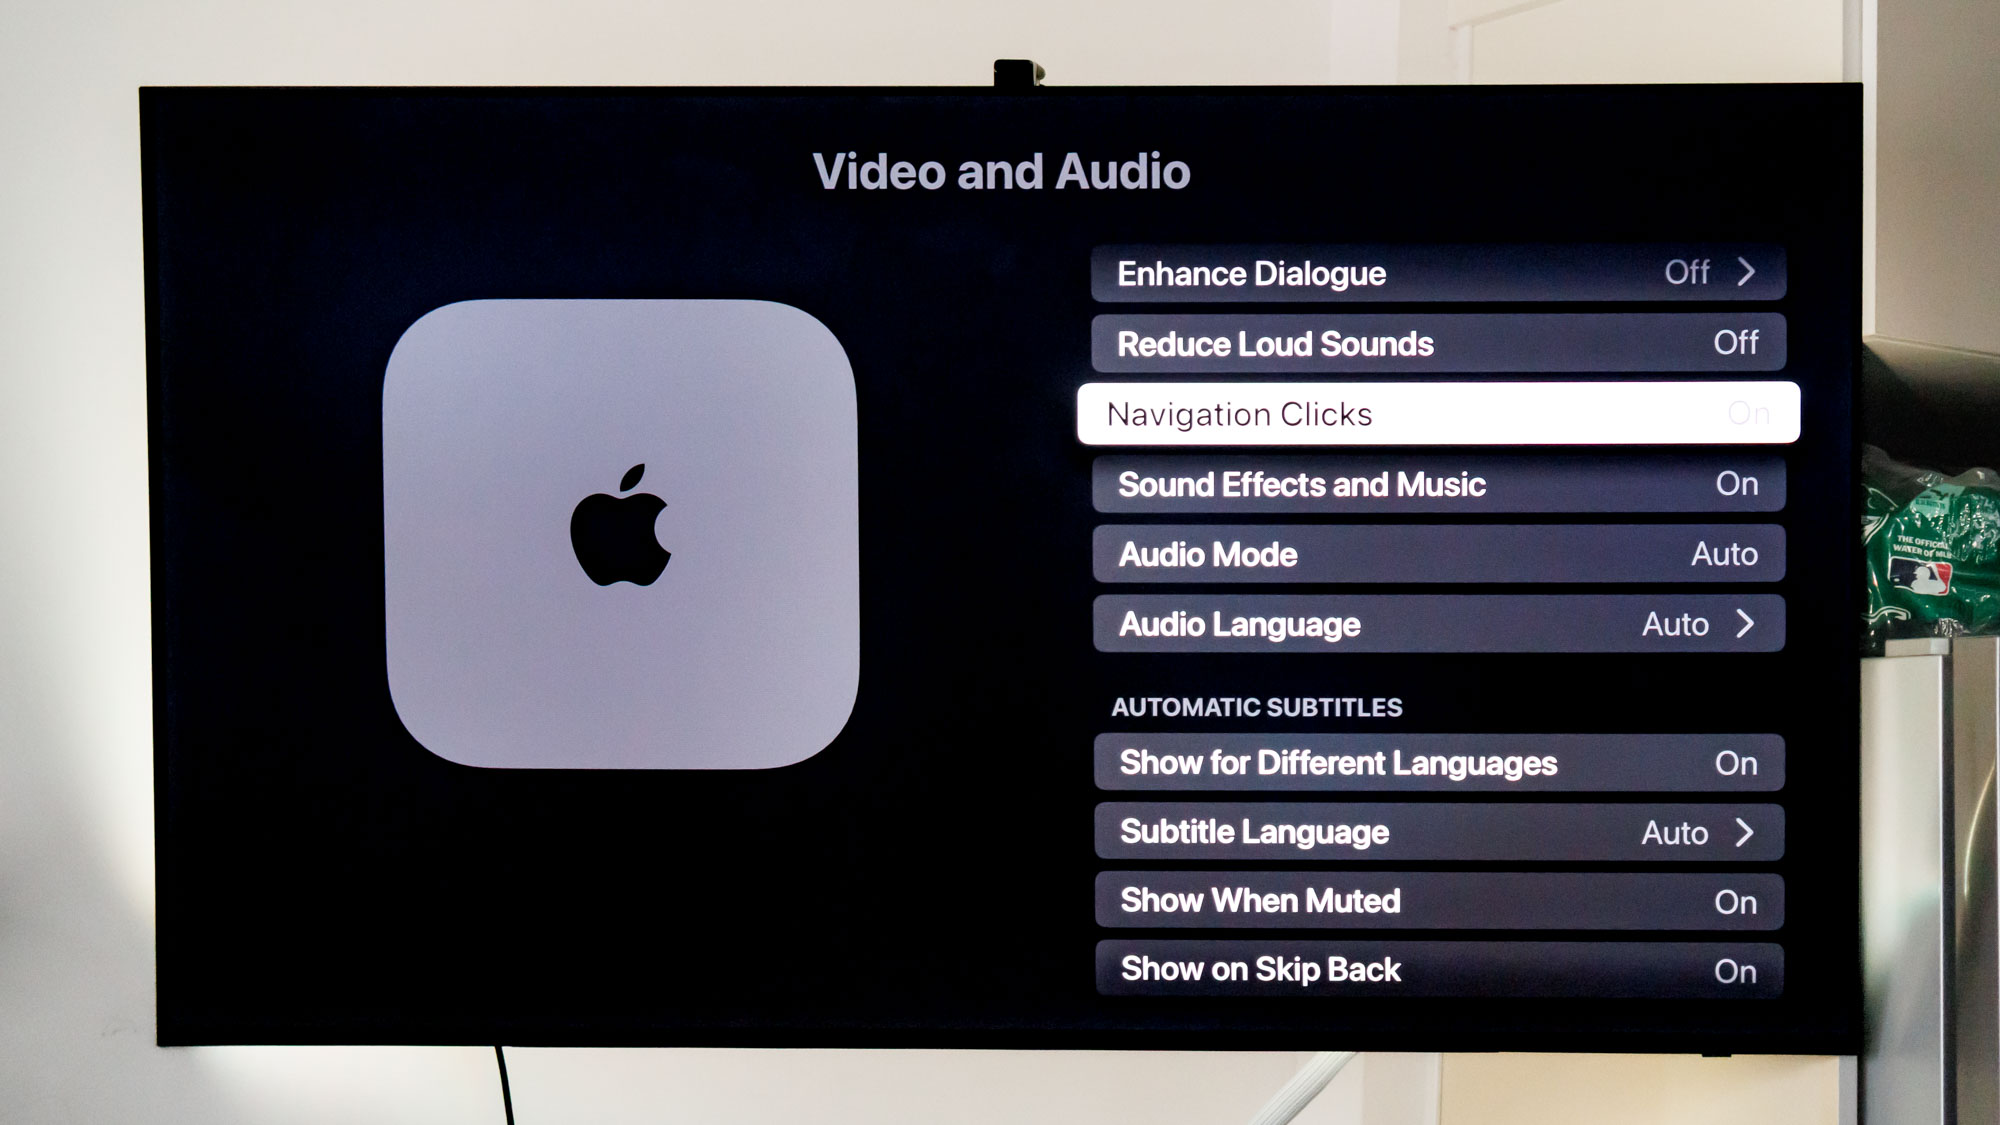
There are also a few other notable settings here that you could tweak, like Enhance Dialogue and Reduce Loud Sounds. As their names suggest, they amplify and diminish certain audio cues to make audio sound slightly better. I'd recommend Enhance Dialogue above all else, but this comes down to user preference.
Lastly, I recommend turning off Navigation Clicks. It doesn't offer too much aside from noisy feedback when you move about the menus.
Remotes and devices
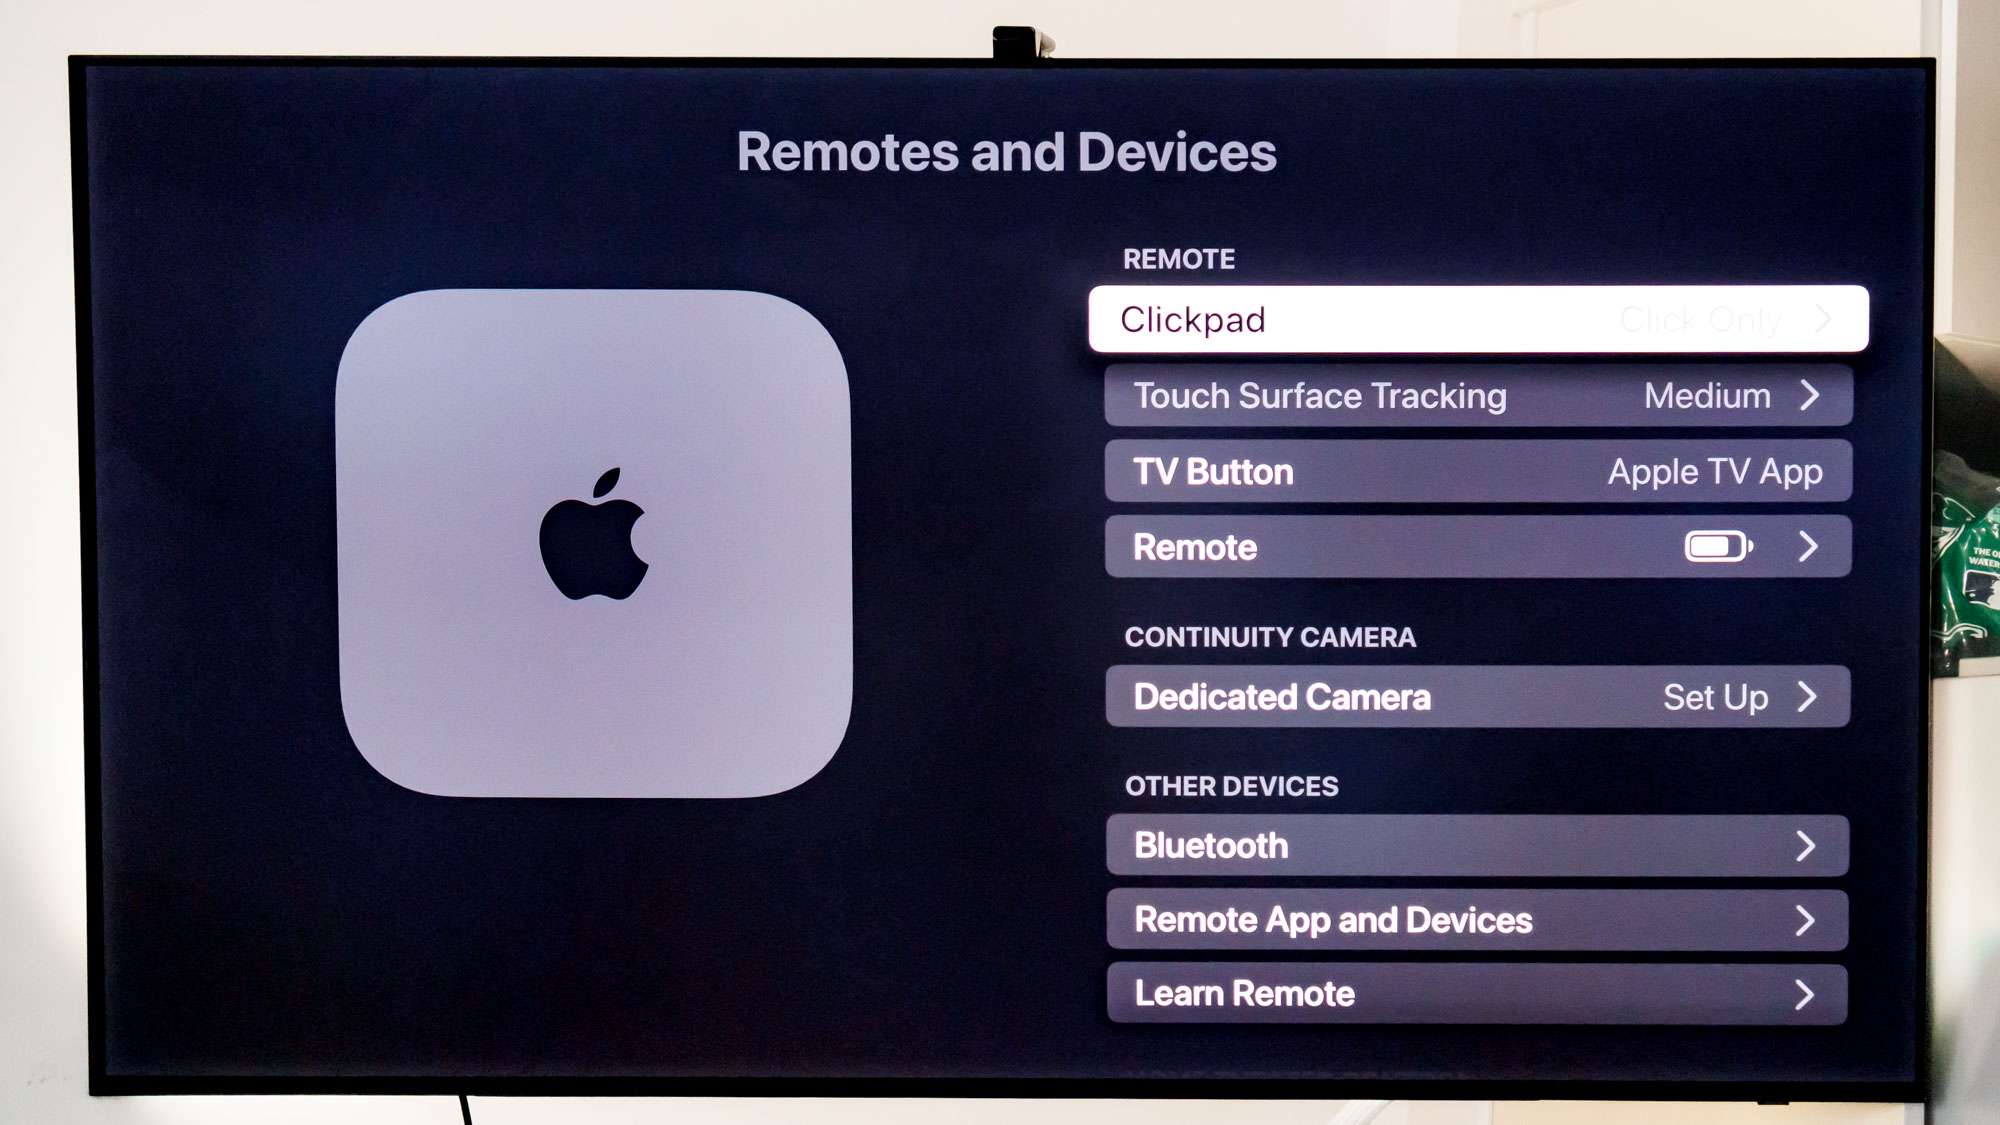
One extra setting I would change is the clickpad functionality. This is another preference thing, so don't feel it's an obligation. Still, this can get pretty annoying — most especially if you have Navigation Clicks enabled in the Audio tab. Better to just keep it to Clicks Only as it just makes navigation so much more fluid.
While you're here, you can also change the TV Button to the Home Screen if you'd prefer that over jumping into Apple TV Plus. It would be cool if Apple let you set this to any application, but makes sense it's just Home or Apple TV Plus in this case.
Also scroll to the bottom and turn on the CEC functionality, which is titled as just "Control TVs and Receivers." This allows you to use a single remote instead of two so you're not stuck rummaging for multiple remotes when it's time for a movie or show.
General settings you should change
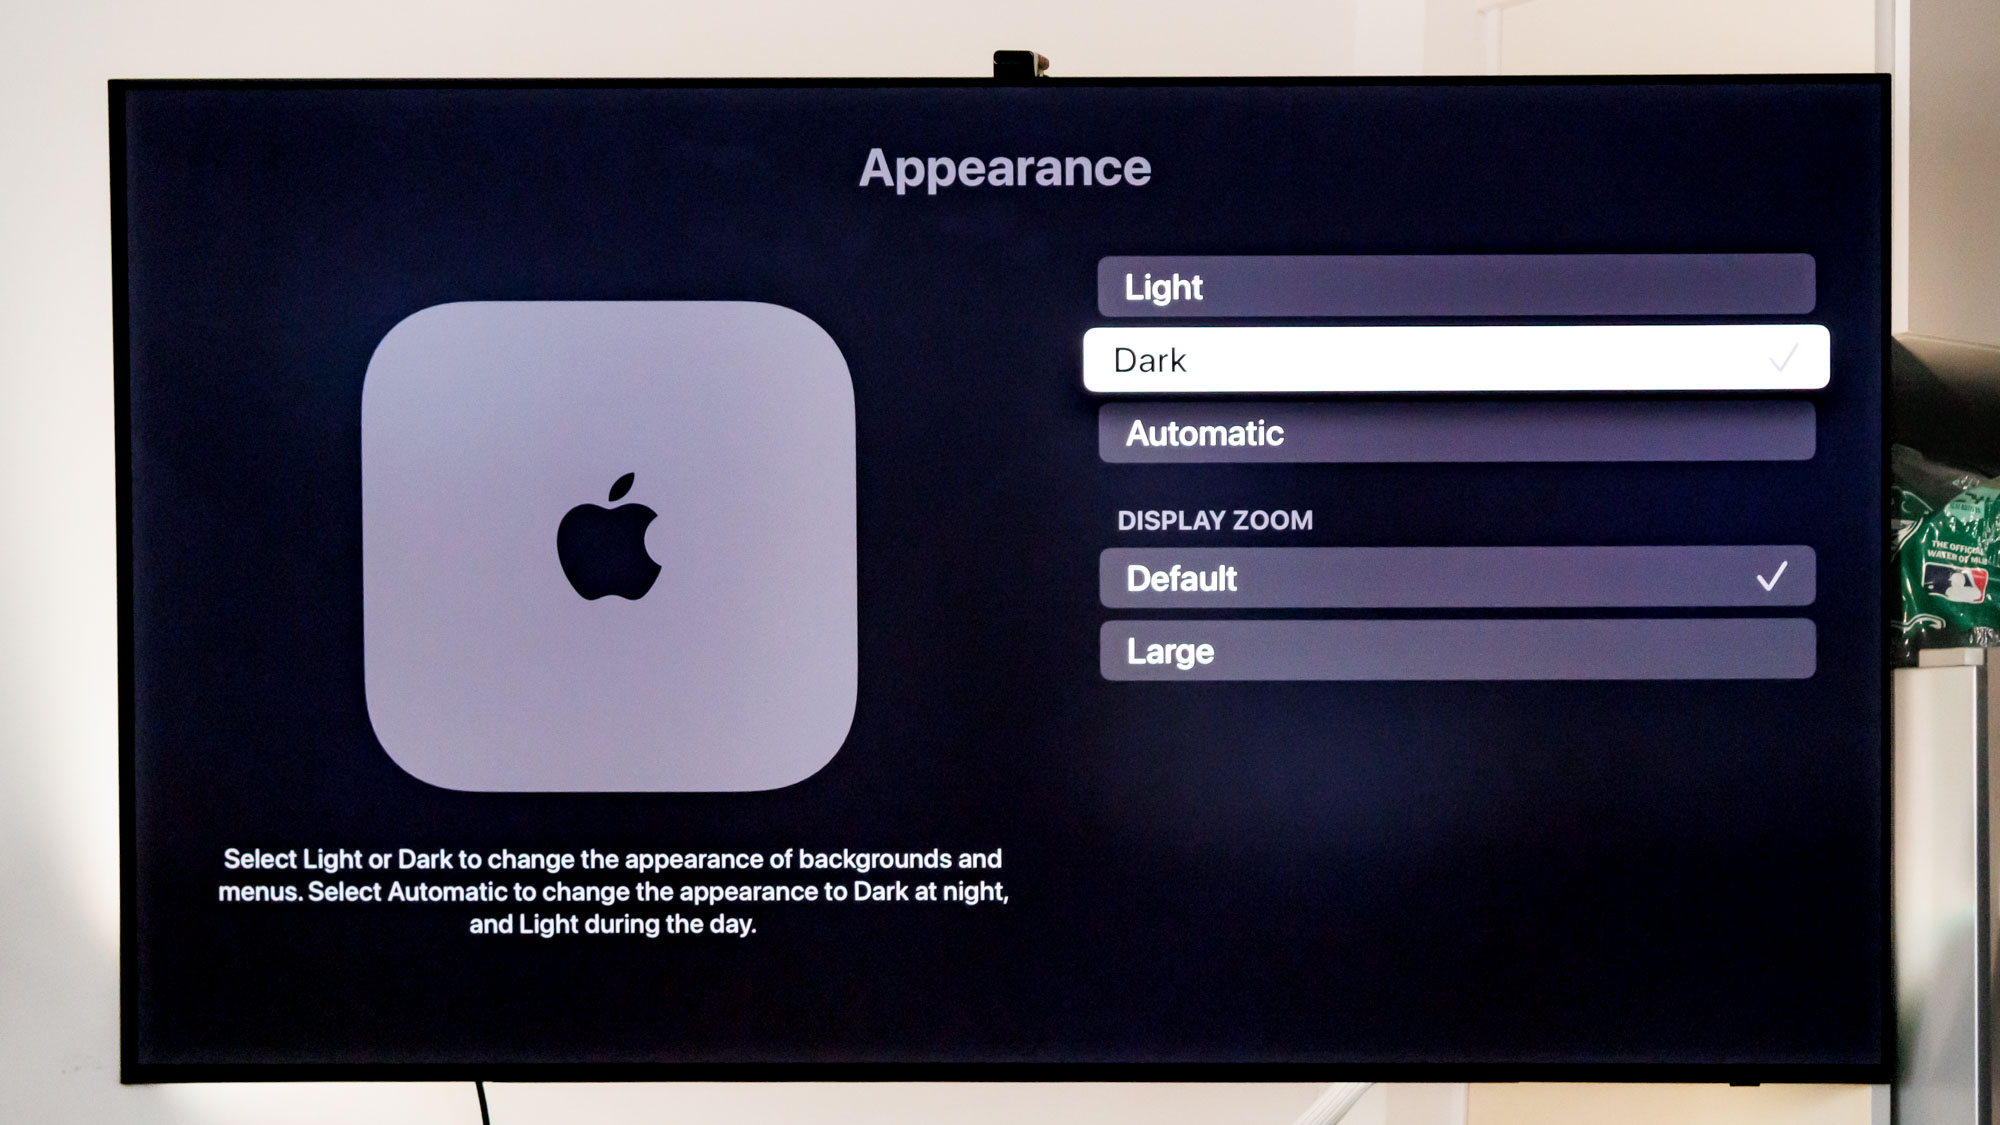
Last but not least, there are a few settings in the General section that you may want to consider changing. A big one is the appearance. I immediately changed this to Dark Mode, which I find to be easier on my eyes, but you might prefer it in the Light setting.
You can also adjust how long it takes before the Apple TV goes into sleep mode. It's set to 15 minutes on default, but this can be as short as 5 minutes or as long as 4 hours. You could set it to "Never" so the Apple TV never goes to sleep, but your energy bill might not be too happy.
In General, you'll also find some notable Privacy settings: Although the Apple TV 4K is still the best streaming box when it comes to privacy, a couple settings are important here, like Share Apple TV analytics, Improve Siri & Dictation, and Location services. You could turn these off you'd prefer, but they do help Apple improve its products.
Make sure you enable "Allow Apple to Ask to Track" in the "Track" setting. This ensures apps must ask you to track data after they're installed, making it harder for certain brands to use your data against you.
You can go down the list and see which apps are using data from various features, like Bluetooth, Photos, Microphone, and Camera. It's a good habit to keep an eye on this, especially if you have kids who might not be so inclined to read want they're opting into at any given moment.
More from Tom's Guide
- I'm an audio reviewer who can't ditch her AirPods — sue me. Here's what other brands need to do to make me switch
- Apple TVs just got a big Dolby Atmos boost thanks to tvOS 18.5
- Forget OLED TVs — this ultra short throw projector can hit 4,000 lumens at 120 inches

Ryan Epps is a Staff Writer under the TV/AV section at Tom's Guide focusing on TVs and projectors. When not researching PHOLEDs and writing about the next major innovation in the projector space, he's consuming random anime from the 90's, playing Dark Souls 3 again, or reading yet another Haruki Murakami novel.
You must confirm your public display name before commenting
Please logout and then login again, you will then be prompted to enter your display name.
 Club Benefits


