
 Club Benefits


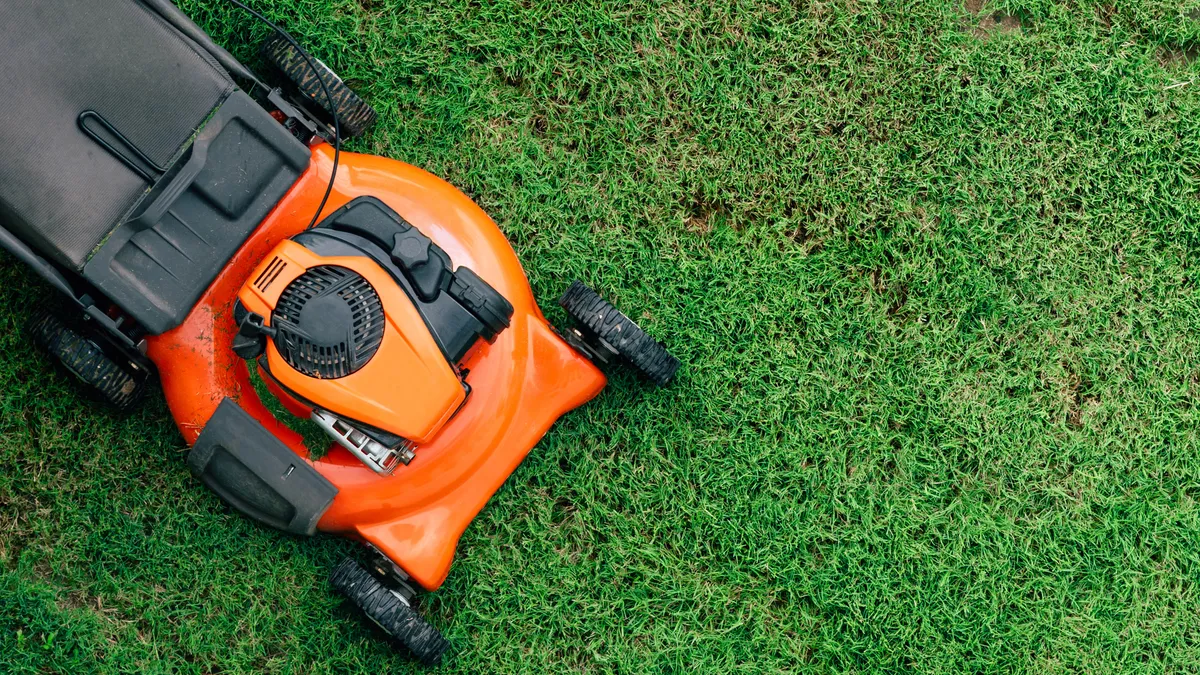
If you take pride in a lush lawn, you'll need to ensure that you keep on top of your lawncare routine. And if you've noticed that the quality of your lawn mower’s cut is not as precise as it used to be you'll probably need to sharpen your mower's blades.
Not only can sharp mower blades get the job done properly, but will ensure that you have healthy grass blades all year round. If not, the dull blades could even pull at the root system as it runs, leading to extensive damage and discoloration.
So, if you want to maintain healthy, green grass, follow our step-by-step guide on how to sharpen lawn mower blades and other top tips.

How to sharpen lawn mower blades
Safety goggles
Protective gloves
Ear protection
Wrench
Microfiber cloth
Metal file or drill-powered blade sharpener or angle grinder
Vise
1. Disconnect the power — Safety first. While wearing goggles and safety gloves, make sure your lawn mower is unplugged from a power supply or the battery has been removed. Disconnect the spark plug wire if you're using a gas lawn mower. You don’t want it switching on accidentally during this process.
2. Drain the tank — This task involves tipping over your lawn mower to access the blade, so you’re going to want to drain the tank of gas to prevent any leaks first. If you’ve got an electric powered lawn mower, you can skip this step.
3. Prepare your lawn mower — Tip your lawn mower carefully onto its side keeping the air filter and carburetor upright. This is to prevent oil and gas from running into the air filter.
Before you go and remove the blade, mark it so that you know which side faces down. You could do this using some spray paint or a permanent marker. If you reinstall the blade upside-down later, it’s not going to cut the grass!

4. Remove the blade — Try to wedge something, such as scrap wood, between the blade and the mower to hold it in place. Then, using a wrench, loosen the nut or bolt that holds the blade. If it’s stiff, the wedge should help keep the blade in place so you can get a better grip. Once the blade comes loose, keep it and the nut or bolt safe.
Before you tip your mower back into its upright position, check if any residual grass cuttings have built up in the deck and clear out if necessary. This isn't an easy section of the mower to clean, so now's your chance.
Tip: Lawn mower blades are sharp, but not sharp enough to cut your hands. So you don’t need to worry about handling them.
5. Clean and inspect the blade — Before you proceed, check the blade and decide if it’s in a good enough condition to be sharpened or whether it should just be replaced. Wipe it clean with a damp microfiber cloth or use a penetrating cleaner if necessary and inspect it. If there’s severe damage, such as cracks and dents, consider buying a new one. If it appears dull with the occasional chip, it’s worth sharpening.
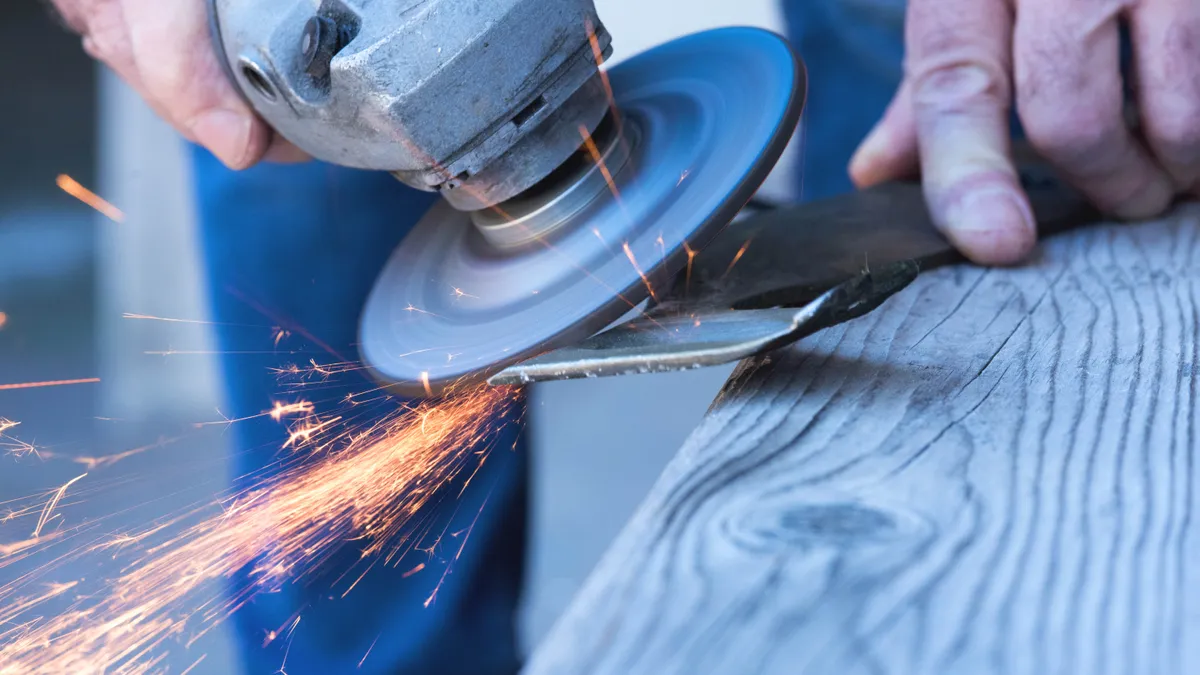
6. Sharpen the blade — You have a couple of options on how you can sharpen a mower blade, depending on what tools you have available. You can use a metal file to manually sharpen it, or for a faster solution you can use an electric angle grinder or a drill-powered blade sharpener. Here, we will cover each method:
- Metal filing method — While wearing your safety goggles and gloves, clamp the blade in a vise with one of the cutting edges facing up and ready your file. The file should be at least 10 inches long and held at a 45 degree angle to the cutting edge. Sharpen in one direction from above with a pushing motion until the blade is ‘butter-knife sharp’.
It shouldn’t take more than 50 strokes with the file to achieve this level of sharpness. If you’re making little progress, you might need to increase the pressure for better results. Once finished, switch to the alternate blade end and repeat. - Drill-powered blade sharpener — This is a little faster than manual filing, thanks to a bit of help from your drill. Again, wearing your protective gear, fit the blade into the vise to hold it in place. Next, fit your blade sharpener to your drill just like a regular drill bit — bear in mind that whenever you pull the trigger, you will power it.
When holding the blade sharpener over the blade, the cutting edge should be pressed against the stone bevel. Now, power the sharpener, moving it across the cutting length of the blade until you’ve achieved the ‘butter-knife’ sharpness. This should only take a couple of strokes so keep an eye on it. Once finished, repeat on the alternative edge. - Electric angle grinder — Wear the necessary safety equipment including gloves, goggles and ear protection and clamp the blade into your vise. Run the grinder down the length of the cutting edge to sharpen. Make sure you maintain the correct angle by checking the shine on the edge after the initial pass. If it’s more shiny at the top or lower end of the edge, you need to adjust your angle to get it evenly shiny.
Be sure to keep an eye on the temperature of the blade as you do this. If it gets too hot, run some water over it to cool it down. Once finished, repeat on the alternate cutting edge.
7. Check the balance — If you’ve worn off more metal on one side of the blade, it naturally won't balance like it used to, which can cause some serious damage to your lawn mower. You can test its balance using a nail or a screwdriver tip — if it sits evenly, then you’re good to reinstall the blade. But, if one side is weighed down, it’s heavier than the other and needs further adjustment. If that’s the case, return to step 6.

8. Reinstall the blade — You’re now ready to return the blade to the mower. Check you’ve got the blade the right way up (using the markings you made earlier) and reinstall with the wrench and nut/bolt. Make sure it’s tight and secure before flipping your mower the right way up again. Refill your gas tank if required.
And there you have it, your lawn mower should cut grass as good as new. Remember to keep an eye on your blade and sharpen it whenever necessary.
How to tell when your mower blade needs to be sharpened
If your lawn mower blade is dull, first of all the quality of your lawn will be affected. The grass will be torn rather than cut, resulting in a messy appearance. Dull blades can also damage the roots of your lawn, turning the grass yellow and killing it in extreme circumstances.

You can also tell when a mower blade needs to be sharpened just by looking at it. If there are visible nicks, dents and small chips, the blade needs some attention.
Can you sharpen a lawn mower blade without removing it?
It is possible to sharpen a lawn mower blade while still attached to the mower using a metal file. However, this would be much more awkward versus simply removing the blade. You also wouldn’t be able to check the blade for balance afterwards, which is why we don’t recommend it.
How often should I sharpen my lawn mower blade?
This ultimately depends on how regularly you use your lawn mower and how long you run it for each time. Generally speaking, you should aim to sharpen the blade after 25 hours of runtime or twice in the mowing season. Putting that in retrospect, if your lawn takes two hours to mow, and you cut it back once a week, you’re looking at about 3 months before the blade needs maintenance.
It’s also a good idea to inspect, clean and, if needed, sharpen the blade prior to storage. In doing this, you won’t need to worry about it corroding from moisture exposure. You also know your lawn mower will be in tip top condition when you bring it back out come spring. This is just one of the steps in learning how to store a lawn mower and protect it through the winter.
The blade can also suffer from chips or nicks sporadically from hidden objects, such as rogue stones and rocks. As and when this happens, it will need attention, so be sure to check its condition regularly for such damage. Repairing small nicks and chips may be possible by sharpening, but if you’re dealing with cracks and dents, a replacement will be necessary.
Whatever you do, don’t neglect this chore and simply replace your blade, or even the lawn mower when you feel it’s running out of life. This is wasteful behavior when the blade still has plenty of hours left in it. Sharpening lawn mower blades is a task which can be completed at home, or if you’re uncomfortable taking it on yourself, your local hardware store or gardening centers may offer such services. In either case, it can save you money as well as potential damage on your lawn if you use a sharpened blade.
More from Tom's Guide
- Here's how to plant grass seed
- Also, check out how to make your grass greener
- These are the best pruning shears you can buy

