How to edit photos on Mac using macOS Photos
Making your images sparkle by learning how to edit photos on Mac for free in macOS Photos
Knowing how to edit photos on Mac for free in MacOS Photos sure comes in handy. It allows you to quickly make alterations to your images so that they look more professional, while letting you iron out any blemishes or the dreaded red eye. By spending a few minutes editing your photos, you can ensure they'll impress whether you're posting them on social media or simply sharing with friends.
As stated, in this guide, we're using Apple Photos on a Mac. This is a great app which comes with macOS, meaning you don't need to splash the cash to be able to edit your photos. As well as allowing you to edit your images, the app ensures you can organise your photos, videos and albums and make quick searches. Sure, there are alternatives, some of which offer more, but those often come at a price. We reckon Photos for macOS is great for newcomers to photo editing and even enthusiast photographers, which is why we've added it to our list of the best photo editing software.
All that said, it's no use having macOS' powerful editing software if you don't know how to use it. So, here's how to edit photos on Mac using macOS Photos.
Note: macOS Photos' editing tools allows you to process images — that means you can retouch them, correct their exposure and change color. macOS Photos isn't an image manipulator like Adobe Photoshop, so can't be used to digitally alter the contents of the actual image.
How to edit photos on Mac using macOS Photos
Basic edits
The first thing you'll need to do is find an image to edit, then open up the Edit feature.
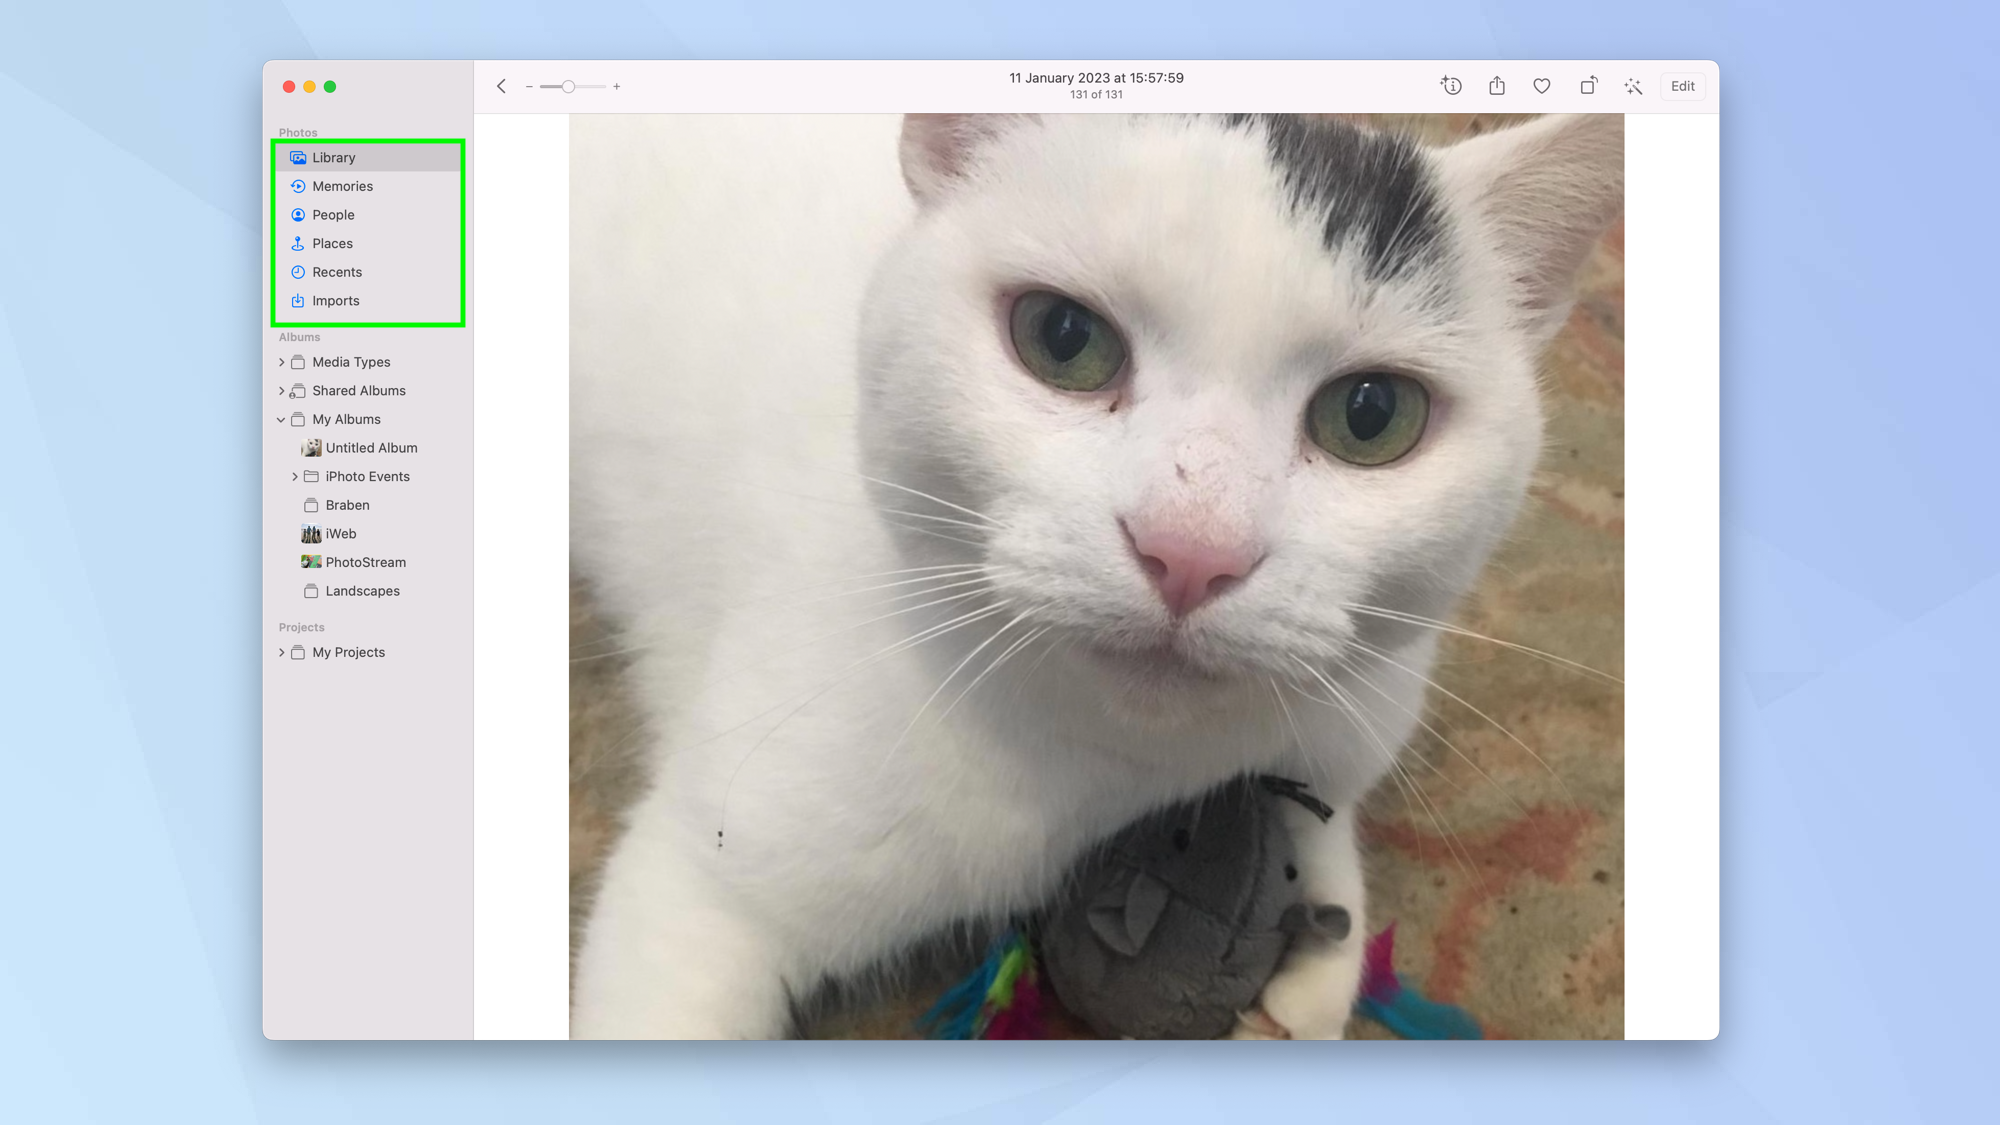
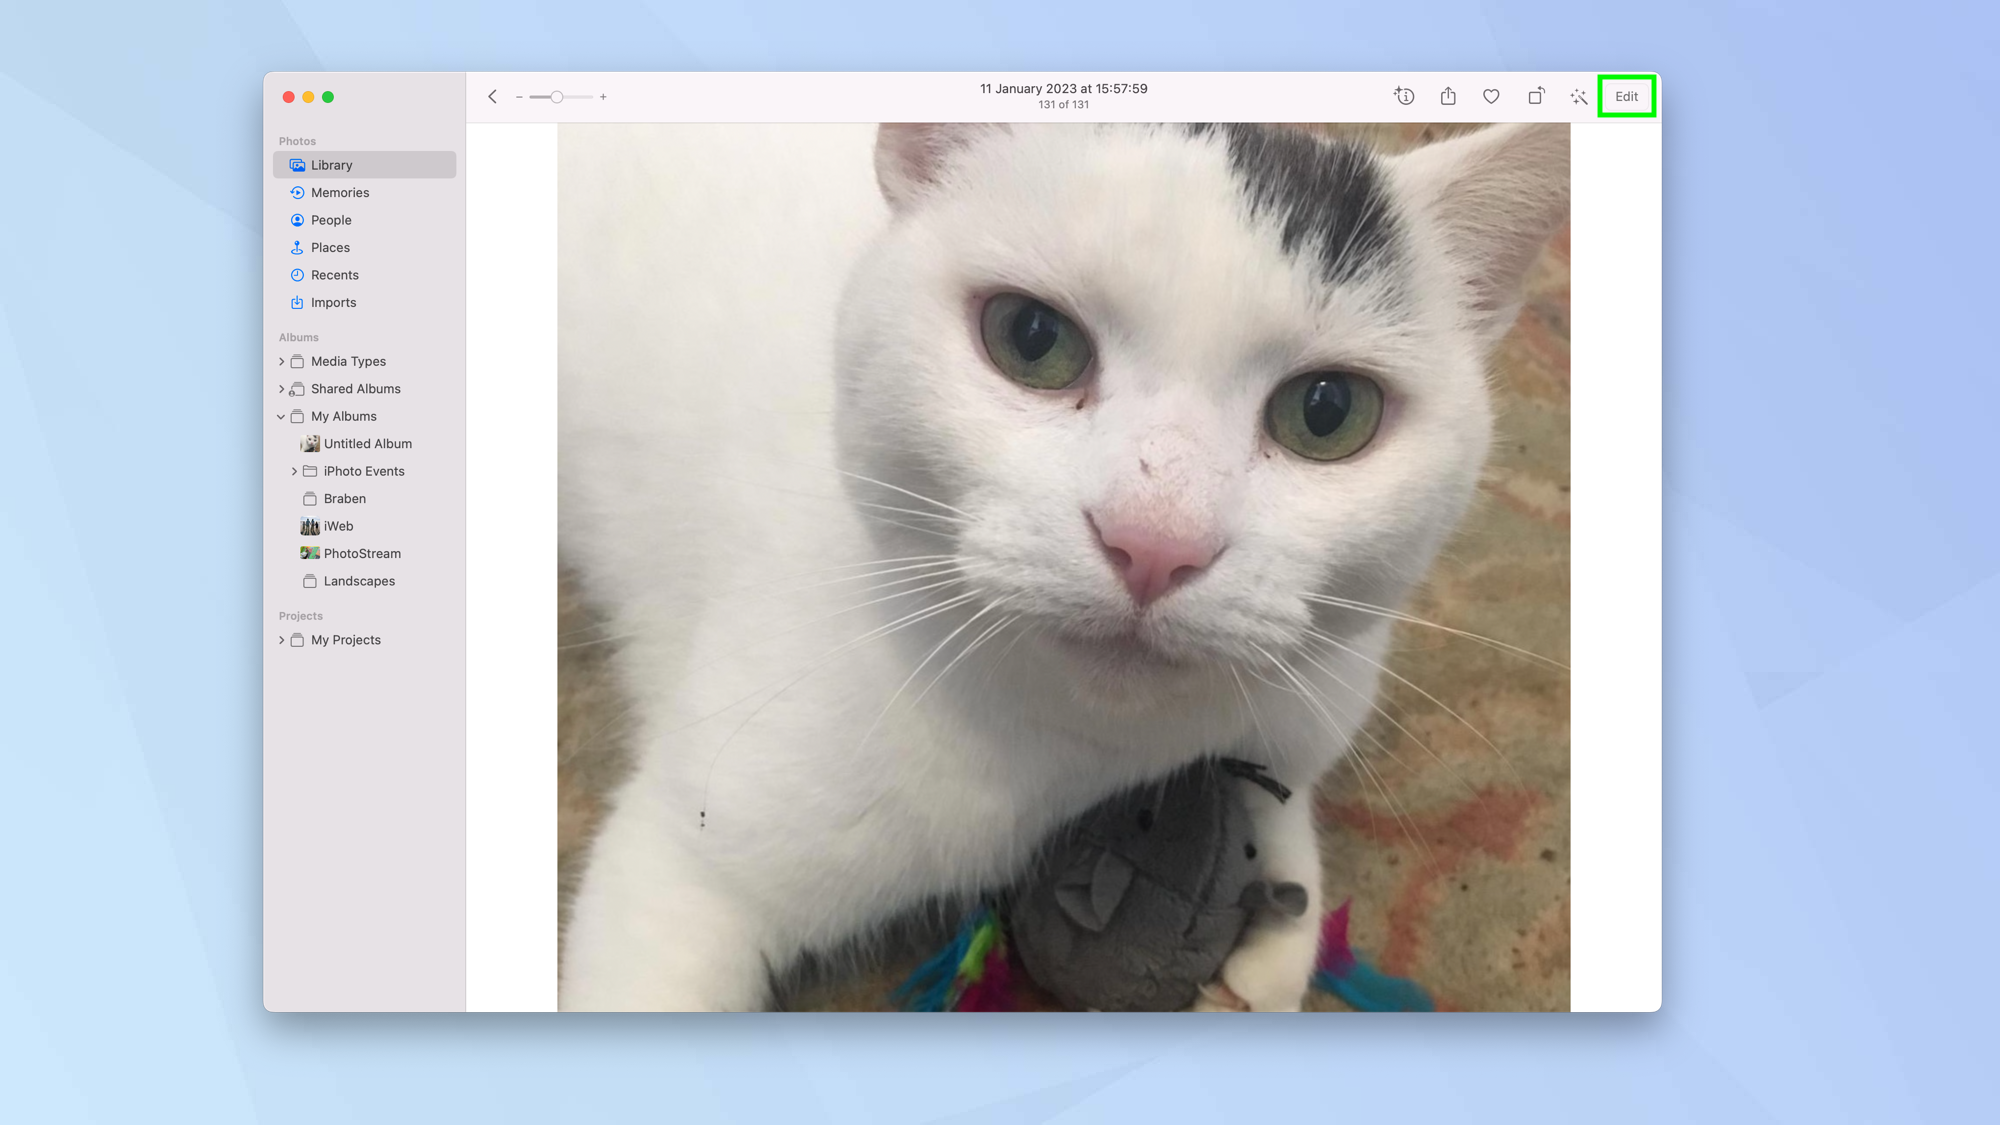
1. Launch the Photos app on your Mac. Next, find and click an image to edit.
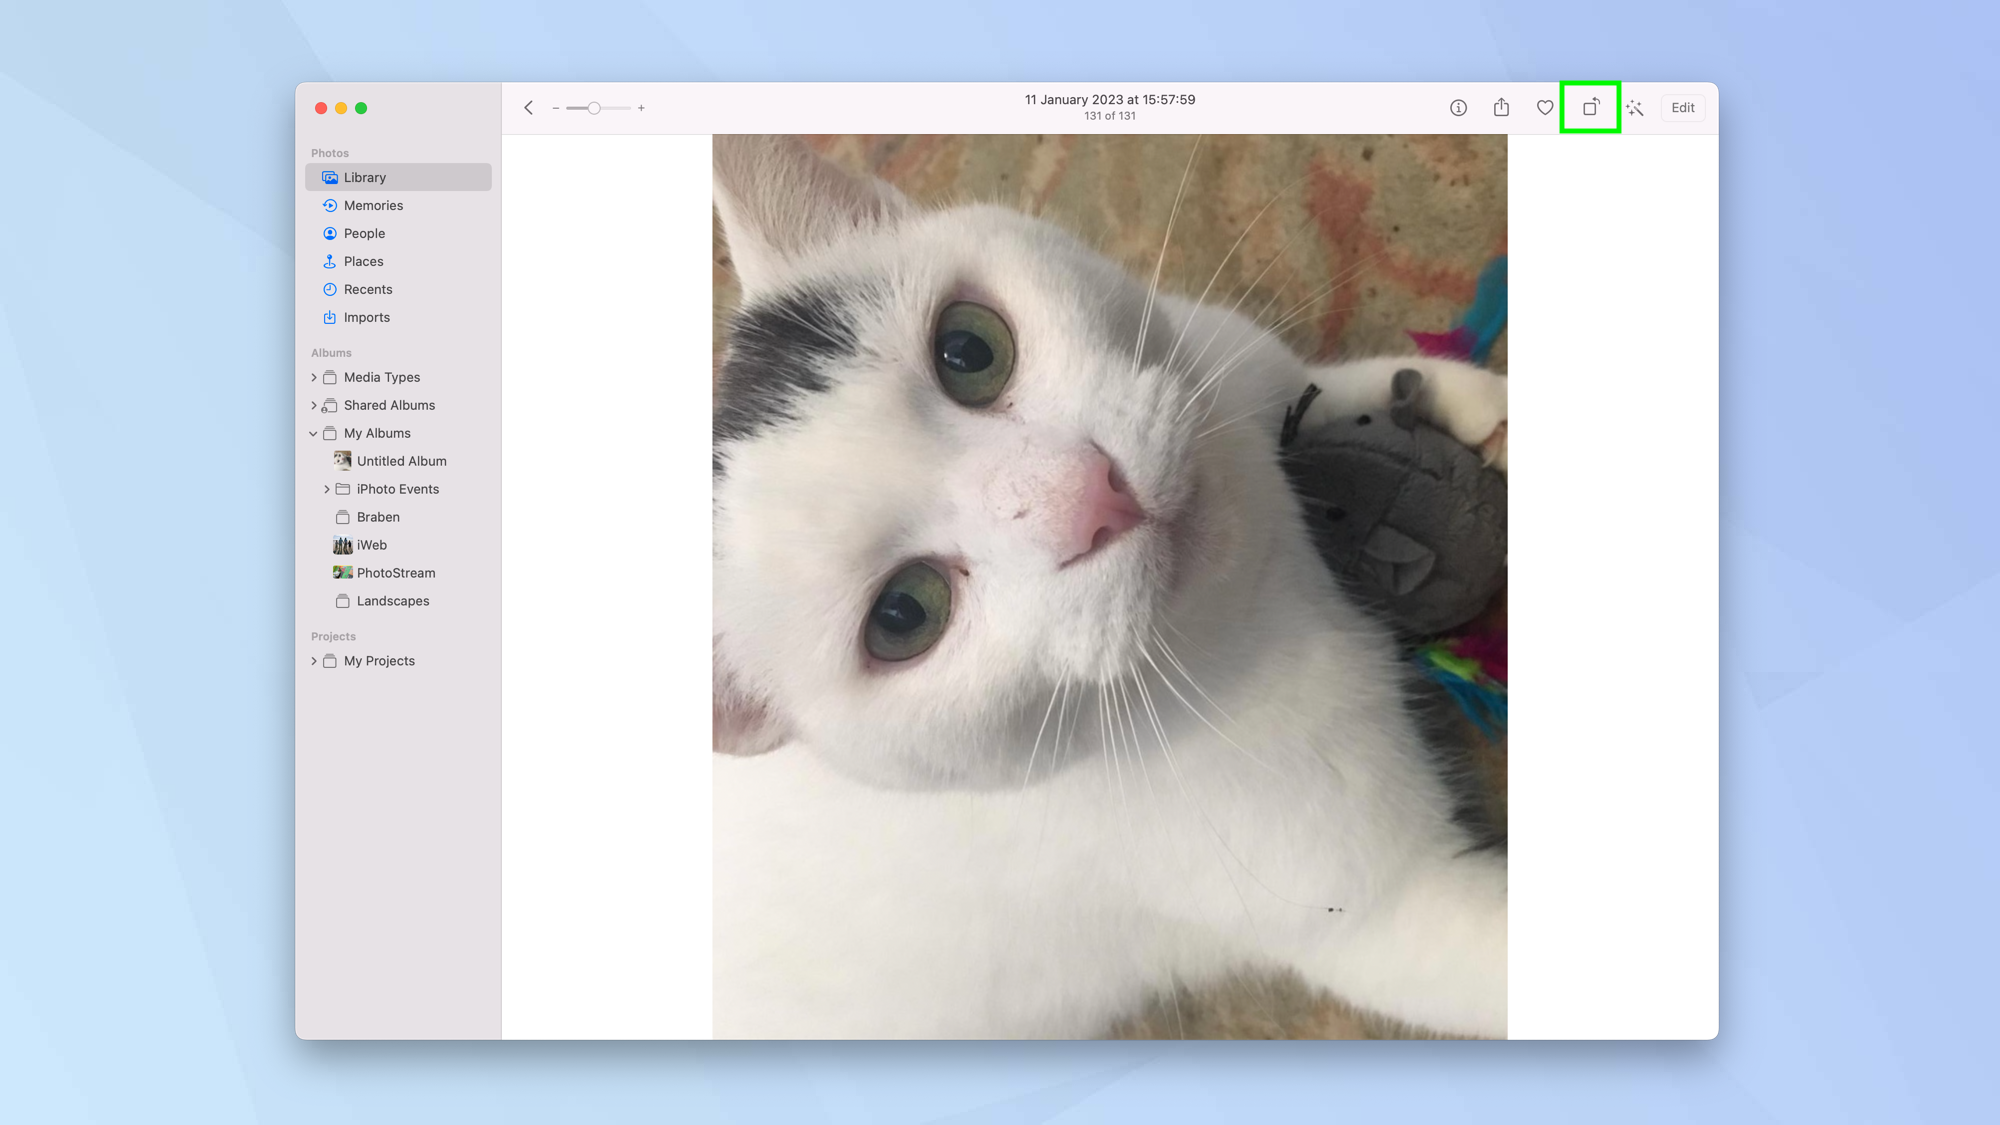
2. You can make two quick alterations. Click the rotate icon, for example, and you can turn your image 90 degrees at a time.
Get instant access to breaking news, the hottest reviews, great deals and helpful tips.
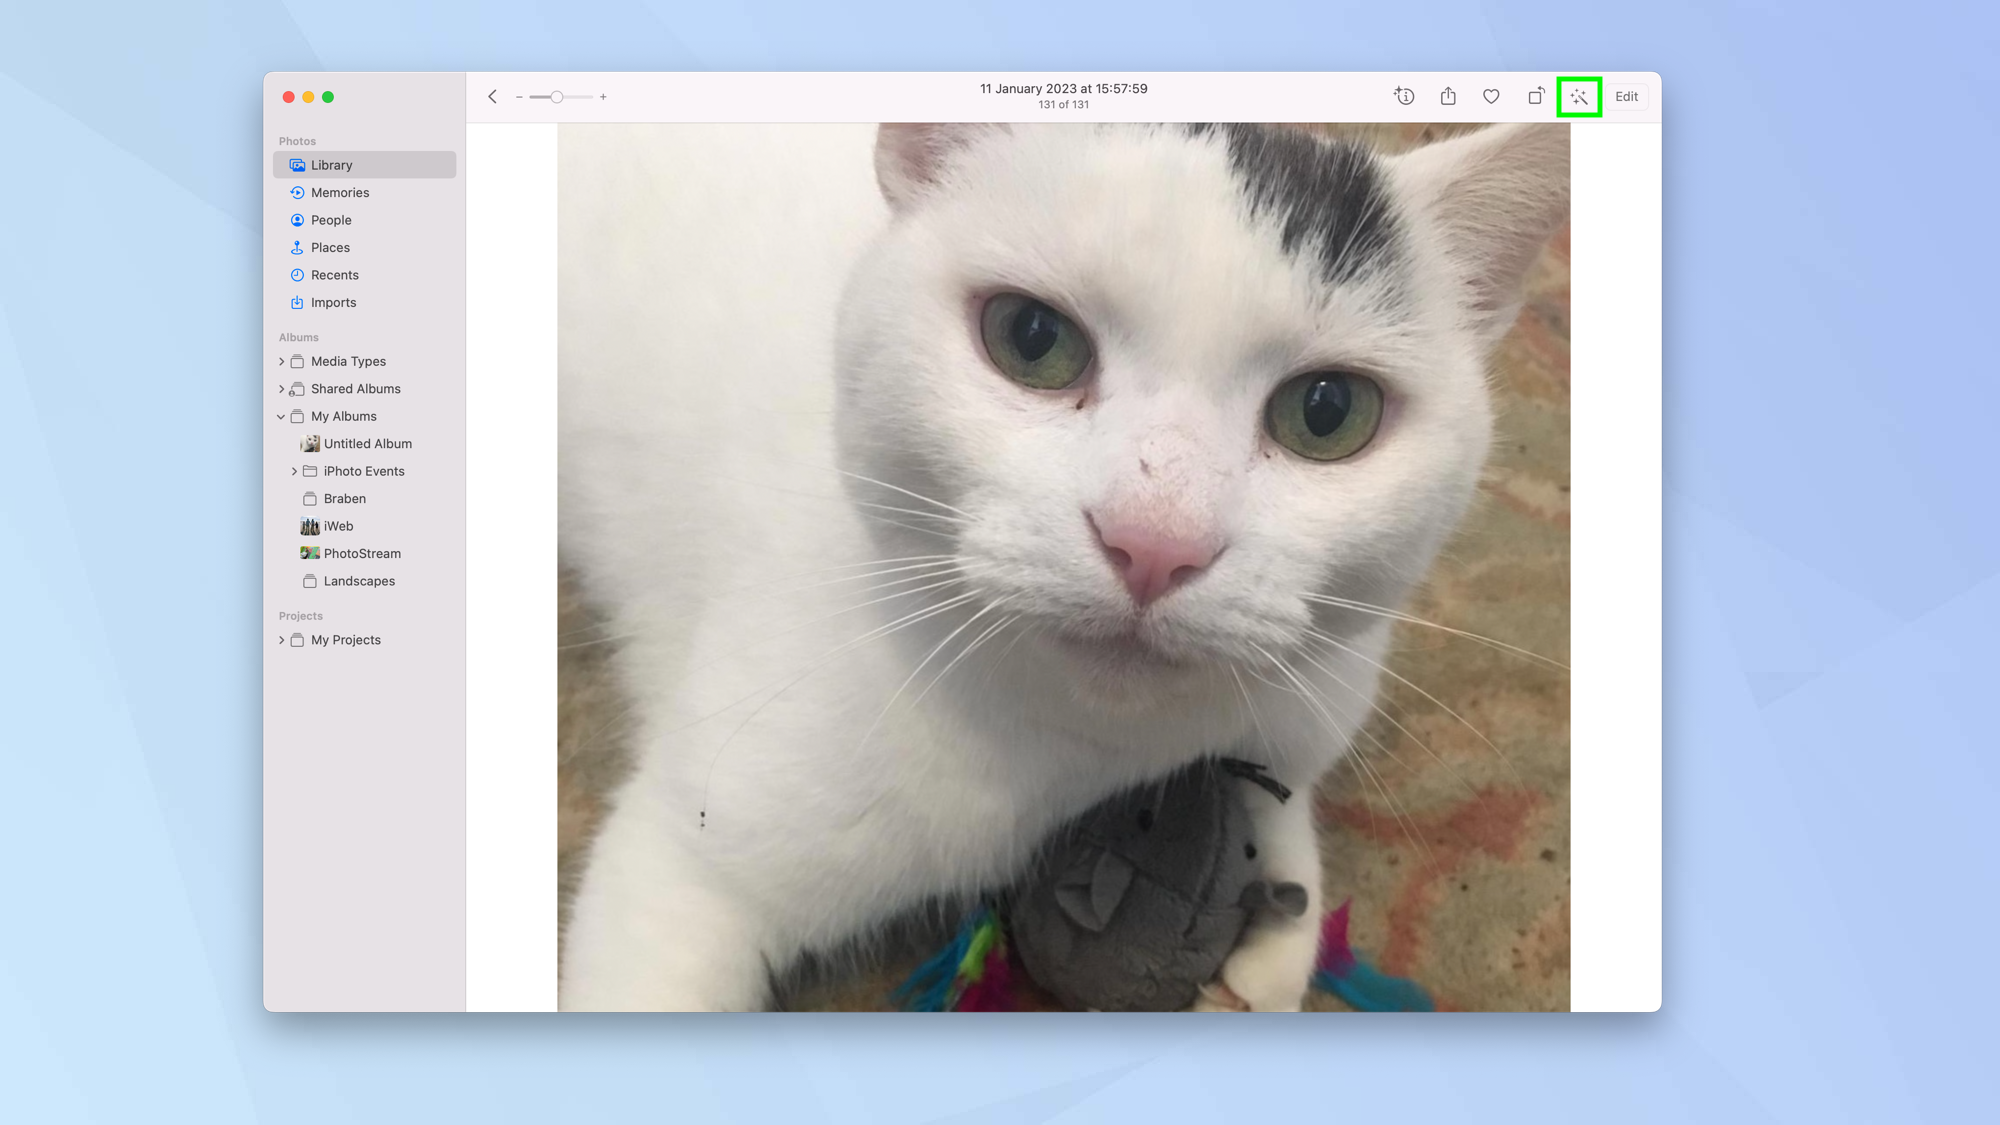
3. You can also click Auto Enhancements. This will automatically adjust the color and contrast of your image. You can click Auto Enhancements again to remove these adjustments.
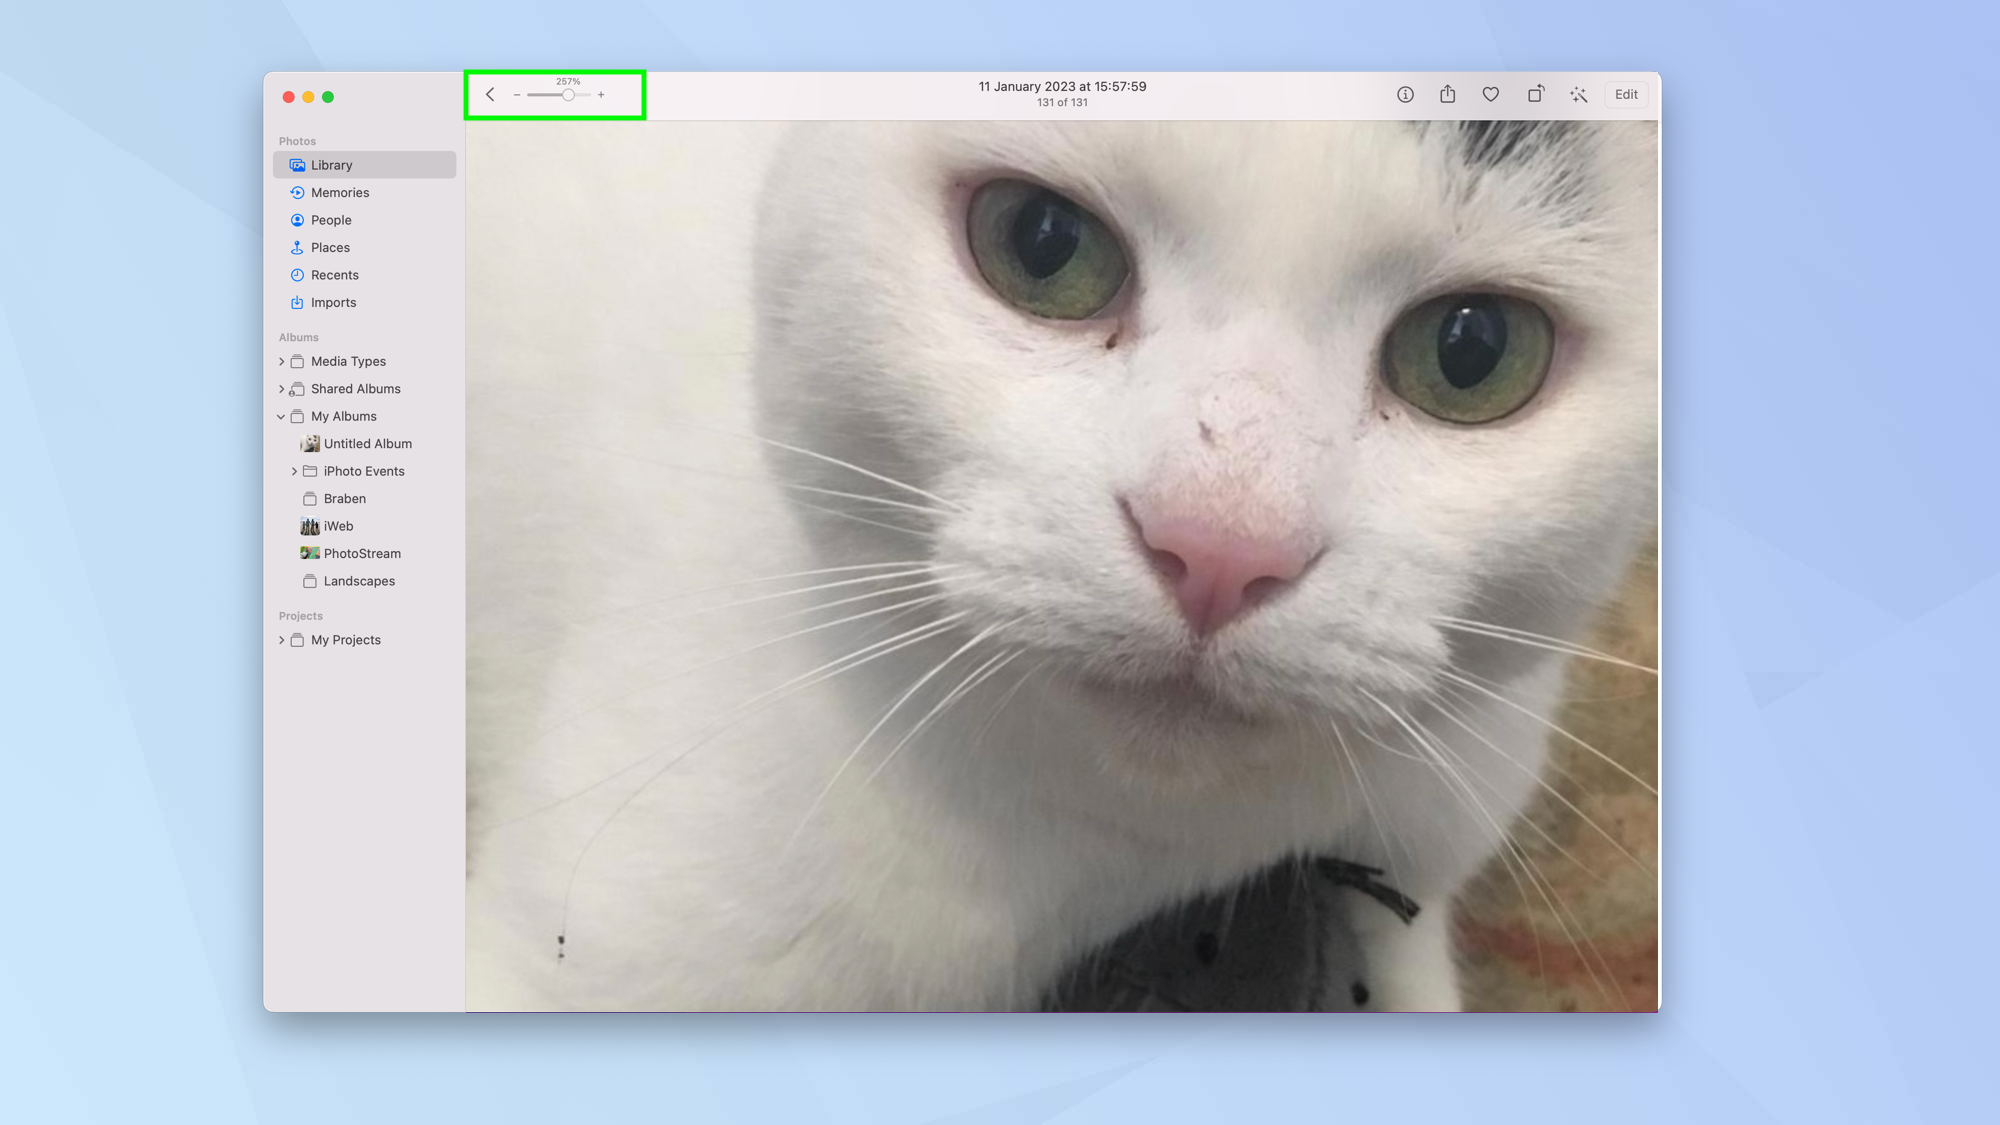
4. It is also possible to zoom in and out of your image — useful for checking focus or close-up detail. Just drag the slider in the top-left corner.
5. For in-depth editing options, click Edit.
You will now see the editing menu to the right of the Photos app. It's time to get serious.
Get to grips with the Edit menus
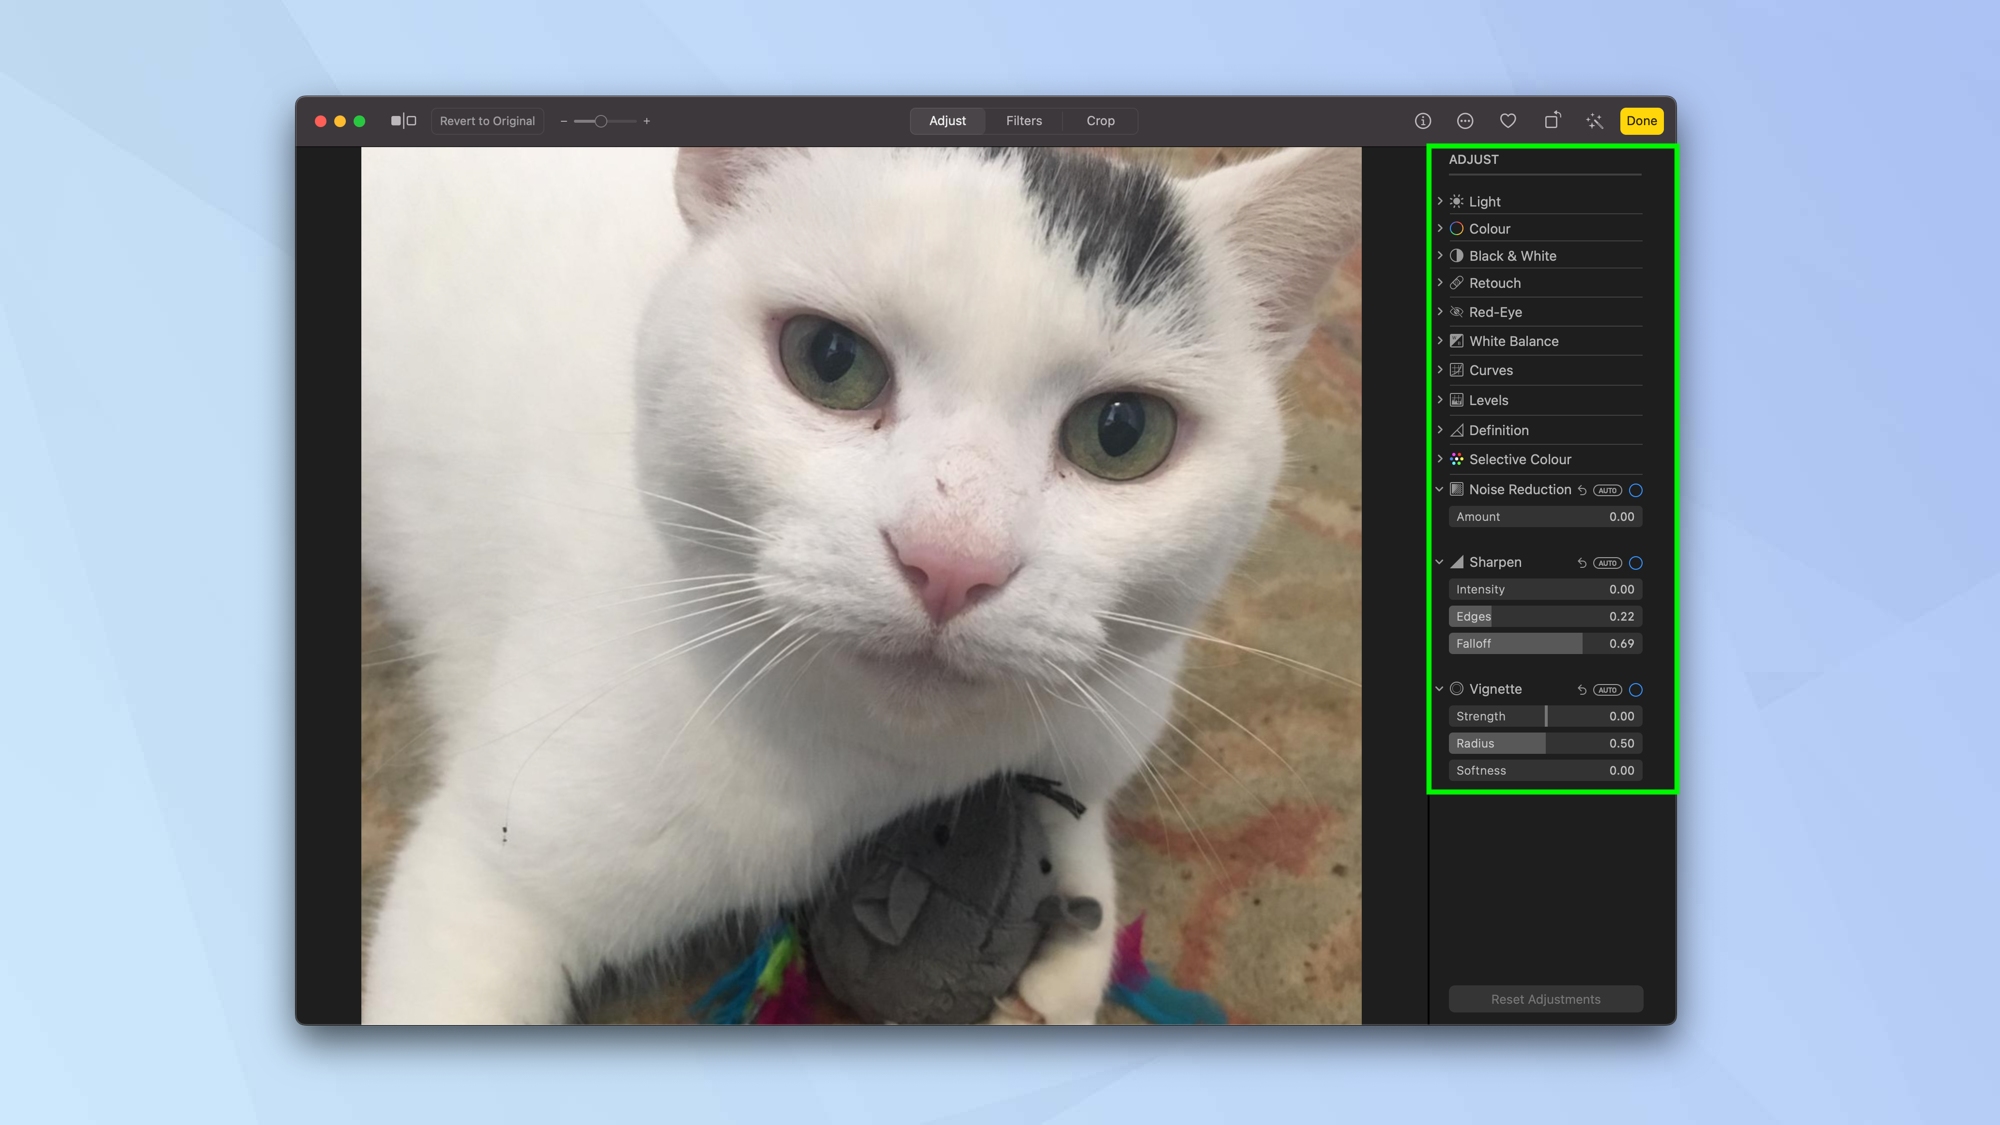
When you tap Edit, there will be a wealth of options at your fingertips. You will see be able to make use of the zoom, rotation and auto enhancements features covered in the section above but you will also see a set of three tabs: Adjust, Filters and Crop.
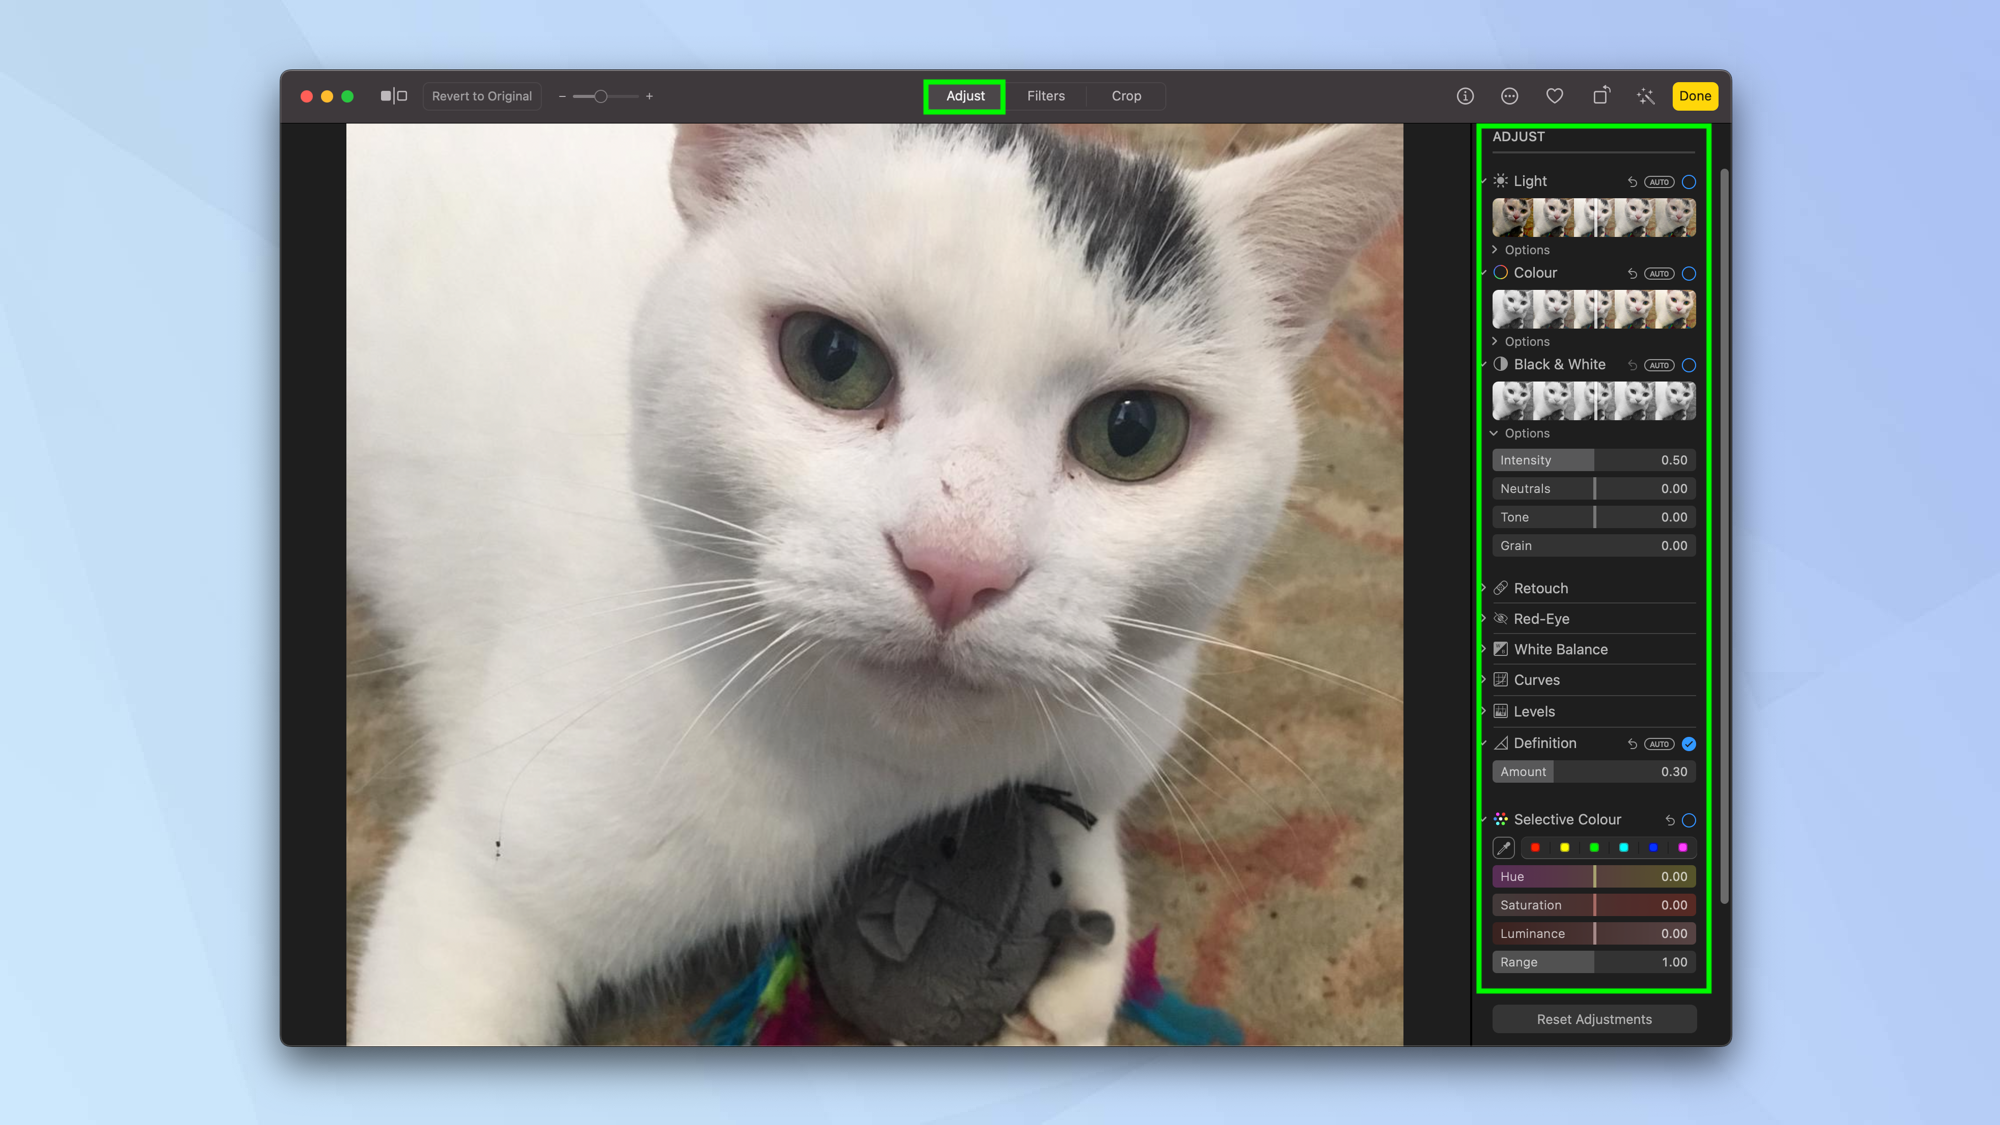
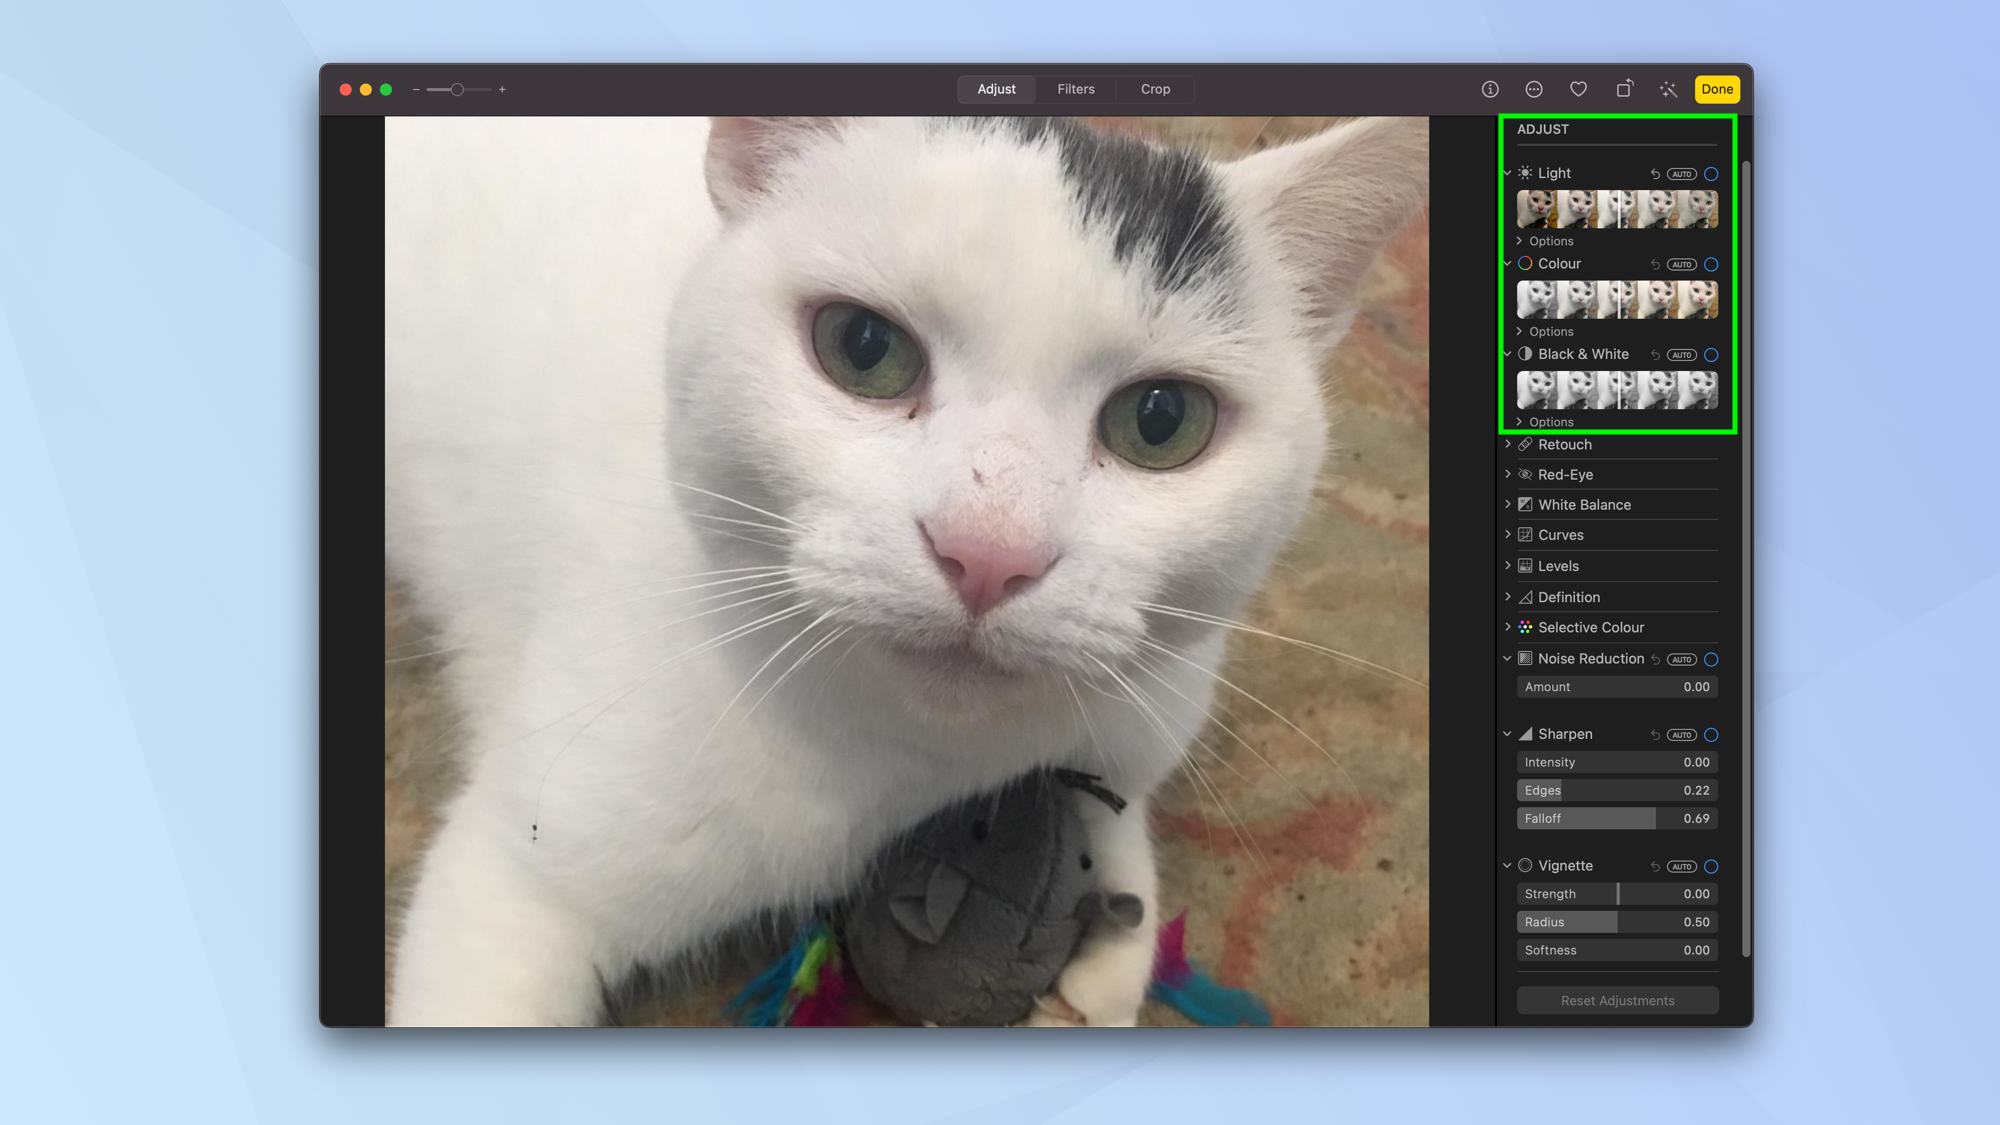
1. Click Adjust and you will be able to make fine adjustments to your image. This will allow you to make changes to the light, color and sharpness of an image, for example...
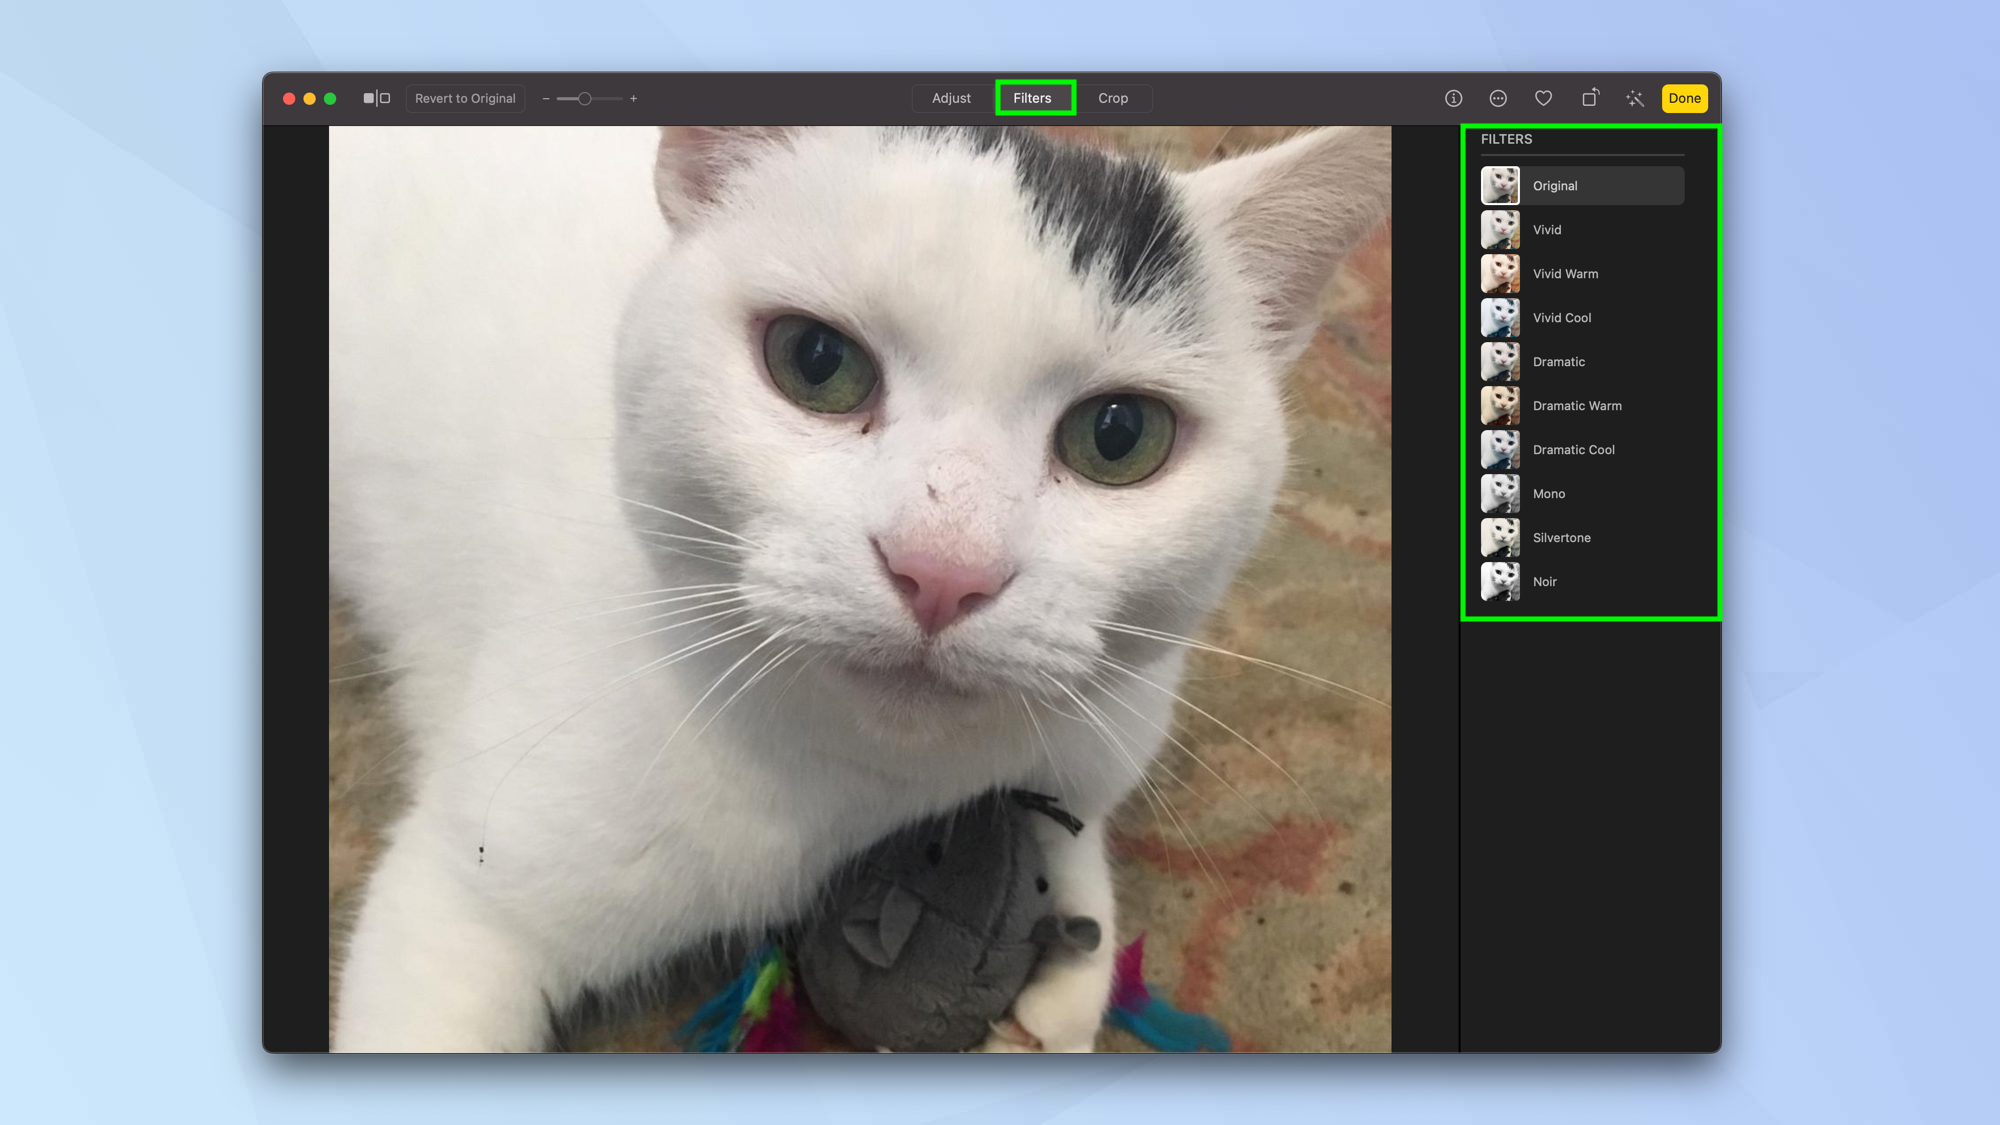
2. Click Filters and you can quickly change the look of your image. Simply select a filter from the right-hand side then click or drag the slider to adjust its look.
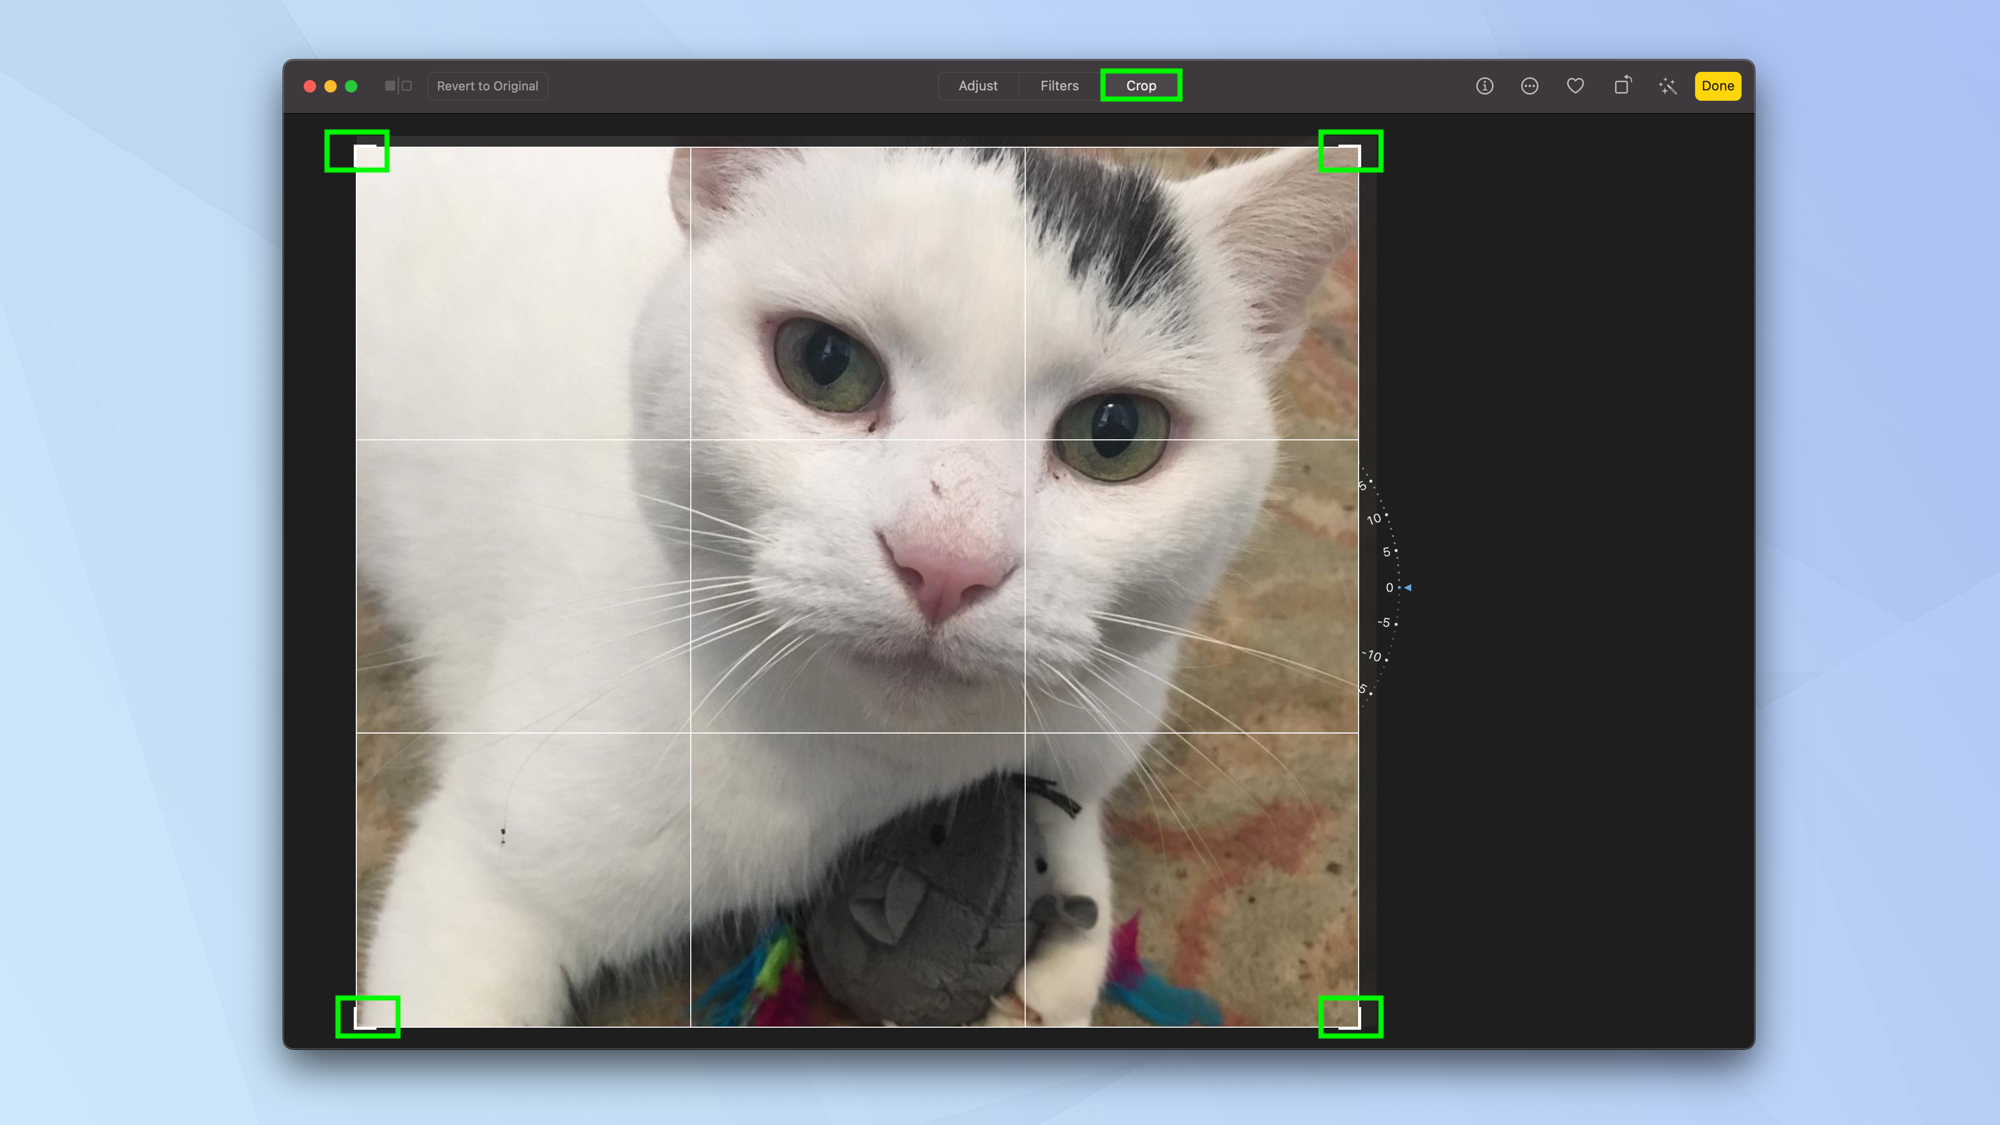
3. Click Crop and you can use the handles that will appear at the corners of image to select the areas of the image you wish to keep.
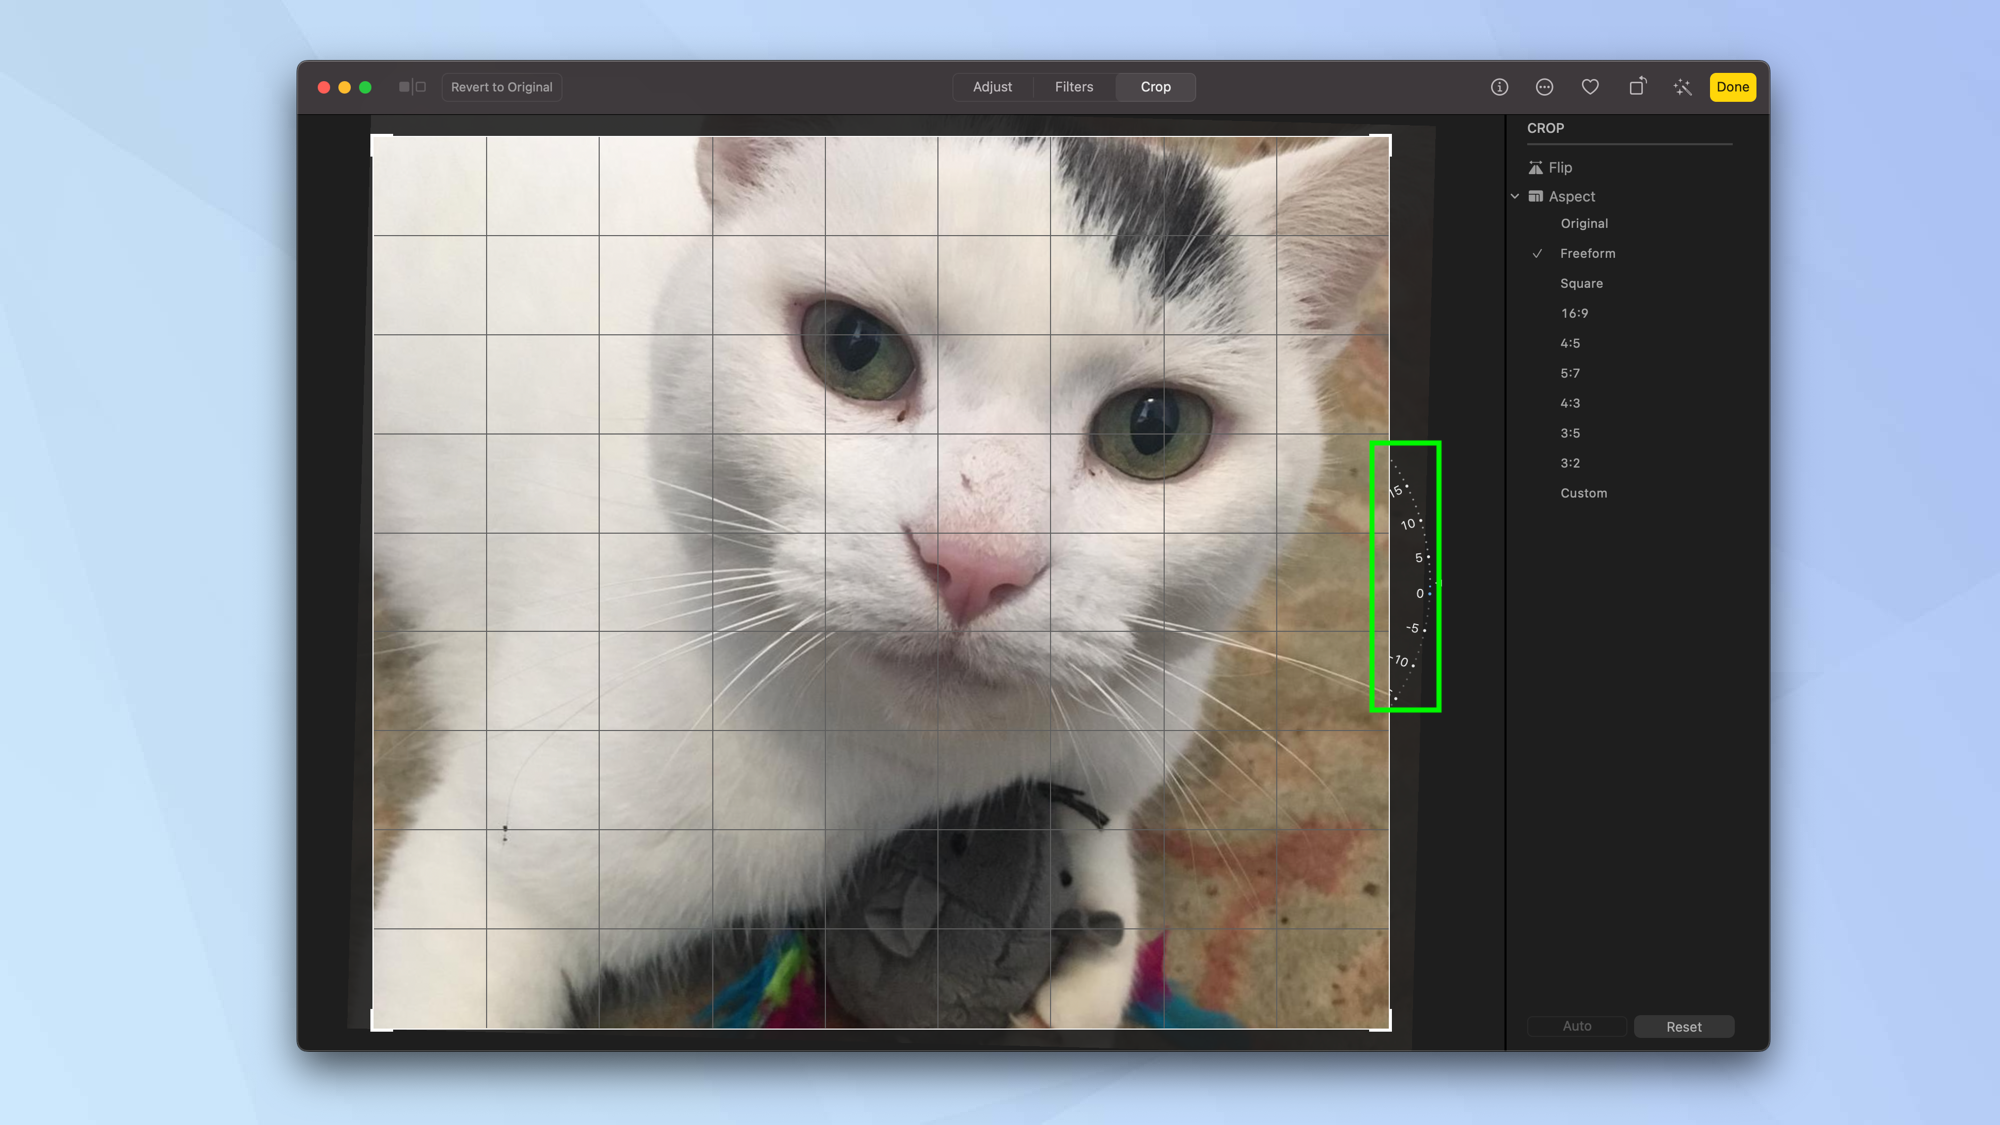
You can also click and drag the wheel to the right of the image to alter its angle or straighten it.
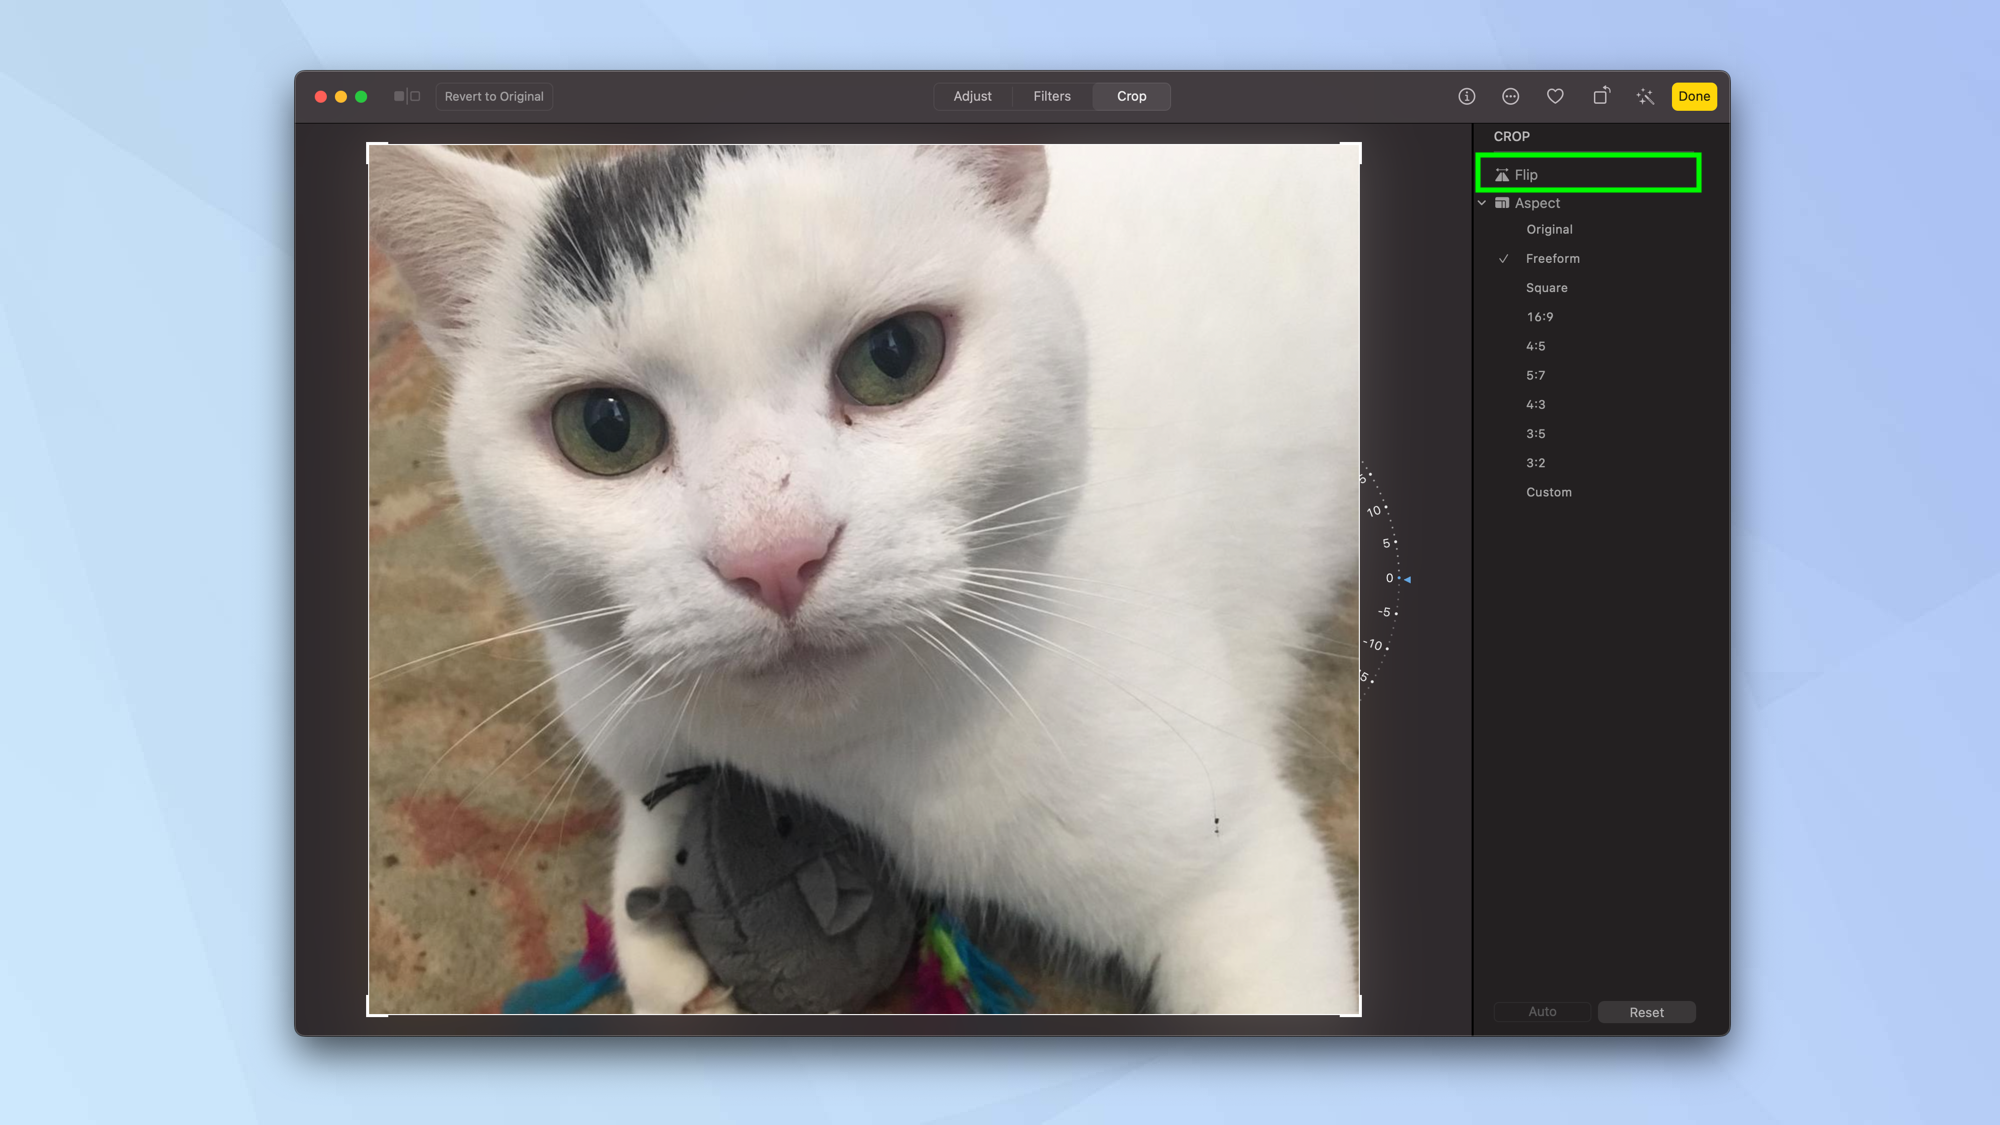
What's more, you can select Flip in the menu to the right, to flip the image horizontally (hold the Option key to flip vertically).
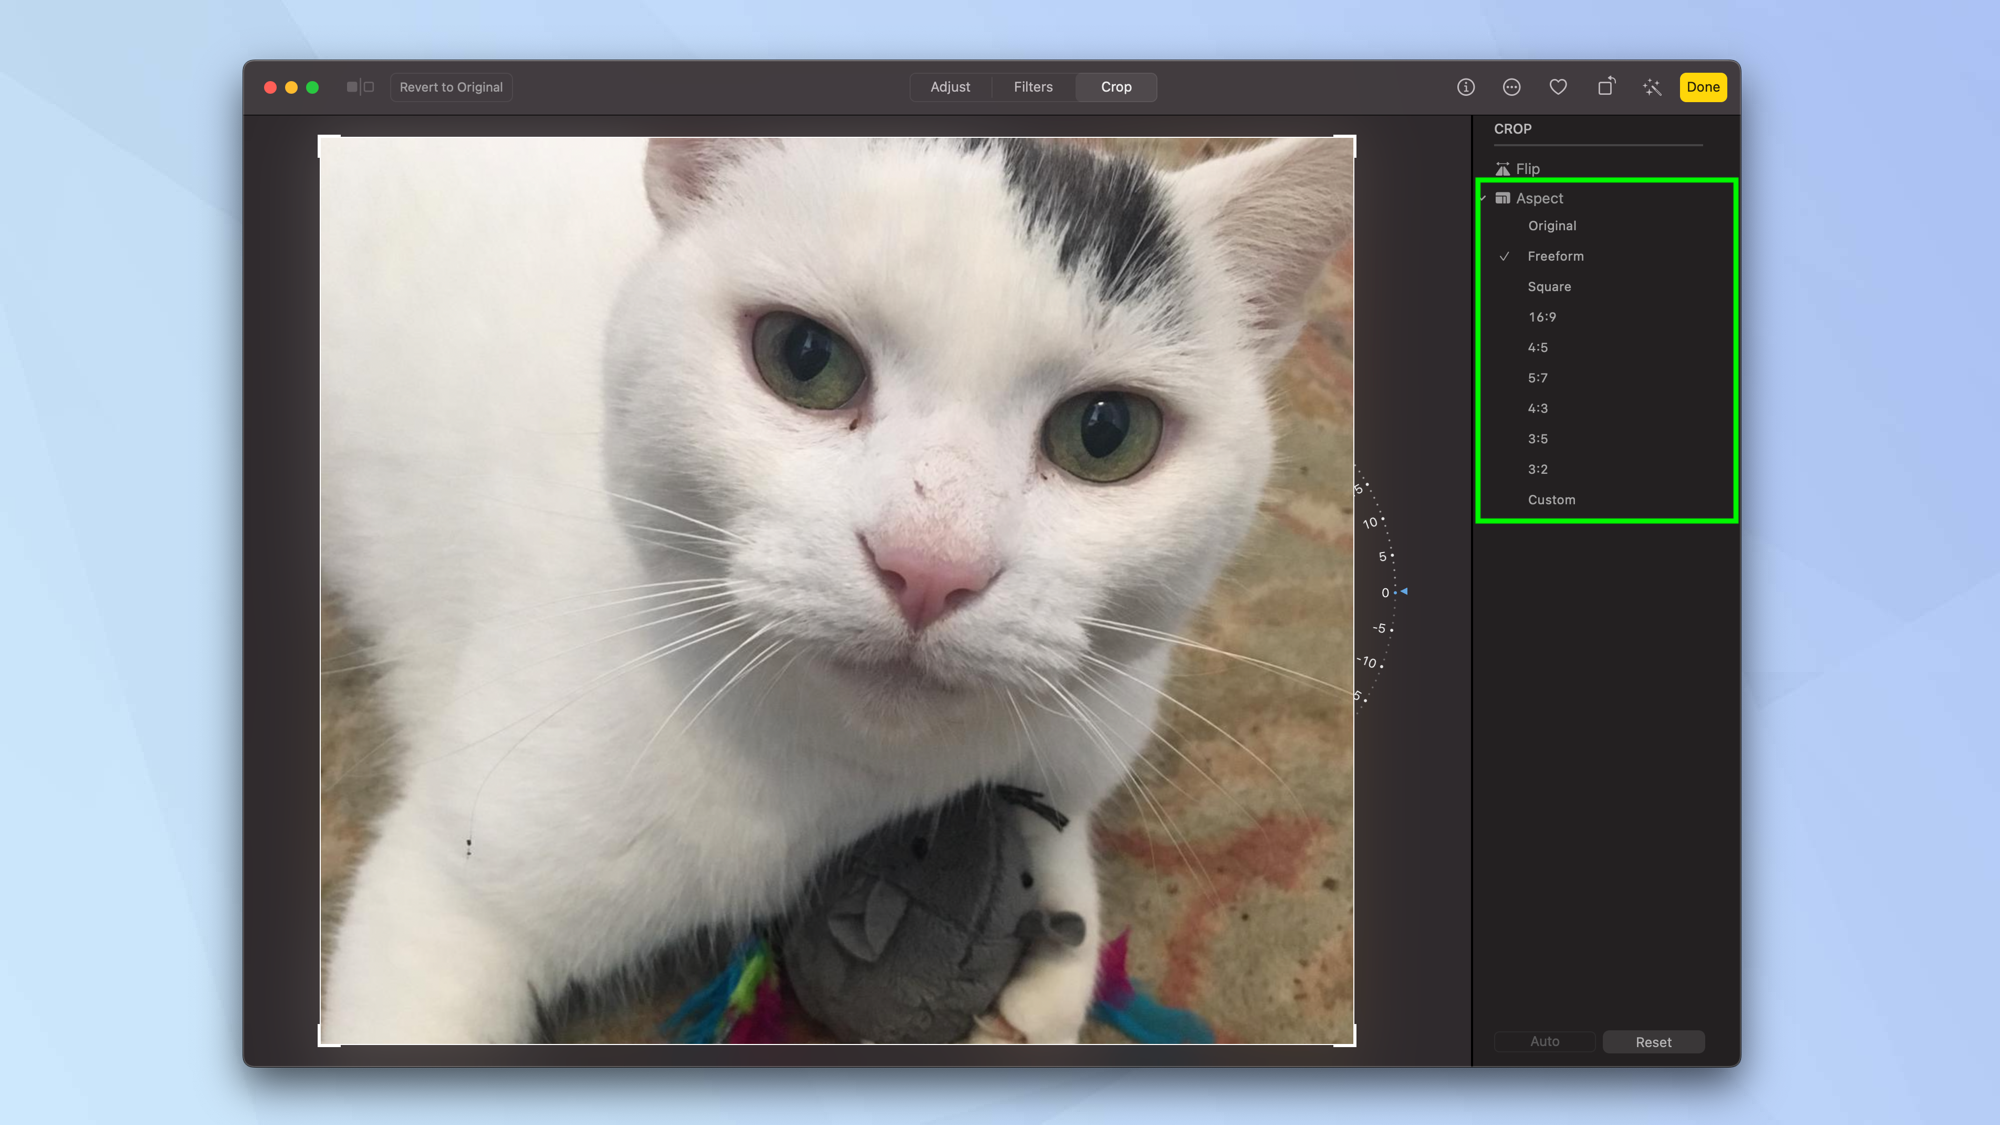
And you can click Aspect if you want to crop the image to a preset or custom aspect ratio. For example, by cropping it a 1:1 square or a 16:9 widescreen image.
Using the Adjust panel
Blown out highlights describes a situation where there is so much light in an area of the photo that nothing in that area can be made out, and detail is lost. If you blow out highlights in camera, that detail can't be recovered as no color data exists in that area. It's also possible blow out highlights while editing — i.e. boosting correctly exposed highlights so far that they become a white blob of light. This is fixed by simply decreasing highlights again.
Making fine adjustments to your image gives you a lot of control and you can go as in-depth as you wish, either manually or automatically.
For instance, you can change the brilliance of an image (this brightens dark areas, adds contrast and makes images look more vibrant). Or you can alter the exposure which brightens all tones equally from highlights to blacks (exposure stems from a photographic term essentially meaning how long your camera’s sensor was exposed to light, so how bright or dark the image is).
It's also possible to adjust the highlight detail — this lifts the very lightest tones, known as highlights, only. You can change the brightness, which lifts all light tones except highlights, to prevent them 'blowing out'.
You can increase or decrease the contrast, so the difference between lightest and darkest tones by raising and decreasing both respectively. And you can set the black point, which darkens already dark areas when raised, lending more depth and increasing the contrast of the image without affecting lighter tones.
Increase the saturation to raise the intensity of an image's color and use vibrancy to add saturation to the parts of an image where colors are not already saturated. All of these options are available in the Adjust panel and here is how you can use them.
1. Look at the right-side panel. You will see options for Light, Color and Black & White. There are a few ways of making adjustments here.
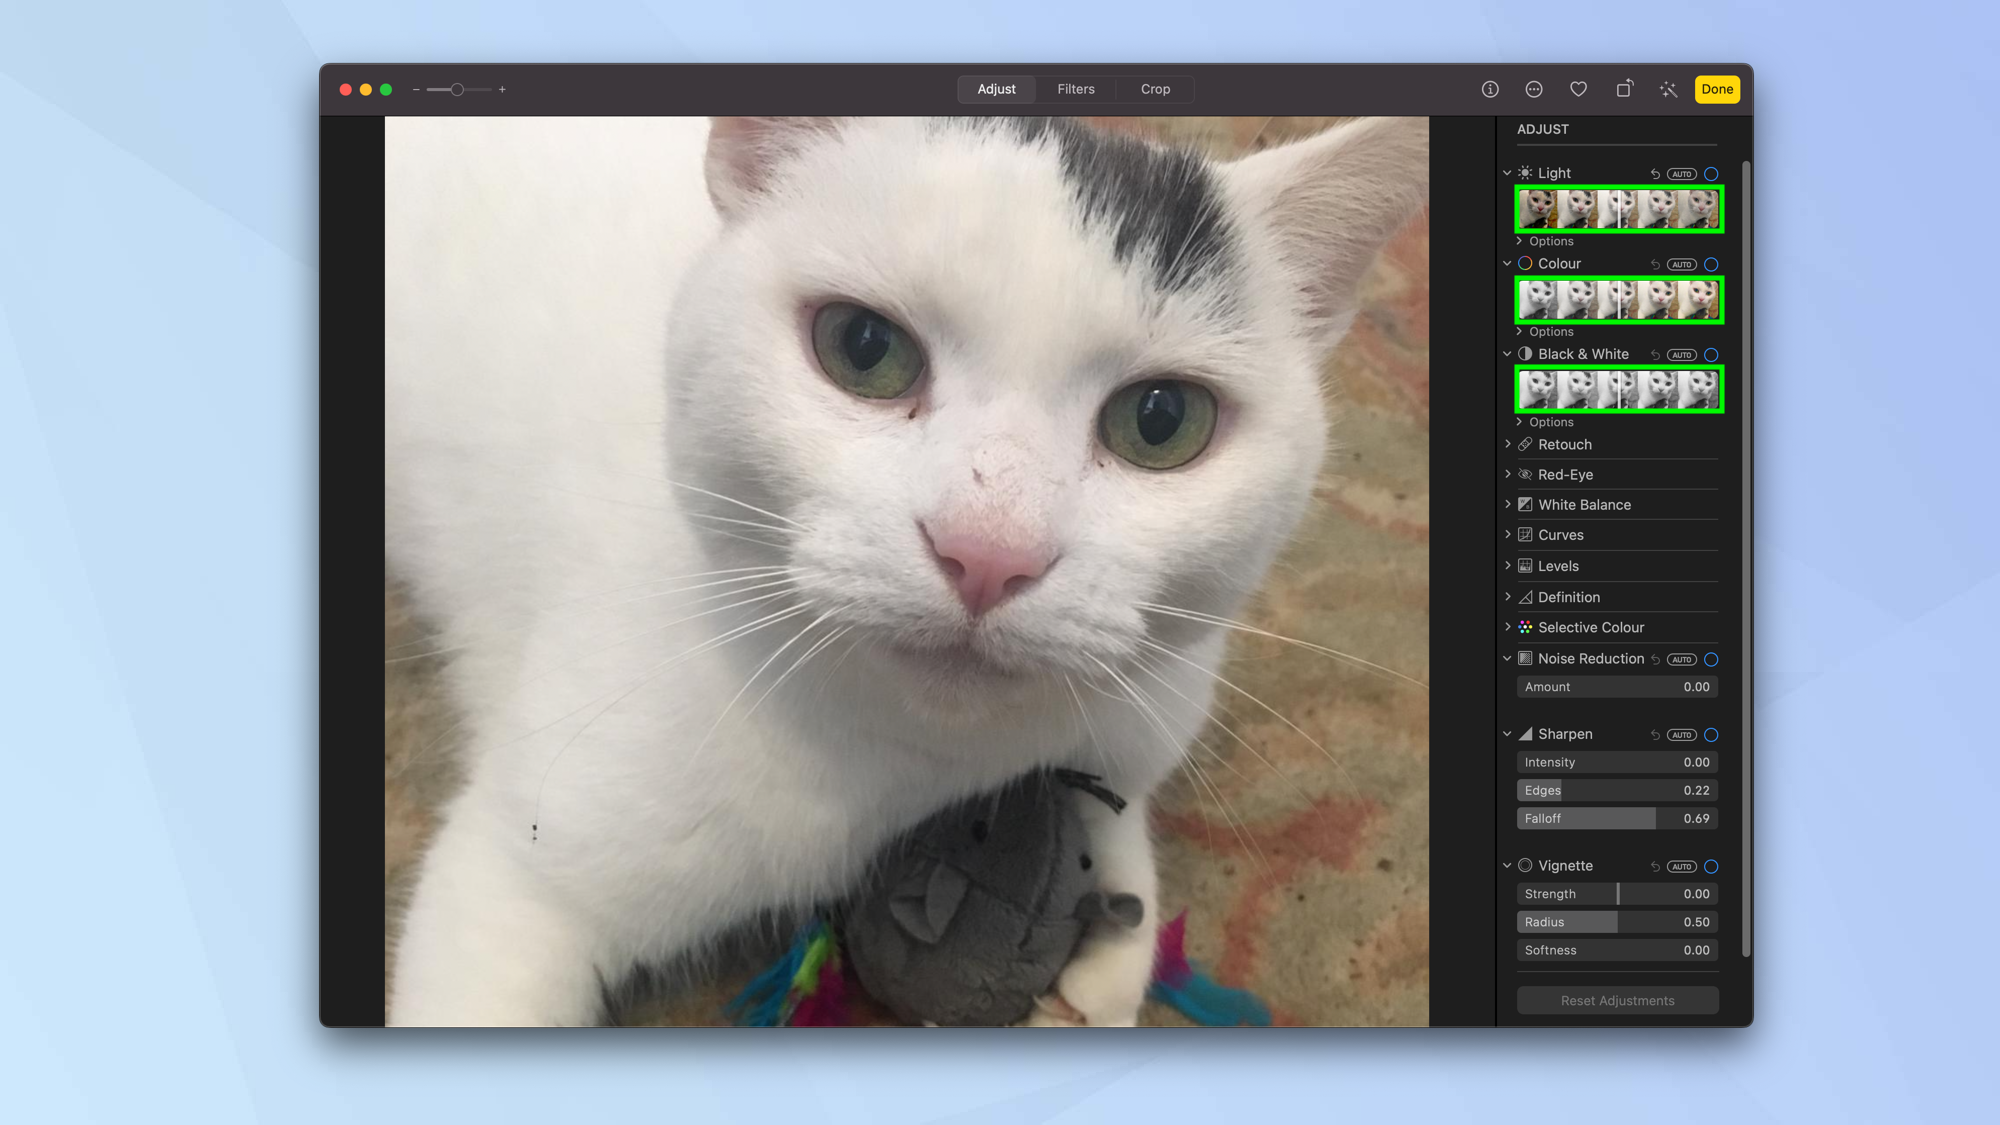
2. First, you can drag and move the slider in any of these thumbnail images to alter the look of the overall image. Alternatively, click Auto and have the Photos app make the decision for you.
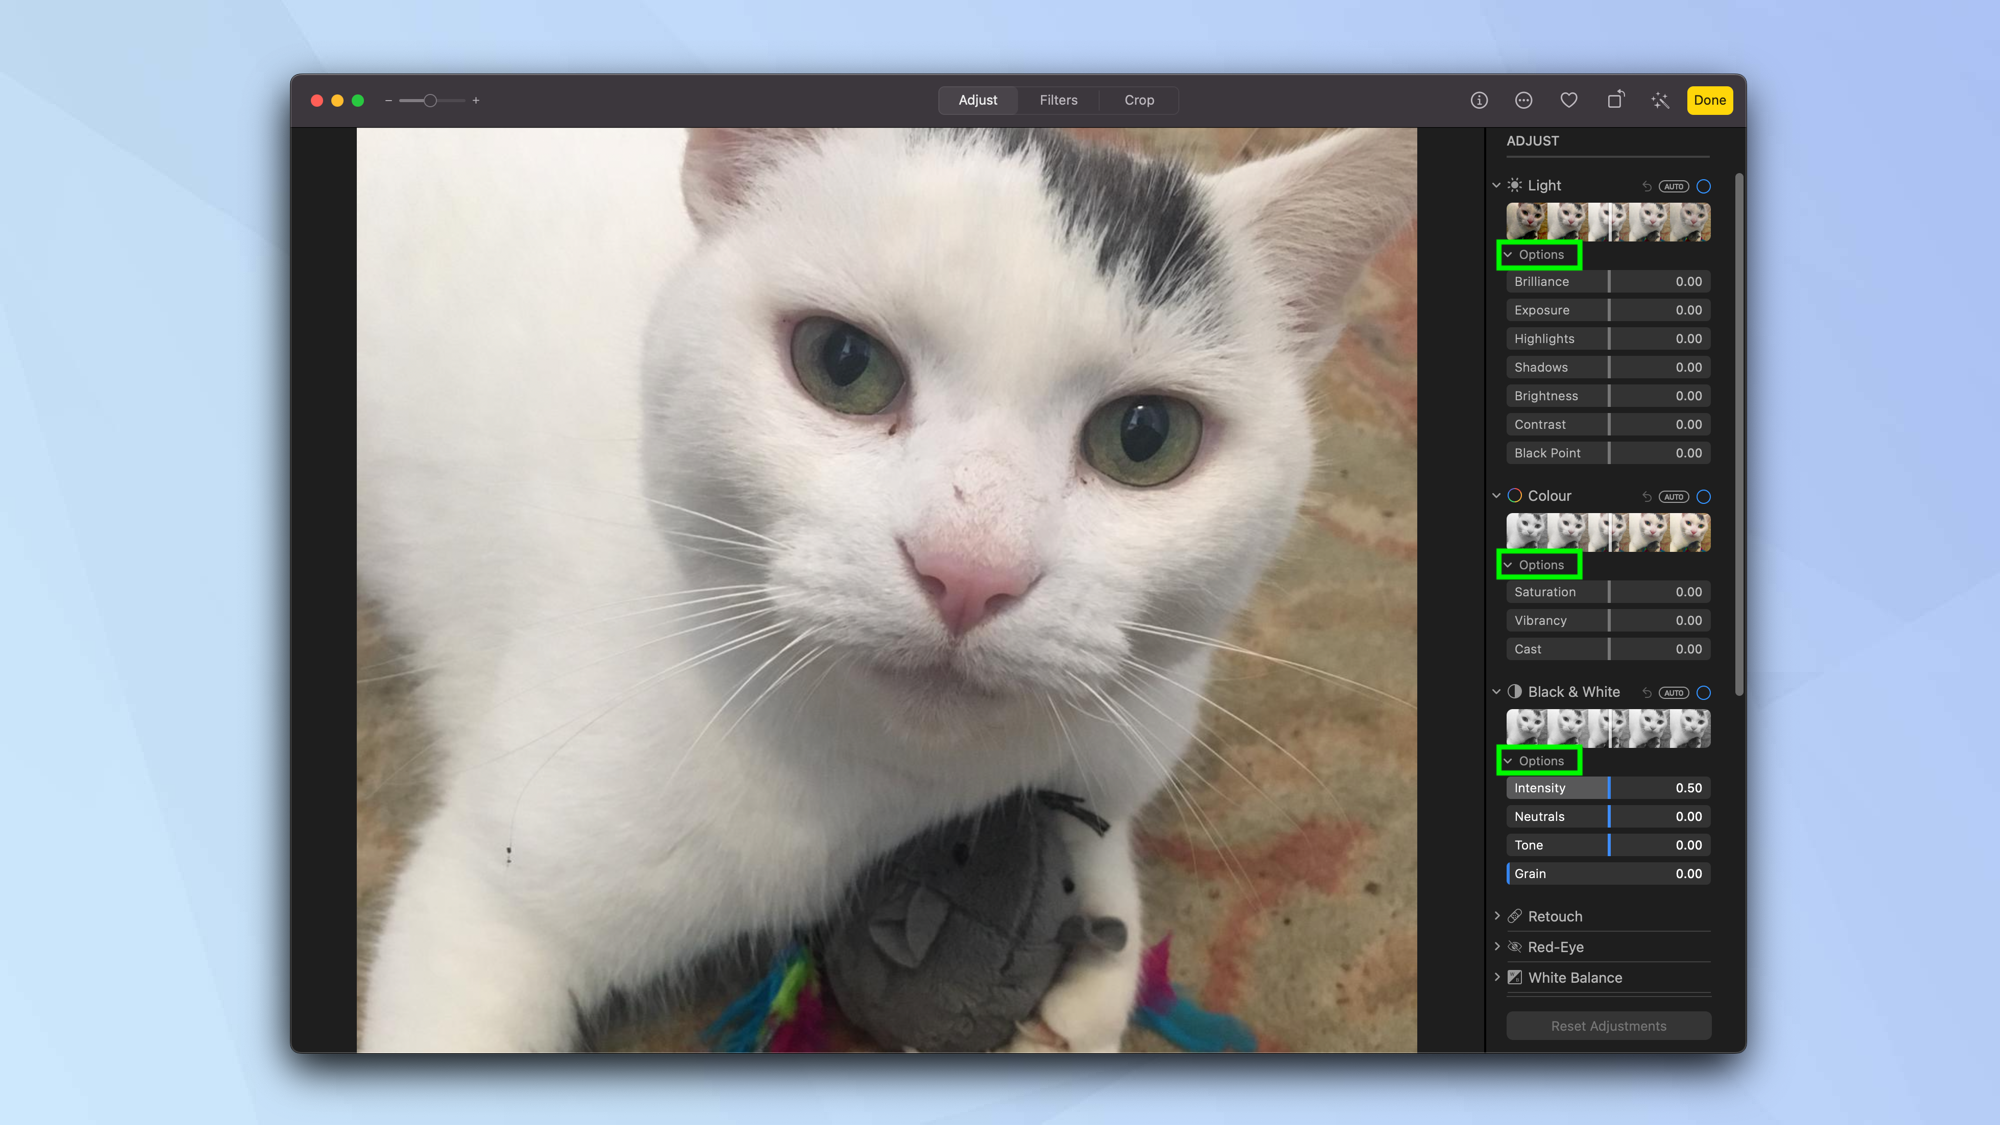
3. Second, you can click Options underneath each of these sections. As you do so, you can make even finer adjustments. For example, you can concentrate on the shadows when adjusting the light or change the vibrancy of a color.
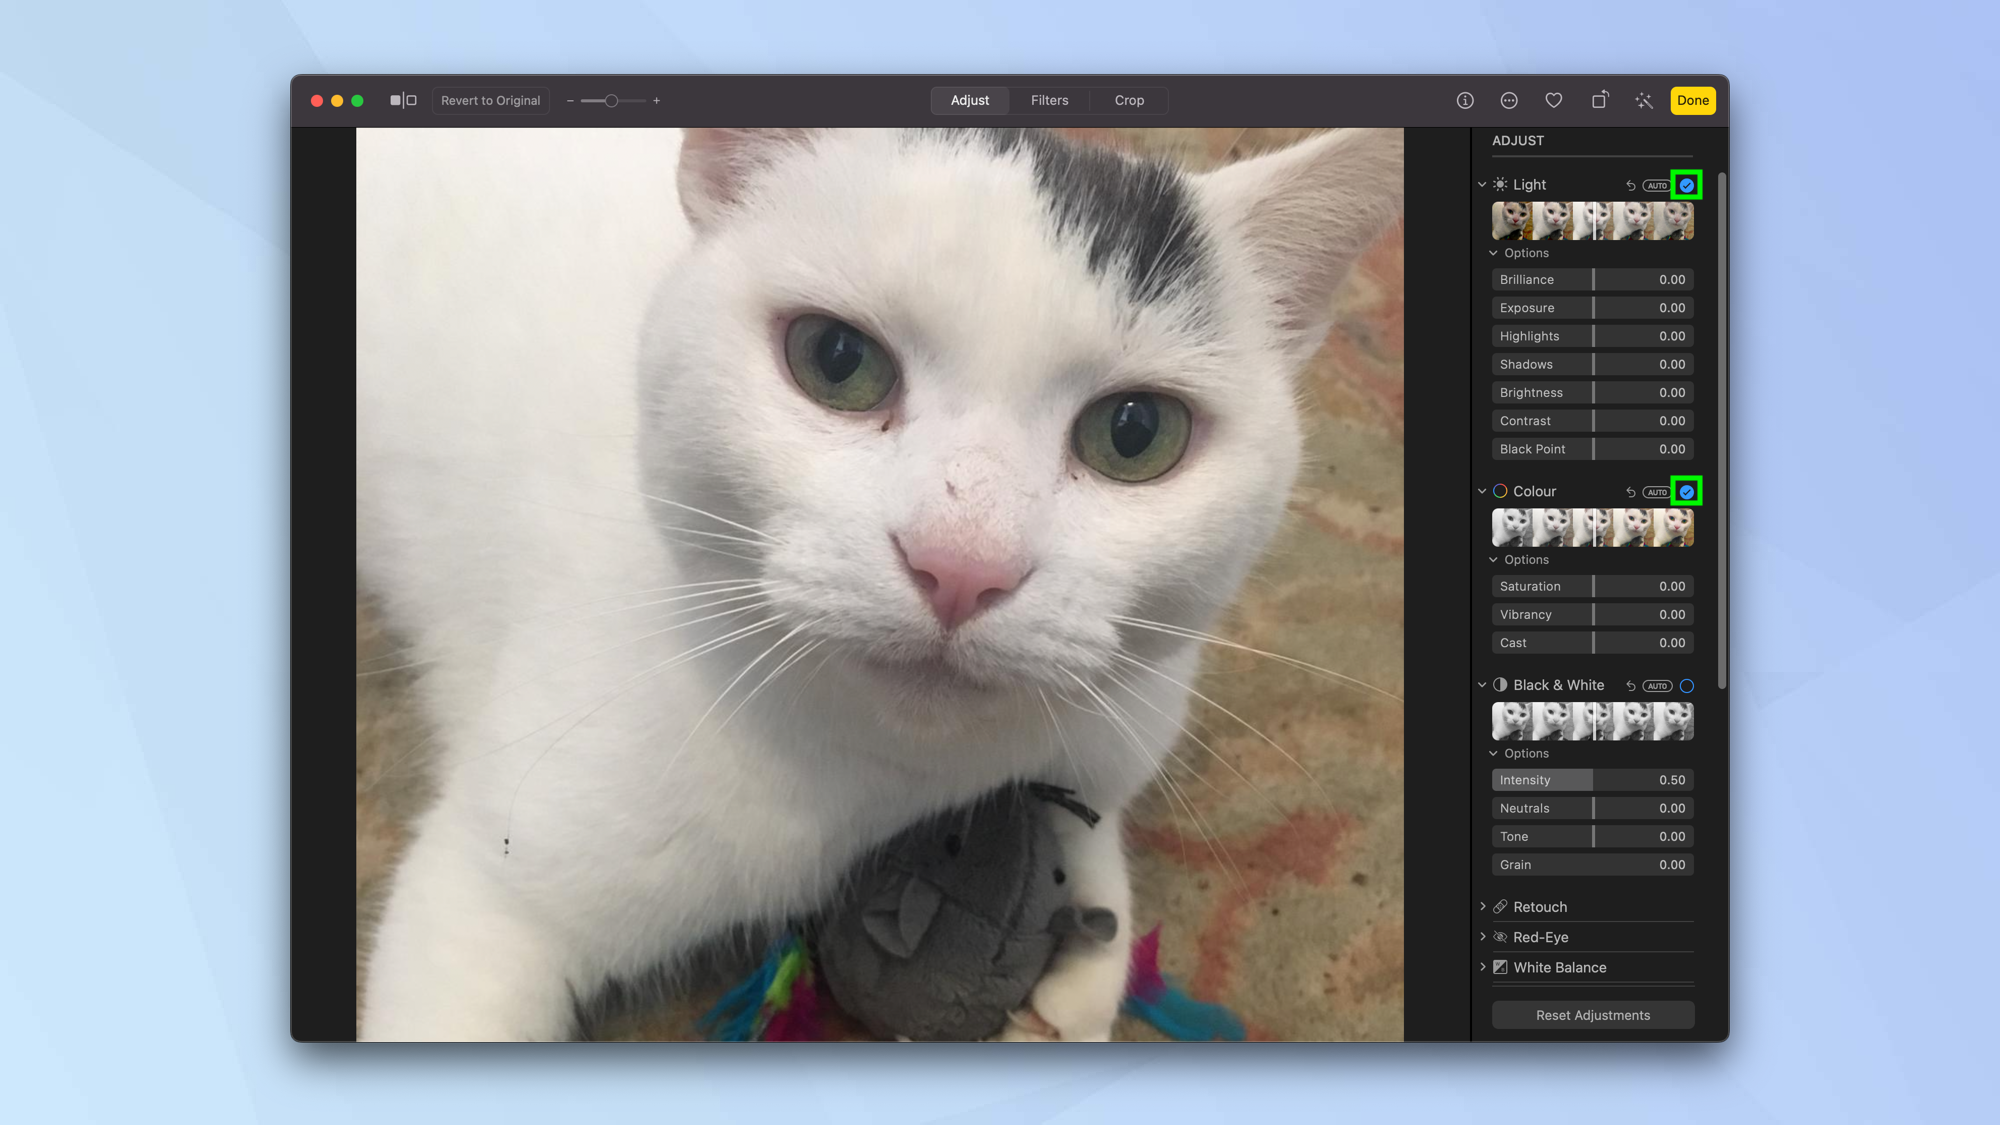
4. When adjustments have been made, a blue tick appears next to the alteration. You can deselect the blue tick to remove the changes (or click again to add them once more).
Retouch an image
If an image has any marks on it that you wish to remove, then reach for the retouch option.
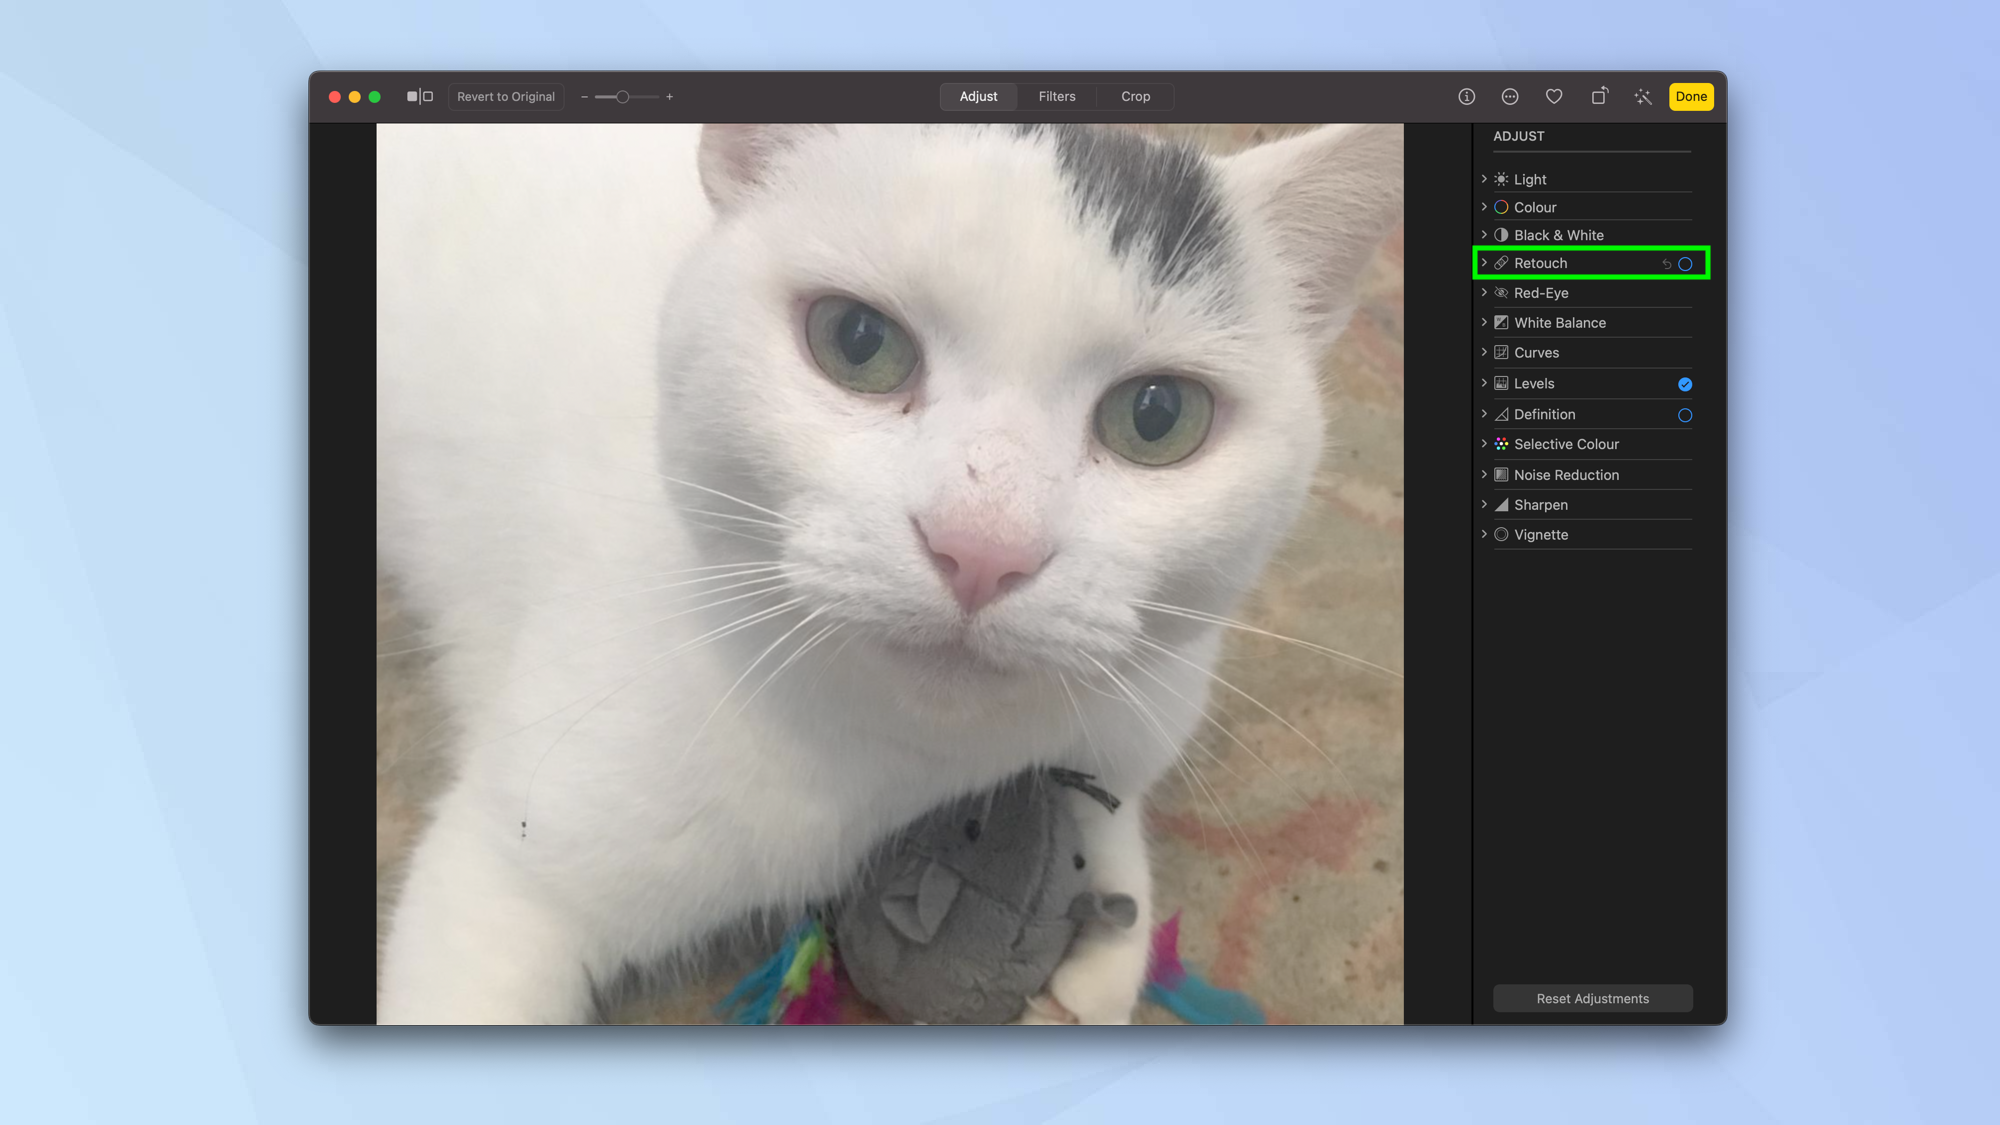
1. Select the arrow next to Retouch in the Adjust panel.
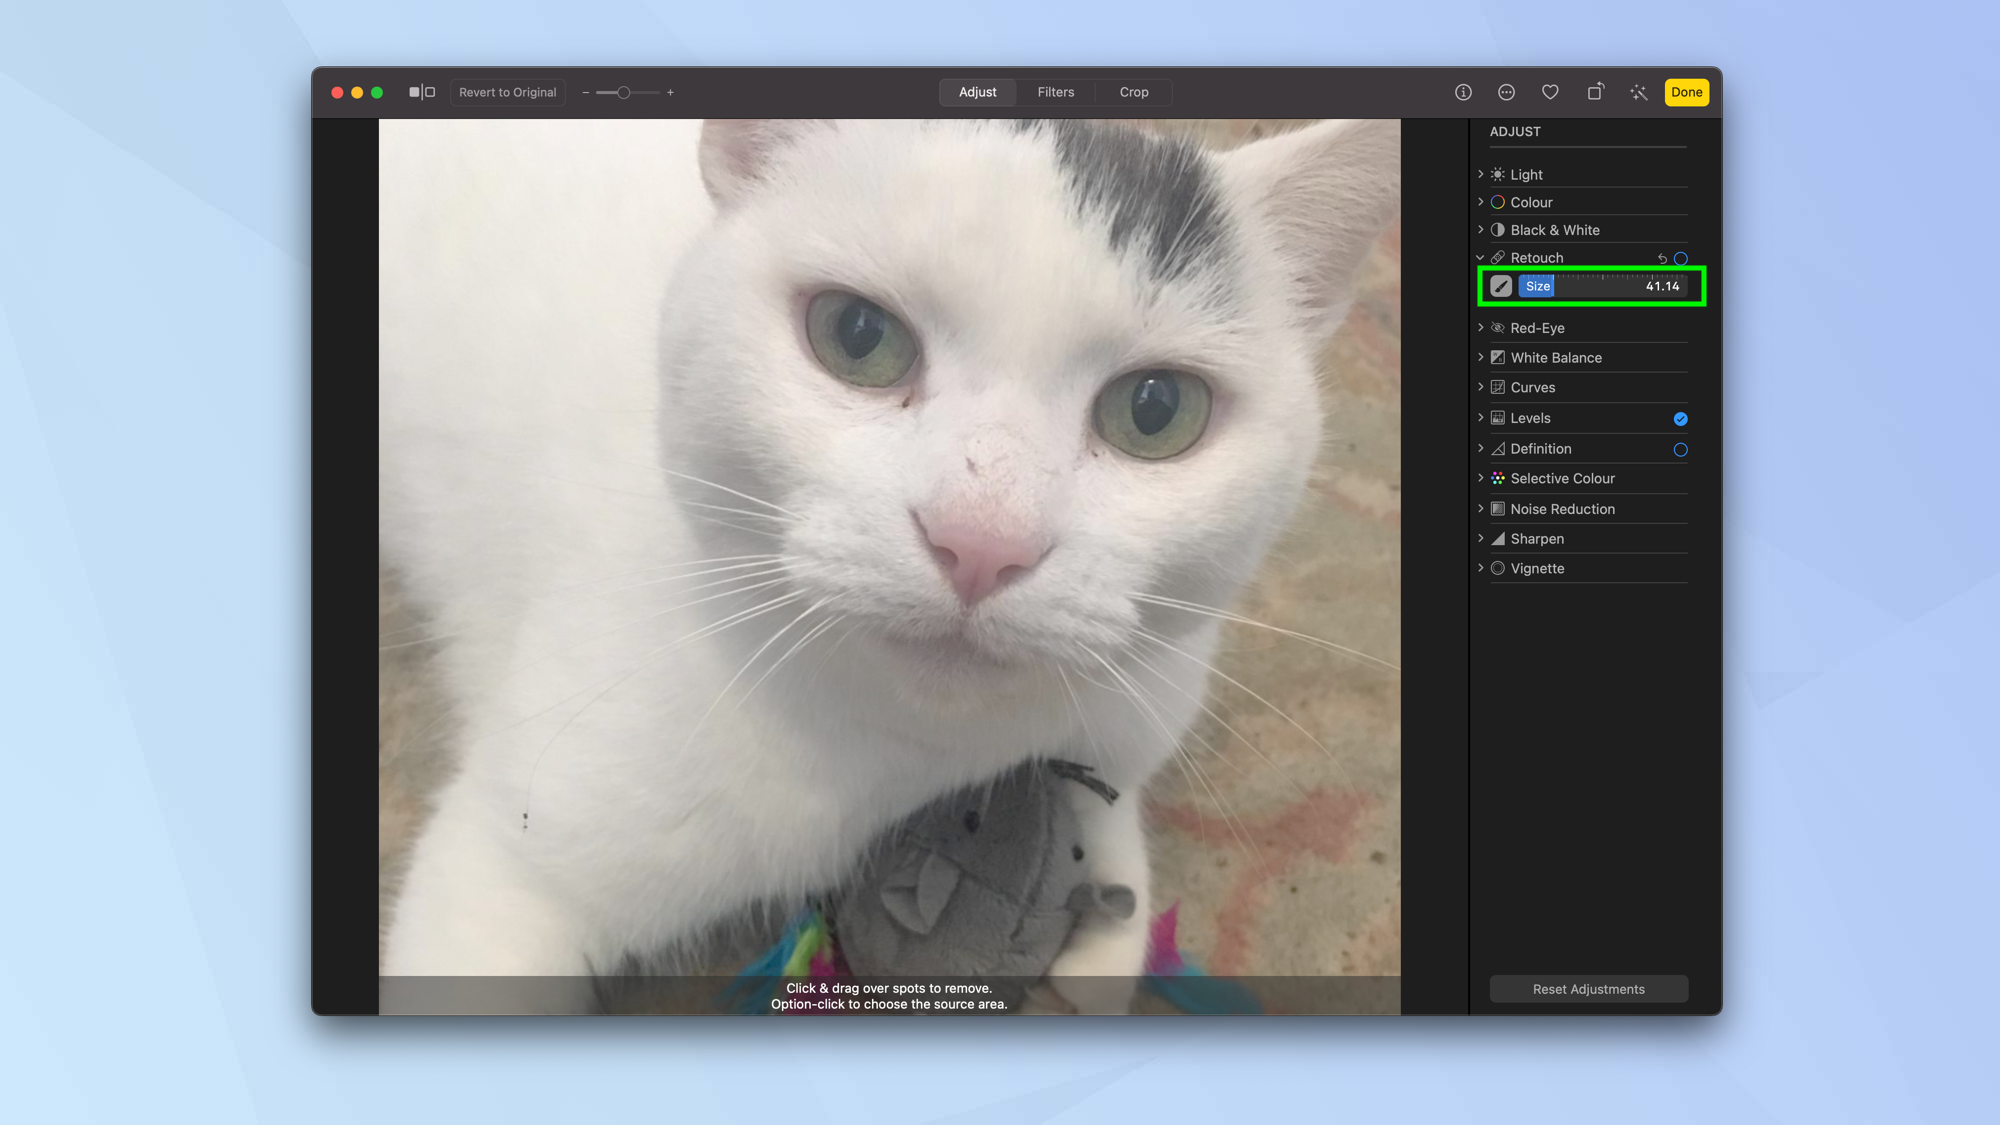
2. Drag the slider to determine how big you want your retouch brush to be.
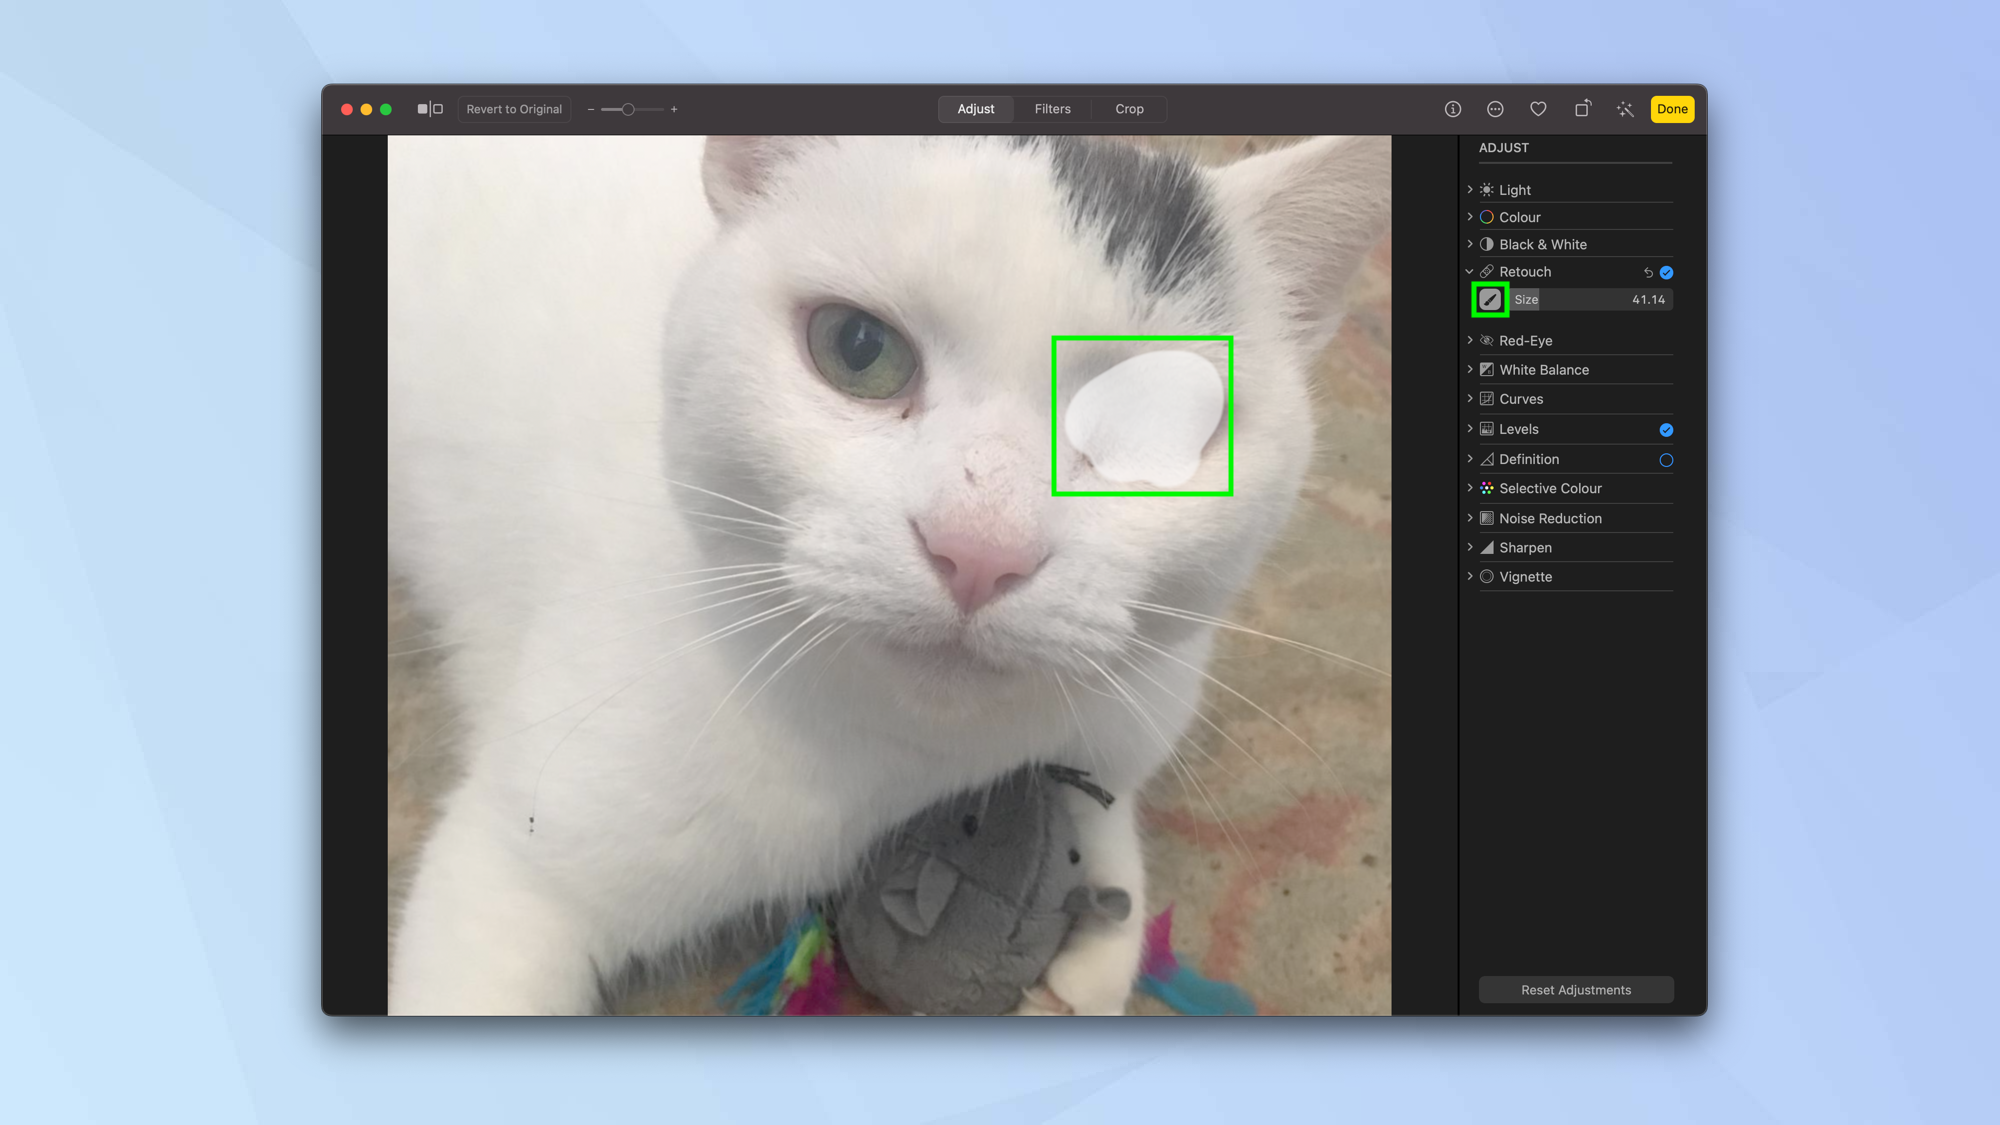
3. Click the brush icon and then use the brush to click the blemished area of your image. The Photos app will attempt to remove the mark. You can also hold down the Option key and select an area of the image that you want to use as a brush and use that to iron out a blemish.
Alter the white balance of an image
You can make images look more white and natural by stripping away unusual color casts. This can work well if, for instance, you've taken an indoor shot and the yellow tungsten light of the room has made the photo look too warm.
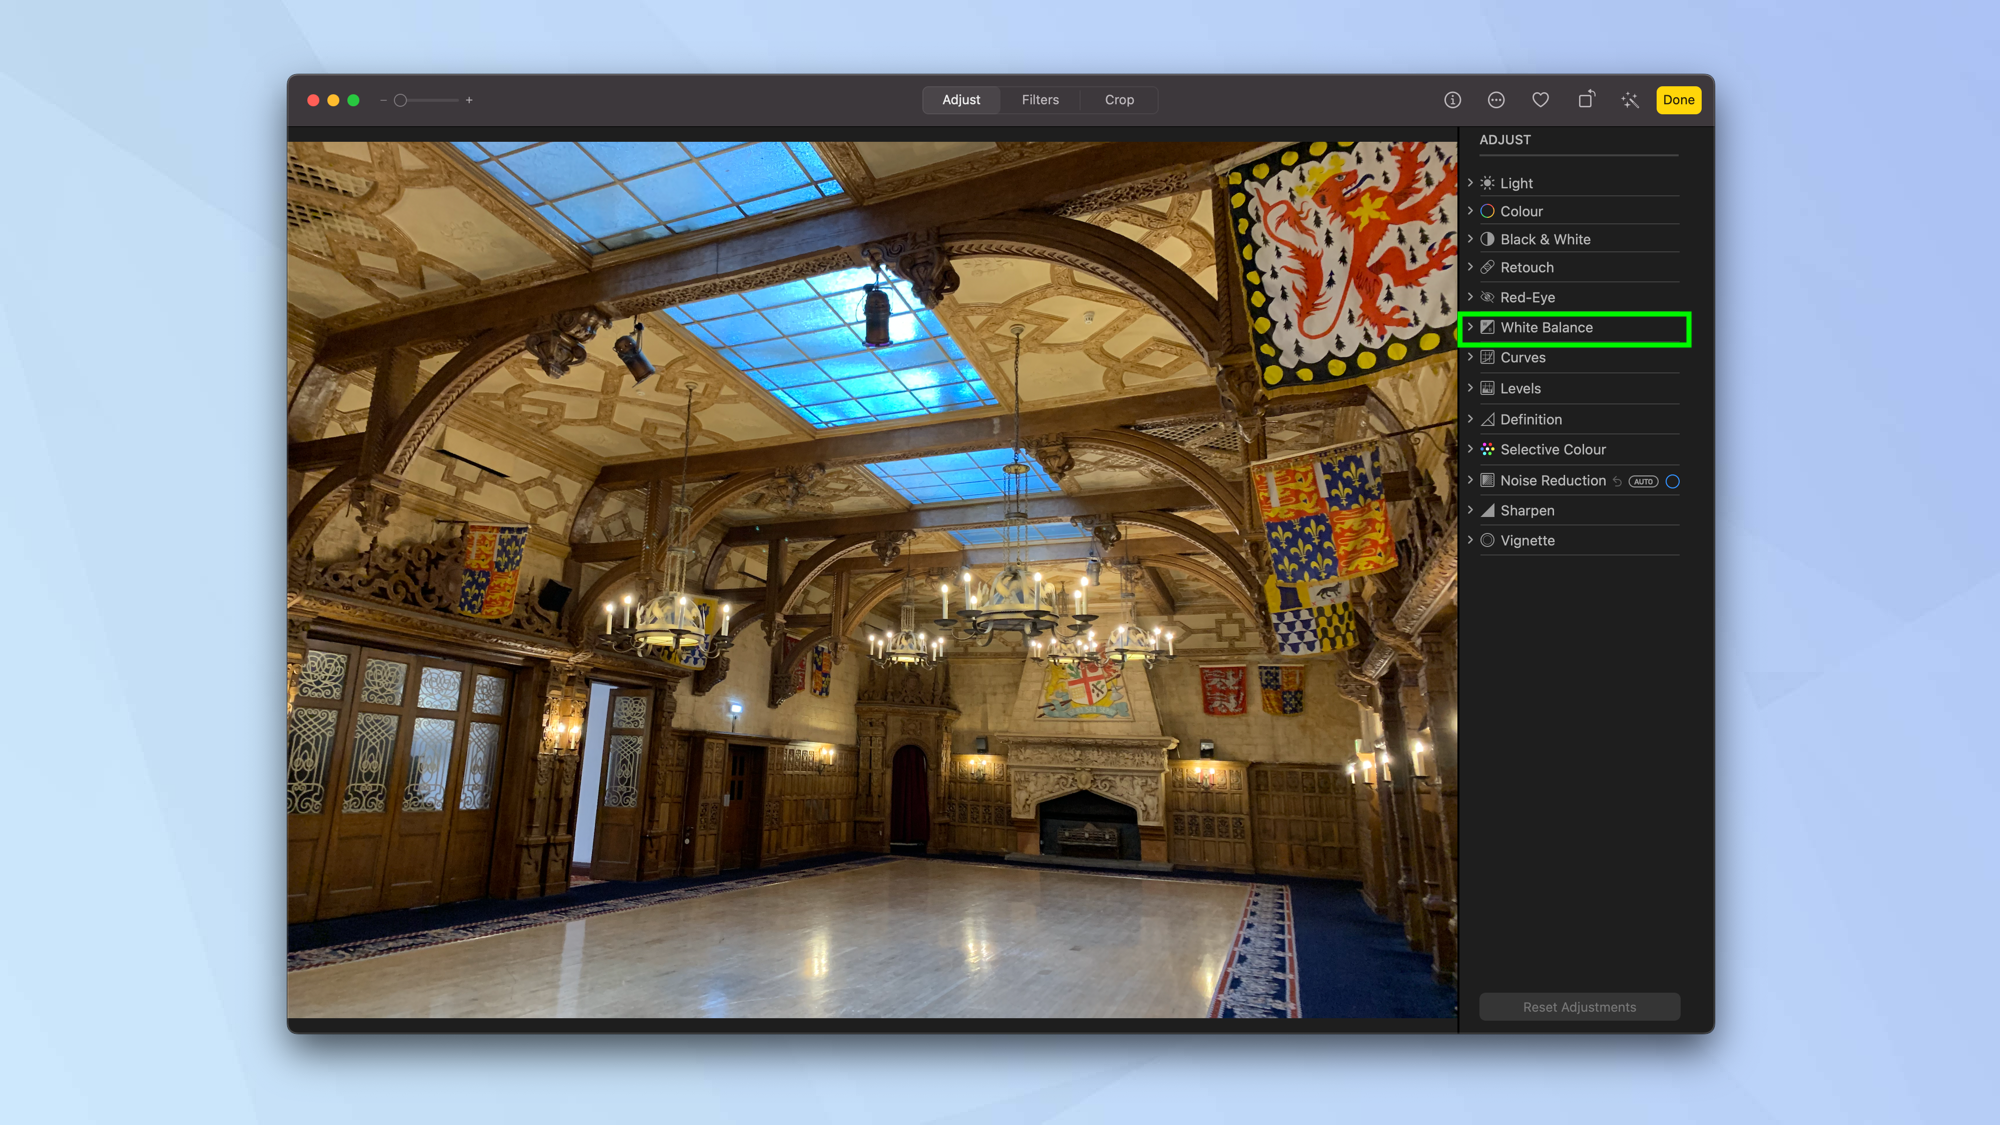
1. Select the arrow next to White Balance in the Adjust panel.
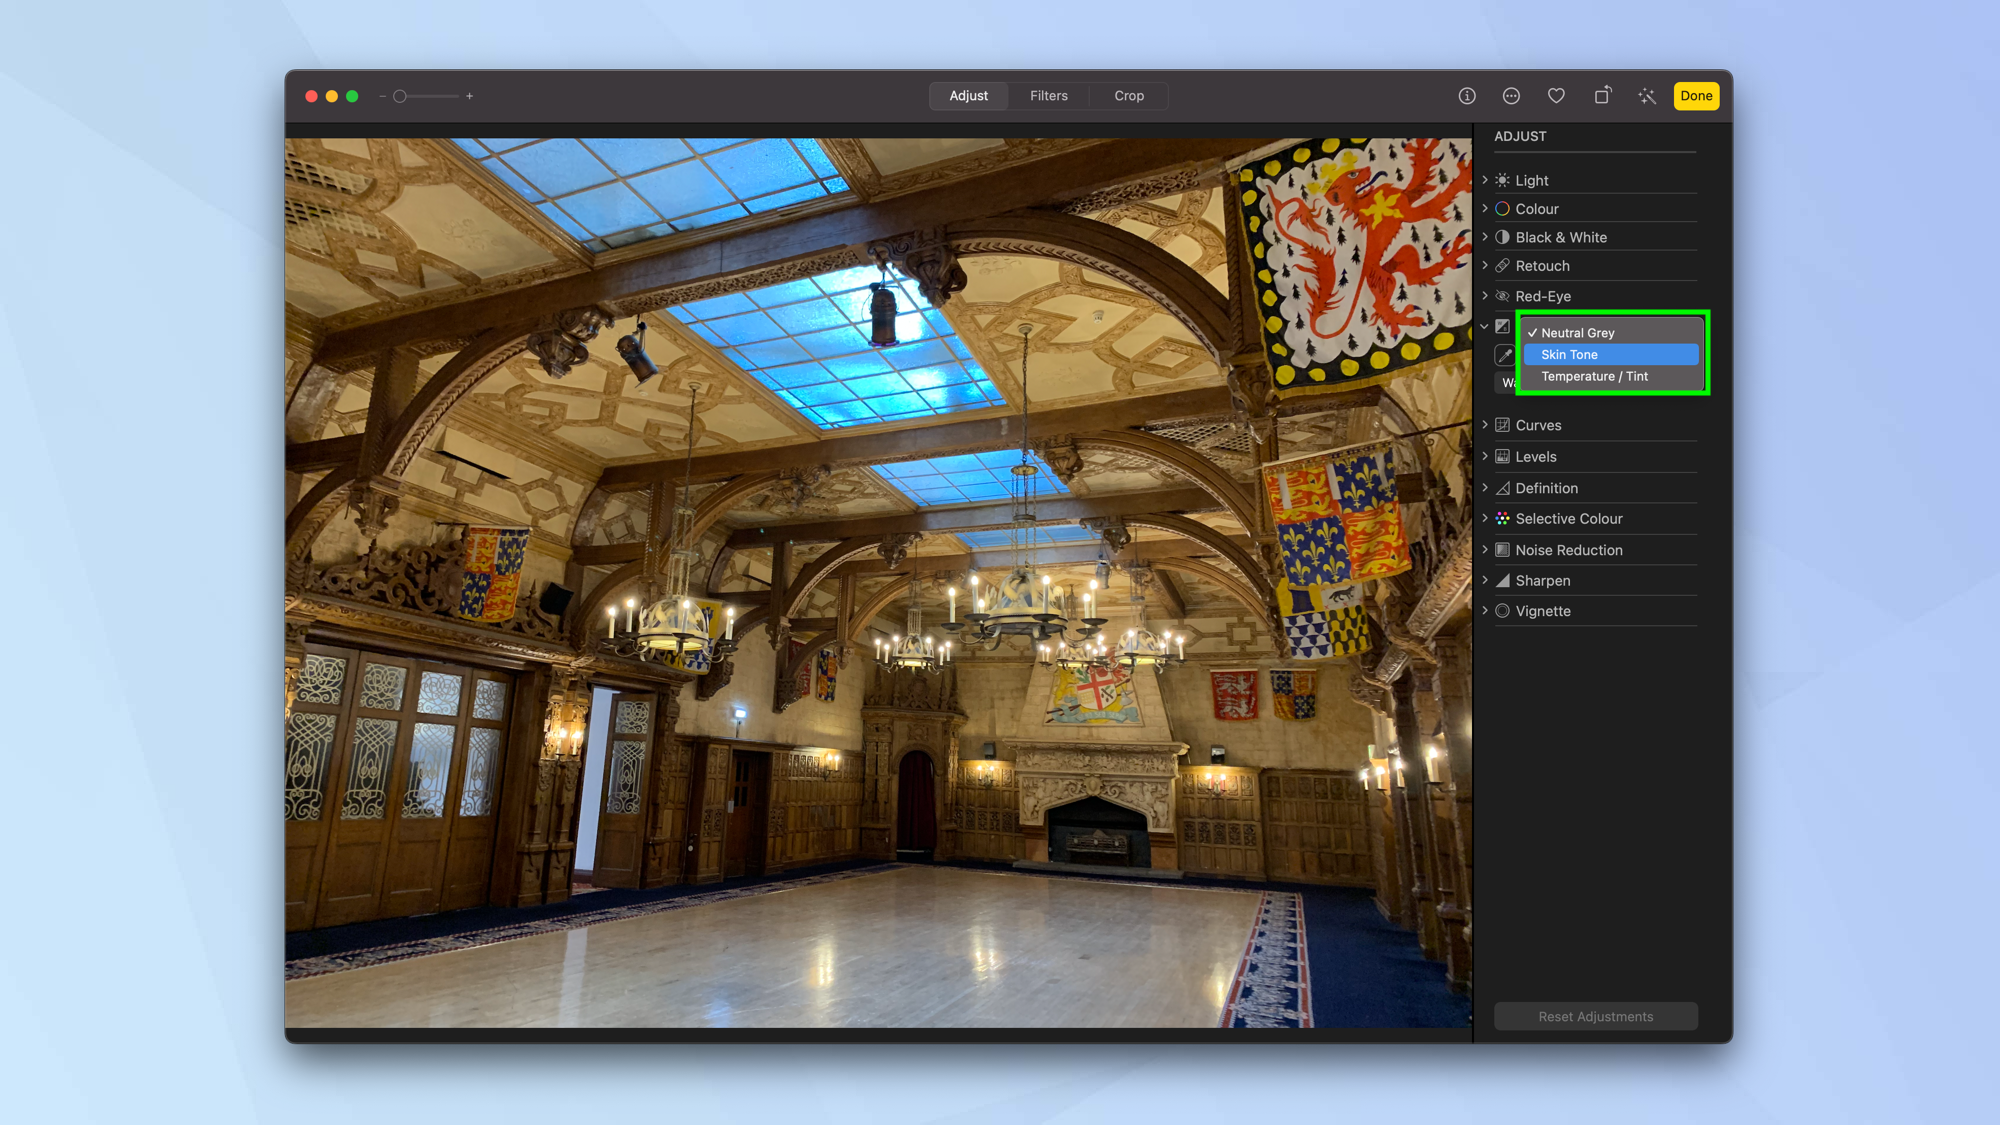
2. Click the dropdown menu to choose the type of white balance you want.
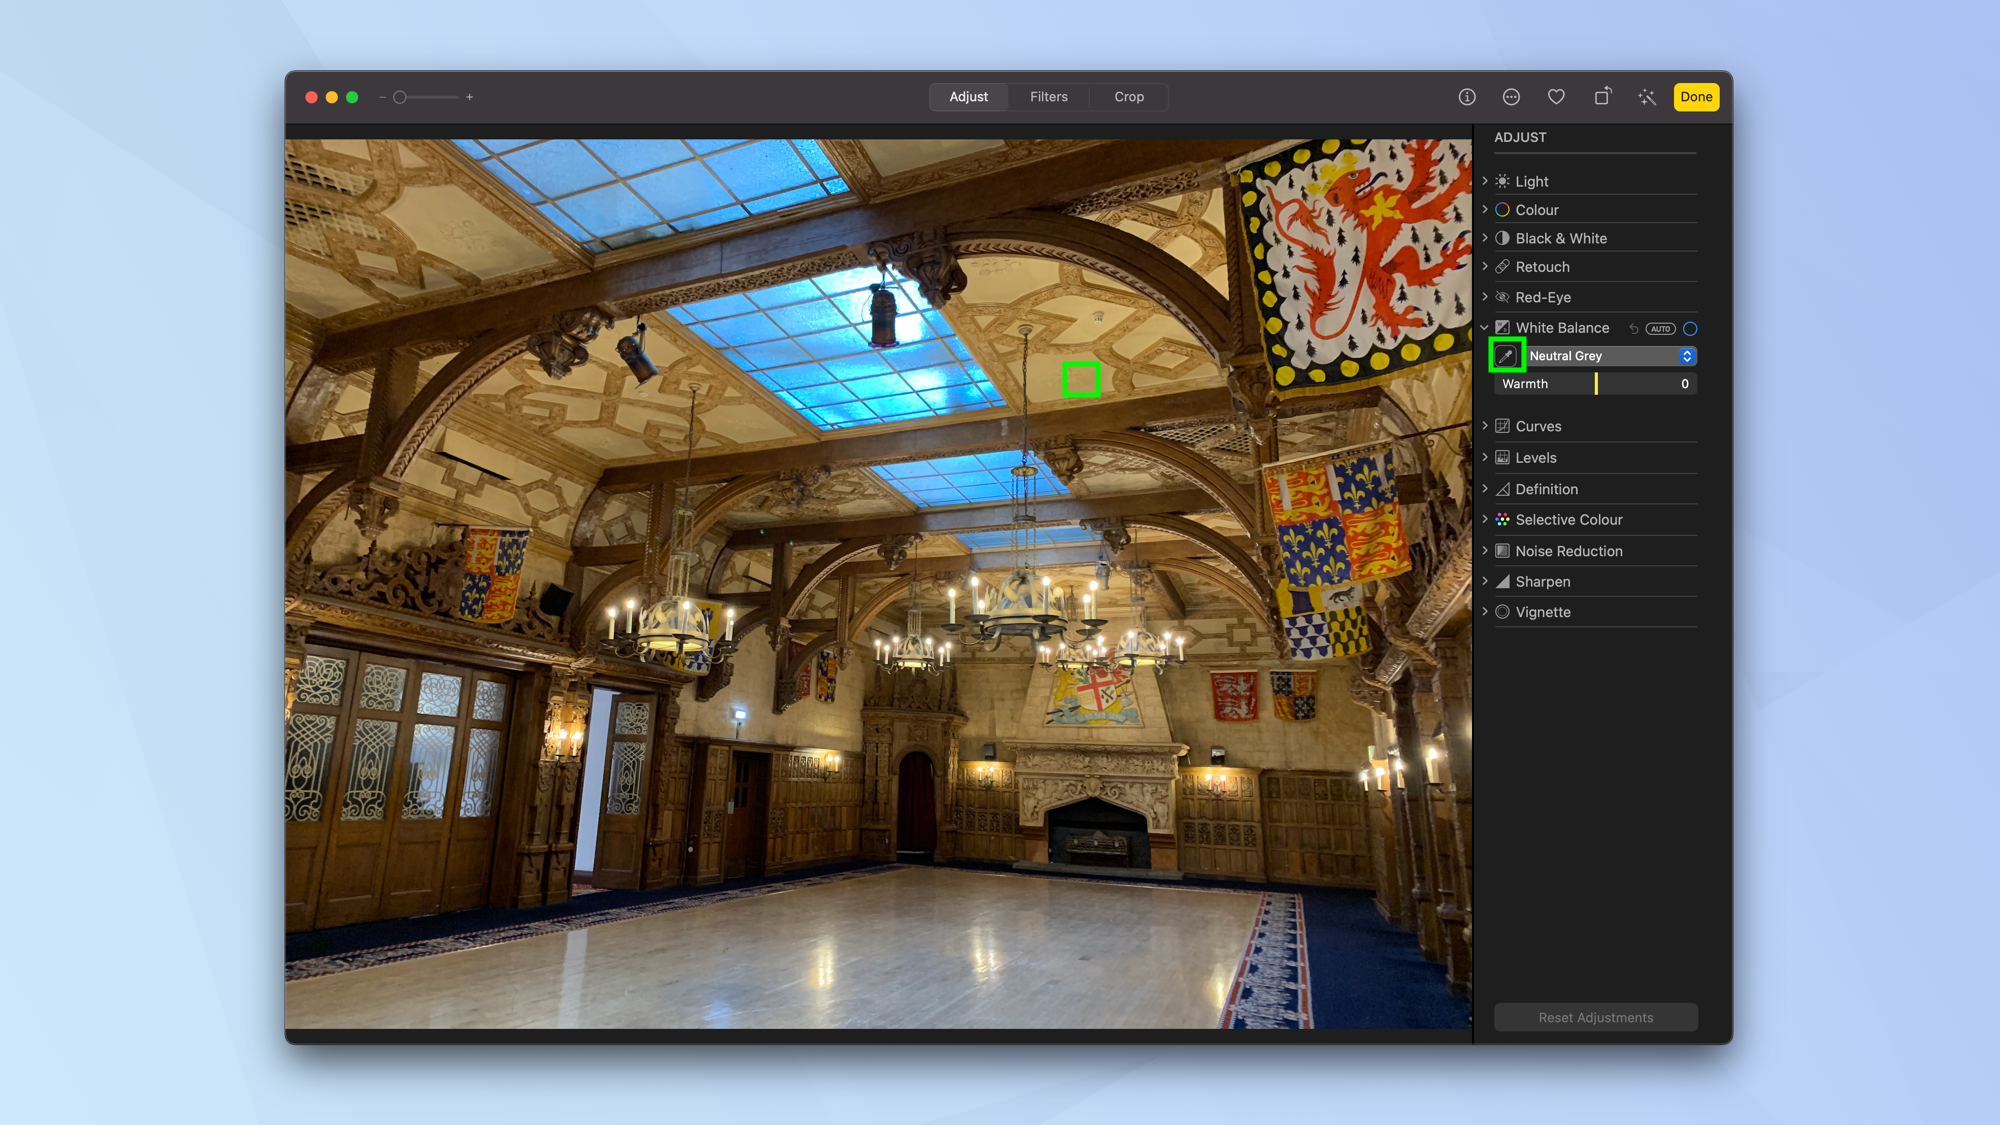
3. Select the Eyedropper icon and click any specific colors in the image you want to alter.
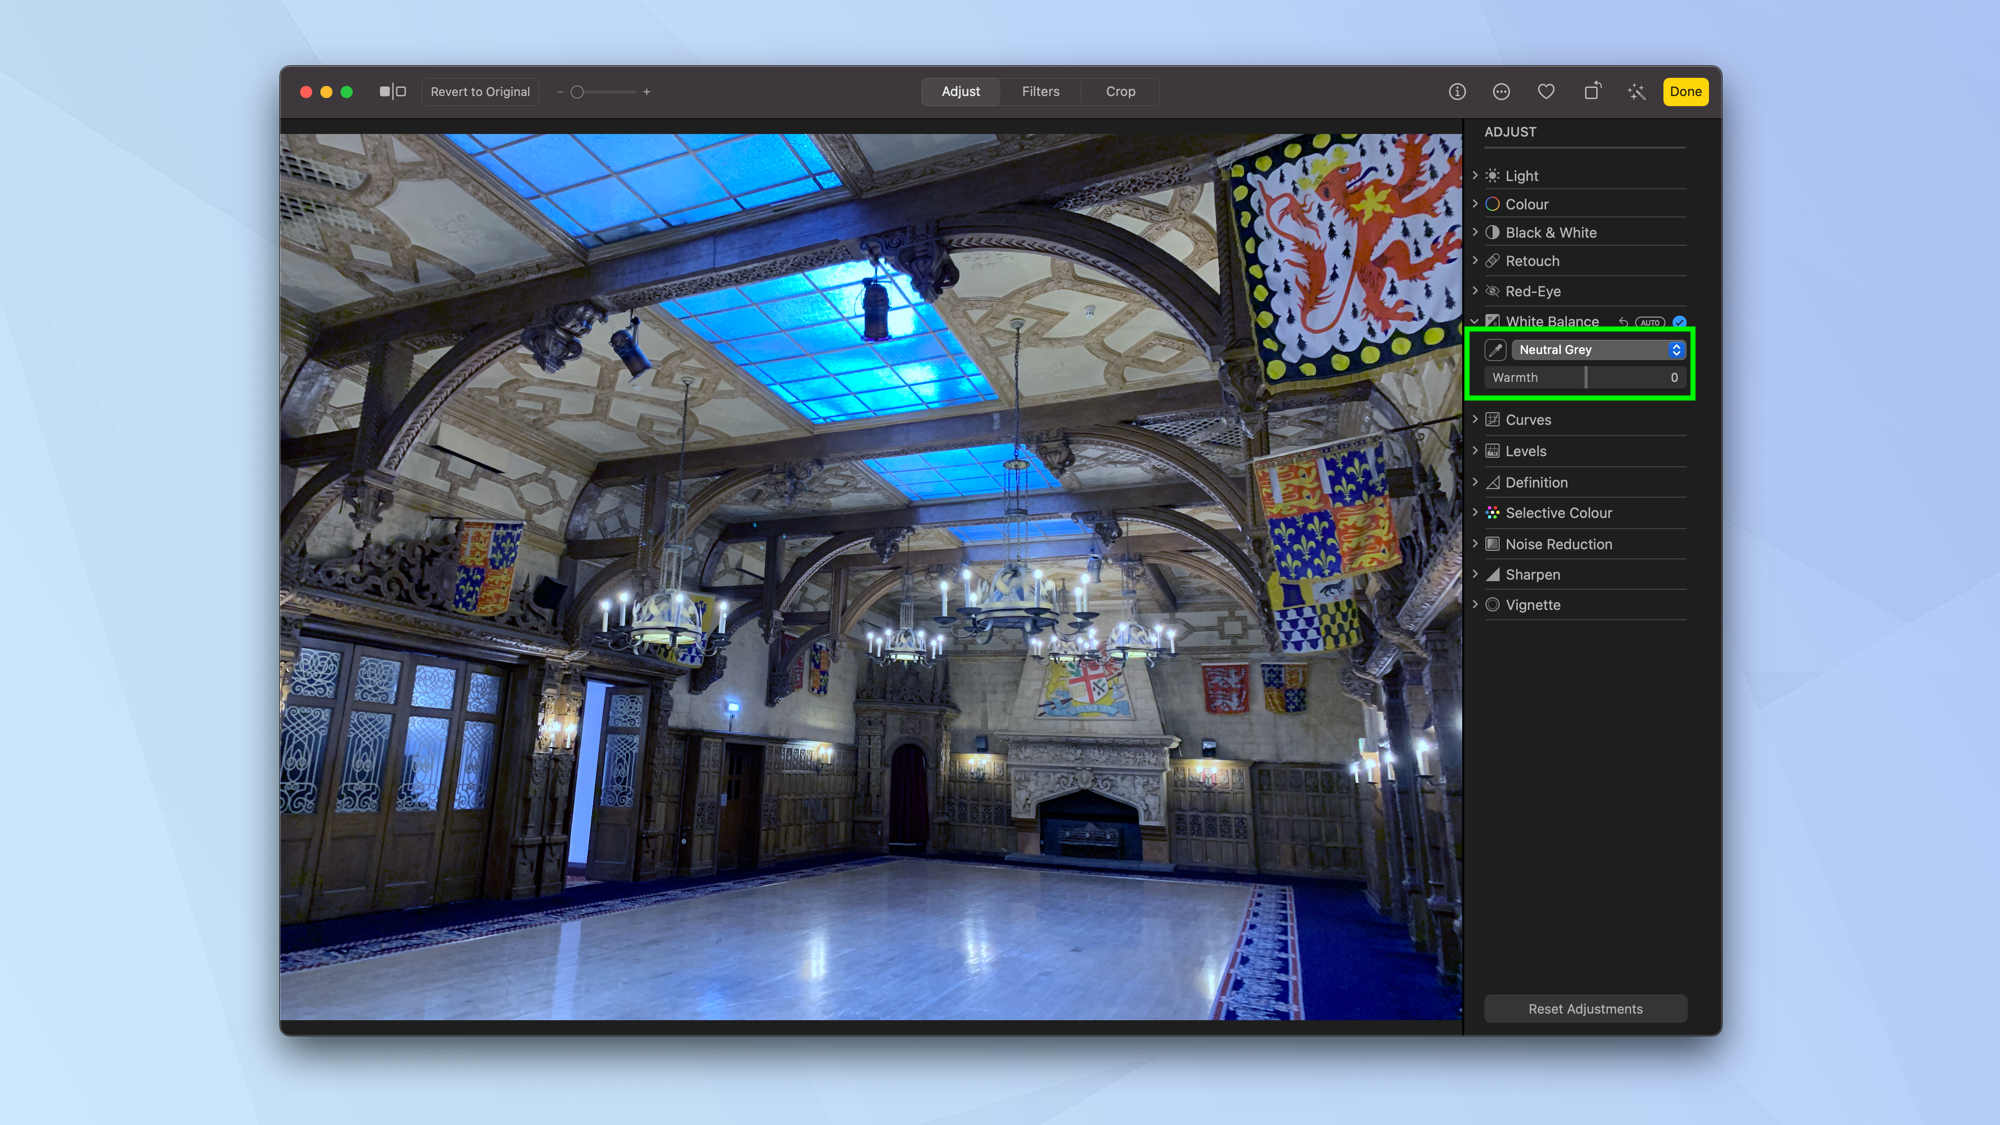
4. Use the sliders to make adjustments to the white balance. For example, when using Neutral Gray, you can alter the warmth of the grey areas or you can use Skin Tone to adjust the warmth of the skin tones in an image. By selecting a neutral grey area, you can use the temperature/tint option to make adjustments.
Adjust the curves of an image
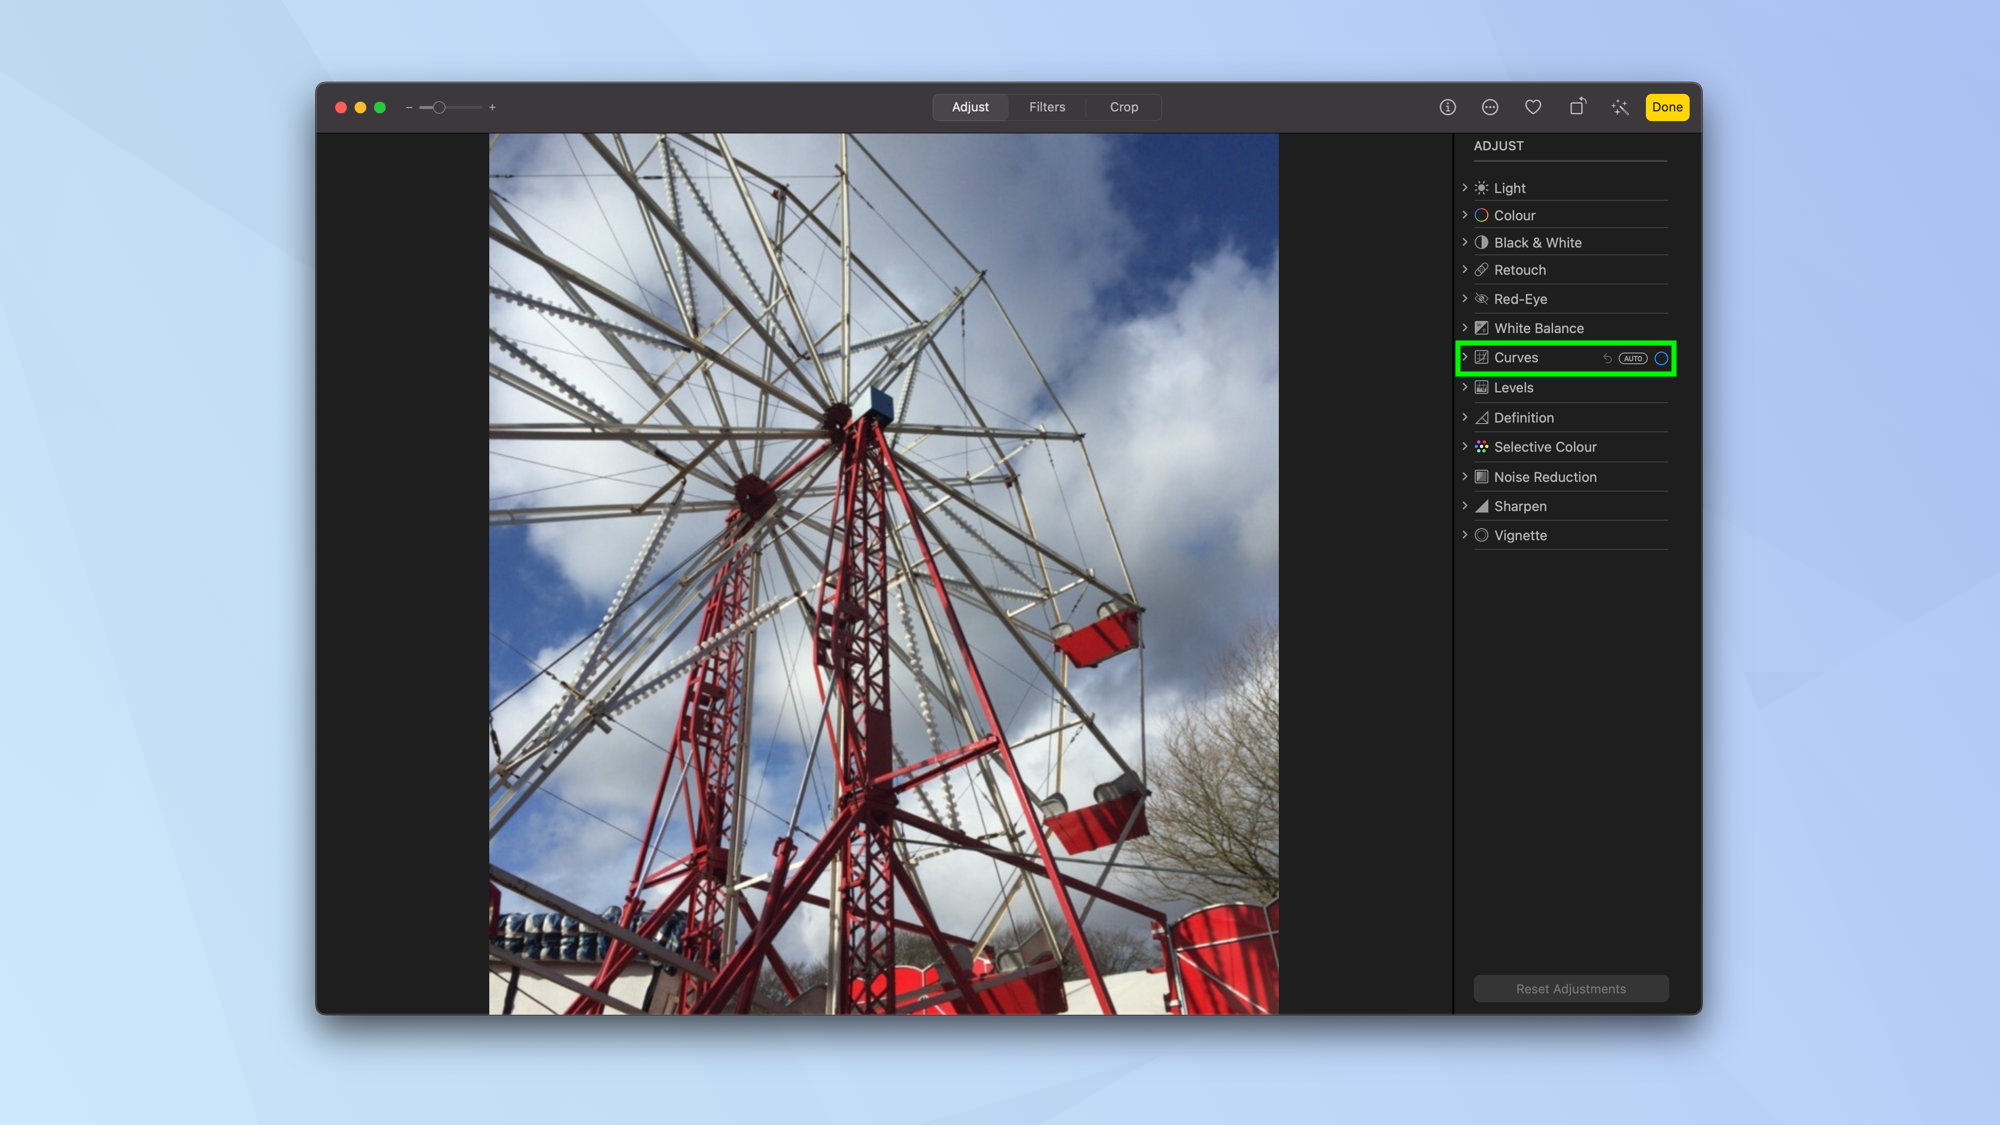
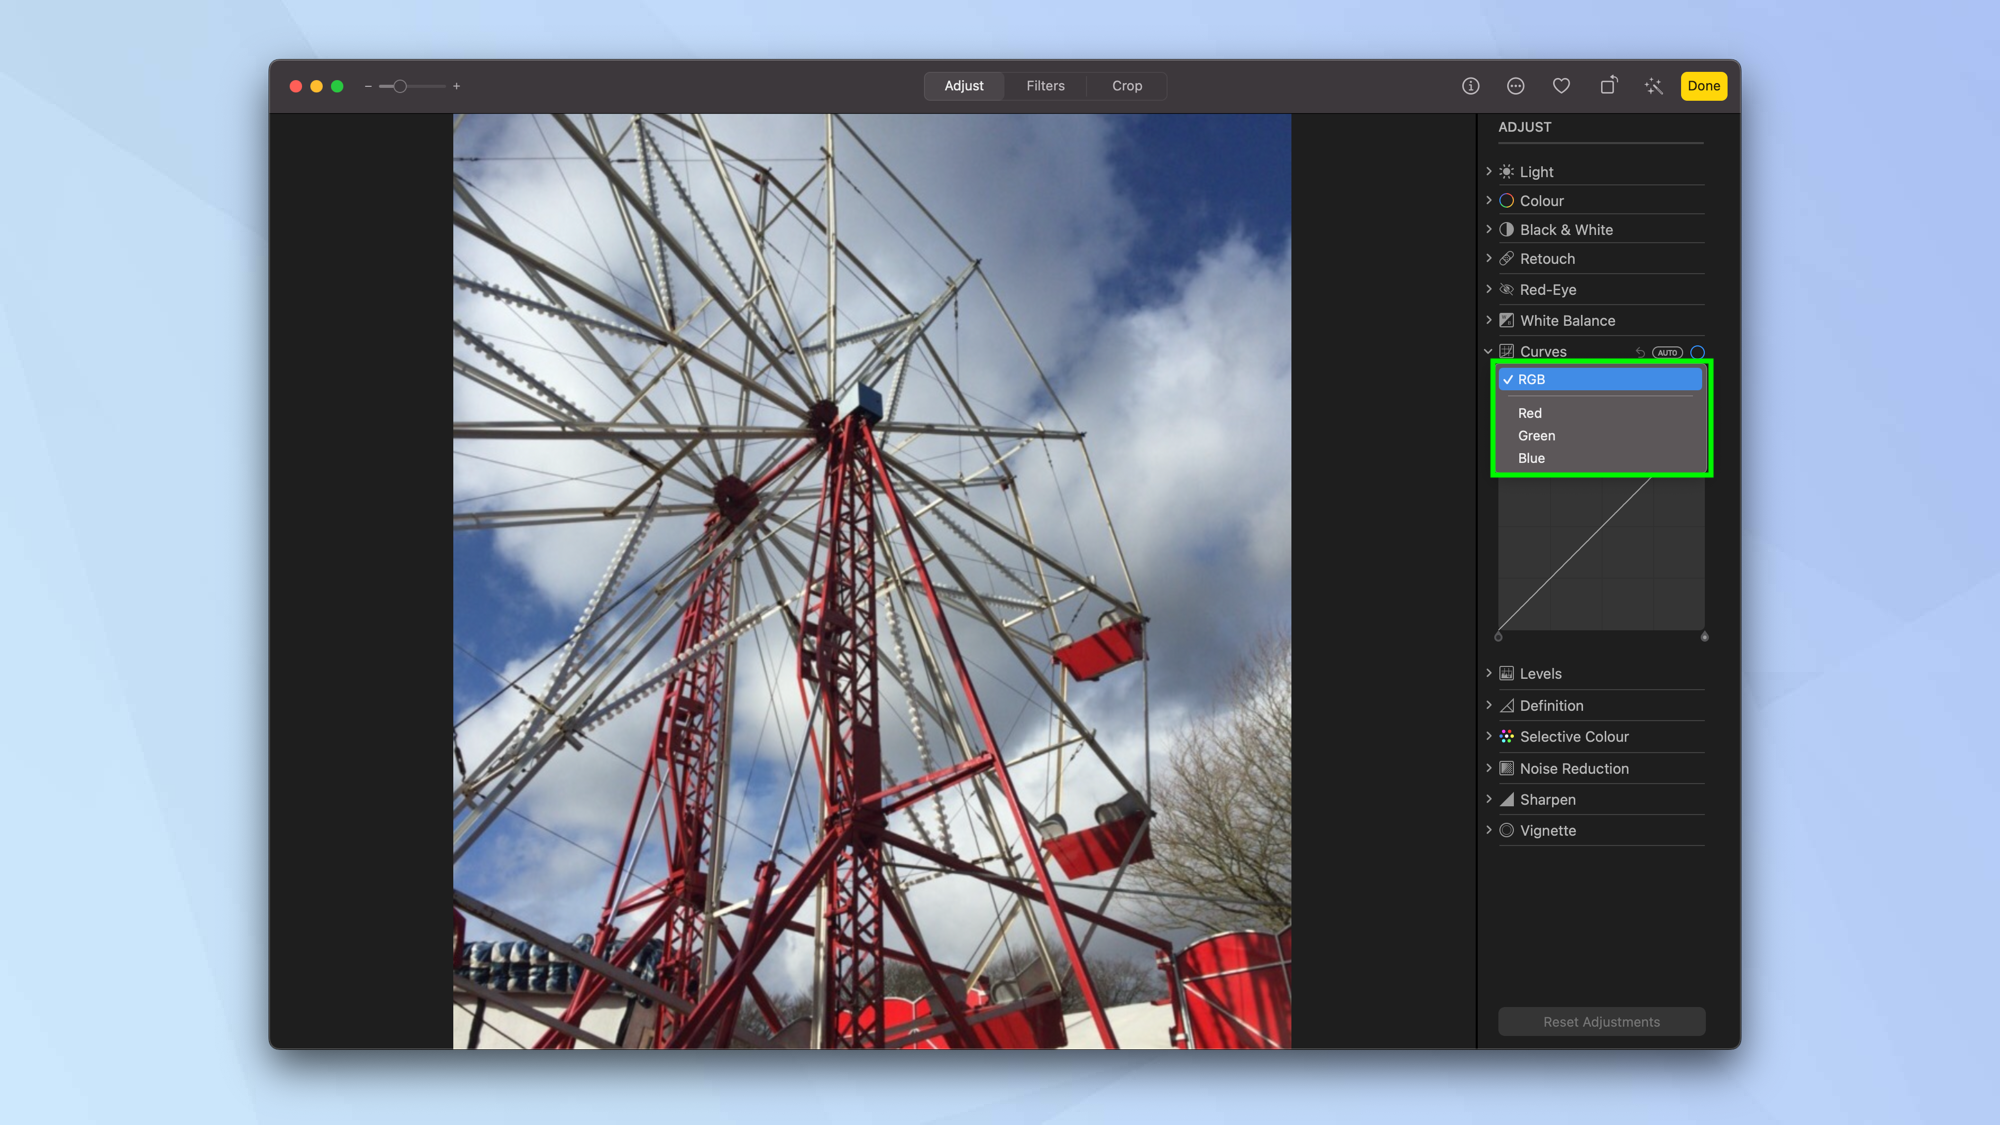
Curves don't mean that you're going to be altering the shapes contained with your image. Rather, it refers to the brightness and contrast of your images. It's a complicated but useful function that lets you isolate red, green and blue if you wish or make changes to the black, gray or white points.
1. Select the arrow next to Curves in the Adjust panel.
2. Click the dropdown menu then select RGB, Red, Green or Blue. This will allow you to make automatic adjustments. You will just need to click the Auto button to ensure they take effect.
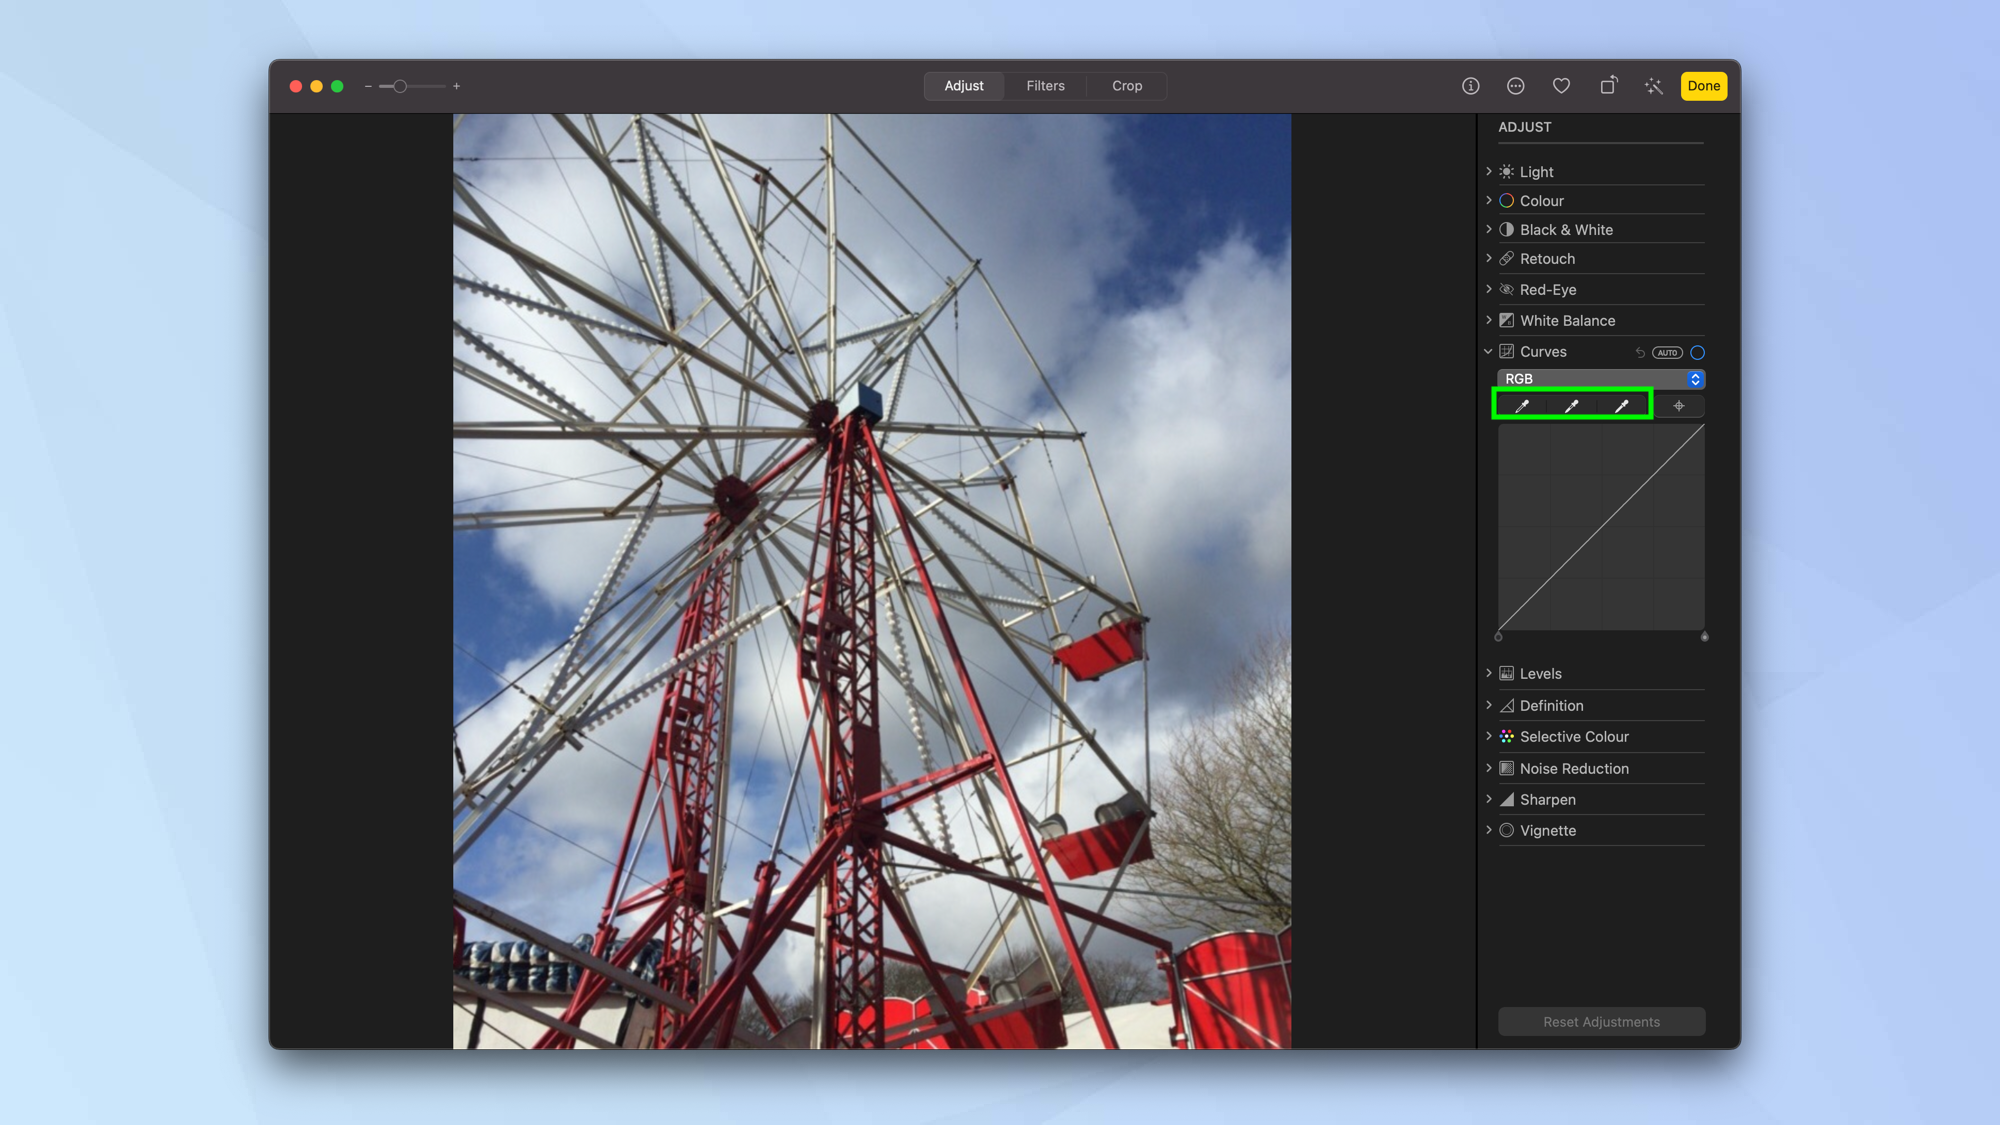
3. You will also see a set of Eyedropper icons that let you set the black, gray and white points. Select the relevant Eyedropper icon and click the part of the image that best suits that point. For example, selecting Black Point will let you adjust the point at which a black area becomes completely black.
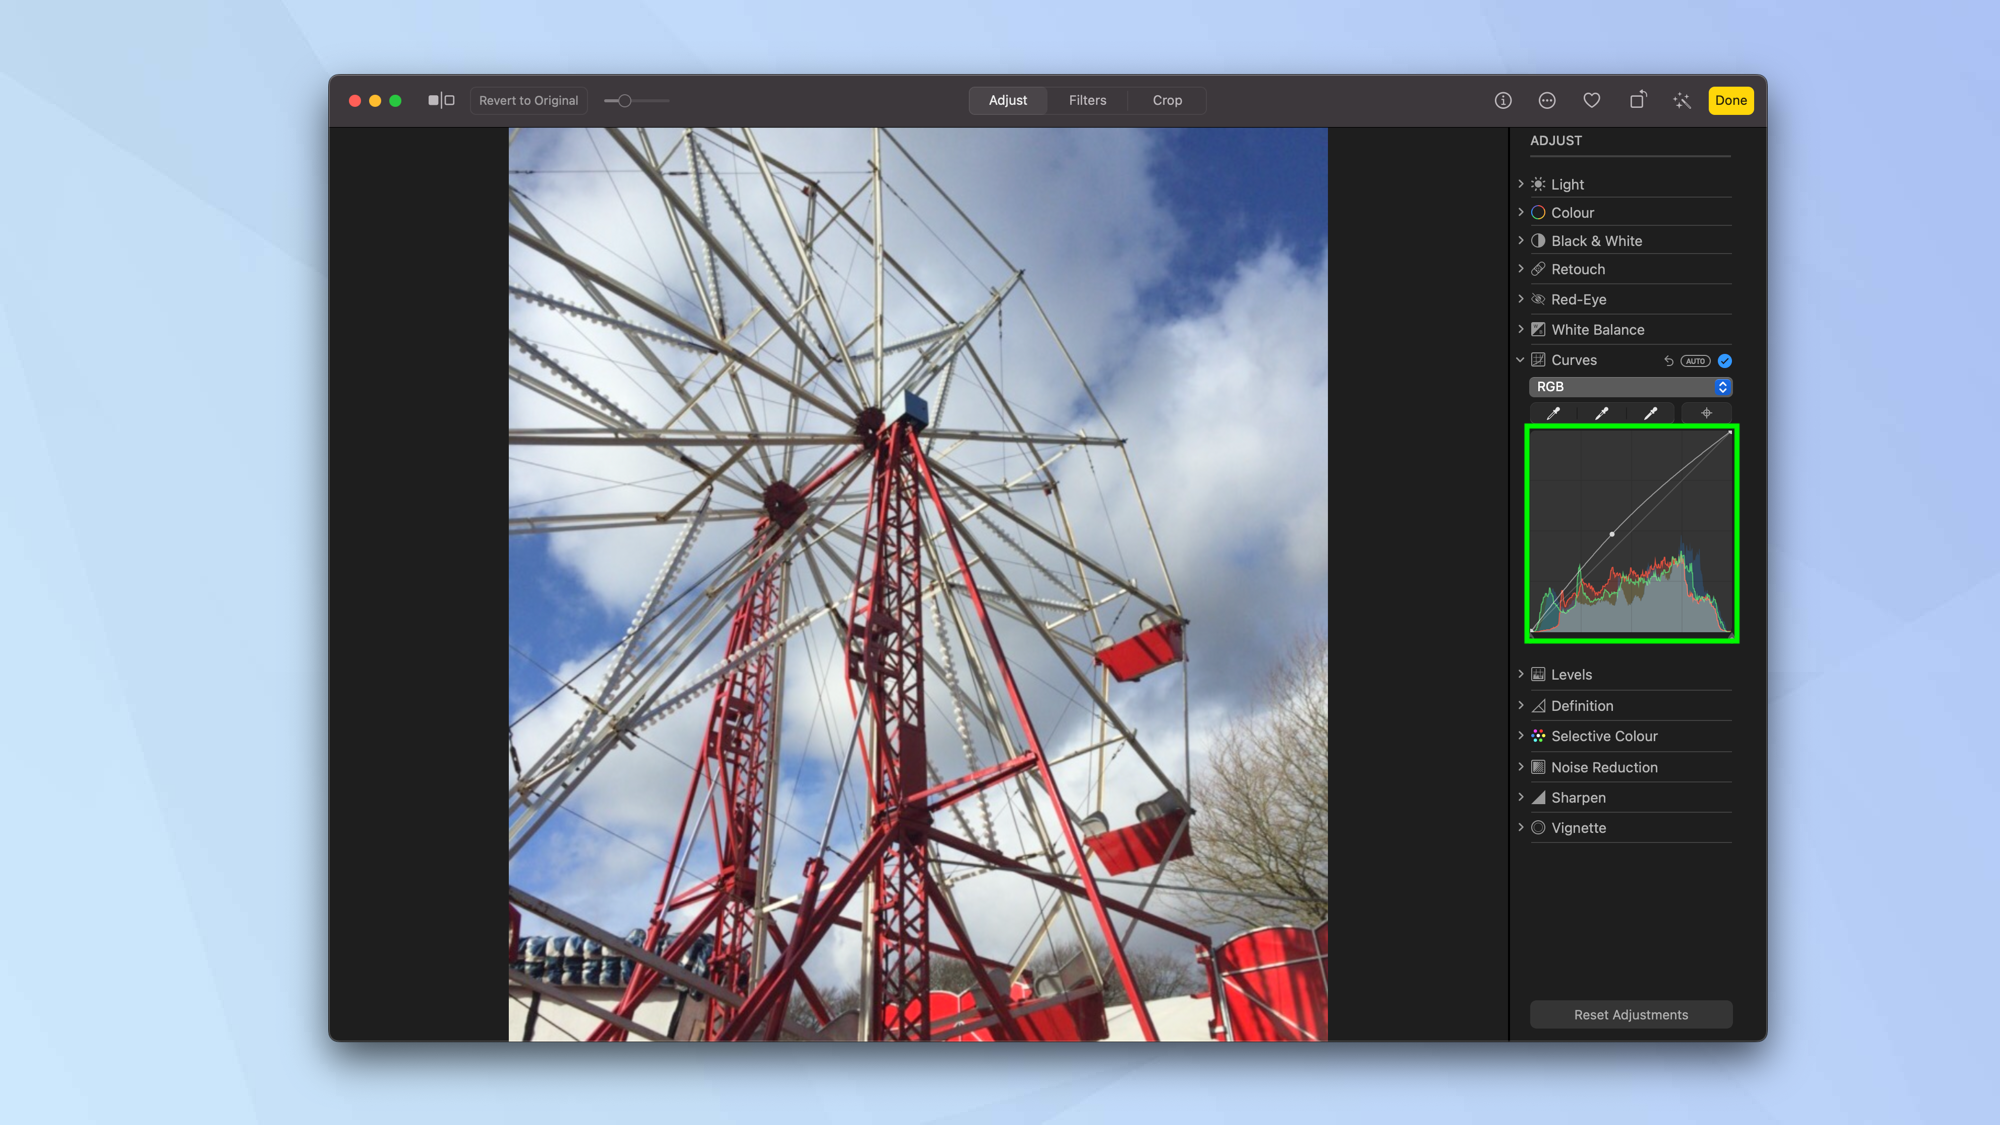
4. You can also click the Add Points button then choose a color in the image to set a point on the curve. By dragging the curve, you can see brightness and contrast changes before your eyes.
Adjust the levels of an image
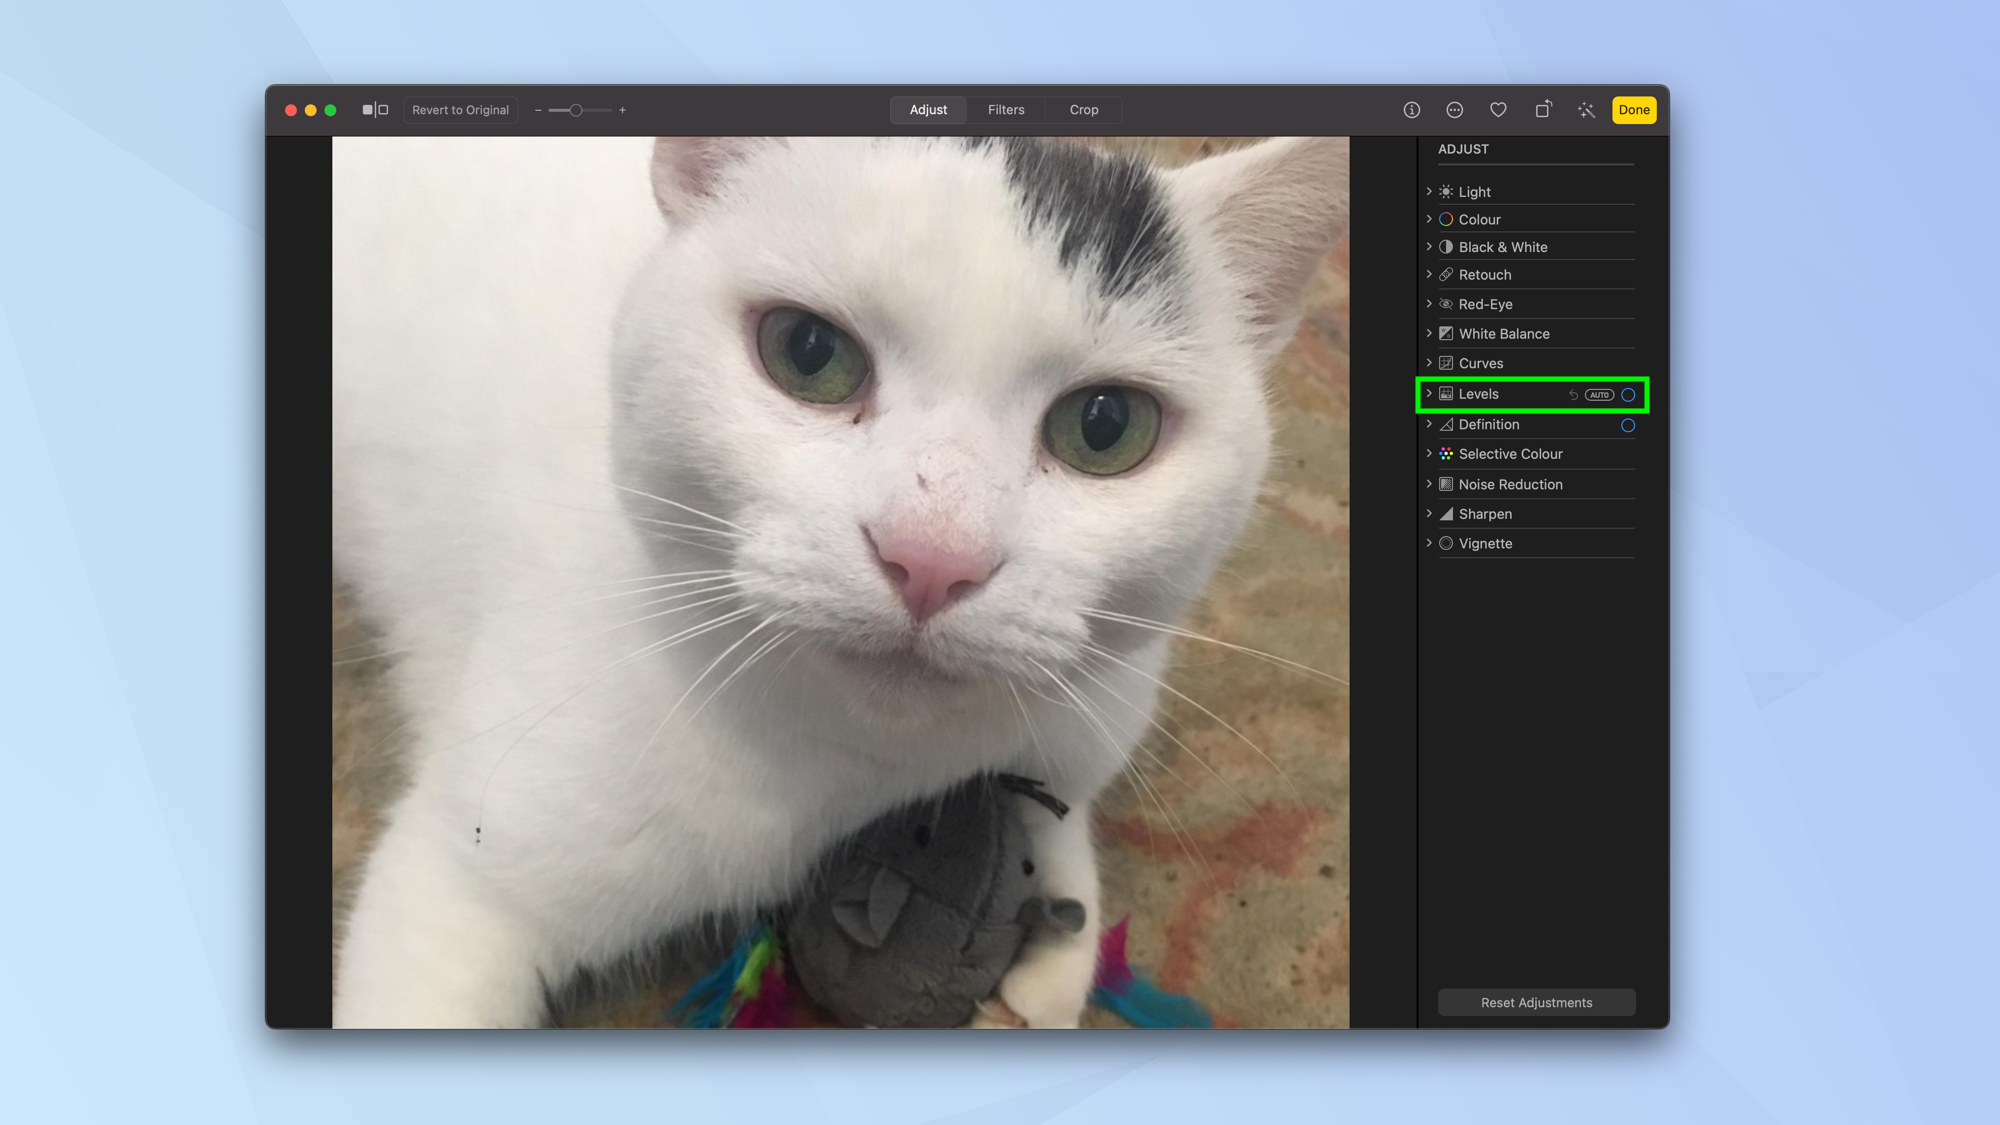
Levels is similar to Curves in that lets you make tonal alterations to an image. You are able to make changes to the contrast and darken or lighten parts of the image while making modifications to the shadows, black point, white point, midtones and highlights. Color changes can also be made.
1. Select the arrow next to Levels in the Adjust panel.
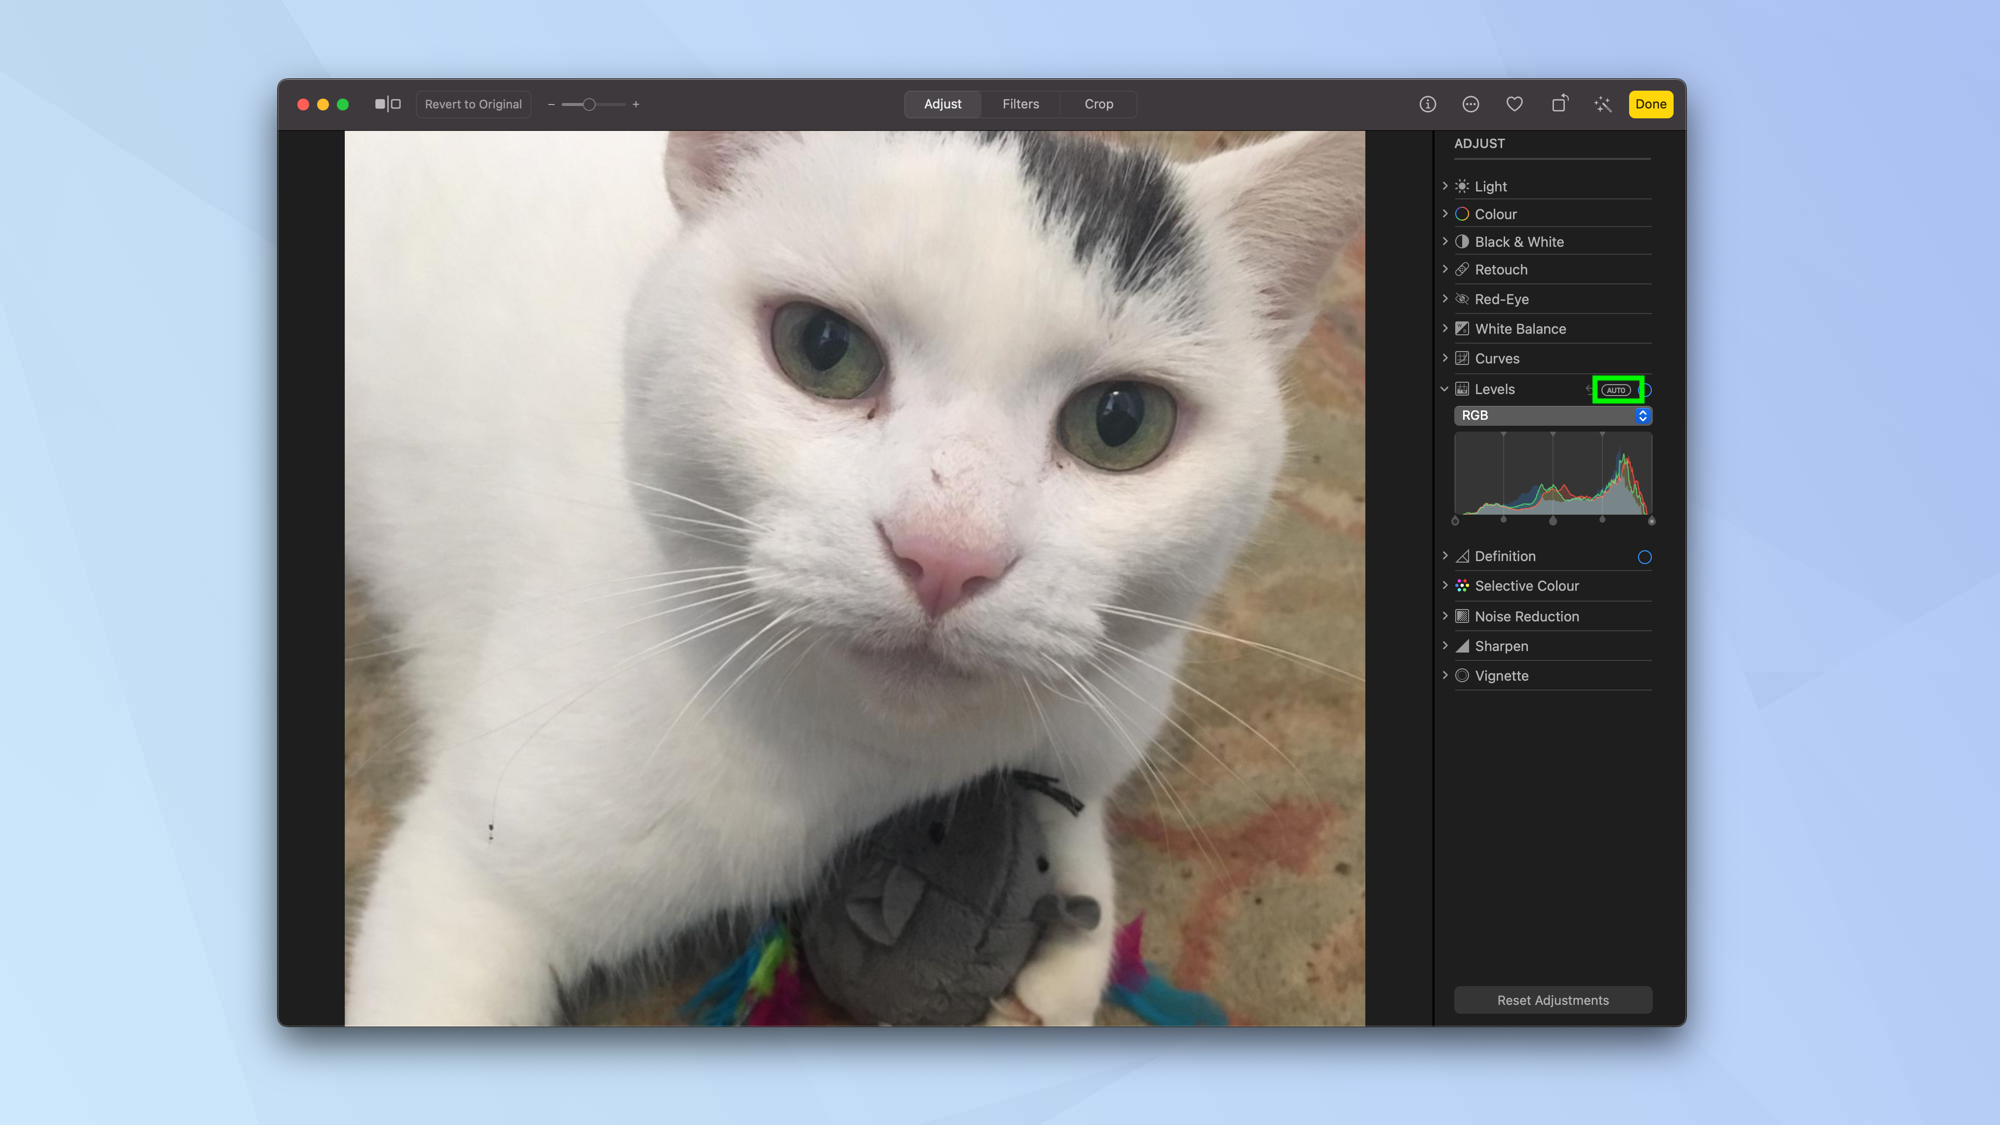
2. You could now click Auto and have the levels automatically adjusted according to how the Photos app believes they should be set.
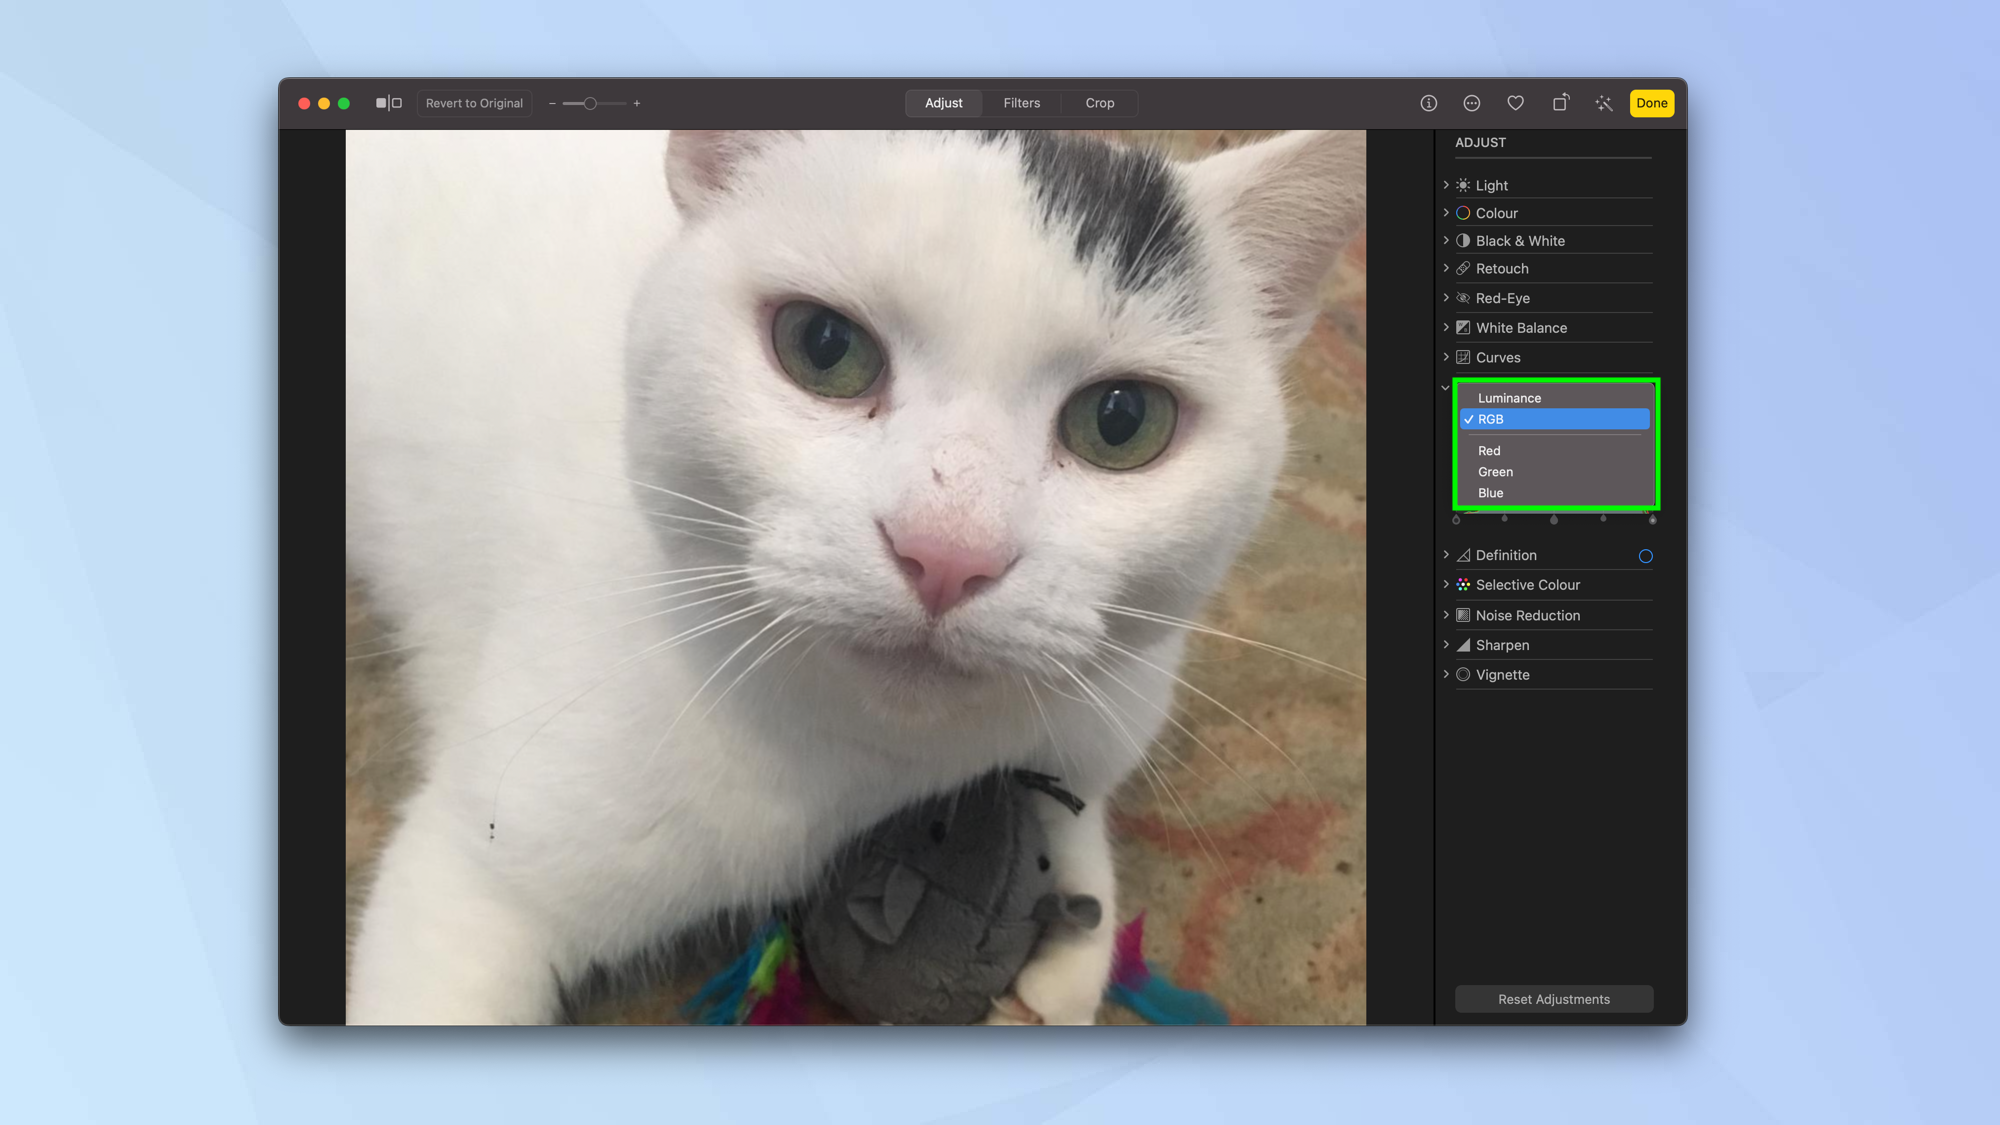
3. You can also click the dropdown menu and select Luminance, RGB, Red, Green or Blue. This will allow you to make automatic adjustments. You will just need to click the Auto button to ensure they take effect.
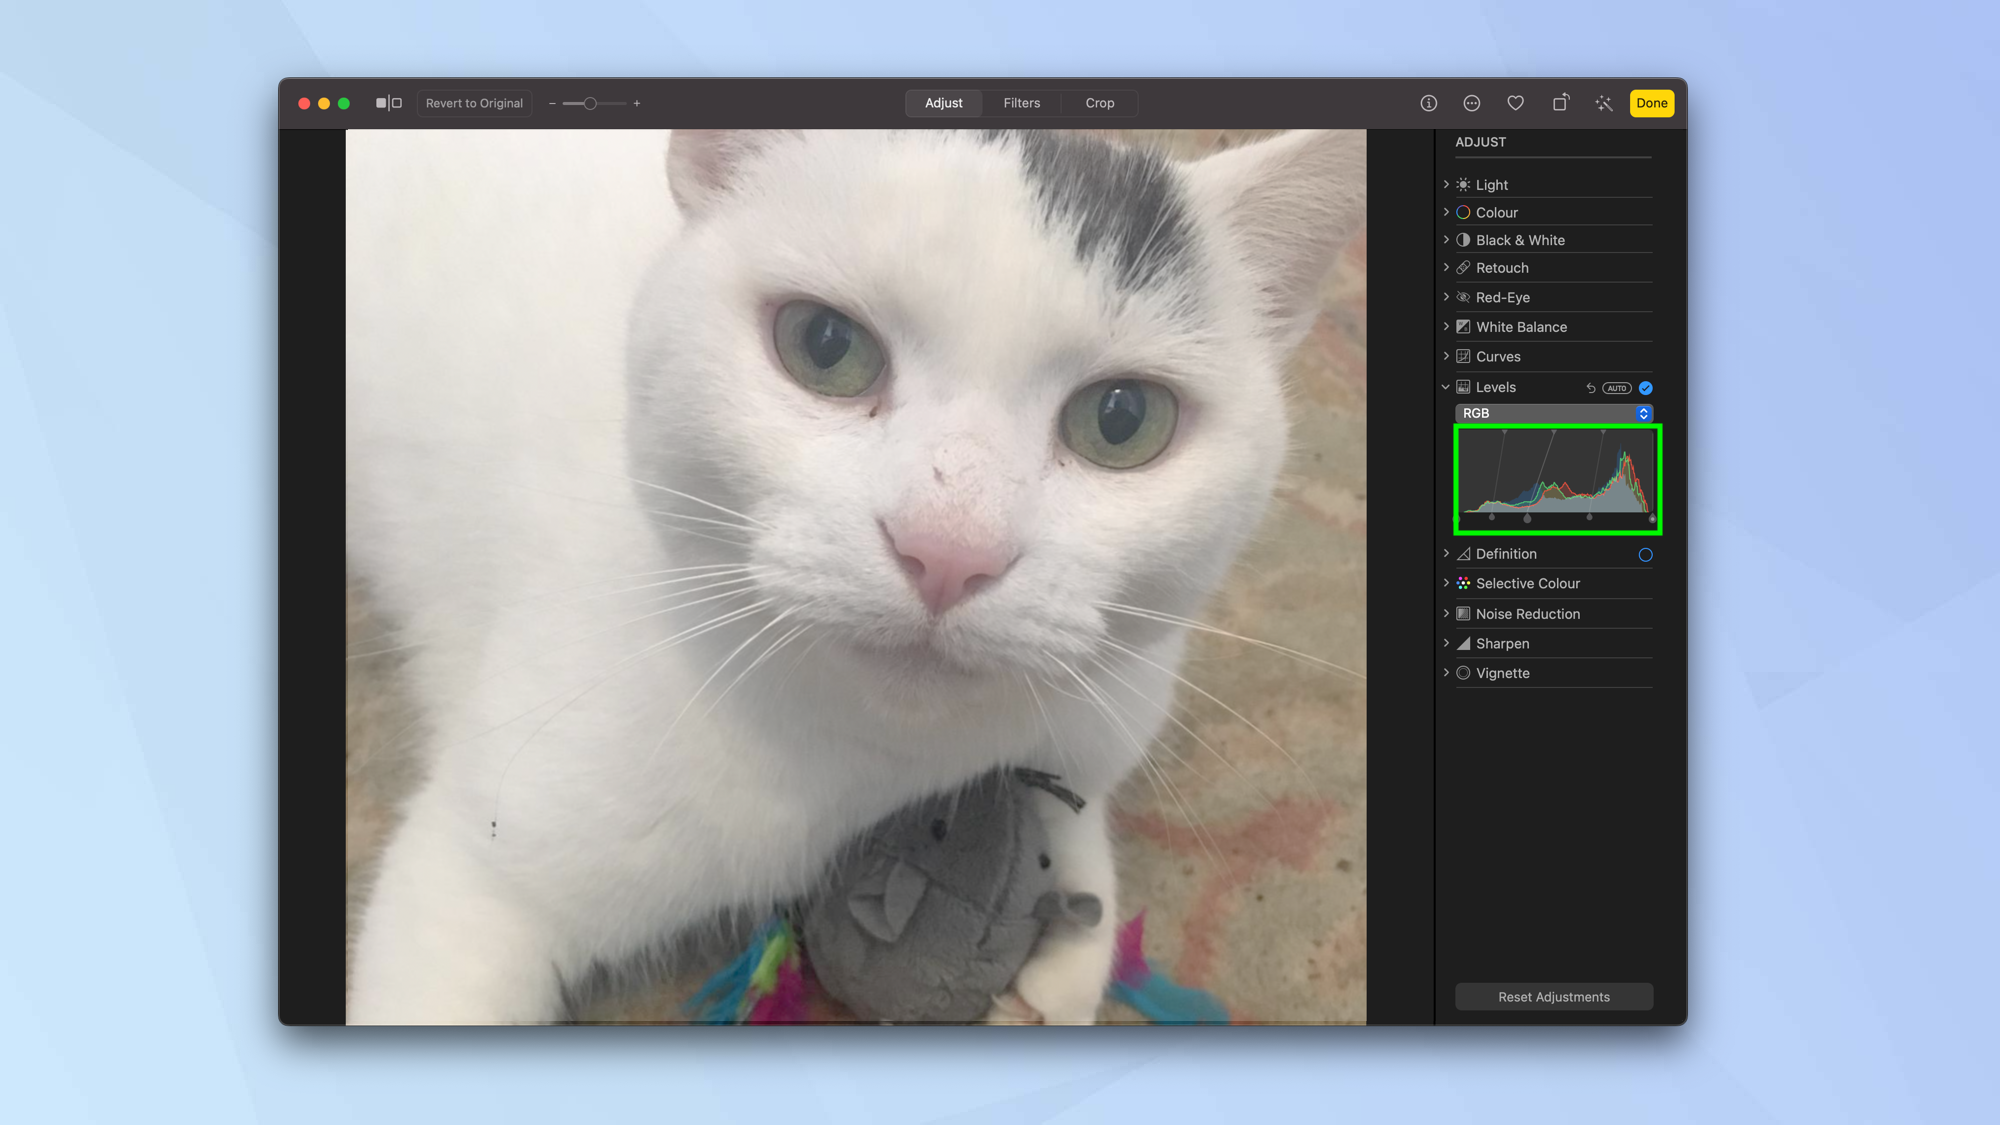
4. The levels can also be adjusted manually. To do this, drag the handles of the histogram. The first handle represents the black point (the point at which black areas become totally black), the second shadows, the third midtones (how light or dark the midtones of the photo are), the fourth highlights and the fifth white point (the point at which white areas become totally white).
Change an image's definition
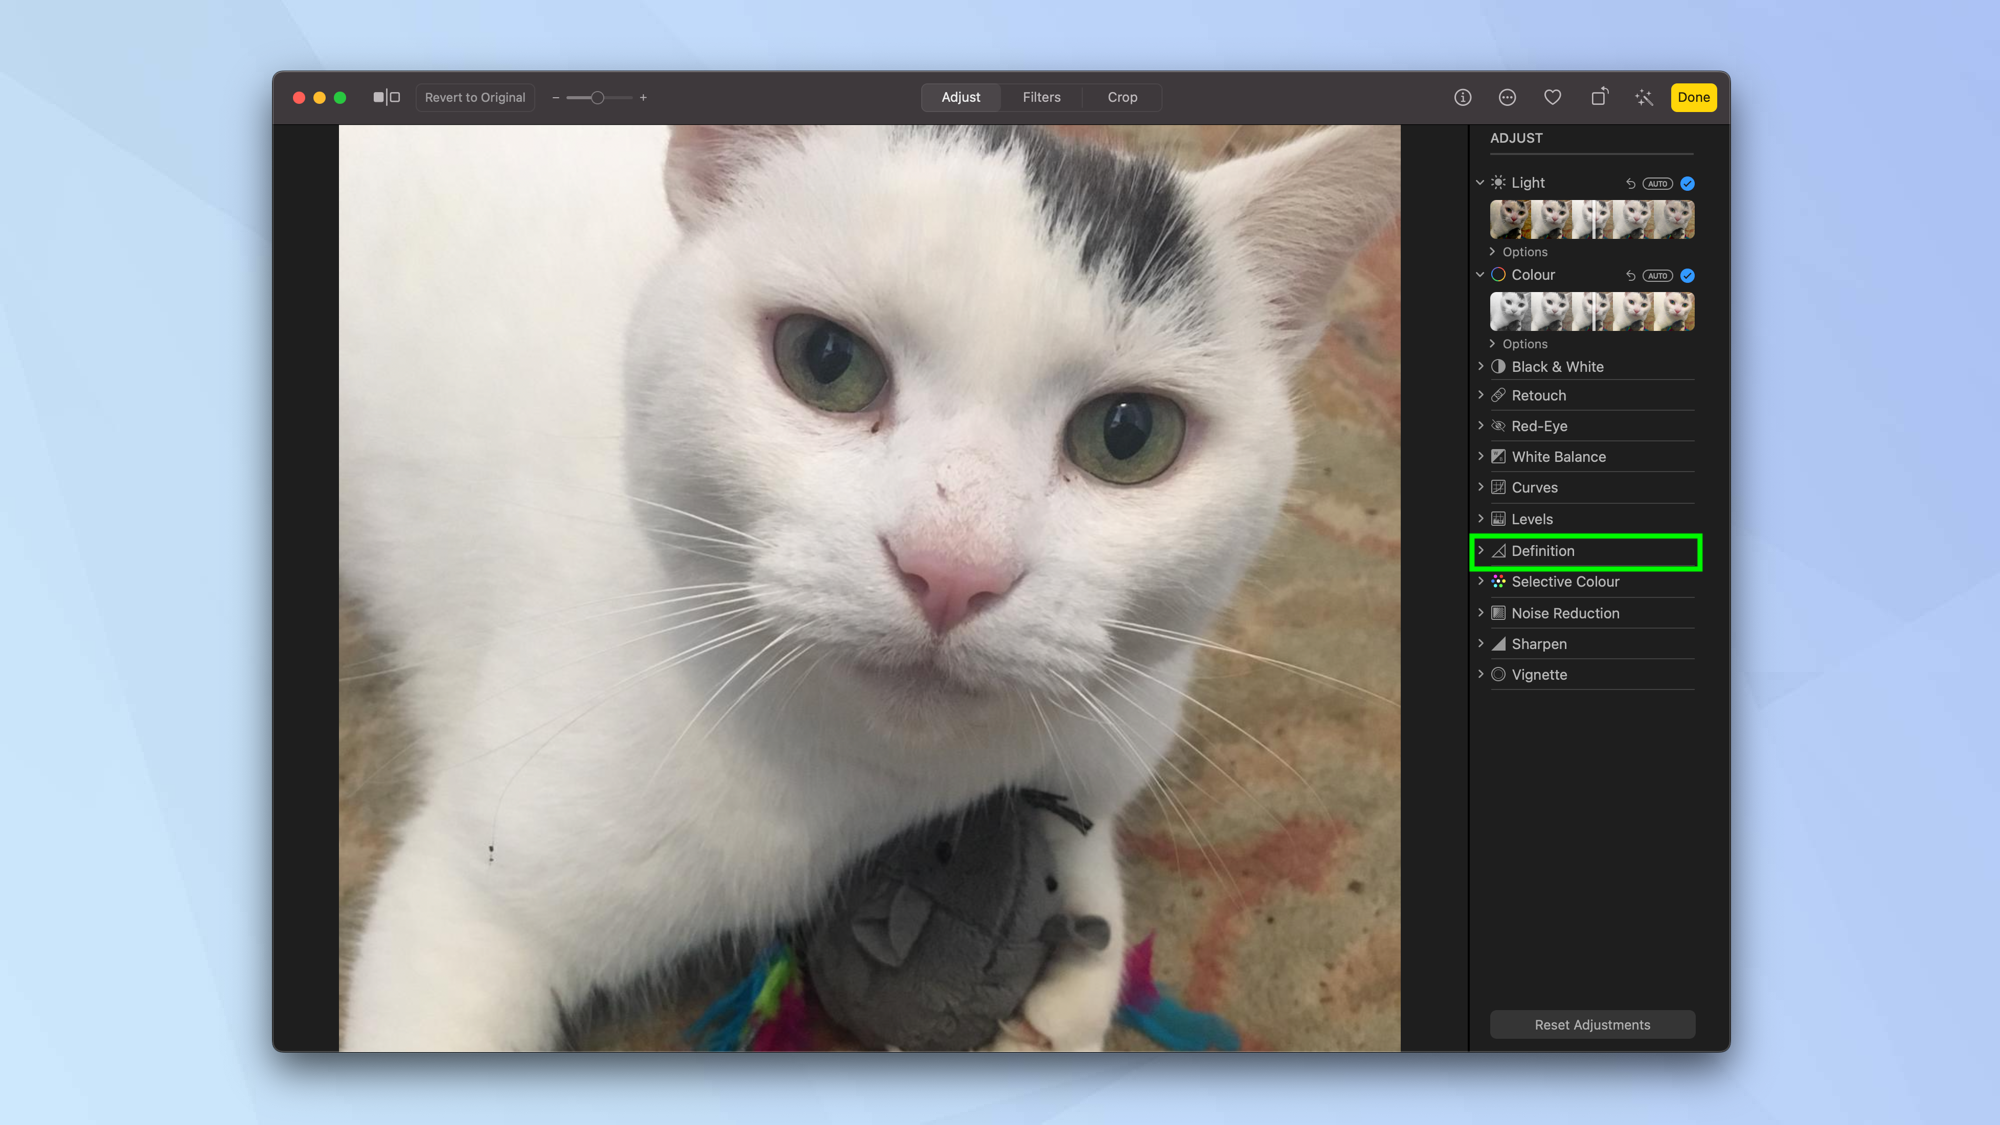
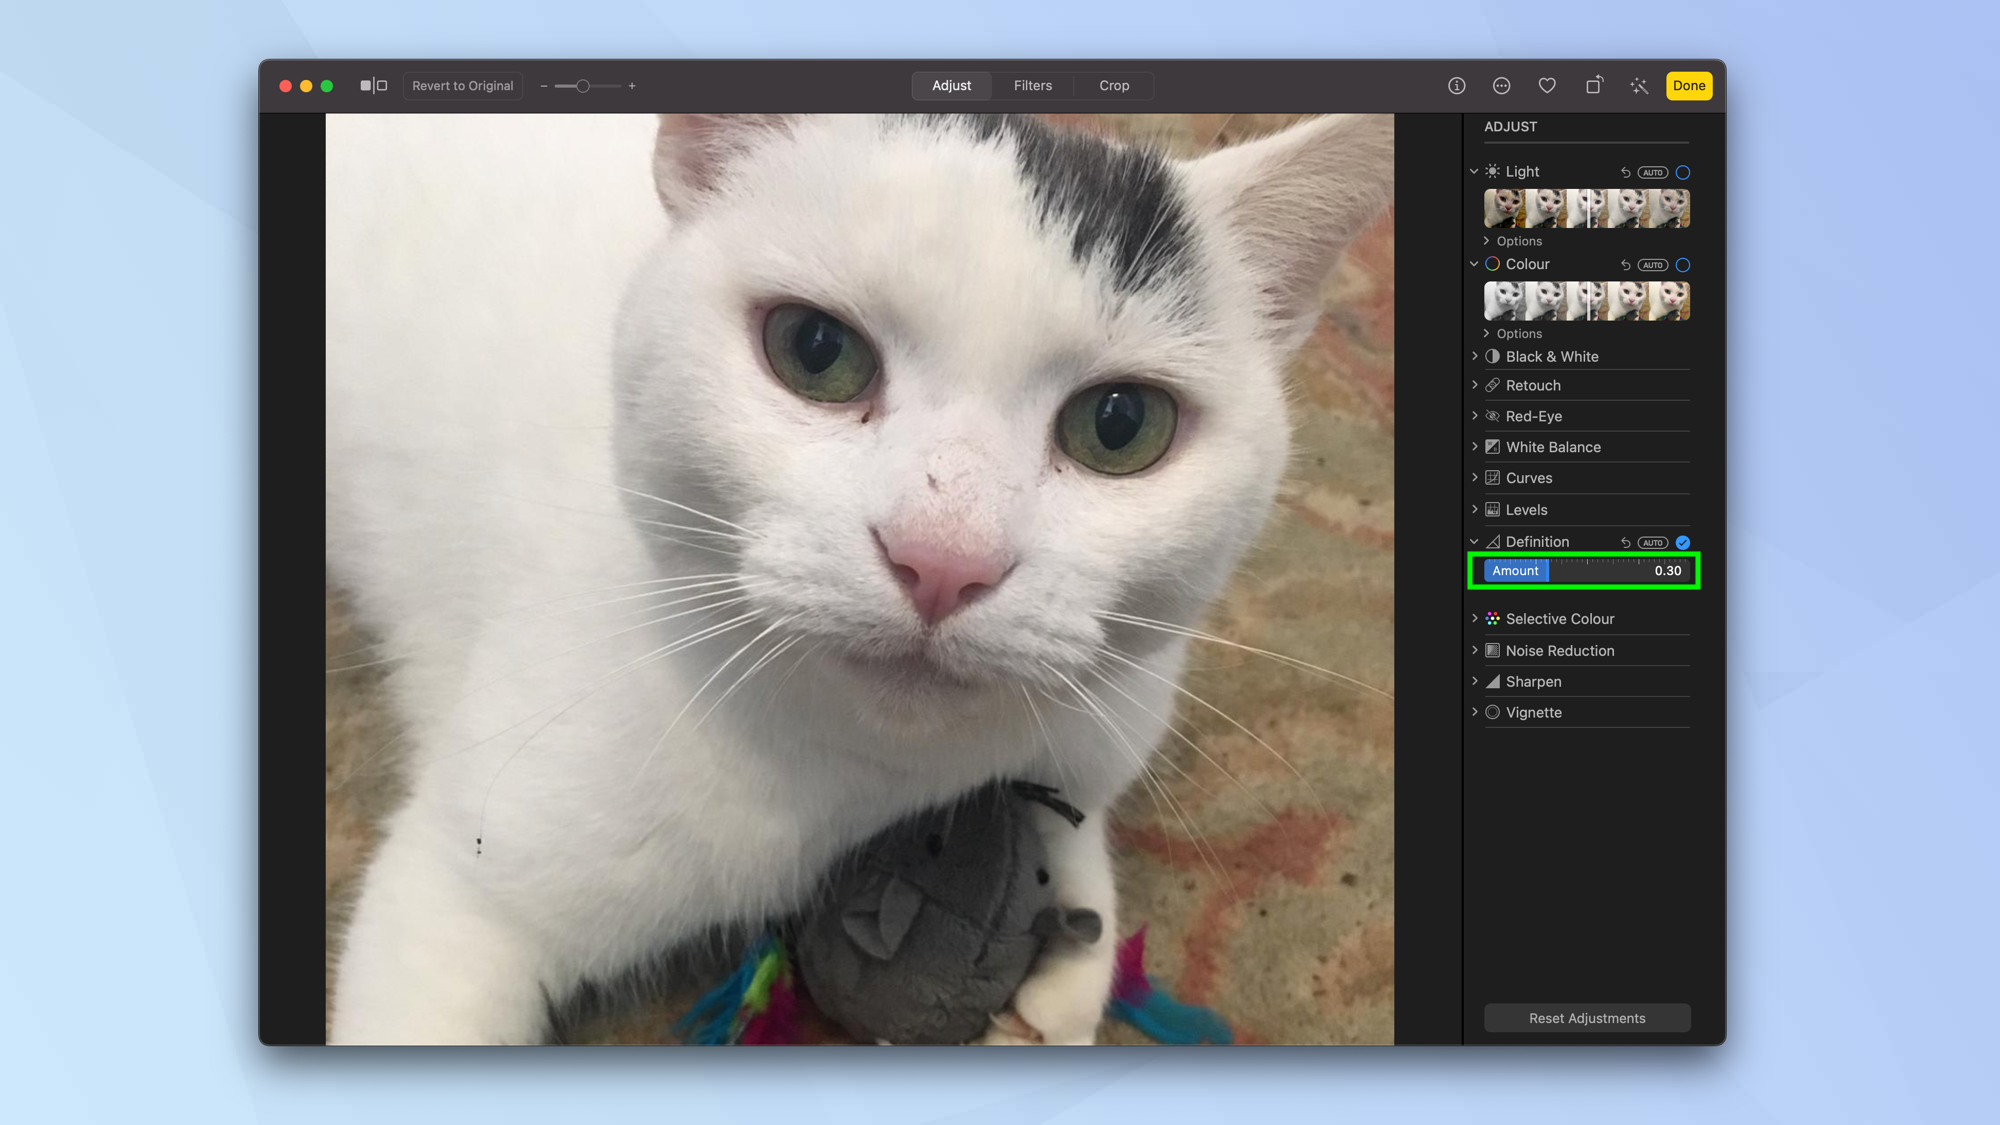
If you want to add contour and shape along with local contrast and midtone definition, then you need to adjust the definition of your image.
1. Select the arrow next to Definition in the Adjust panel.
2. Now click Auto or drag the slider left and right until the image looks right for you.
Alter specific colours in an image
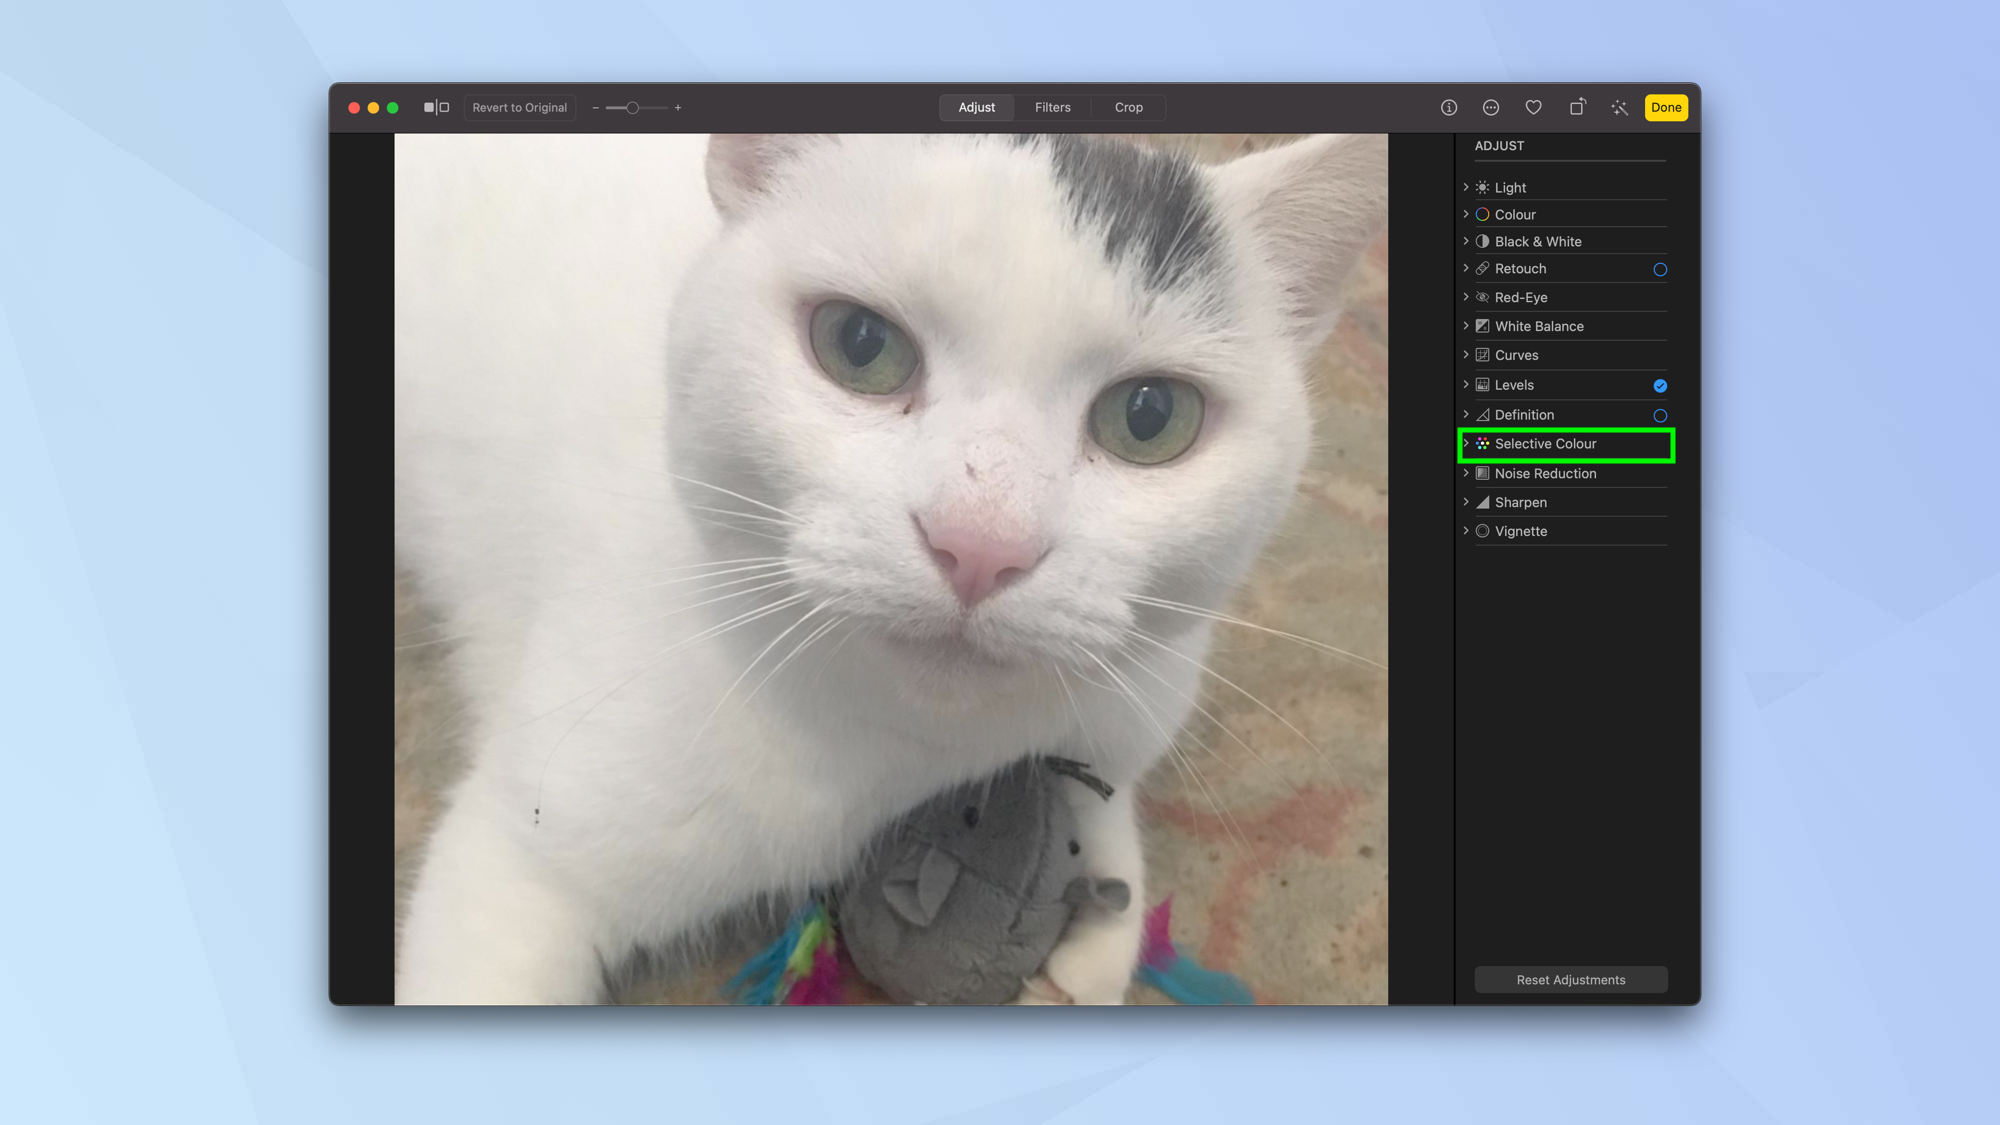
This is a very useful function, allowing you to make alterations to a specific color. For example, you could change a blue background to one that's purple. It can dramatically alter an image.
1. Select the arrow next to Selective Color in the Adjust panel.
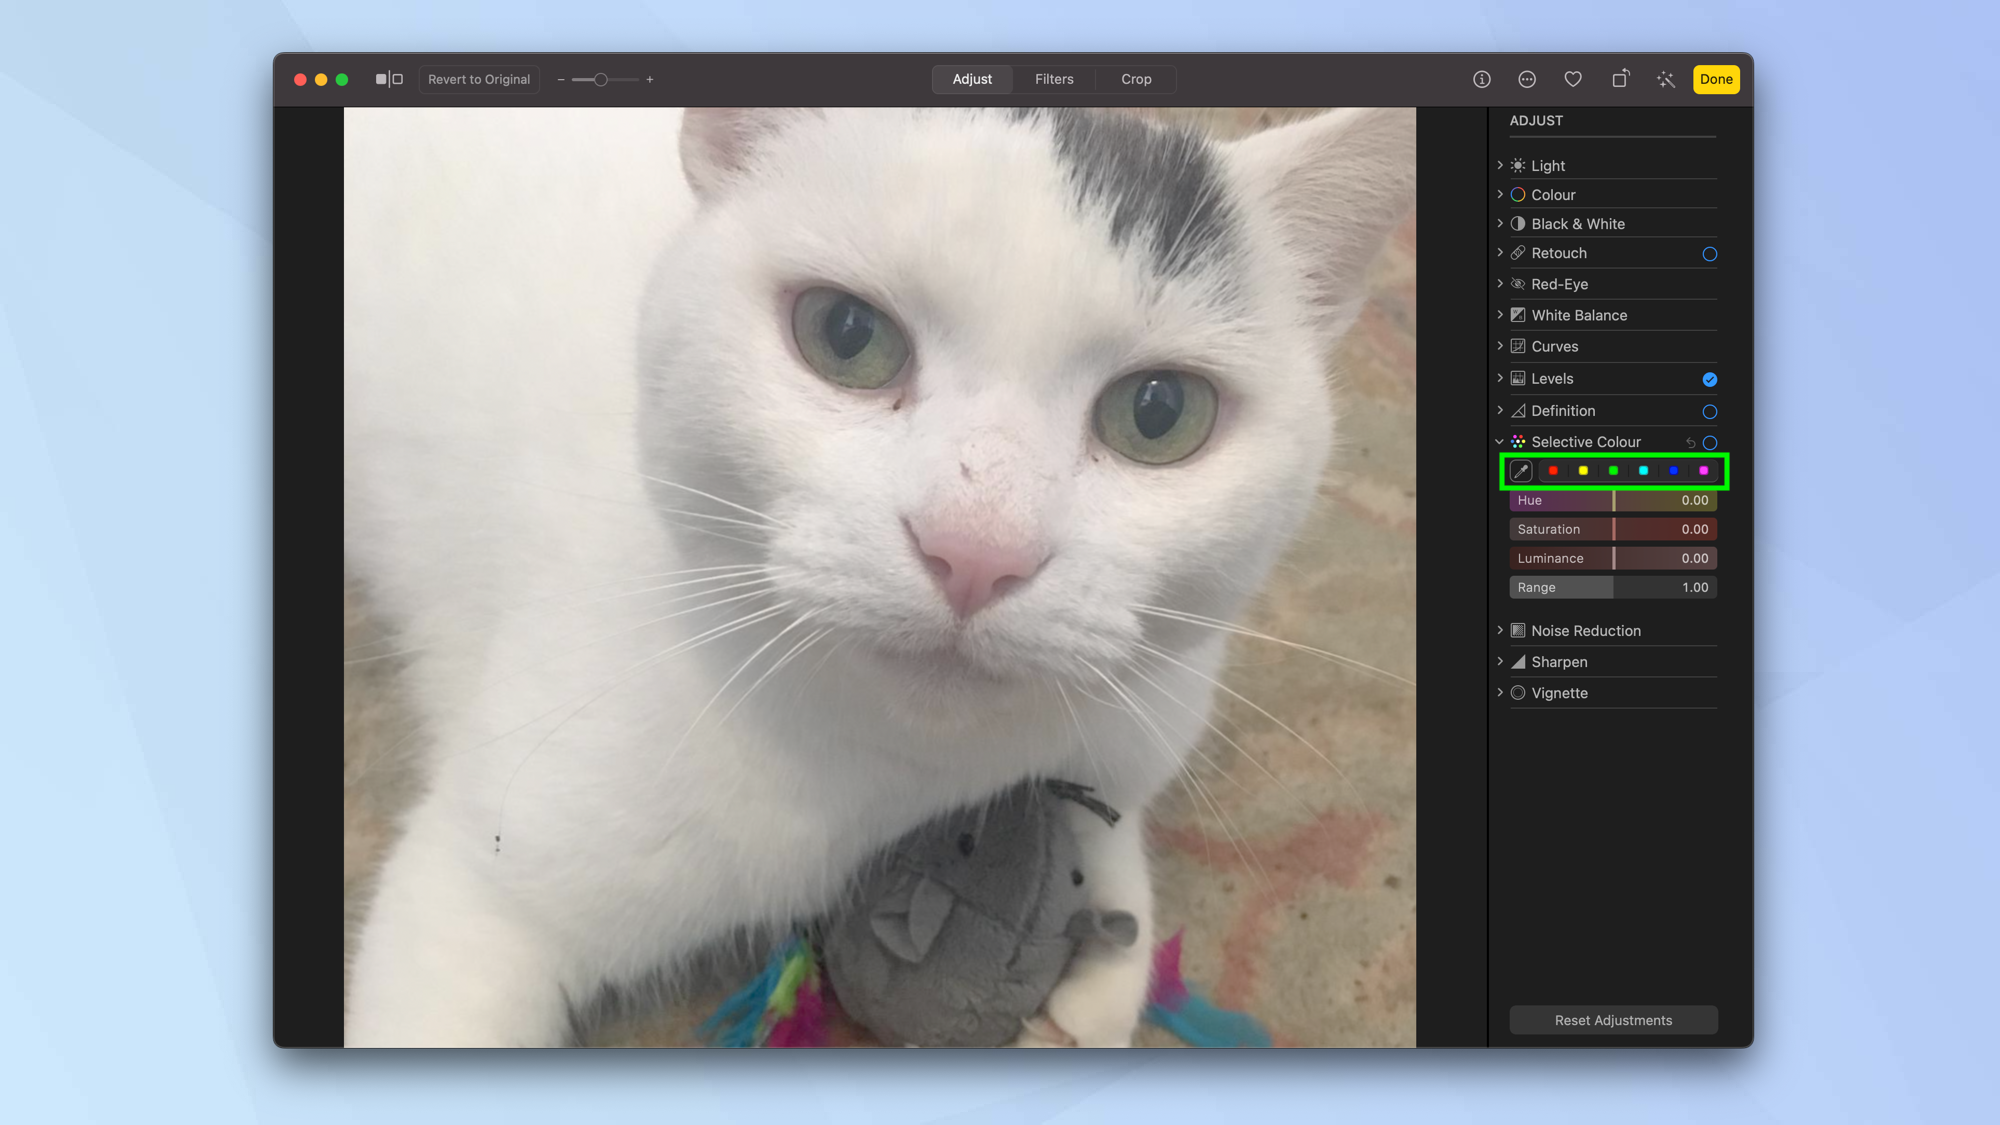
2. Now choose one of the colours and click the Eyedropper icon.
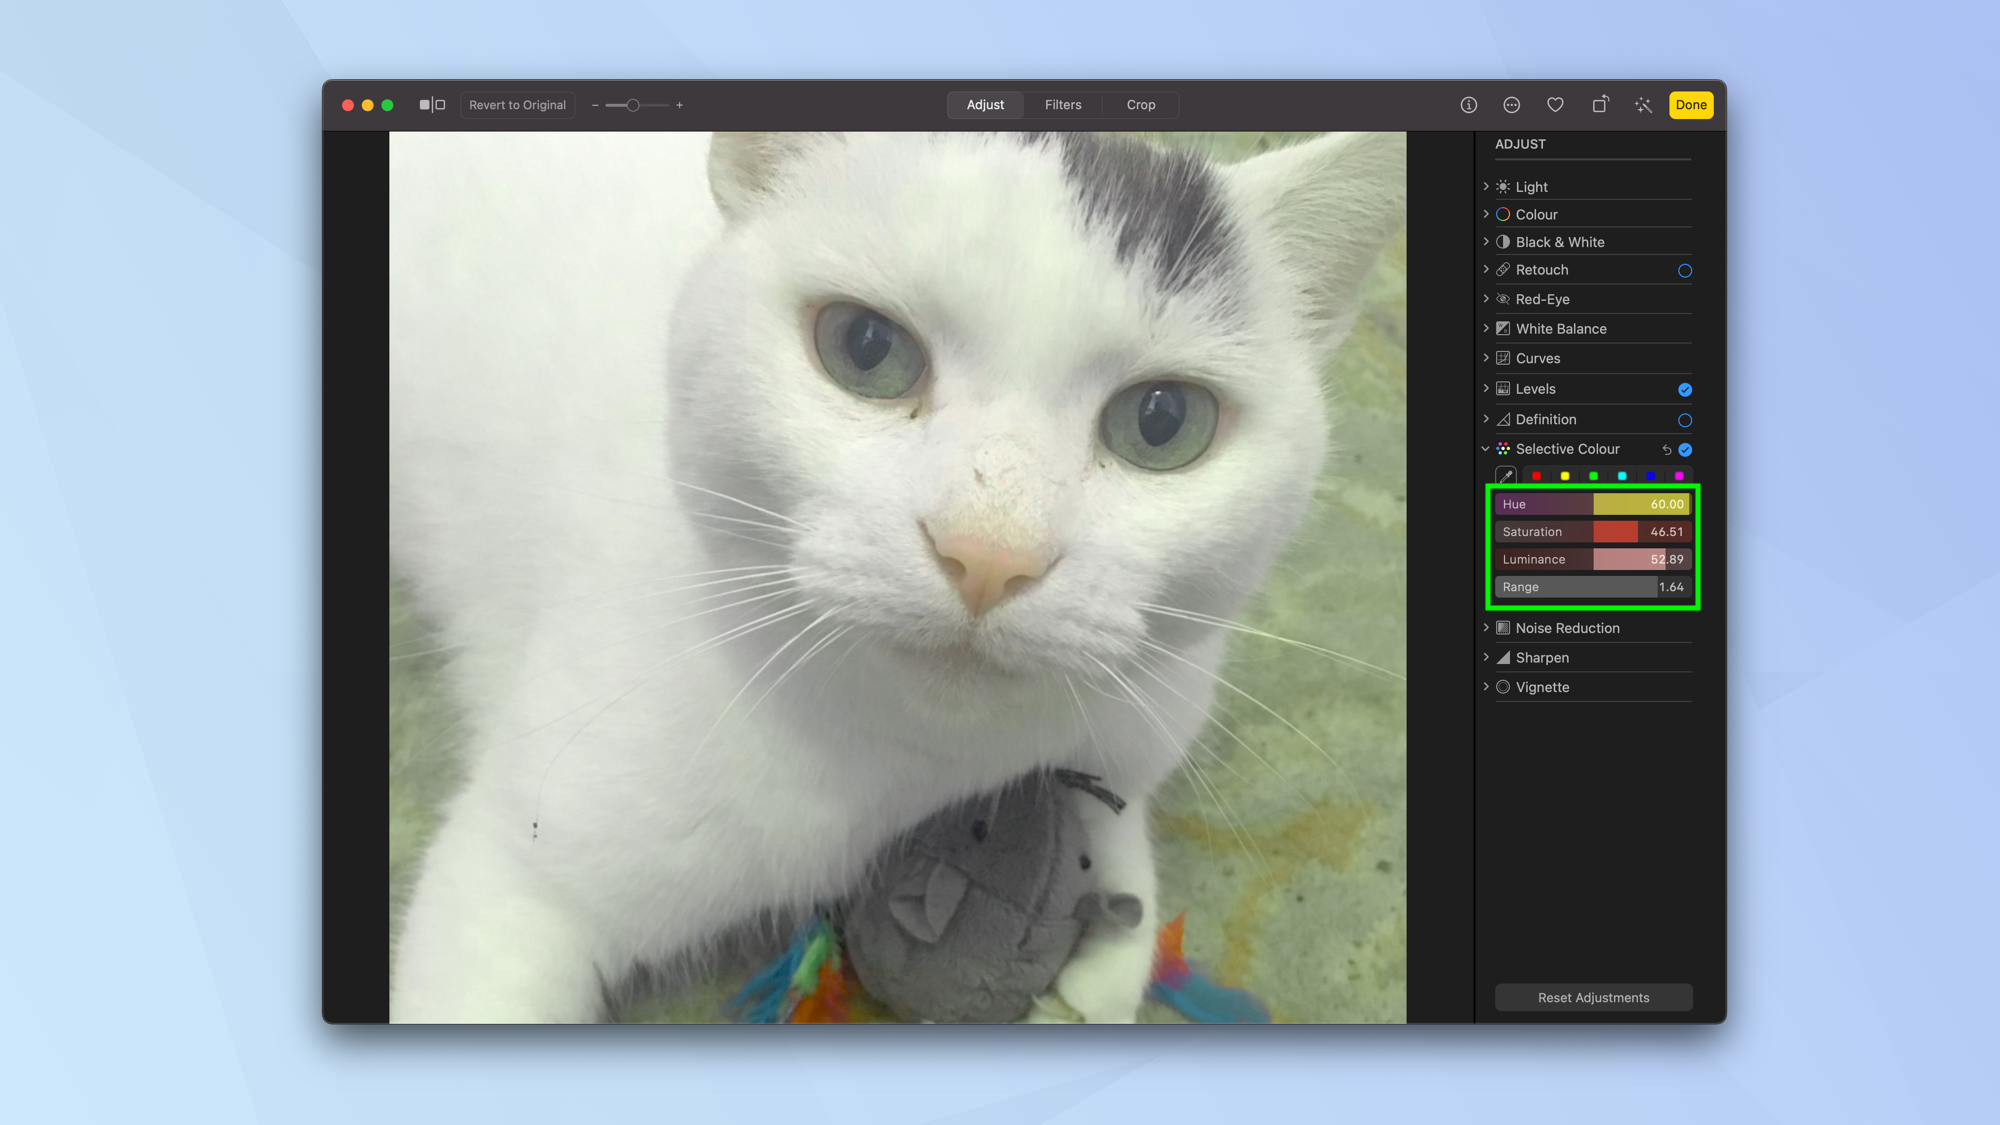
3. Use the cursor to select a specific color in your image. You can now drag the sliders to make adjustments to the hue, saturation (color intensity), luminance (brightness) and range (the number of similar colors that will be affected).
Sharpen your images
At the bottom of the Adjust panel are a set of tools that will make your images appear more vivid.
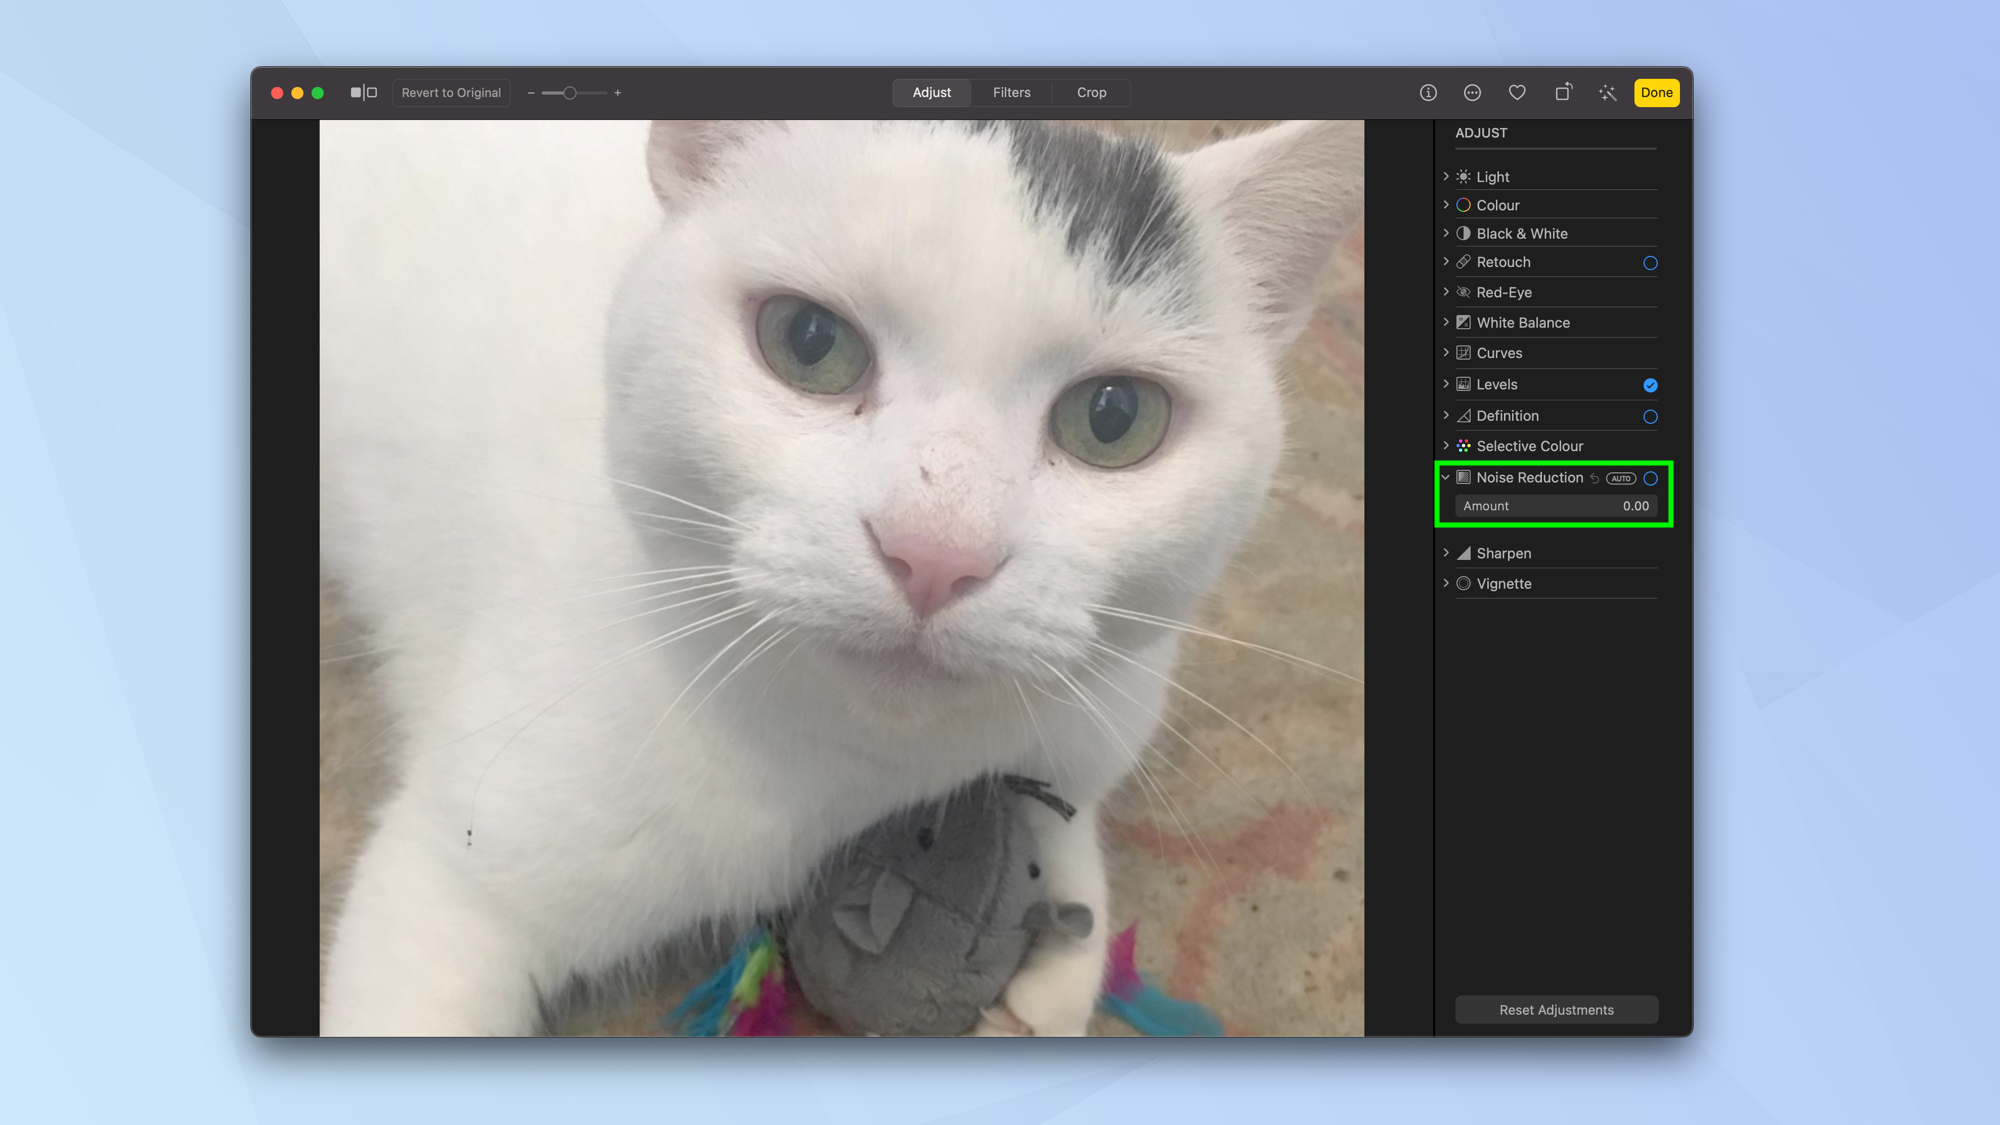
You can select Noise Reduction, for example, and drag the slider to remove grainy texture from your image. This is useful if you've shot an image at a high ISO value. At high ISO values, the camera sensor is more light sensitive, increasing image brightness but adding more noticeable grain to the image.
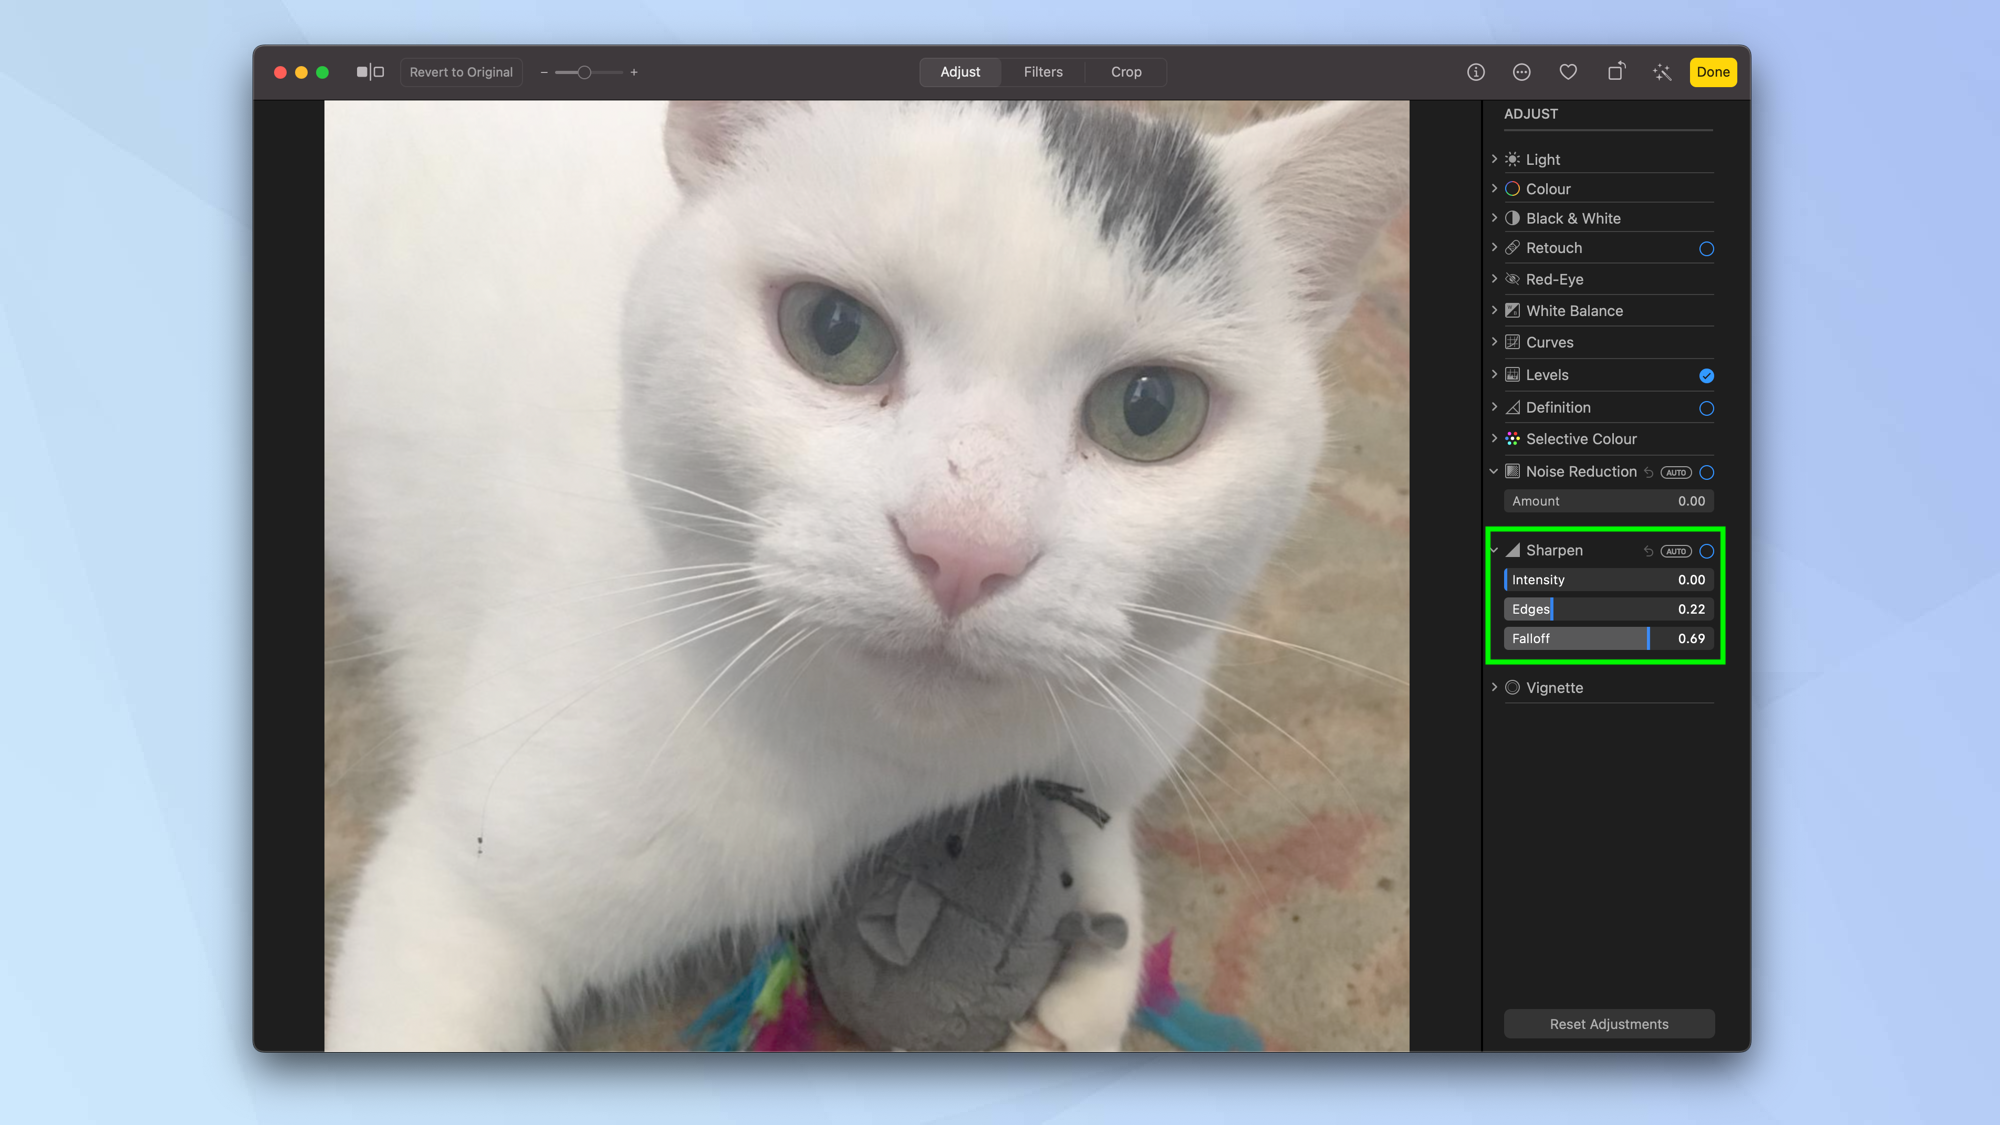
You can also select Sharpen if you want to better define the edges within your image. Use Intensity to adjust the strength of the sharpened edges, use Edges to determine which pixels form an edge and select Falloff to make the sharpening look more or less prominent.
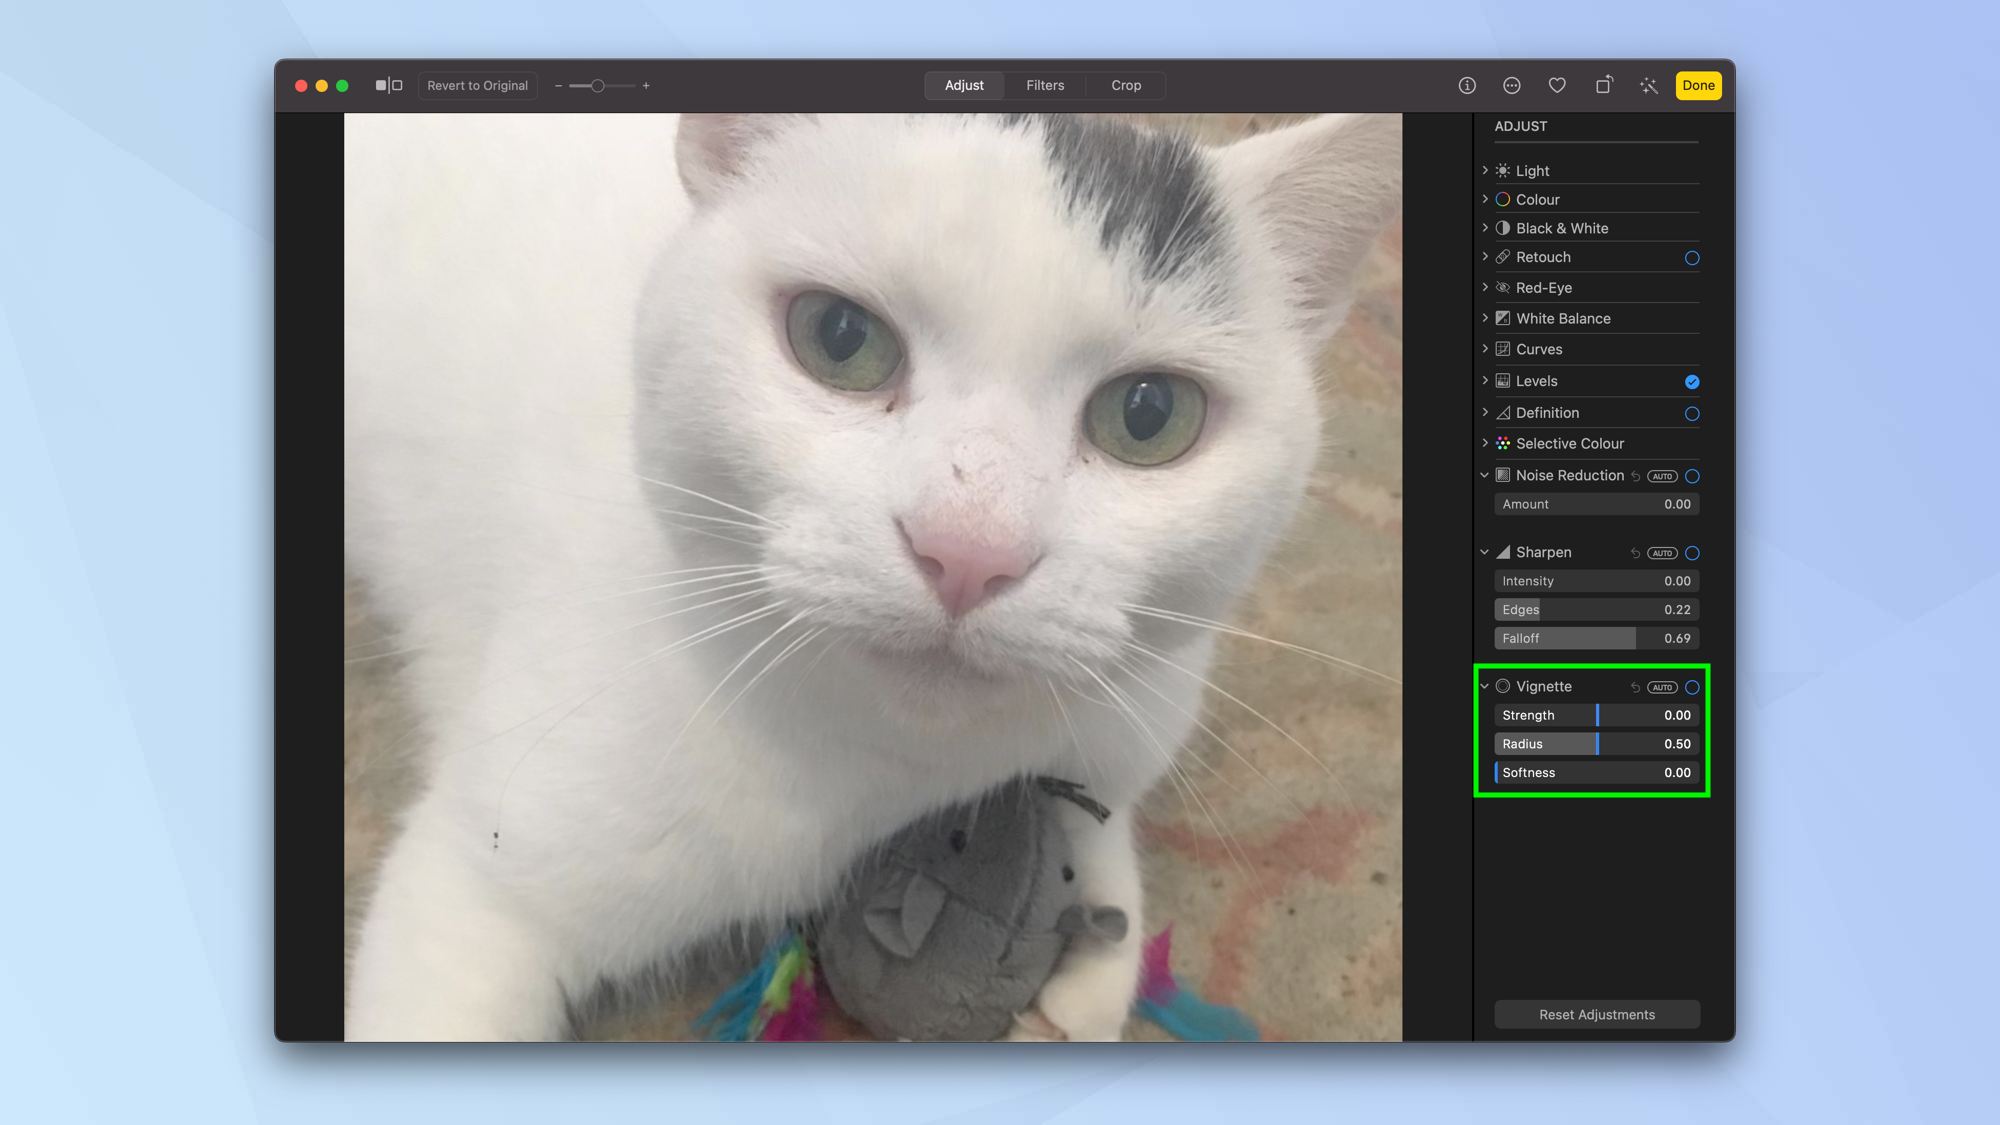
Finally, select Vignette to darken the corners of a photo. This will highlight the image at the centre: use strength to darken or lighten the vignette, use radius to change the vignette's size and use softness to alter the vignette's opacity.
Now you know how to edit photos on a Mac for free in macOS Photos. The software is great, isn't it? Don't worry if you make any mistakes along the way. You can simply click Reset Adjustments at the bottom of the Adjust tab or click Reset in the Crop tab. When you're happy with your image edits, you can also click Done.
But what else can you do? Well, if you'd like to step up a level, why not consider making use of Photoshop? We can show you how to remove a background in Photoshop, how to add a drop shadow in Photoshop, how to add a background in Photoshop and how to add a border in Photoshop. You may also be interested in using Affinity Photo, a great pocket-friendly alternative.
If video is more your thing, then it's always worth checking out the best free video editing software. You may also want to take a look at the best photo storage and sharing sites.
Next up: how to select multiple files on Mac.

David Crookes is a freelance writer, reporter, editor and author. He has written for technology and gaming magazines including Retro Gamer, Web User, Micro Mart, MagPi, Android, iCreate, Total PC Gaming, T3 and Macworld. He has also covered crime, history, politics, education, health, sport, film, music and more, and been a producer for BBC Radio 5 Live.
 Club Benefits


