Getting started with Mac Shortcuts — how to find, use and create time-saving automations
You can make macOS even easier to use by adding and even creating your own shortcuts
Here at Tom’s Guide our expert editors are committed to bringing you the best news, reviews and guides to help you stay informed and ahead of the curve!
You are now subscribed
Your newsletter sign-up was successful
Want to add more newsletters?

Daily (Mon-Sun)
Tom's Guide Daily
Sign up to get the latest updates on all of your favorite content! From cutting-edge tech news and the hottest streaming buzz to unbeatable deals on the best products and in-depth reviews, we’ve got you covered.

Weekly on Thursday
Tom's AI Guide
Be AI savvy with your weekly newsletter summing up all the biggest AI news you need to know. Plus, analysis from our AI editor and tips on how to use the latest AI tools!

Weekly on Friday
Tom's iGuide
Unlock the vast world of Apple news straight to your inbox. With coverage on everything from exciting product launches to essential software updates, this is your go-to source for the latest updates on all the best Apple content.

Weekly on Monday
Tom's Streaming Guide
Our weekly newsletter is expertly crafted to immerse you in the world of streaming. Stay updated on the latest releases and our top recommendations across your favorite streaming platforms.
Join the club
Get full access to premium articles, exclusive features and a growing list of member rewards.
We’d hazard a guess that a lot of Mac users haven’t opened the Shortcuts app and, if they have, they’ve done very little other than have a quick look. That’s to be expected. Shortcuts can, at first glance, feel just a tad too complex and it’s not always immediately apparent how useful it can be. But if you spend even a short amount of time playing around with this app, you can certainly reap the benefits.
In this guide, we'll get you up and running with Shortcuts. We'll take a look at the basics of the Shortcuts app, show you how to use the pre-built ones, have you use them in a widget or within an app and, finally, guide you through creating a shortcut of your own. What we're not going to do is go super in-depth and overwhelm you, but we hope you'll be suitably encouraged to explore some more.
What are Mac shortcuts?
To be brief, Shortcuts allows you to automate tasks on your Mac and they’re made up of actions that are strung together and acted out in turn. If you find a particular, daily process to be cumbersome and time-consuming, chances are you’ll be able to create some shortcuts to take the sting out of them.
You can also make use of a host of pre-built shortcuts and even edit them to better suit what you’re looking to do.
How to set up Apple shortcuts on Mac
1. Open the Shortcuts app
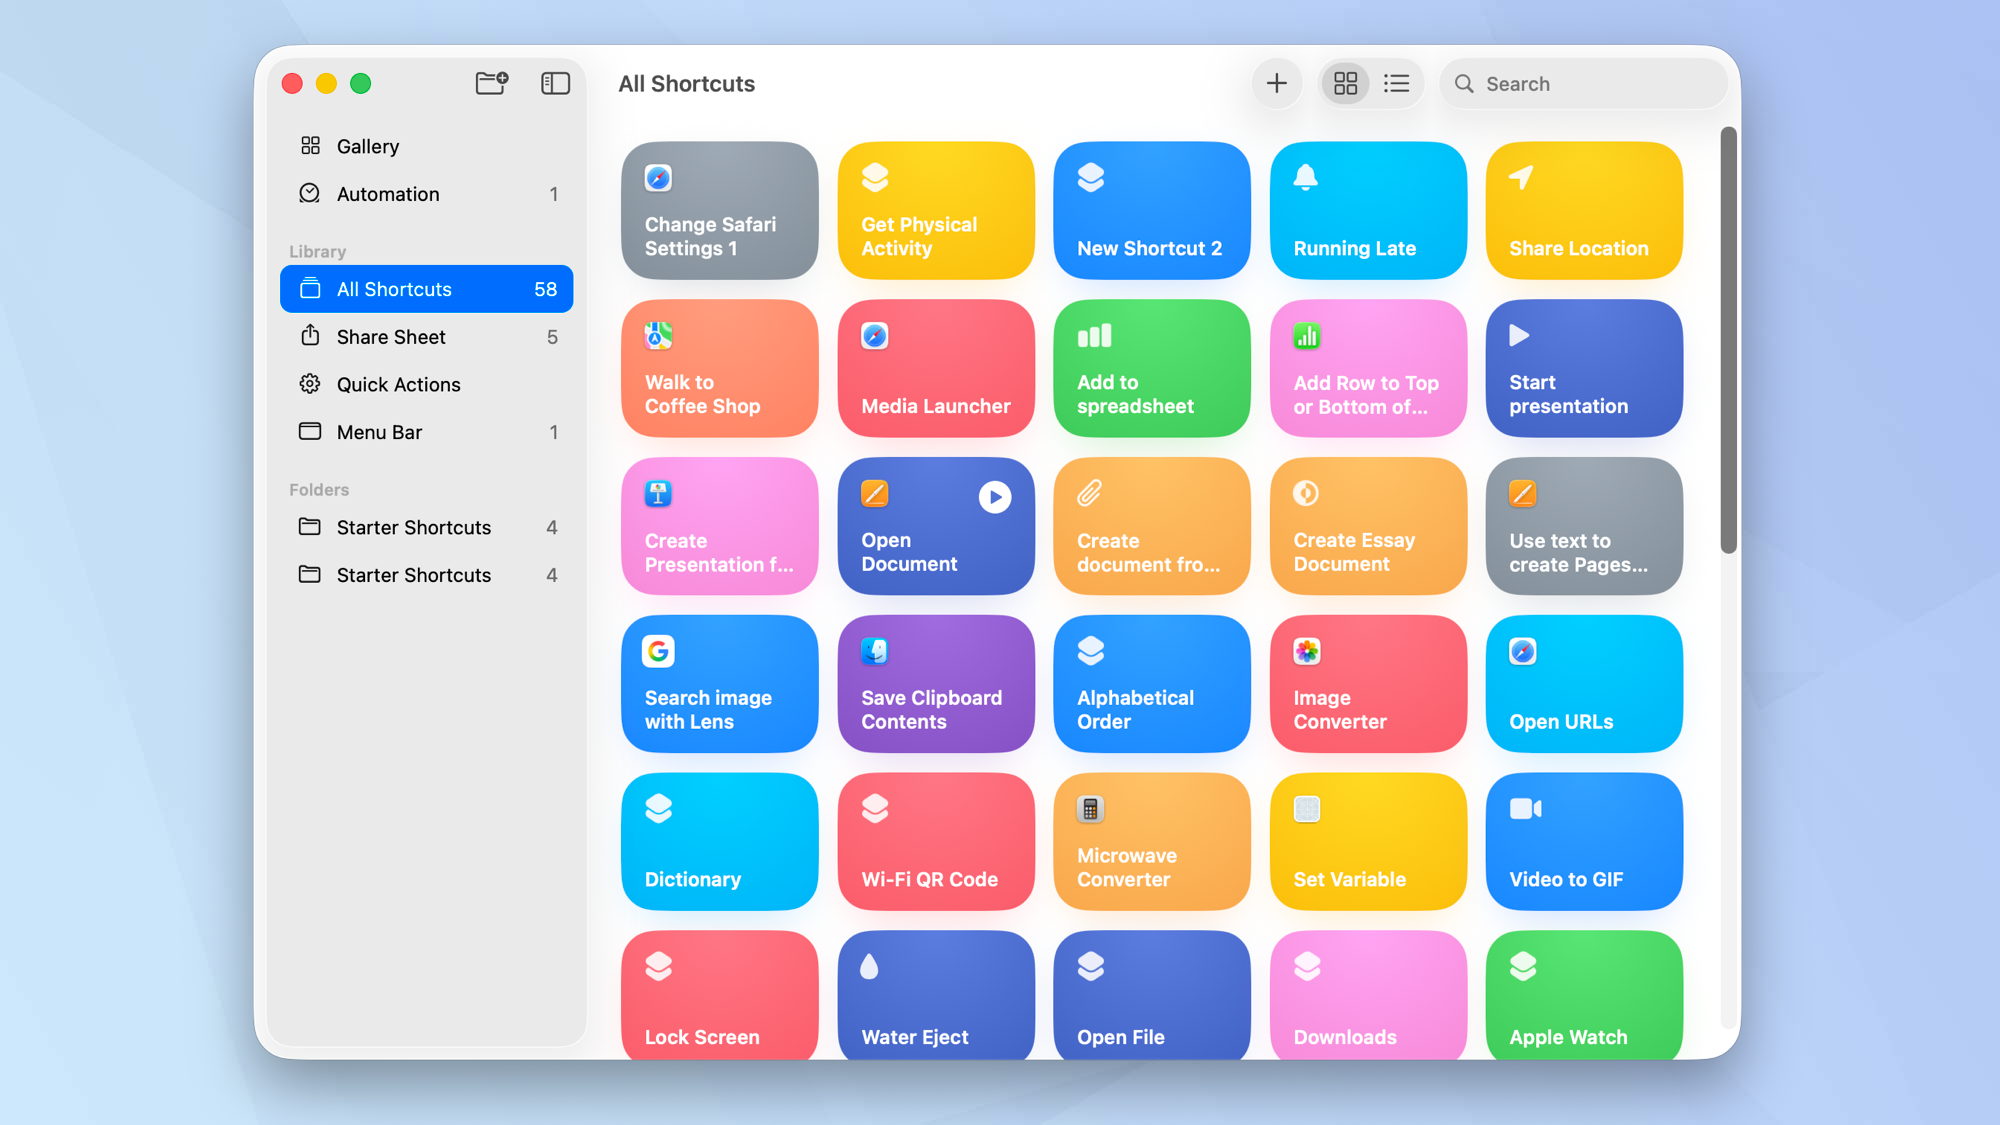
First things first, you need to open the Shortcuts app on your Mac. Once you’ve done that, you effectively have two main options: you can create your own shortcut from scratch or take a look at those which Apple provides.
2. Browse the gallery
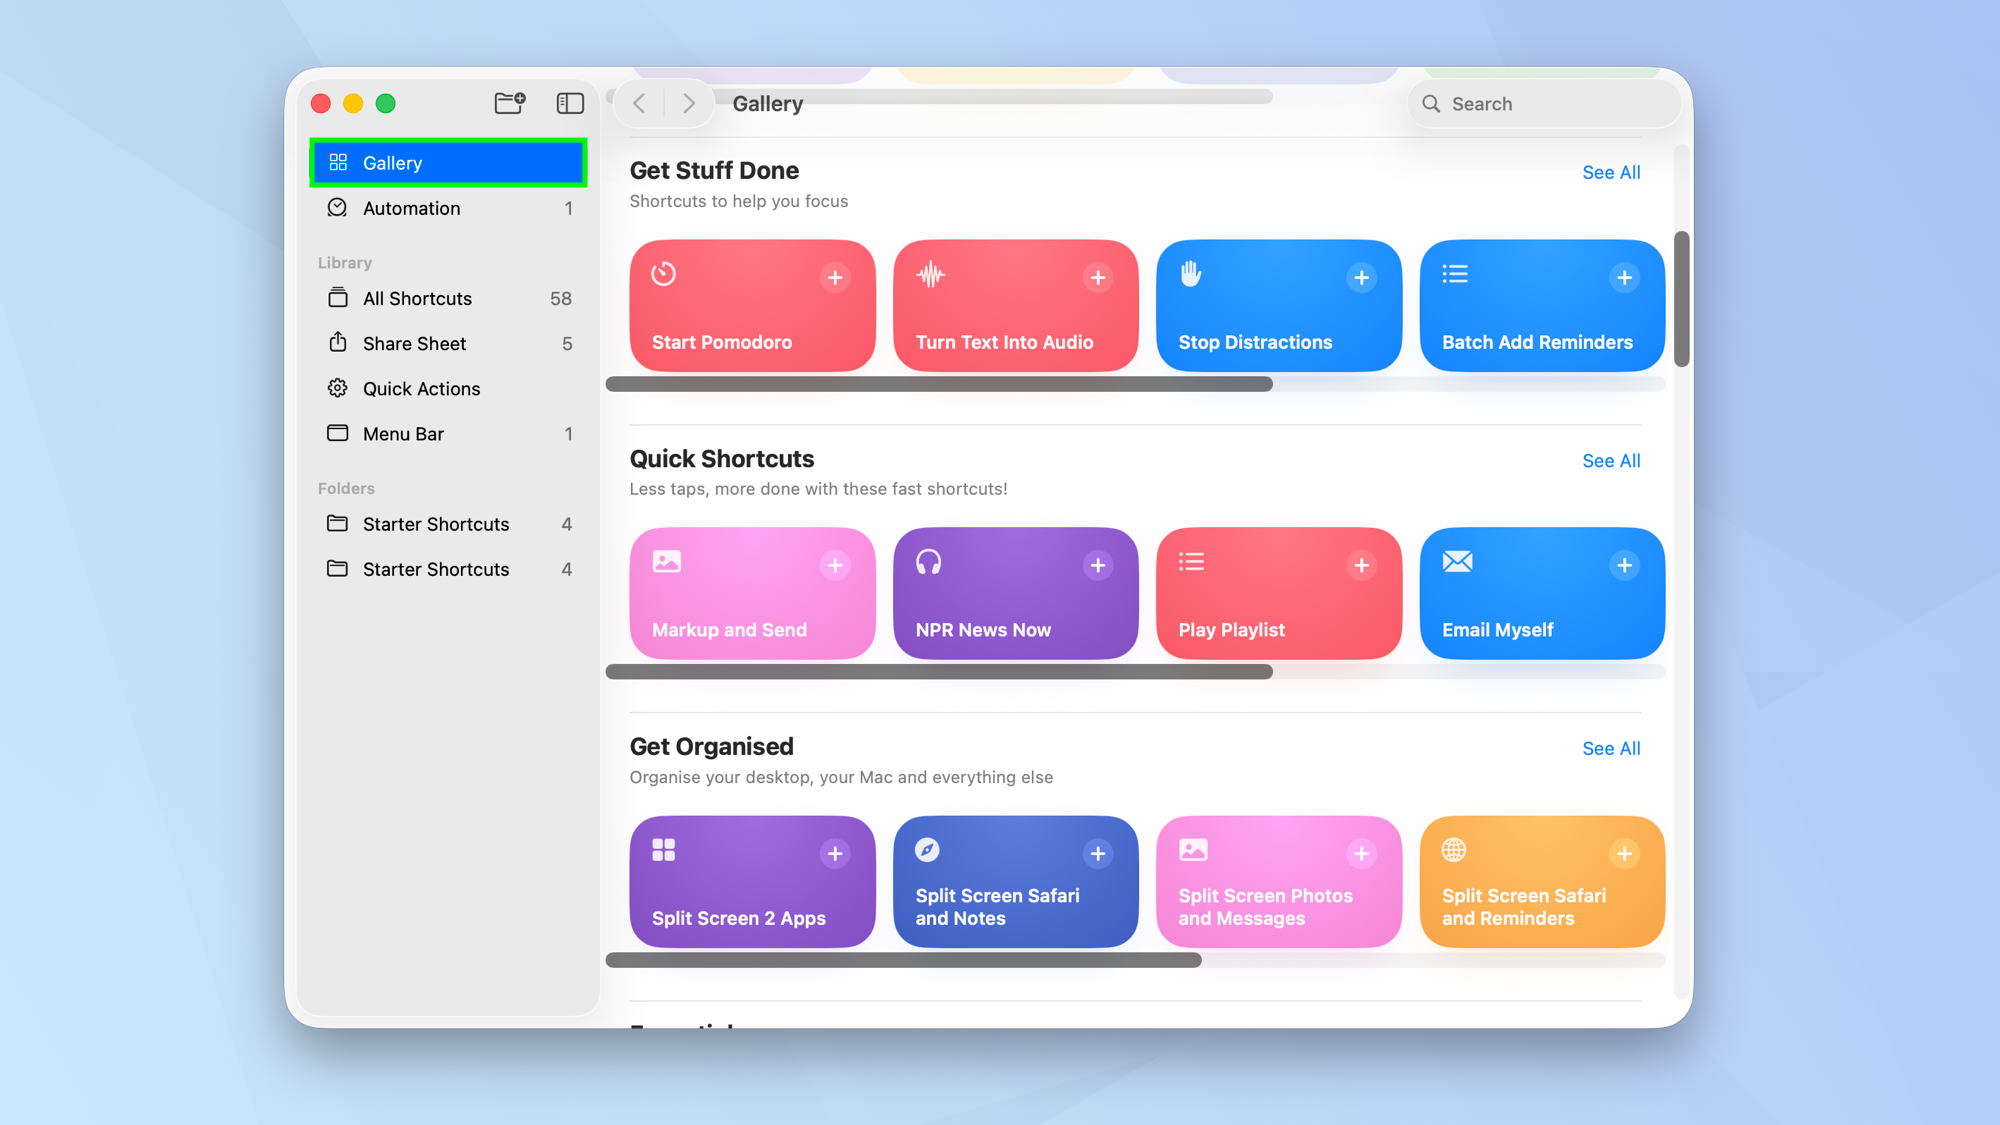
The easiest way to familiarize yourself with shortcuts is to click Gallery from the left-side menu and see what shortcuts can do. The Gallery page is split into different sections according to the type of tasks they accomplish.
For example, you will find shortcuts that help you to better organised — one will let you batch rename files which is sure to come in handy. There are also shortcuts aimed at photographers, writers and remote workers and those which connect with Apple Music, the Calendar and more.
3. Check out the AI options
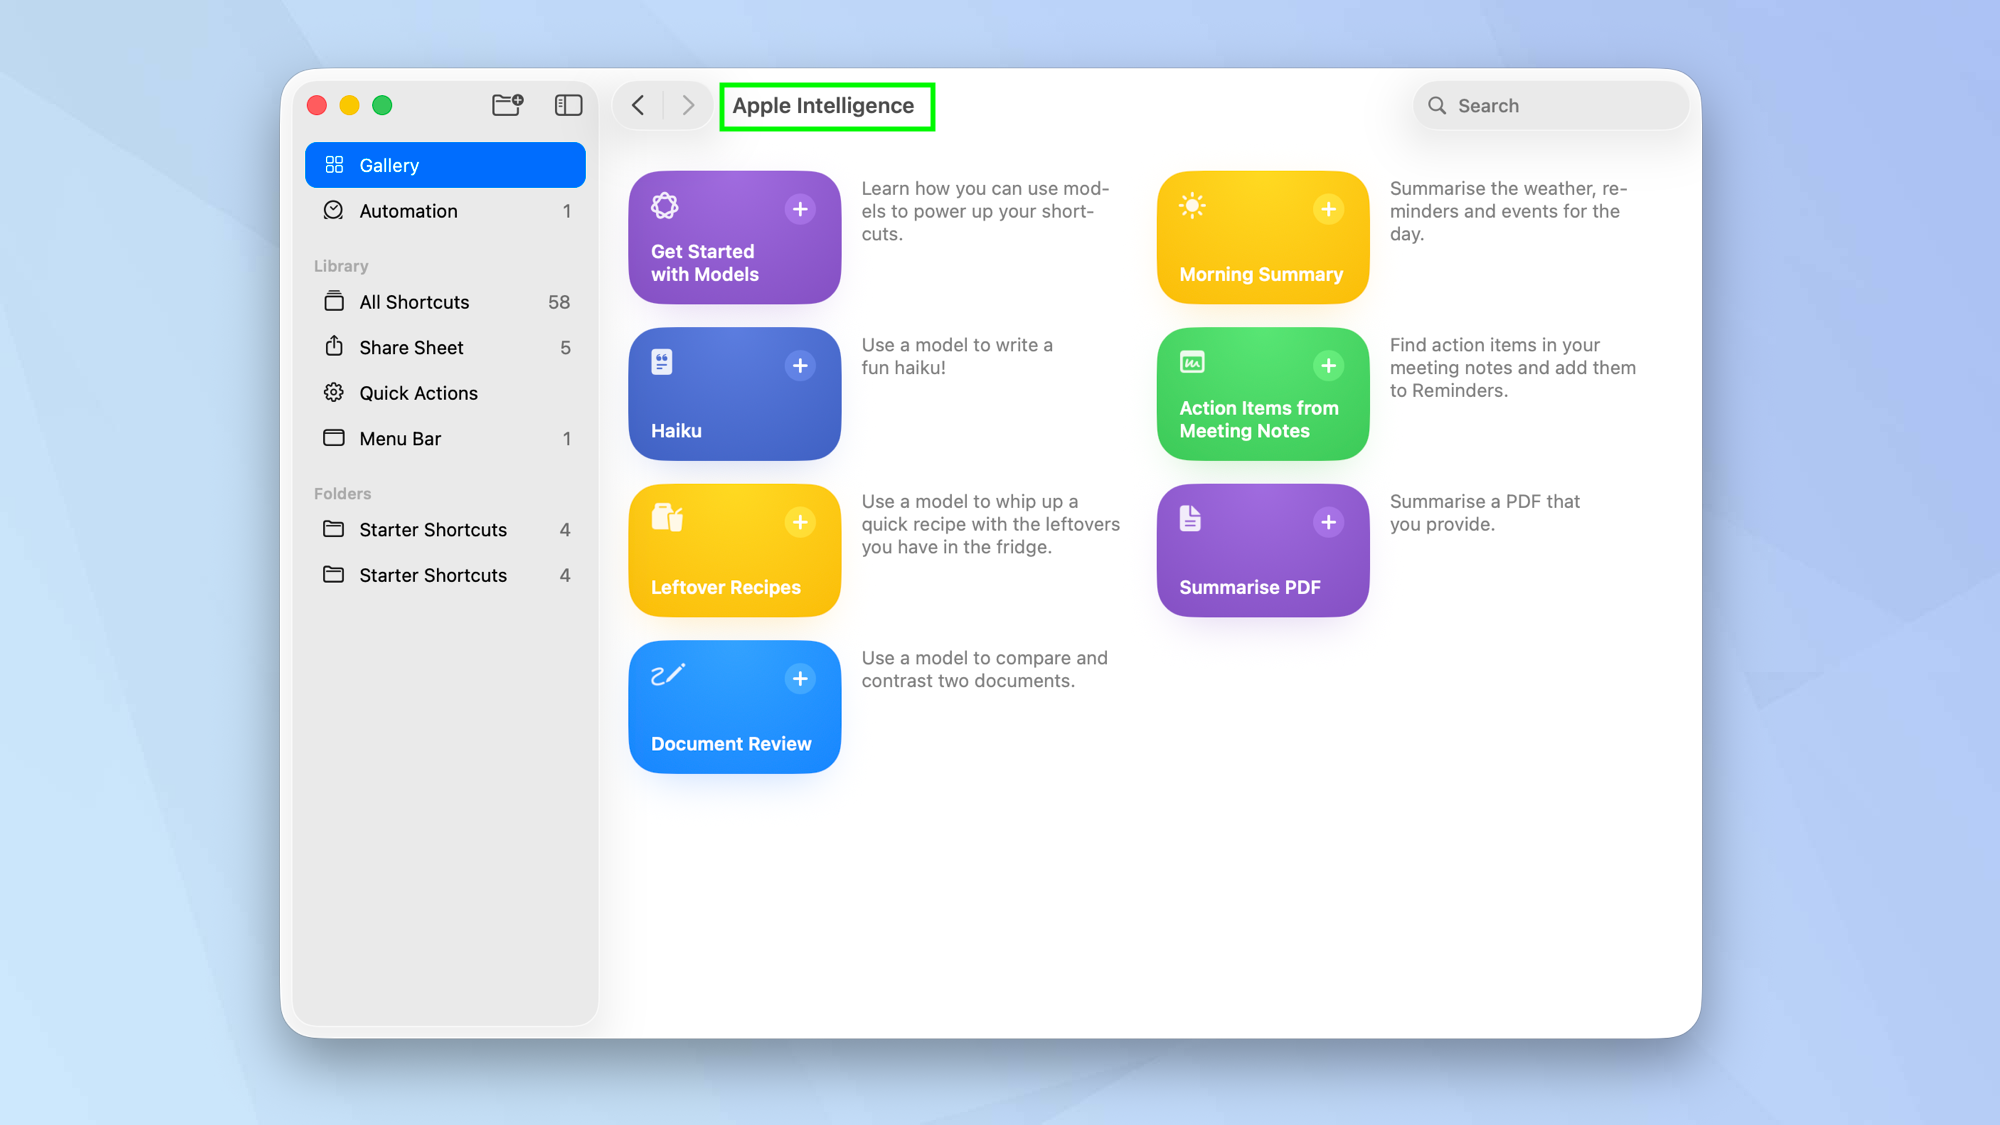
If you have installed macOS Tahoe, you will find the Gallery includes an Apple Intelligence section which let you make use of Apple’s AI tools. Just click See All next to Apple Intelligence.
There’s shortcut that will Summarize a PDF and one that will create recipes based on the leftovers you have in the fridge.
4. Choose a shortcut

If you select a shortcut in the Gallery, you will be able to click the three-dot icon on its thumbnail and get a preview of how the shortcut is structured. You can also click Add Shortcut.
5, Use a shortcut
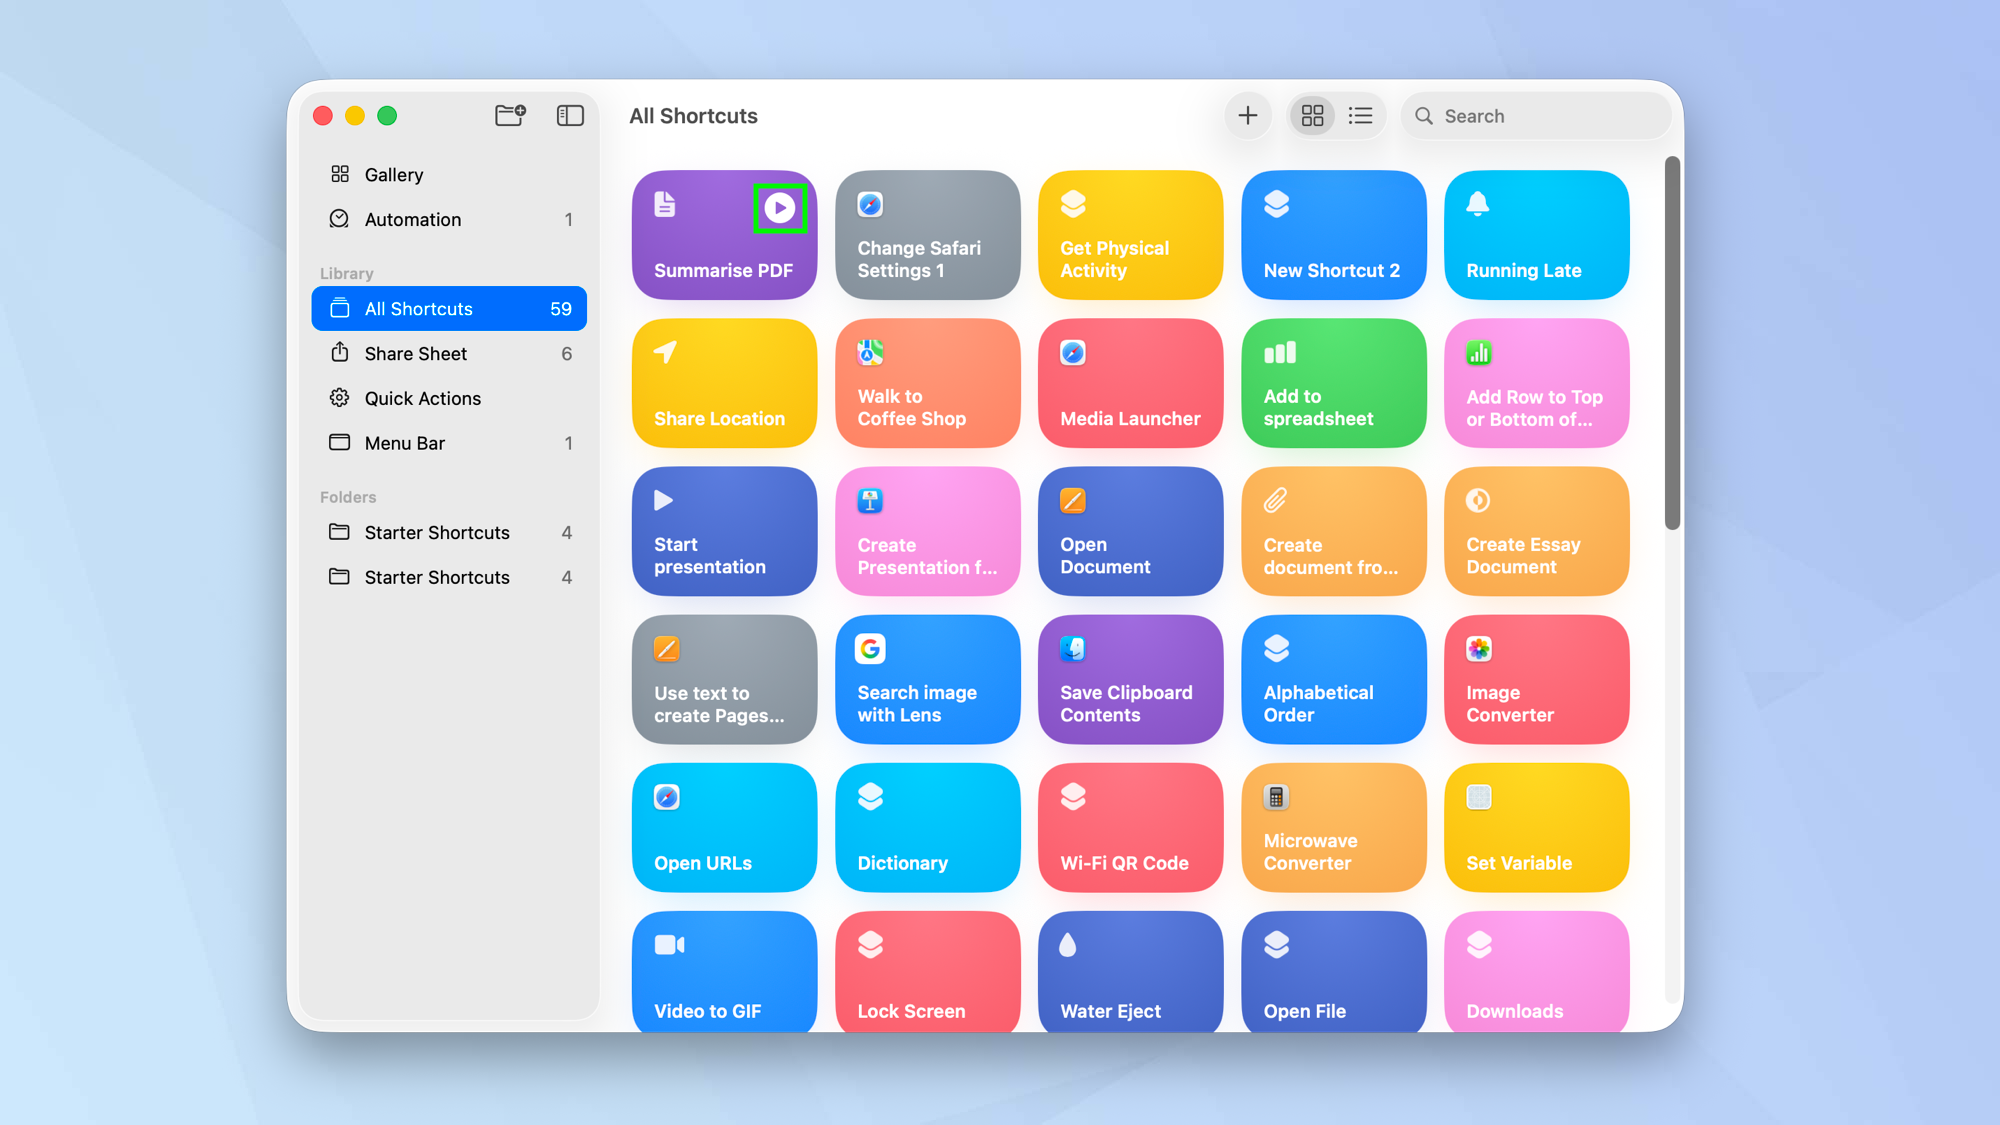
To use a shortcut, you can select All Shortcuts from the left side menu, hover over a shortcut and click the Play button.
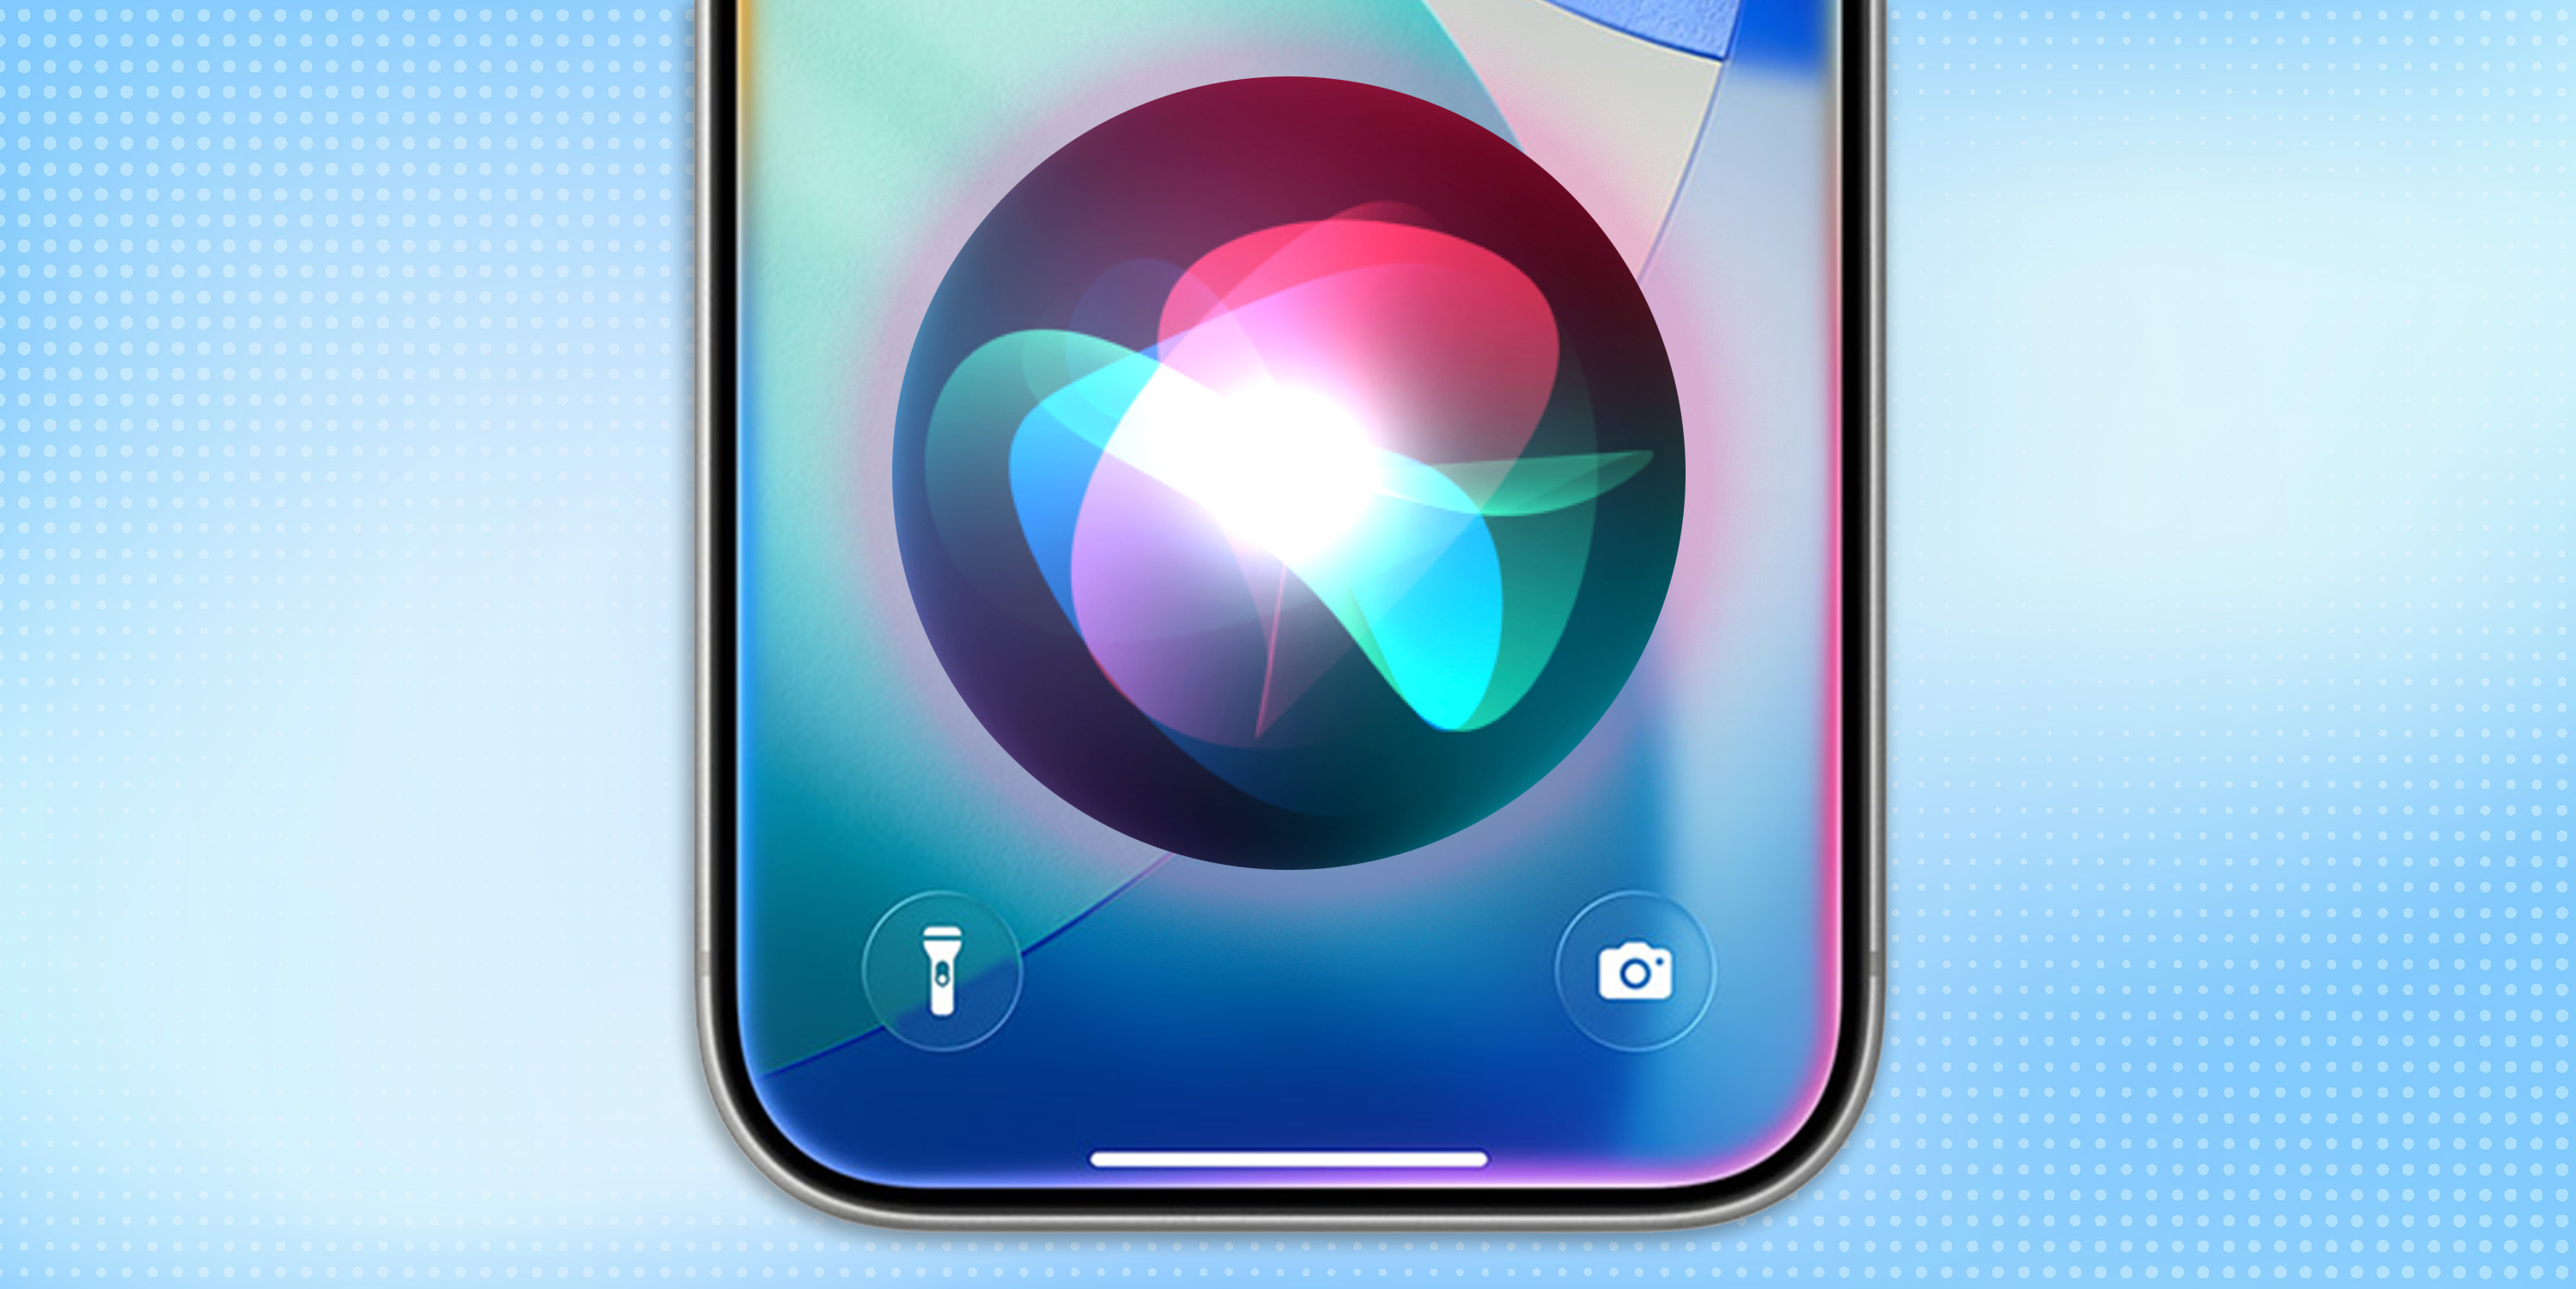
You can also say: "Hey Siri, [name of shortcut]" to activate it.
6. Add it to the share sheet
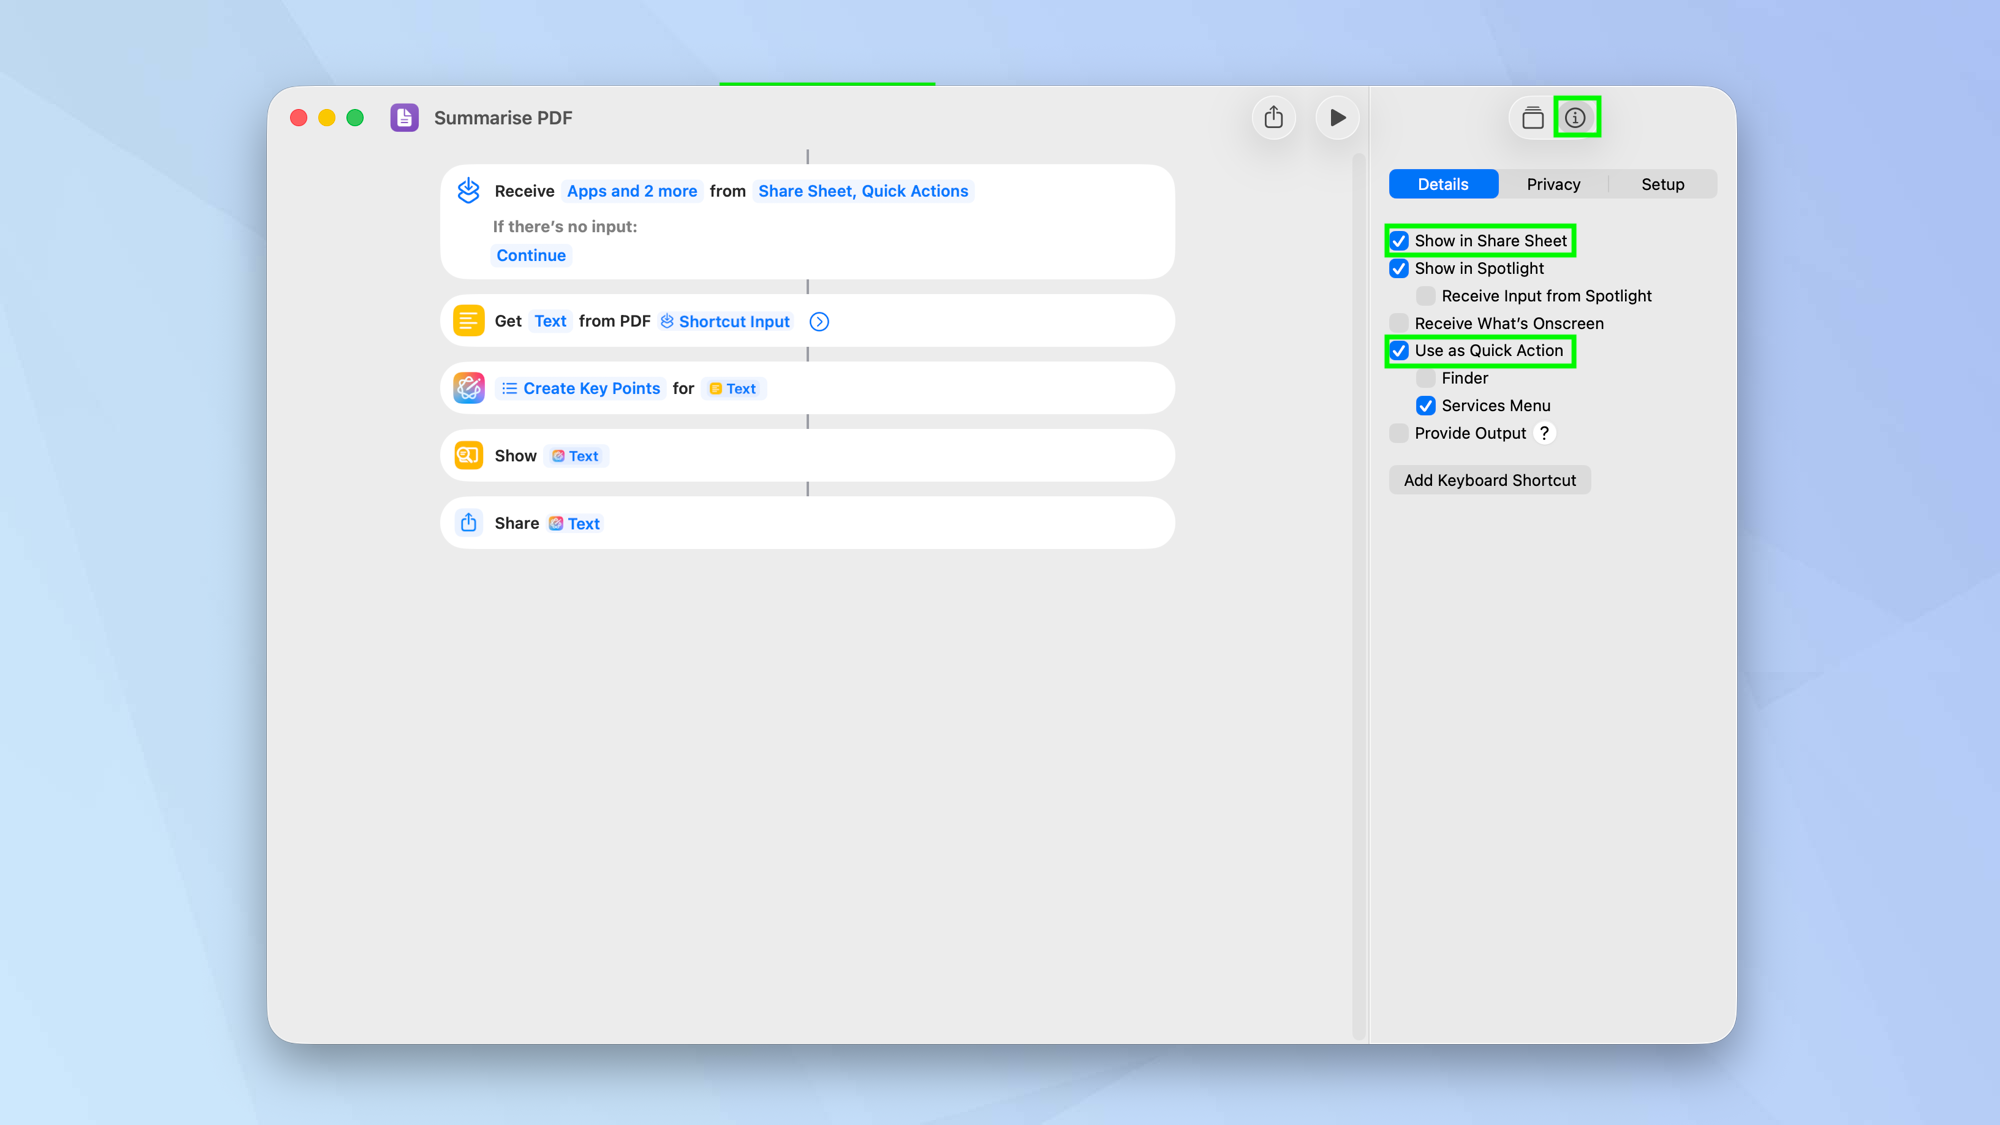
You can ensure the Shortcut is available for use in other apps as well by adding it to the share sheet or setting it as quick action. To do this, double-click the shortcut and select the 'i' icon then tick Show in Share Sheet, and/or tick Use as Quick Action.
7. Run it from a widget
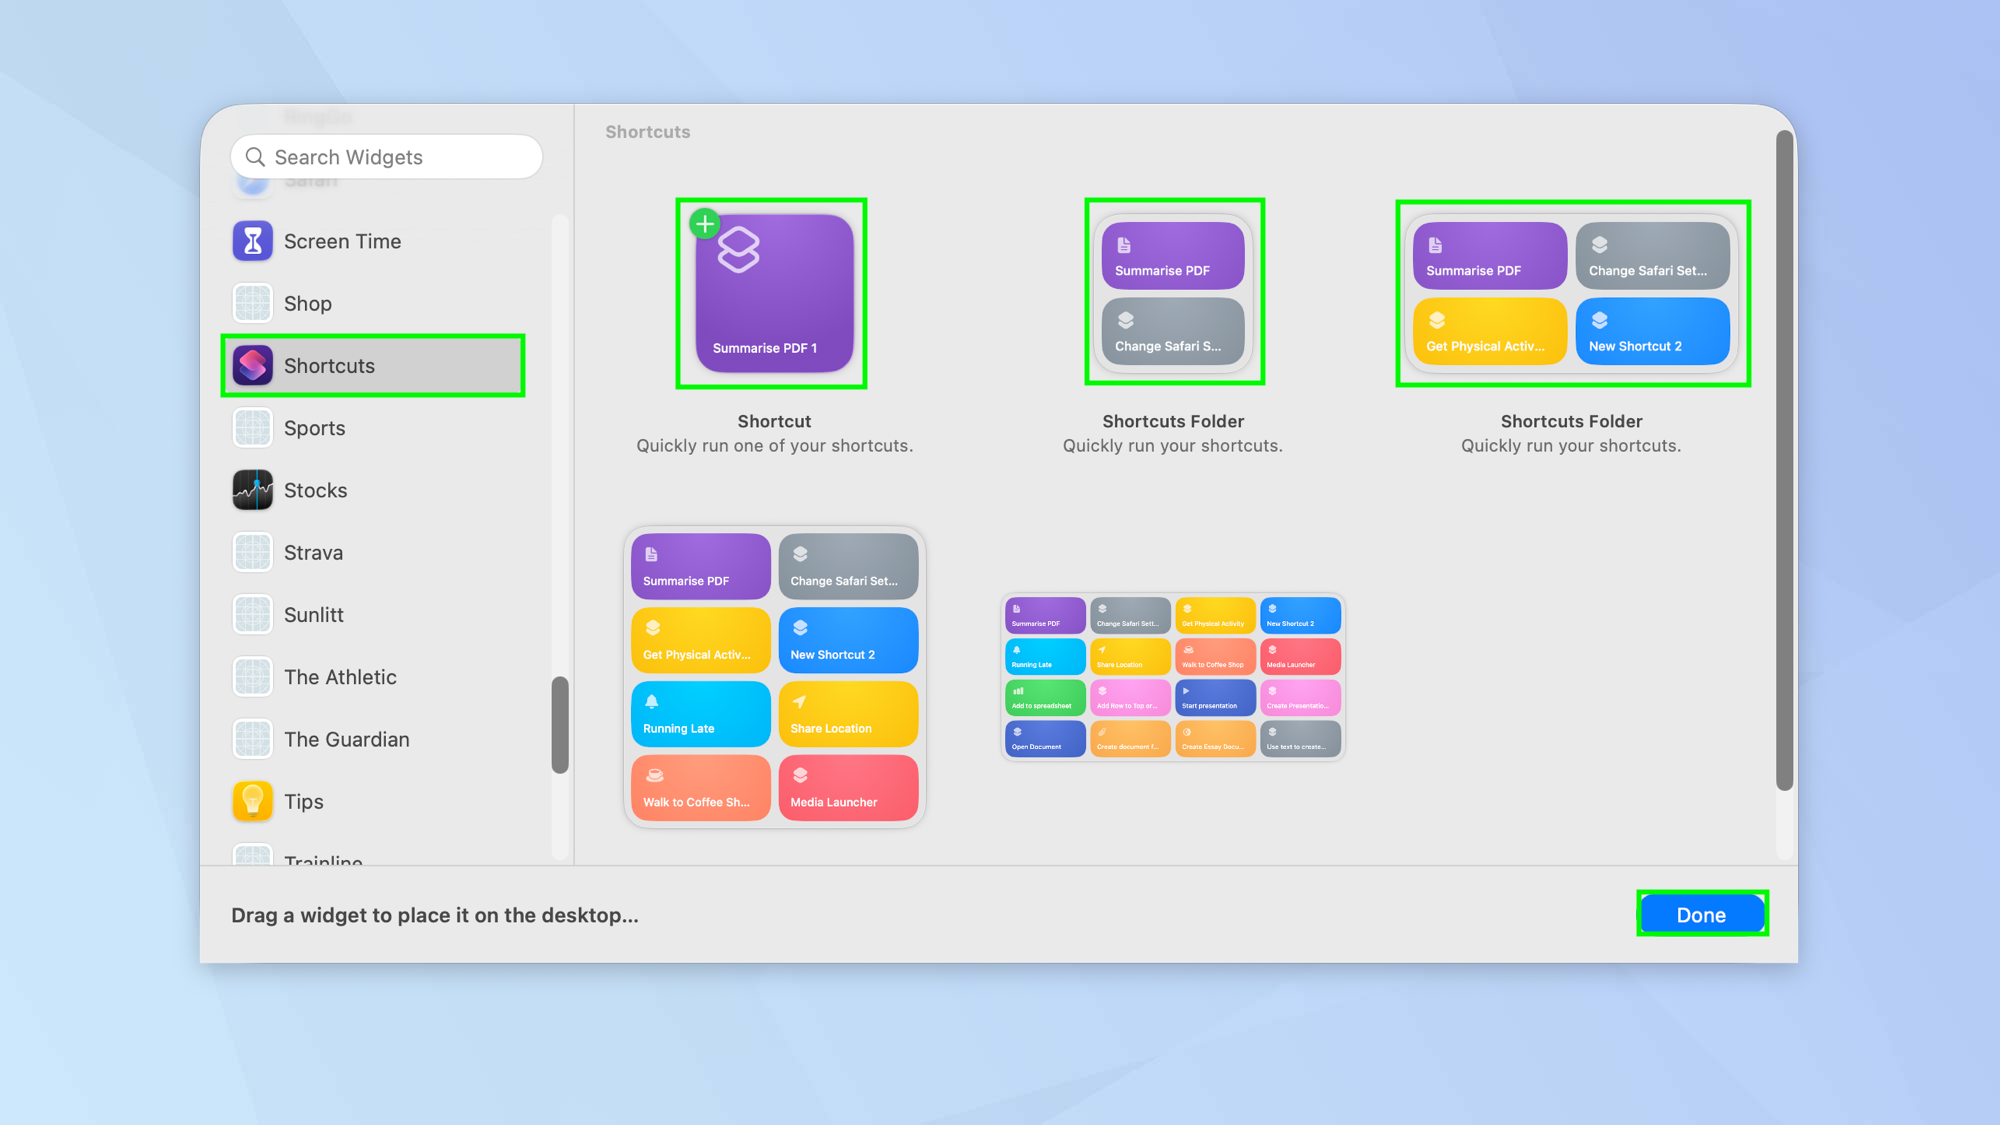
Shortcuts can be set up and run from a widget too. Click the time in the macOS menu bar to open Notification Center and select Edit Widgets, which you’ll find right at the bottom. Click Shortcuts, choose a widget and drag it to either the desktop or the Notification Center. You can then click Done.
8. Create your own shortcut
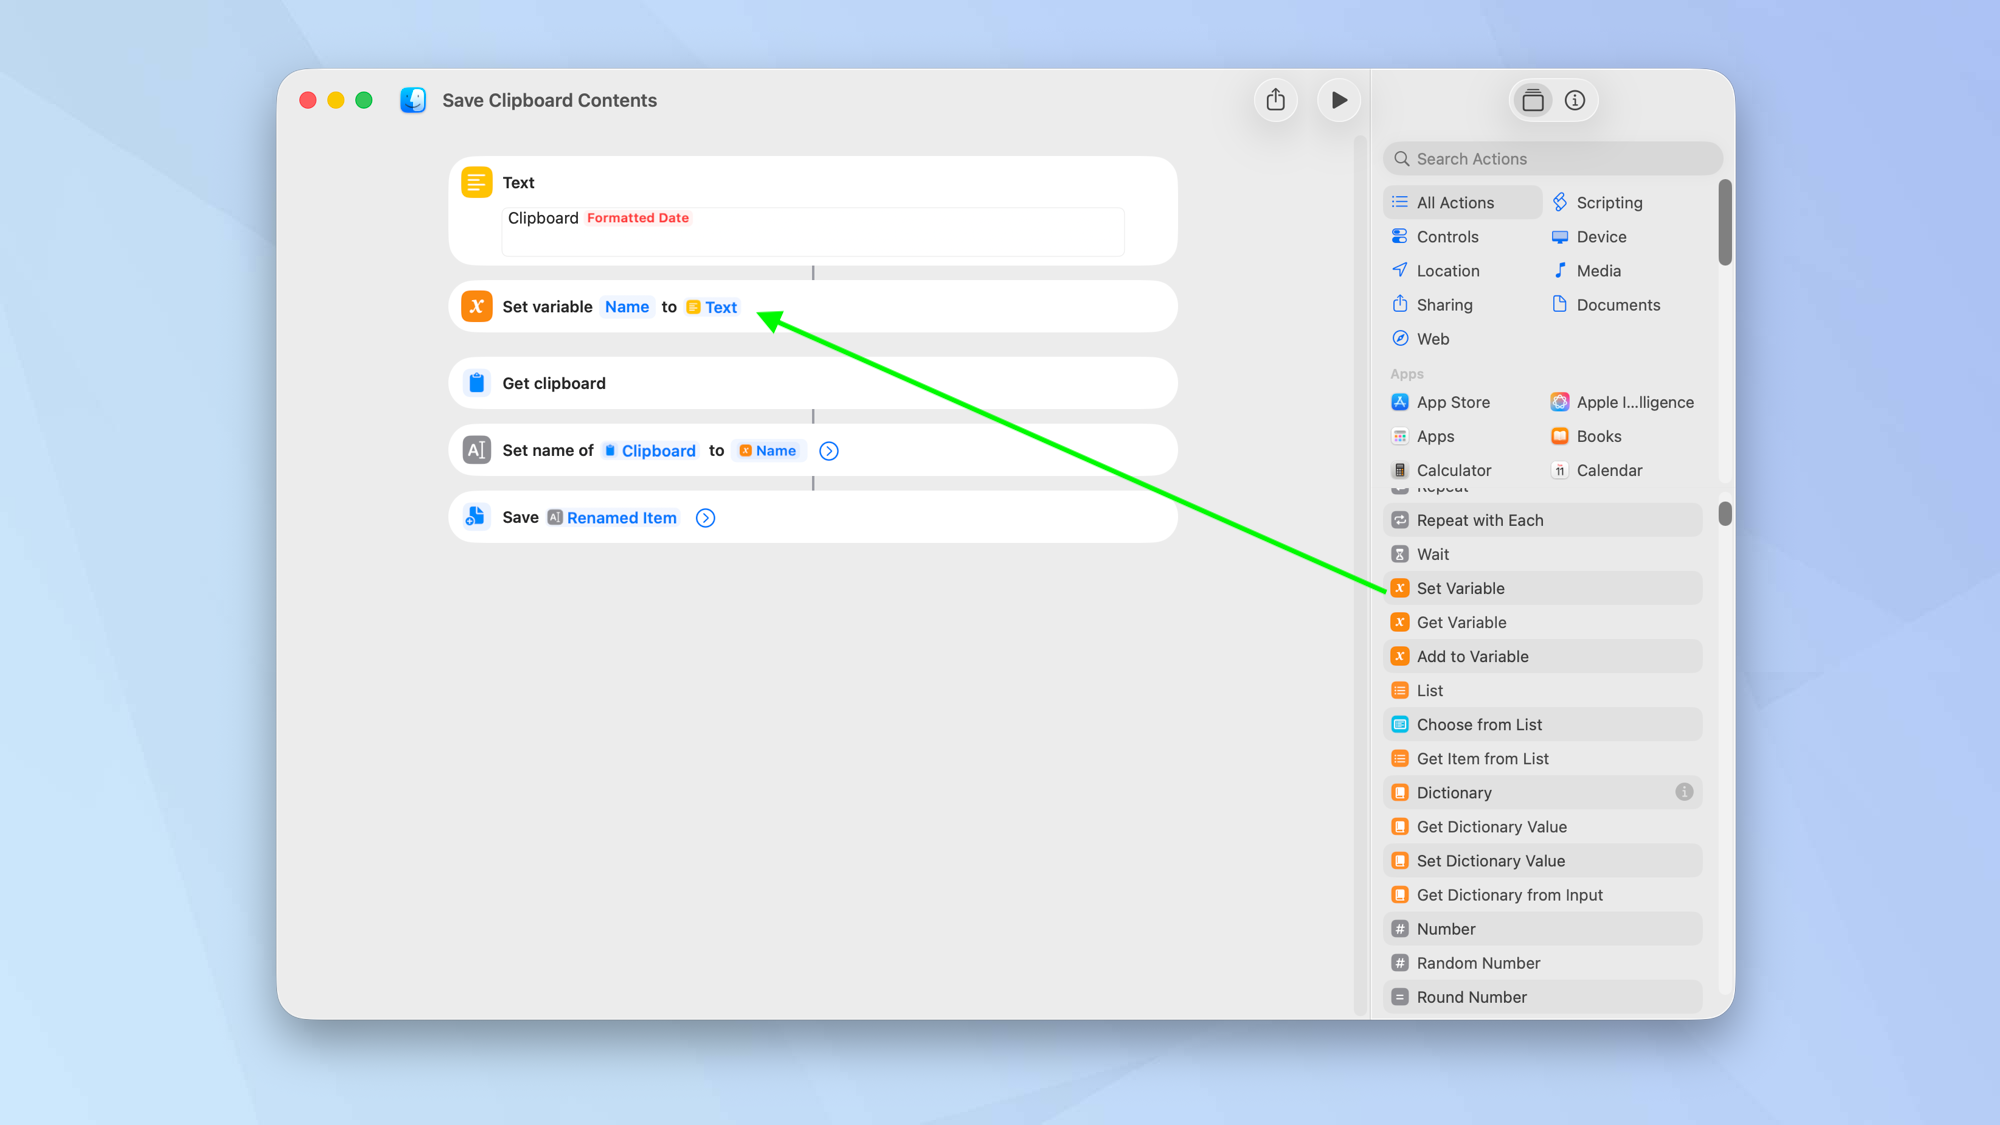
It is possible to produce your own shortcut or edit an existing one. It can feel overwhelming at first but if you look at the structure of an existing shortcut, you can learn more about how they work.
To start from scratch, click All Shortcuts in the left-side menu and click + at the top of the Shortcuts window. You’ll find yourself in the shortcut editor.
The idea is that you select a category from the right-side menu and choose an action — you can drag an action to the main section of the shortcut editor. Keep going until you’ve built a shortcut and, to test it, just click the Play icon. When you close the editor, the shortcut will appear in All Shortcuts.
9. Use Automations
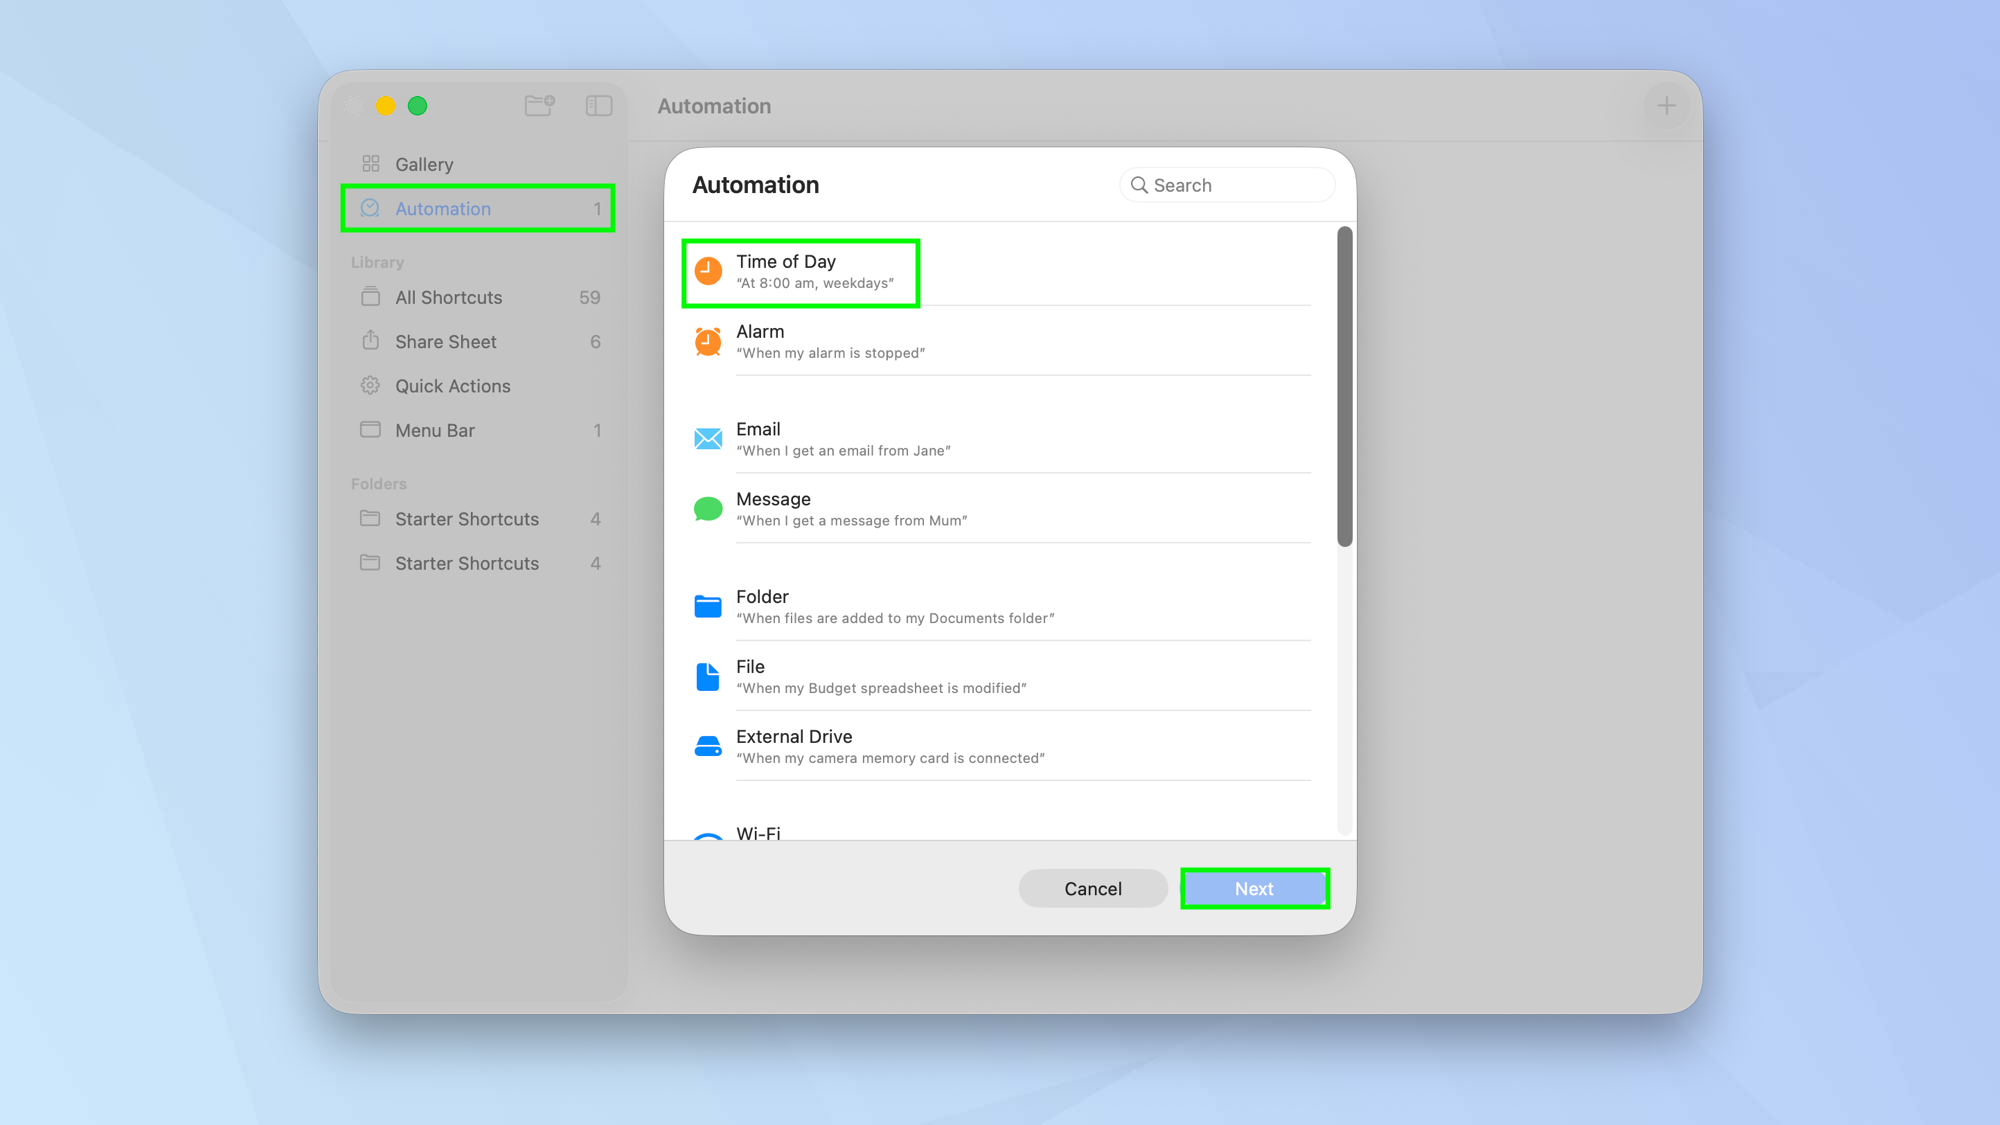
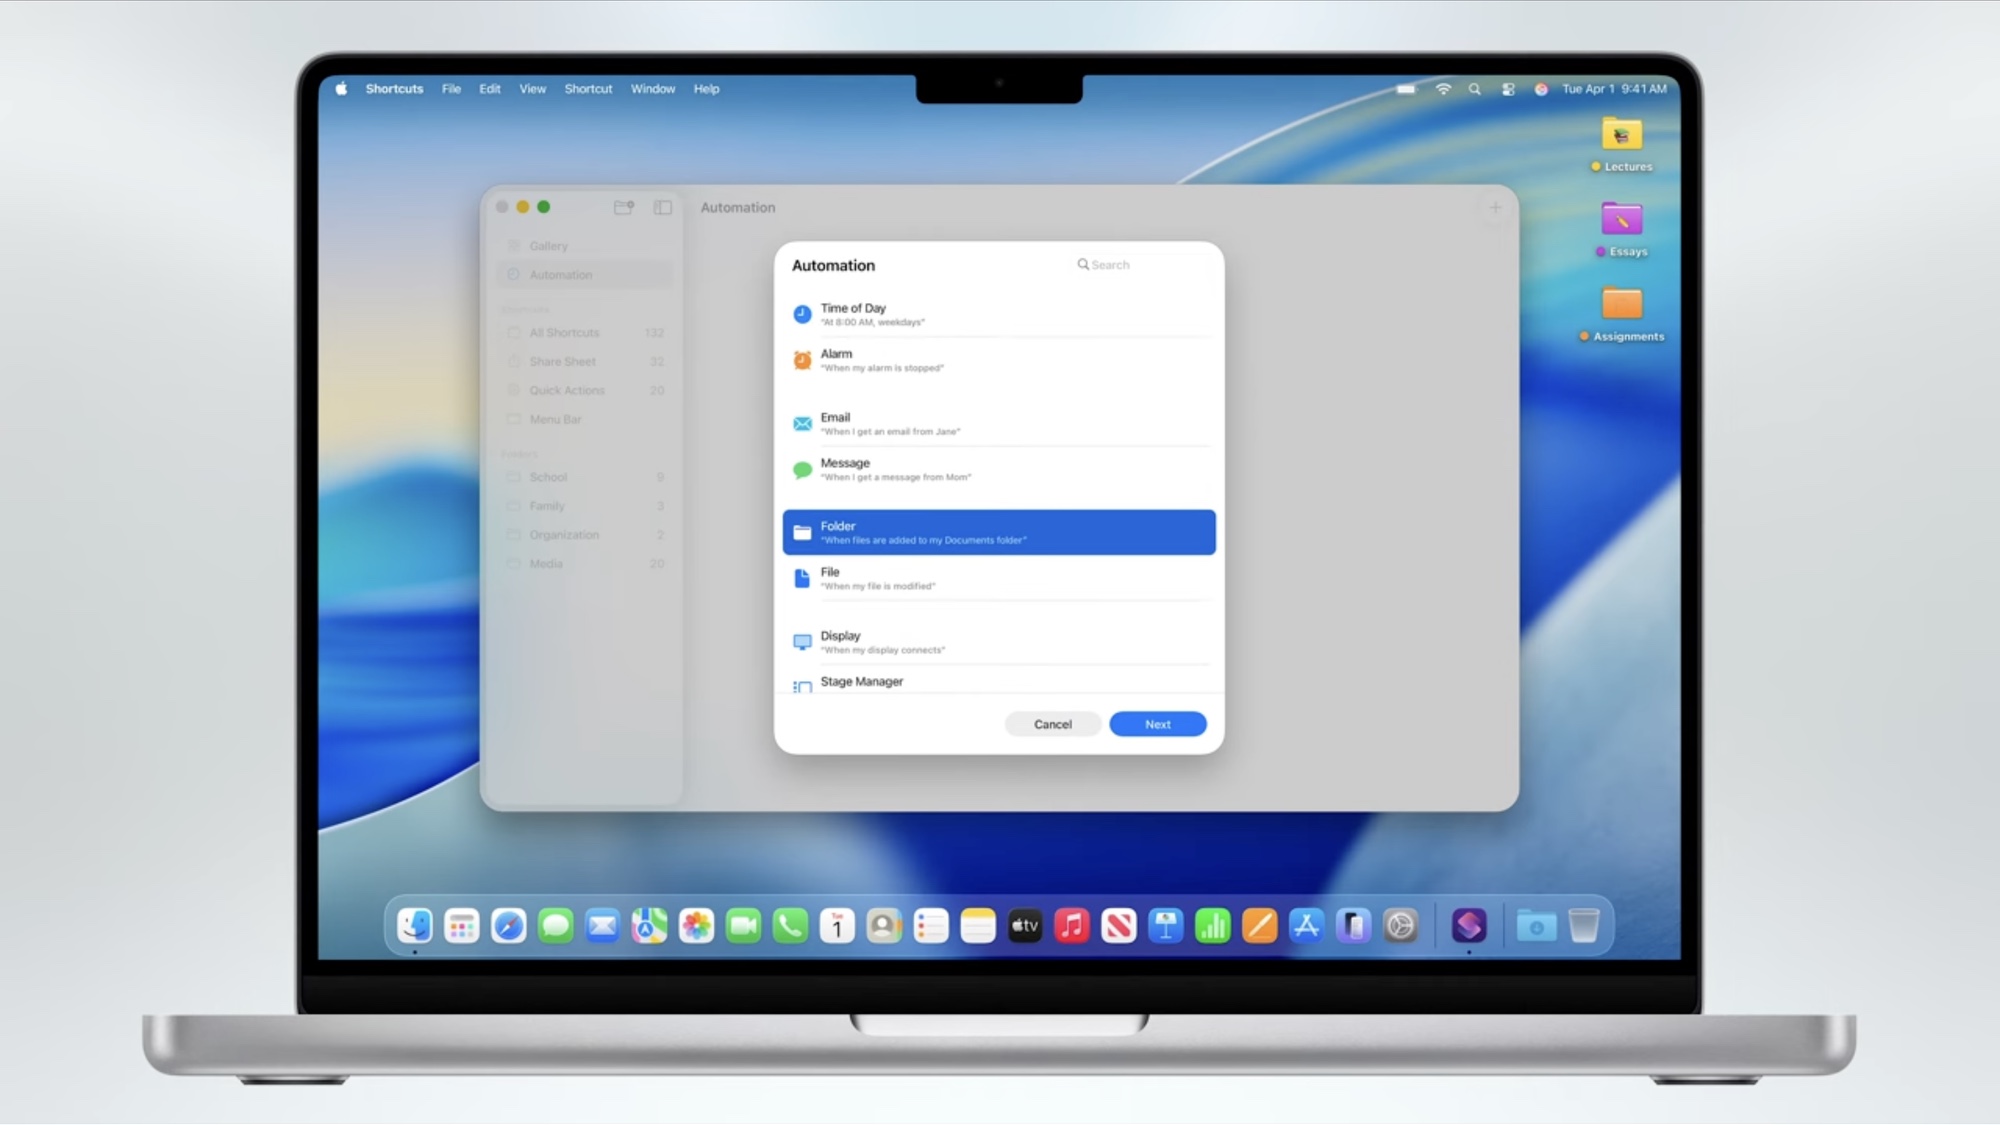
It’s also worth exploring the Automations. These are routines that automatically run when they’re triggered by certain conditions. Click Automations from the left-side menu and select + to get started. You will find lots of options relating to the time of day, alarms, messages, the display, Wi-Fi and more.
Select an option and click Next then fill in any required details. Click Next again and tell Shortcuts what you want to happen when the trigger conditions are met.
As an example, you could select the Automation called Time of Day, set it for sunrise and have the shortcut automatically open a particular app. Automations are the most simple shortcut types to create yourself so they’re worth exploring.

Follow Tom's Guide on Google News and add us as a preferred source to get our up-to-date news, analysis, and reviews in your feeds. Make sure to click the Follow button!
More from Tom's Guide
- 9 MacBook keyboard shortcuts you need to know first
- 7 iOS Shortcuts that will transform how you use your iPhone
- iOS has a killer camera shortcut for your iPhone — here's how to turn it on
Get instant access to breaking news, the hottest reviews, great deals and helpful tips.

David Crookes is a freelance writer, reporter, editor and author. He has written for technology and gaming magazines including Retro Gamer, Web User, Micro Mart, MagPi, Android, iCreate, Total PC Gaming, T3 and Macworld. He has also covered crime, history, politics, education, health, sport, film, music and more, and been a producer for BBC Radio 5 Live.
You must confirm your public display name before commenting
Please logout and then login again, you will then be prompted to enter your display name.
 Club Benefits


