How to Create Videos With Adobe Voice
Adobe's latest app makes it easy for you to create fun compelling videos with photos, text, narration and background music.
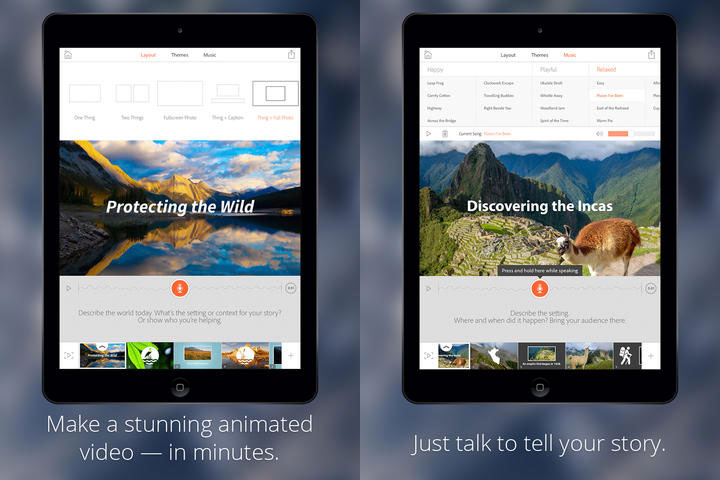
If you've always wished you could create a snazzy, Apple-y video to better share your ideas with the world, but don't have the skills to do so, a new Adobe app could help realize your dream. Voice is an app for the iPad that lets you create polished animated videos in just a few steps. Here's how to use Adobe Voice to produce your very own video to promote your website, make a class presentation or even just for kicks.
Before you start, we recommend preparing a script or outline. Think about the images and narration you want to present, as well as the order and timing of frames. This will help you figure out when to stop recording each soundbite.
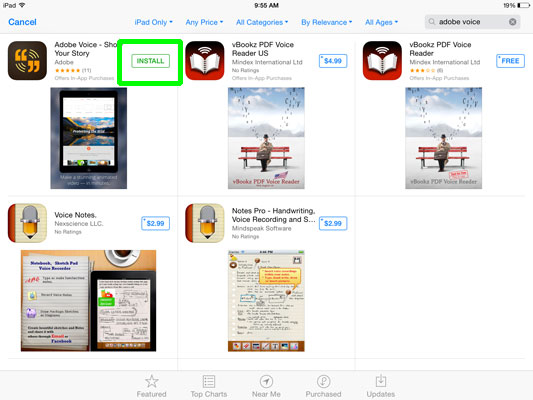
1. Download and install Adobe Voice from the App store. You can search for "Adobe Voice" to pull it up.
MORE: 15 Best Apps Only on iOS
2. Open the app.
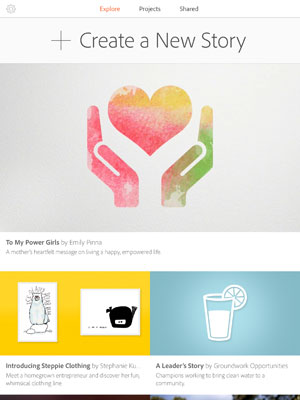
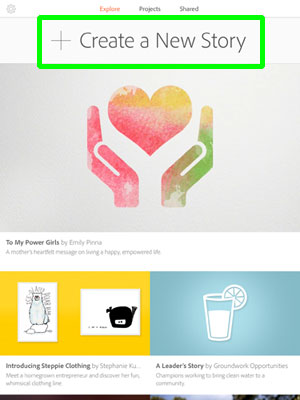
3. Tap Create A Story at the top.
4. Name your video and hit Next.
Get instant access to breaking news, the hottest reviews, great deals and helpful tips.
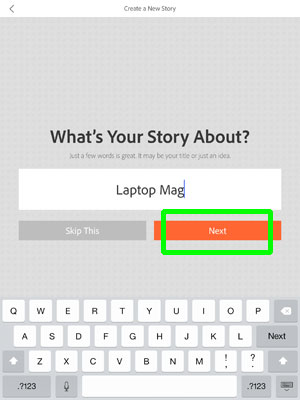
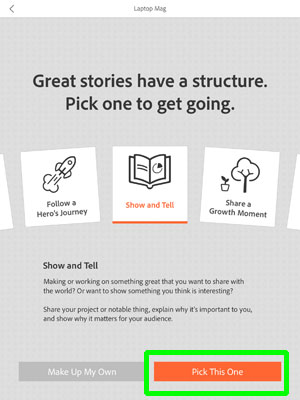
5. Select a structure. You can choose from eight preset structures or make up your own. Tap Pick This One to continue.
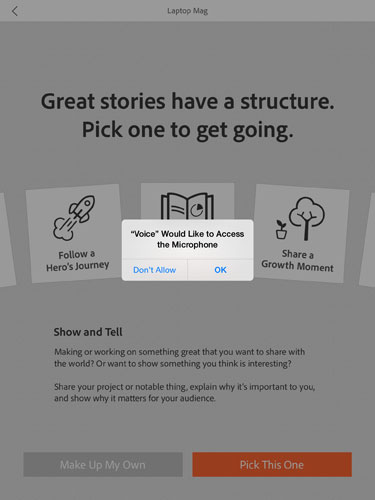
6. Allow Adobe Voice to access your microphone.
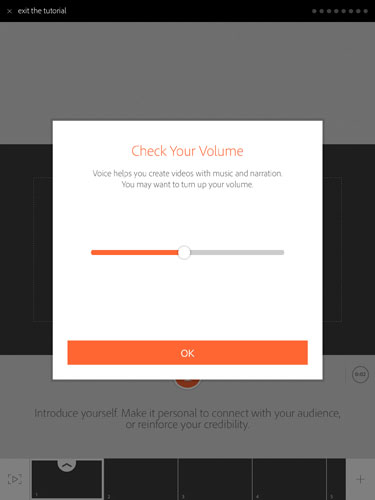
7. Check your volume.
8. Tap and hold the microphone icon to record your narration. Let go when you're done.
MORE: 25 Free Apps for New iPad Users
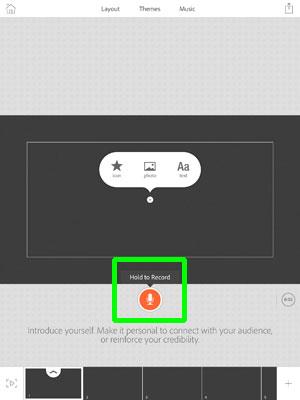
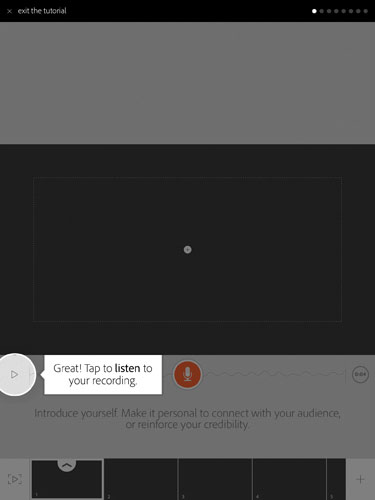
9. Review your sound clip by tapping the play button on the left. Voice automatically adds backing music to your video based on the structure you selected. You can change the backing music later. If you don't like your soundbite, just tap and hold the microphone button again to re-record.
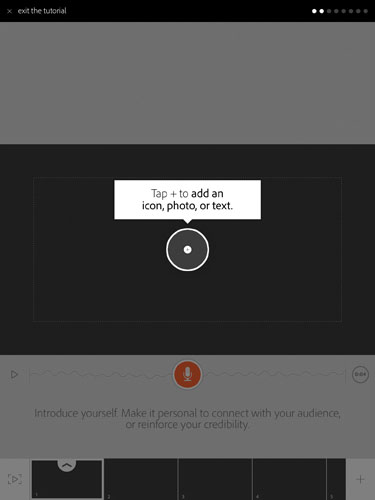
10. Press the Plus symbol in the middle of the slide to insert a graphic. You can add one of 25,000 icons available, import a photo from your iPad, Facebook, Creative Cloud or Dropbox account, take one with the camera or search for an image in Adobe's database. You can also enter text.
11. Tap Play to the left of the timeline at the bottom of the screen to review your video so far. If you like what you see, you can move on to the next step.
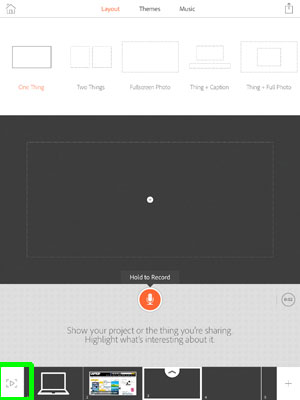
12. Hit the Plus symbol to the right of the timeline to add another slide.
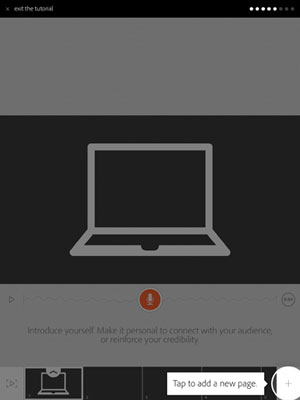
13. Repeat steps 8 to 12 to keep developing your story. You don't always have to record your voice first, feel free to insert a graphic before adding sound.

14. Tap Layout at the top to change how each slide looks. You can have the slide be a fullscreen photo, a graphic and caption, or two graphics side by side.
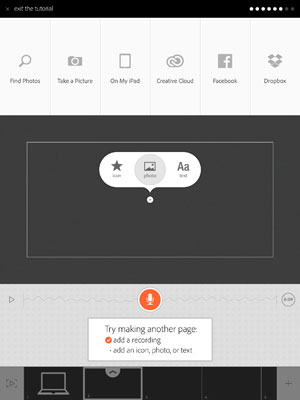
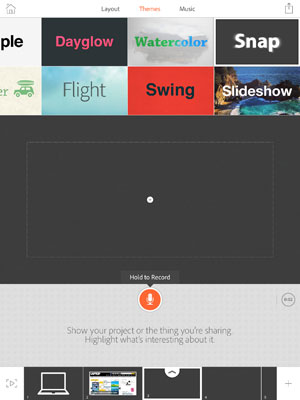
15. Pick a template for your overall video under the Themes tab. Adobe provides 32 themes for you to choose from.
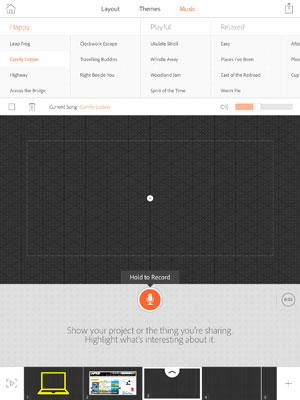
16. Change the background music by picking your preferred song in the Music tab. There are 33 songs of varying moods such as Happy, Rousing, Relaxed, Thoughtful and Uplifting.
17. Tap the Share button at the top right when you feel your video is ready.

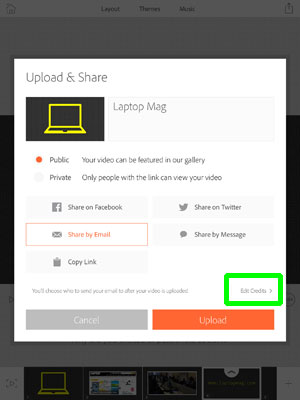
18. Choose whether you want the video to be public or private, and how you'd like to share the video. You can also enter credits to include people who contributed photos, graphics, narrations or ideas.
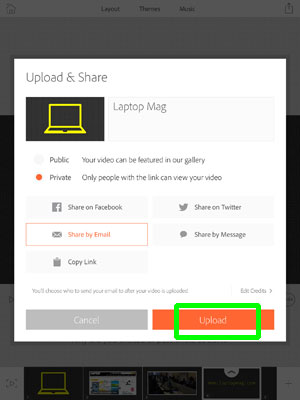
19. Hit Upload.
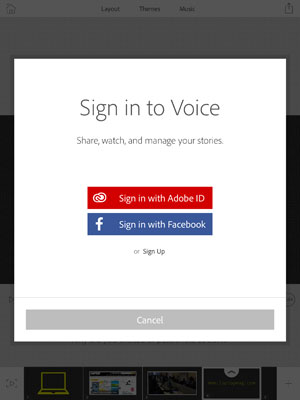
20. Sign in to your Facebook or Adobe account. You'll need to sign in to one of these services before Adobe will upload your video. Your masterpiece will be hosted on voice.adobe.com.
And you're done. Public videos are available in Adobe's gallery for anyone to view. If you selected Private in step 18, you'll get another screen to either email your video to friends or a link to paste it anywhere you want.
Follow Cherlynn Low at @CherlynnLow and on Google+. Follow Tom's Guide at @tomsguide, on Facebook and on Google+.
Cherlynn is Deputy Editor, Reviews at Engadget and also leads the site's Google reporting. She graduated with a Master’s in Journalism from Columbia University before joining Tom's Guide and its sister site LaptopMag as a staff writer, where she covered wearables, cameras, laptops, computers and smartphones, among many other subjects.
 Club Benefits


