Tom's Guide Verdict
Adobe Premiere Elements continues its long reign as the overall best consumer video-editing app, with new automated features and simplified workflows for quick video editing.
Pros
- +
Supports new HEVC and HEIF file formats for images and videos
- +
Quick Edit update streamlines most editing tasks
- +
New home screen provides continuous access to all functions and apps
- +
Auto-generated slideshows and photo/video collages make social media sharing quick and easy
- +
Works on Macs and PCs
- +
Intriguing new guided edits
- +
Built-in asset manager
Cons
- -
Some aspects of automated video trimming seem counterintuitive
- -
No support for HEVC and HEIF file formats on Windows
- -
Must sign in with an Adobe ID to use the app
- -
No support for 360-degree video
- -
Can't resize Home Screen window
- -
No support for multicam editing
Why you can trust Tom's Guide
Premiere Elements, Adobe's consumer video-editing app, has been a favorite of ours for several years. It's creative, friendly, easy to use and cross-platform, allowing video novices to edit with panache and quickly share smartphone videos with family and friends.
This year's update, Premiere Elements 2019, has all the stellar attributes of previous versions but with a couple of significant artificial intelligence upgrades.
Adobe's consumer photo and video apps have remained the same price for many years. Premiere Elements alone costs $99.99, with an upgrade price of $79.99 (£86.56; £70.91). If you buy both the video editor and Photoshop Elements as a bundle, the purchase will set you back $149.99, with an upgrade price of $119 for both apps (£130.36; £107.41).
What's new
For 2019, Adobe has revamped the all-important Quick Edit mode with a simplified interface. Quick Edit now directs users to either the updated Smart Trim feature or the new Sceneline, a storyboard-style editing interface you can use to organize and edit multiple clips and photos. The new version of Quick Edit is short on new guided edits — there are only two in this version — but they are imaginative and unique, offering new opportunities to enhance run-of-the-mill footage.
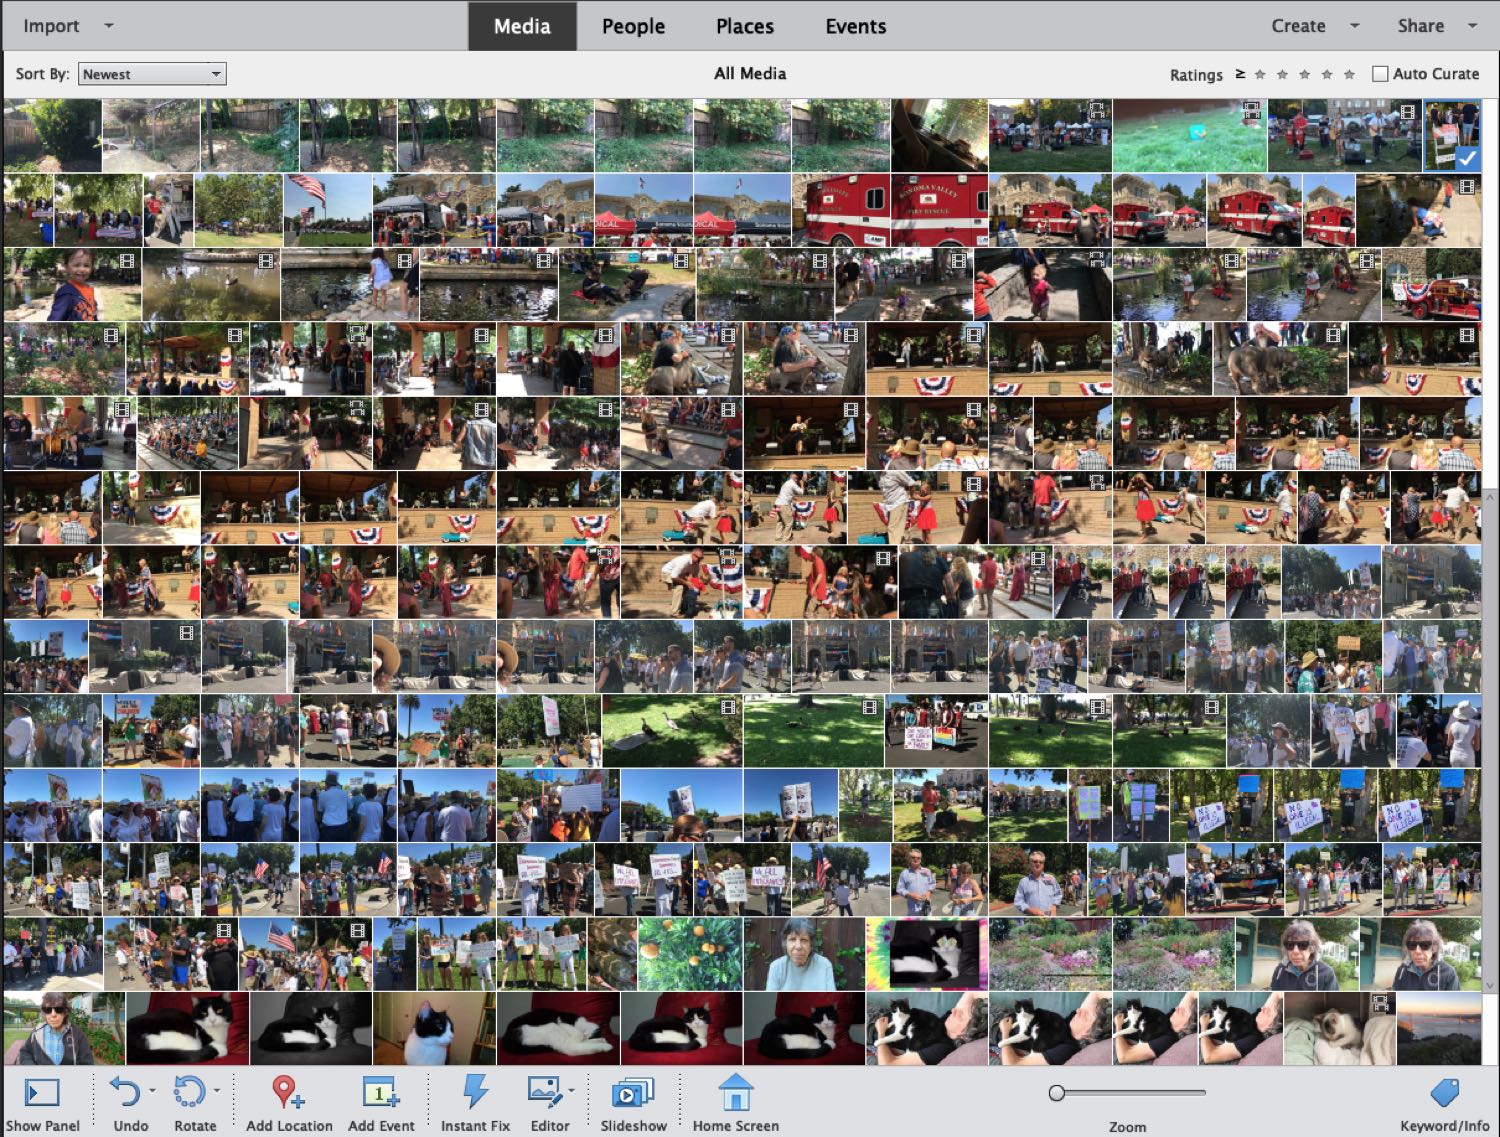
Premiere Elements now supports VFR (variable frame rate) footage and HEVC (High Efficiency Video Coding), also known as H.265, a high-compression video codec. Space-saving HEIF and HEVC formats debuted alongside iOS 11 and macOS High Sierra. While the app supports H.265 on the Mac, support has yet to arrive for Windows. Adobe still does not consider 360-degree VR video or multicam editing to be consumer features, reserving support for such features to the company's pro-level Creative Cloud Premiere Pro CC.
MORE: The Best Free Video-Editing Software
For the first time in recent memory, there are no feature additions to the Elements companion Organizer app, which already does much of the heavy lifting for search, slideshow production and collage creation. Any functionality improvements built in to the Organizer reside under the hood. And for the first time, using Premiere Elements generates two instances of dock icons: one for the Home Screen and the other for the program work space.
Get instant access to breaking news, the hottest reviews, great deals and helpful tips.
Auto Creations
As you launch Premiere Elements, the star of the new Home Screen is Auto Creations: complete collages and slideshows automatically generated via Adobe Sensei, the company's artificial intelligence engine. If you have imported photos and videos into the Organizer, the app will generate several polished creations.
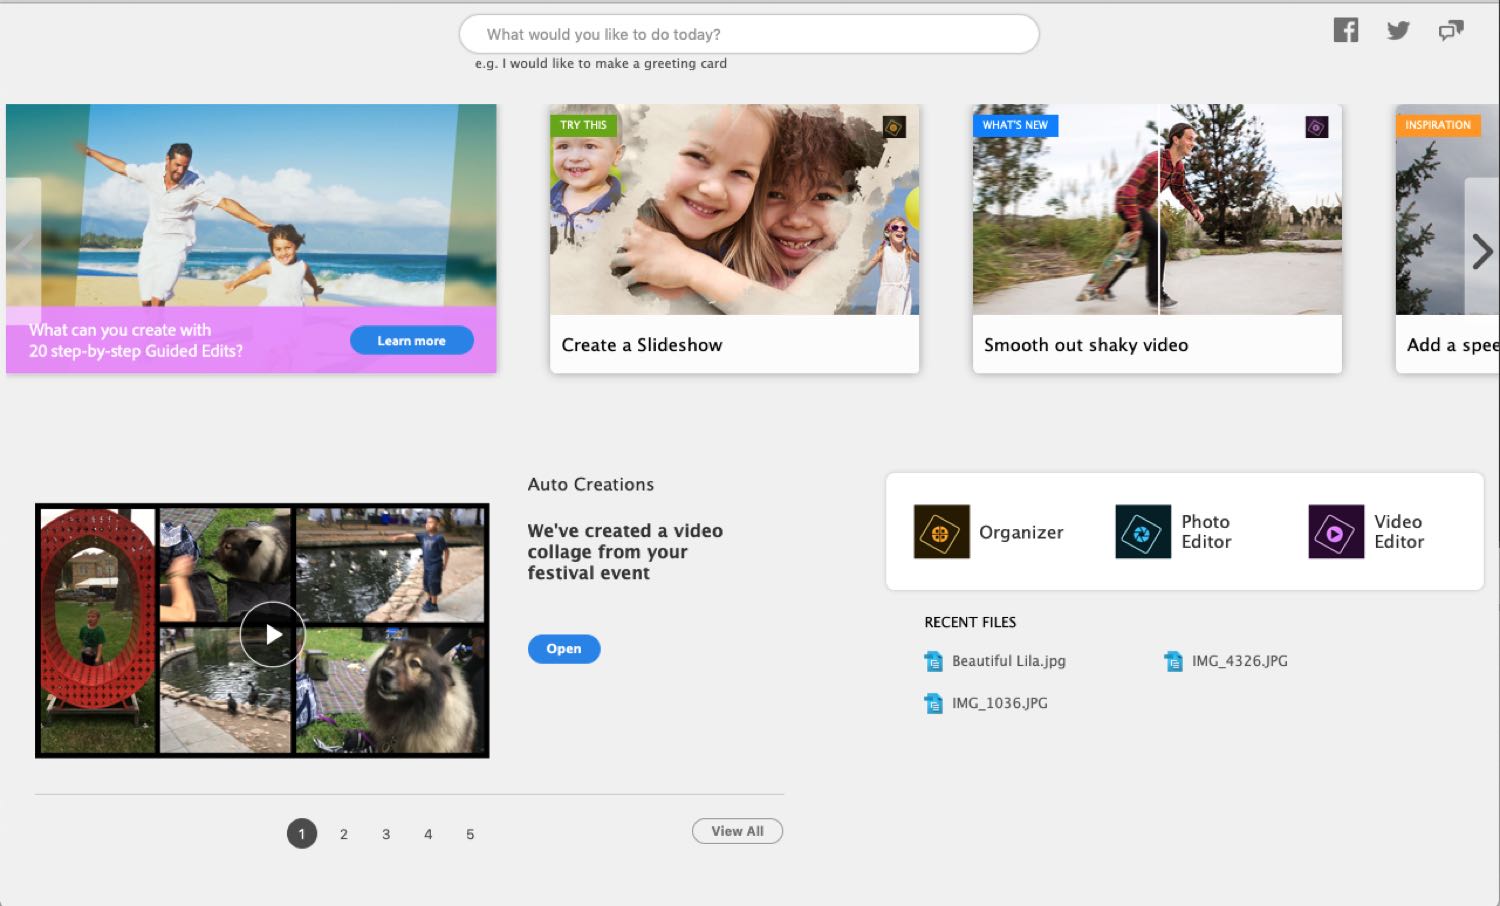
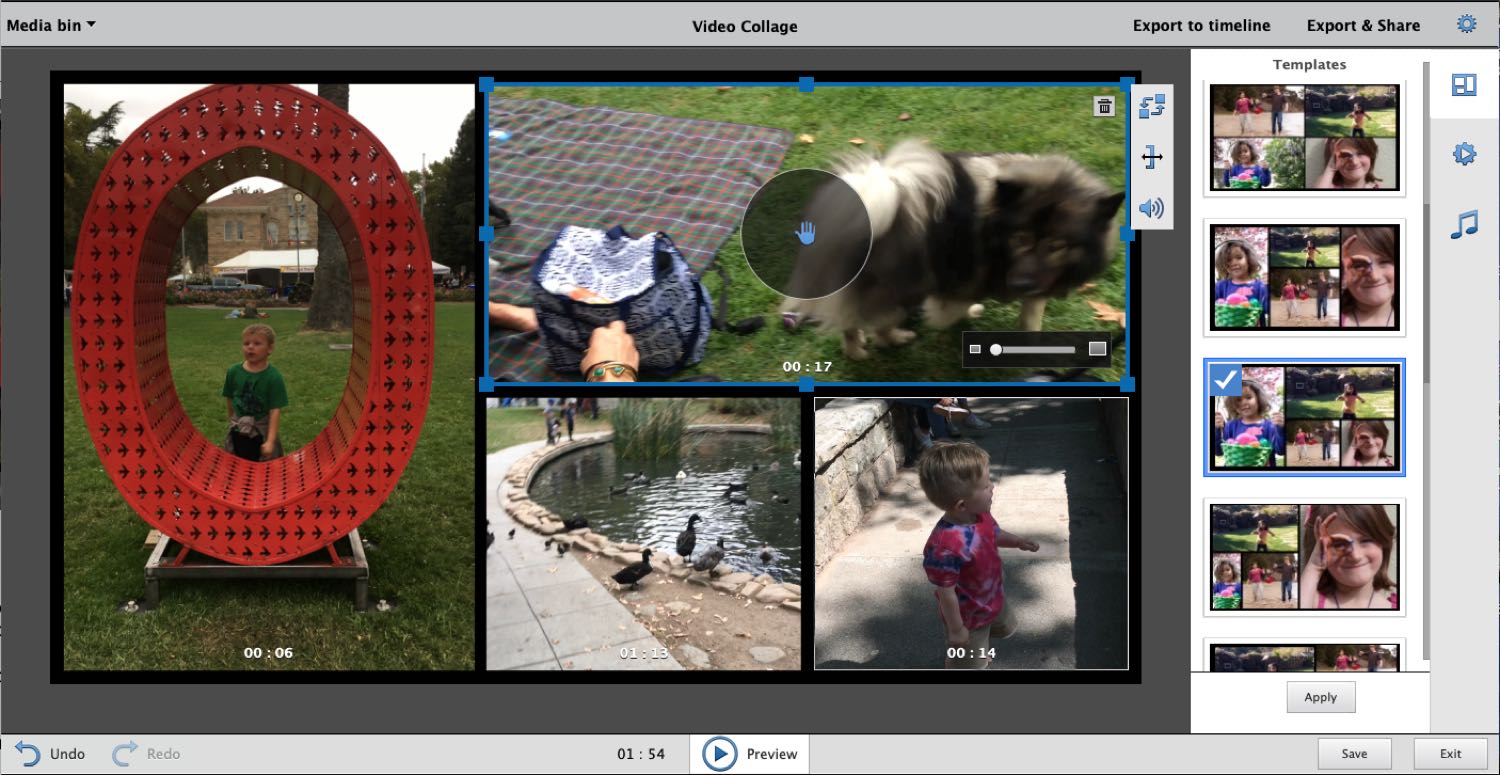
Sensei scans your content and pulls together numerous videos, photos and stills extracted from video to create slideshows and collages that you can use as is or tweak by swapping out content and backgrounds. Busy users will appreciate how presentable these montages look for quickly preparing social media postings.
Intelligent trimming
Adobe's revamped Quick Edit mode now funnels edits into two main channels — Smart Trim and Sceneline — each accessible with a separate button. These allow you to either trim a single clip or combine photos and videos to create a longer, more complex movie.
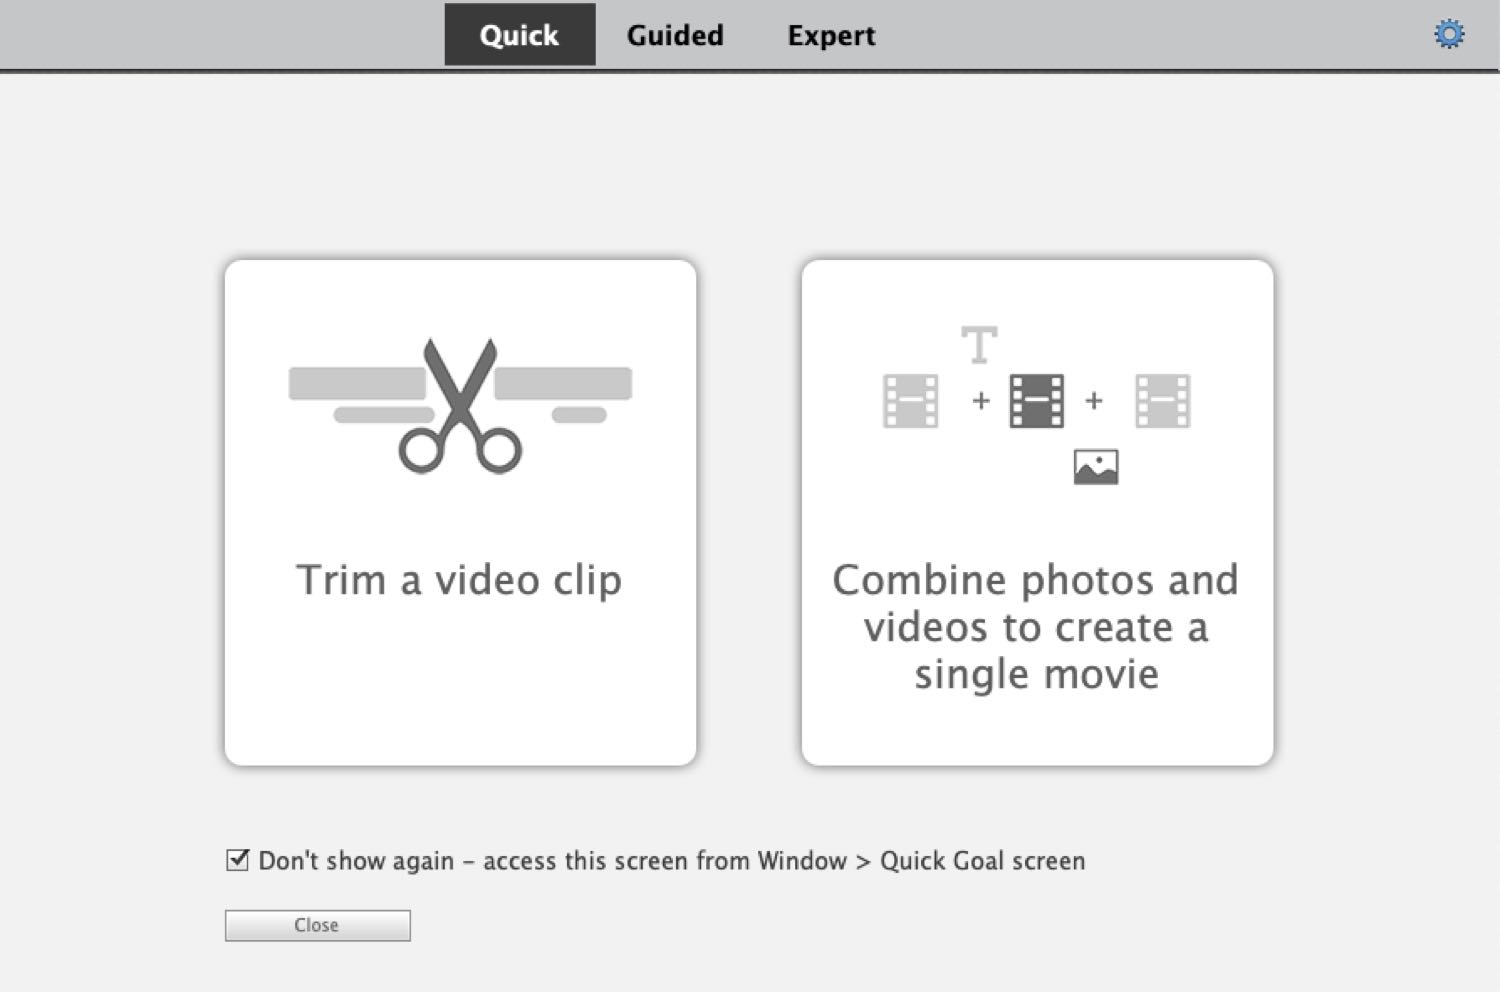
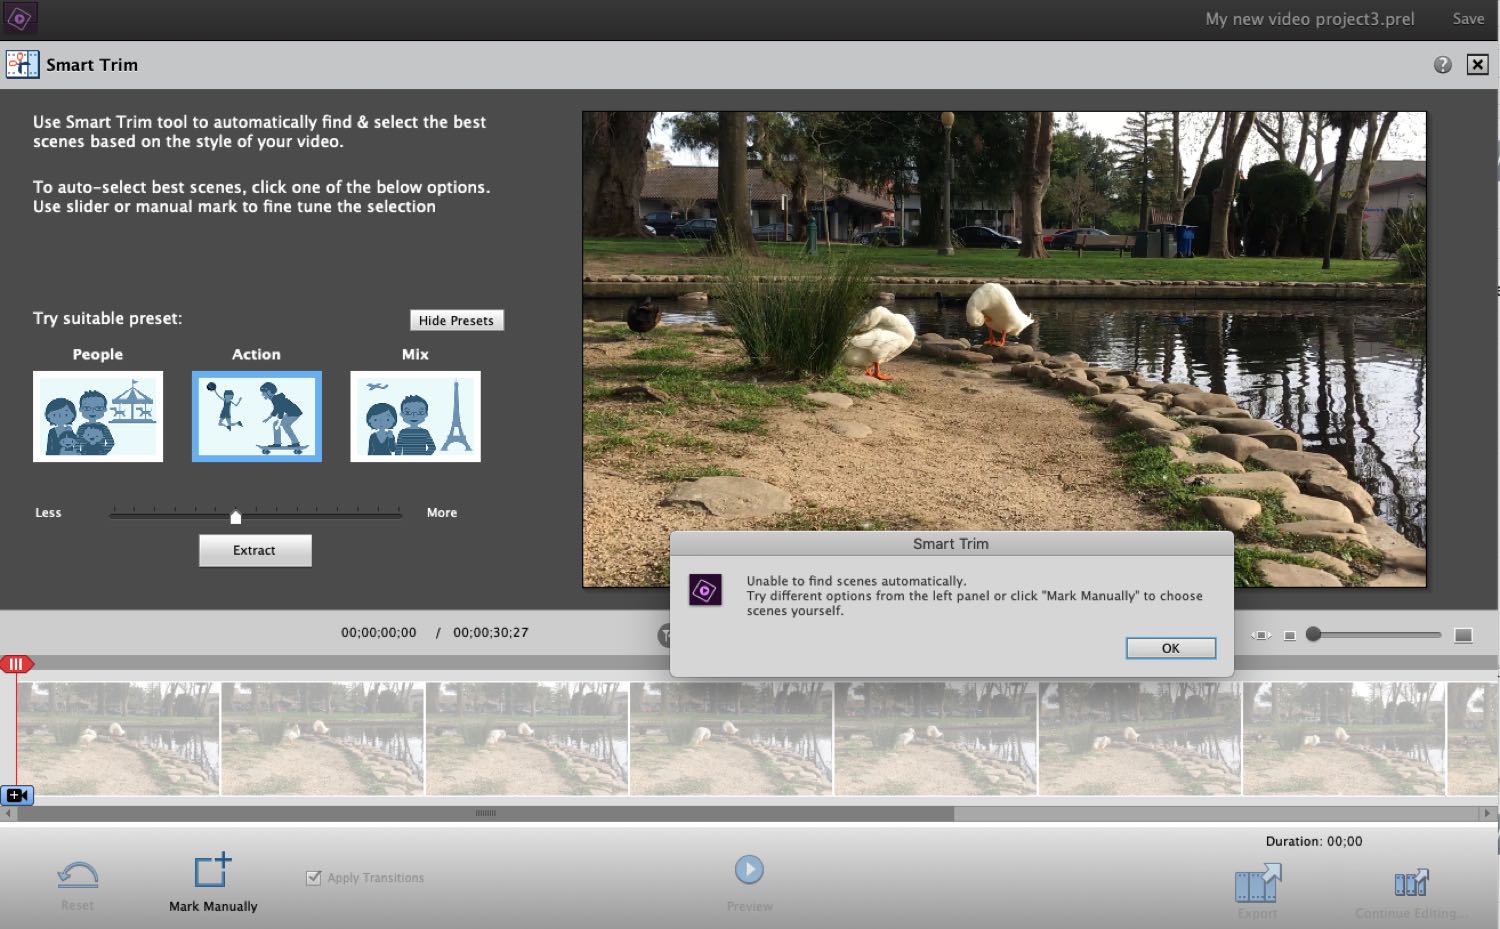
Smart Trim uses Sensei tech to automatically scan and trim the fat off your videos so you can focus on only the most dynamic and compelling parts. You can manually modify clips in any way you want, as you may not always agree with what the Premiere Elements algorithm identifies as interesting, but it's a start to an inherently tedious task.

I found Smart Trim a little counterintuitive at first, because the auto-trim feature always automatically selects the first few seconds of a movie. Activating and moving the Preset slider in the Smart Trim tool lets the program select and reject various parts of your movie based on the action or people present. Adobe says the marking of the first few seconds of all videos is designed to familiarize novice editors with how to use the feature. You can always cut the movie manually or use the preset as a starting point for additional manual edits, but if you choose the preset after you have manually carved out your cuts, the tool will wipe out that original work.
Premiere Elements' new Sceneline interface brings all the needed tools into closer proximity with each other in an elegant workflow.
Sensei doesn't work well with all footage. Certain videos, like one of my foray at the duck pond, are apparently so boring that the app refused to judge the action at all. Adobe has confirmed that extremely short videos or those that lack faces or medium- to high-level activity or action may produce error messages. For editing my little ducklings, I was on my own.
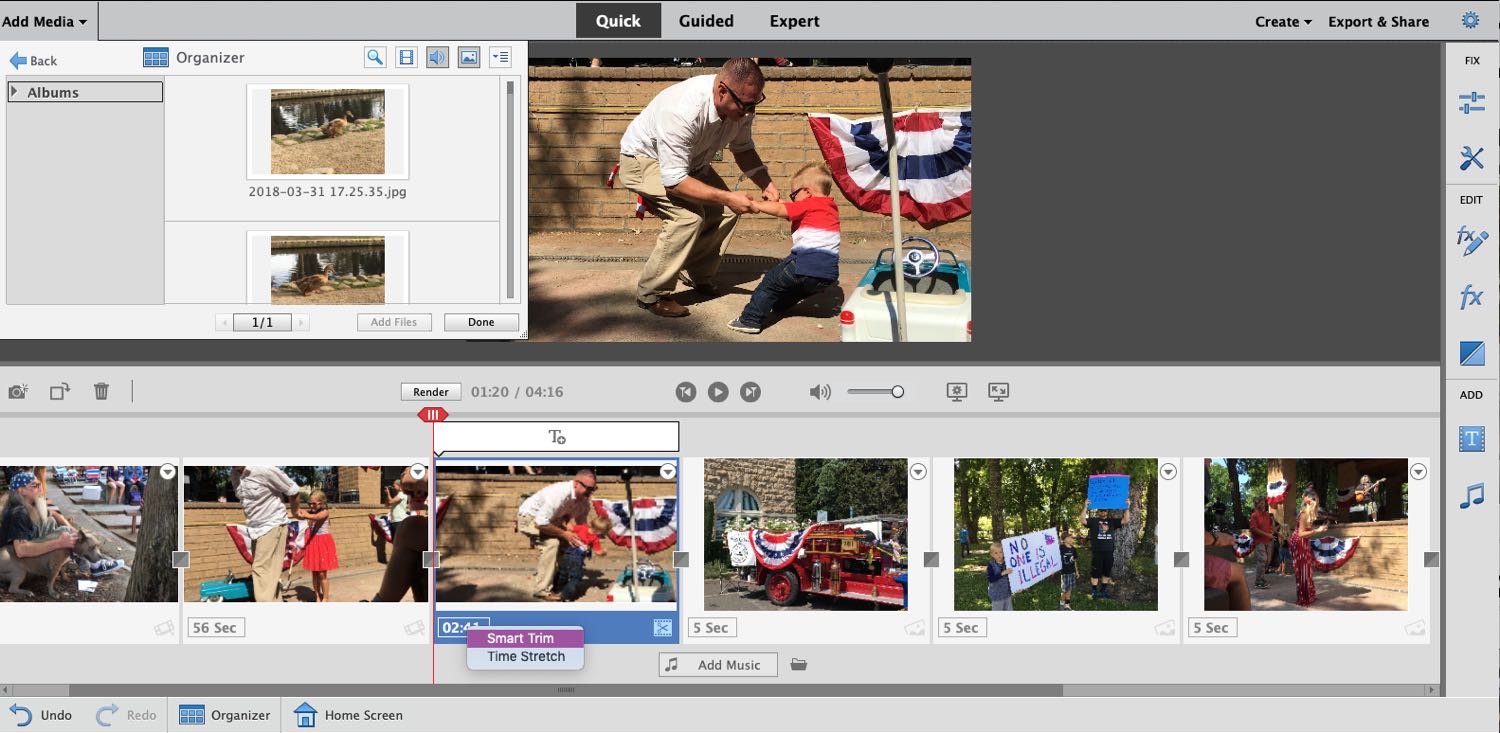
The new Sceneline interface brings all the needed tools into closer proximity with each other on the timeline in an elegant workflow. With it, you assemble multiple clips and photos to create a longer and more complex movie. This is basically a storyboard layout, a classic video-editing view that shows you each clip and image as a separate entity on the timeline. Storyboarding works well as an organizational tool, because it gives a macro view of how the movie is organized before you get too deep into the edit.
Guided edits
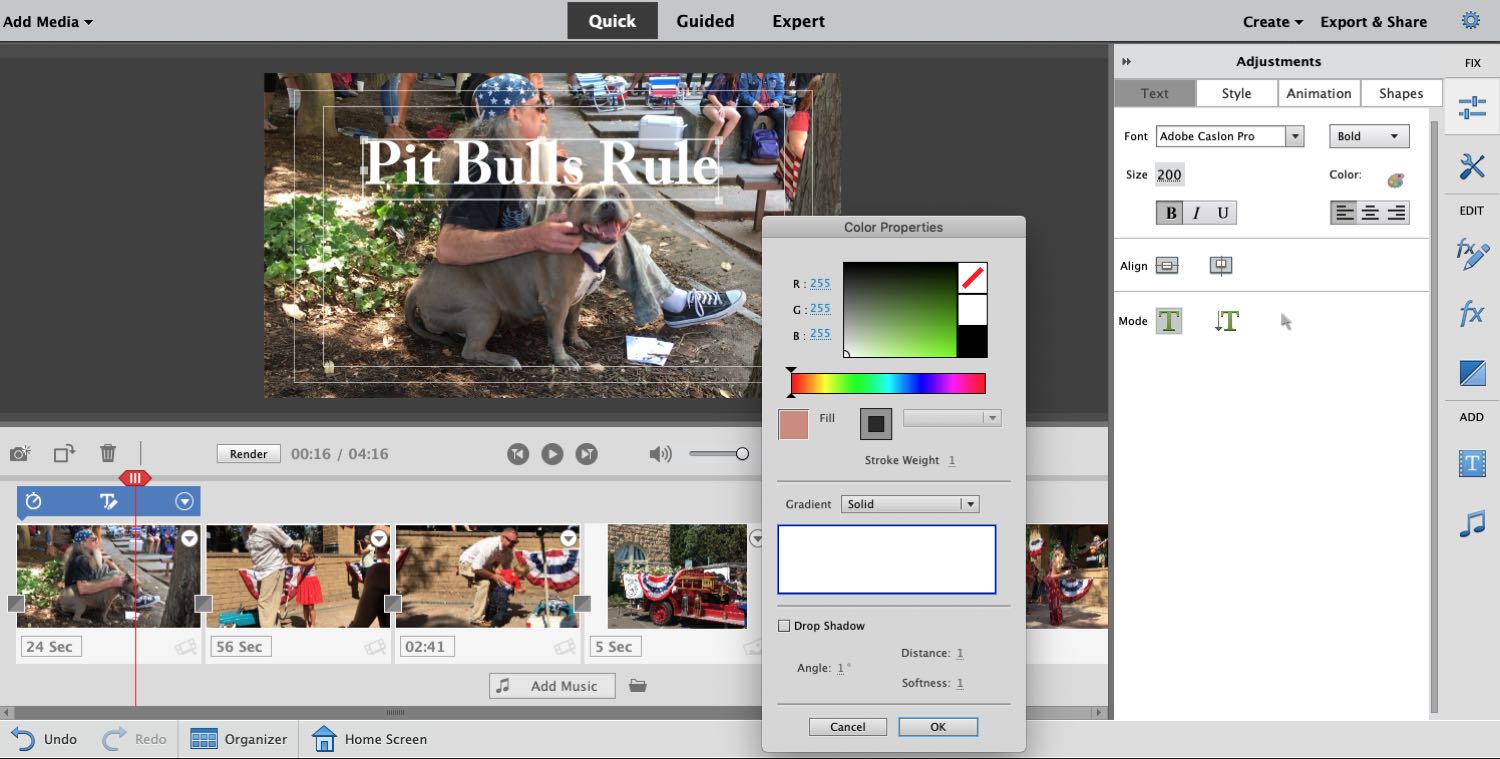
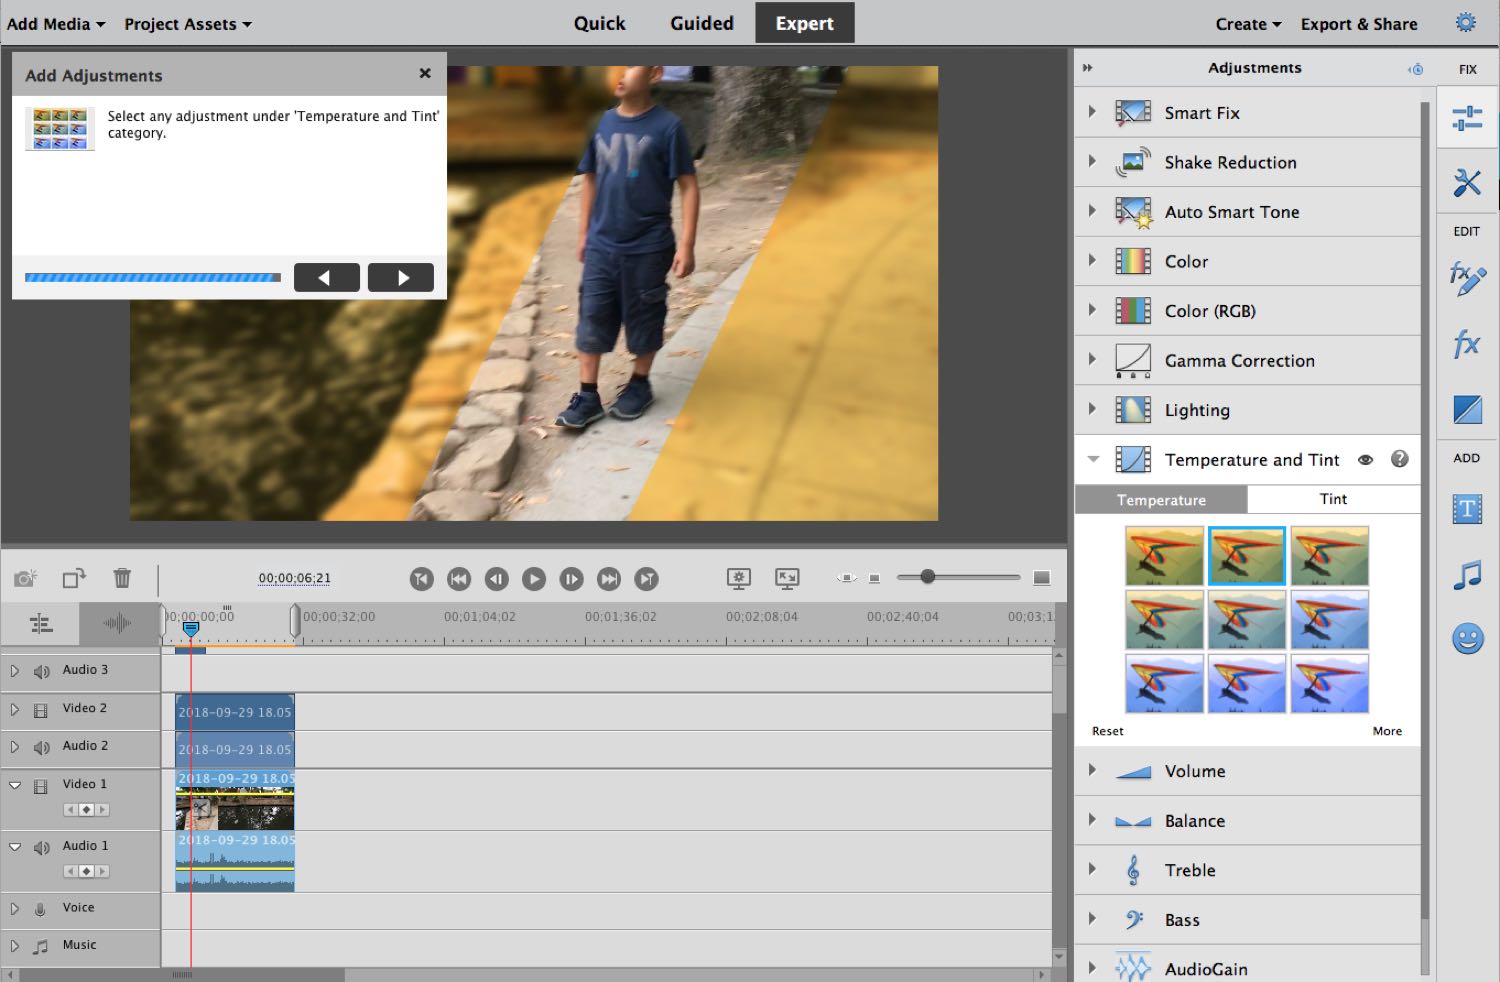
Most Premiere Elements versions introduce several new guided edits. These friendly, step-by-step instructional recipes are videographer show-and-tells that instruct you on how to achieve special effects that most novices would have no clue how to accomplish. This year, Premiere Elements has only two new guides, but they are distinctive and artistic if properly used. Not all videos will benefit from the guides, but the ones that do look outstanding.
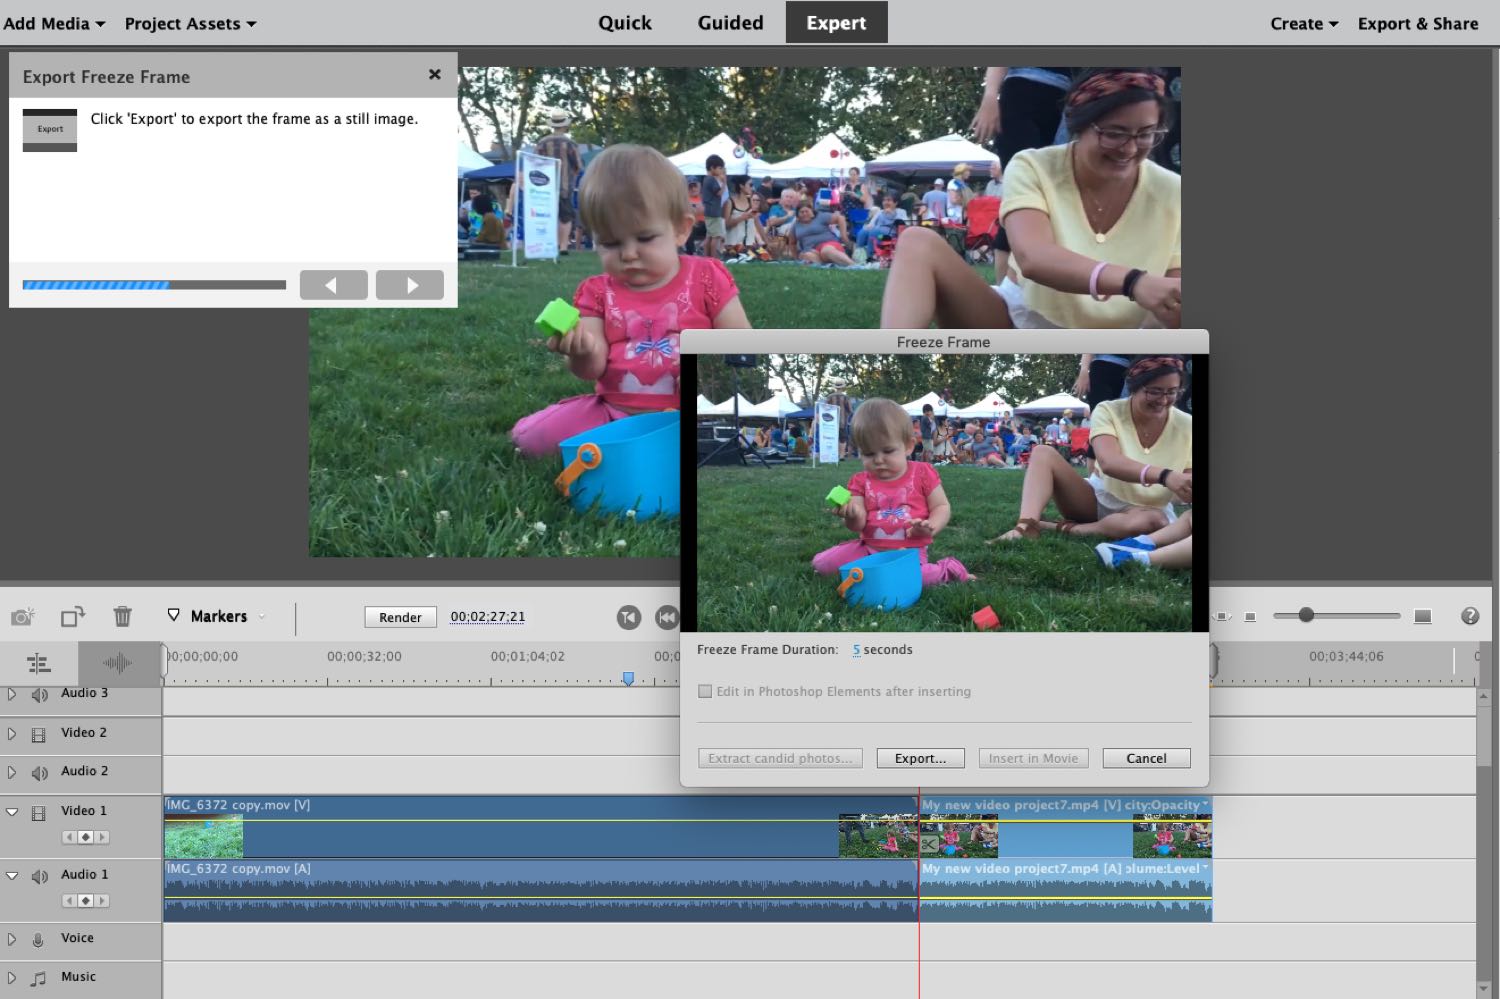
Luma Fade transition: First and foremost, Luma Fade is a transition connecting two different clips together. While Premiere Elements has a variety of built-in transitions, this effect is unique and dramatic, because it fades in colors from darkest to lightest in a still image derived from your video. Luma Fade is an inspiring and easy-to-use effect, but it works well with only certain kinds of videos. For example, it works for videos in which the second clip in the sequence features a close-up of a clearly defined face or object as opposed to a busy scene.
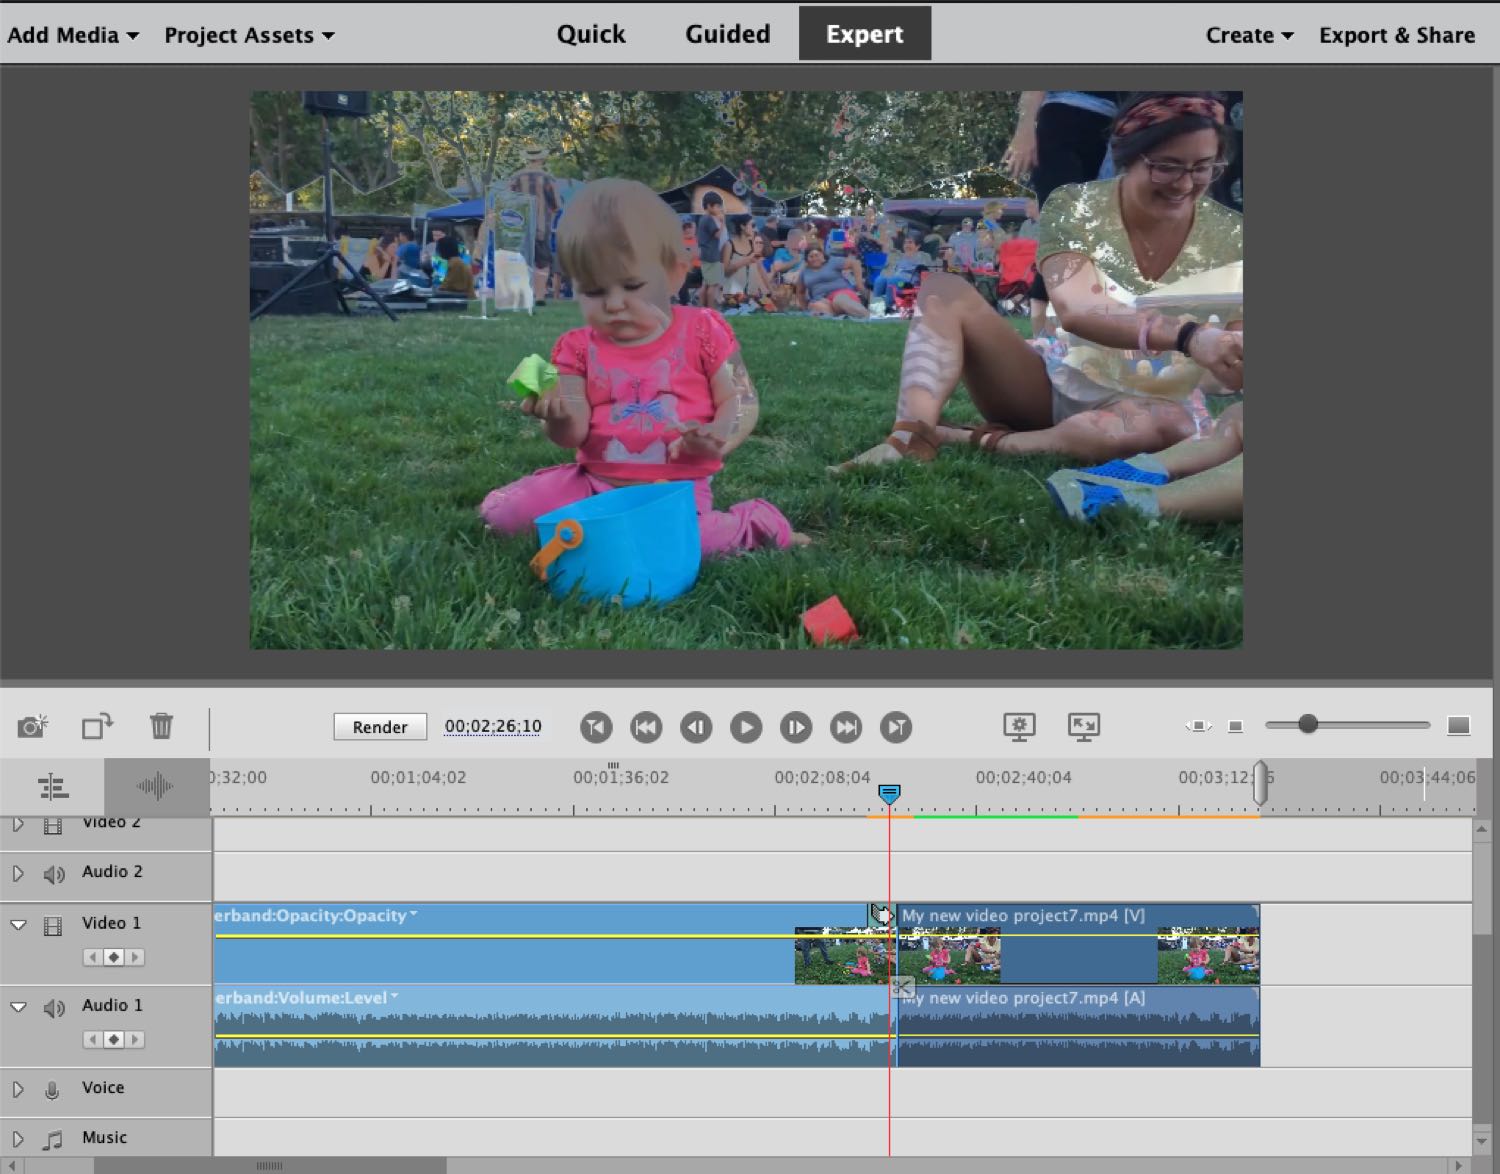
This year, Premiere Elements has only two new guides, but they are distinctive and artistic if properly used.
The transition is ideally derived from a still of the movie you're editing, but I often found myself experimenting with different still shots from the same shoot to try and get the transition to look more distinctive. When the transition is finished, you can reposition it slightly on the timeline for maximum effect. When this effect works, it's really nice. When it doesn't, your transition won't look like anything special.
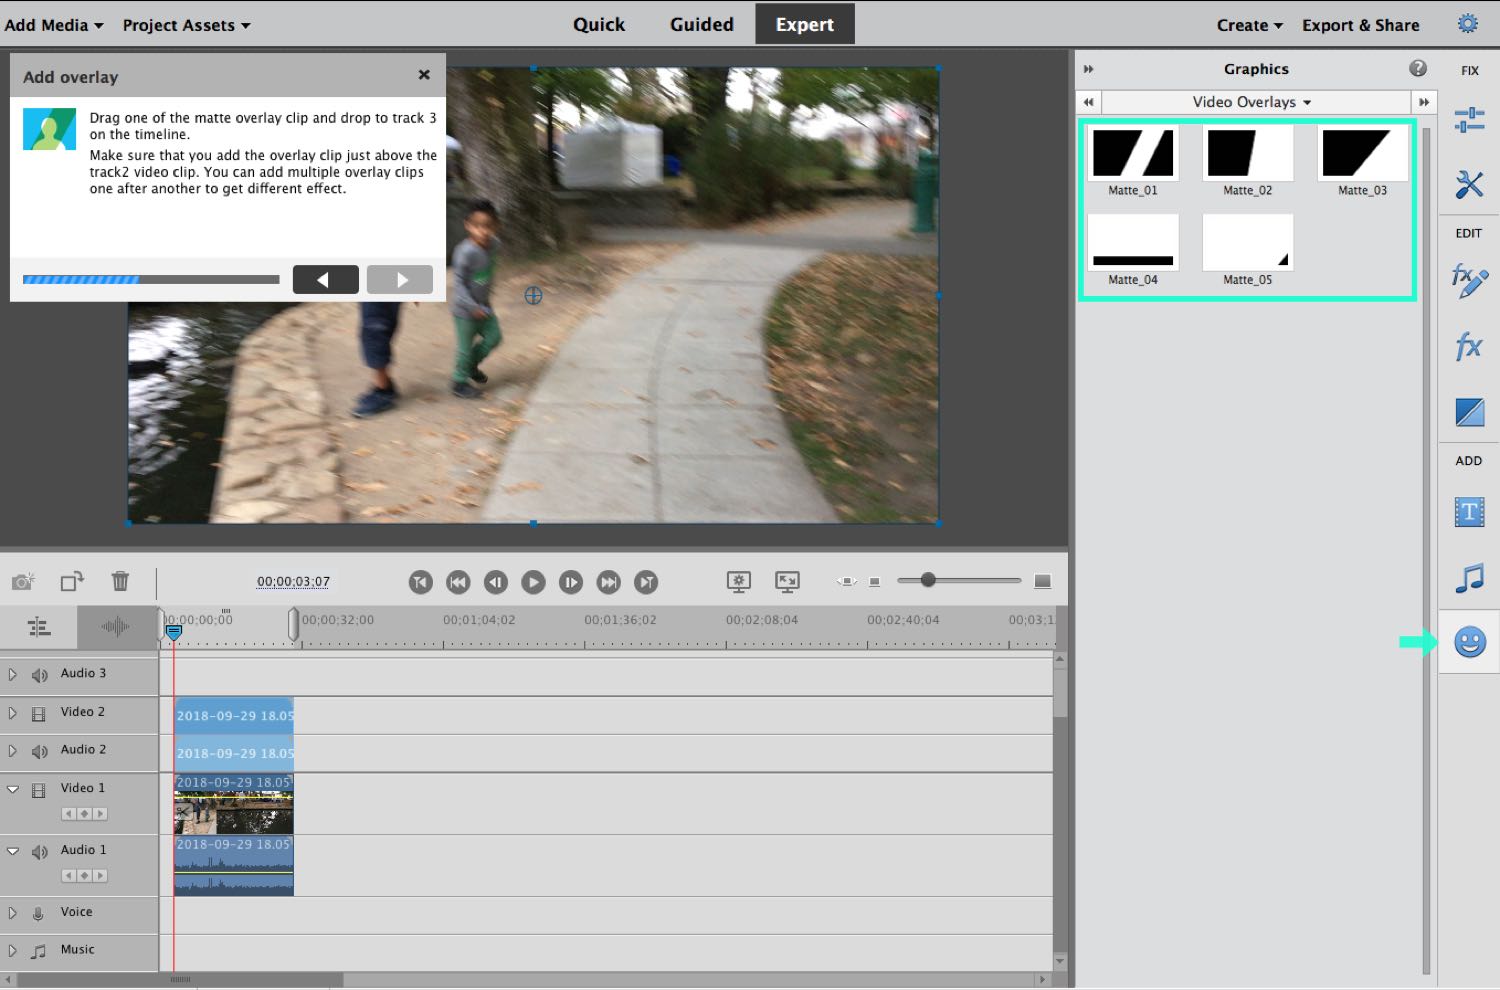
Glass Pane effect: This effect makes your scene look like the action is seen through glass. Glass Pane is easy to use and makes your footage look more dynamic as it moves a special effect through the length of your video. There are four built-in glass effects, and you can layer as many as you want. This effect is an acquired taste, but it's something you don't see every day.
Performance
I tested Premiere Elements 2019 on an HP EliteBook x360 1030 G2 running Windows 10 Pro. This machine's 64-bit Intel Core i7 processor with a 7600U CPU runs at 2.80 GHz on an Intel HD Graphics 620 system with 16GB of RAM. I combined five clips into a 2.5-minute video shot at 60 frames per second and rendered the projects to MPEG 4 at 720p, timing rendering at both 60 fps and 30 fps.
Rendering speeds are nothing to write home about on Premiere Elements 2019.
Rendering speeds are nothing to write home about on Premiere Elements 2019. The app's universal Quick Export proved the fastest option for rendering: 2:46 at 30 fps. The 720 HD Computer setting, rendering at 60 fps, took 4:37 to get the job done.
Bottom Line
Adobe is always judicious about what and how much to add to its consumer video app — careful not to break Elements while adhering to a fairly aggressive upgrade schedule with a new version appearing every year. Adobe Premiere Elements 2019 augments some existing features, revamps a critical workflow and tops it off by adding some intriguing guided edits into the mix.
As in years past, if you are happy with your Elements from the previous year or two and are not pining for the specific new features in this upgrade, you'll be fine sticking with the version you already have. Family memoirists just getting into video, as well as users of older versions, will find much creative freedom and inspiration with the new additions in Premiere Elements 2019.
Credit: Jackie Dove/Tom's Guide
Jackie is an obsessive, insomniac tech writer and editor in northern California. A wildlife advocate, cat fan, and photo app fanatic, her specialties include cross-platform hardware and software, art, design, photography, video, and a wide range of creative and productivity apps and systems. Formerly senior editor at Macworld and creativity editor at The Next Web, Jackie now writes for a variety of consumer tech publications.
-
Prizm4 This is probably the only review site that thinks Premiere Elements is the best in its class?? Last year's Premiere Elements 2018 was an absolute abomination and has the worst reviews on Amazon that I've EVER seen for a video editor.Reply
Most sites tend to pick PowerDirector as their number 1, because it has a ton more features, much faster rendering speed, and its interface is much more snappier and responsive.
