How to Manage Android Oreo's New Notifications Features
The latest version of Android adds new ways of managing just how you get notifications. Here's what the new Channels and Dots features add to notifications and how you enable them.
Android has always given users an extensive suite of customization options when it comes to managing their notifications. Android Oreo takes things a step further with two new capabilities: notification channels and notification dots.
Channels offer an in-depth, uniform way to manage notifications for applications, so you have the ability to cherry pick what apps deliver which notifications. For example, you can set it so that Google Photos will only provide a text notification but not play a sound when backing up your library, or you can turn off Google Maps’ travel times for major traffic delays. Channels give control back to the user, giving them more power over the types of alerts that clog their inboxes.
Dots, on the other hand, are more like badges on app icons. You may be familiar with that approach if you’ve glanced at Apple’s iOS.
MORE: When Is Your Phone Getting Android 8.0 Oreo?
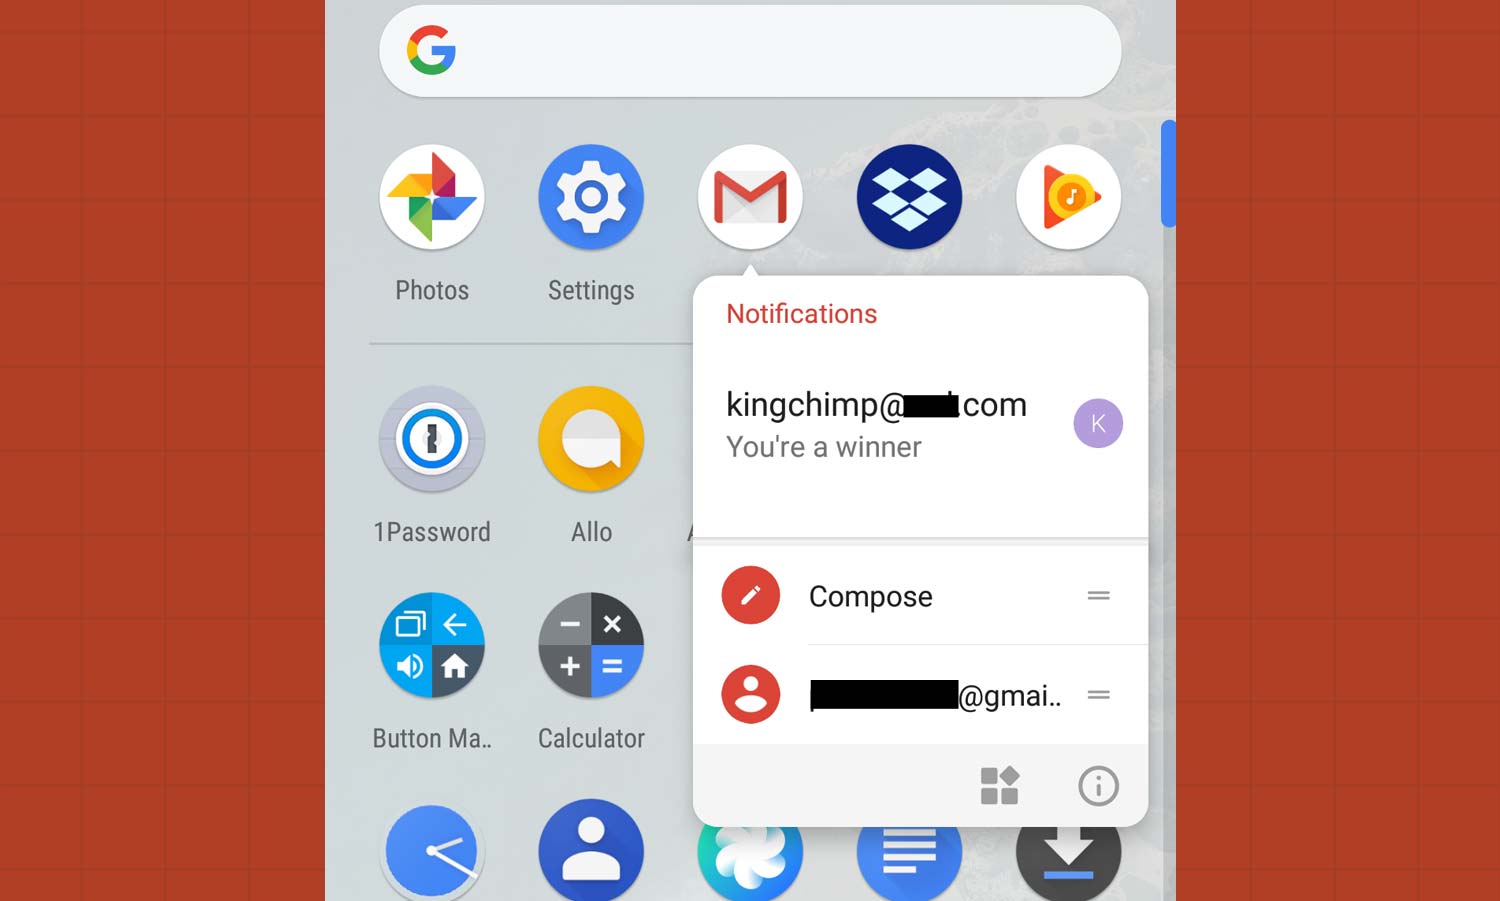
The main difference between what iOS offers and Android Oreo’s feature is that Dots are interactive: long press on an icon on your home screen, and you’ll be able to see the notifications tied to that app in a pop-up window above without having to pull down the shade.
You manage both Channels or Dots via the settings for a particular app. In this instance, we’ll adjust notification settings for Google Maps.
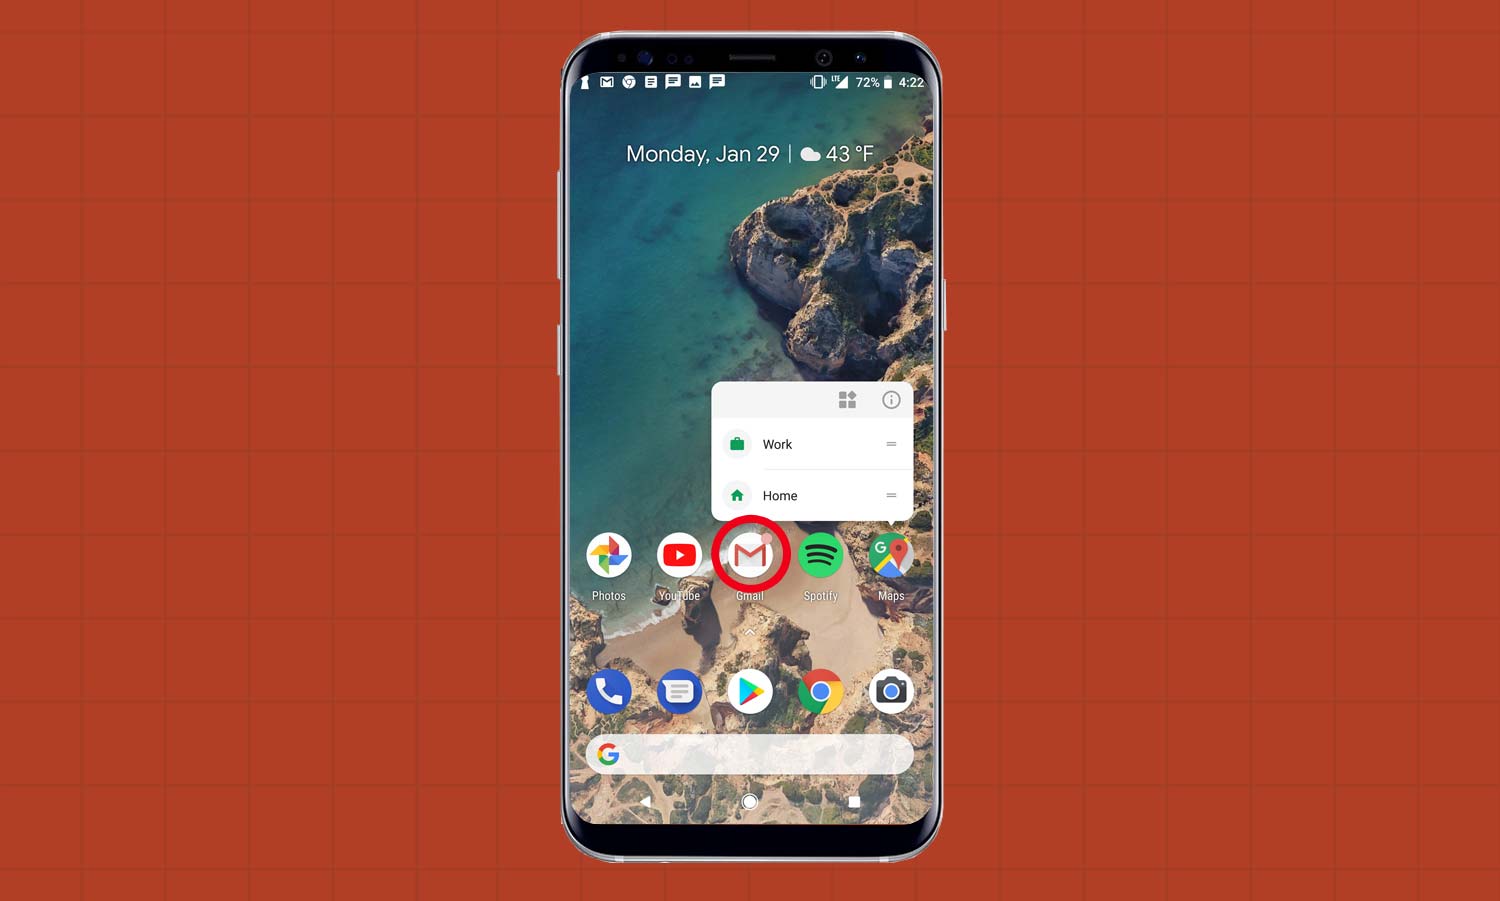
1. On the home screen or in the app drawer, long press on the app whose notifications you want to alter.
Get instant access to breaking news, the hottest reviews, great deals and helpful tips.
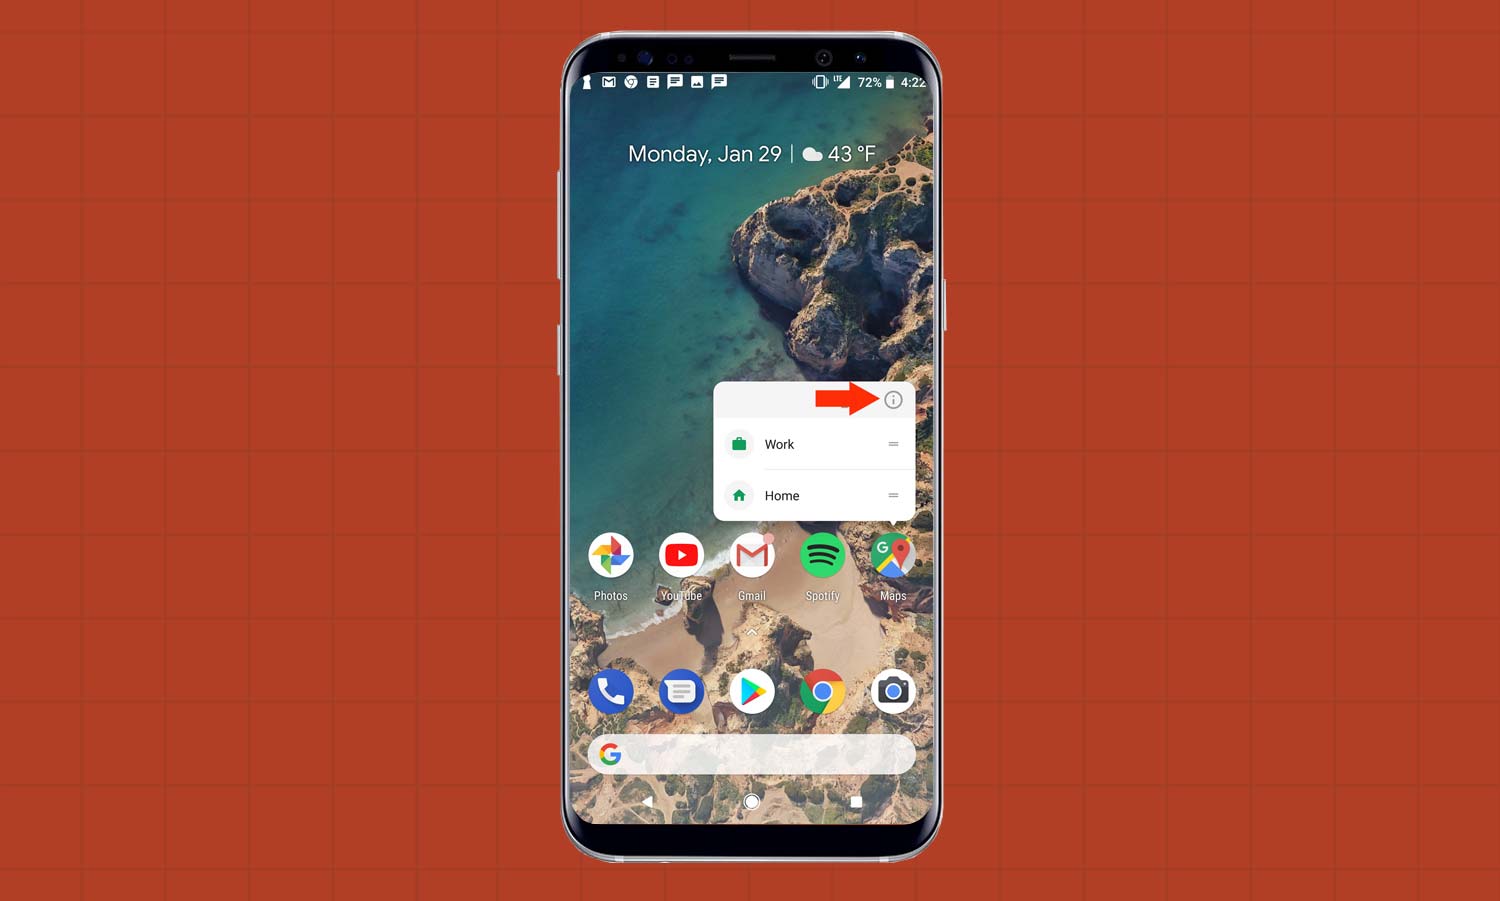
2. In the pop-up window that appears, tap the Info icon, represented by a lowercase “i.” This will take you to the App Info page.
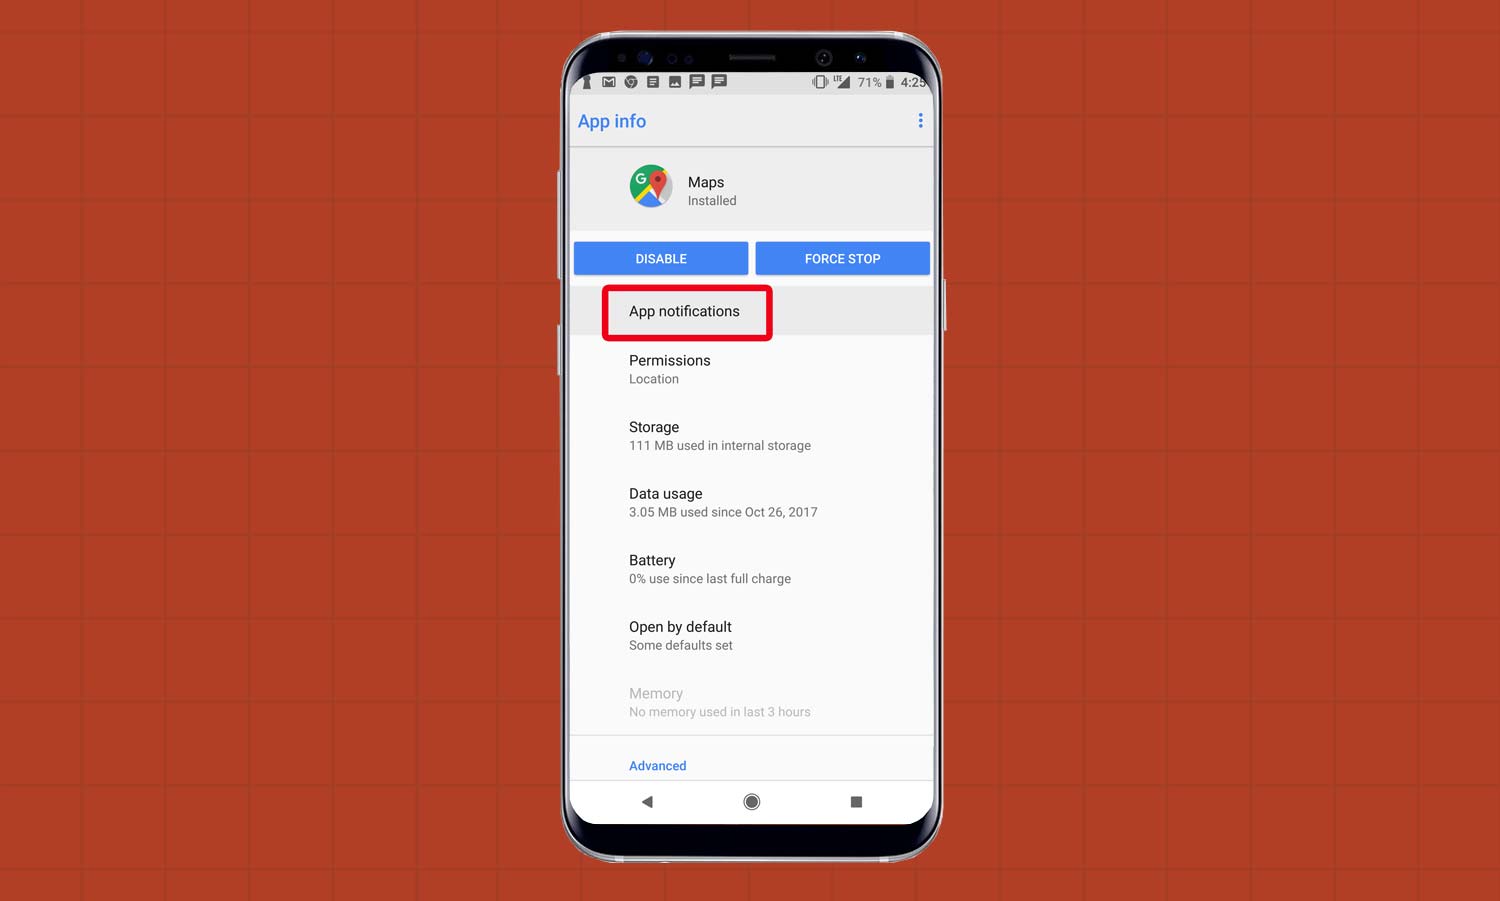
3. Tap App Notifications.
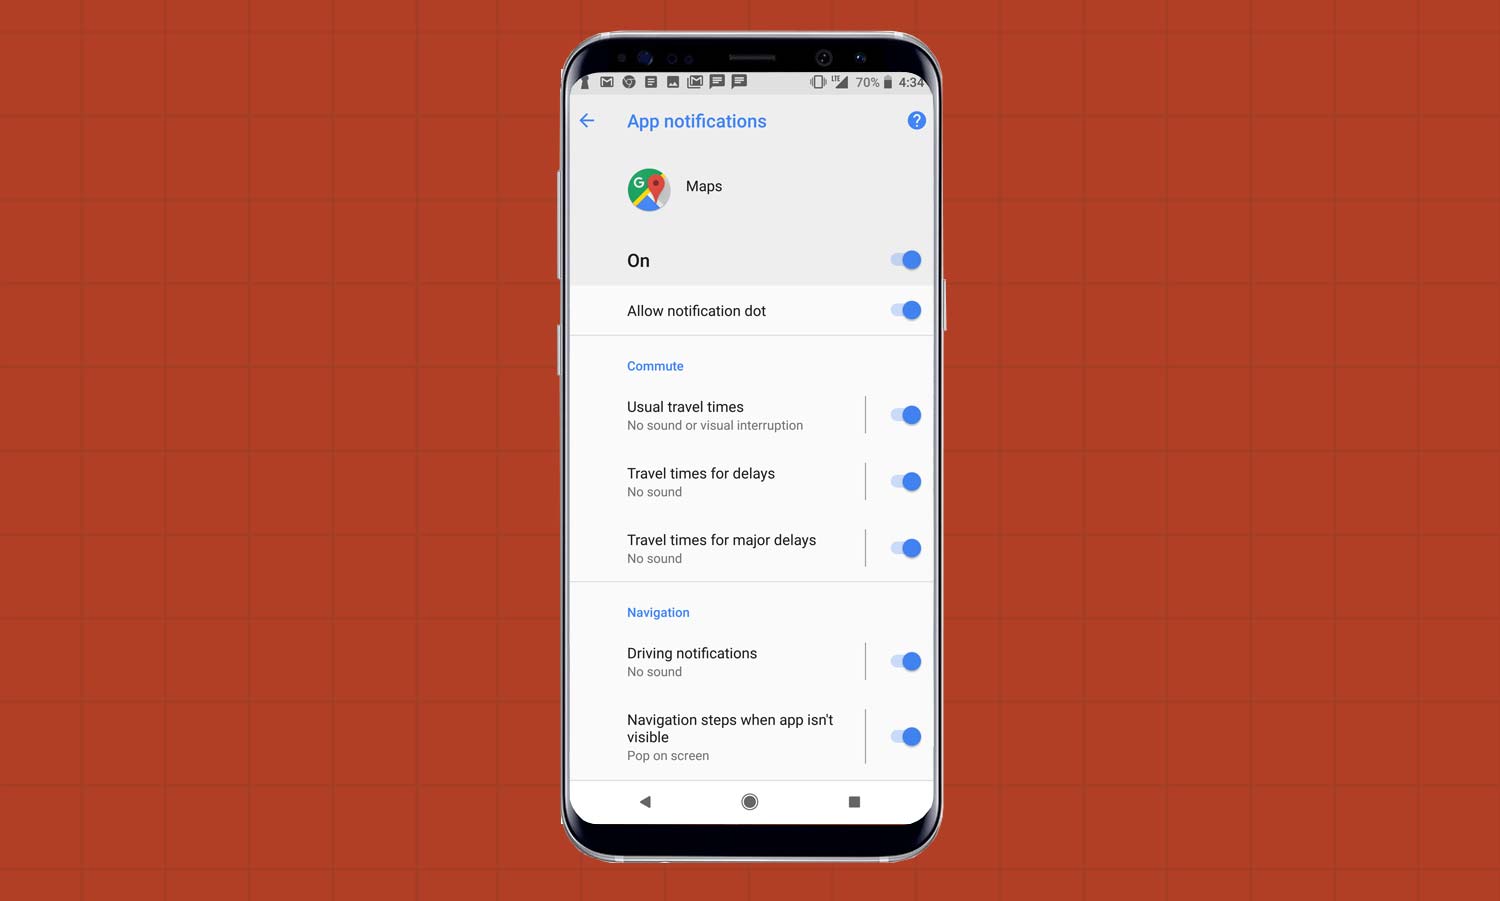
4. From this screen, you can indiscriminately enable or disable all notifications for the app (represented by the on/off switch at the top),enable or disable notification dots for the app, or specifically choose which types of notifications you’d like to see from the app.
These notification types are broken into different categories, and the list you see will greatly vary in length and content depending on the app. In the case of Maps, for example, you’ll find many travel and navigation-related notifications that aren’t relevant to other apps, so these notification types are packaged together. Tapping on the switch on the right turns that particular notification on or off, while tapping on the text at the left gives you even more granular control over how that specific type behaves.
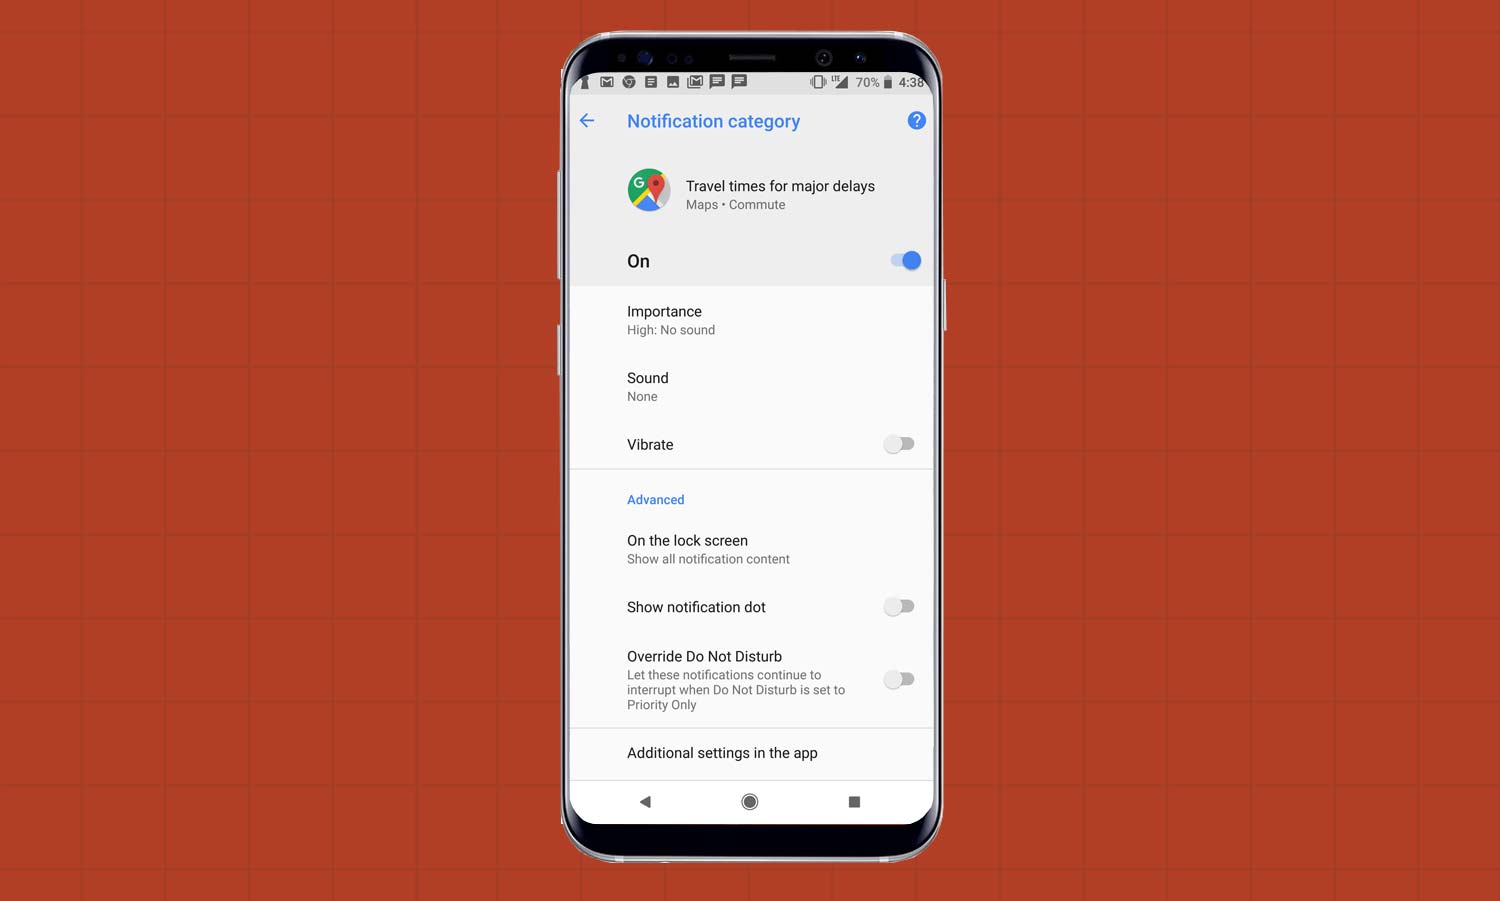
If we tap “Travel times for major delays,” say, we can then give that notification a custom sound or turn on vibration, give it the privilege to override Do Not Disturb mode, change how it appears on the lock screen, or decide whether it will cause a notification dot when it occurs. In some cases, the apps themselves offer further options from within that don’t appear in the Android settings menu.
It may look very complicated, but in the wide majority of cases, you should only need to turn notifications on or off for certain apps, without diving into the nitty gritty. Fortunately, each notification type usually comes with a detailed description of what exactly you’re enabling or disabling, which makes things a little easier.
Adam Ismail is a staff writer at Jalopnik and previously worked on Tom's Guide covering smartphones, car tech and gaming. His love for all things mobile began with the original Motorola Droid; since then he’s owned a variety of Android and iOS-powered handsets, refusing to stay loyal to one platform. His work has also appeared on Digital Trends and GTPlanet. When he’s not fiddling with the latest devices, he’s at an indie pop show, recording a podcast or playing Sega Dreamcast.
-
chjones8 My HTC 10 just got Oreo. I can no longer set discrete sounds for notifications on most apps. It seems that any change globally changes the default sound. EX. I use 1 sound for incoming SMS, a different sound for FB Messenger, a 3rd sound for Whatsapp, etc., so that I know in advance which app is calling me. I then have the default sound for "everything else." FB Messenger app did allow me to change the sound only inside that app but the biggest problem is that SMS and "everything else" now seem incapable of having a discrete sound notification. Hopefully, I am missing an option. Each app displays "default notification sound" as the selection so I assume there is some ability to change that to "custom notification sound" ??Reply -
chjones8 Update: I did discover that in Whatsapp, if you change the notification sound, the first option on the list is "default ringtone" which actually should say "default notification" since is selects the default system notification sound, not the default system ringtone." So, for me, the only real problem, is setting SMS as different from "everything else," although I do have several other apps that I would like to carve out, if possible.Reply
