 Club Benefits


Knowing how to clean a Beautyblender the right way could save you the trouble of constantly dealing with persistent skin breakouts and will also make it last a lot longer too.
There’s an ongoing debate on whether a makeup sponge is a better choice when it comes to blending out your liquid makeup products. Some prefer it over a brush due to its ability to deliver an airbrushed look without leaving any streaks, while others enjoy its versatility. But similar to any other makeup tool that you regularly use on your face, your makeup sponge should be well looked after and, in a perfect world, cleaned after each use. Oh, and in case you've been wondering, here's a guide on how to clean makeup brushes.
Article continues belowWhy should I clean my Beautyblender?
If you’re experiencing skin-related issues and no skincare products seem to help, there’s a good chance that the culprit could be your very own makeup sponge. This is due to the bacteria build-up that occurs when your Beautyblender is soaked with previously-used foundation, powder and other products. While your hands and other makeup tools like brushes could also distress your skin, your Beautyblender is still primarily used to apply face makeup, meaning it is more likely to have a more significant impact on your skin.
Even if a brand describes its makeup sponge as “antimicrobial,” it doesn’t mean that your Beautyblender somehow has self-cleaning properties. It basically implies that the sponge provides a less hospitable environment for bacteria to grow. We don’t mean to scare you, but over time, serious bacteria build-up can eventually lead to skin inflammation, irritation and acne.
Another reason to clean your makeup sponge is to simply make sure it serves you for a longer period of time. The original Beautyblender is priced at $20, which falls within the premium range when compared to its competitors. For example, the Real Techniques Miracle Complexion sponge costs a mere $5.47, which is more than 70% less than the price of the Beautyblender. So if you've opted for the more expensive option, naturally, you'd want it to last you longer than just a month or so.
Cleaning your makeup sponge regularly will prevent it from tearing and crumbling, and ensure a better application too. Experts say that "regularly" ideally means cleaning it after each use, or at least every week.
How to clean a Beautyblender in just a few minutes
At first glance, the process of cleaning your makeup sponge may seem like a dragging chore, but you'd be surprised by how simple and quick it is to clean. There are various methods out there, from getting a mini washing machine, to heating the sponge up in a microwave or using a special cleansing pad. And while all of those may prove to be extremely effective, you don't really need to go through so much trouble just to keep your Beautyblender nice and clean.
I've personally come to a conclusion that nothing really beats the good ol' soap and water method. And the good news is that all you need is ... (you guessed it) any kind of soap (I've found that regular bar of soap and dishwashing soap are best) and water. But the key to this process is the technique, so make sure to follow the below steps and check the photos for guidance.
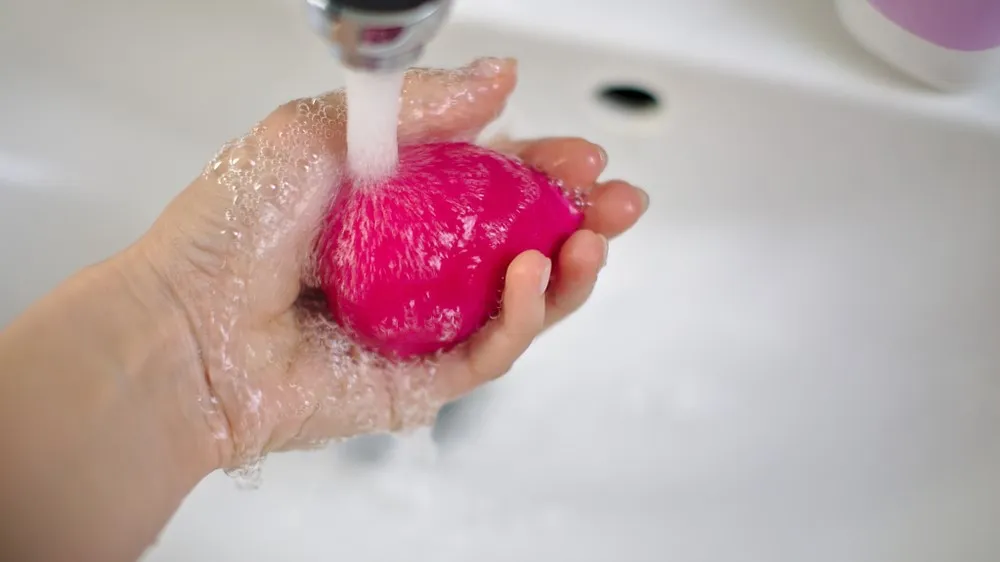
1. Rinse your makeup sponge under running lukewarm water and keep squeezing it as you go.

2. If you're using a bar of soap, rub your makeup sponge against it. Make sure to cover all the areas, and if you haven't cleaned it in a while, make sure to cover it with as much soap as you can. Remember, foam does not necessarily scream cleanliness. Quality soaps contain less foaming properties but can clean just as well.

If you're using a dishwashing soap or a handwashing soap, squeeze an approximate amount of a tablespoon on the palm of your hand and scrub away.

3. This step probably takes the longest (but not really, around two minutes or so). After your makeup sponge is covered with soap, go ahead and rinse it all out. Remember to squeeze throughout the process in an upwards motion to get all of that old foundation out. Keep rinsing and squeezing until the liquid that comes out of the sponge is clear and not foamy at all. Reapply soap and repeat the above steps if your sponge is in a more critical condition.

4. Dry your makeup sponge. First, squeeze out all of the water. The next step is up to you. If you want, you can use a paper towel or an ordinary hand towel to soak up most of the moisture. Keep in mind that if you're planning to use it right away, don't dry it out too much as it needs to be damp for even application.

That's it! You now know how to clean your makeup sponge the right way. And hopefully this article will inspire you to turn it into a healthy habit.
For more beauty and styling tips, tricks, and how-tos, check out our guides on where to buy the Dyson Airwrap, how to remove gel nail polish, how to clean a hairbrush, and how to curl hair with straighteners.

