How to customize your folders on macOS Tahoe 26
With macOS Tahoe 26 you can give your folders a new look
Drowning in digital clutter? Your Mac is probably awash with files and folders, so it makes sense to seek out the best ways to organize them. For some time, Apple has given you a wealth of options, most of them built around Finder and Spotlight, but with macOS Tahoe you now have more methods than ever before.
Although you’ve long been able to change a file or folder icon with your own image (something we cover in detail below), you can now also use a unique color, symbol, or emoji.
Customizing is a much easier way to make your folders instantly recognizable and add some personality to your desktop. Here’s how you can customize your folders on macOS Tahoe 26.
How to change the color of a folder and add symbols or emojis
You can make folders more identifiable by adding color and characters.
1. Find a folder
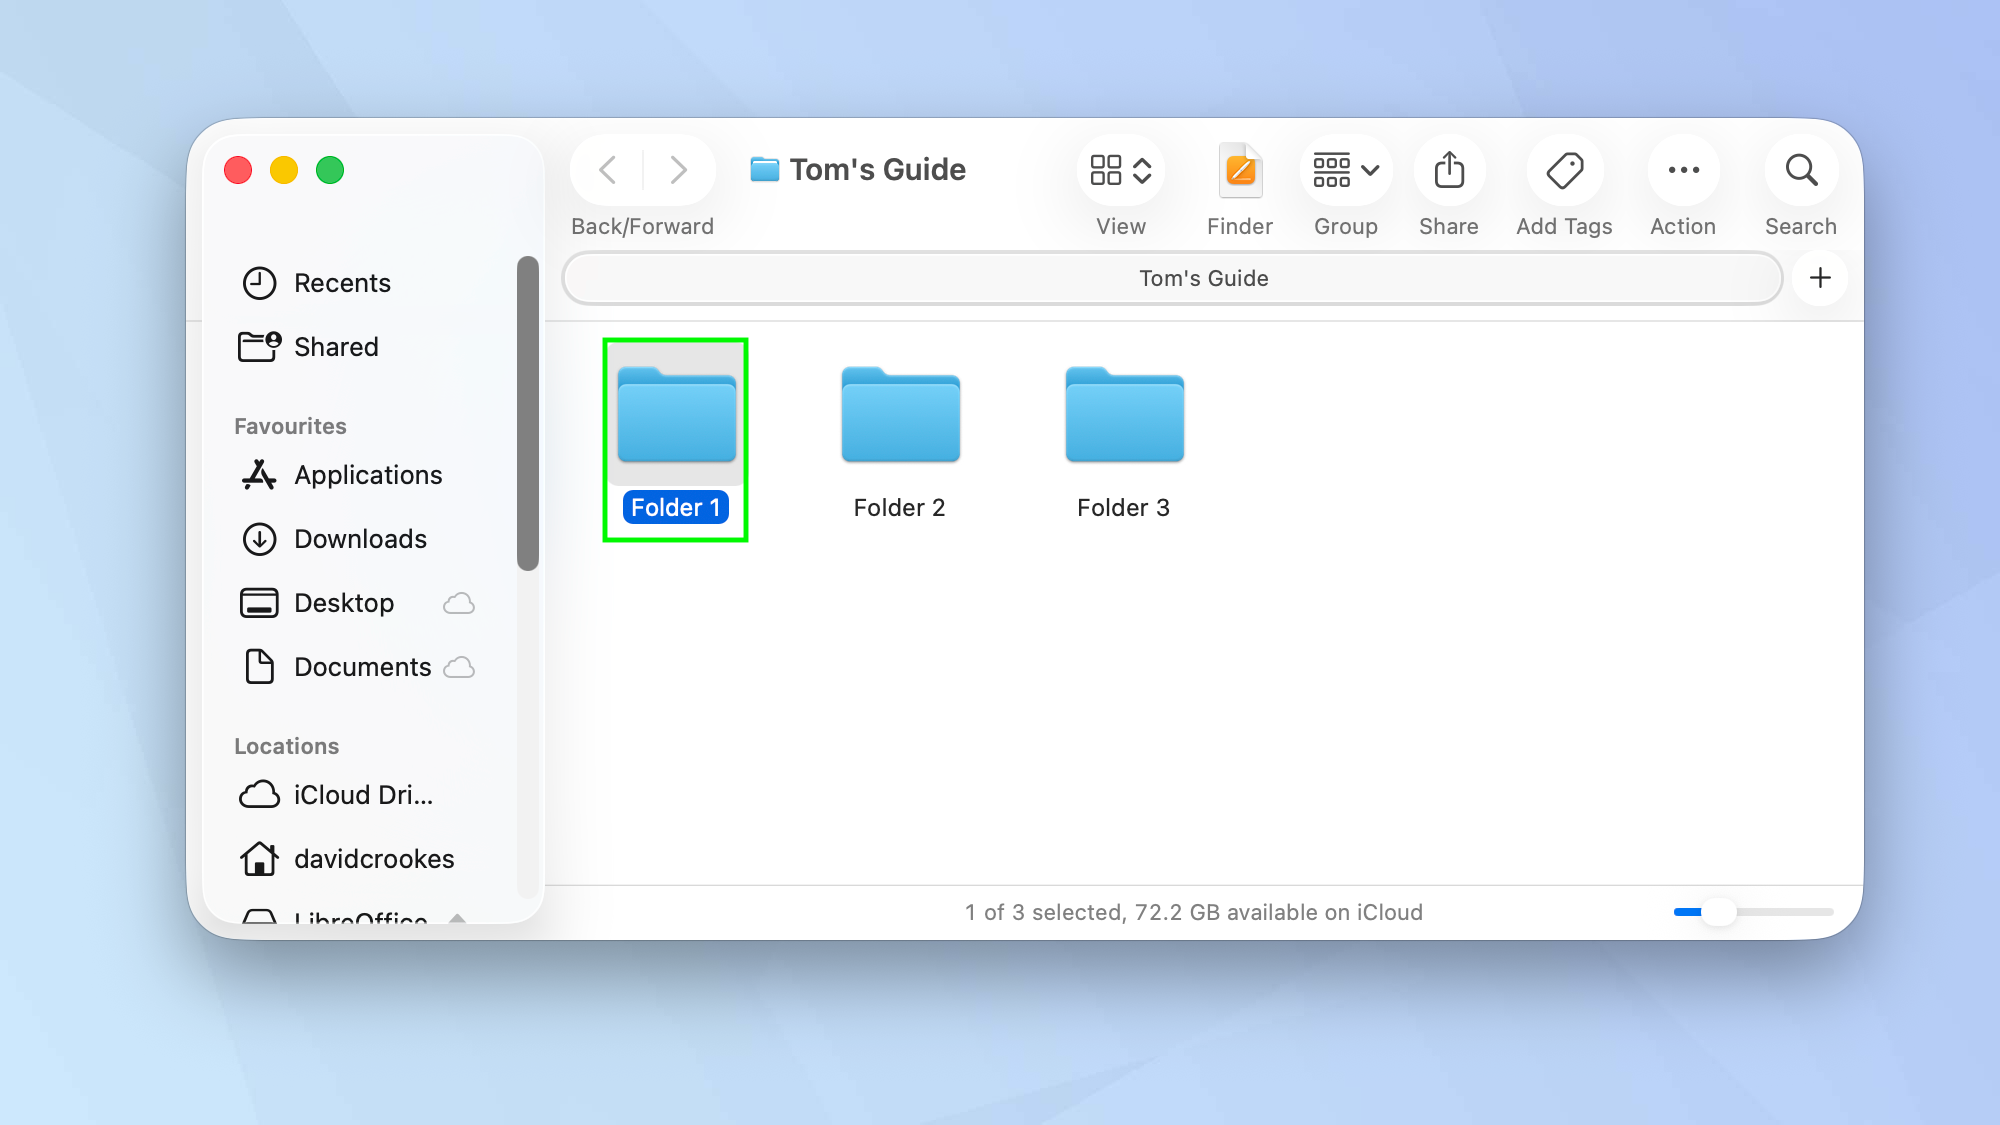
Open the Finder app (or go to your Desktop if you have folders stored there) and select a folder.
2. Customize Folder
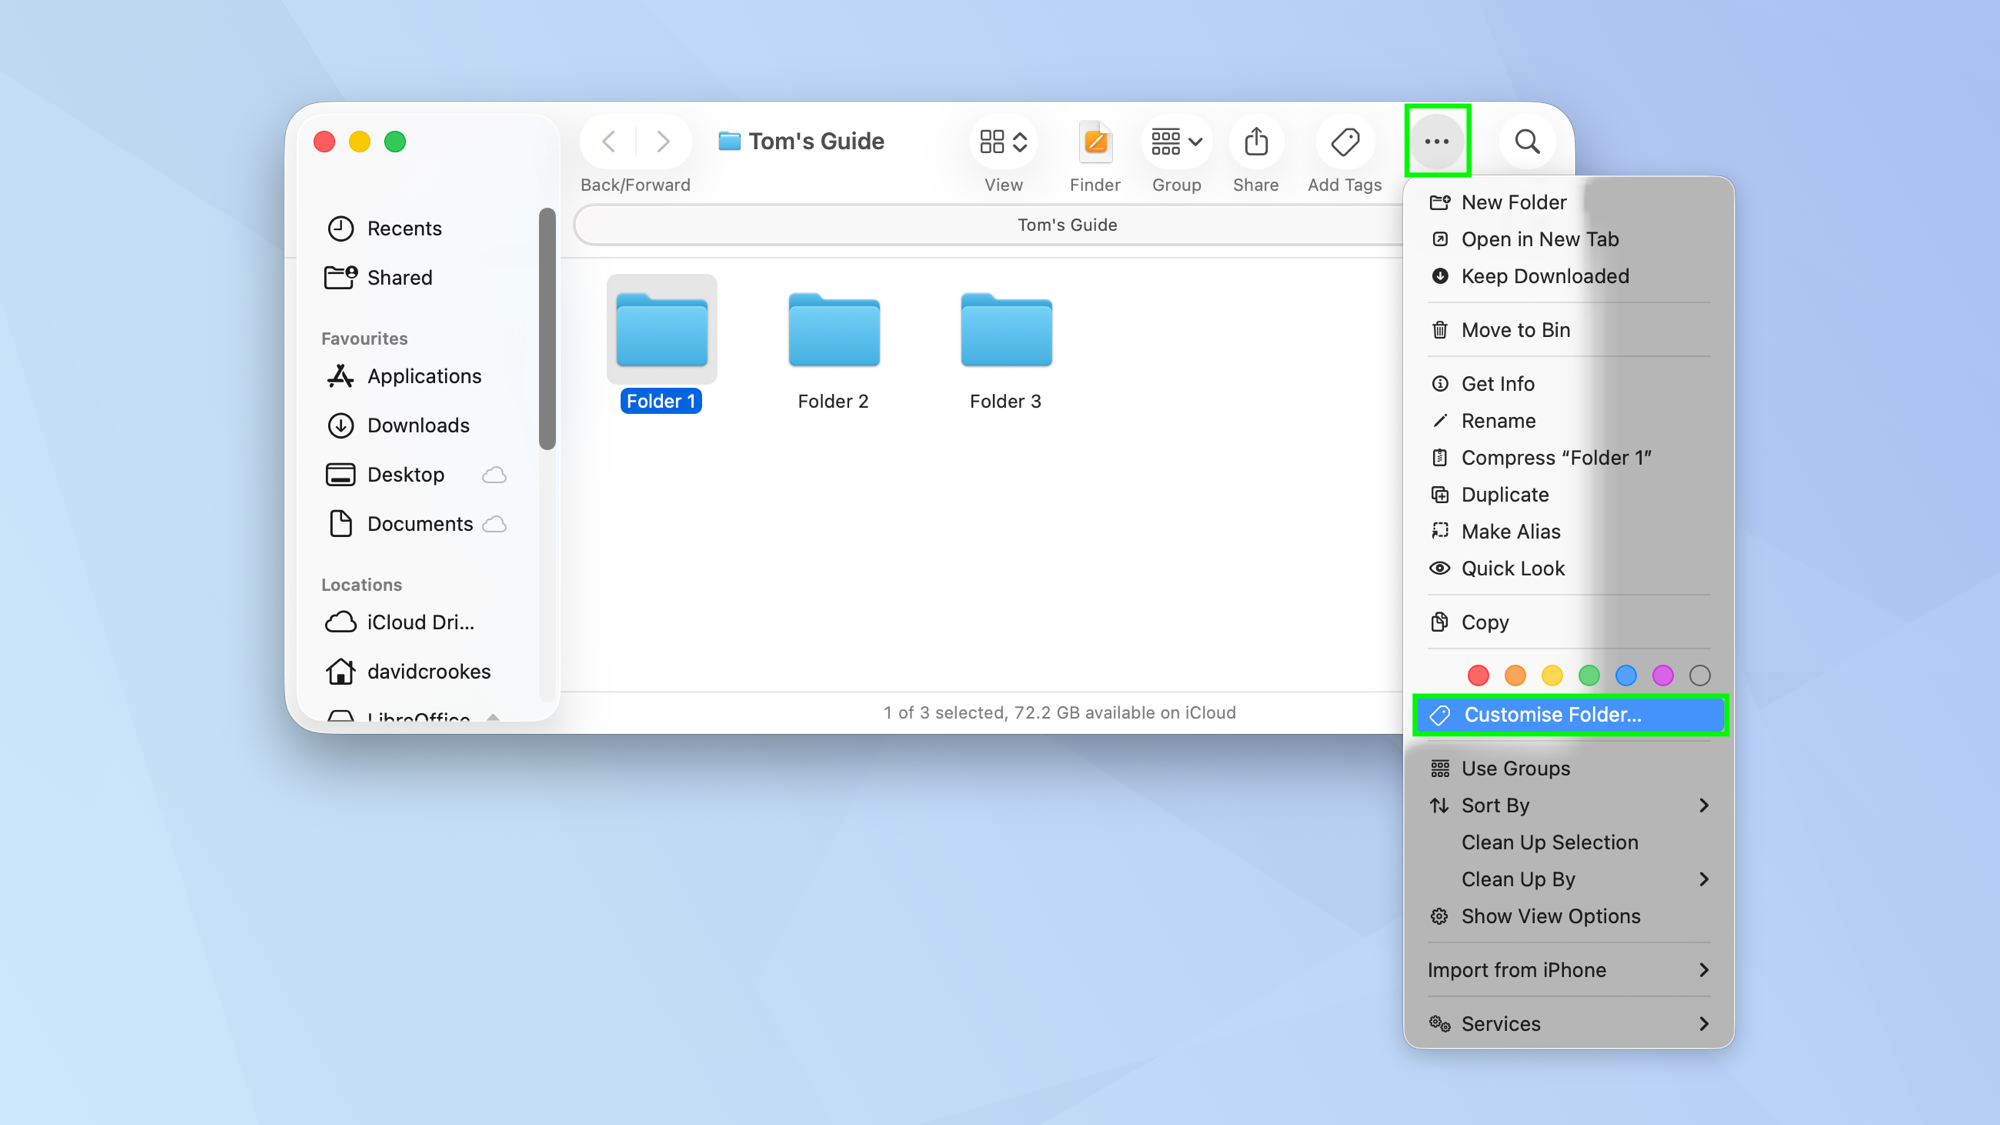
In Finder, select the Action button from the toolbar and select Customize Folder.
Alternatively, in Finder or from the Desktop, right-click the folder and select Customize Folder from the menu of options.
3. Change a color
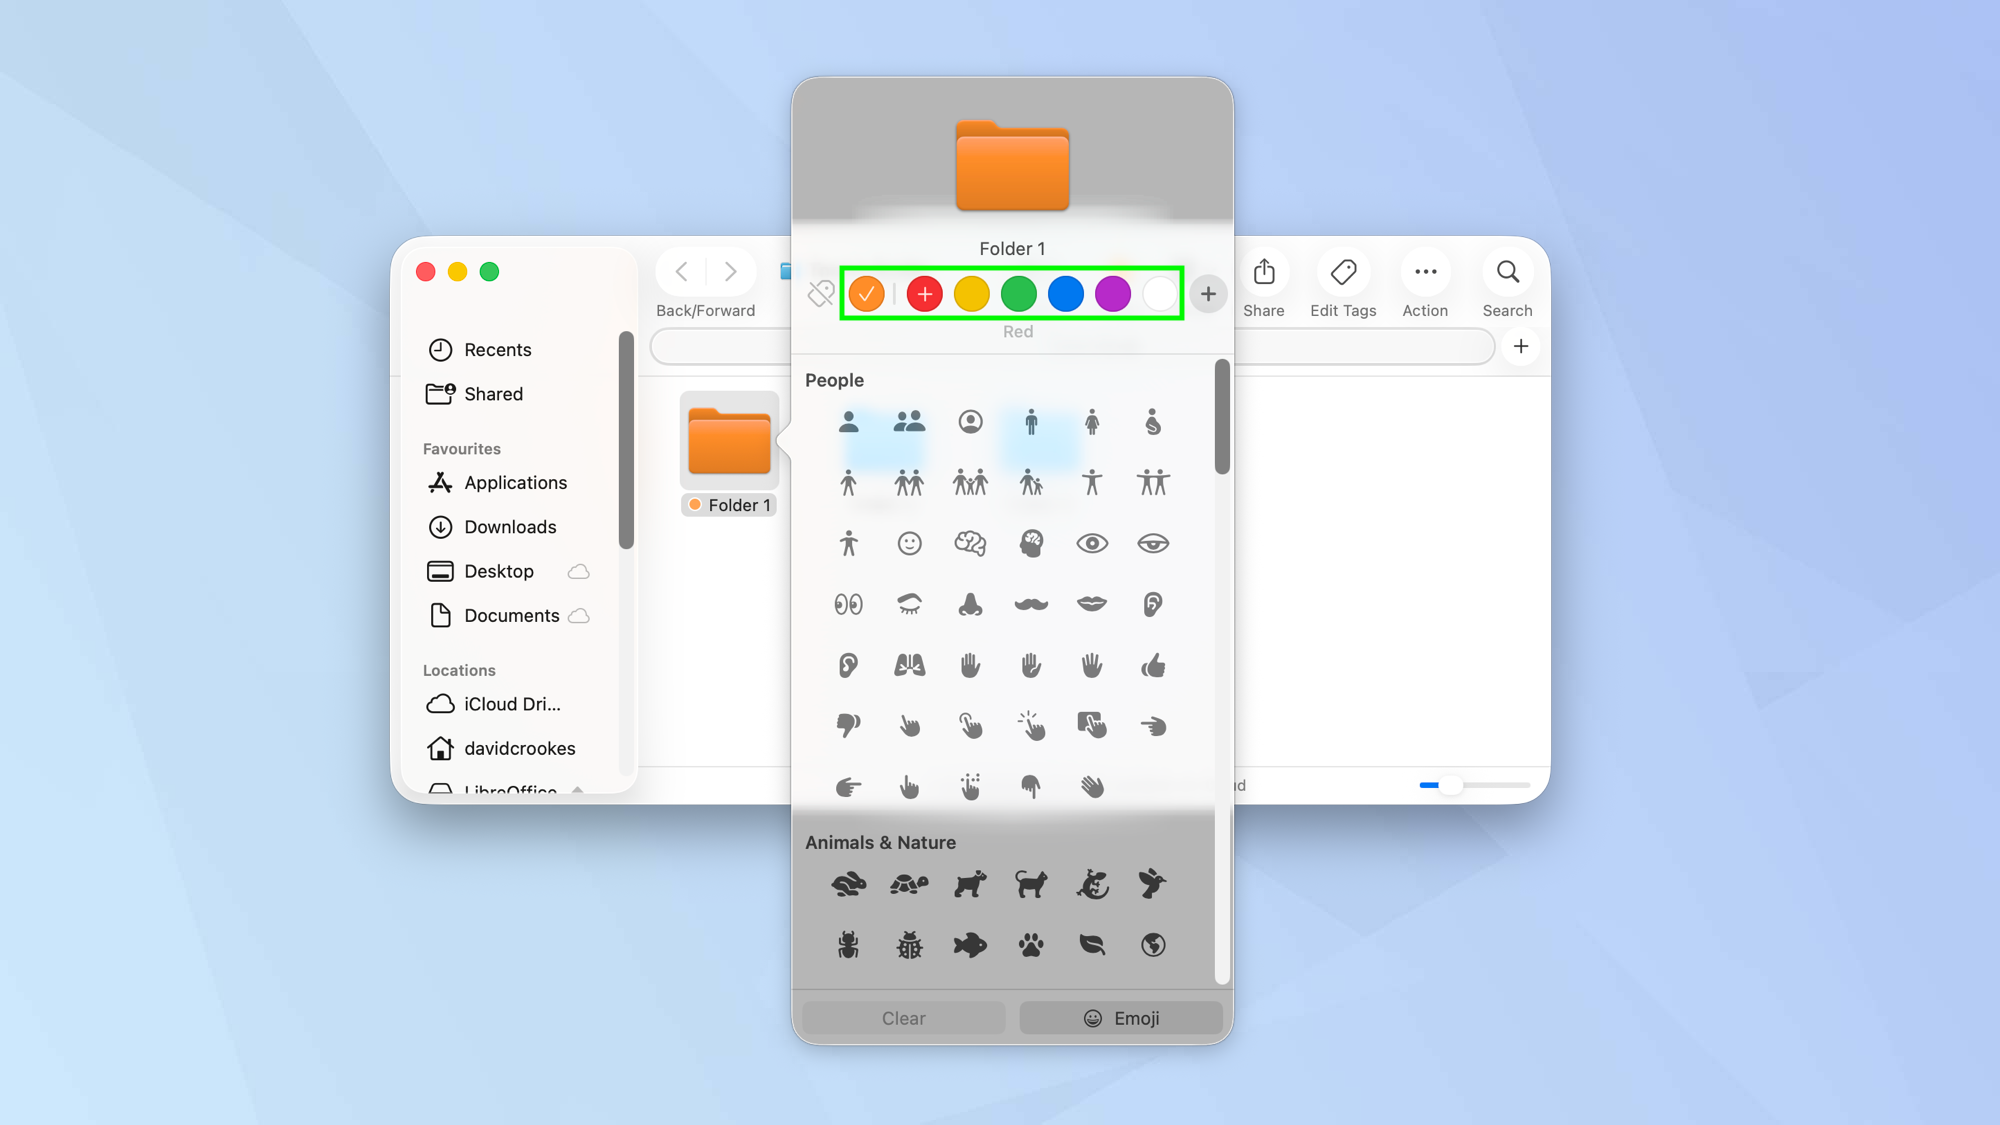
Although you could have changed the colors in the previous step (there was a choice of colors above Customize Folder), this method shows all of the available options.
At the top of the window is a row of colored circles. Simply click a color and the selected icon will change to that color.
4. Add a symbol or emoji
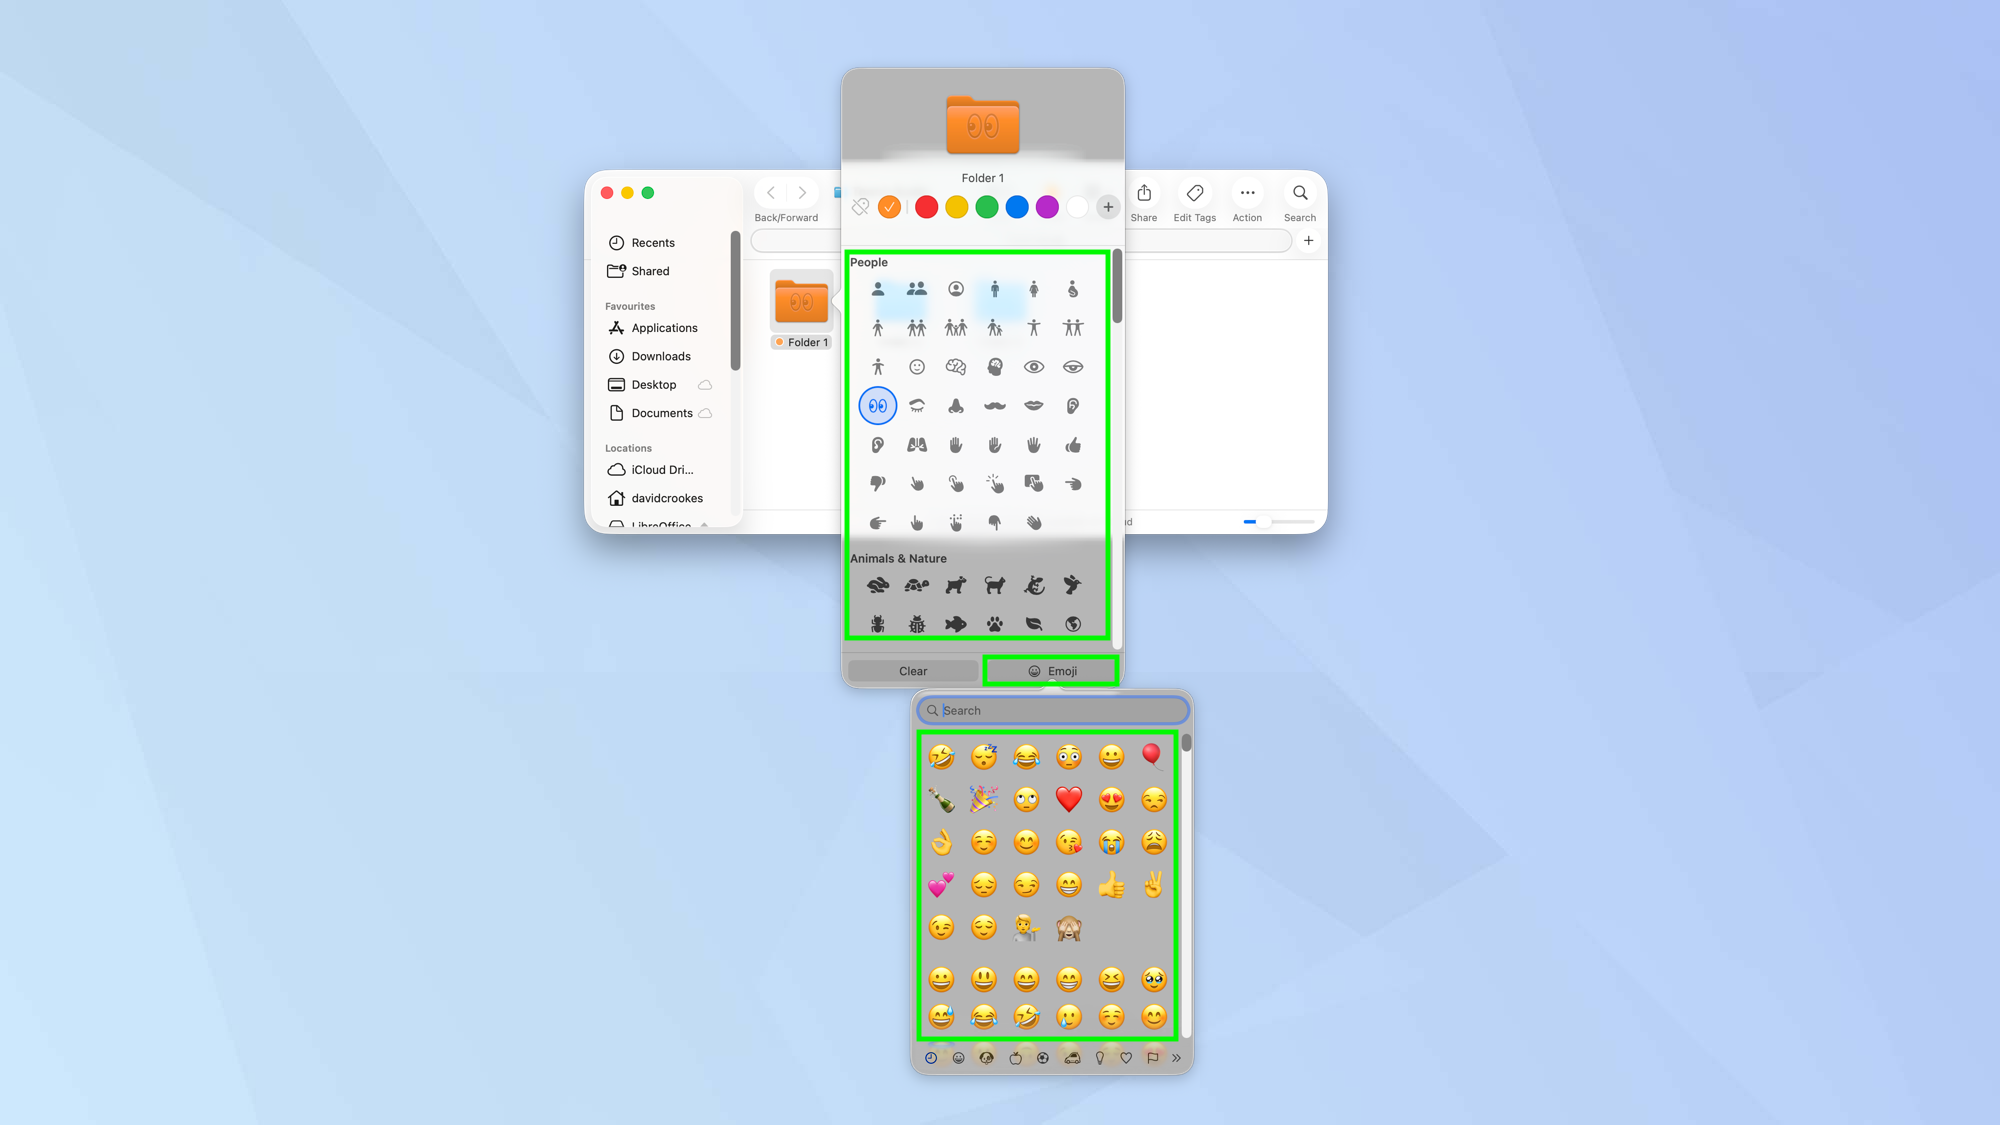
You can also place a symbol or an emoji on to a folder (whether or not you’ve changed the color).
Just select a symbol from the list or click the Emoji button and select an emoji.
5. Remove symbols and color
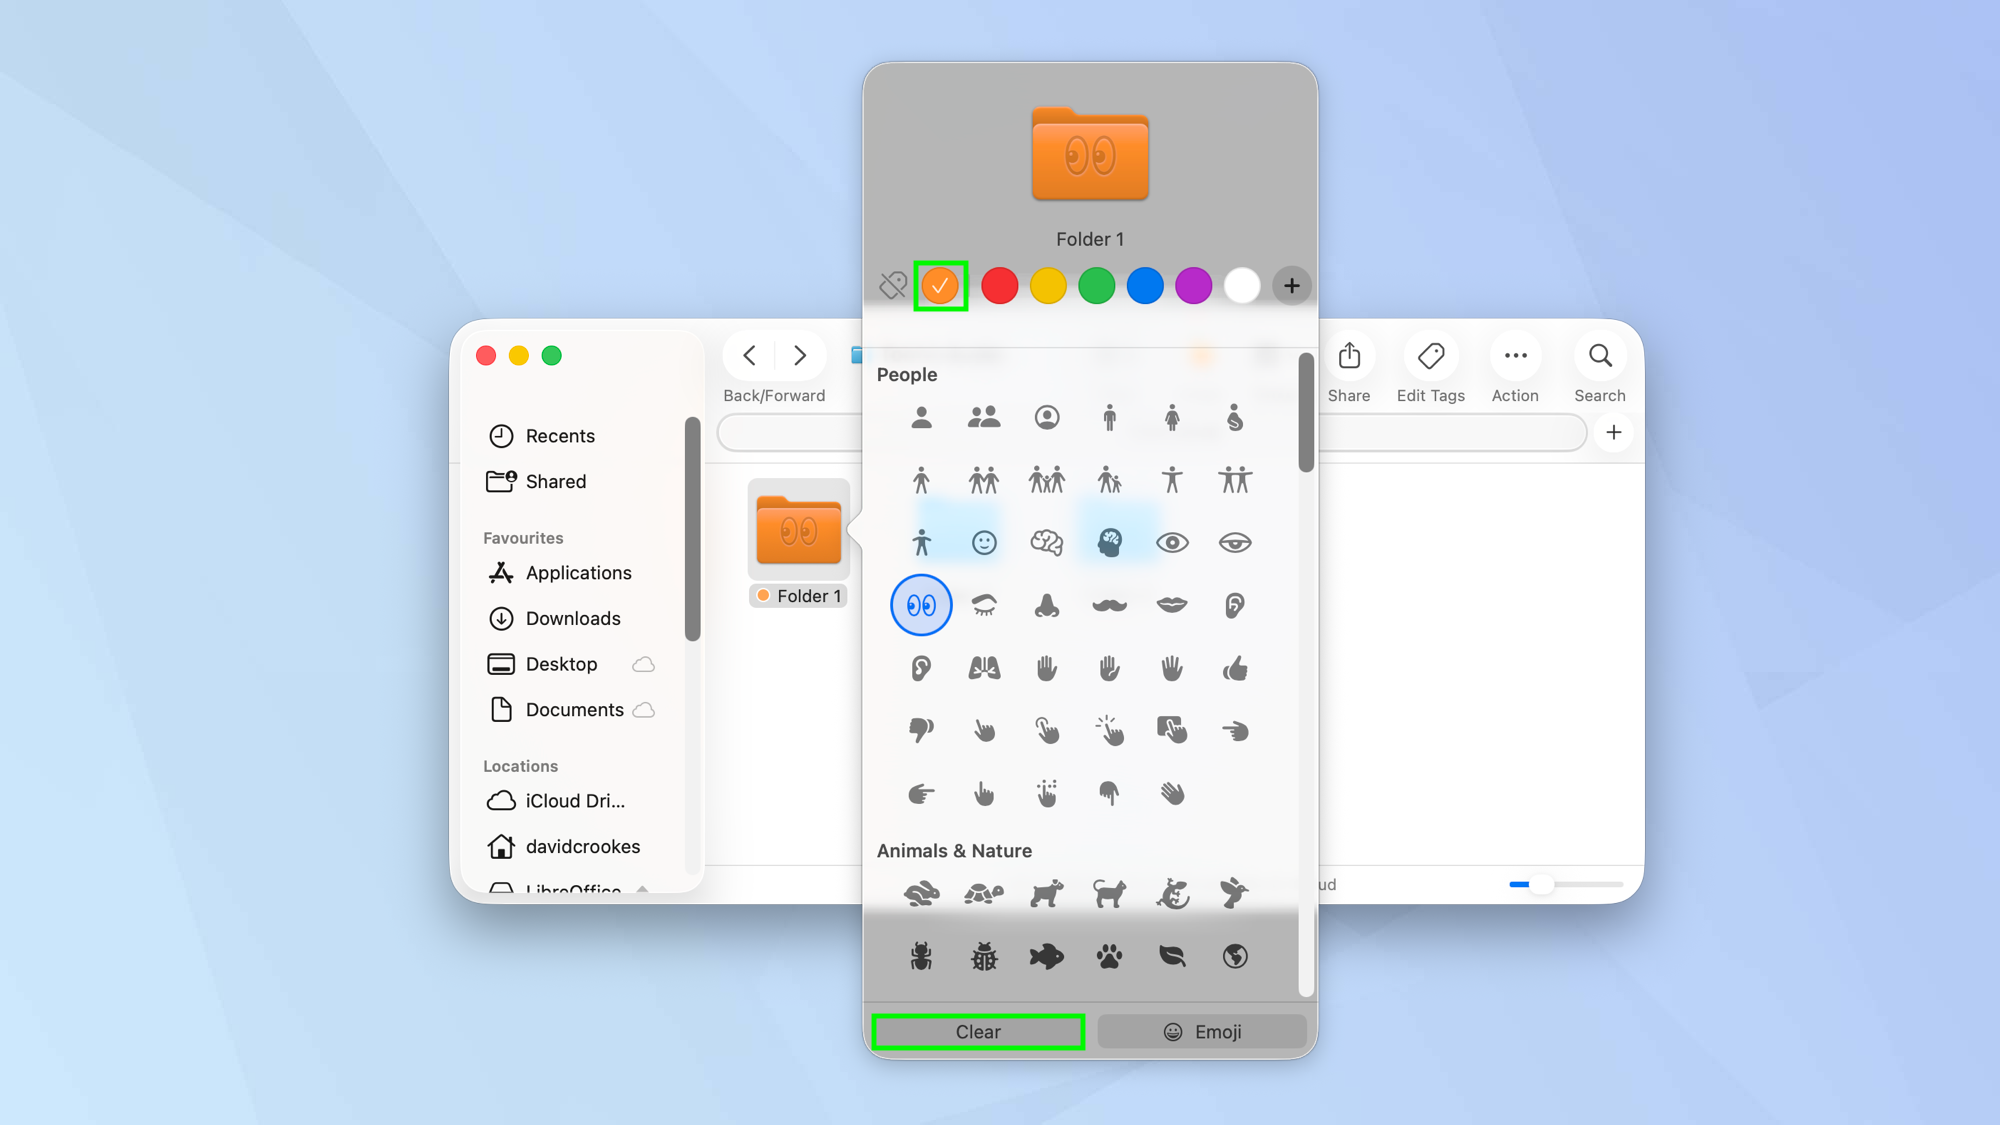
If you want to revert back a blue folder without symbols or emoji, select Clear and either click the current color or select the tag icon.
How to replace a file or folder icon with your own image
You can use any image you wish as a file or folder icon – be as creative as you can.
1. Select an image file
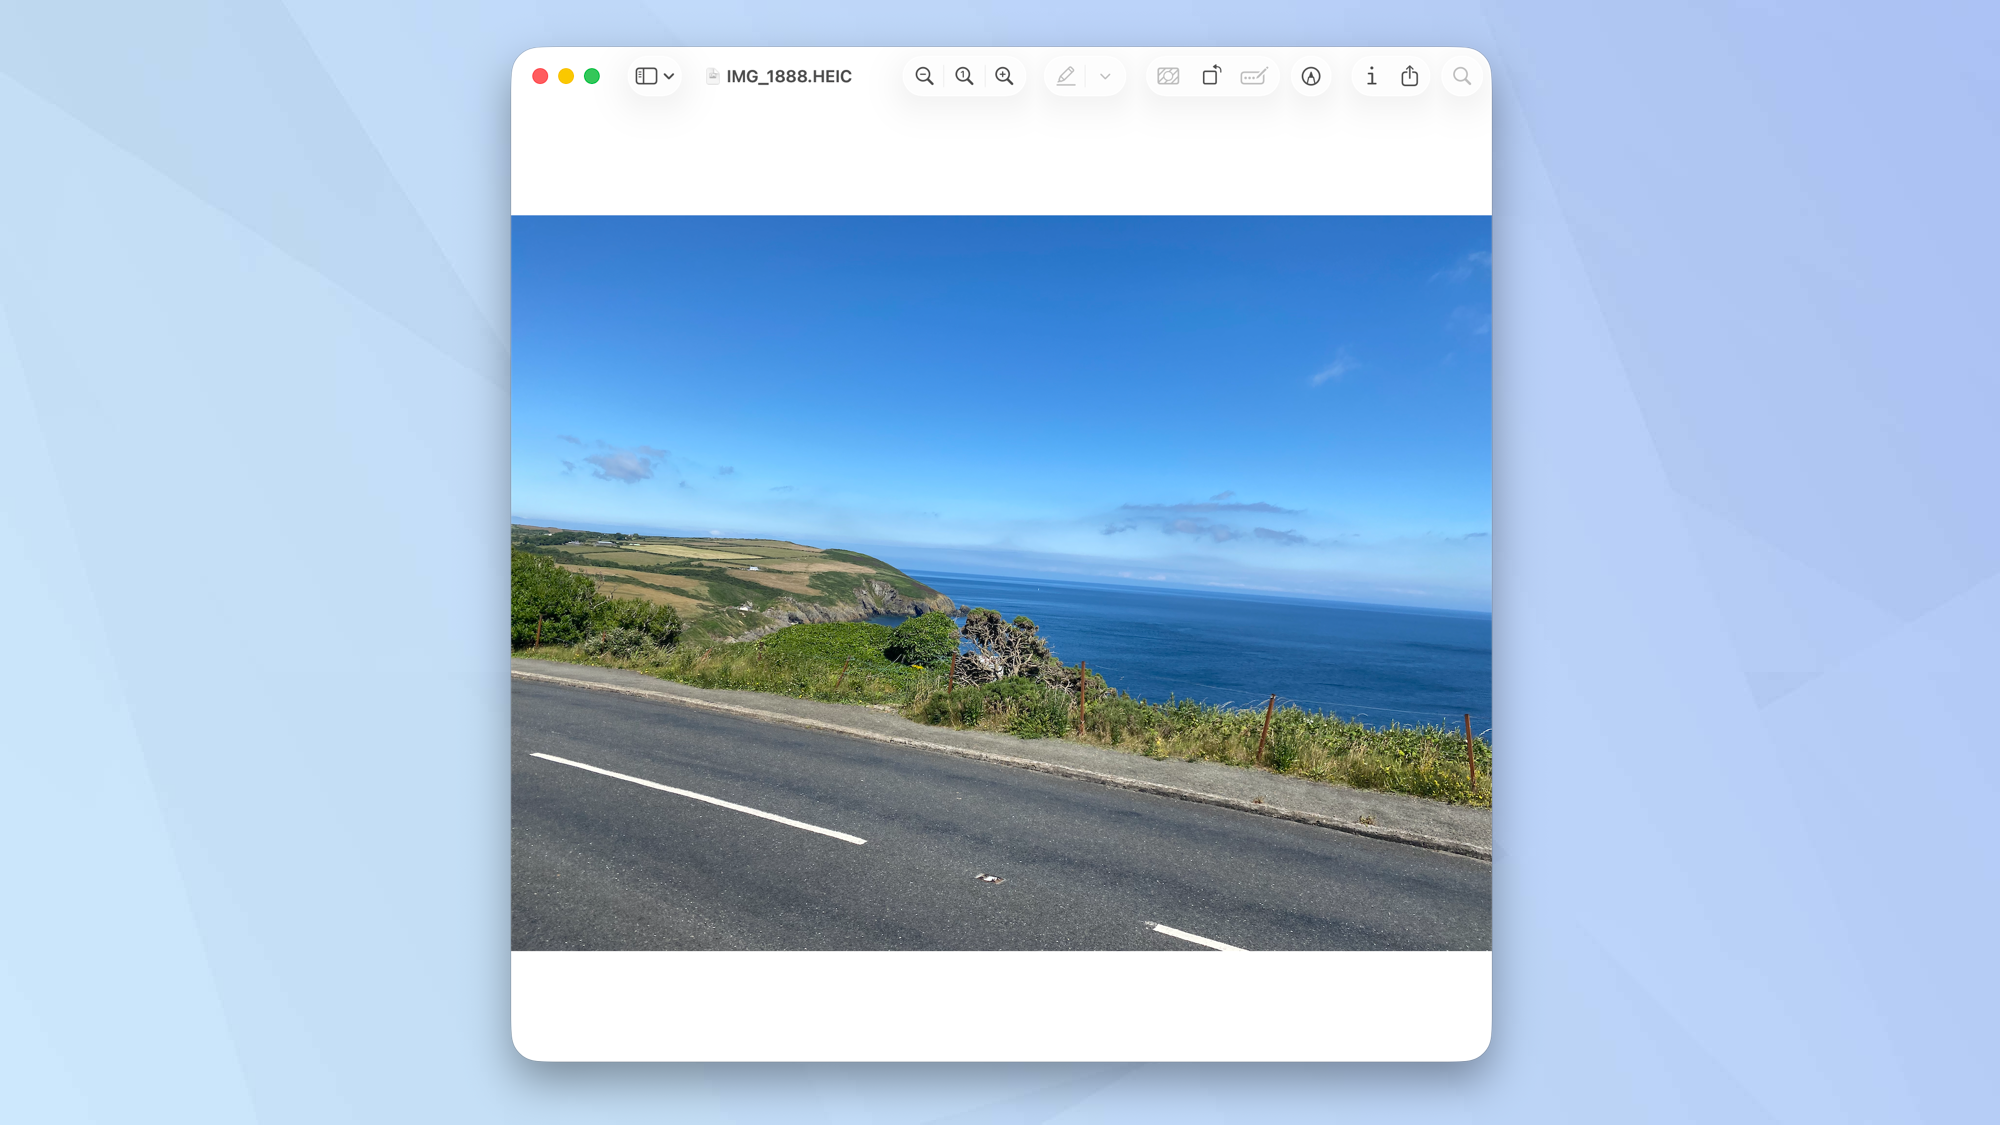
Find and select an image that you would like to use as a folder icon. It should open in the Preview app.
2. Copy the image
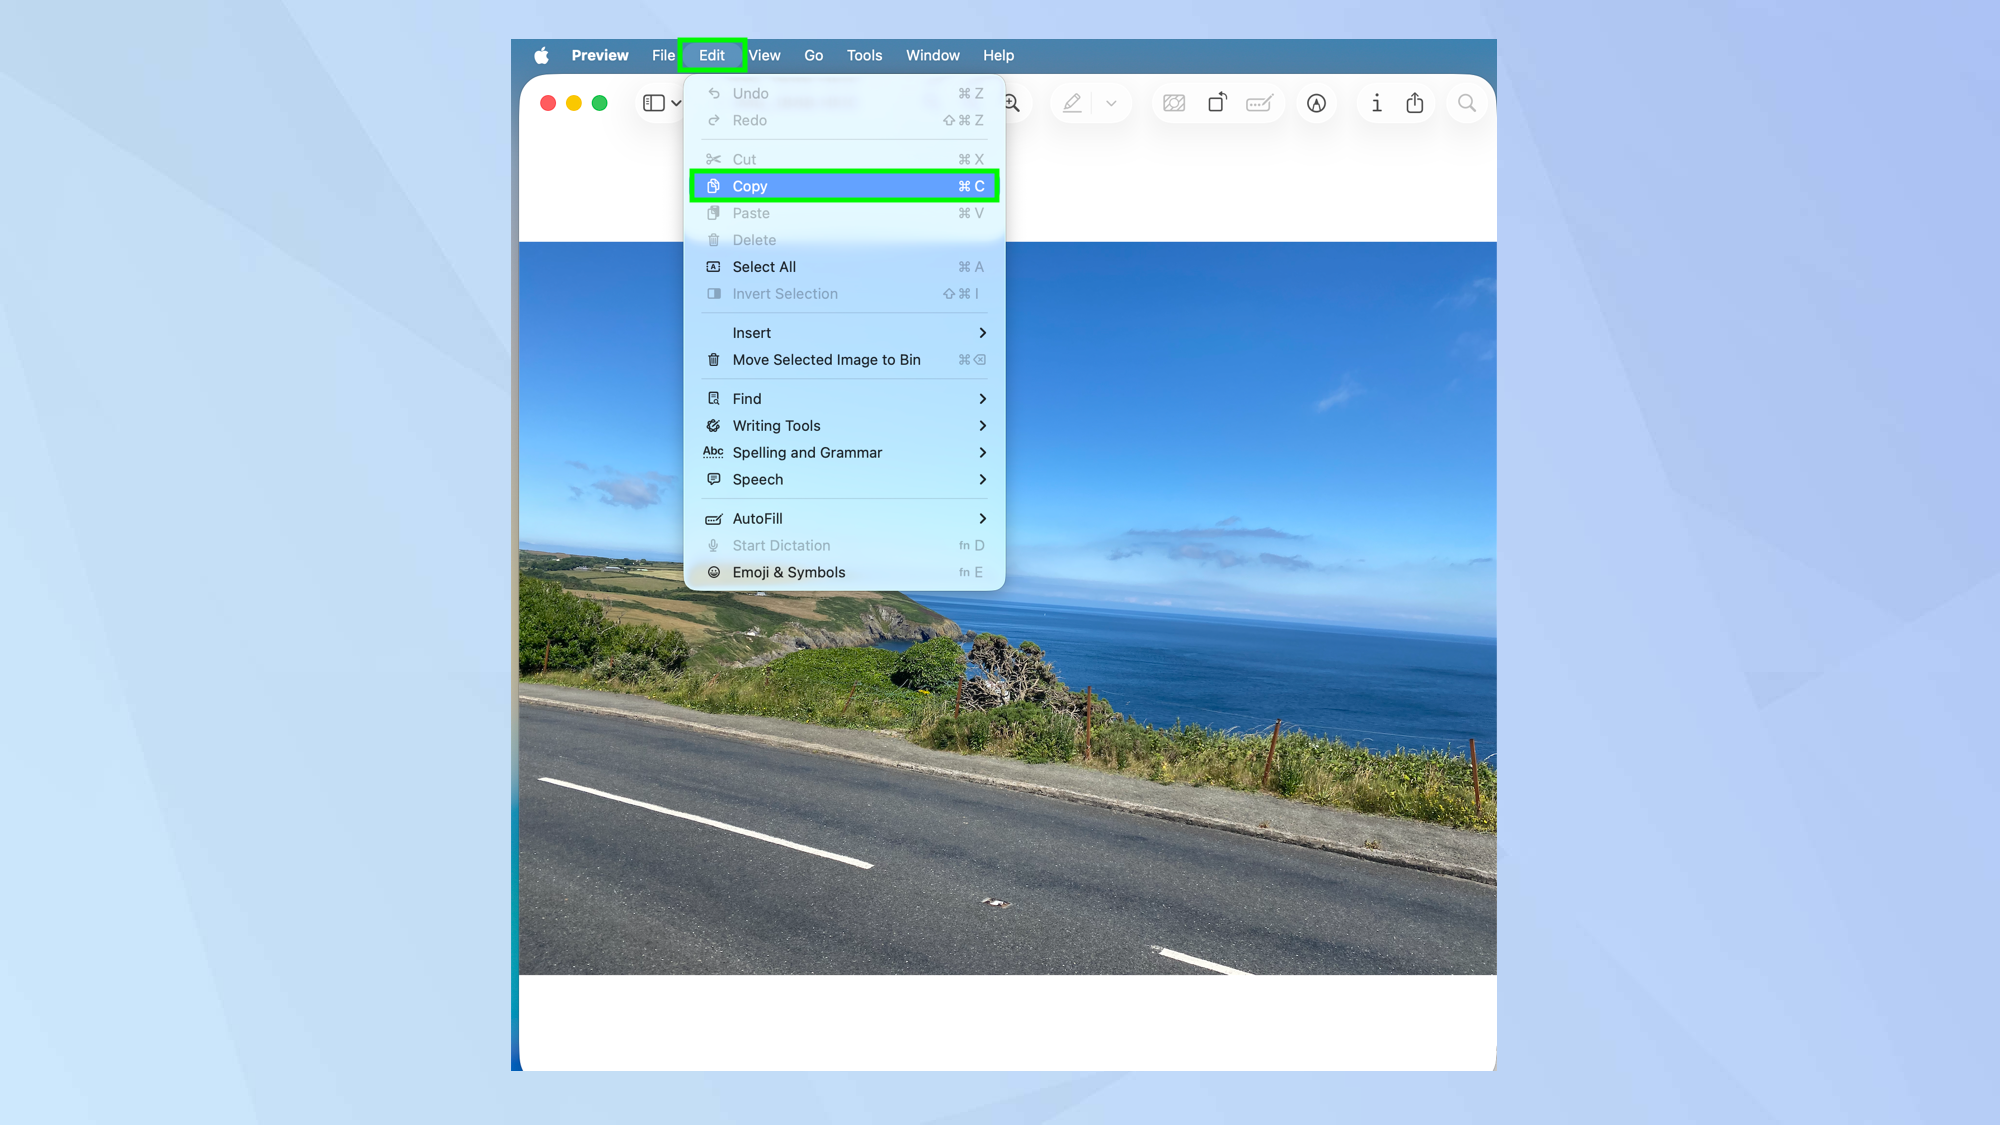
With the image in Preview, select Edit and click Copy.
3. Click the file or folder
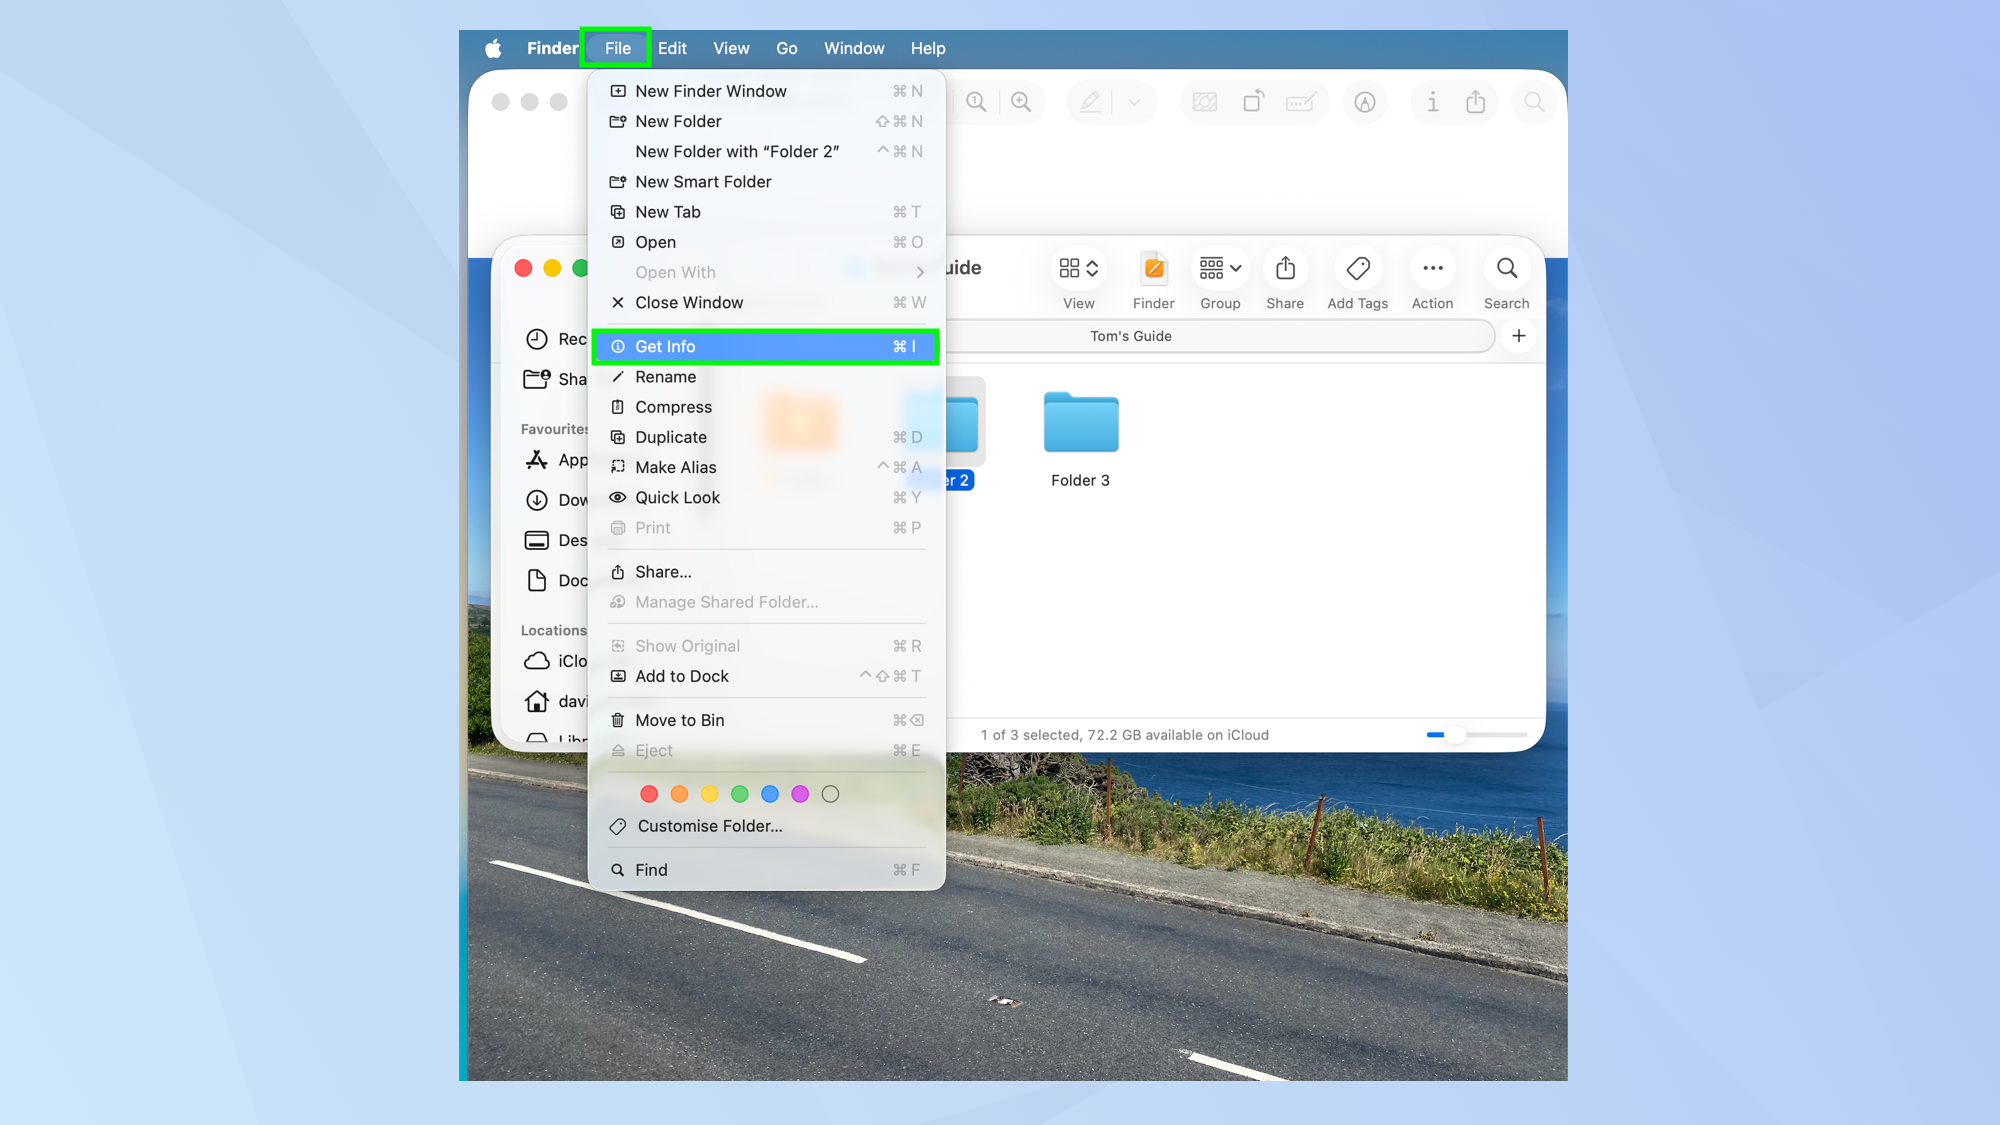
Now, in Finder or on the Desktop, select a file or folder that you want to use the image with.
Either right-click the file or folder and select Get Info or click File in the menu bar and select Get Info.
4. Select the icon
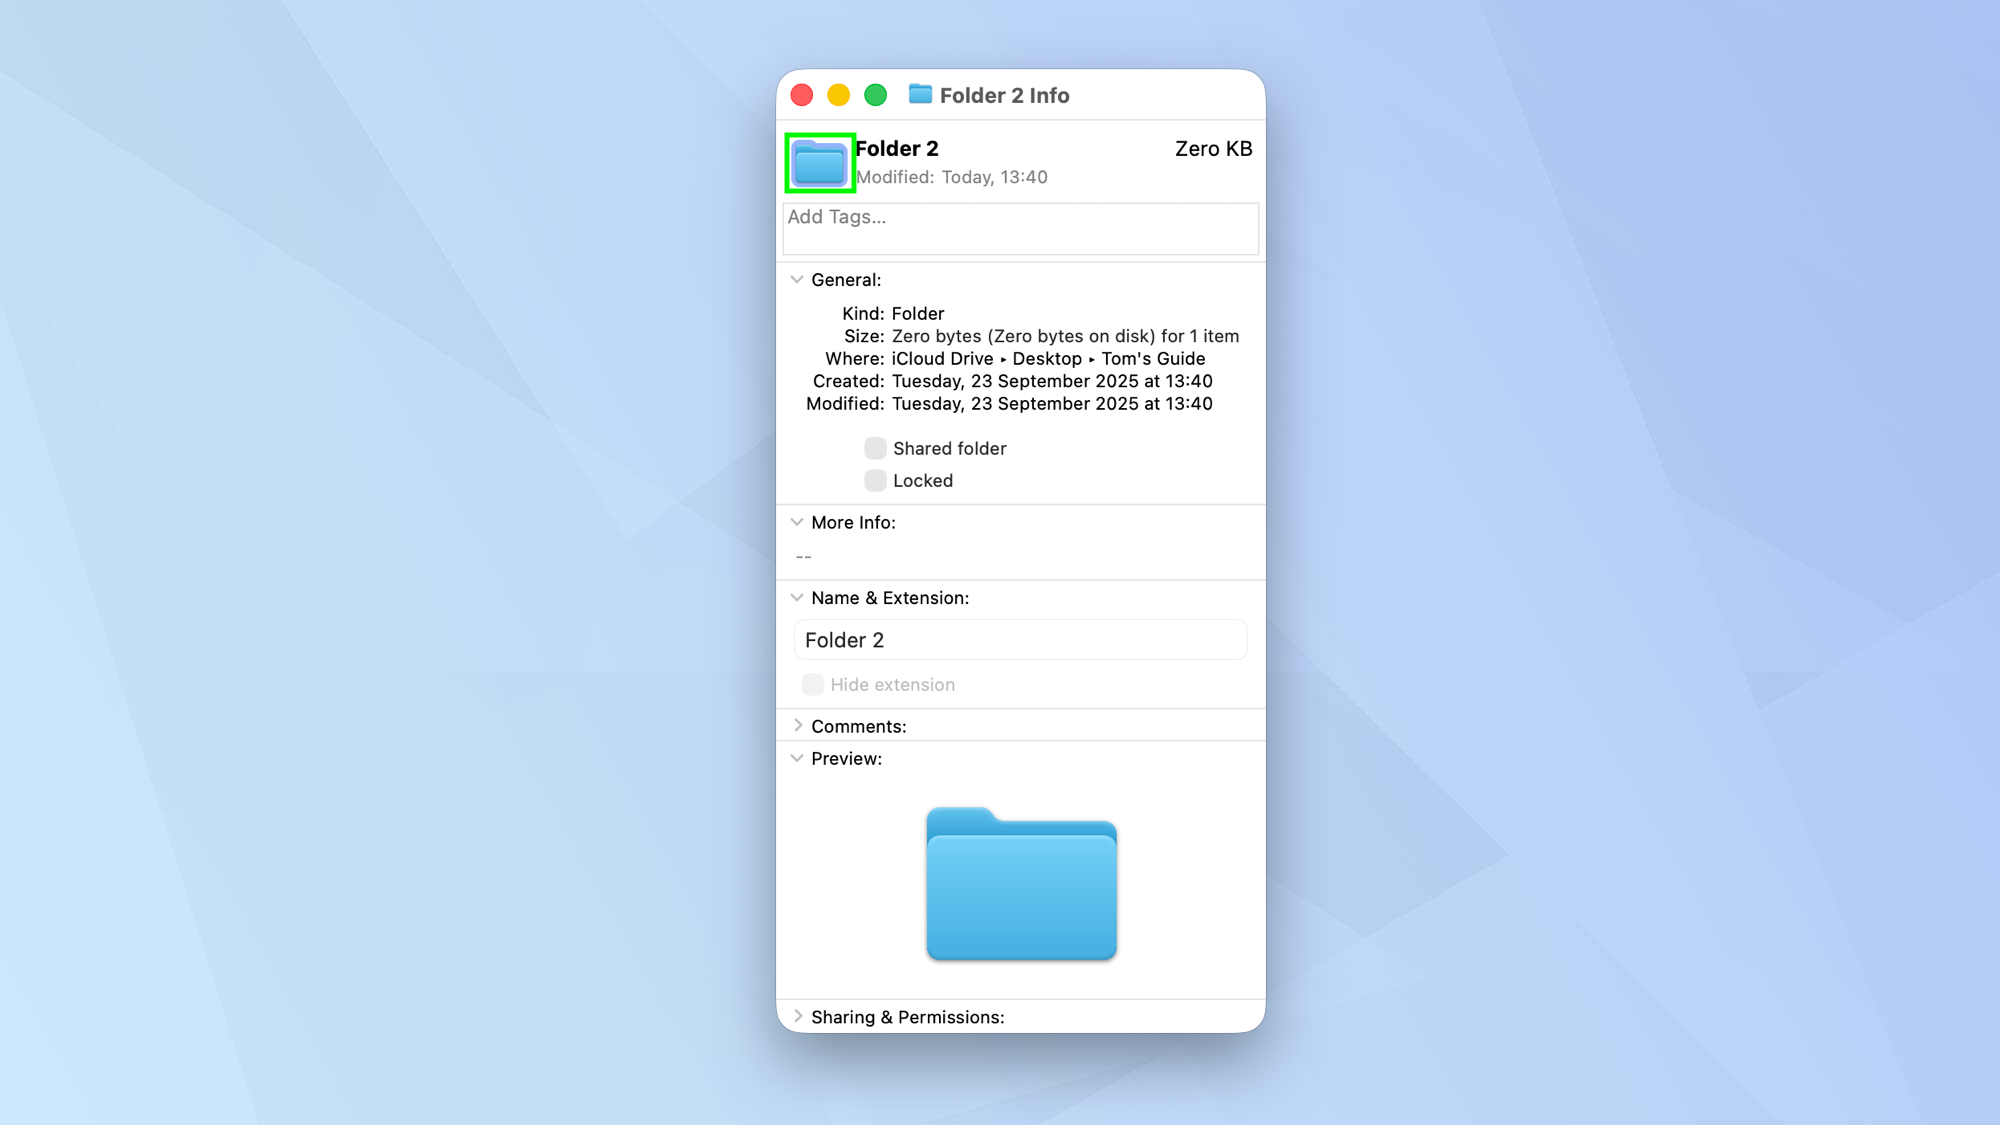
Click the small icon at the top of the Info window. It’s the one next to the folder or file’s title.
5. Paste the image
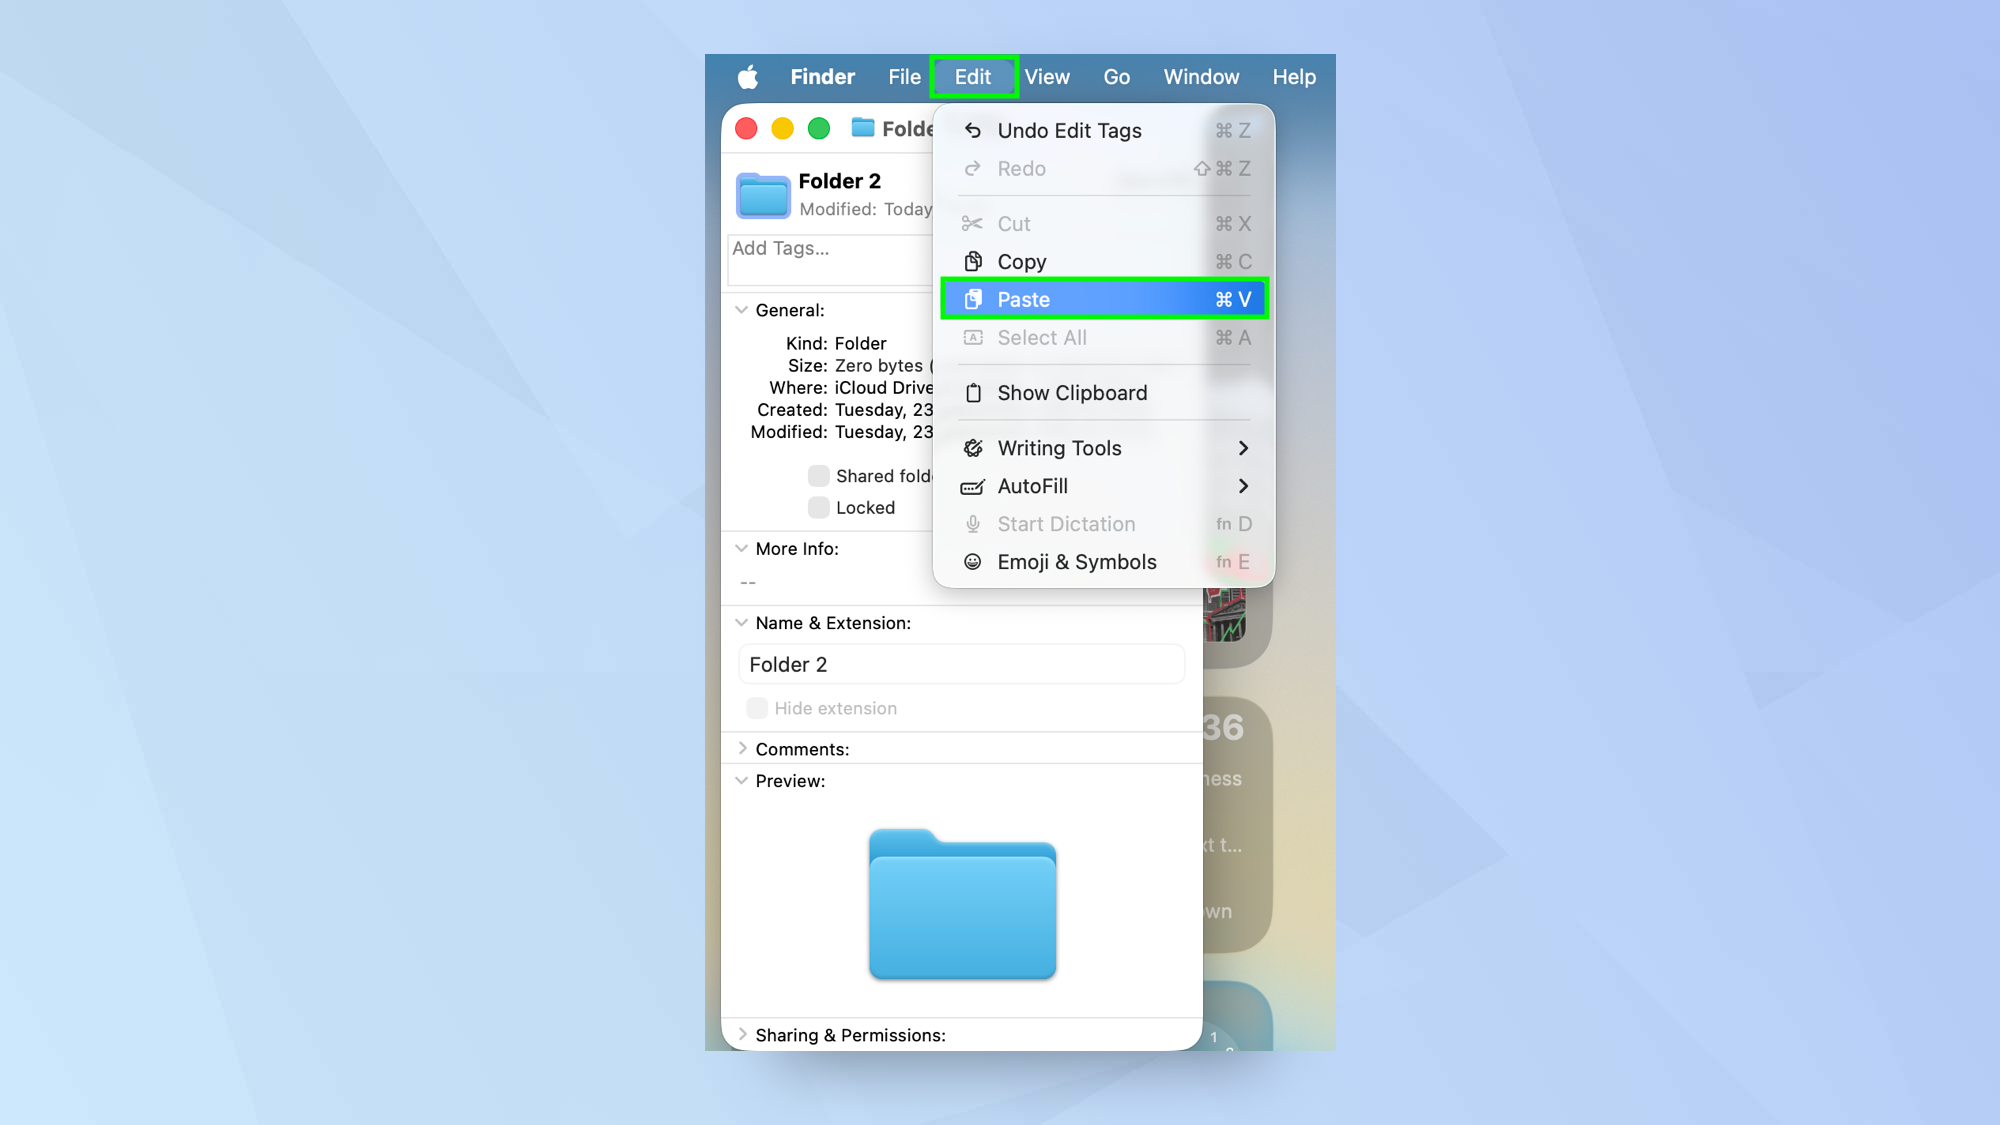
Next, select Edit in the menu bar and choose Paste. The image should replace the existing file or folder image.
6. Restore the icon
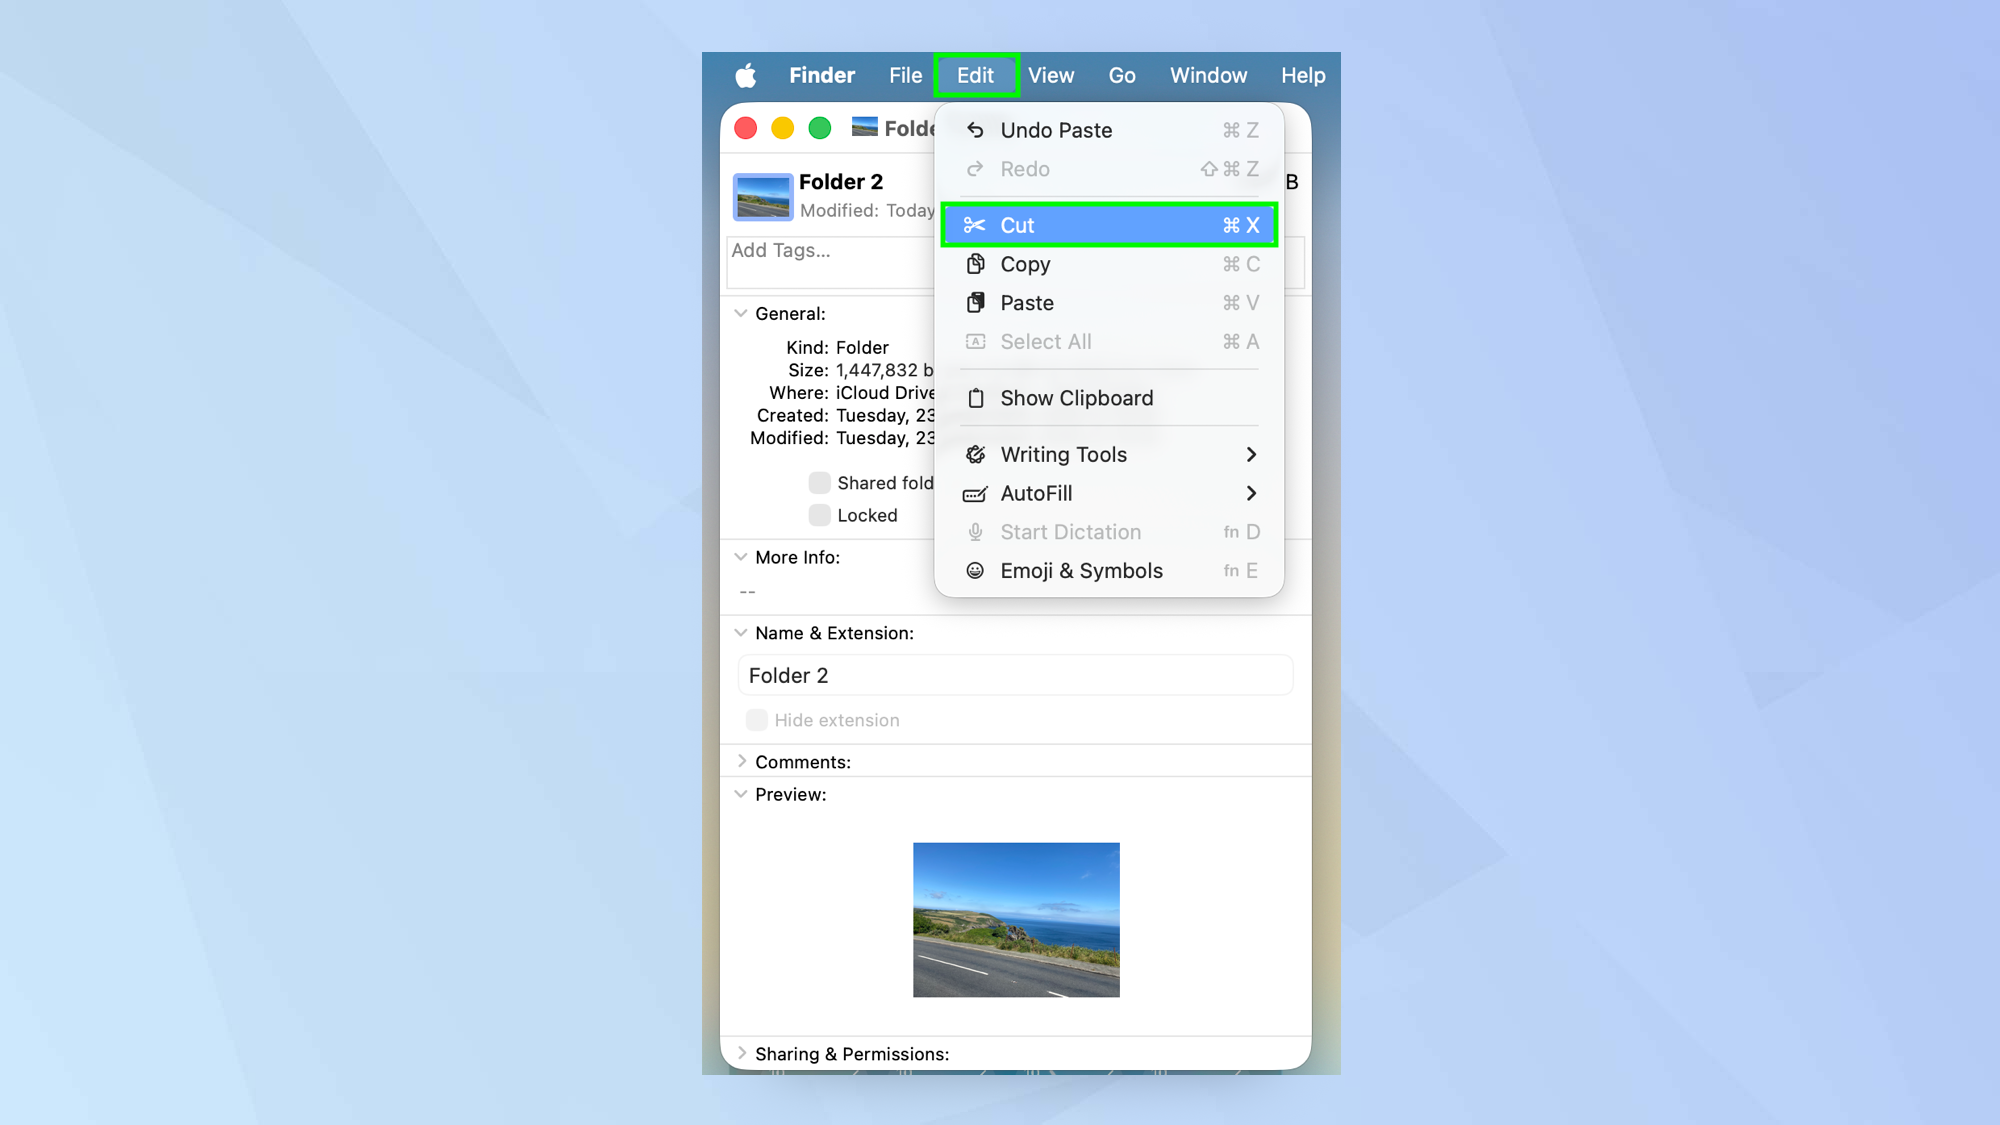
If you decide you don’t like the new look, you can click the icon in the Info window once more. Then select Edit in the menu bar and choose Cut.
Follow Tom's Guide on Google News and add us as a preferred source to get our up-to-date news, analysis, and reviews in your feeds. Make sure to click the Follow button!
More from Tom's Guide
- You can get more out of Genmoji on macOS Tahoe 26 — here's how
- macOS Tahoe is live now: 5 features to try first
- I discovered one of the best hidden macOS Tahoe features
Get instant access to breaking news, the hottest reviews, great deals and helpful tips.

David Crookes is a freelance writer, reporter, editor and author. He has written for technology and gaming magazines including Retro Gamer, Web User, Micro Mart, MagPi, Android, iCreate, Total PC Gaming, T3 and Macworld. He has also covered crime, history, politics, education, health, sport, film, music and more, and been a producer for BBC Radio 5 Live.
You must confirm your public display name before commenting
Please logout and then login again, you will then be prompted to enter your display name.
