How to clean up a folder in macOS Finder
Files a mess? Here's how to clean up a folder in macOS Finder
Here at Tom’s Guide our expert editors are committed to bringing you the best news, reviews and guides to help you stay informed and ahead of the curve!
You are now subscribed
Your newsletter sign-up was successful
Want to add more newsletters?

Daily (Mon-Sun)
Tom's Guide Daily
Sign up to get the latest updates on all of your favorite content! From cutting-edge tech news and the hottest streaming buzz to unbeatable deals on the best products and in-depth reviews, we’ve got you covered.

Weekly on Thursday
Tom's AI Guide
Be AI savvy with your weekly newsletter summing up all the biggest AI news you need to know. Plus, analysis from our AI editor and tips on how to use the latest AI tools!

Weekly on Friday
Tom's iGuide
Unlock the vast world of Apple news straight to your inbox. With coverage on everything from exciting product launches to essential software updates, this is your go-to source for the latest updates on all the best Apple content.

Weekly on Monday
Tom's Streaming Guide
Our weekly newsletter is expertly crafted to immerse you in the world of streaming. Stay updated on the latest releases and our top recommendations across your favorite streaming platforms.
Join the club
Get full access to premium articles, exclusive features and a growing list of member rewards.
You'll want to learn how to clean up folders in macOS Finder if, like me, you get a little annoyed at how messy your folders get. While Macs are some of the best laptops around, and macOS is beloved by many, the operating system does have its quirks.
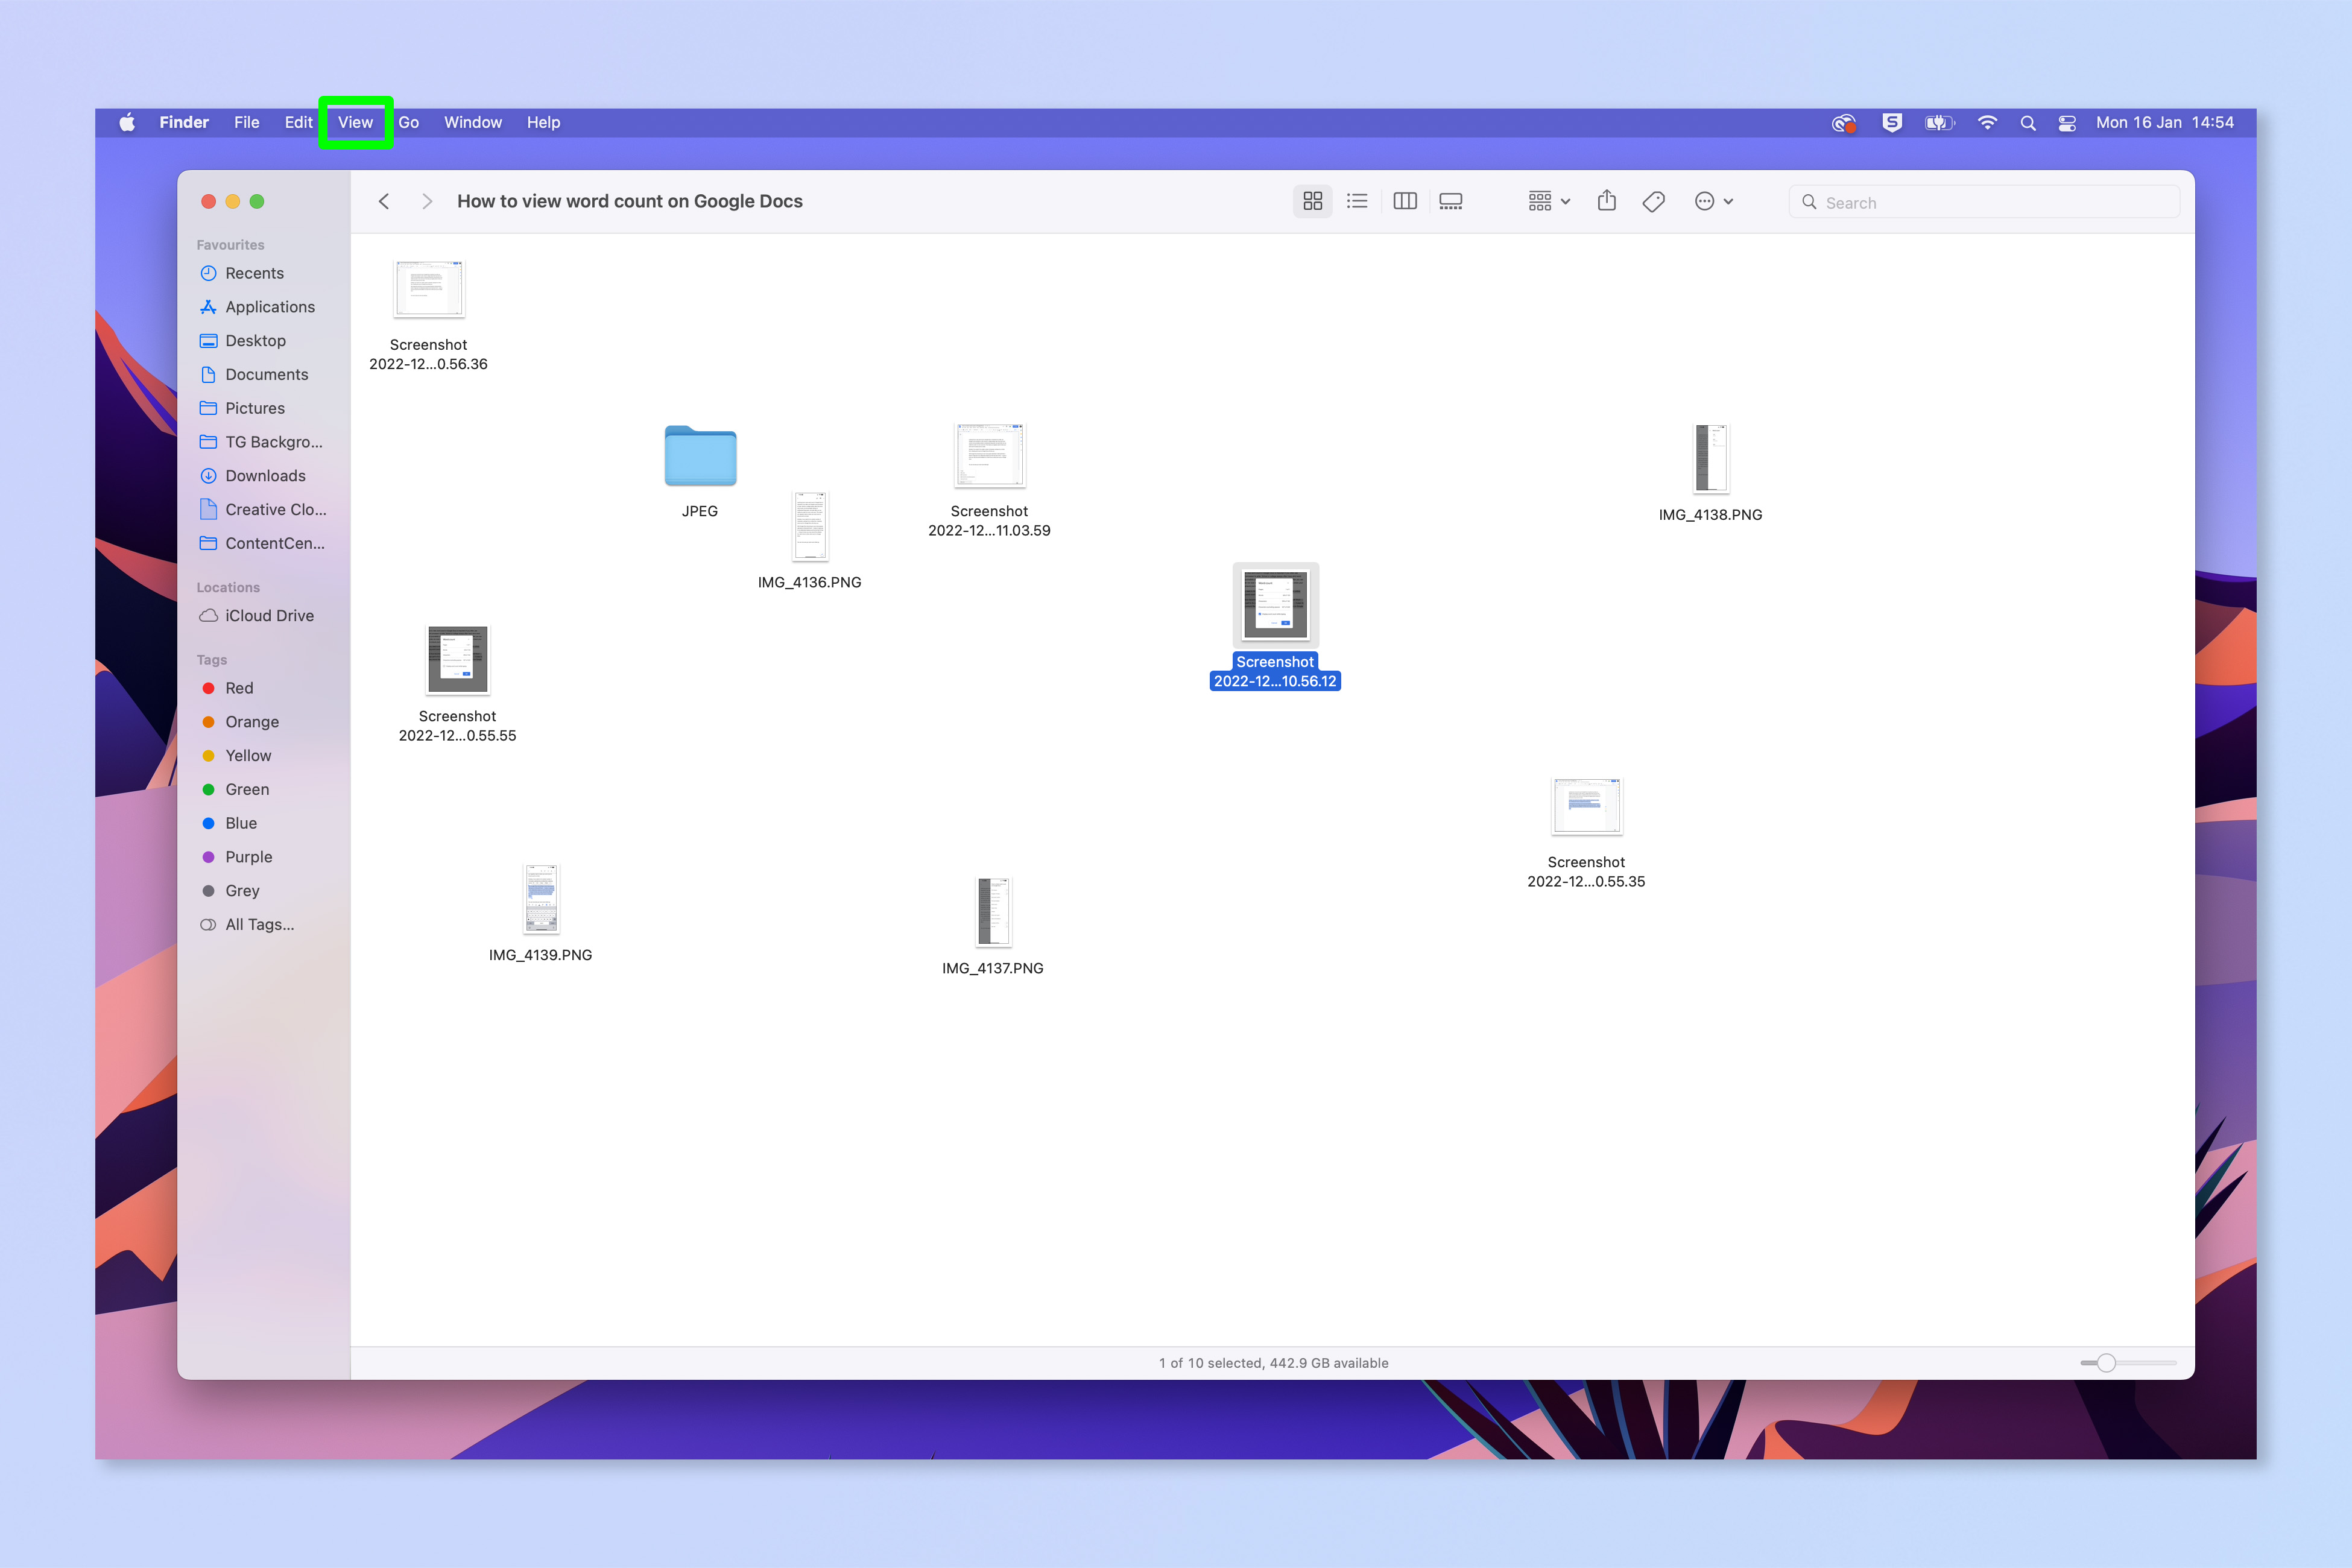
One particular quirk is that when using icon view, Finder doesn't organize items that are dropped into folders. Given dragging and dropping is one of the most common ways of moving items in macOS, the result is that you can often end up with very messy folders, with files and folders littered sporadically across your Finder window.
You can solve this by switching to another view, of course, such as list view. However, using icon view is often preferable when you want a small preview of the files you're browsing — if looking through a folder full of images, for example.
Thankfully, Apple has a quick way of tidying items in Finder: the Clean Up function. This function has been around for a long time — as long as I've been using Macs, which is well over a decade now. It has seen its functionality decreased in recent years, as you used to be able to perform the Clean Up function from the right click menu, whereas now you must navigate the tool bars. That may even be why you're here, if you've recently moved back to macOS after some time away and are wondering where the function has gone.
Luckily, the Clean Up function still exists, and can be used to snap items back into an ordered state. Without further ado, here's how to clean up a folder in macOS Finder.
How to clean up a folder in macOS Finder
1. In a messy folder, click View in the top toolbar.
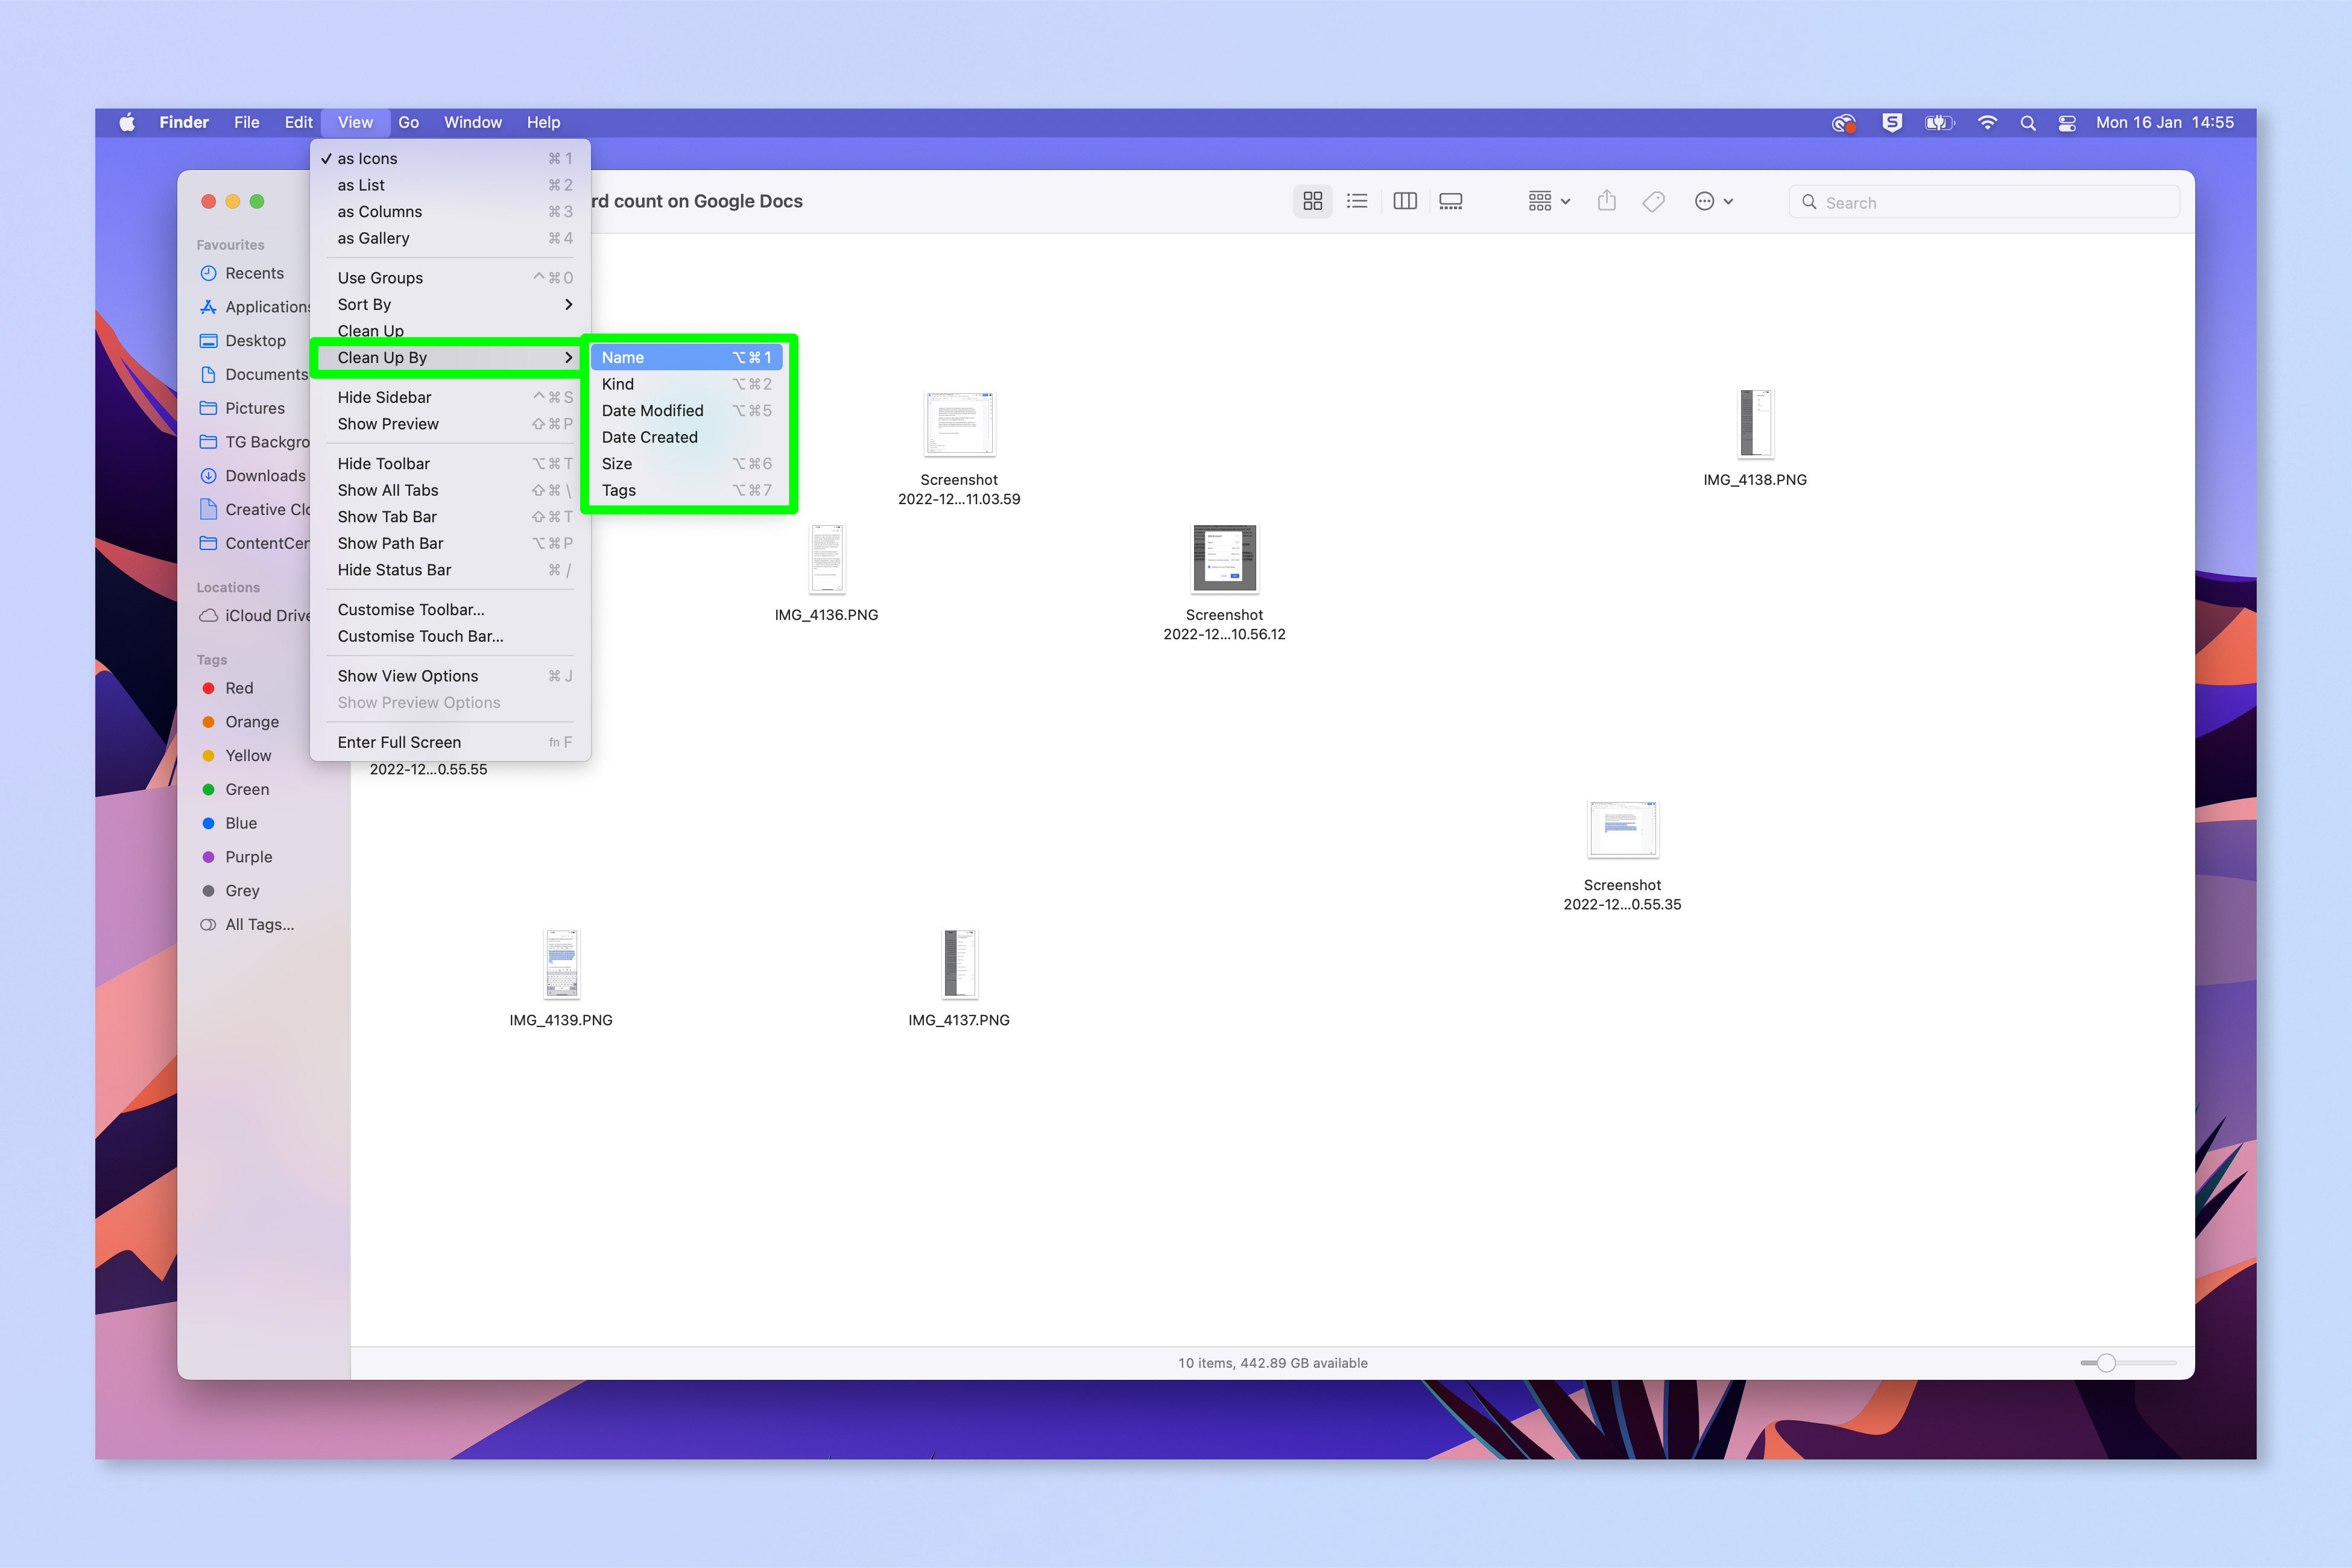
2. Hover over Clean Up By, then select a sorting method to arrange the items.
Get instant access to breaking news, the hottest reviews, great deals and helpful tips.
Alternatively, you can simply select Clean Up, but this no longer snaps items back into a nice neat order starting top left, as it used to. Instead, this simply snaps them to the grid point nearest to where they currently are in Finder. In short, this doesn't do much.
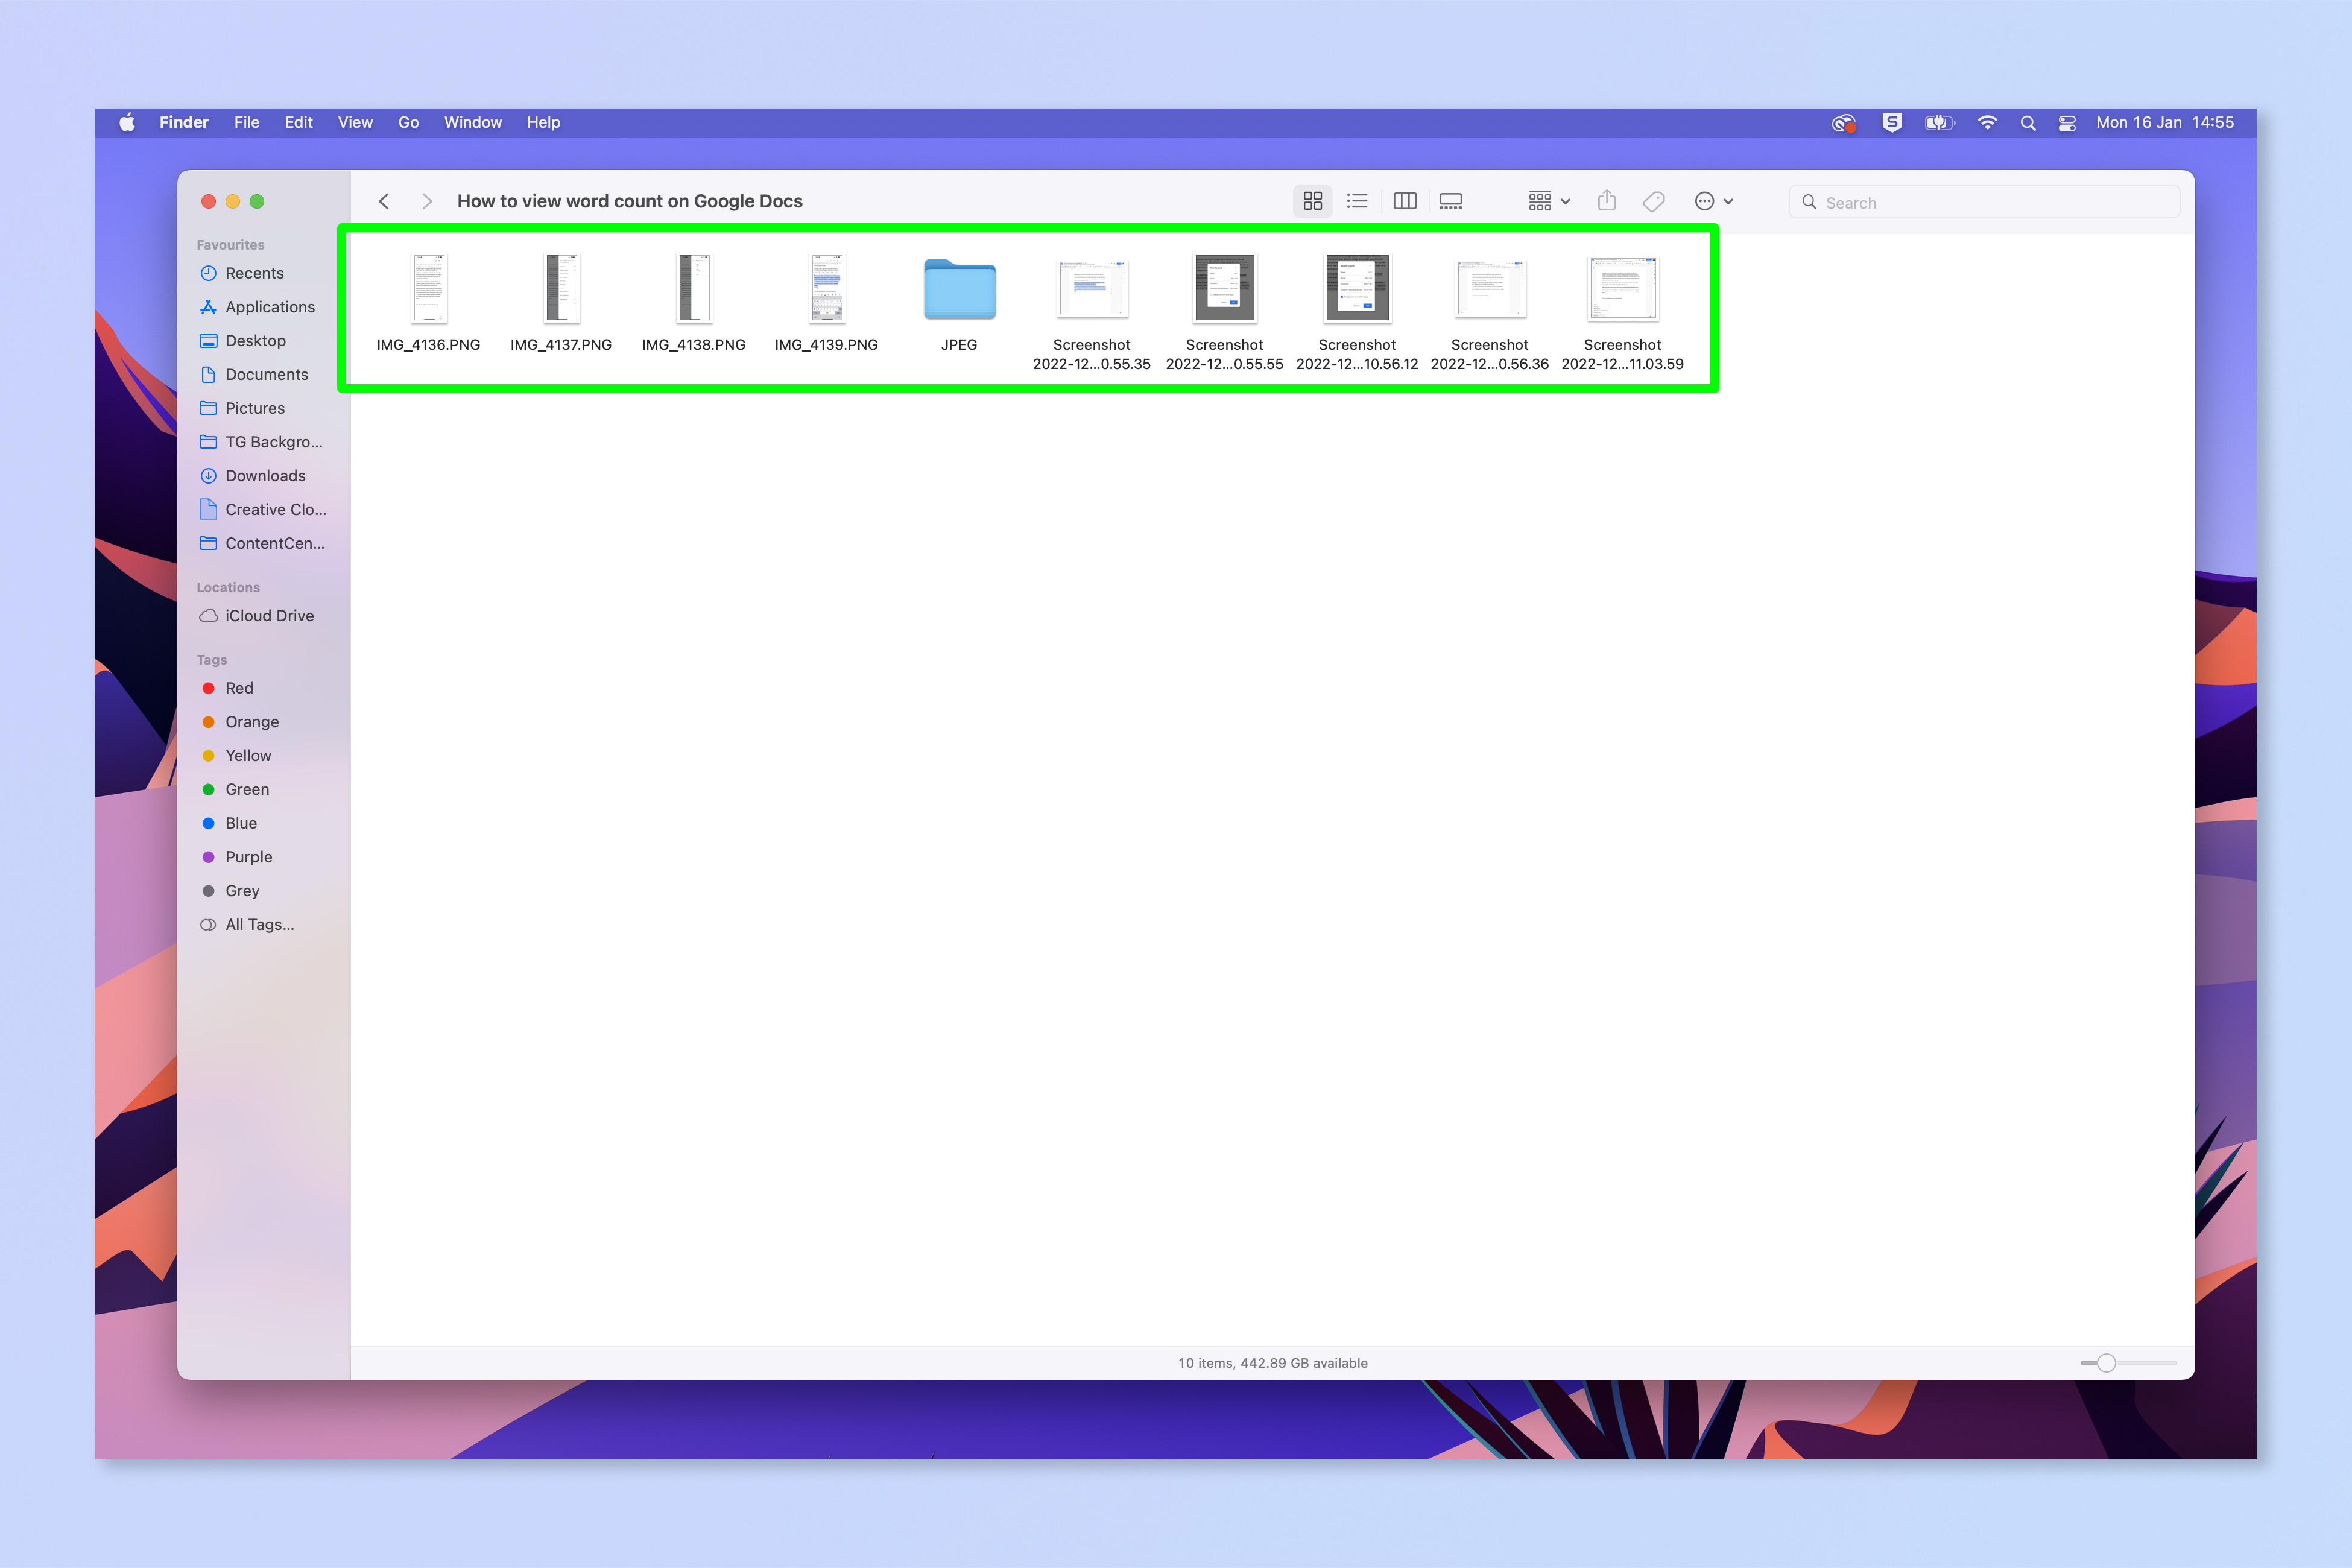
3. Your items will now be neat and ordered, starting from the top left.
This is one of my favorite functions of macOS, so I'm glad it's still there to use, even if it has been hidden slightly by being removed from the right click menu.
On that note, if you're looking for other Mac tutorials, get started by learning how to right click on Mac and how to scroll on Mac. If your Mac is running a little sluggish of late, check out how to clear the cache on Mac. And if you're wondering how to type emoji on your machine, learn how to access the emoji keyboard on Mac. Did you know that macOS comes with a built-in powerful image editor? Find out how to use it with our guide on how to edit photos on Mac for free. Fancy talking to nobody? Learn how to use ChatGPT.

Peter is a Senior Editor at Tom's Guide, heading up the site's Reviews team and Cameras section. As a writer, he covers topics including tech, photography, gaming, hardware, motoring and food & drink. Outside of work, he's an avid photographer, specialising in architectural and portrait photography. When he's not snapping away on his beloved Fujifilm camera, he can usually be found telling everyone about his greyhounds, riding his motorcycle, squeezing as many FPS as possible out of PC games, and perfecting his espresso shots.
 Club Benefits


