How to use DALL•E 2 AI image generator
Learn how to use DALL•E 2 AI image generator to create art and AI-edited photos
Here at Tom’s Guide our expert editors are committed to bringing you the best news, reviews and guides to help you stay informed and ahead of the curve!
You are now subscribed
Your newsletter sign-up was successful
Want to add more newsletters?
Daily (Mon-Sun)
Tom's Guide Daily
Sign up to get the latest updates on all of your favorite content! From cutting-edge tech news and the hottest streaming buzz to unbeatable deals on the best products and in-depth reviews, we’ve got you covered.
Weekly on Thursday
Tom's AI Guide
Be AI savvy with your weekly newsletter summing up all the biggest AI news you need to know. Plus, analysis from our AI editor and tips on how to use the latest AI tools!

Weekly on Friday
Tom's iGuide
Unlock the vast world of Apple news straight to your inbox. With coverage on everything from exciting product launches to essential software updates, this is your go-to source for the latest updates on all the best Apple content.

Weekly on Monday
Tom's Streaming Guide
Our weekly newsletter is expertly crafted to immerse you in the world of streaming. Stay updated on the latest releases and our top recommendations across your favorite streaming platforms.
Join the club
Get full access to premium articles, exclusive features and a growing list of member rewards.
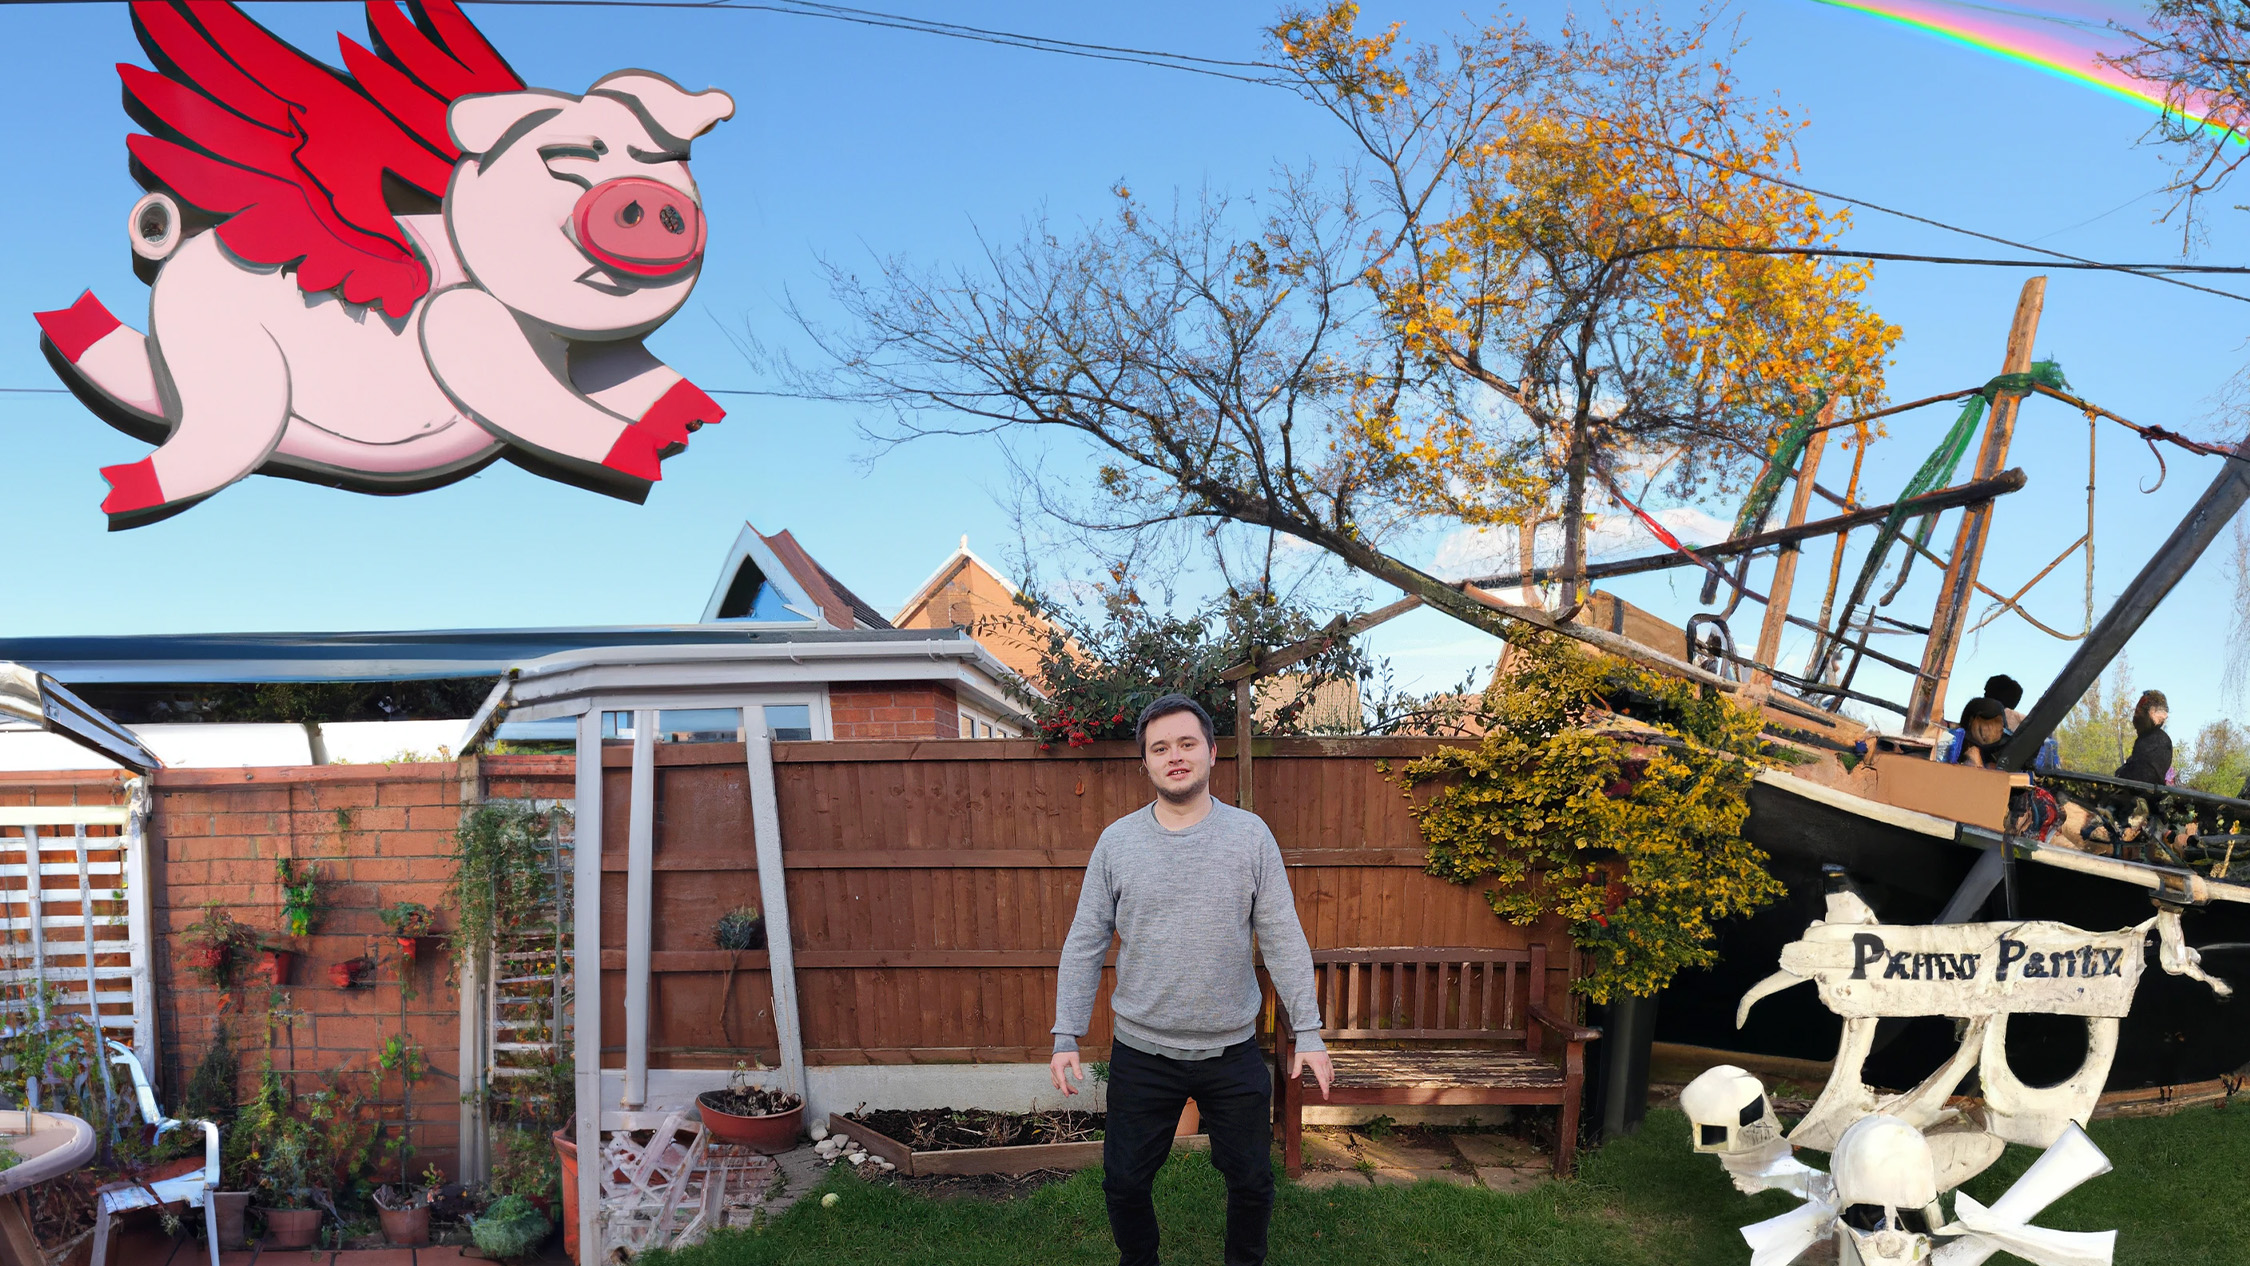
Once you know how to use DALL•E 2 AI image generator, nothing will hold your imagination back again. This AI software from Open AI, the team behind Chat GPT, can generate images from text prompts like other AI tools, but most excitingly (or scarily) you can edit real photos and blend AI-generated images in, blurring the lines between reality and creativity.
To get started, you’ll need to create an account on the Open AI website. It’s quick and free, although you will need to pay after your first 50 or so creations. Here’s a guide on how to use DALL•E 2 to create an image from a text prompt, and to edit your own pre-existing images.
How to use DALL•E 2
Just a quick note before we get started: it's worth remembering that DALL•E 2 is currently in beta. It's usable, but you can expect some features to not work perfectly just yet. With that out of the way, assuming you've created your OpenAI account, here's how to use DALL•E 2.
How to use DALL•E 2 to generate an image from text
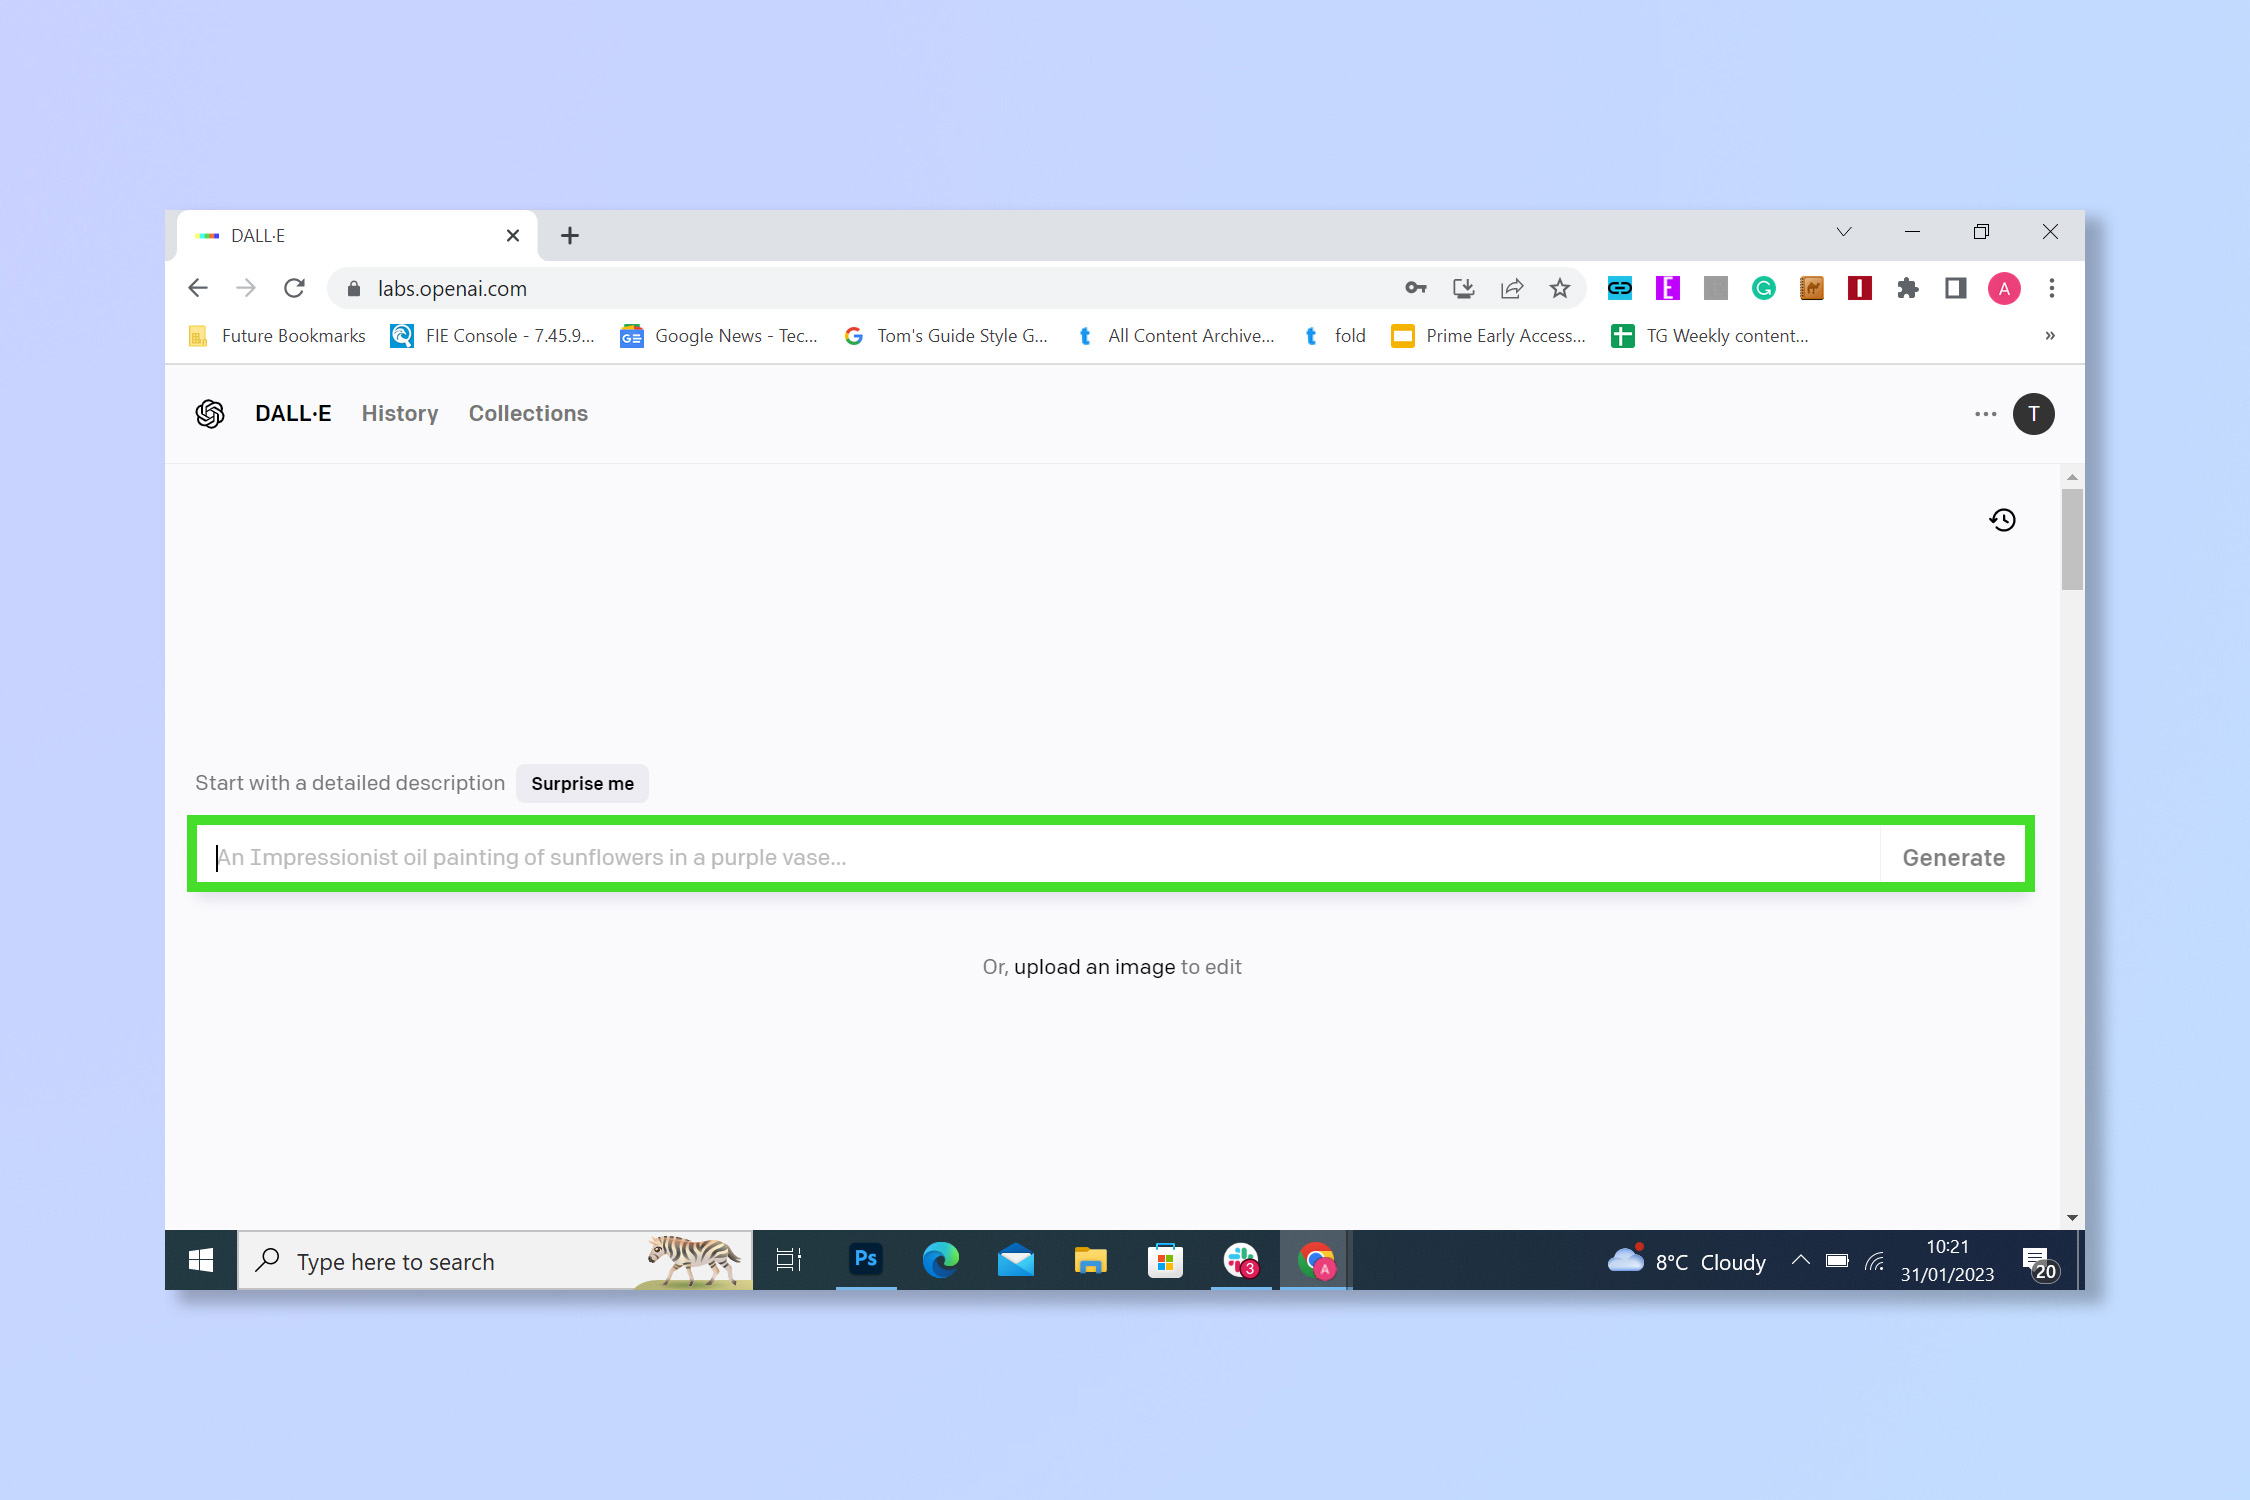
1. Log into your account and then select the search bar.
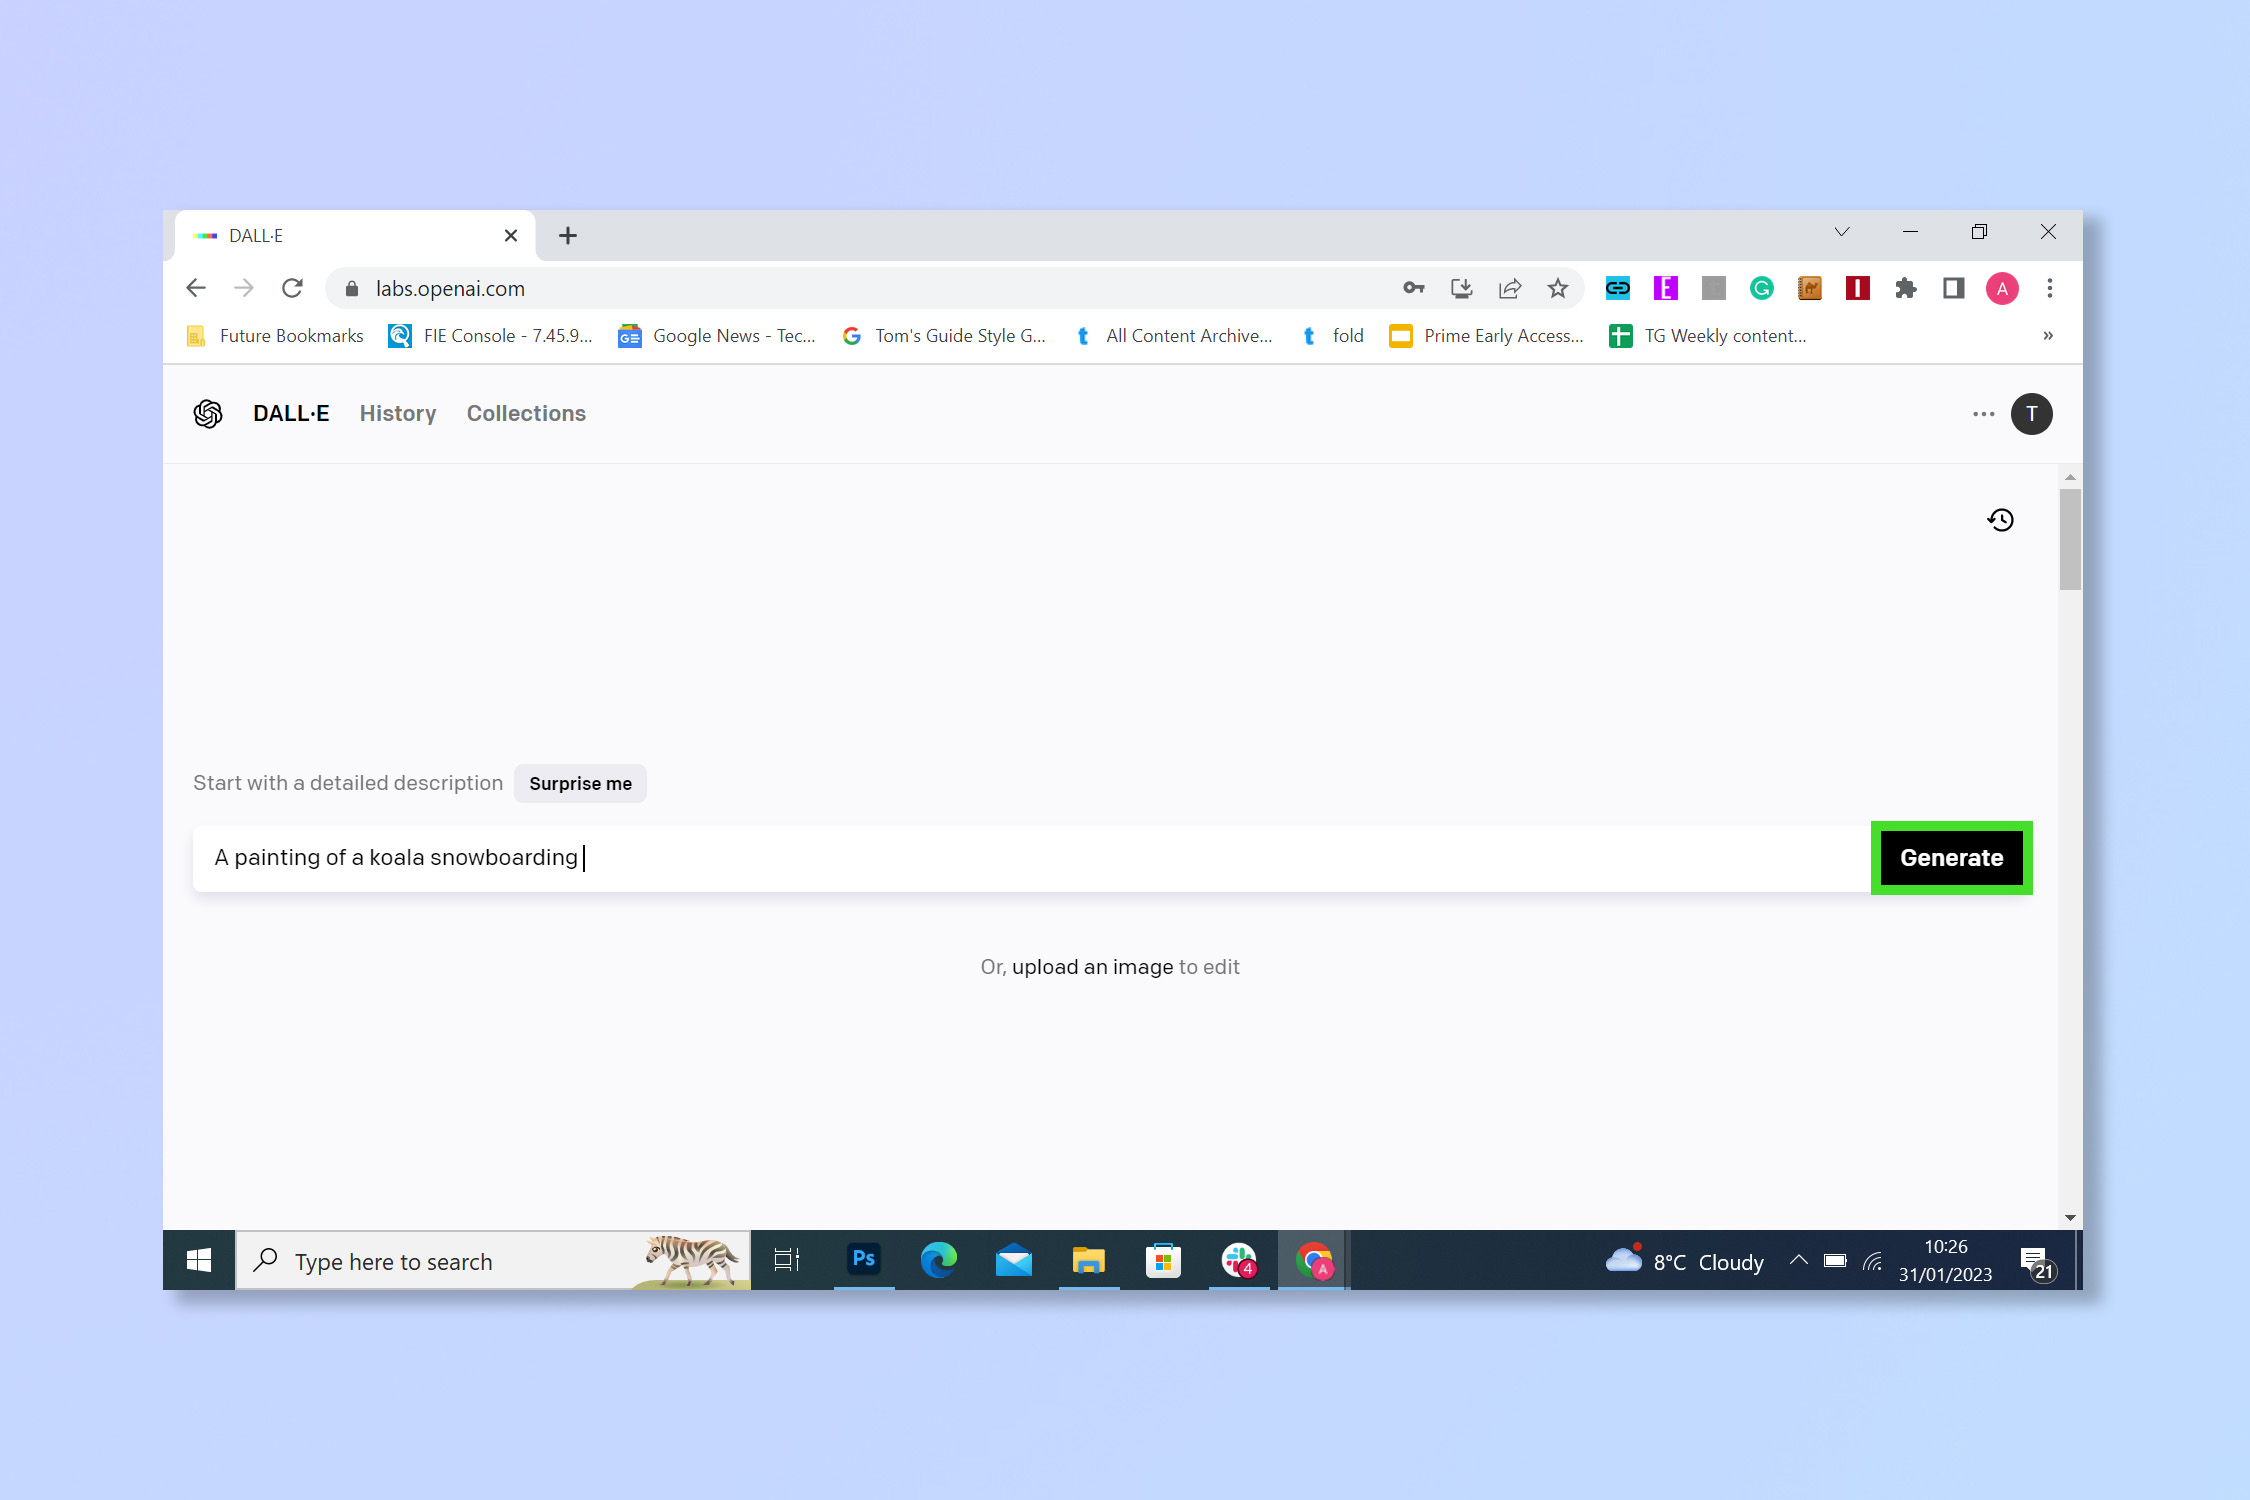
2. Type in a prompt. The more detail here, the better you can go granular and specify a specific style or artistic genre. When you're done, select Generate.
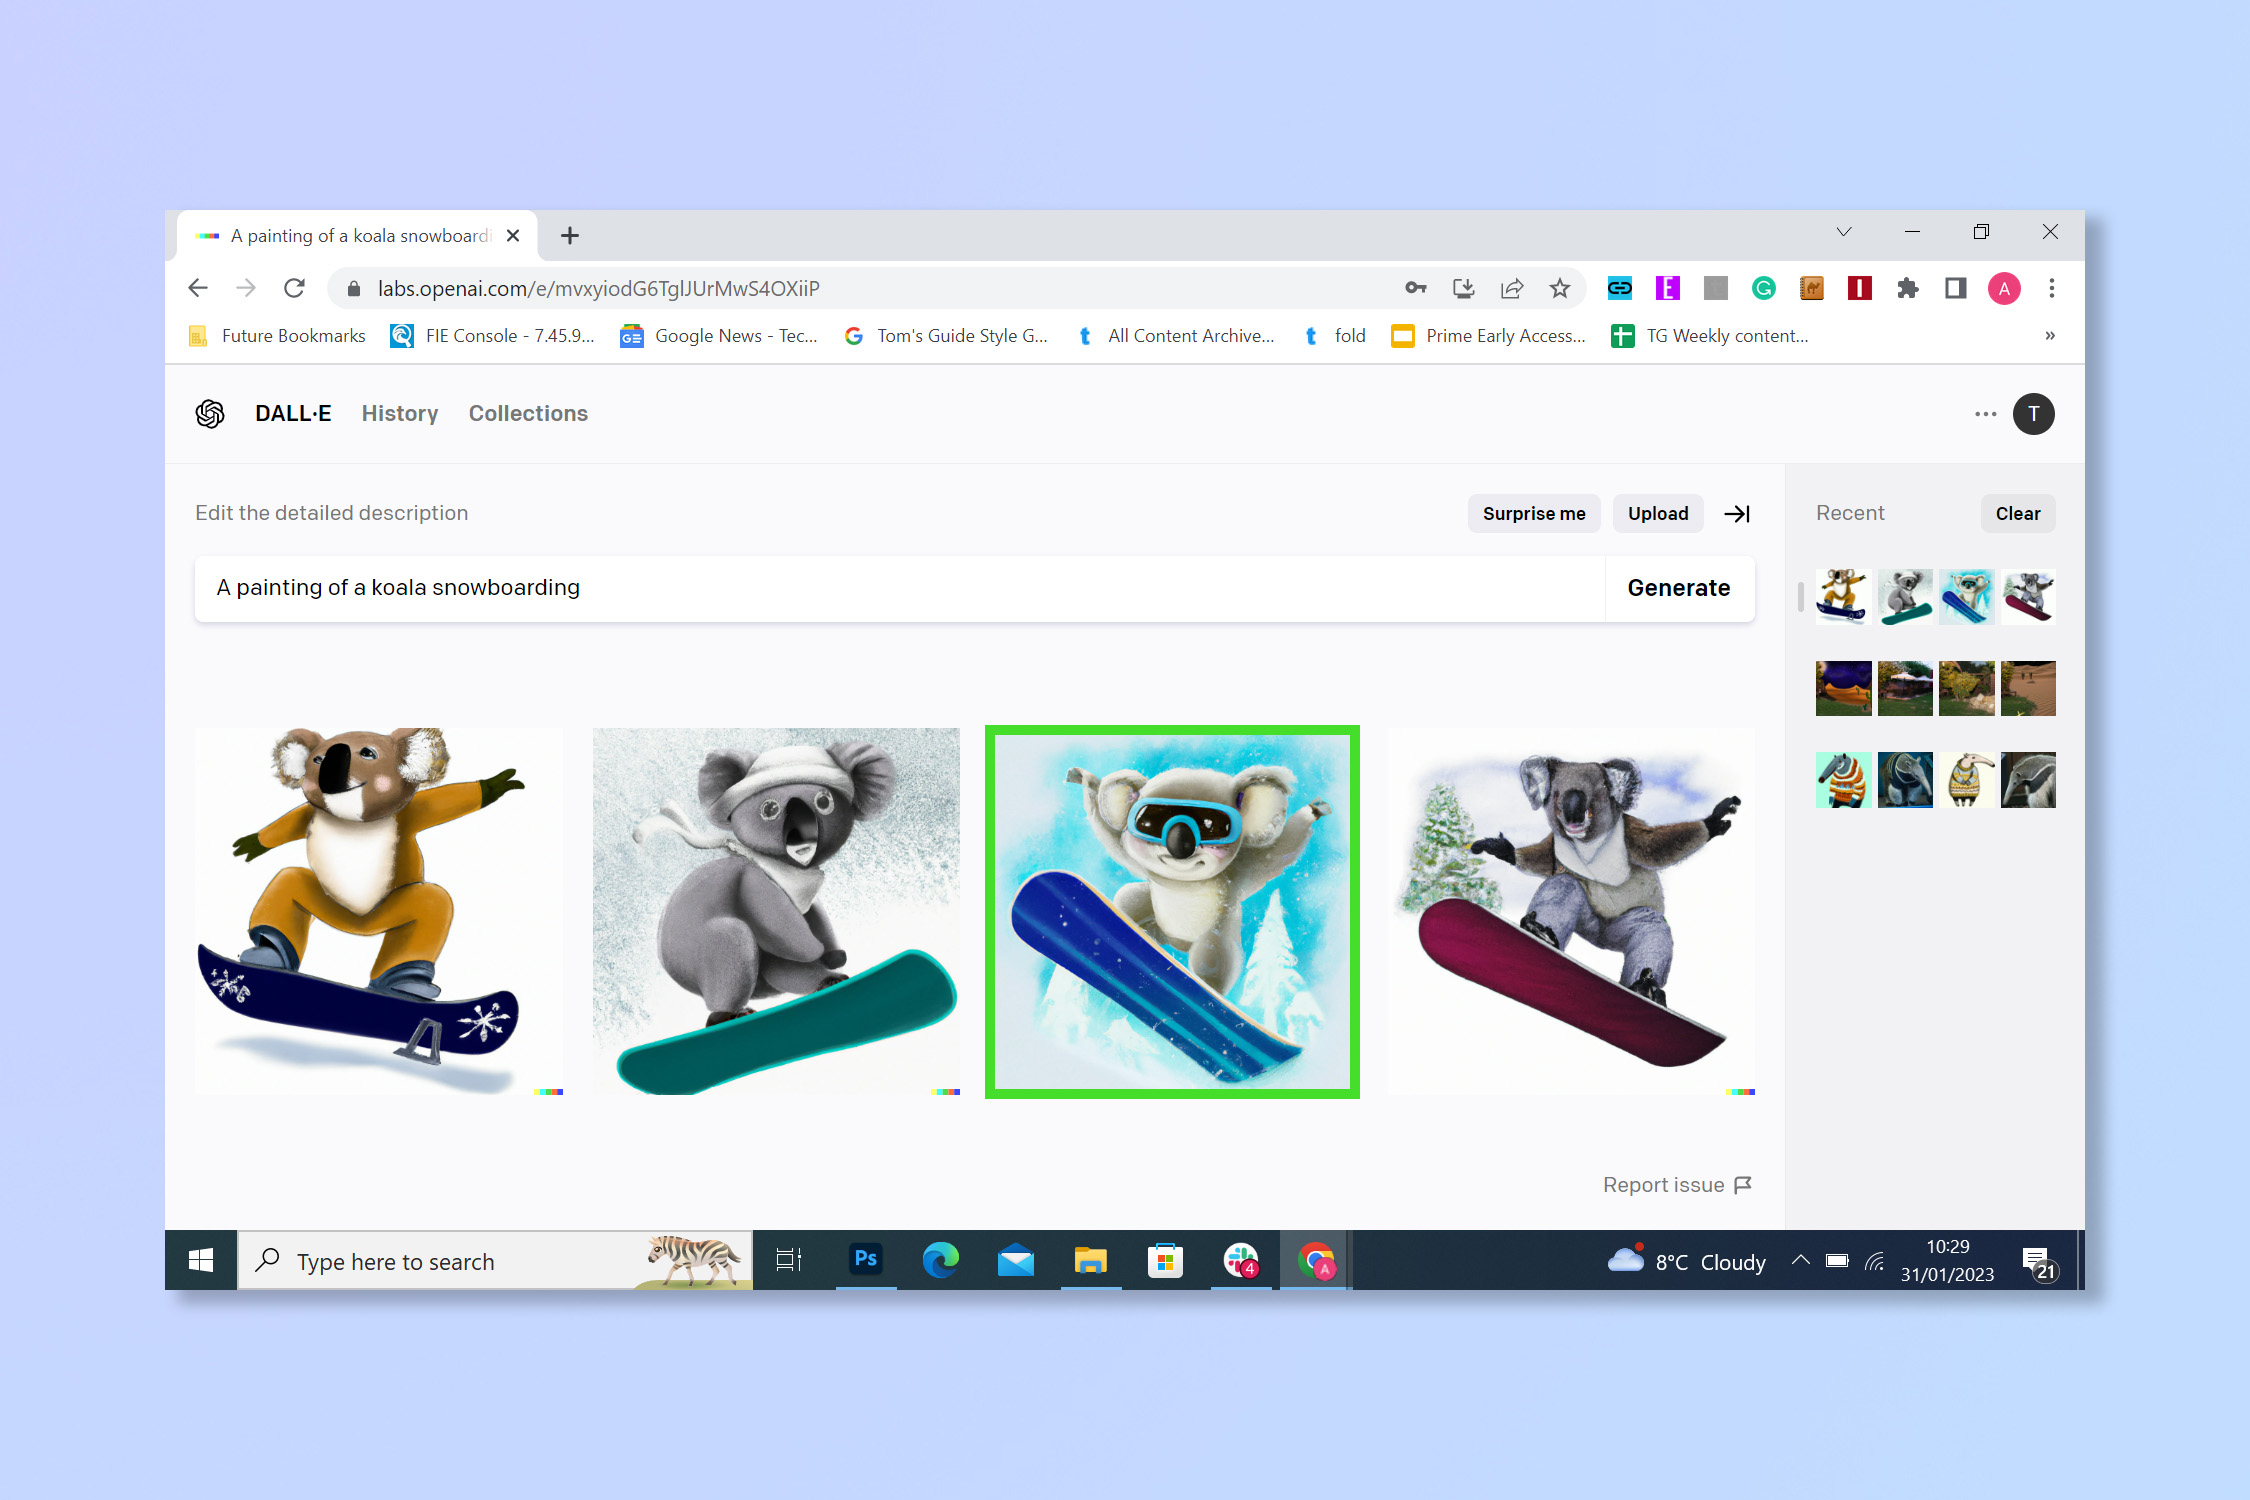
3. Wait for the AI to work and then choose from four different variations.
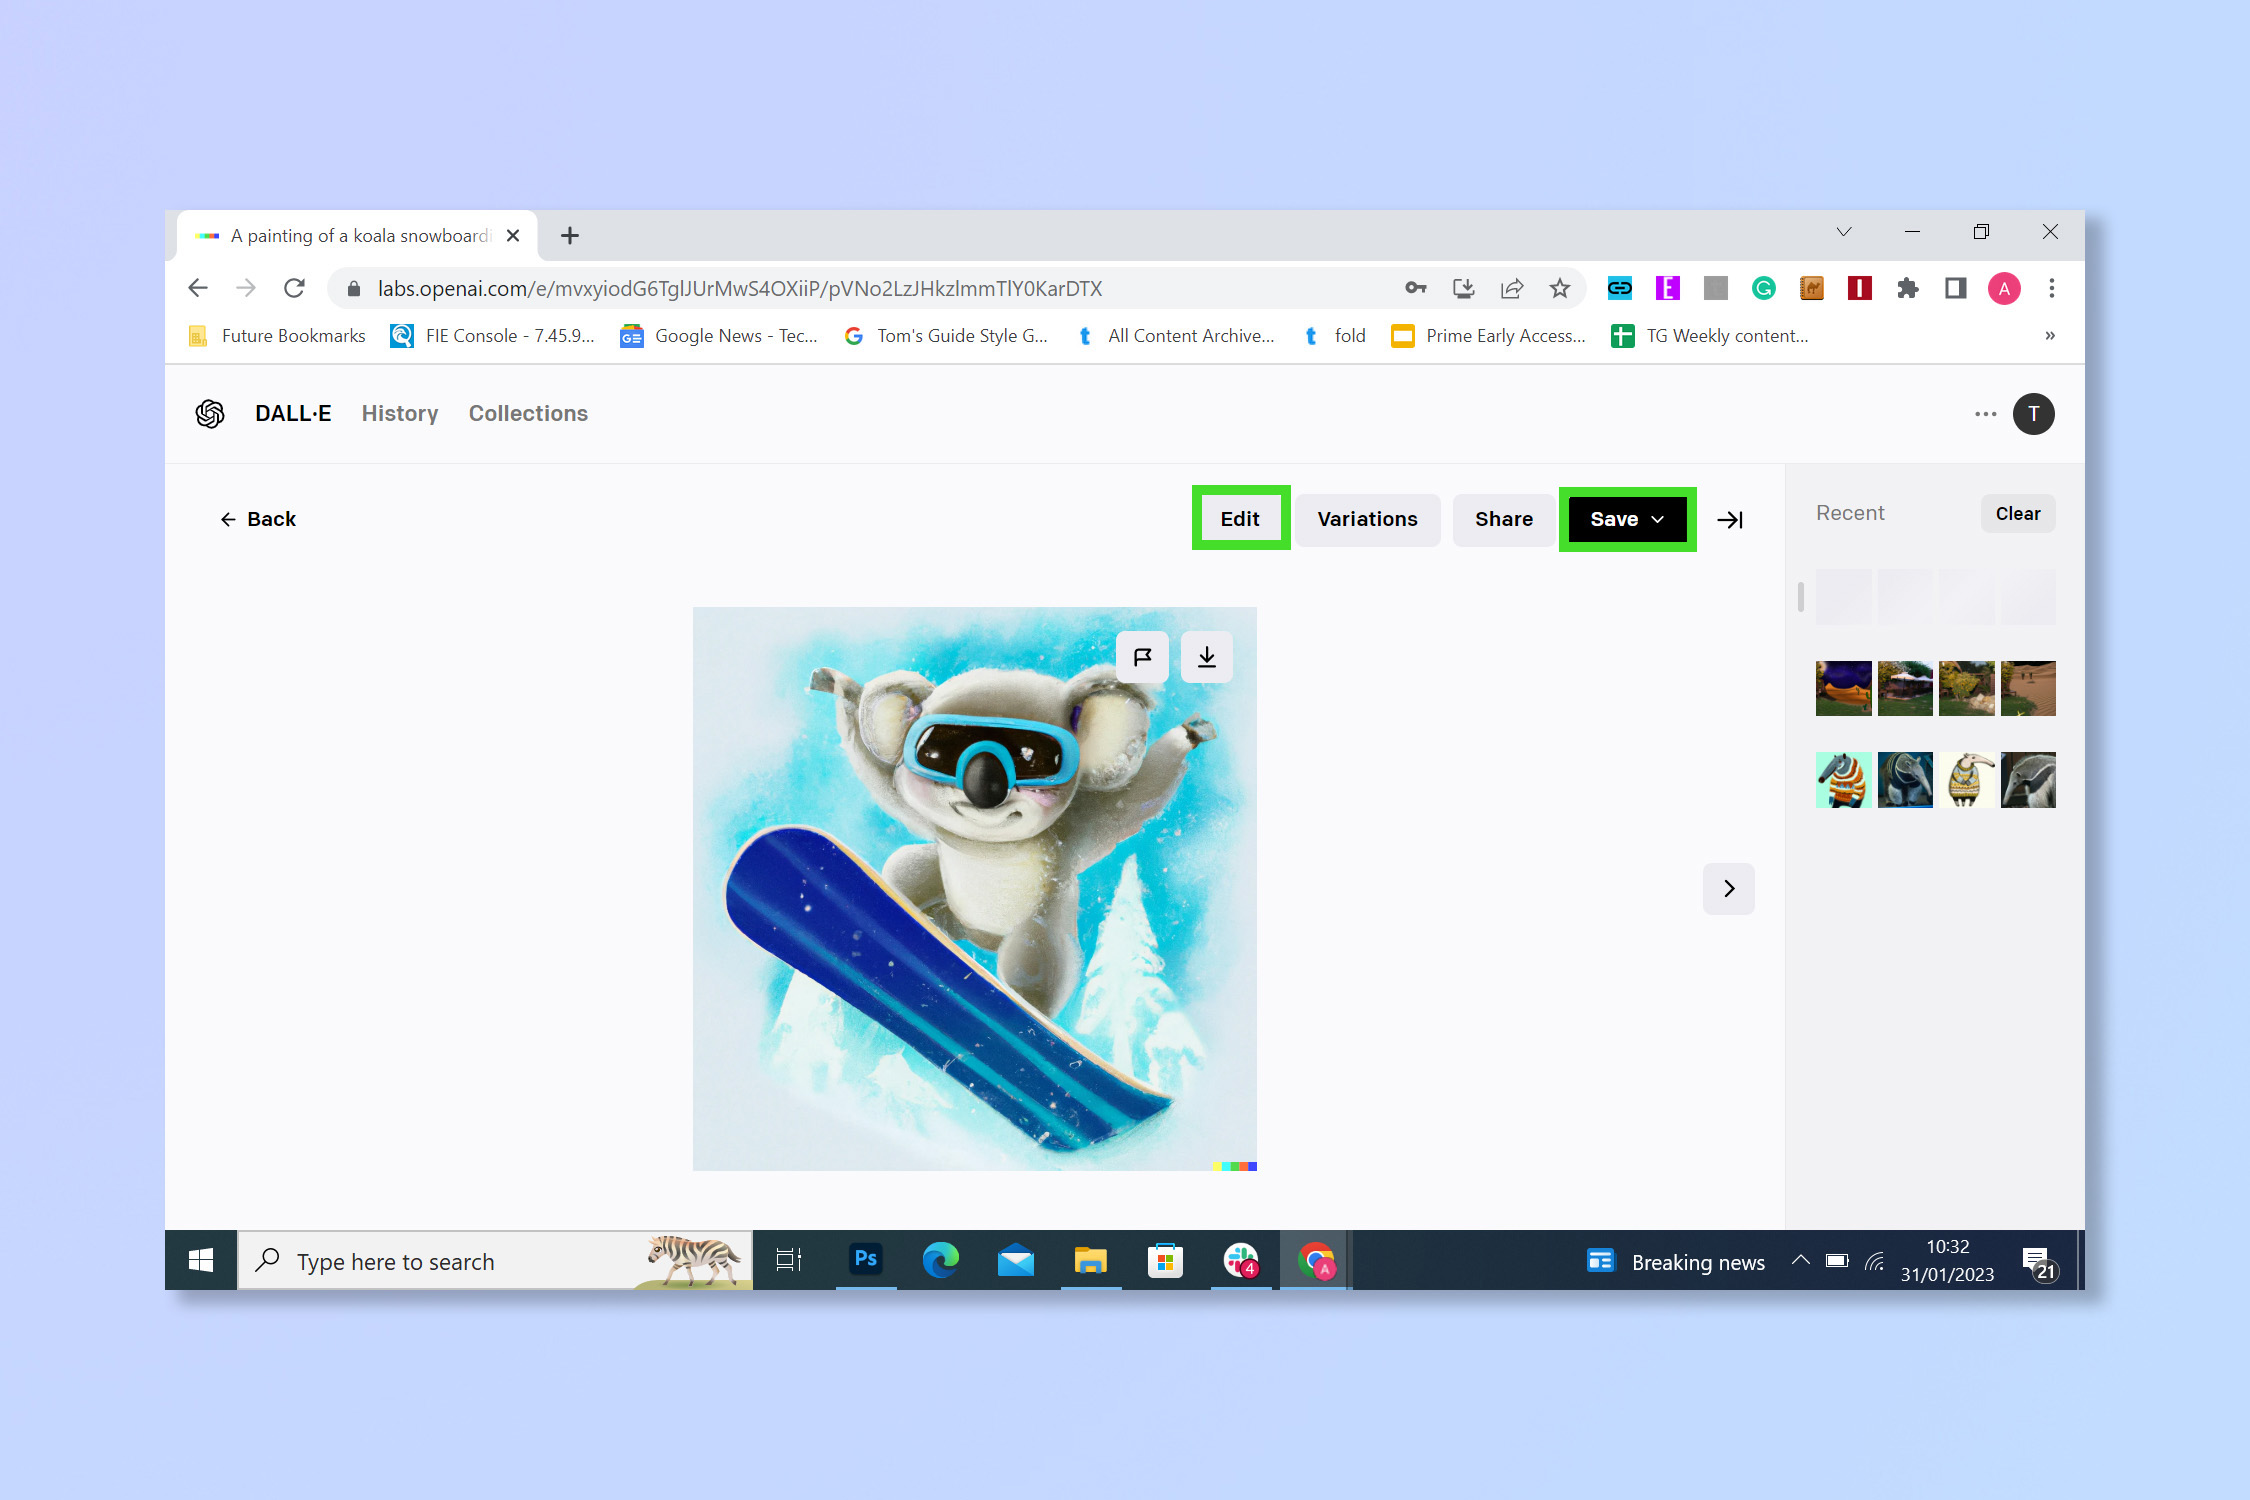
4. On a variation, you have two choices: you can either click Save to export the image and end the process, or you can click Edit to tweak the image — which we'll cover in the section below.
Get instant access to breaking news, the hottest reviews, great deals and helpful tips.
How to use DALL•E 2 to edit a photo
DALL•E 2 allows you to take existing imagery, whether that's a real photo or an AI generated image from the section above, and augment it with further AI generated content. Here's how.
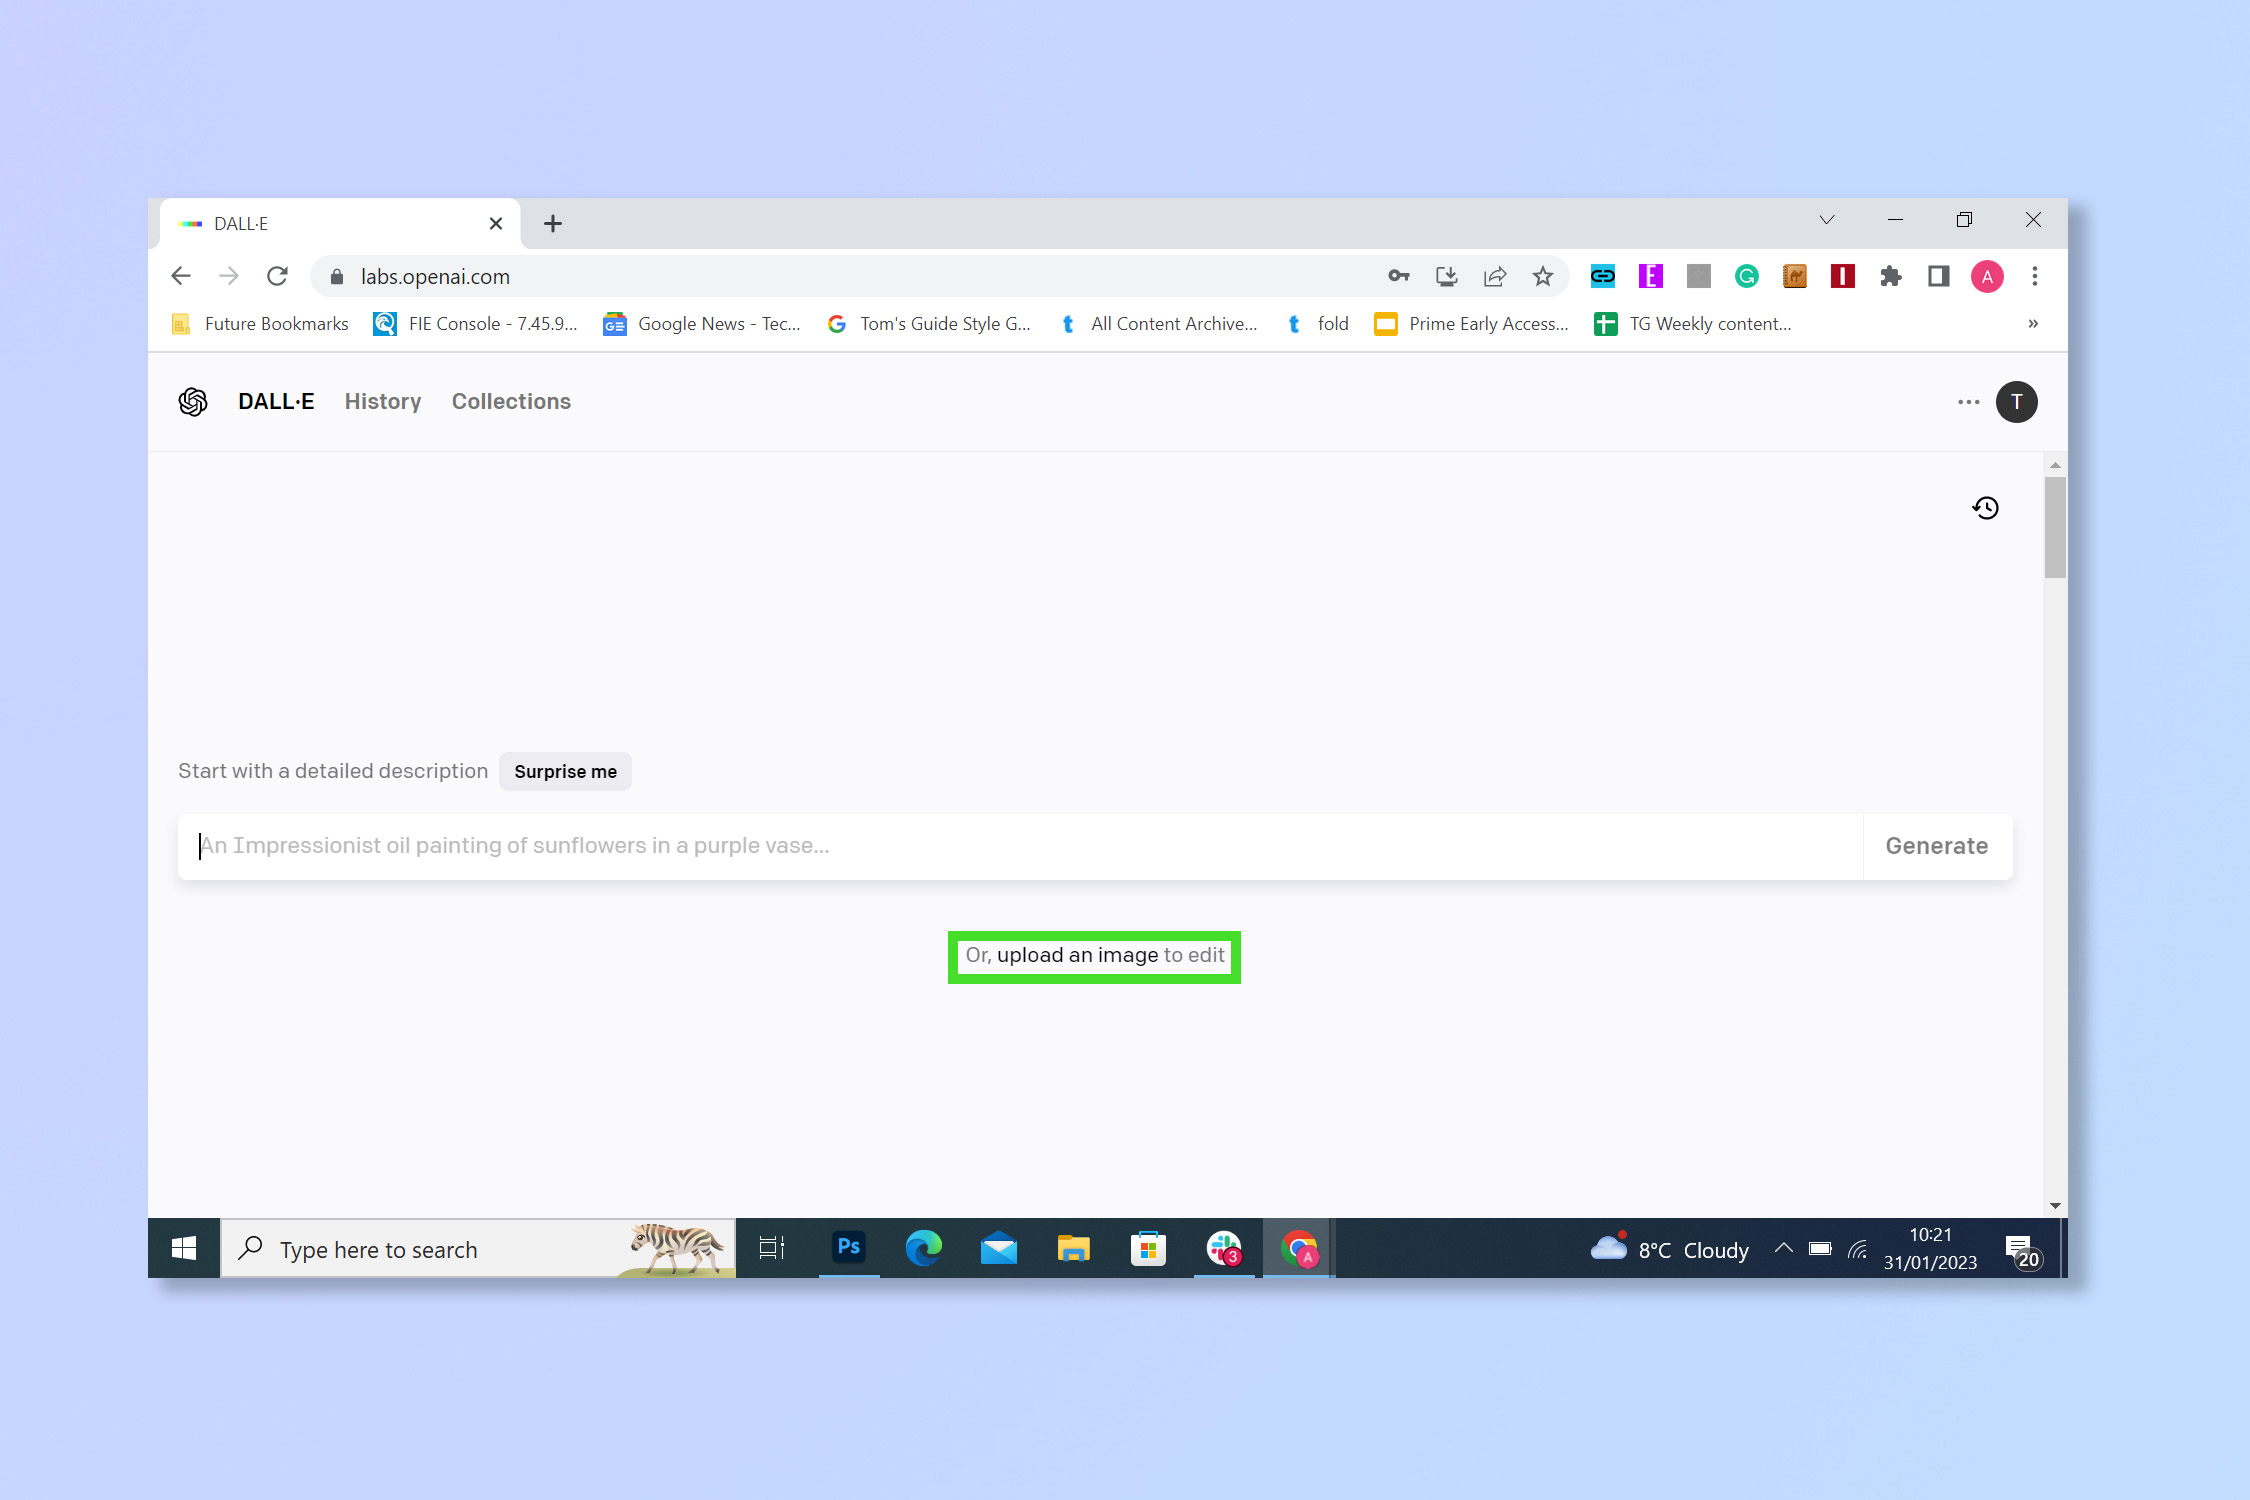
1. If you aren't editing an image you just generated, log into your account and then select upload an image.
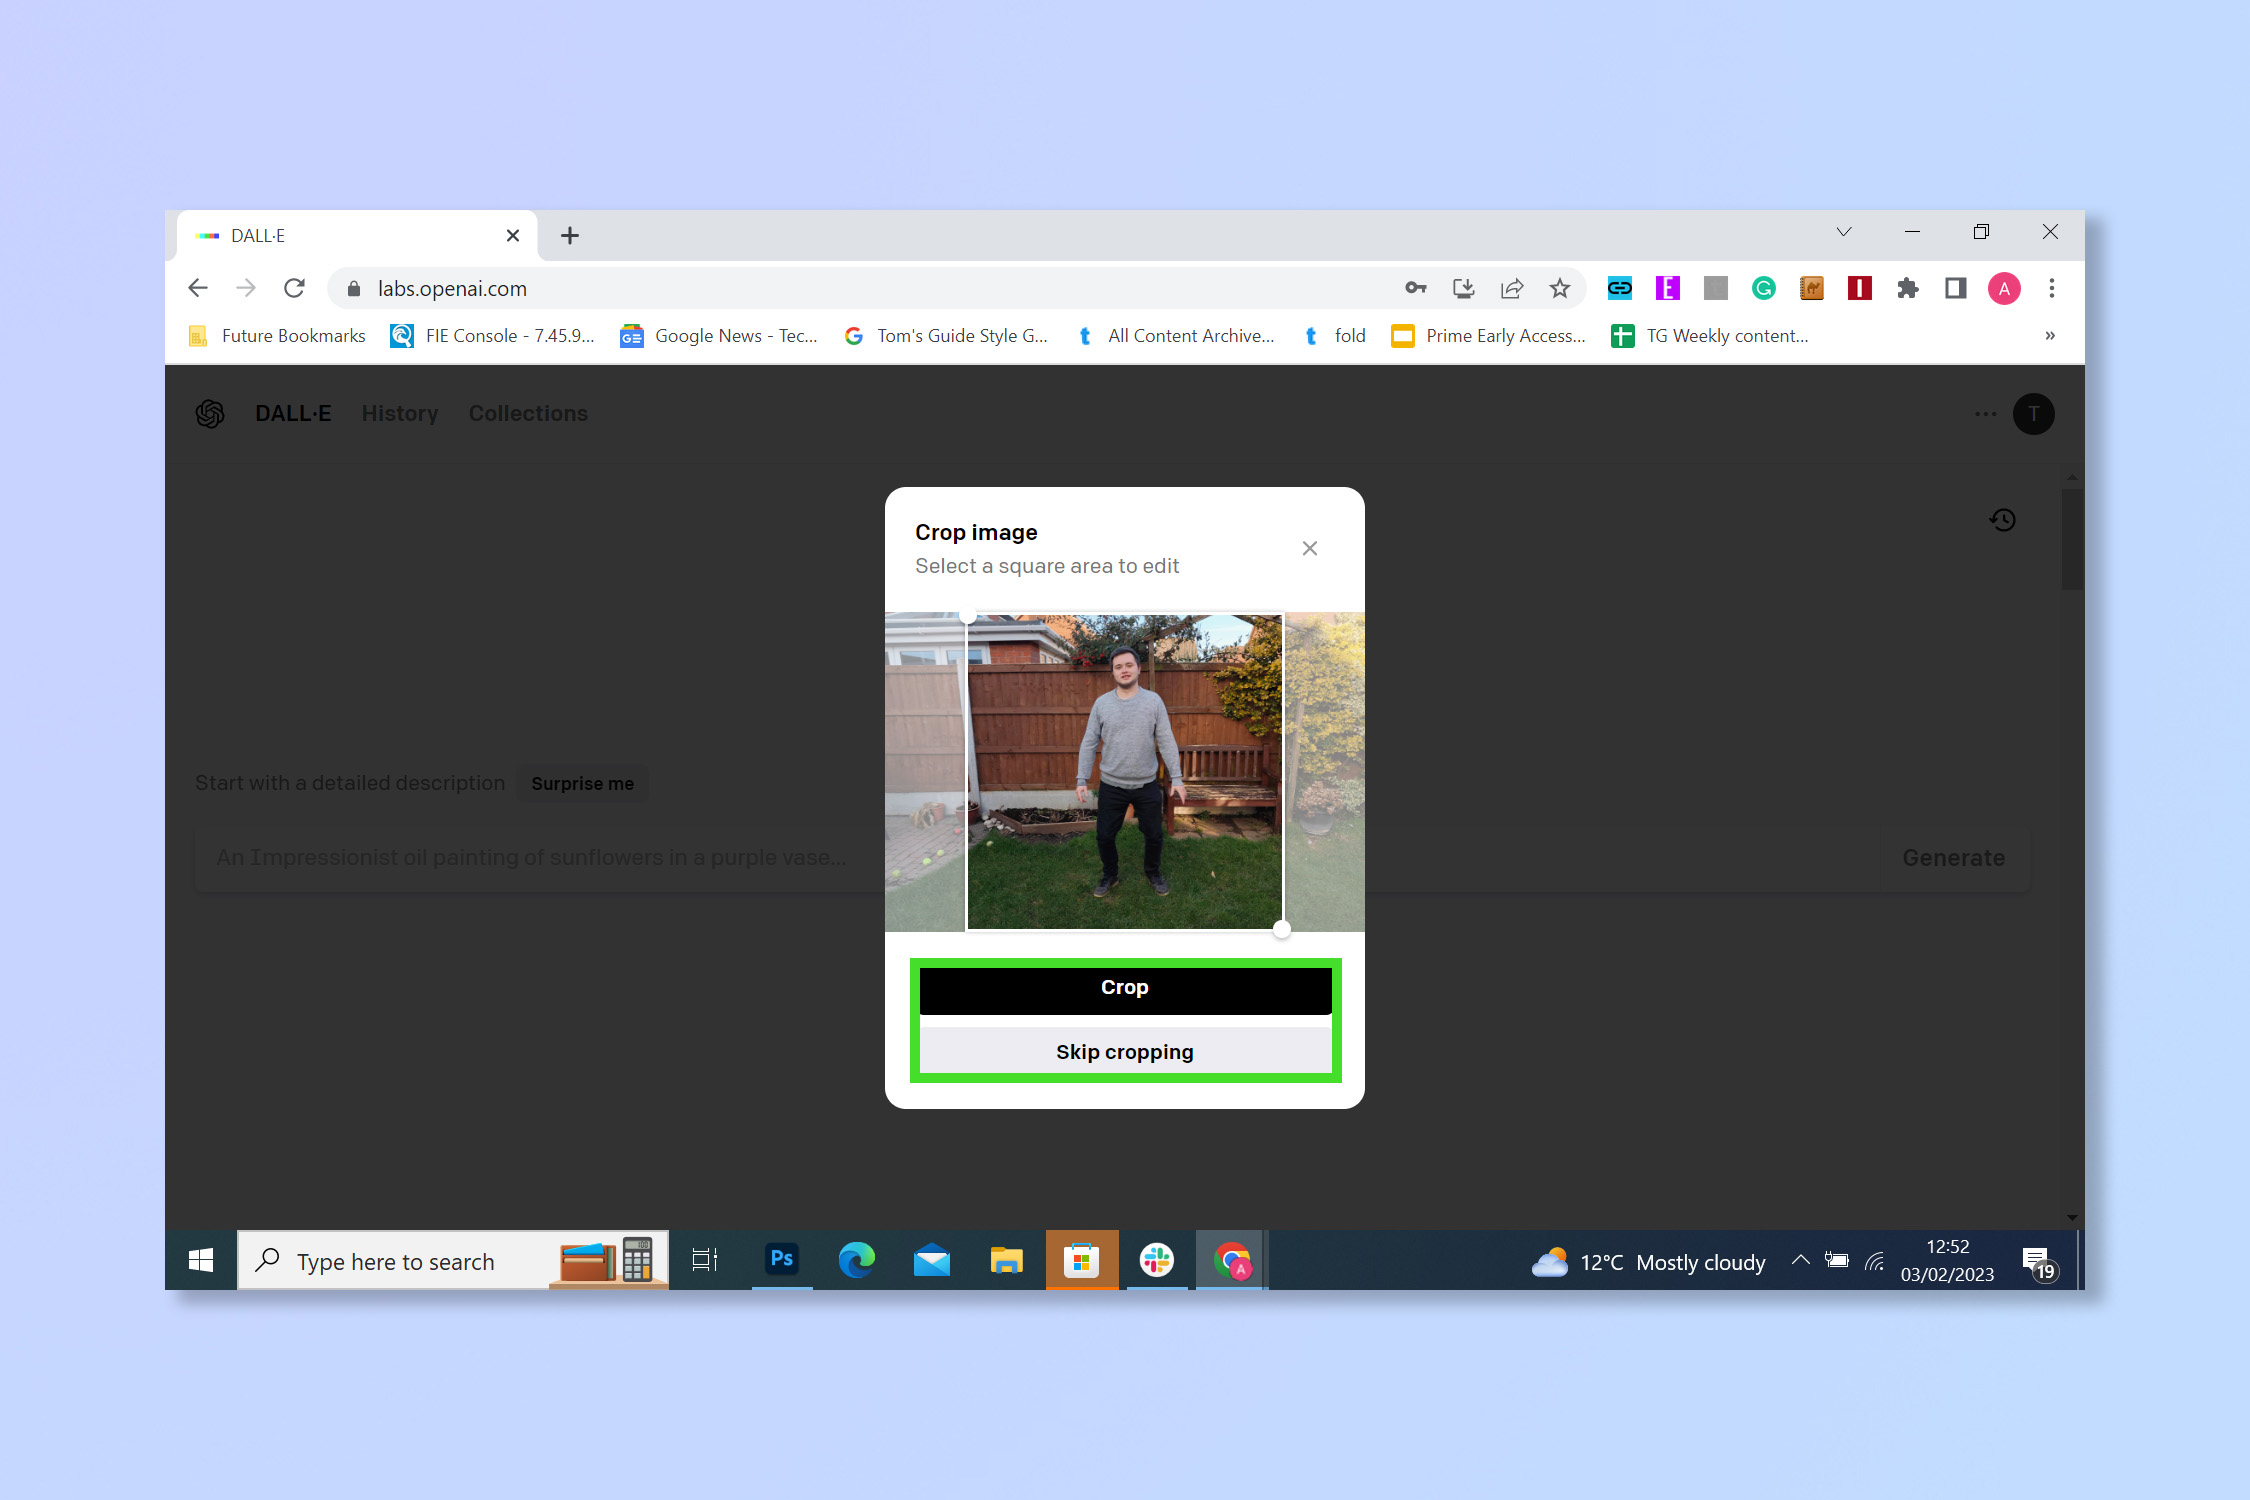
2. Select an image, you'll then be given the option to crop it and focus on one element, if you'd like.
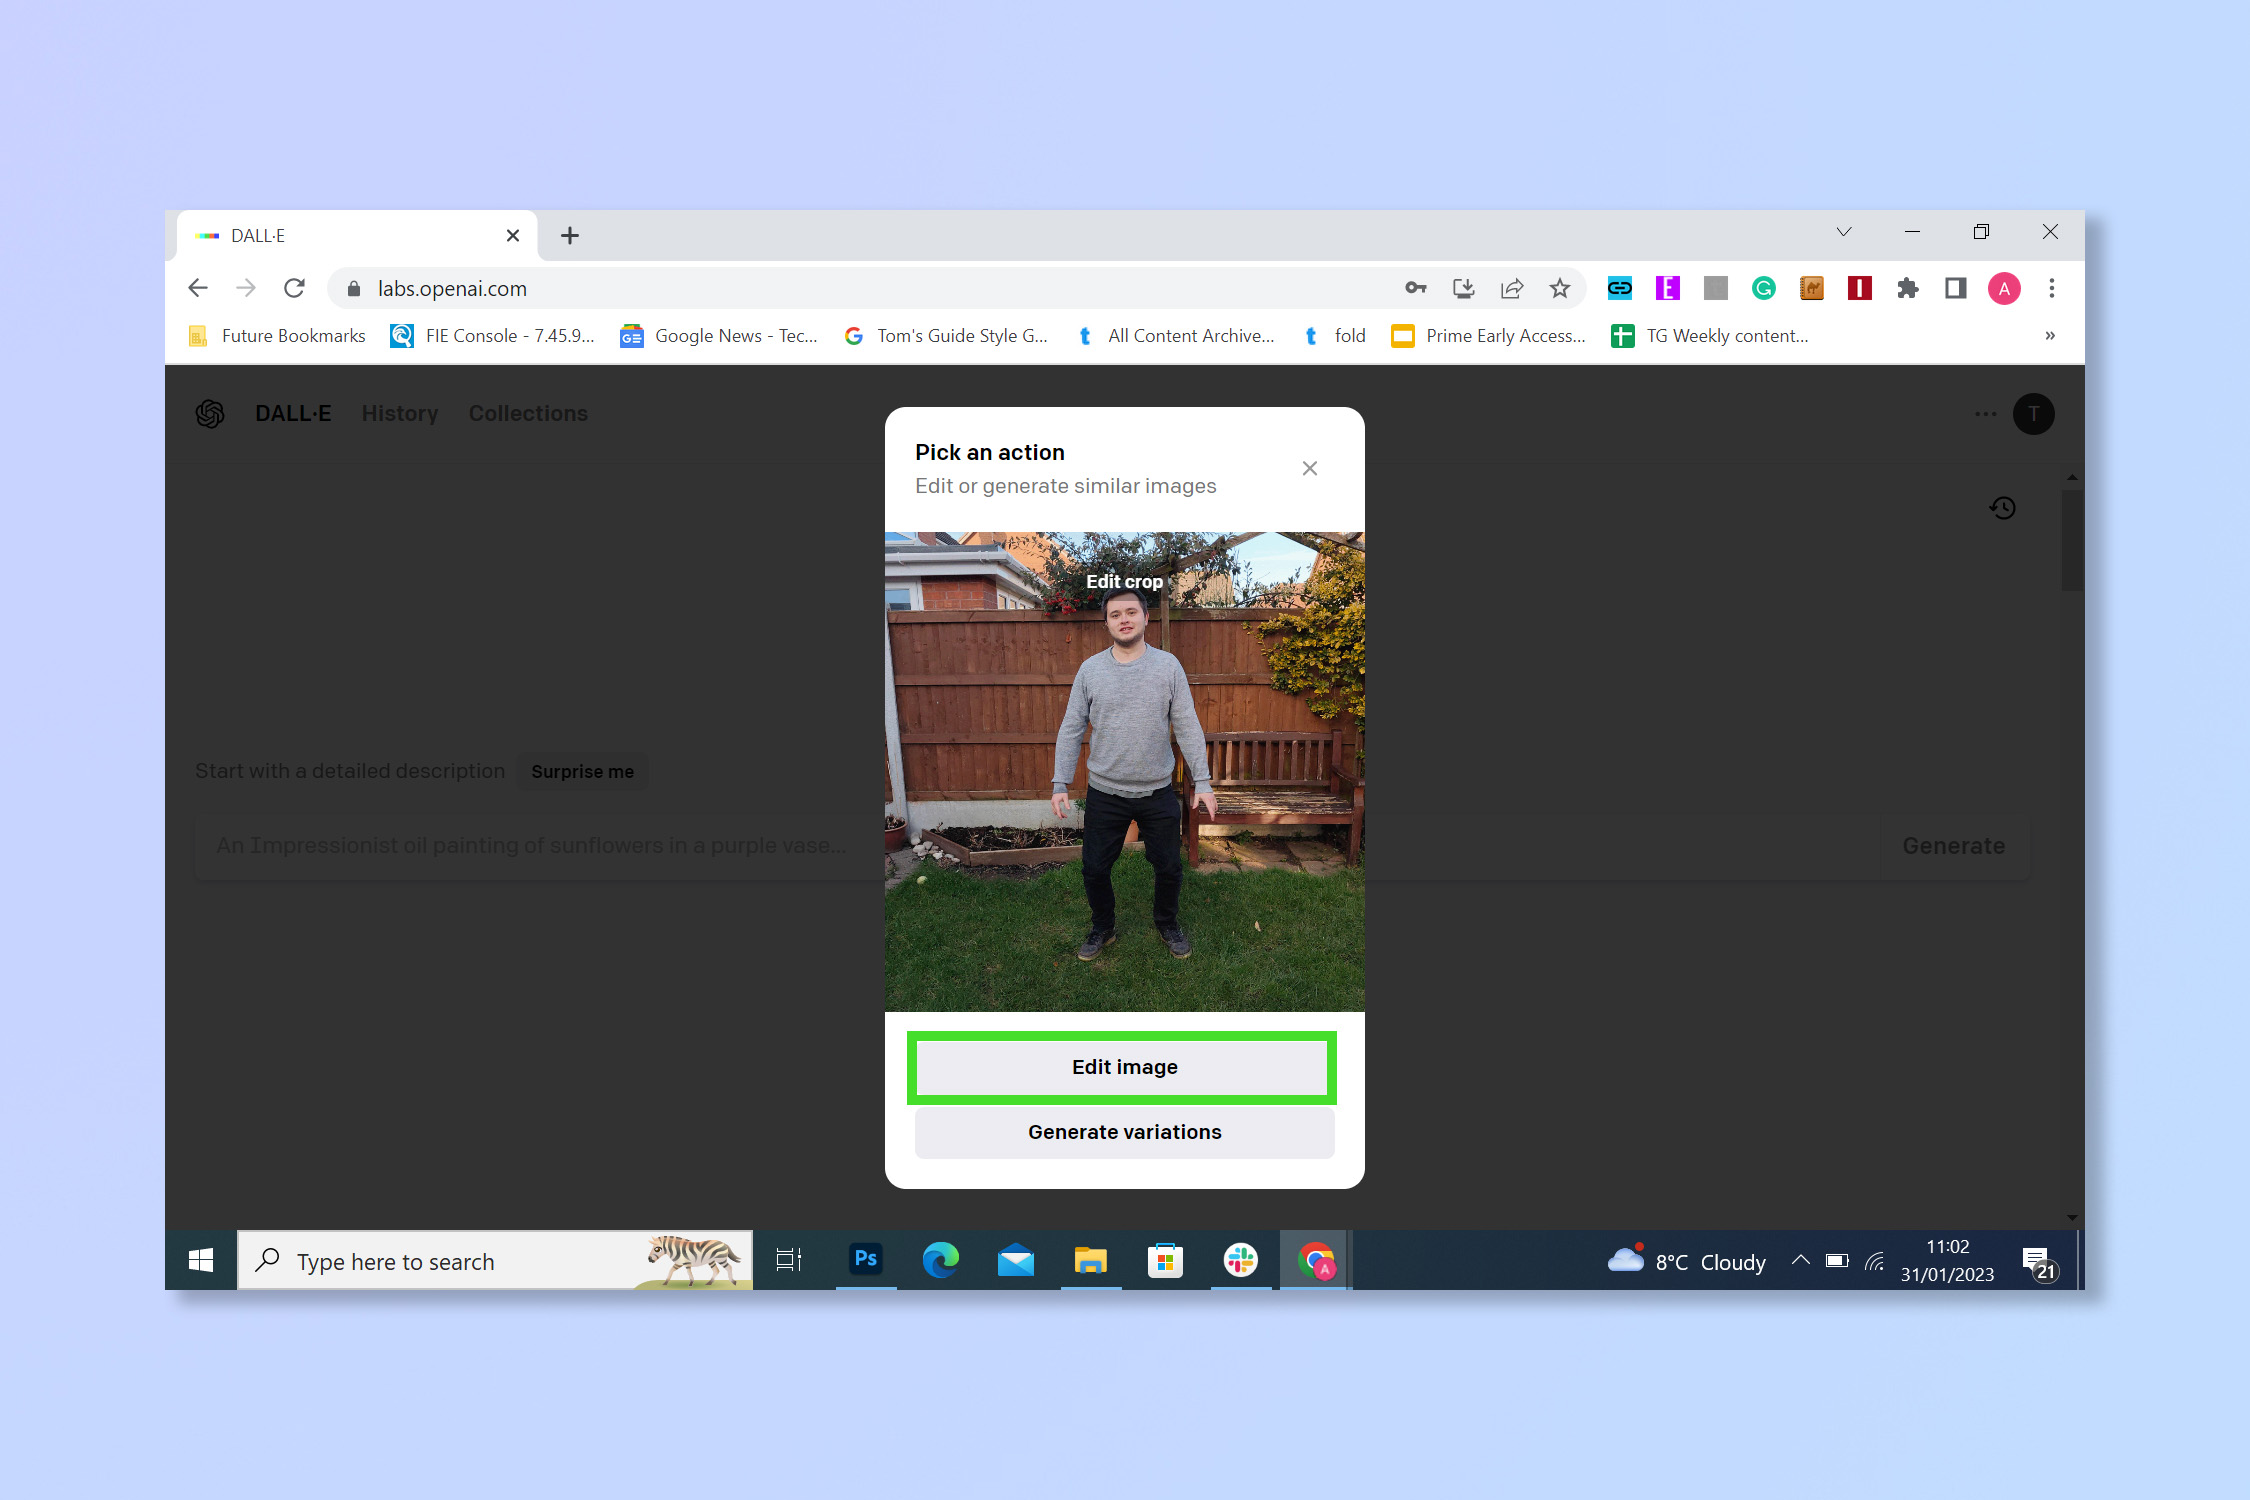
3. To start editing, select Edit image or to generate AI variations of the image, select Generate variations.
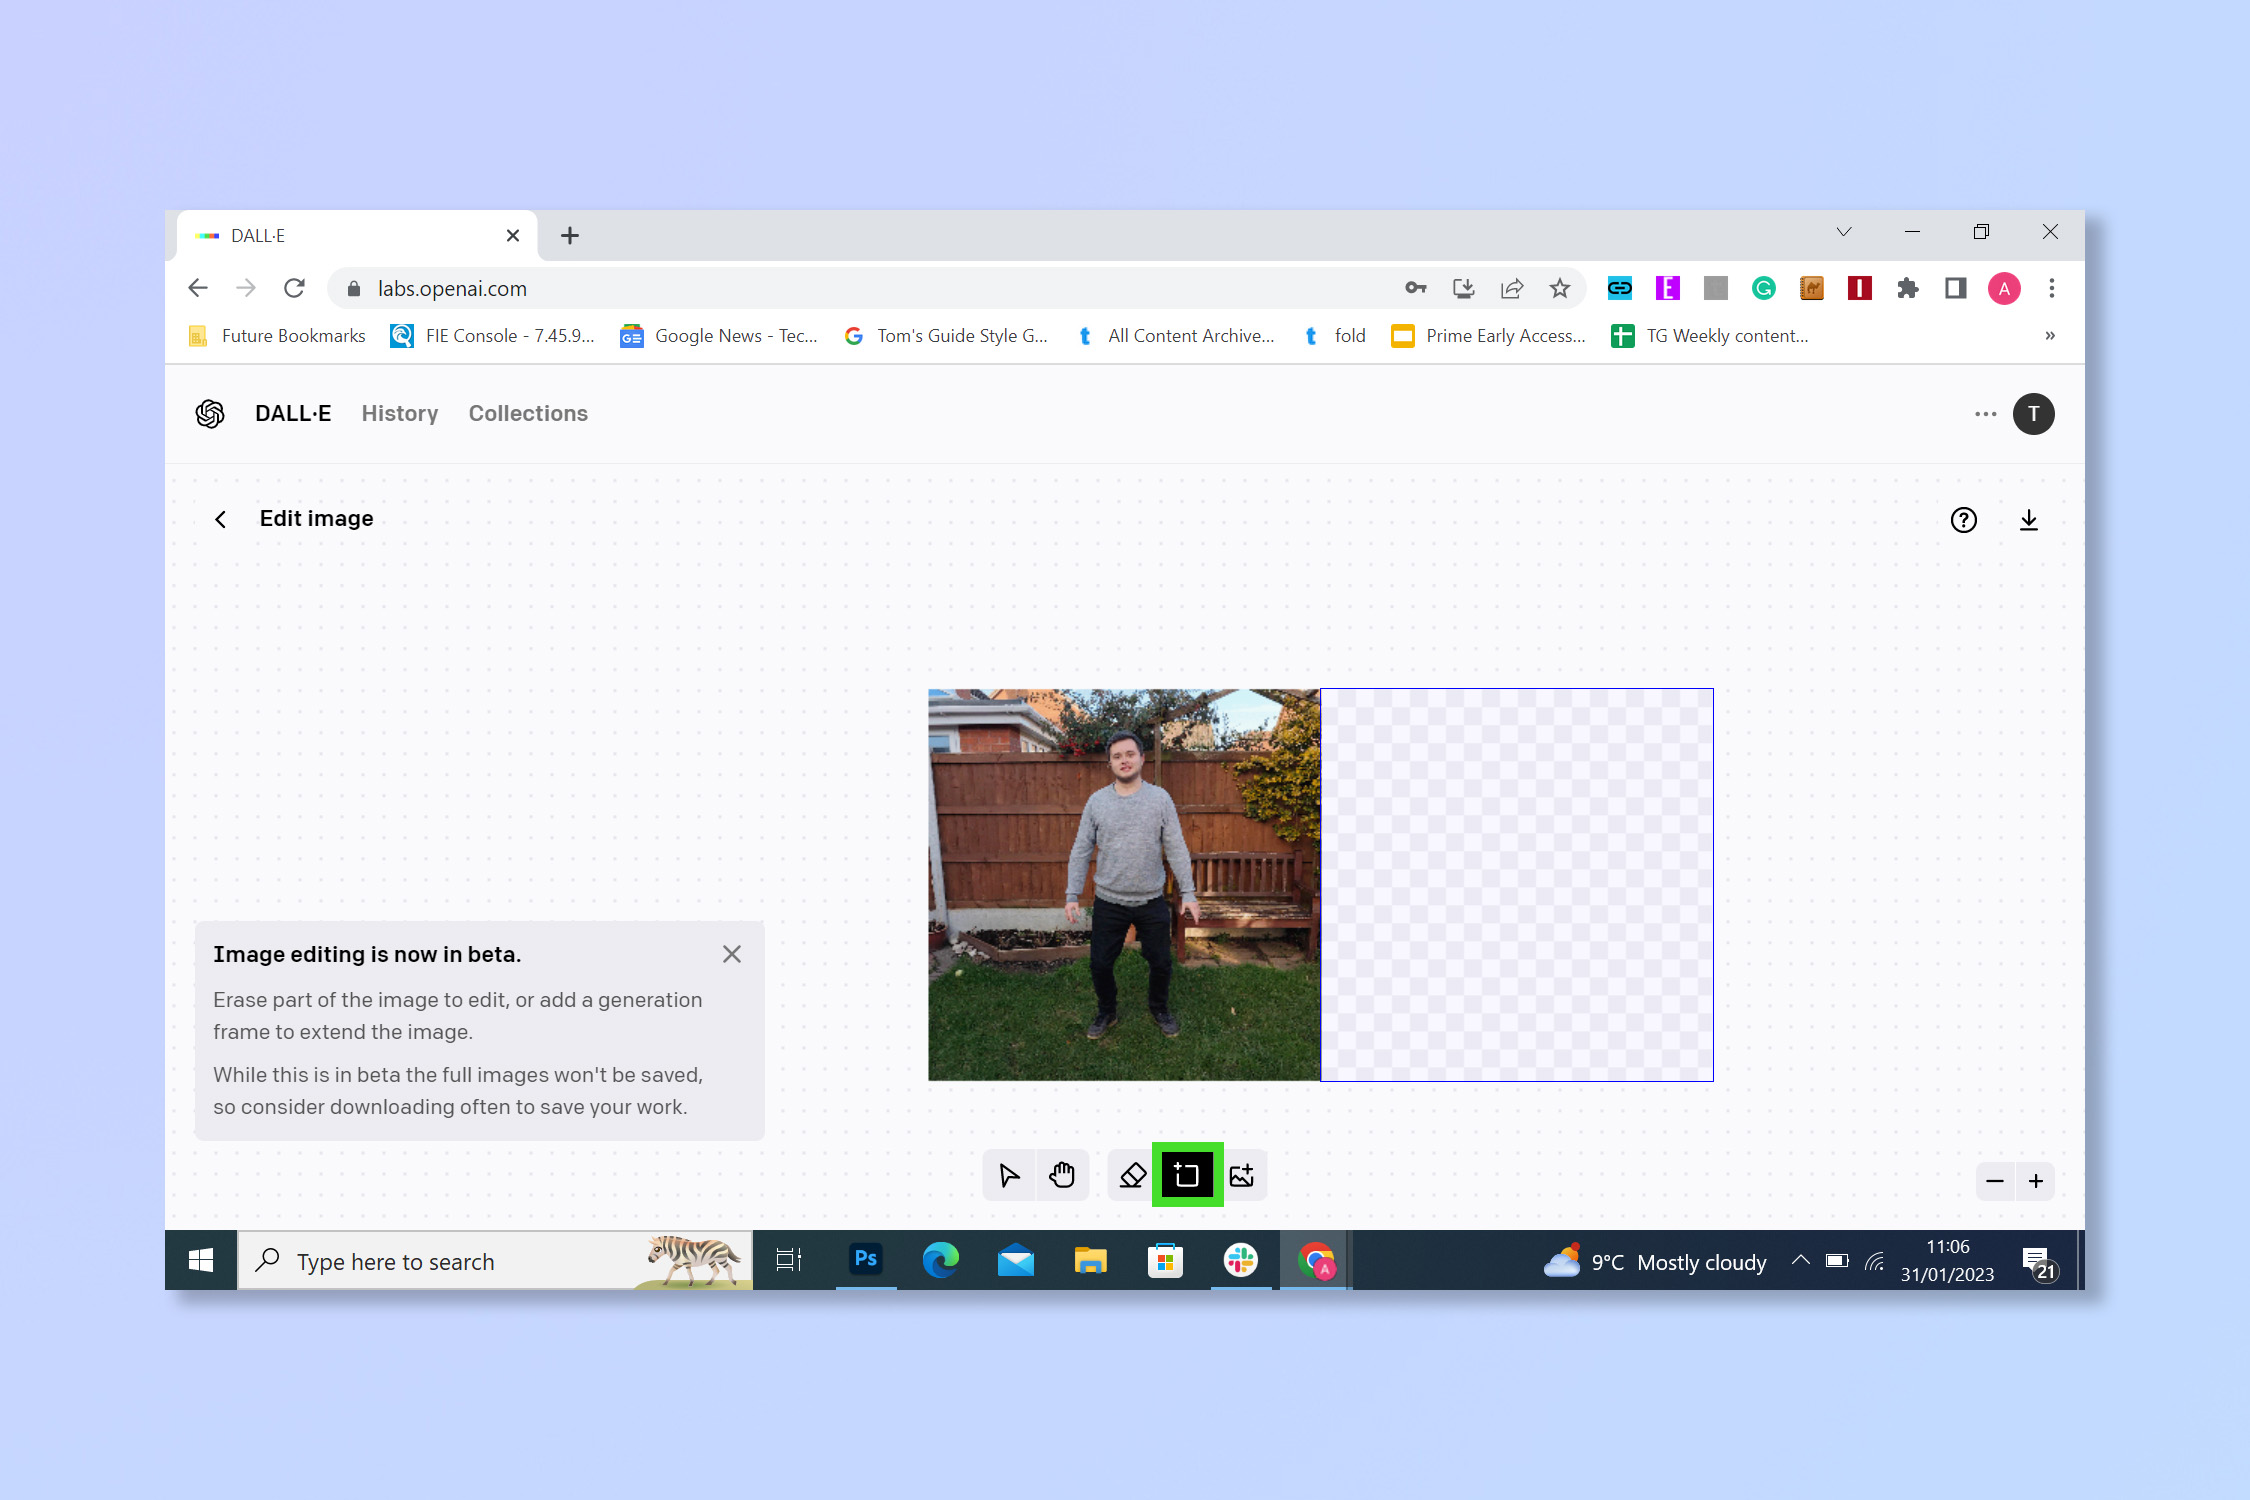
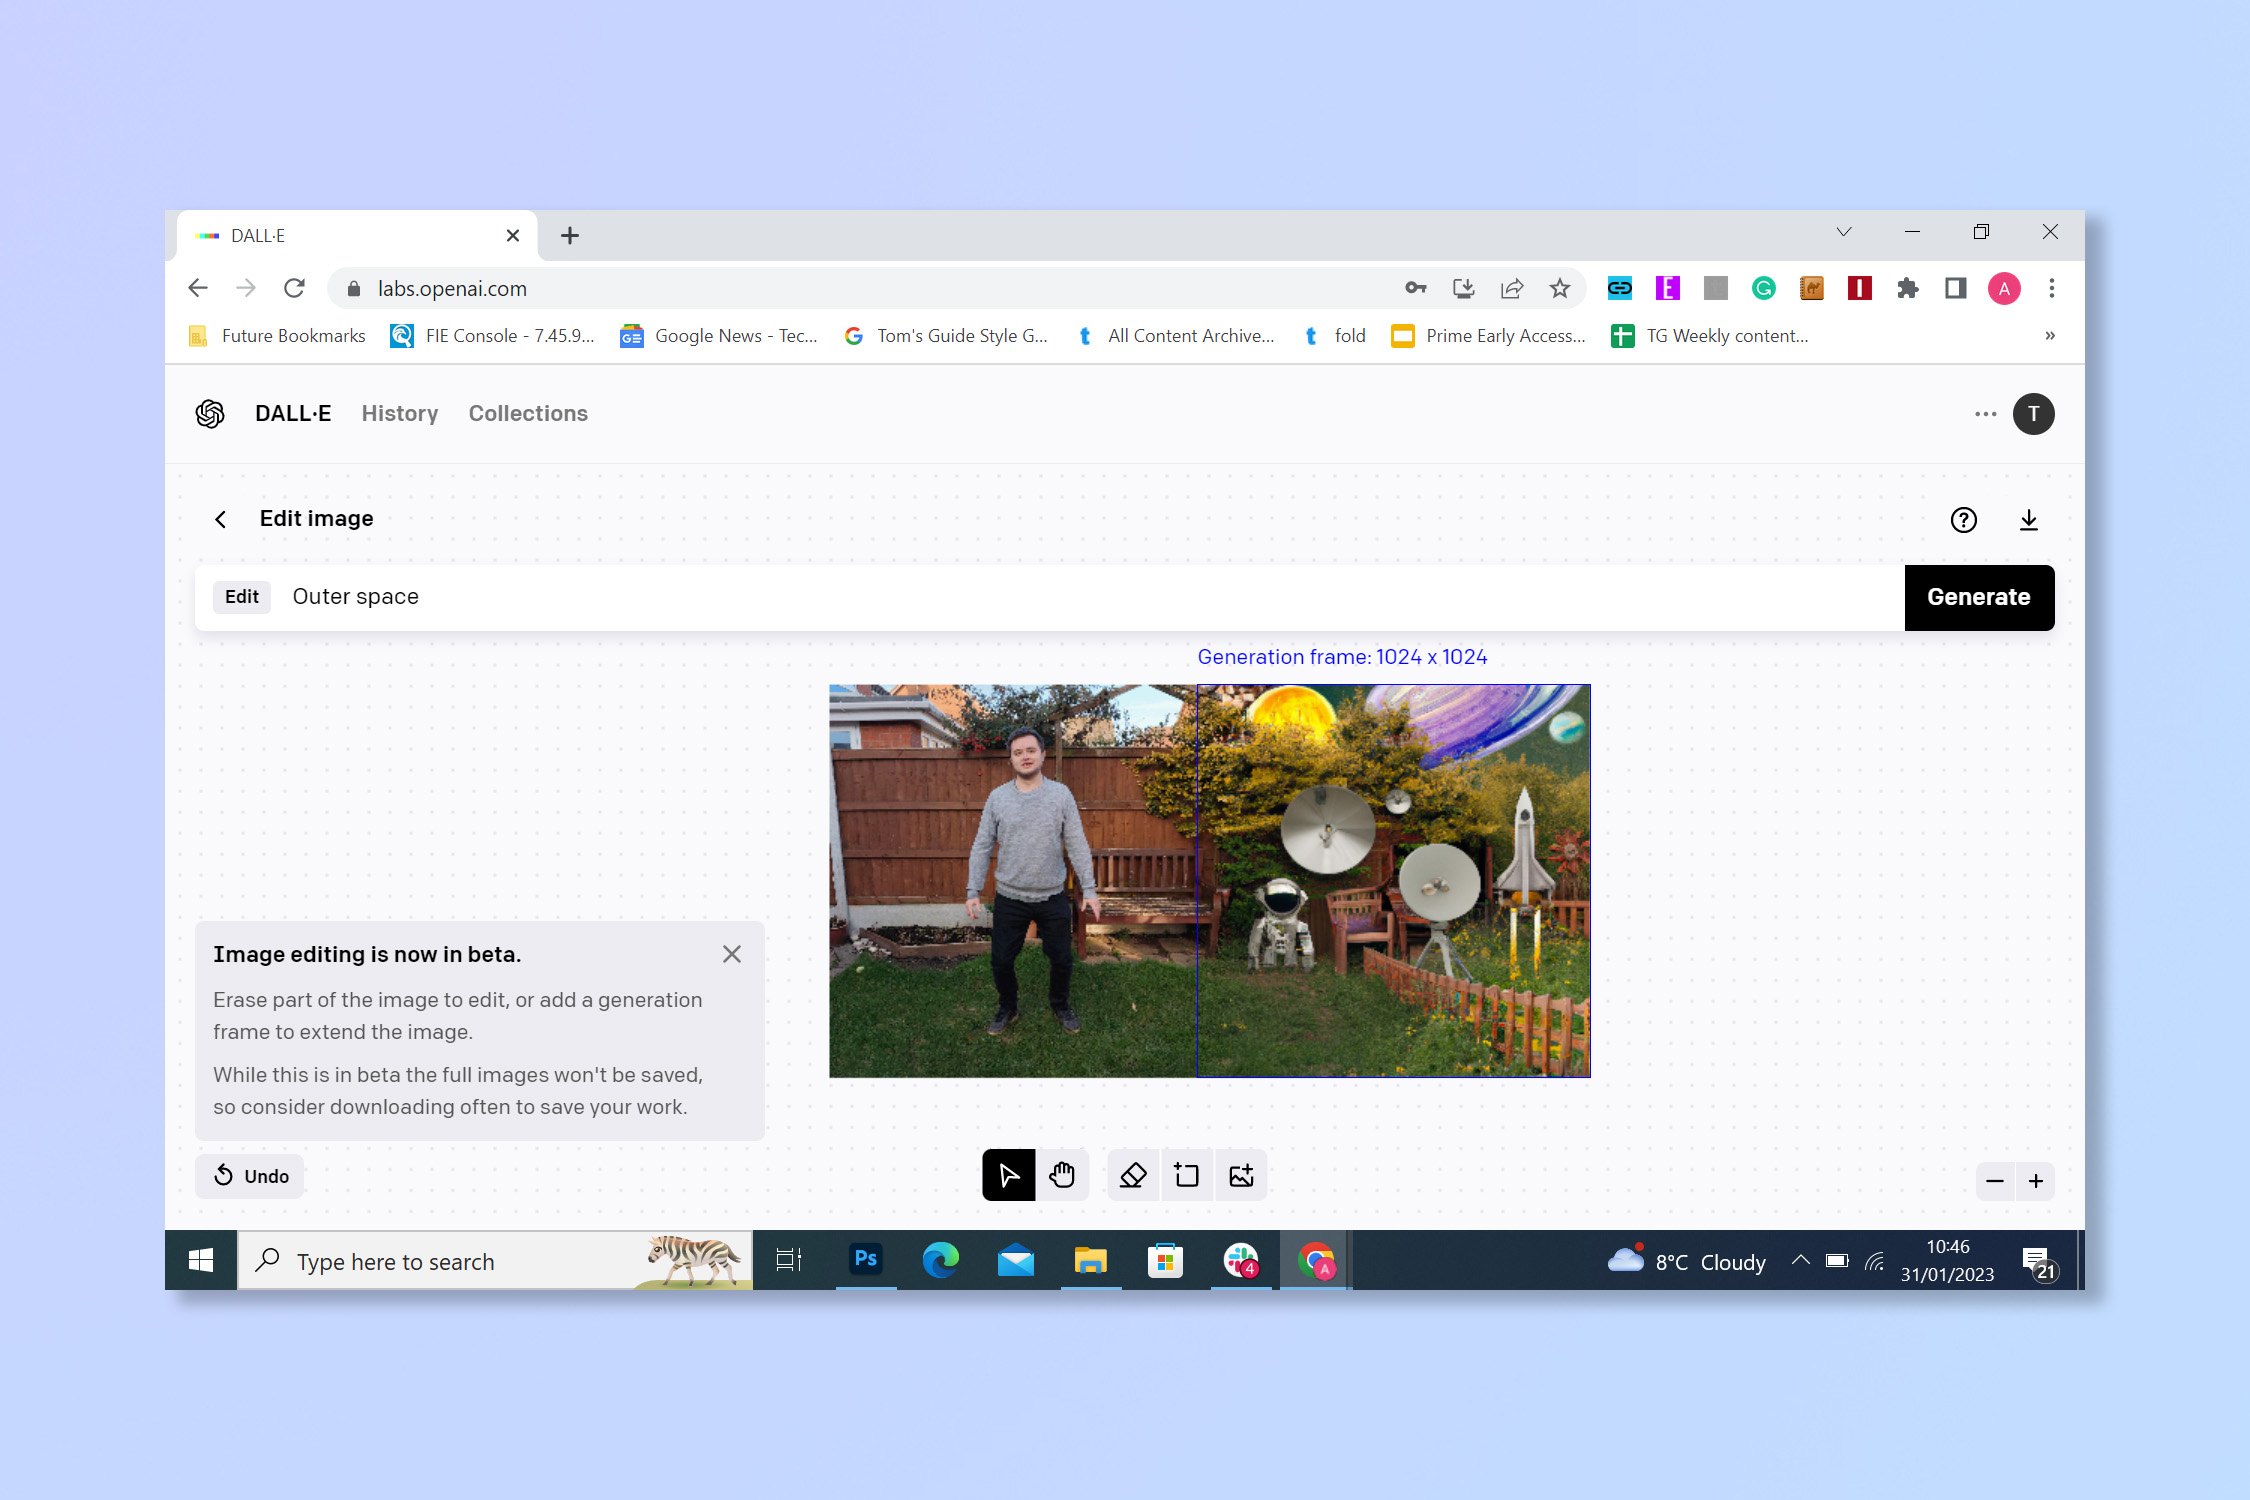
4. To add a new AI generated image to the photo, select Add generation frame.
5. Position the square where you want it, then type in a prompt (as with the generation section above) and select Generate. To blend the two images make sure the square overlaps your original image before you generate a prompt.
There you go, that’s just the beginning of your AI art adventures. If you're curious about Open AI's work, check out our interview with Chat GPT, it certainly has a lot to say.
If you’re excited by AI, why not try how to use Chat GPT or continue your artistic exploration with how to use Midjourney. Take your imagination to your iPhone and try how to use Starry AI on your iPhone.
Andy is a freelance writer with a passion for streaming and VPNs. Based in the U.K., he originally cut his teeth at Tom's Guide as a Trainee Writer before moving to cover all things tech and streaming at T3. Outside of work, his passions are movies, football (soccer) and Formula 1. He is also something of an amateur screenwriter having studied creative writing at university.
 Club Benefits


