How to use Google Flow — the new AI video generator made for filmmakers
Start making consistent, realistic-looking movies with dialogue and music
Producing professional-looking movies is an expensive business but with AI, you can take that story swimming around your head and translate it to the small screen with very little outlay.
In fact, fire up Google Flow and you will be amazed at what you can achieve. For proof just take a look at Flow TV where you will see a huge number of entertaining videos, all created using prompts.
Looking at those videos will do more than inspire you. They will teach you a thing or two as well. When viewing a video, you can click the Show Prompt button and see exactly what was written – a wonderful way to learn the art of prompt writing and the kind of language that can prove to be effective.
With your appetite whetted, you can then get stuck in, and we’ll show you how below. Just be aware that it’s still experimental so there are some bugs and problems but that’s not to say it’s not impressive.
There’s some great tech behind this one: the Veo 3 model which combines the video generator Veo, Gemini’s prompting abilities, and Imagen’s text-to-image capabilities. Some of the features use Veo 2, however, but it won’t detract from the result.
A word of warning, though. Flow isn’t free. Flow TV won’t cost you a bean but if you want to produce your own videos, you must be a Google AI subscriber – either signing up to Google AI Pro or Google AI Ultra.
The good news is you can get the former free for one month which is a great way of checking out this filmmaking tool. The latter costs $249.99/month and, even with three months half price, it’s a princely sum if you’re just looking to play around.
Get instant access to breaking news, the hottest reviews, great deals and helpful tips.
Now we're past that, here's how to use Google Flow.
1. Launch Flow
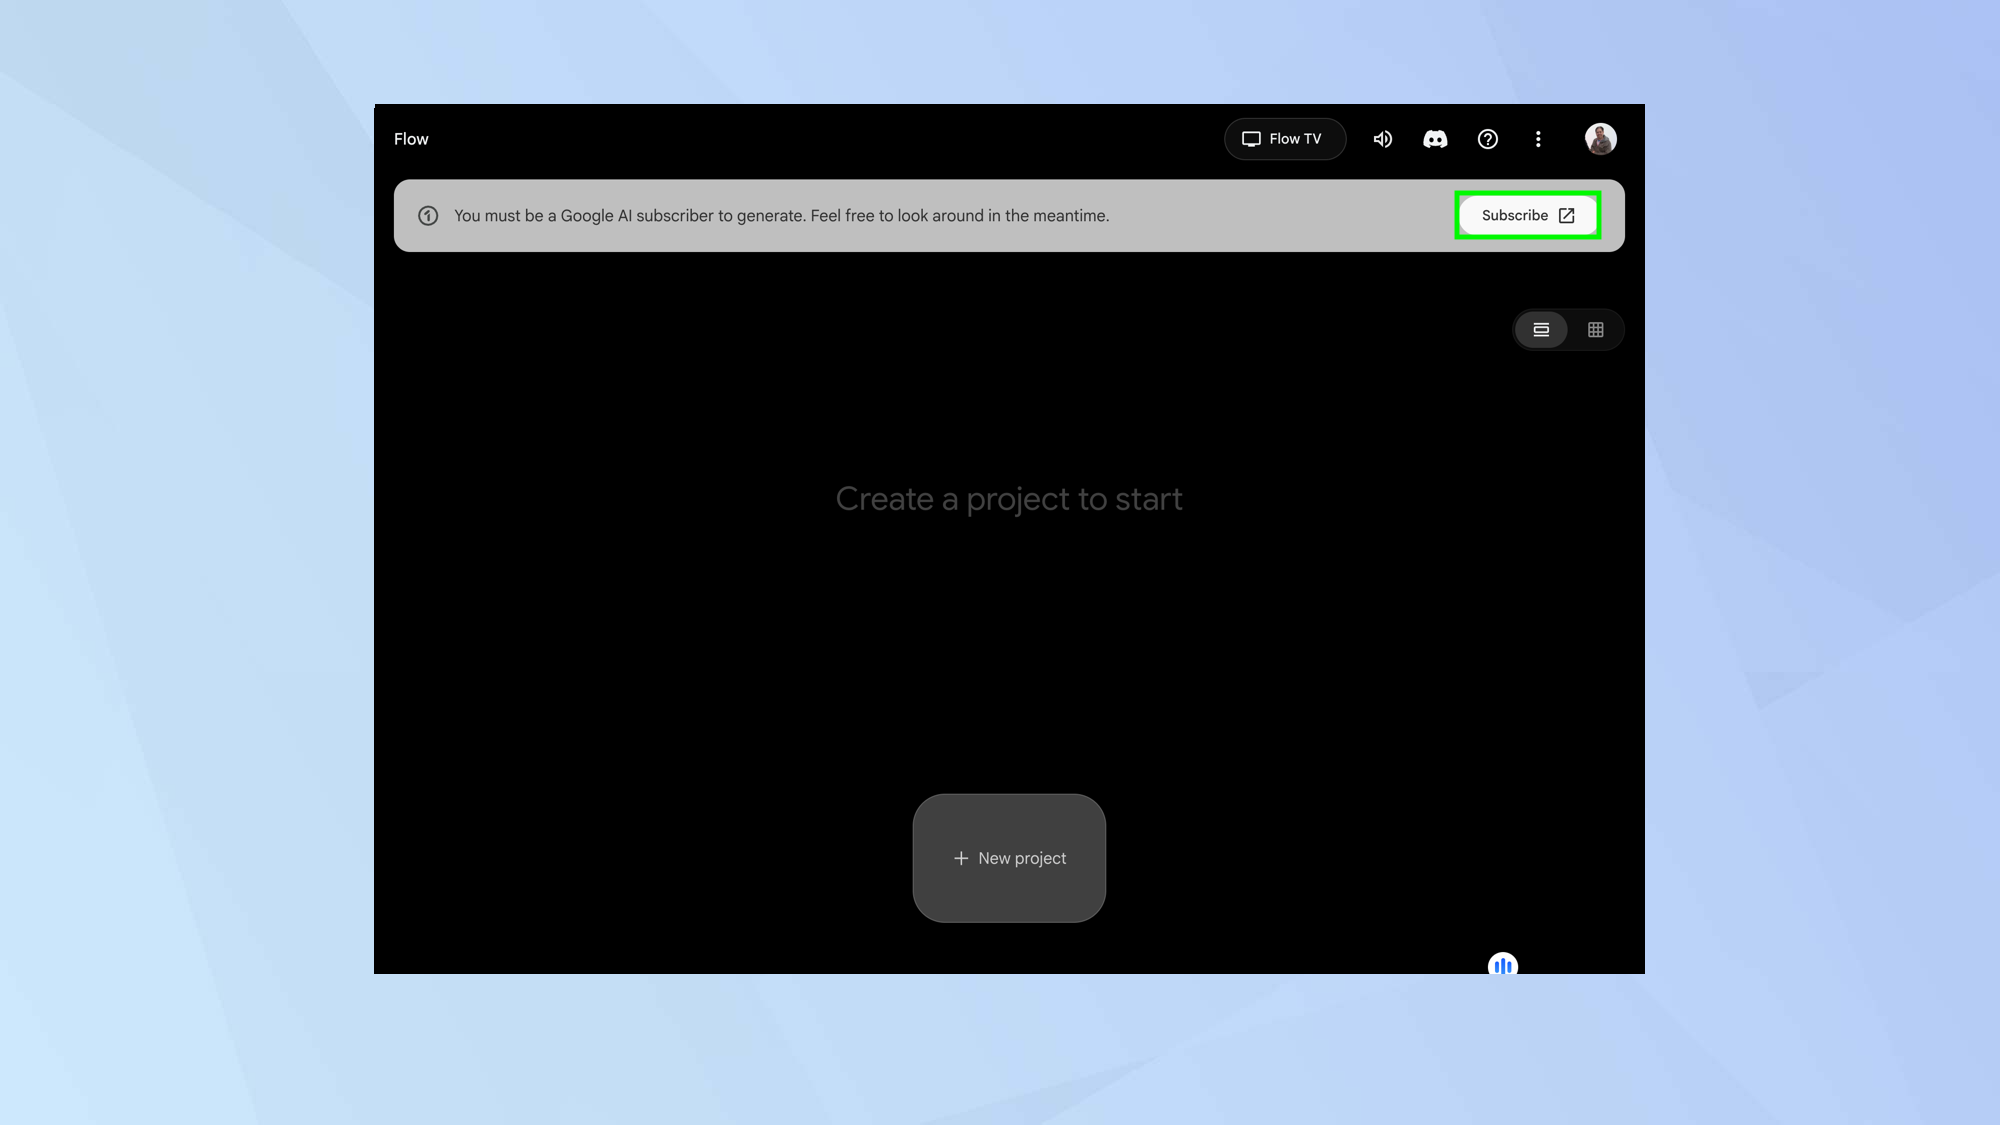
Visit flow at https://labs.google/flow/ and select Create with Flow.
2. Create a project
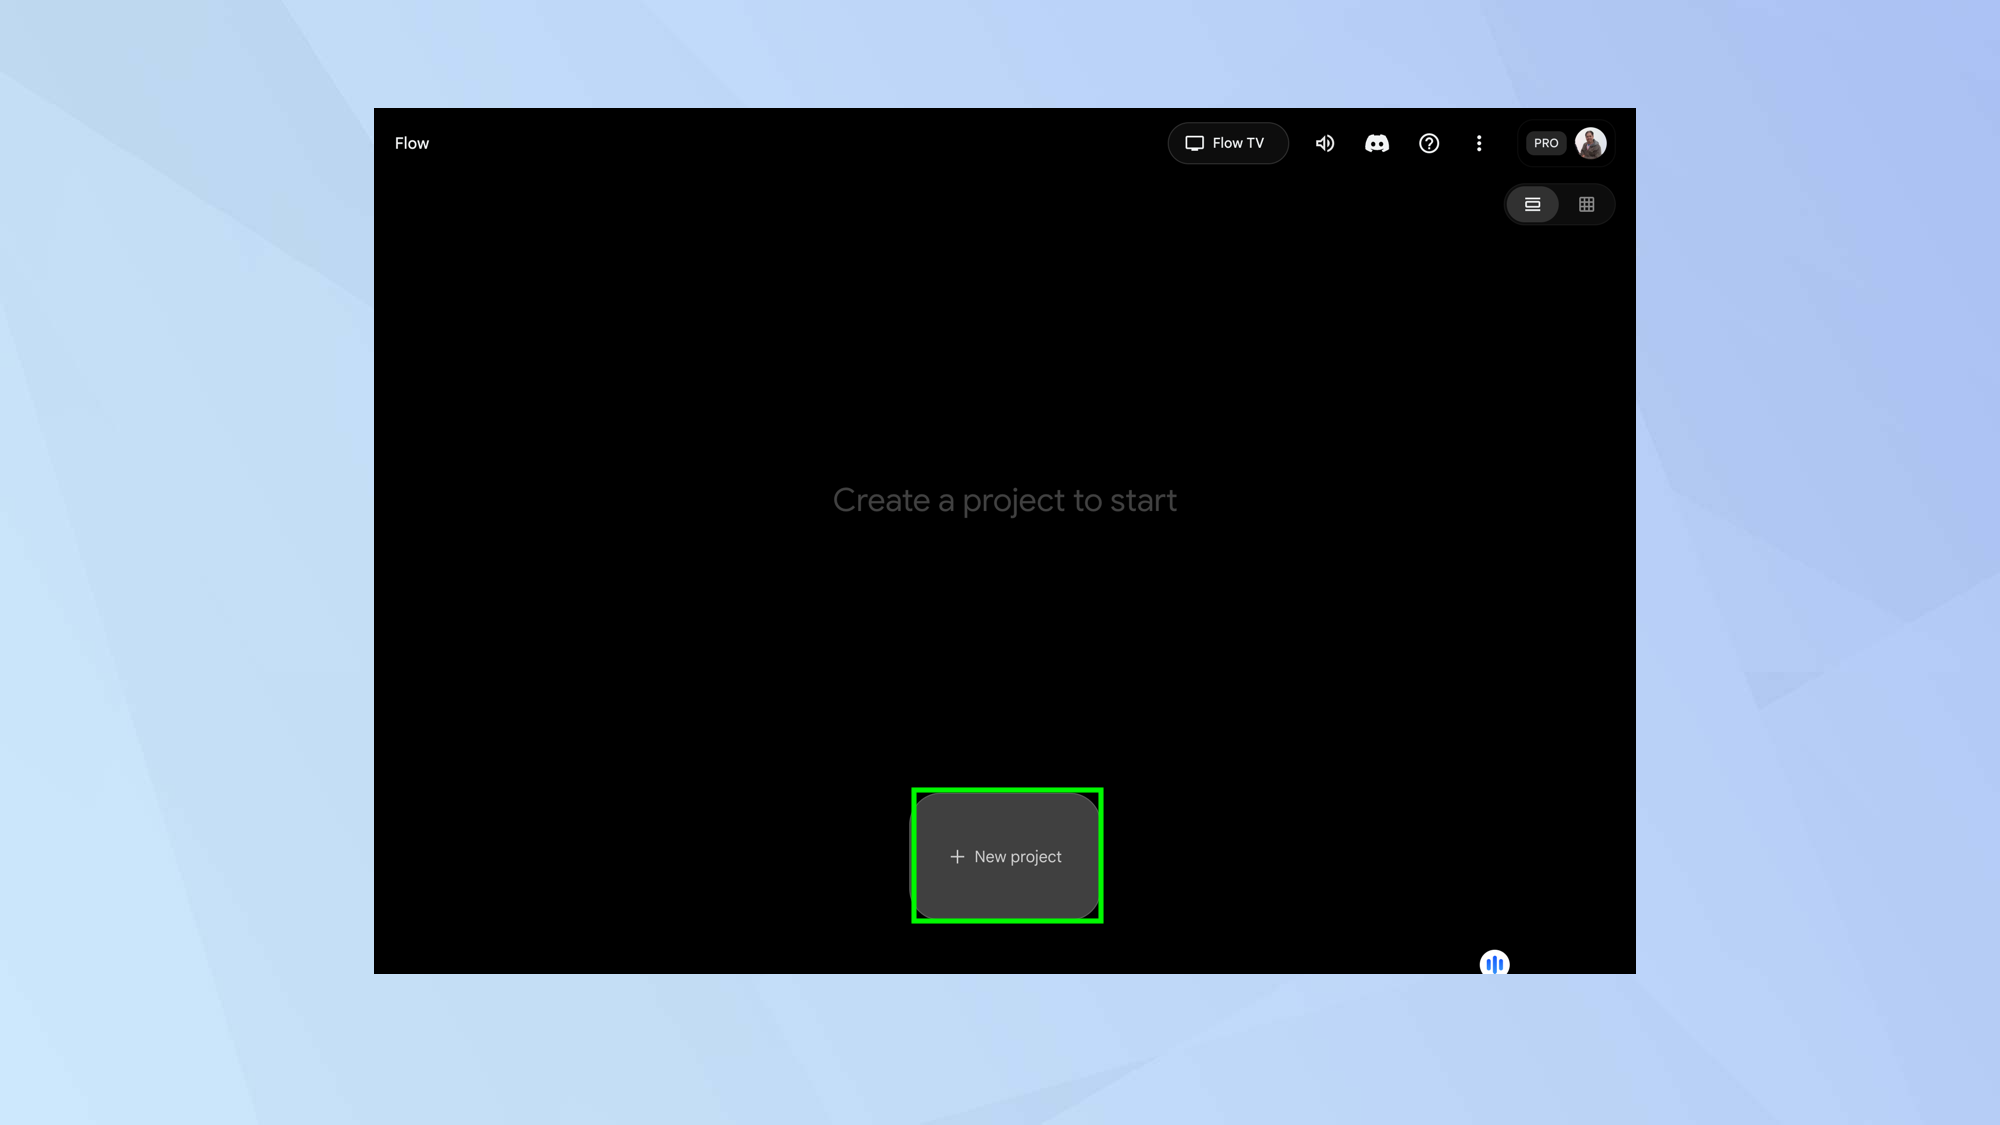
To begin, click New Project on the main screen. In time, as you create new projects, you will see them appear on this screen, allowing you to view, resume and edit them but, for now, we’re starting from scratch.
3. Choose the model
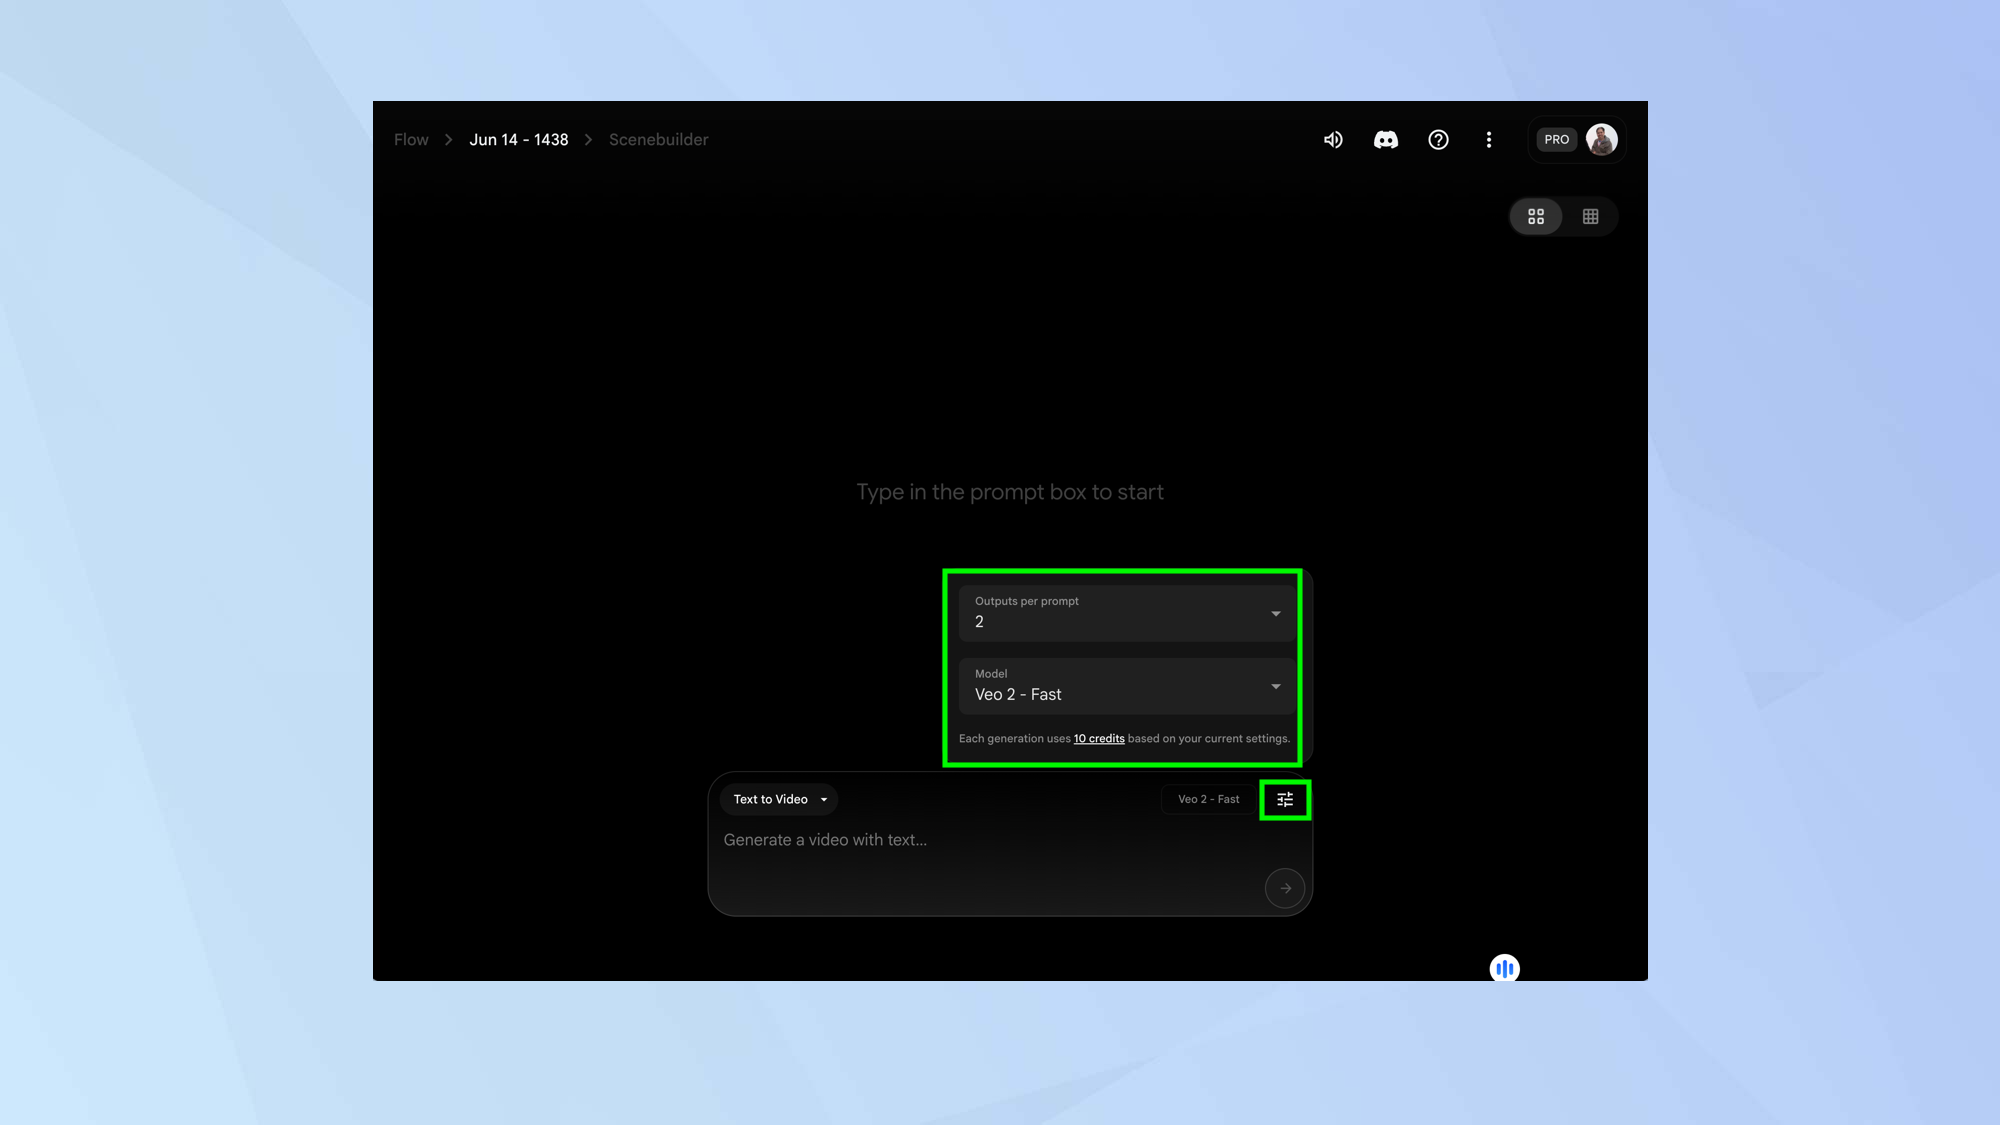
You will see a prompt box at the bottom of the screen. As it stands, this allows you to enter text that will be used to generate a video.
Before you do that, though, click the settings icon in the top-right corner of the box and select the downward arrow in the category Model. Choose Veo 3 – Fast (Text to Video) or choose Veo 3 – Quality. The latter will use up five times as many credits. Then enter text.
If a feature isn’t compatible with a particular model, Flow will default you to one that is.
4. Enter a prompt
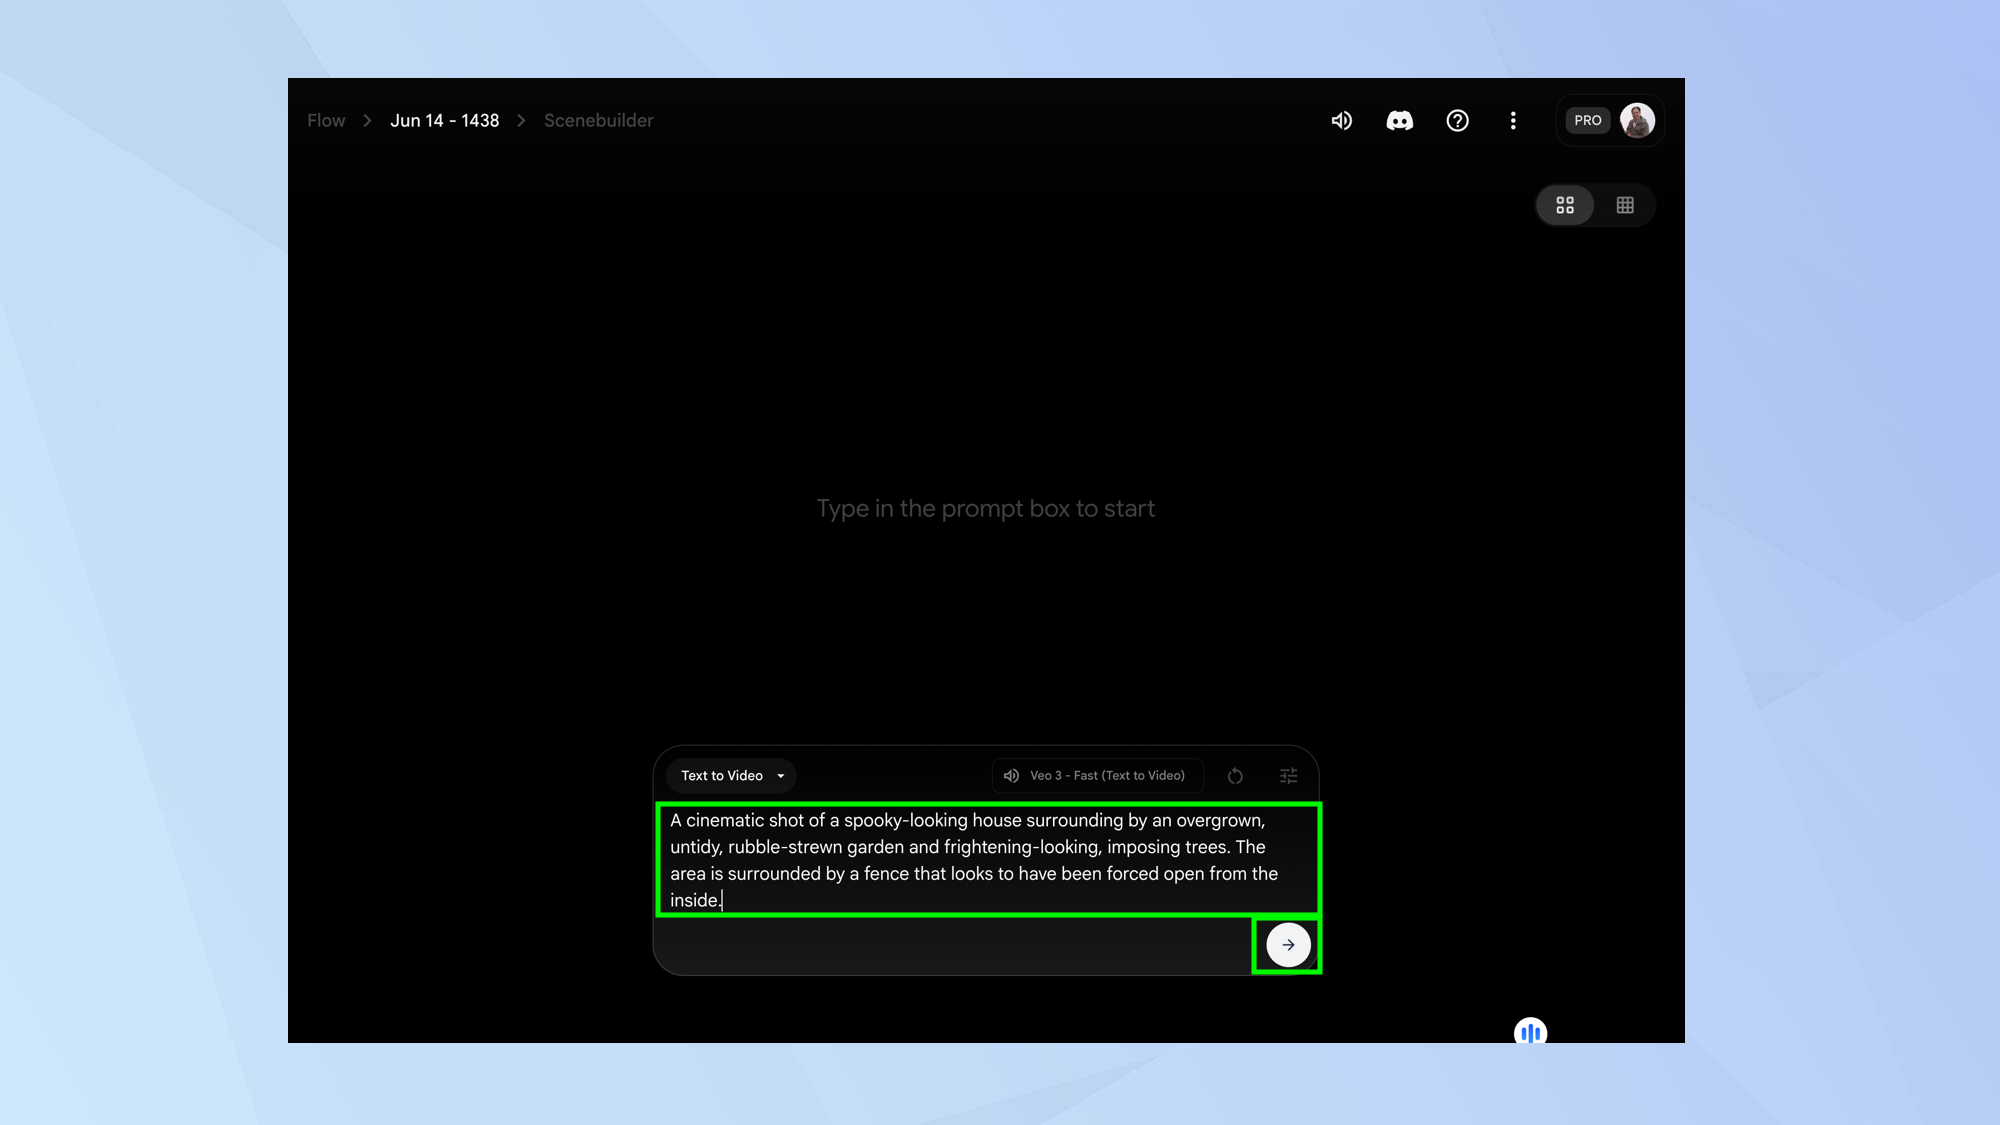
Now write a prompt, being as descriptive as possible. You can include sound effects, background noise and speech in your descriptions (although speech is only available in the Text to Video mode) so long as you’re using Veo 3.
The more detail you include the more satisfactory the result is going to be. Click the Arrow when done and be patient. It can take a couple of minutes for the results to appear on screen even if you’re using the Fast model.
5. Upload an image
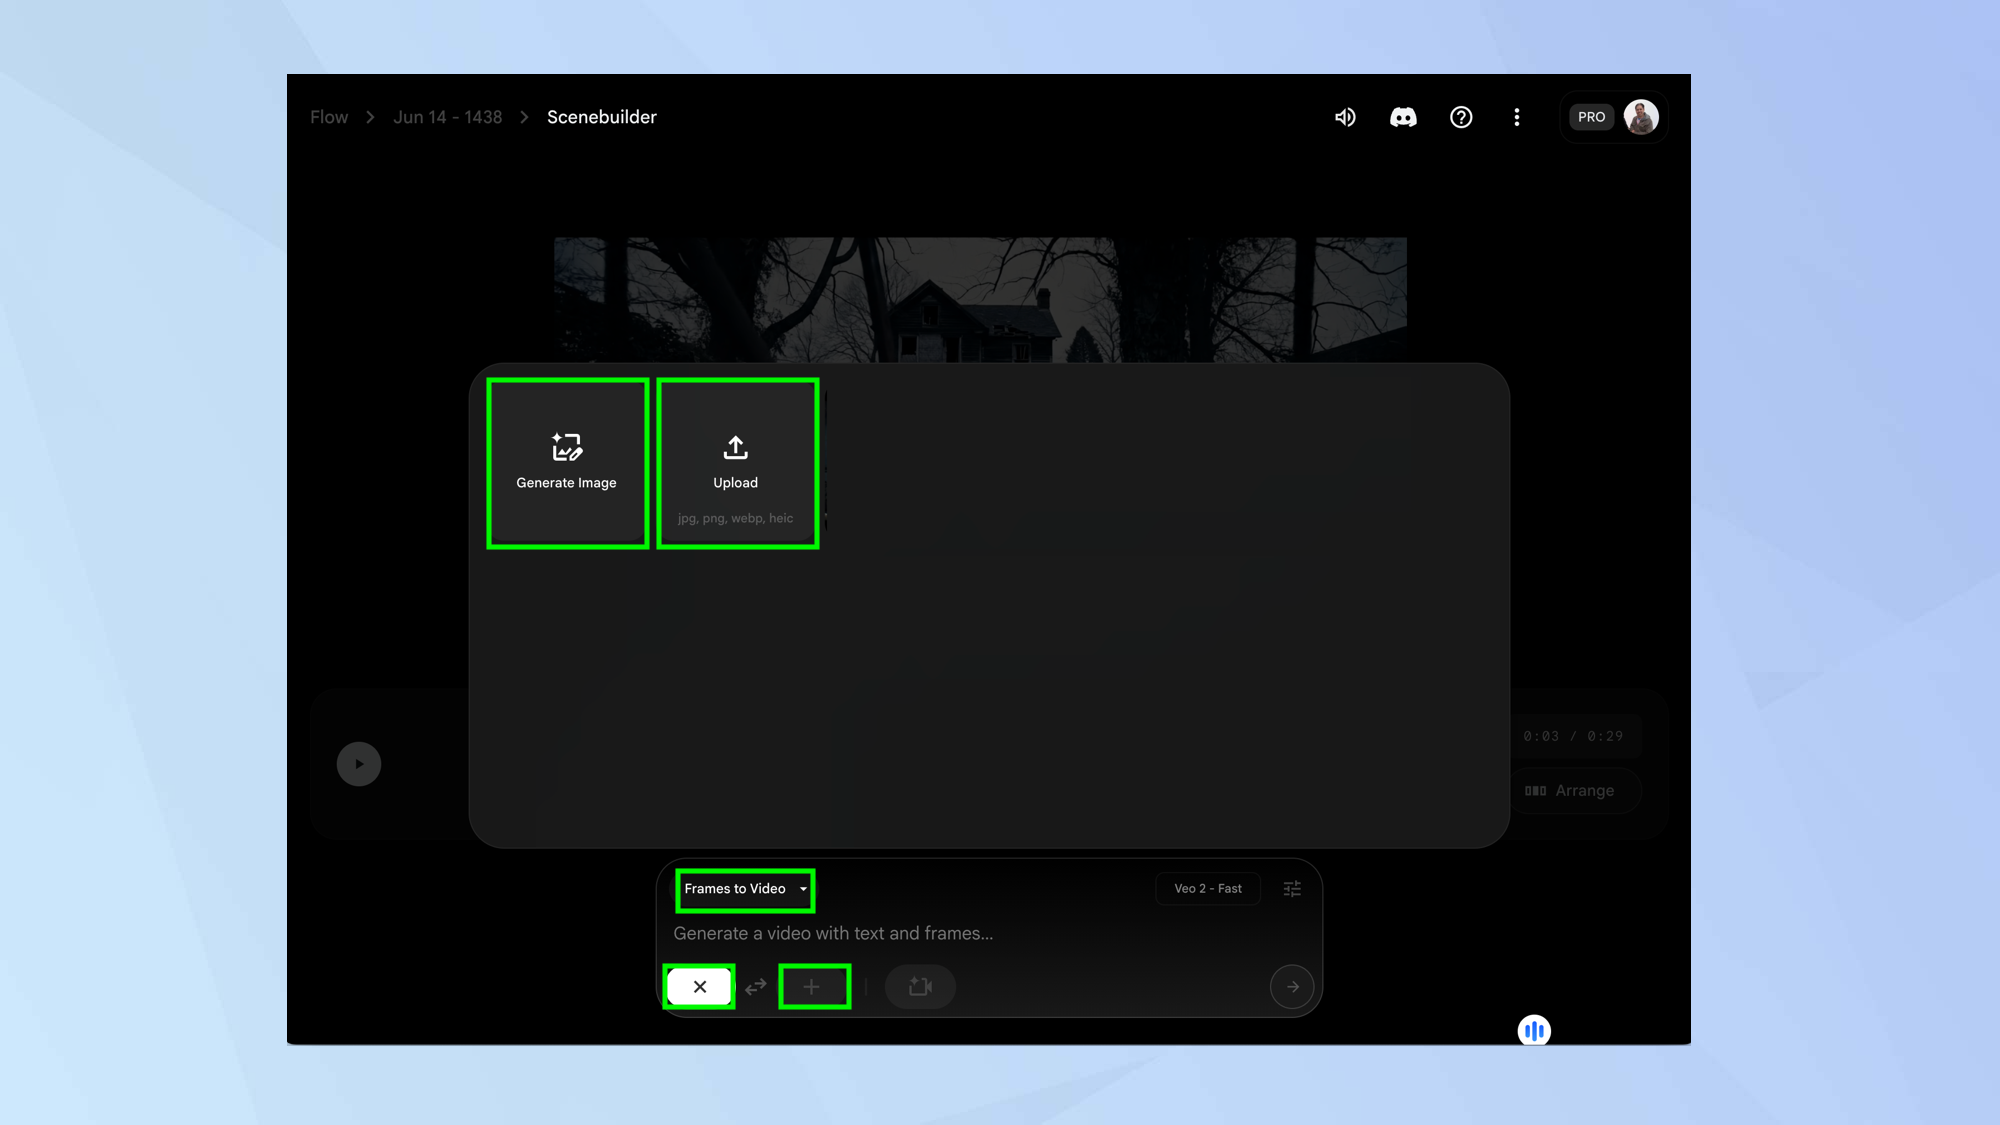
Alternatively, if you click the downward arrow next to Text to Video, you will see different ways of generating video including Frames to Video and Ingredients to Video. The latter is only available to anyone on an AI Ultra subscription plan but given this costs $249 each month, we’ll hazard a guess that you won’t be using it – suffice to say it allows you to generate individual elements for use in a scene.
You can, however, select Frames to Video.
In the prompt box, select + (it’ll turn into an X if you wish to cancel) and either click generate image or click upload. In each case, the image will be used for the basis of a starting frame. You can create an ending frame if you select the second +.
6. Control the camera
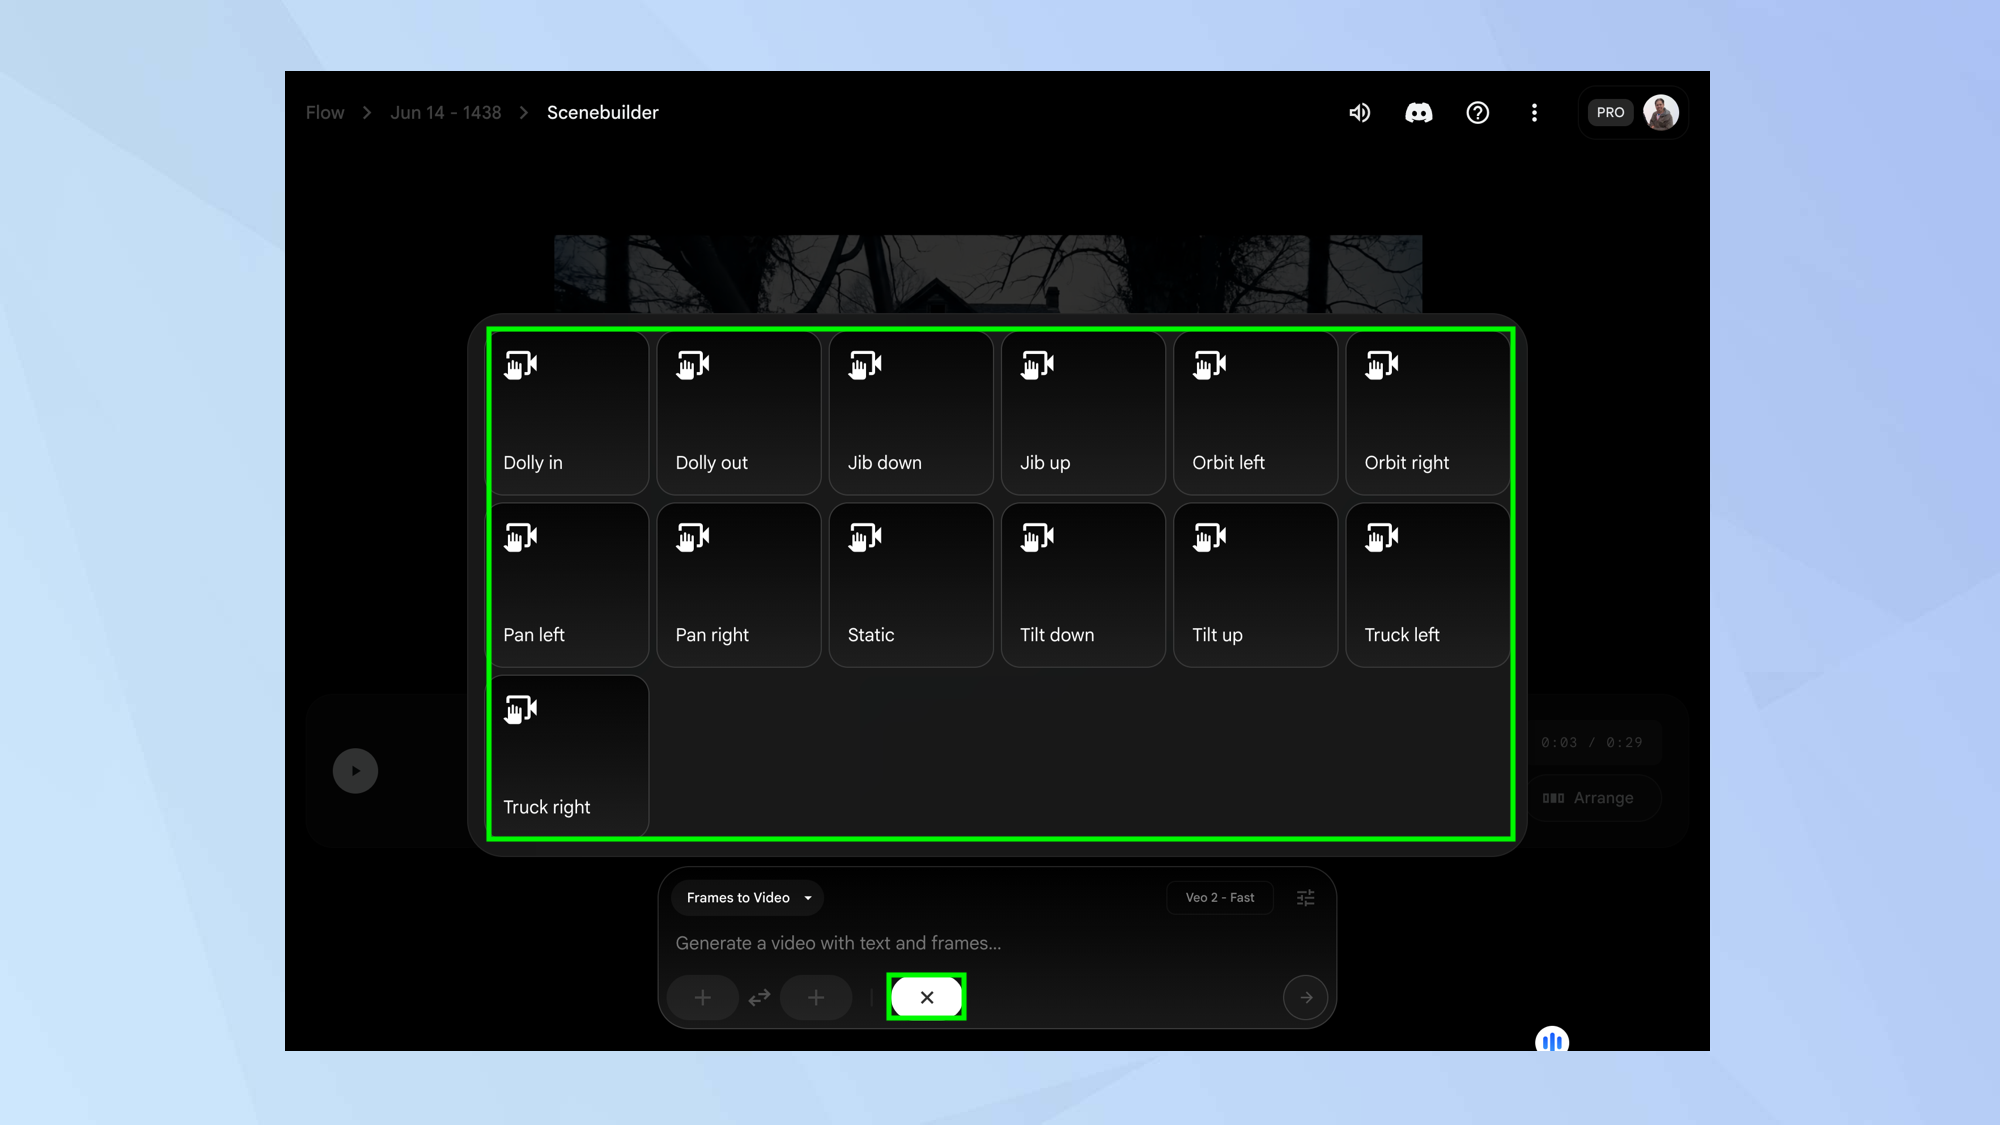
In Frames to Video, you can also select the camera icon to make use of a selection of camera controls (it will turn into an X to cancel) such as dolly in, pan left and so on. When you describe the scene you want, the chosen camera control will be used in the resulting shot.
7. Play the scenes
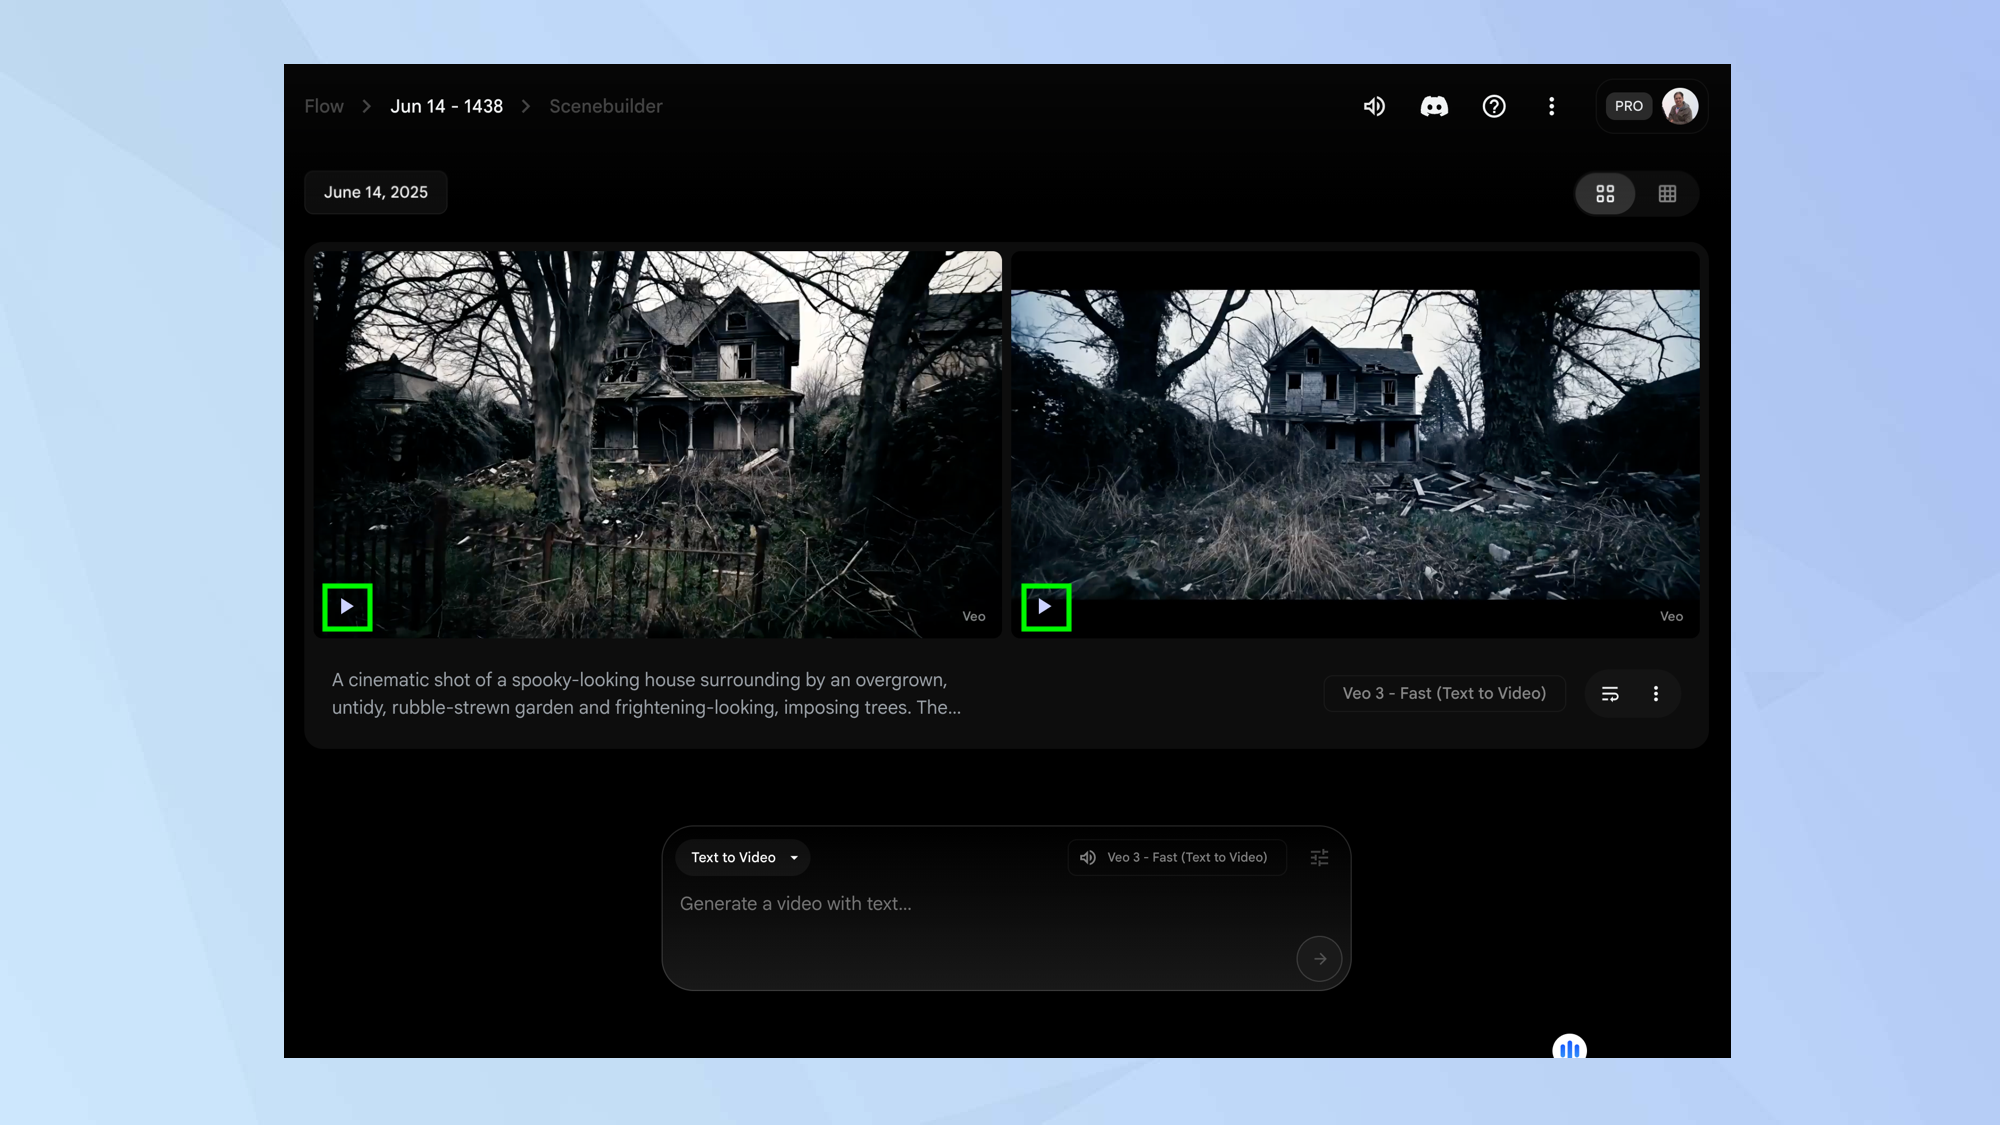
You will see two videos, each eight seconds long, with suitable audio playing in the background. Press Play to see the content of each video.
8. Select a video
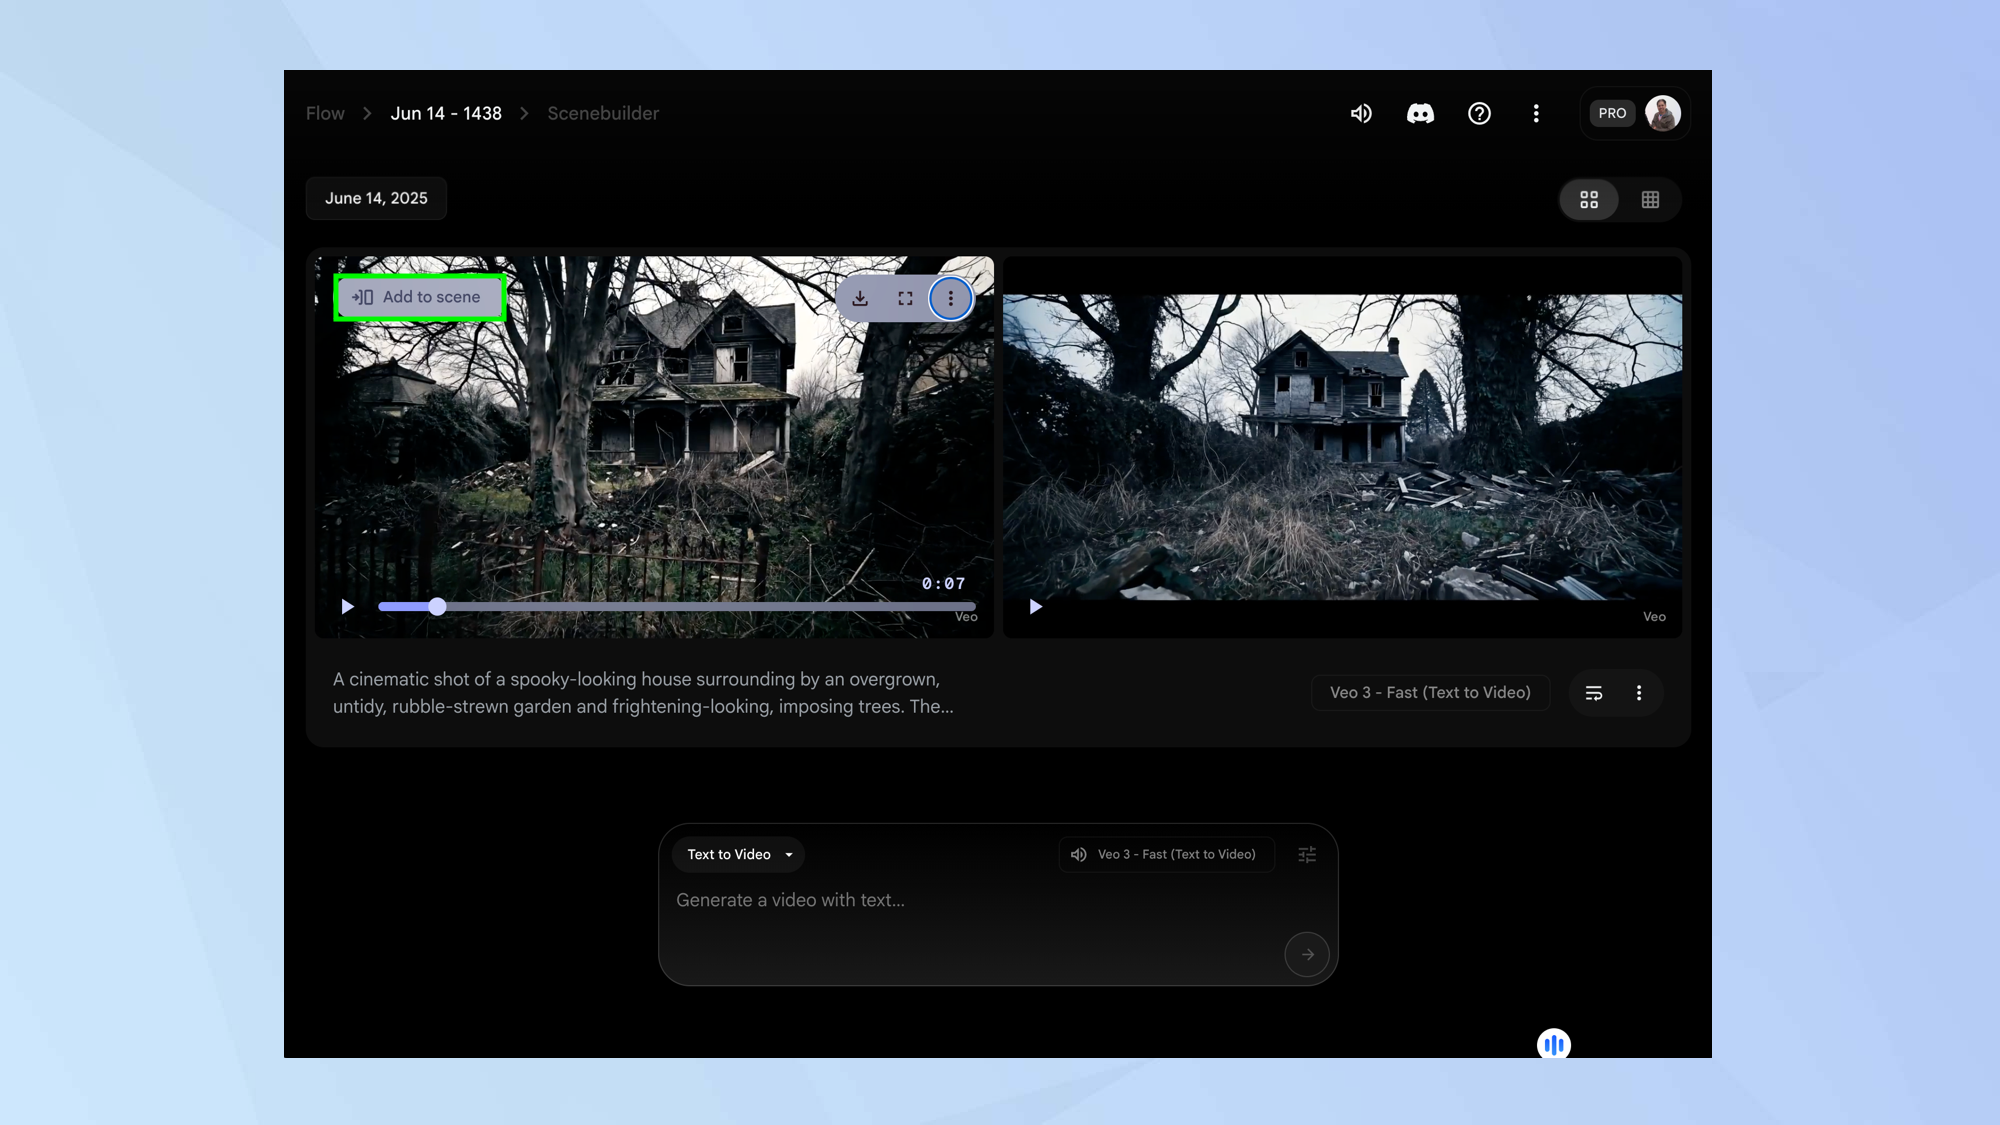
If you hover over a video, you can select Add to scene, using it to start building your film. You can also view it in fullscreen, flag the output if there’s something concerning or delete it. There is an option to download it too but it’s likely too early to do that.
9. Build your video
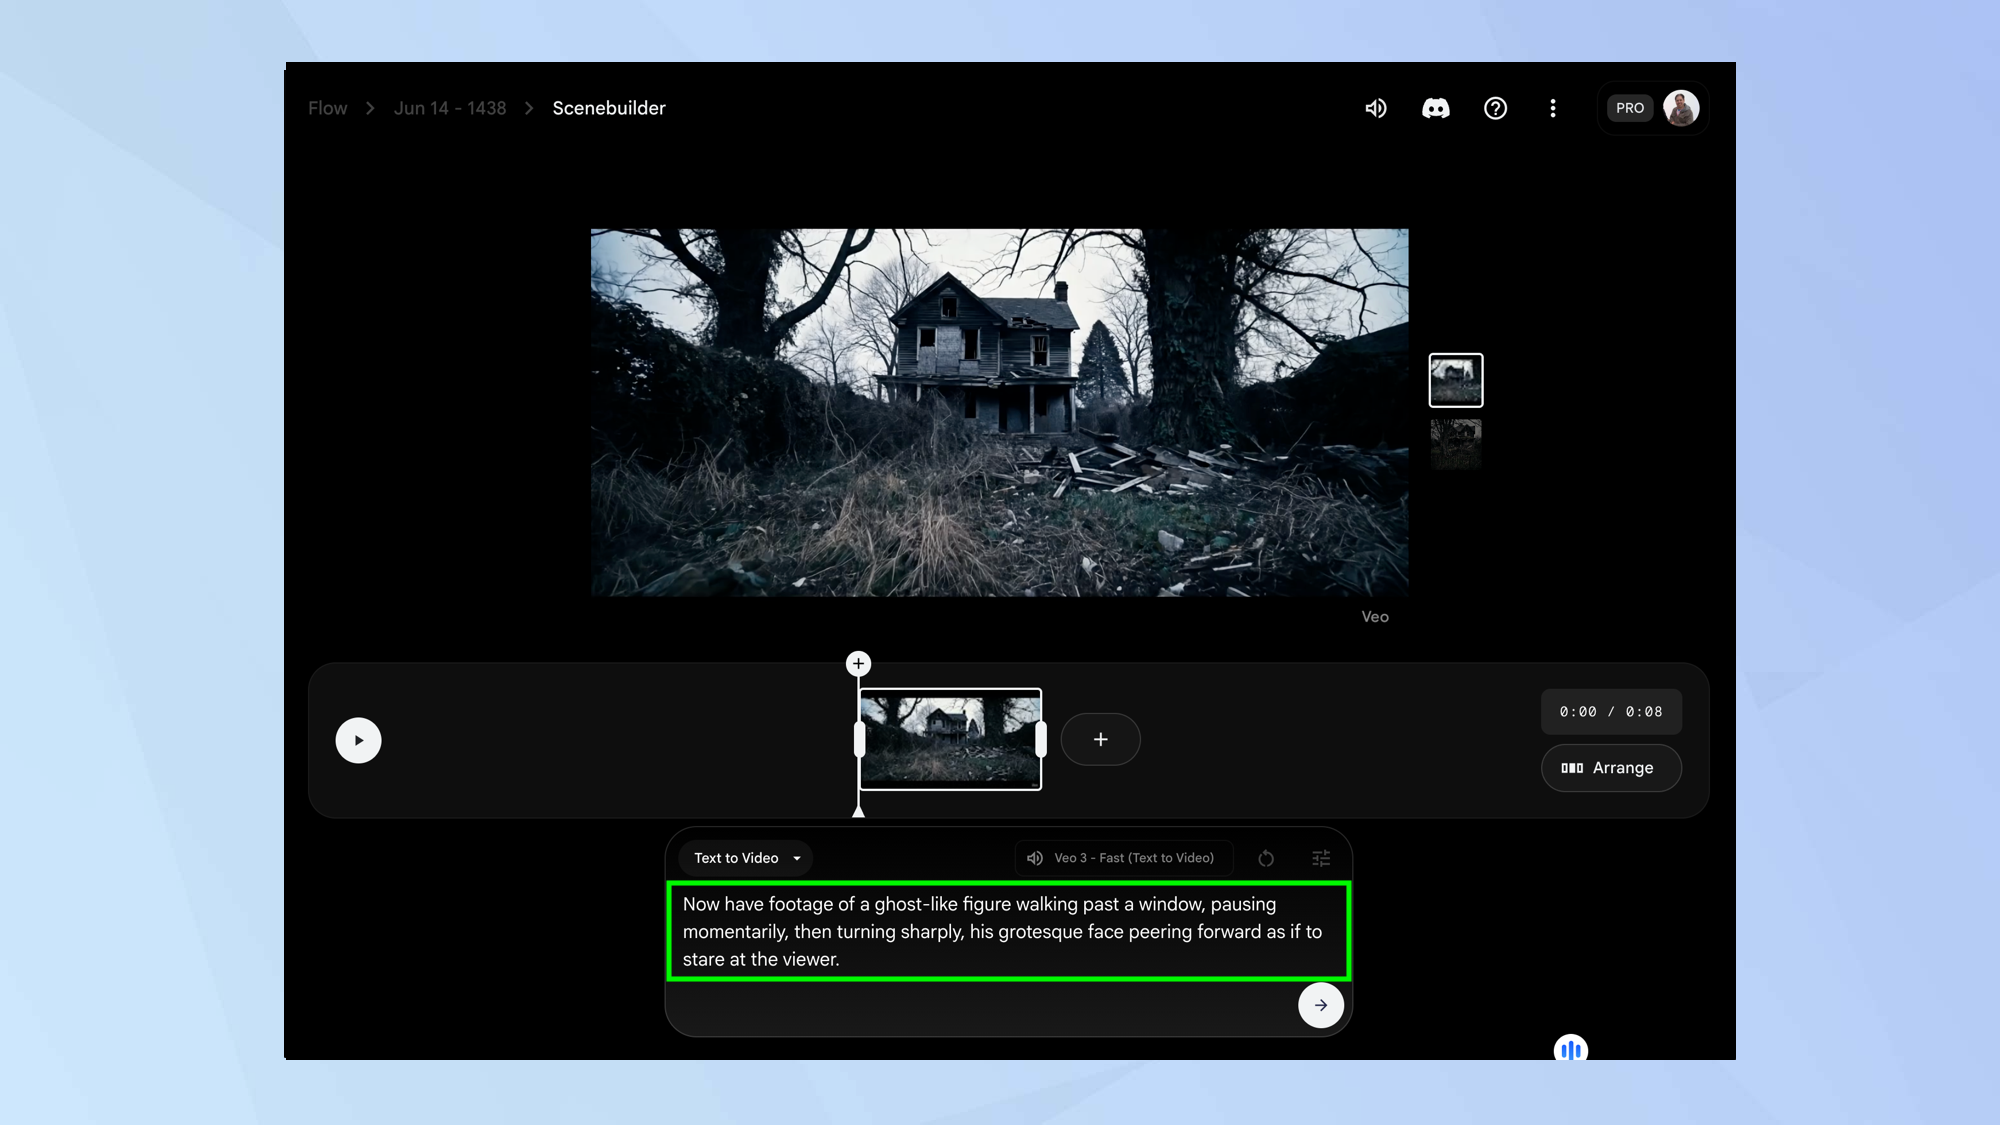
You can now continue creating your film. You may want to enter more text in the prompt box to produce another scene. You will see this scene appear in a timeline (again, it can take a little bit of time).
You can click the scene to play it and use a bar to quickly scroll through the footage. You can also click Play to view the entire video so far.
10. Extend the footage
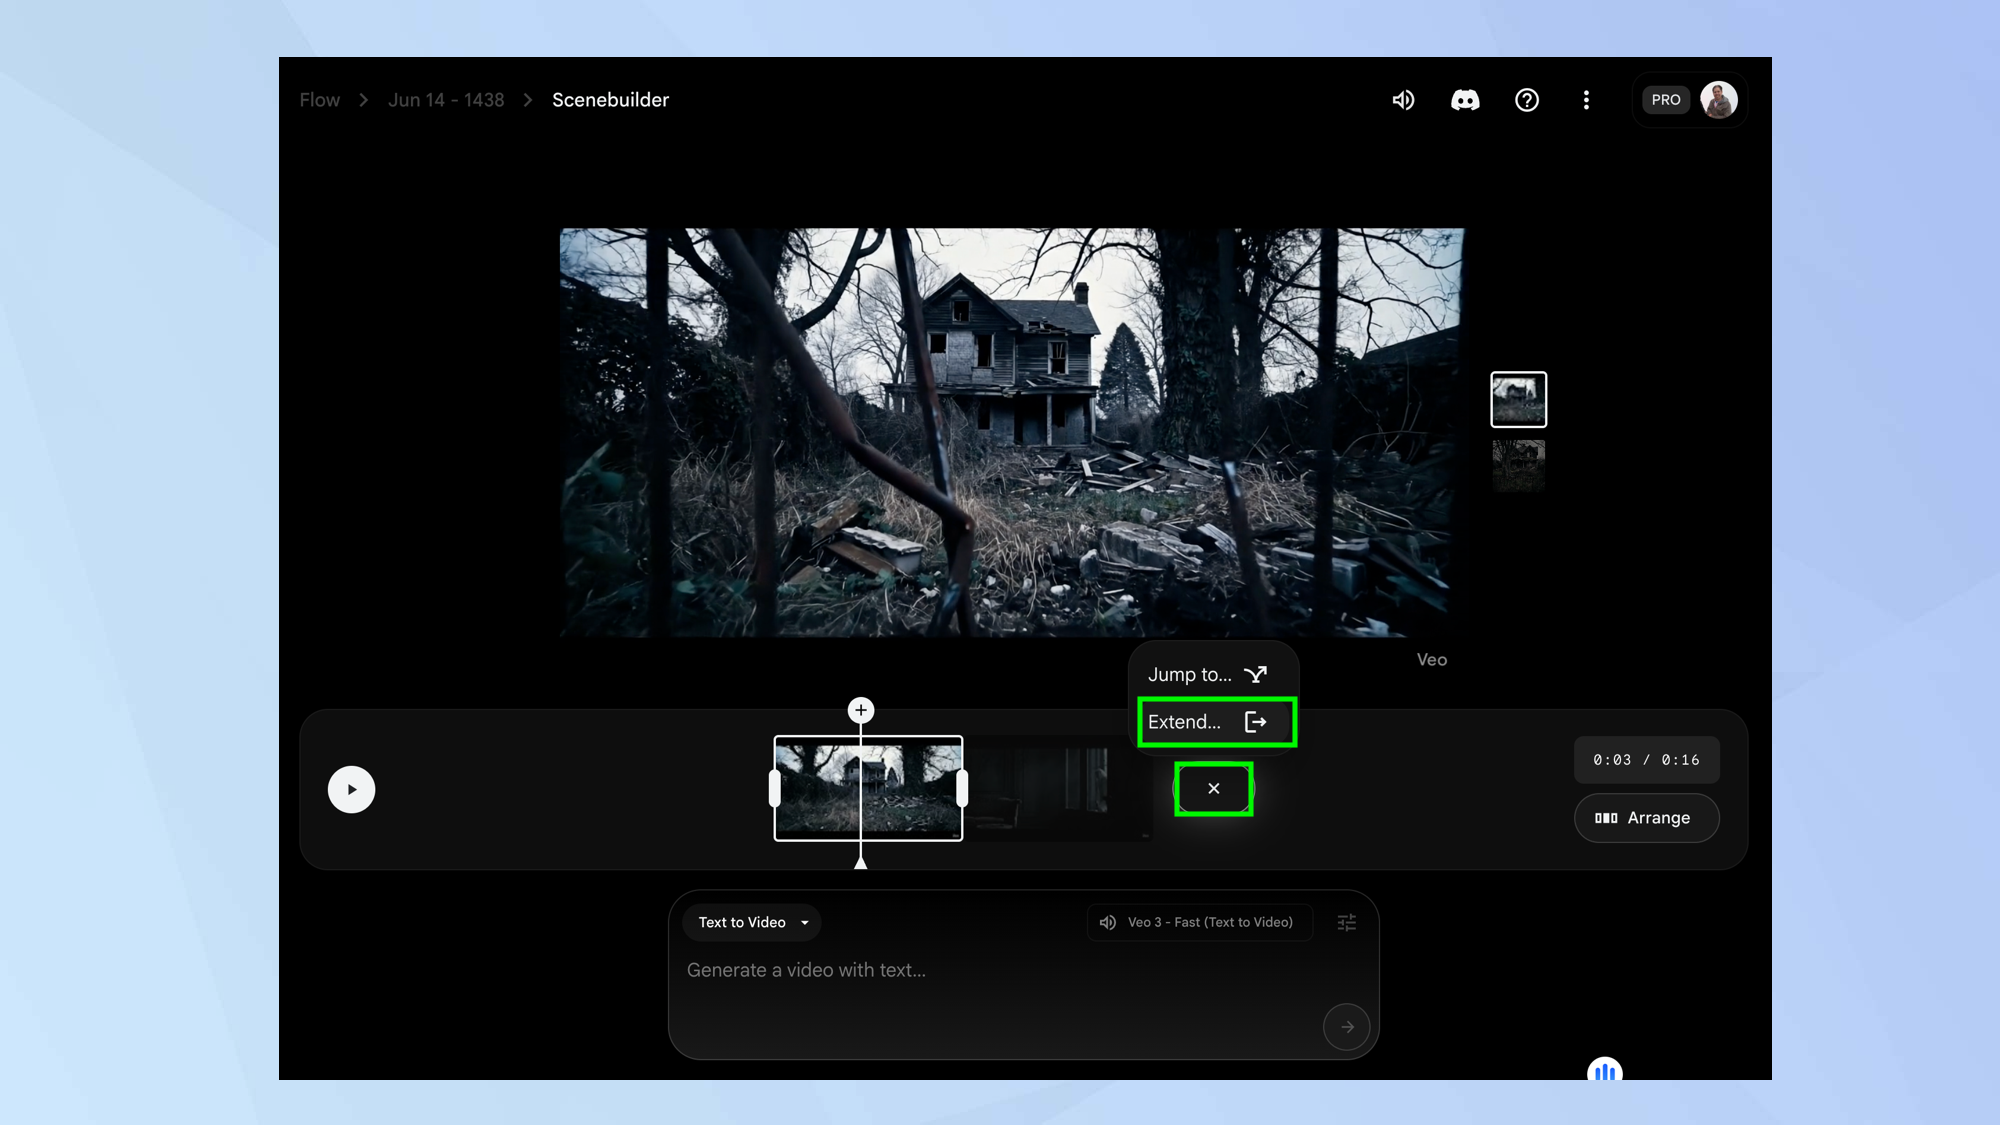
If you like the footage you’ve created but you’d like to expand it with a seamless transition, you can select + to the right of the scene and select Extend. This gives you the opportunity to enter what you would like to happen next within this shot. Flow will assess the last 24 frames and smoothly continue the shot.
11. Jump to a shot
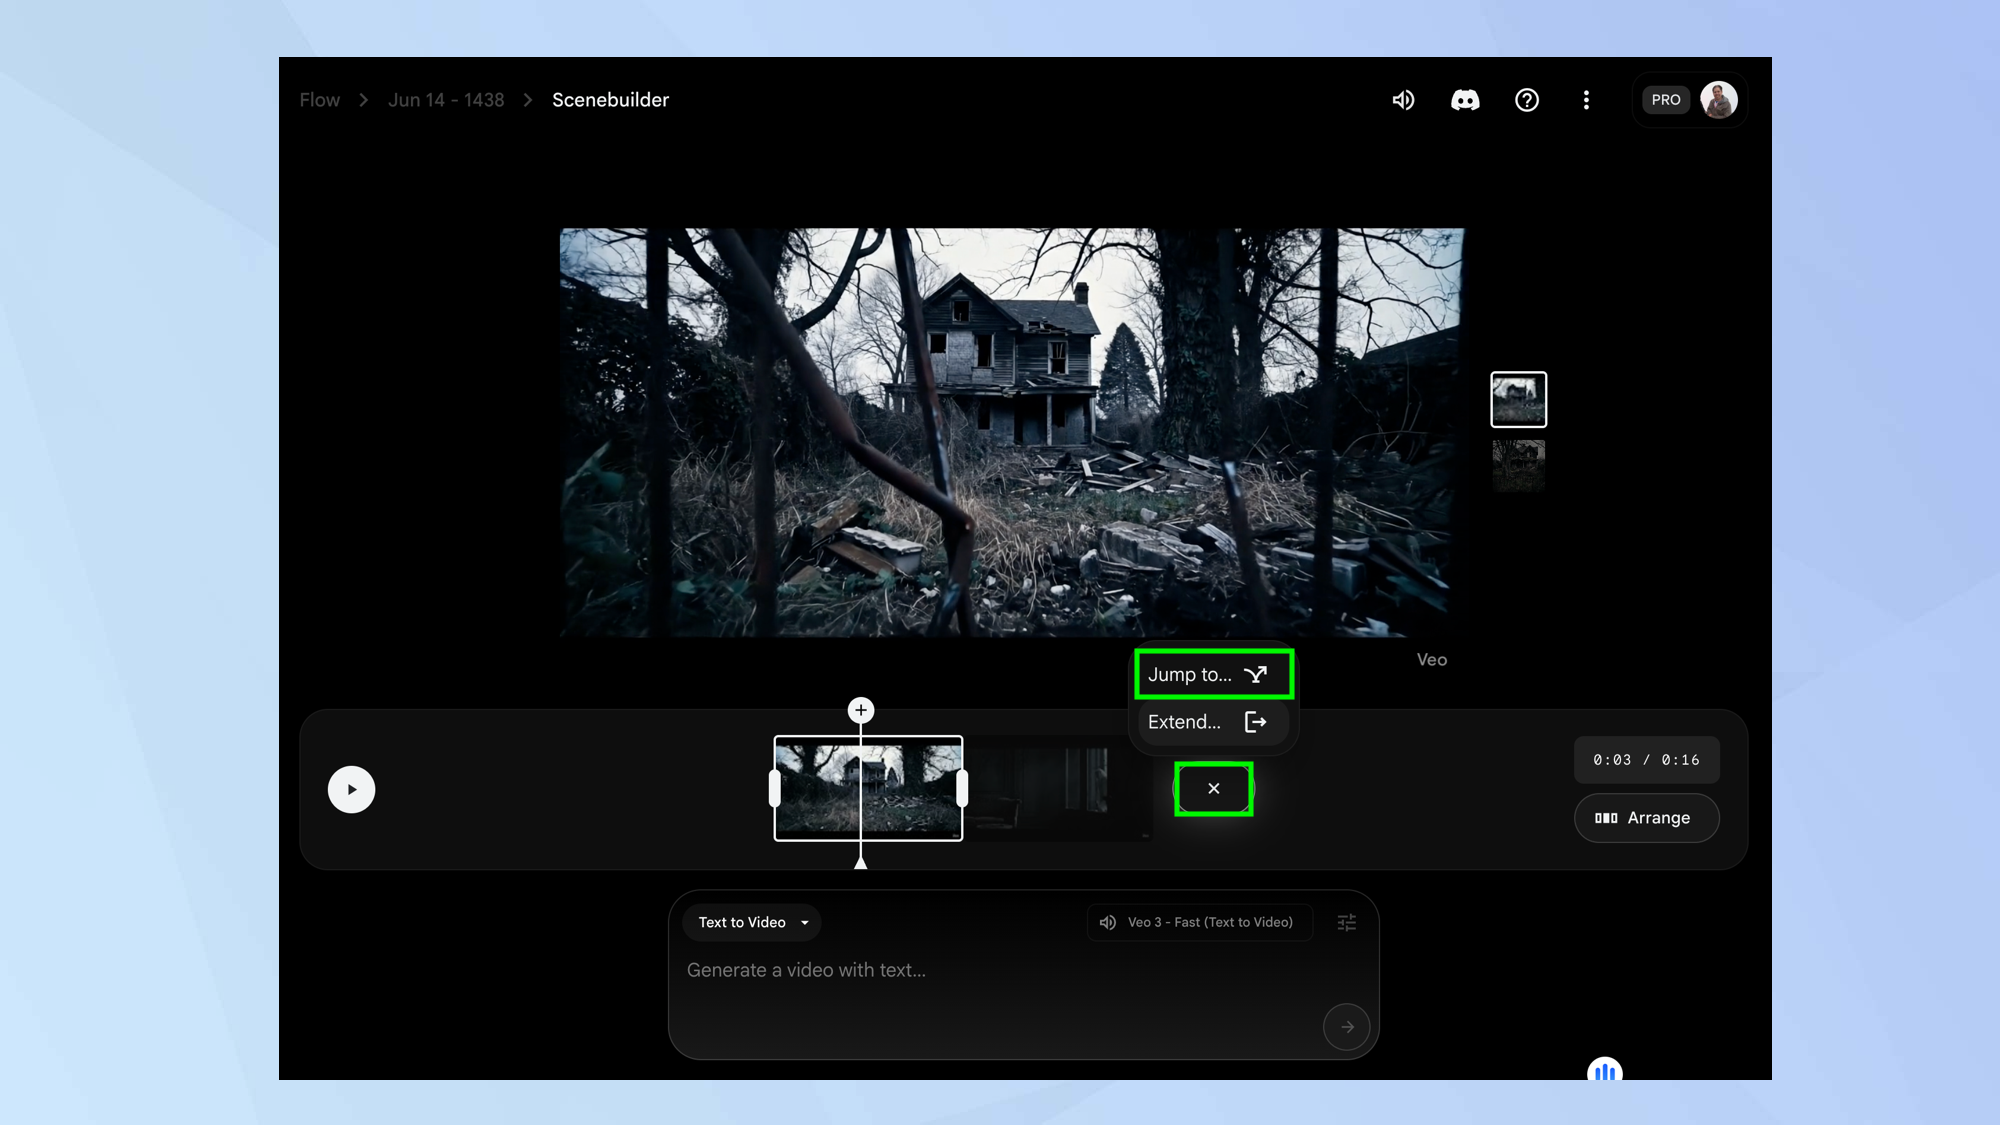
You can also select + and choose Jump to. With this, you would explain what should happen next and the footage will transition to a new shot but preserve the context from the last frame.
12. Arrange your shots
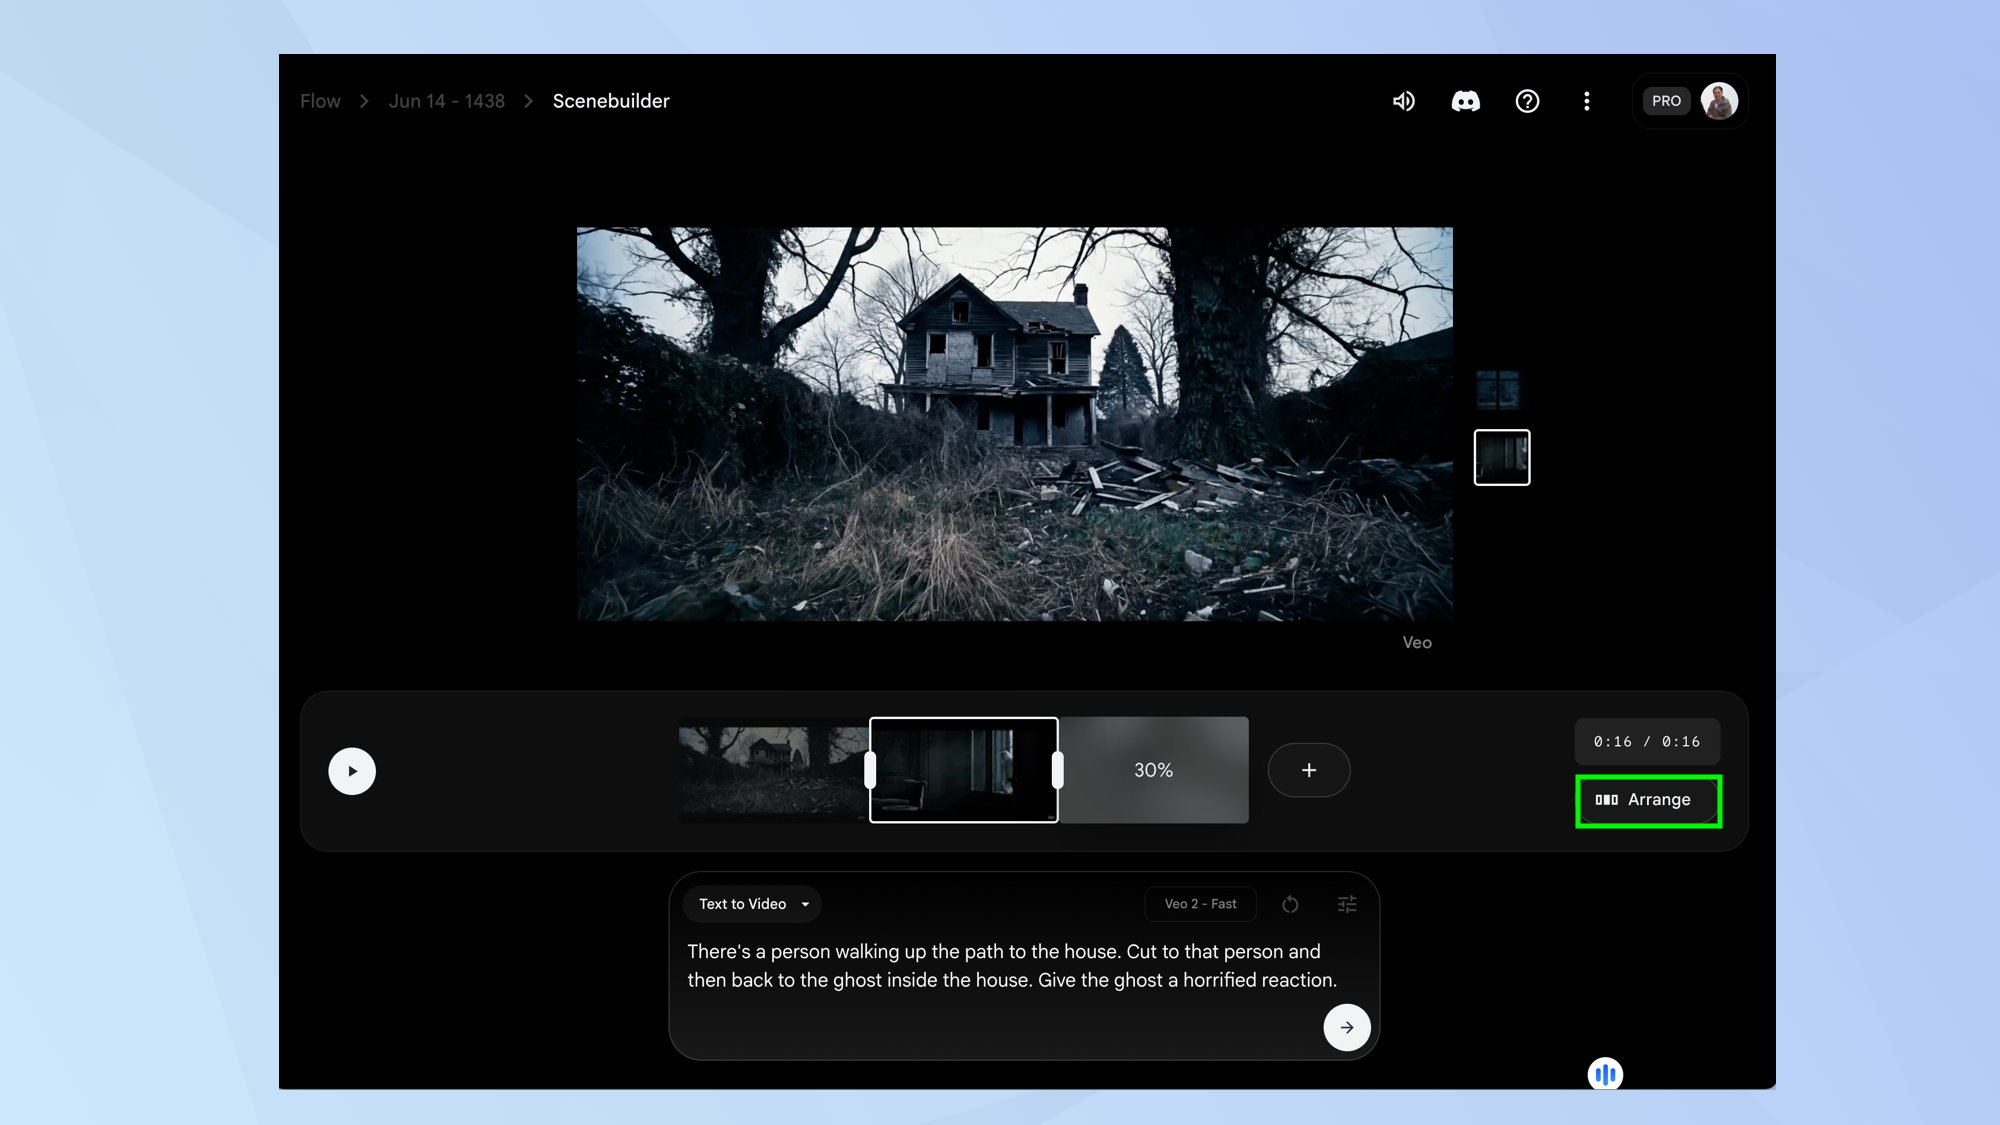
You can select Arrange then click, hold and move any shots around the timeline, altering the order in which they will be shown. This feature also lets you select – to remove a shot from the timeline. Select Done when you’re finished.
13. Edit frame length
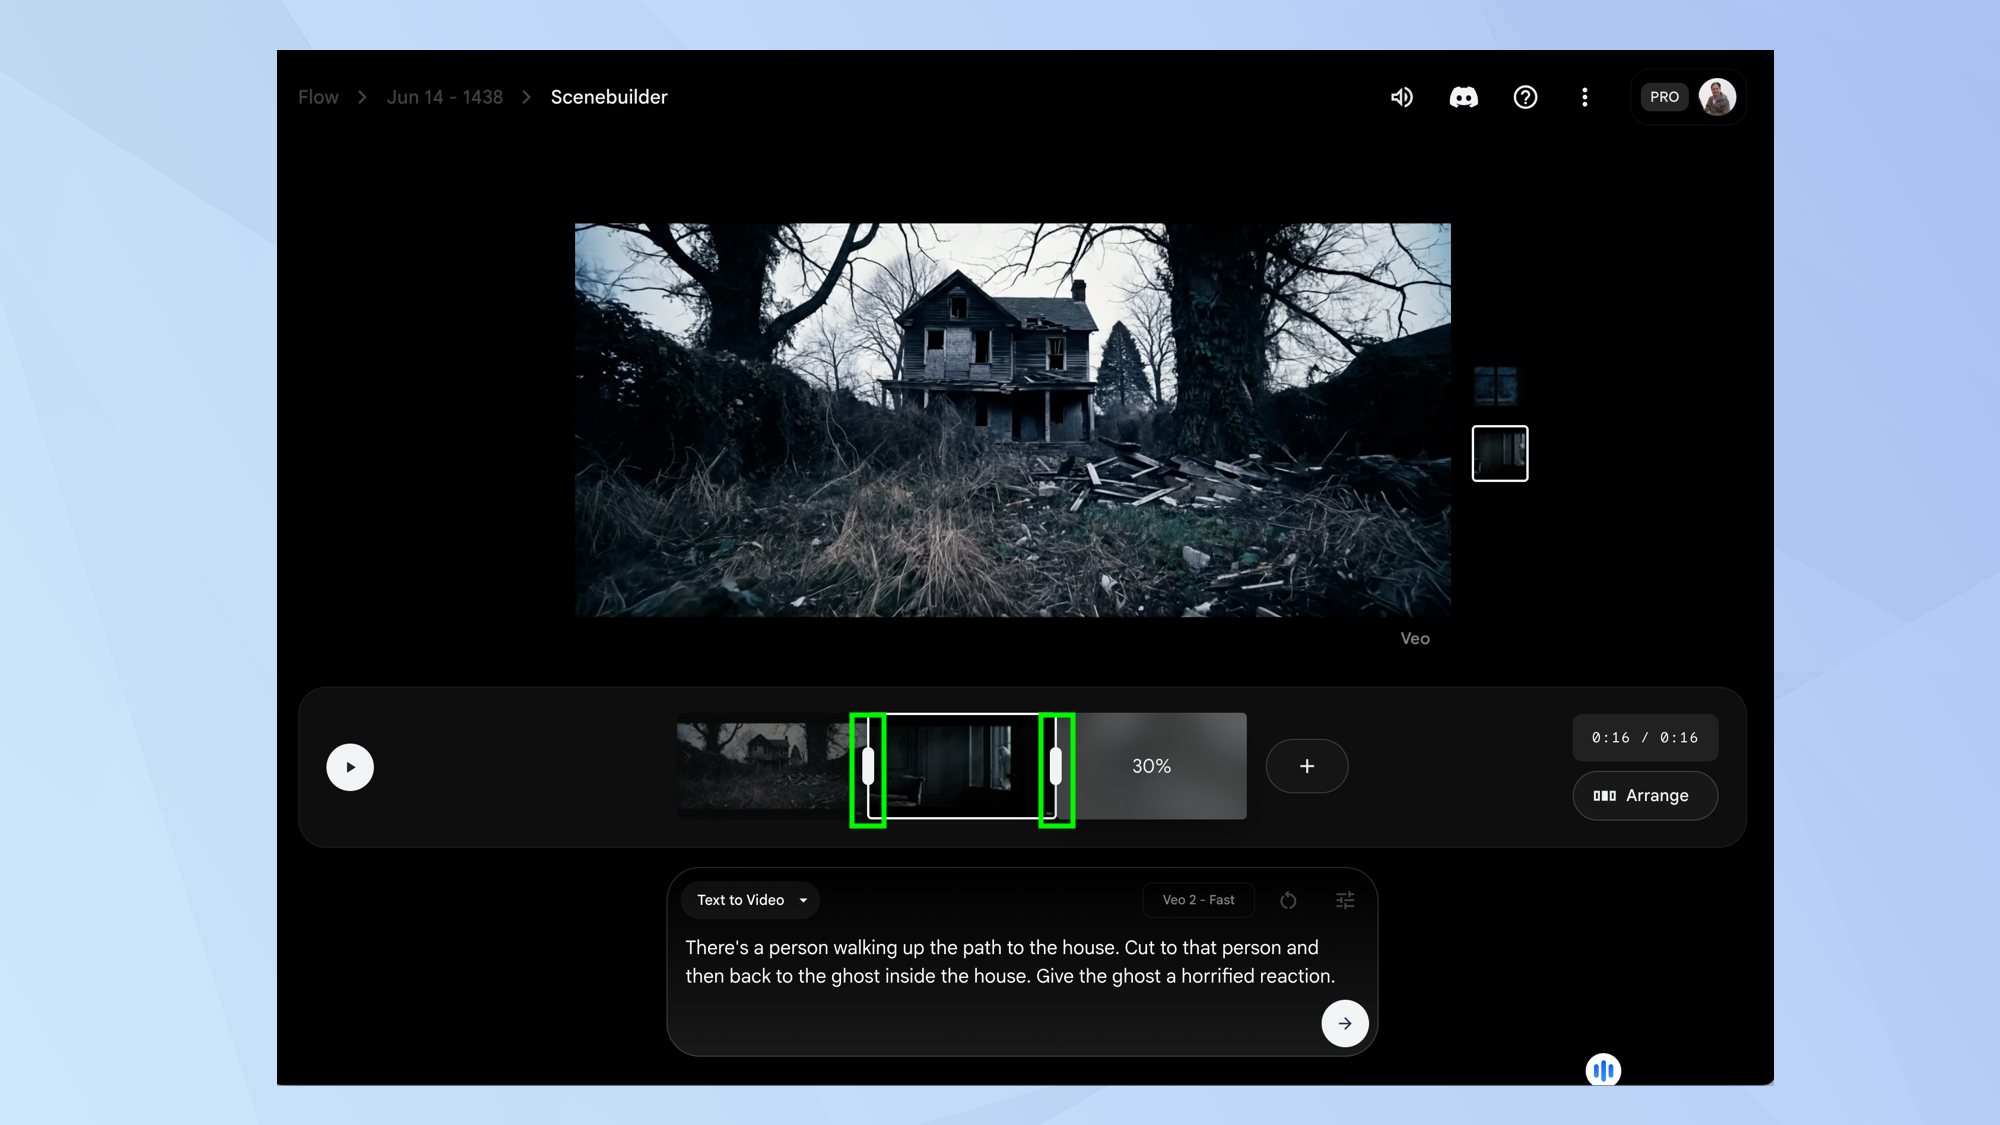
If you click a frame, you can drag the handles and reduce the length of that frame or focus on a particular part of it, putting you in greater control.
14. Continue creating
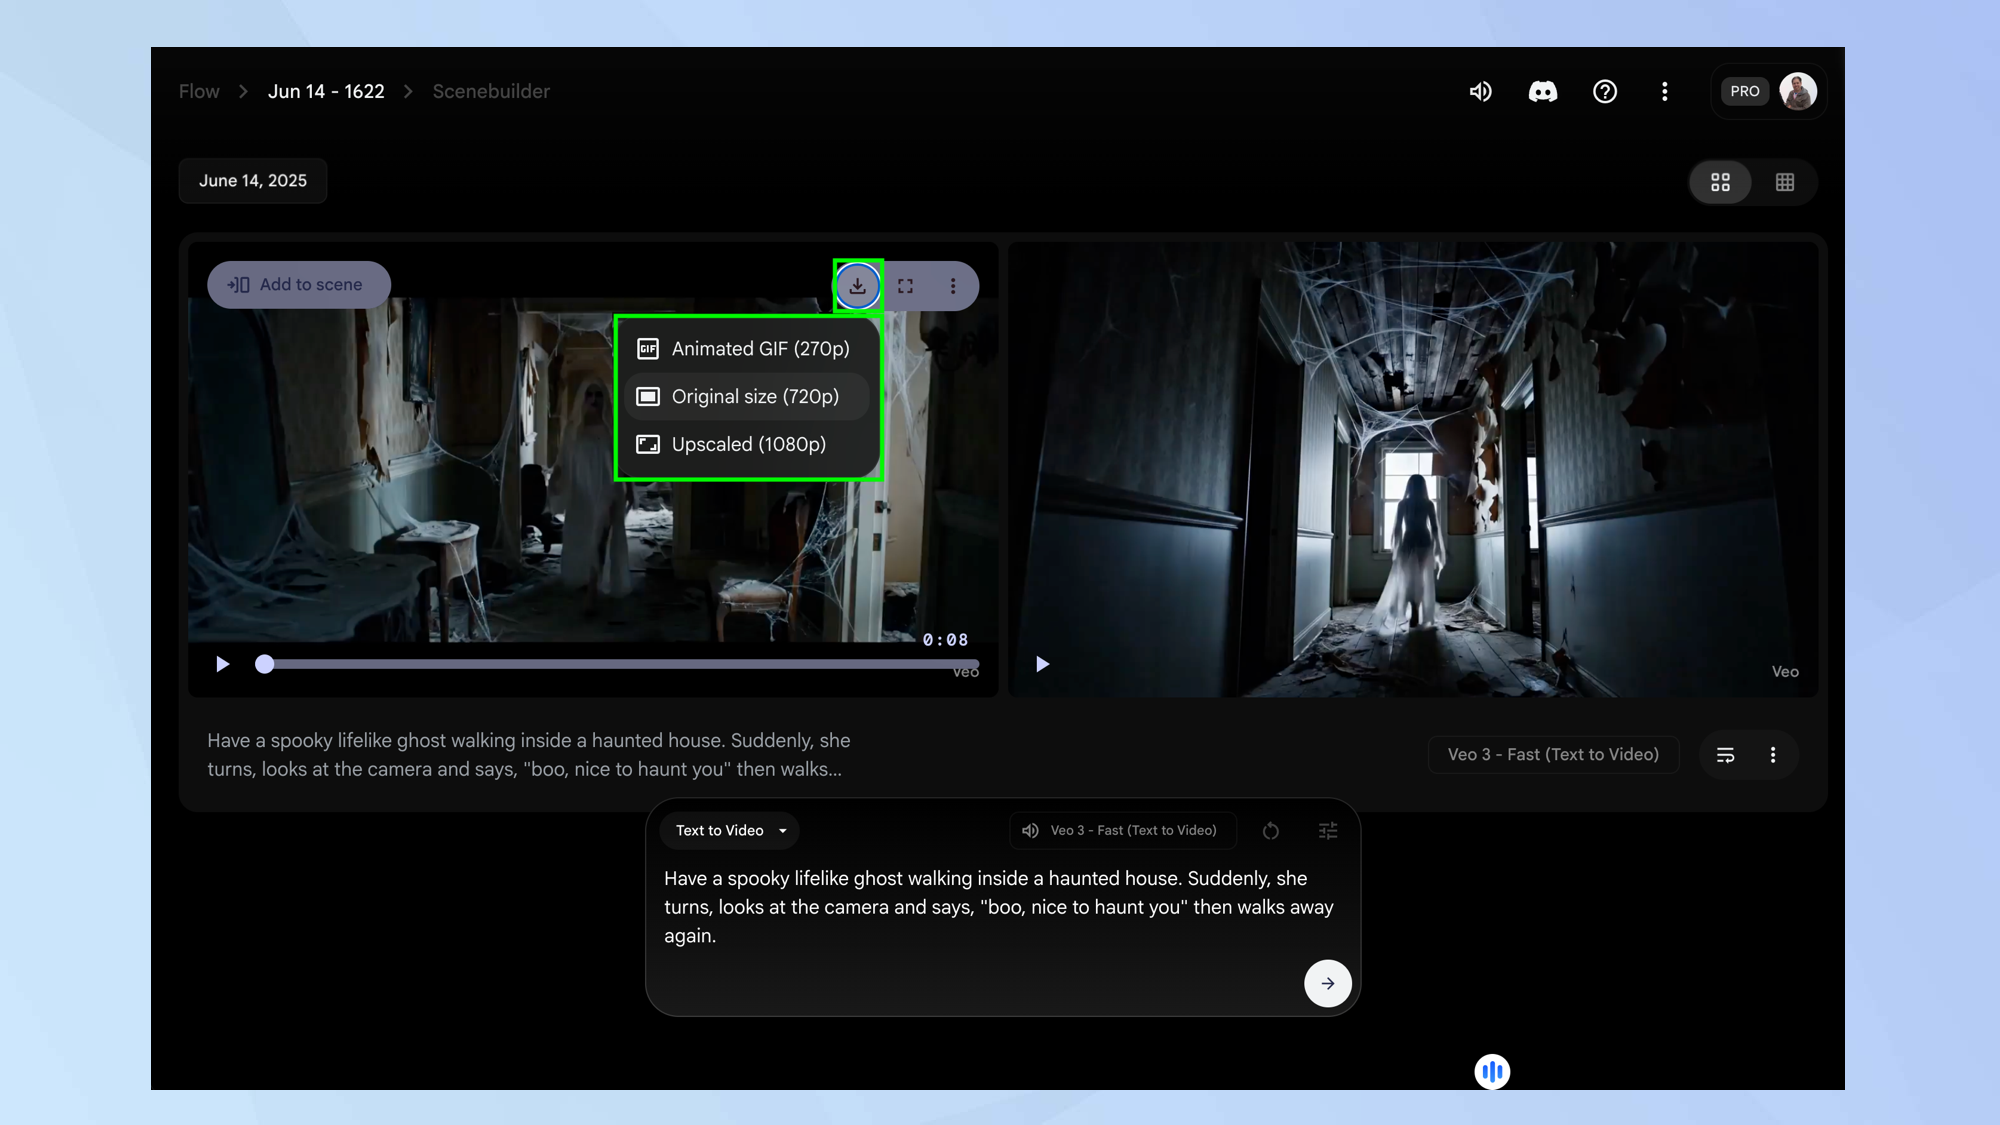
You can now continue producing your masterpiece, editing and adding shots until you’re satisfied. When you’re done, you can hover over the video and select Download to export the footage in a variety of styles: as a GIF, in original 720p or upscaled to 1080p. You will need to select Download again to save it.
Be aware that when you leave the Scenebuilder, it will reset. Your clips and prompts are saved as a Project and they remain intact but you’ll have to put it all together again. A Scenebuilder saved state is on its way.
And there you go. You now know how to use Flow. But there are other ways to create movies. Learn how to create AI-generated videos with Luma Dream Machine and get hands on with ReelMagic – an AI video tool for creating entire short films from a single prompt. You can also use LTX Studio – we created an AI music video in 30 minutes.

David Crookes is a freelance writer, reporter, editor and author. He has written for technology and gaming magazines including Retro Gamer, Web User, Micro Mart, MagPi, Android, iCreate, Total PC Gaming, T3 and Macworld. He has also covered crime, history, politics, education, health, sport, film, music and more, and been a producer for BBC Radio 5 Live.
You must confirm your public display name before commenting
Please logout and then login again, you will then be prompted to enter your display name.
 Club Benefits


