You're not using ChatGPT to its full potential until you try agents — here's how to set them up
Handle tasks automatically with ChatGPT's agent mode

I recently discovered ChatGPT's Agent Mode feature and immediately kicked myself for not trying it sooner. While I'd been manually prompting the AI for each response, agents were quietly handling entire workflows for others.
What makes OpenAI's latest addition truly useful is its ability to tackle complex tasks from start to finish. You could set up agents to monitor industry news and compile weekly summaries, create presentations, or even or track online shopping deals across multiple retailers for products you want to purchase.
Setting up an agent takes just a few clicks and significantly expands what you can accomplish with ChatGPT.
1. Access Agent Mode

Activating Agent Mode in ChatGPT is straightforward and requires just a few simple steps.
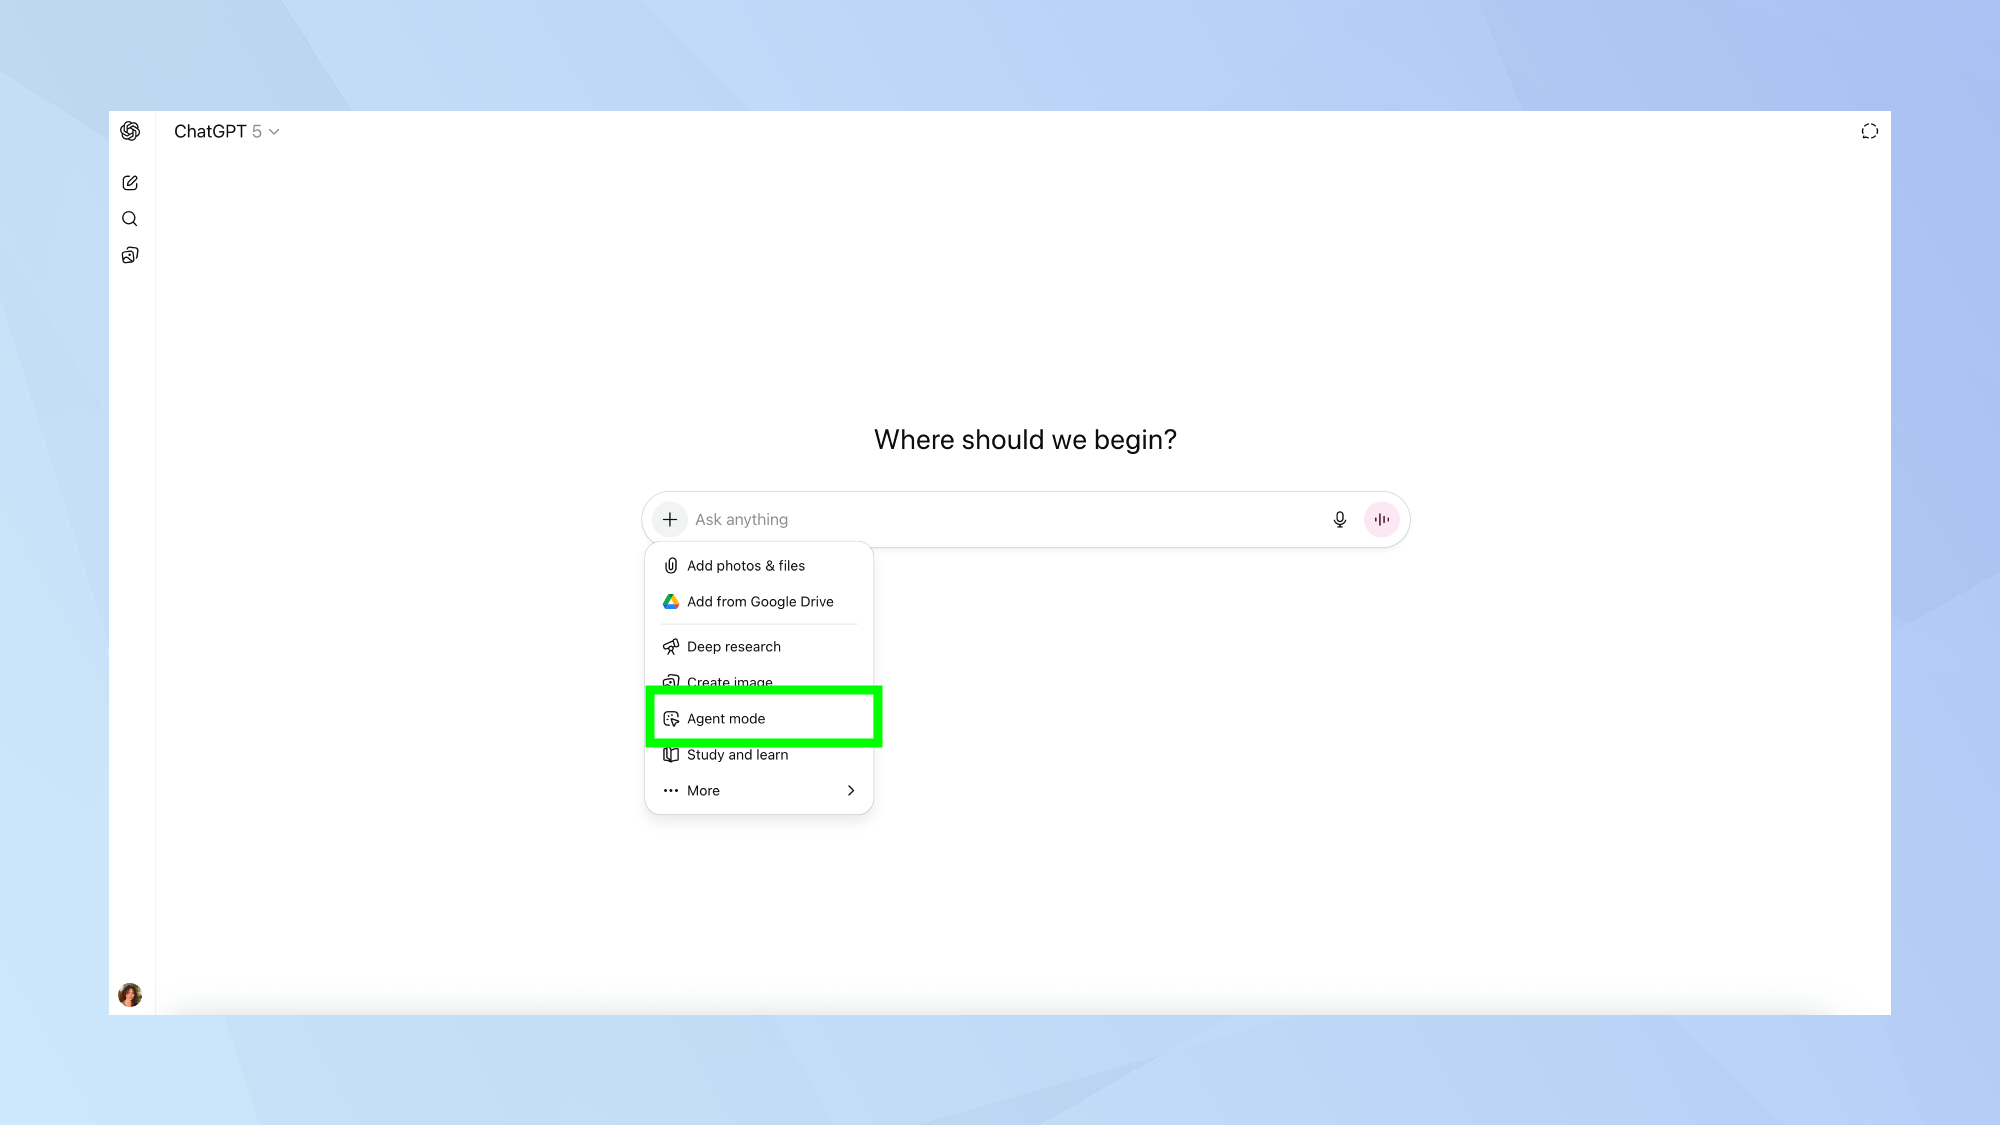
Log in to your ChatGPT account, or sign up, and look for the plus (+) button in the chat interface. Click this button and select Agent Mode from the options that appear.
The interface will immediately change to indicate that Agent Mode is now active.
2. Choose from suggested agent templates

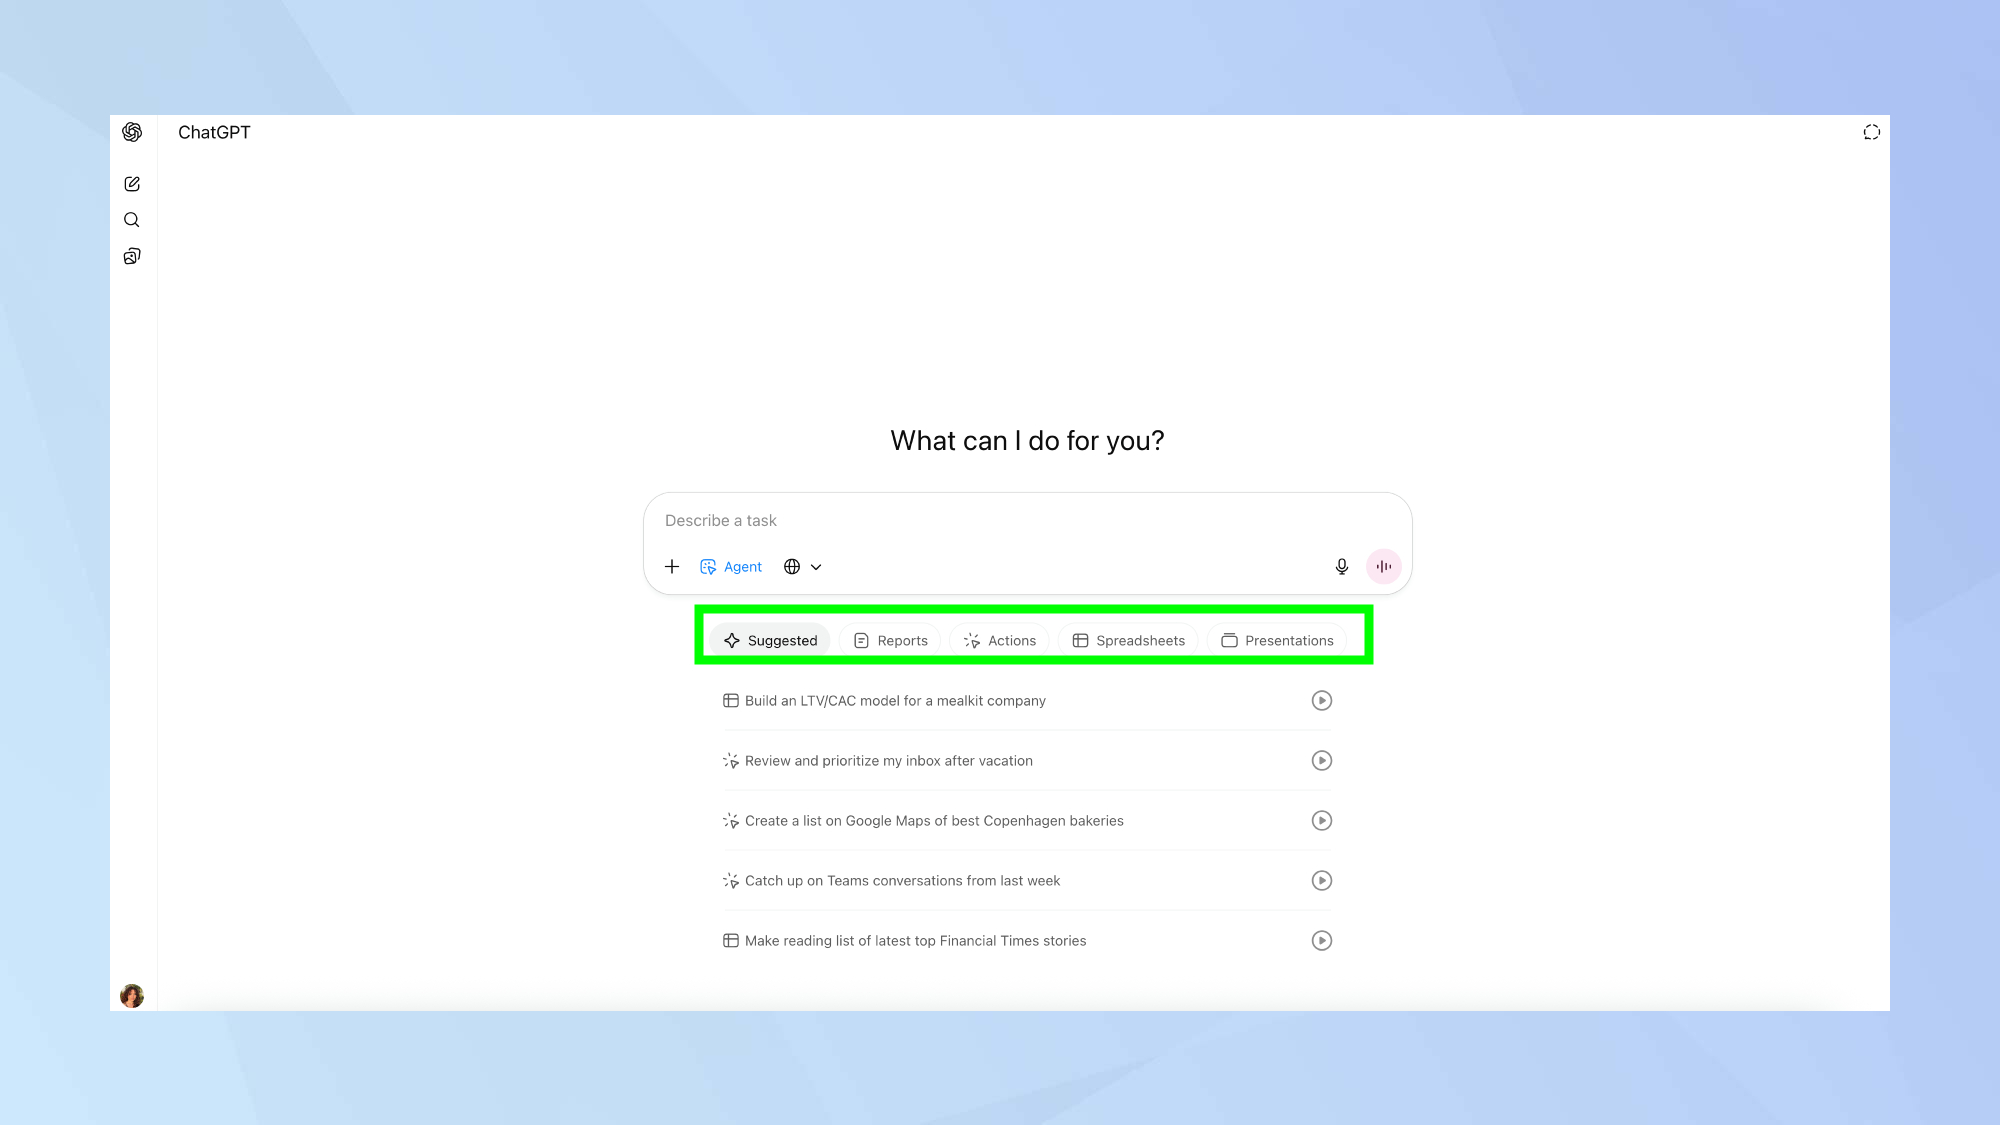
Once Agent Mode is activated, ChatGPT displays several pre-configured agent options to help you get started quickly.
Browse through the suggested actions for inspiration on what your agent can accomplish. These templates cover common use cases and can be used as-is or modified to suit your specific needs.
ChatGPT organizes suggested agents into categories including reports, actions, spreadsheets, and presentations. Each template is designed for different types of tasks, from data analysis to content creation.
3. Create custom agents for specific tasks

Beyond the templates, you can create agents tailored to your exact requirements for maximum productivity.
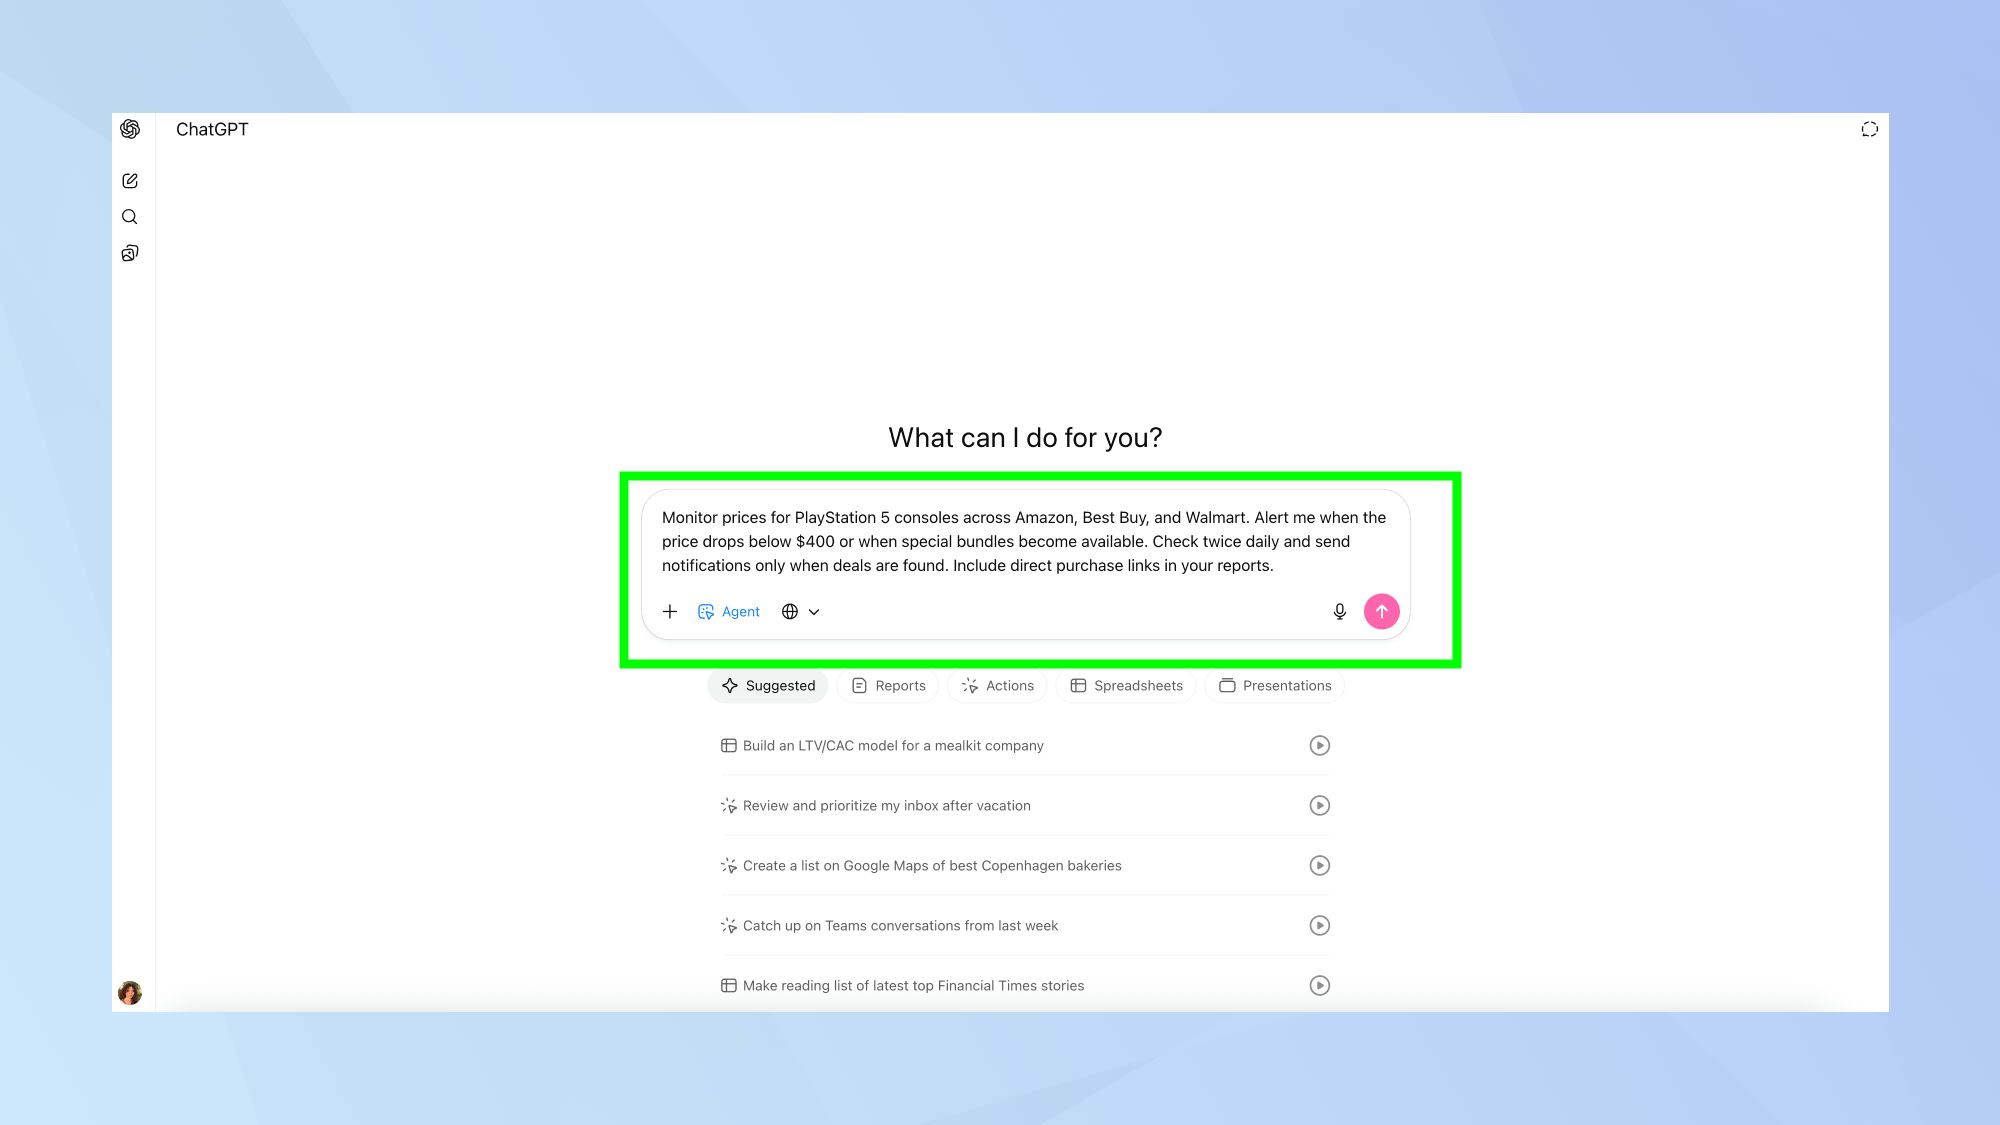
In the prompt box, define your agent's purpose clearly, including what tasks it should perform, what information it needs to access, and what format you want the results delivered in.
Set parameters for how often the agent should run, what actions it's authorized to take, and how it should notify you when tasks are completed. Once you've done all this, click the generate arrow.
4. Monitor and refine your agents

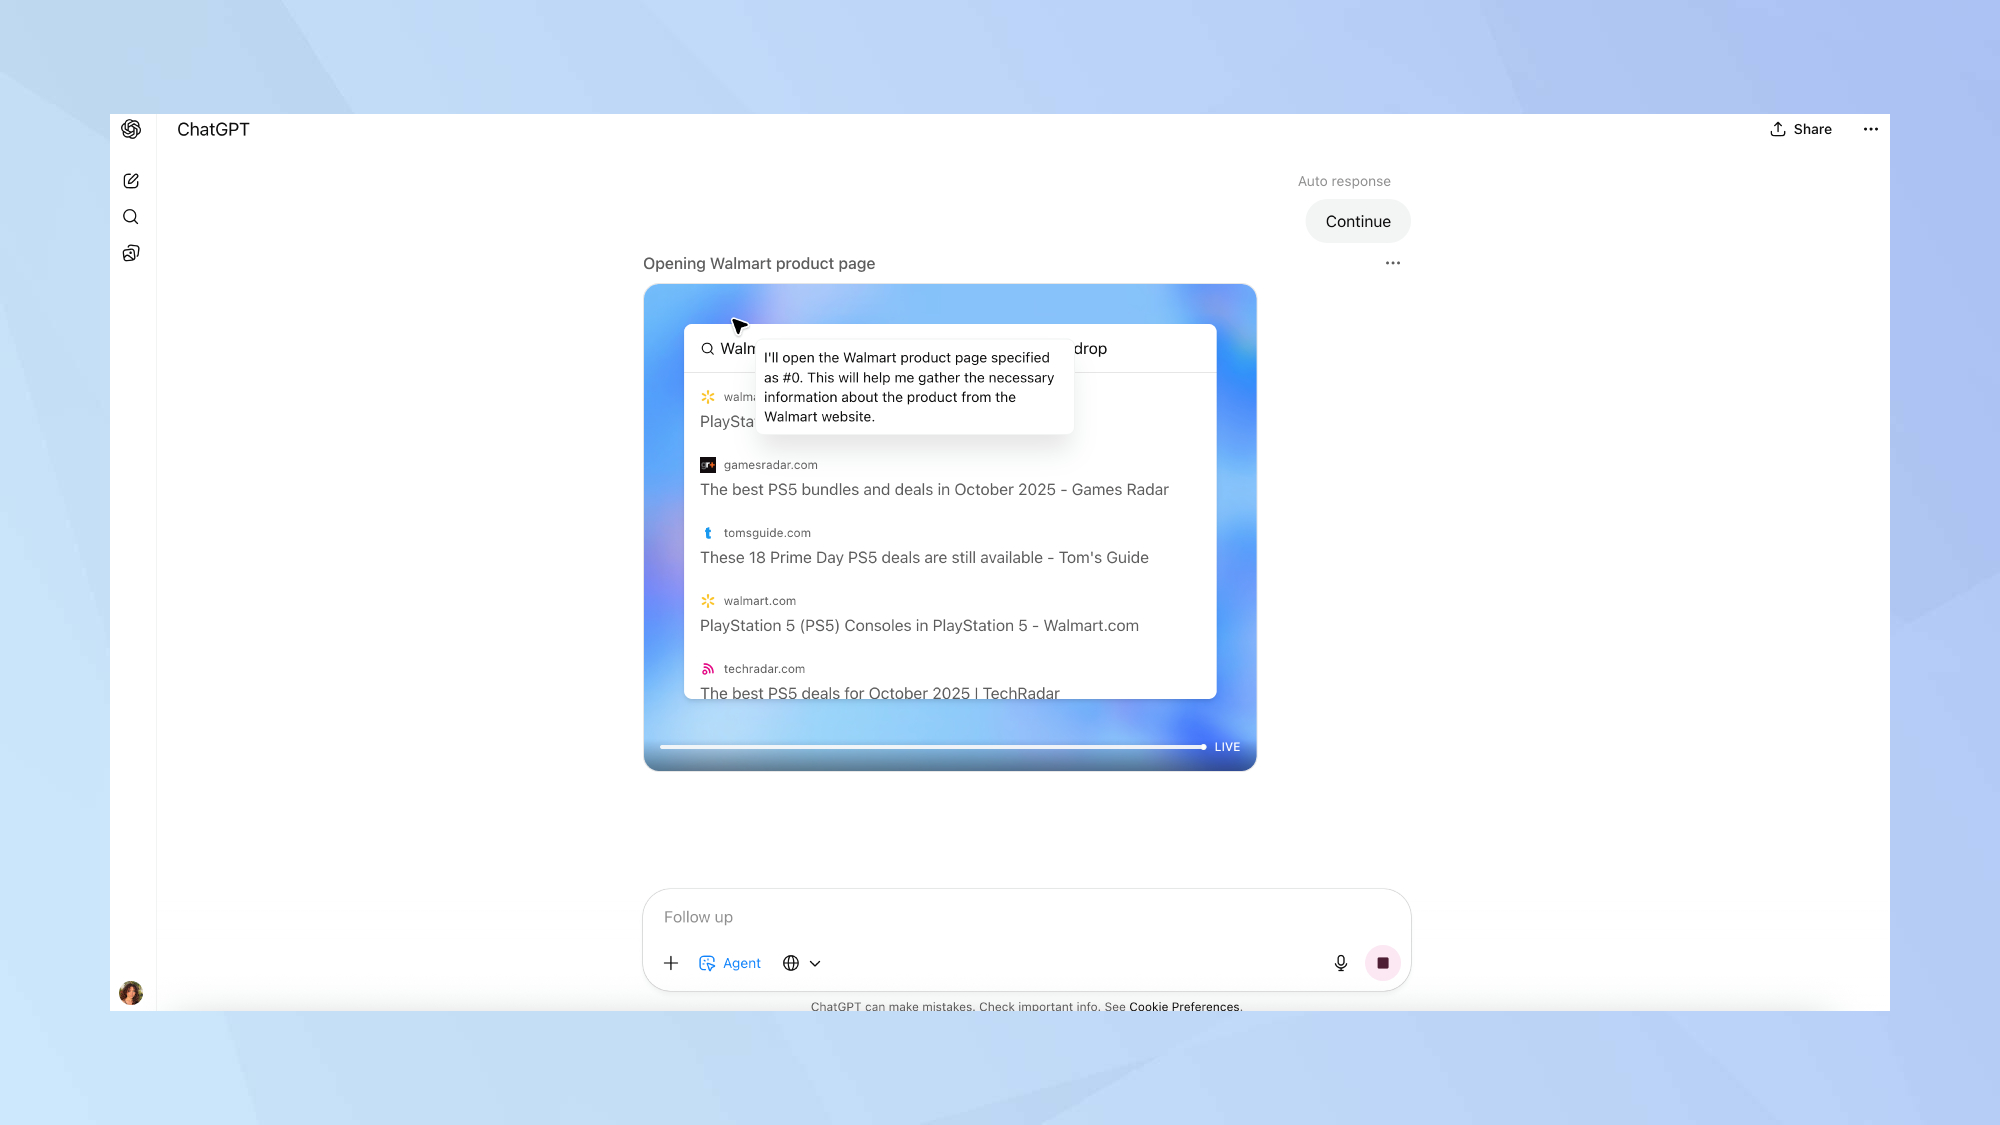
After setting up your agents, you can track their progress and make adjustments to improve their performance. Review completed tasks to ensure your agent is delivering the results you expect. And use this feedback to refine your instructions and make your agents more effective over time.
As you get comfortable with the results, you can create more specialized agents for different aspects of your work. Even with just two or three properly set-up agents, you can handle in minutes what used to take hours.
Follow Tom's Guide on Google News and add us as a preferred source to get our up-to-date news, analysis, and reviews in your feeds. Make sure to click the Follow button!
More from Tom's Guide
- Getting started using ChatGPT: everything you need to know
- ChatGPT Atlas is here — how to download for macOS now
- I use ChatGPT every day — here's 9 prompts I can't live without
Get instant access to breaking news, the hottest reviews, great deals and helpful tips.

Kaycee is Tom's Guide's How-To Editor, known for tutorials that get straight to what works. She writes across phones, homes, TVs and everything in between — because life doesn't stick to categories and neither should good advice. She's spent years in content creation doing one thing really well: making complicated things click. Kaycee is also an award-winning poet and co-editor at Fox and Star Books.
You must confirm your public display name before commenting
Please logout and then login again, you will then be prompted to enter your display name.
 Club Benefits


