
 Club Benefits


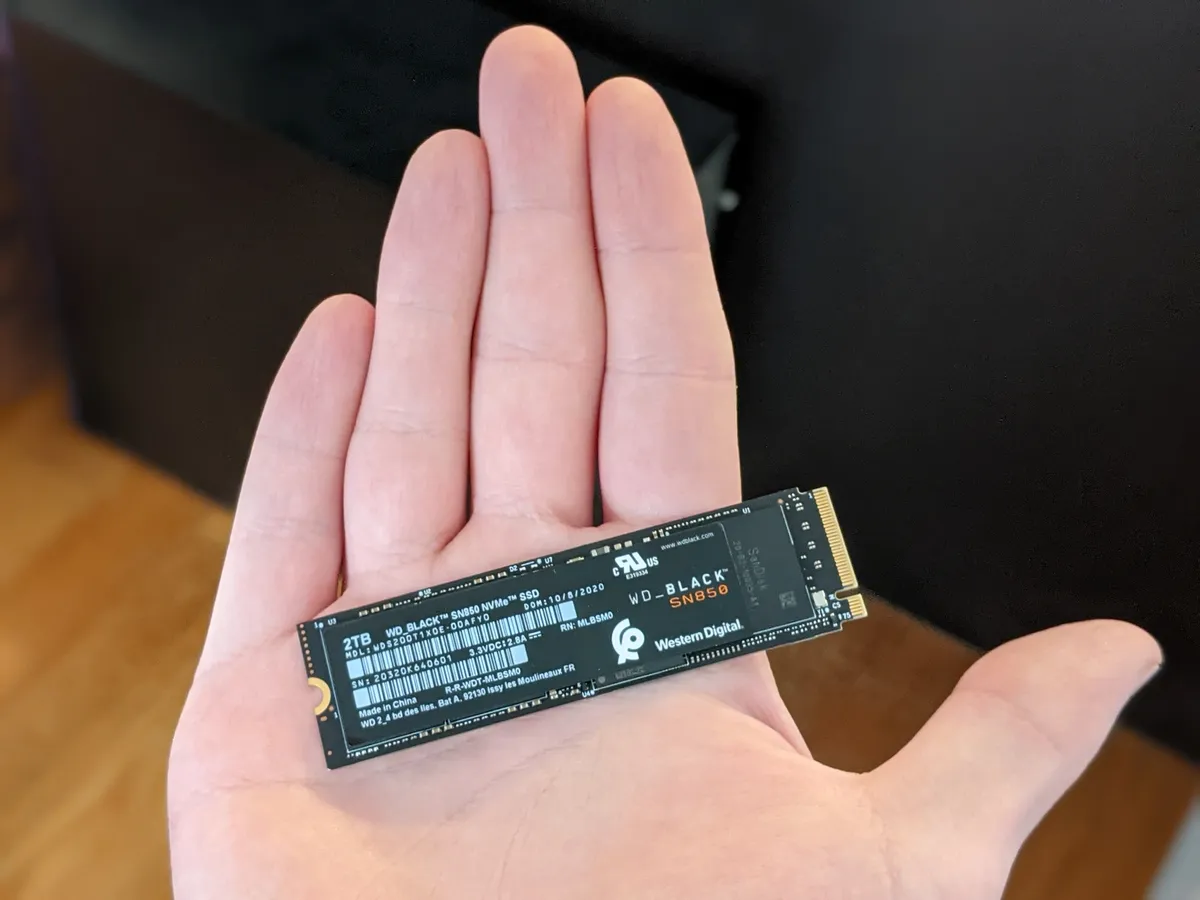
The M.2 SSD is a thing of beauty. While traditional SSDs still require lots of wires and physical space, an M.2 SSD is a tiny device that fits in the palm of your hand, and attaches directly to your motherboard. While these efficient little components don’t come cheap, they can help keep the inside of your desktop nice and neat. That means less clutter, which means more efficient airflow, which means better performance. Or, at the very least, fewer ways to cut your fingers when you install new hardware.
The even better news is that M.2 SSDs are ridiculously easy to install — provided you have the right tools and a little bit of patience. If you can afford one of these sleek storage units, your computer will load up files almost instantaneously for a long time to come.
- Play the best PC games
- Buy the best external hard drives
Before you begin
Before you purchase an M.2 SSD, you should check to make sure that your motherboard supports them. Most new motherboards do, but M.2s have only become common within the last five years. As such, if your PC is a few years old, you may have to stick with traditional SSDs instead. Consult your motherboard’s instruction manual, or look it up your model online. An M.2 slot is a small upraised connector that resembles a very skinny cable port. You’ll know it when you see it.

For the purposes of this tutorial, I used a WD Blue 1 TB SSD and a WD Black 2 TB SSD, both of which are now permanently installed in the Tom’s Guide test rig. Our test rig has an MSI Z490 Unify motherboard.
Also, you should clean your workspace, just as you would if you were building a new PC. Ground yourself on a metal object, and have a vessel to hold all the tiny screws you’ll need to manage during the installation process. You’ll need one Phillips head screwdriver with a very small head.

1. Crack open your PC.
This probably goes without saying, but still, let’s start at the beginning. Unscrew or unhitch the side of your case, and make sure you can access the motherboard.
2. Locate your M.2 slot.
If you followed my advice above and consulted your motherboard’s instruction manual, this part will be easy. Just be aware that your M.2 slot may be behind your GPU, as mine is on the Z490 Unify.

3. Figure out your heatsink situation.
Some M.2 SSDs come with heatsinks; some don’t. Some motherboards come with heatsinks for M.2 SSDs; some don’t. If you don’t have any heatsinks at all, consider buying some third-party models. Depending on what you do with your SSD, a heatsink may not be strictly necessary, but you can get a perfectly good model for $25 or less, and that’s an awful lot cheaper than a new SSD.
If your motherboard has heatsinks built in, you’ll need to remove one before you add an M.2 SSD. Just unscrew one and put it off to the side for now.

4. Add the M.2 SSD diagonally.
When you find your M.2 SSD slot, you’ll first have to remove a screw from its holder. Then, you’ll have to insert the SSD diagonally into the slot. There’s only one way it fits, so if it’s not going in properly, you probably have it upside-down. This is the trickiest part of the whole process, since the object is to put the drive in diagonally now, and push it down later. But if you give the M.2 a firm push, you should be able to find the proper angle easily. Just don’t press it down yet.

5. Screw the M.2 in place.
Remember that screw you just took out? Screw it back in, using it to secure the M.2 SSD in place. (The M.2 drive has a small semicircular hole, so you’ll see exactly where the screw goes.) As long as everything’s in place, the SSD should make a satisfying “click” once everything is tightened. If it doesn’t, just unscrew and try inserting the M.2 again.

6. Add the heatsink.
Now you’ll want to add the heatsink on top of your SSD. (Remember to remove the protective tape first; it sort of defeats the purpose if you don’t.) The exact process varies, depending on what kind of M.2 and heatsink you have, but generally speaking, you’ll want to press the heatsink down on top of the M.2 firmly, then screw it in place.
7. Get your computer hooked up.
You don’t necessarily want to close your computer at this point, in case you need to tinker with the hardware while troubleshooting. But you do need to get it up and running; the physical installation is now done.

8. Name and format your new drive.
From here, you need to format your new SSD and assign it a letter in Windows. There are a variety of ways to do this, depending on whether you feel more comfortable with built-in Windows programs, or the command prompt, or a Windows 10 installation USB. Simply choose to boot from the USB in BIOS, and follow the prompts.
If the M.2 is your primary drive, I recommend using a Windows 10 installer USB to get your OS up and running from scratch. If the M.2 is your secondary drive, you can use the Disk Management option in Windows to allocate space and format the drive. Just right-click your new drive and select New Simple Volume. Windows will walk you through the rest of the steps.
And that’s all you have to do! Your computer is now running off of an M.2 SSD, which is one of the fastest, most reliable forms of storage out there. The difference in load speeds is particularly noticeable in high-end video games, so feel free to give those a try, if your GPU is up to it.

