I tested the iPhone 15 Pro cameras for a week — 5 features I love
Some awesome upgrades over my old 14 Pro
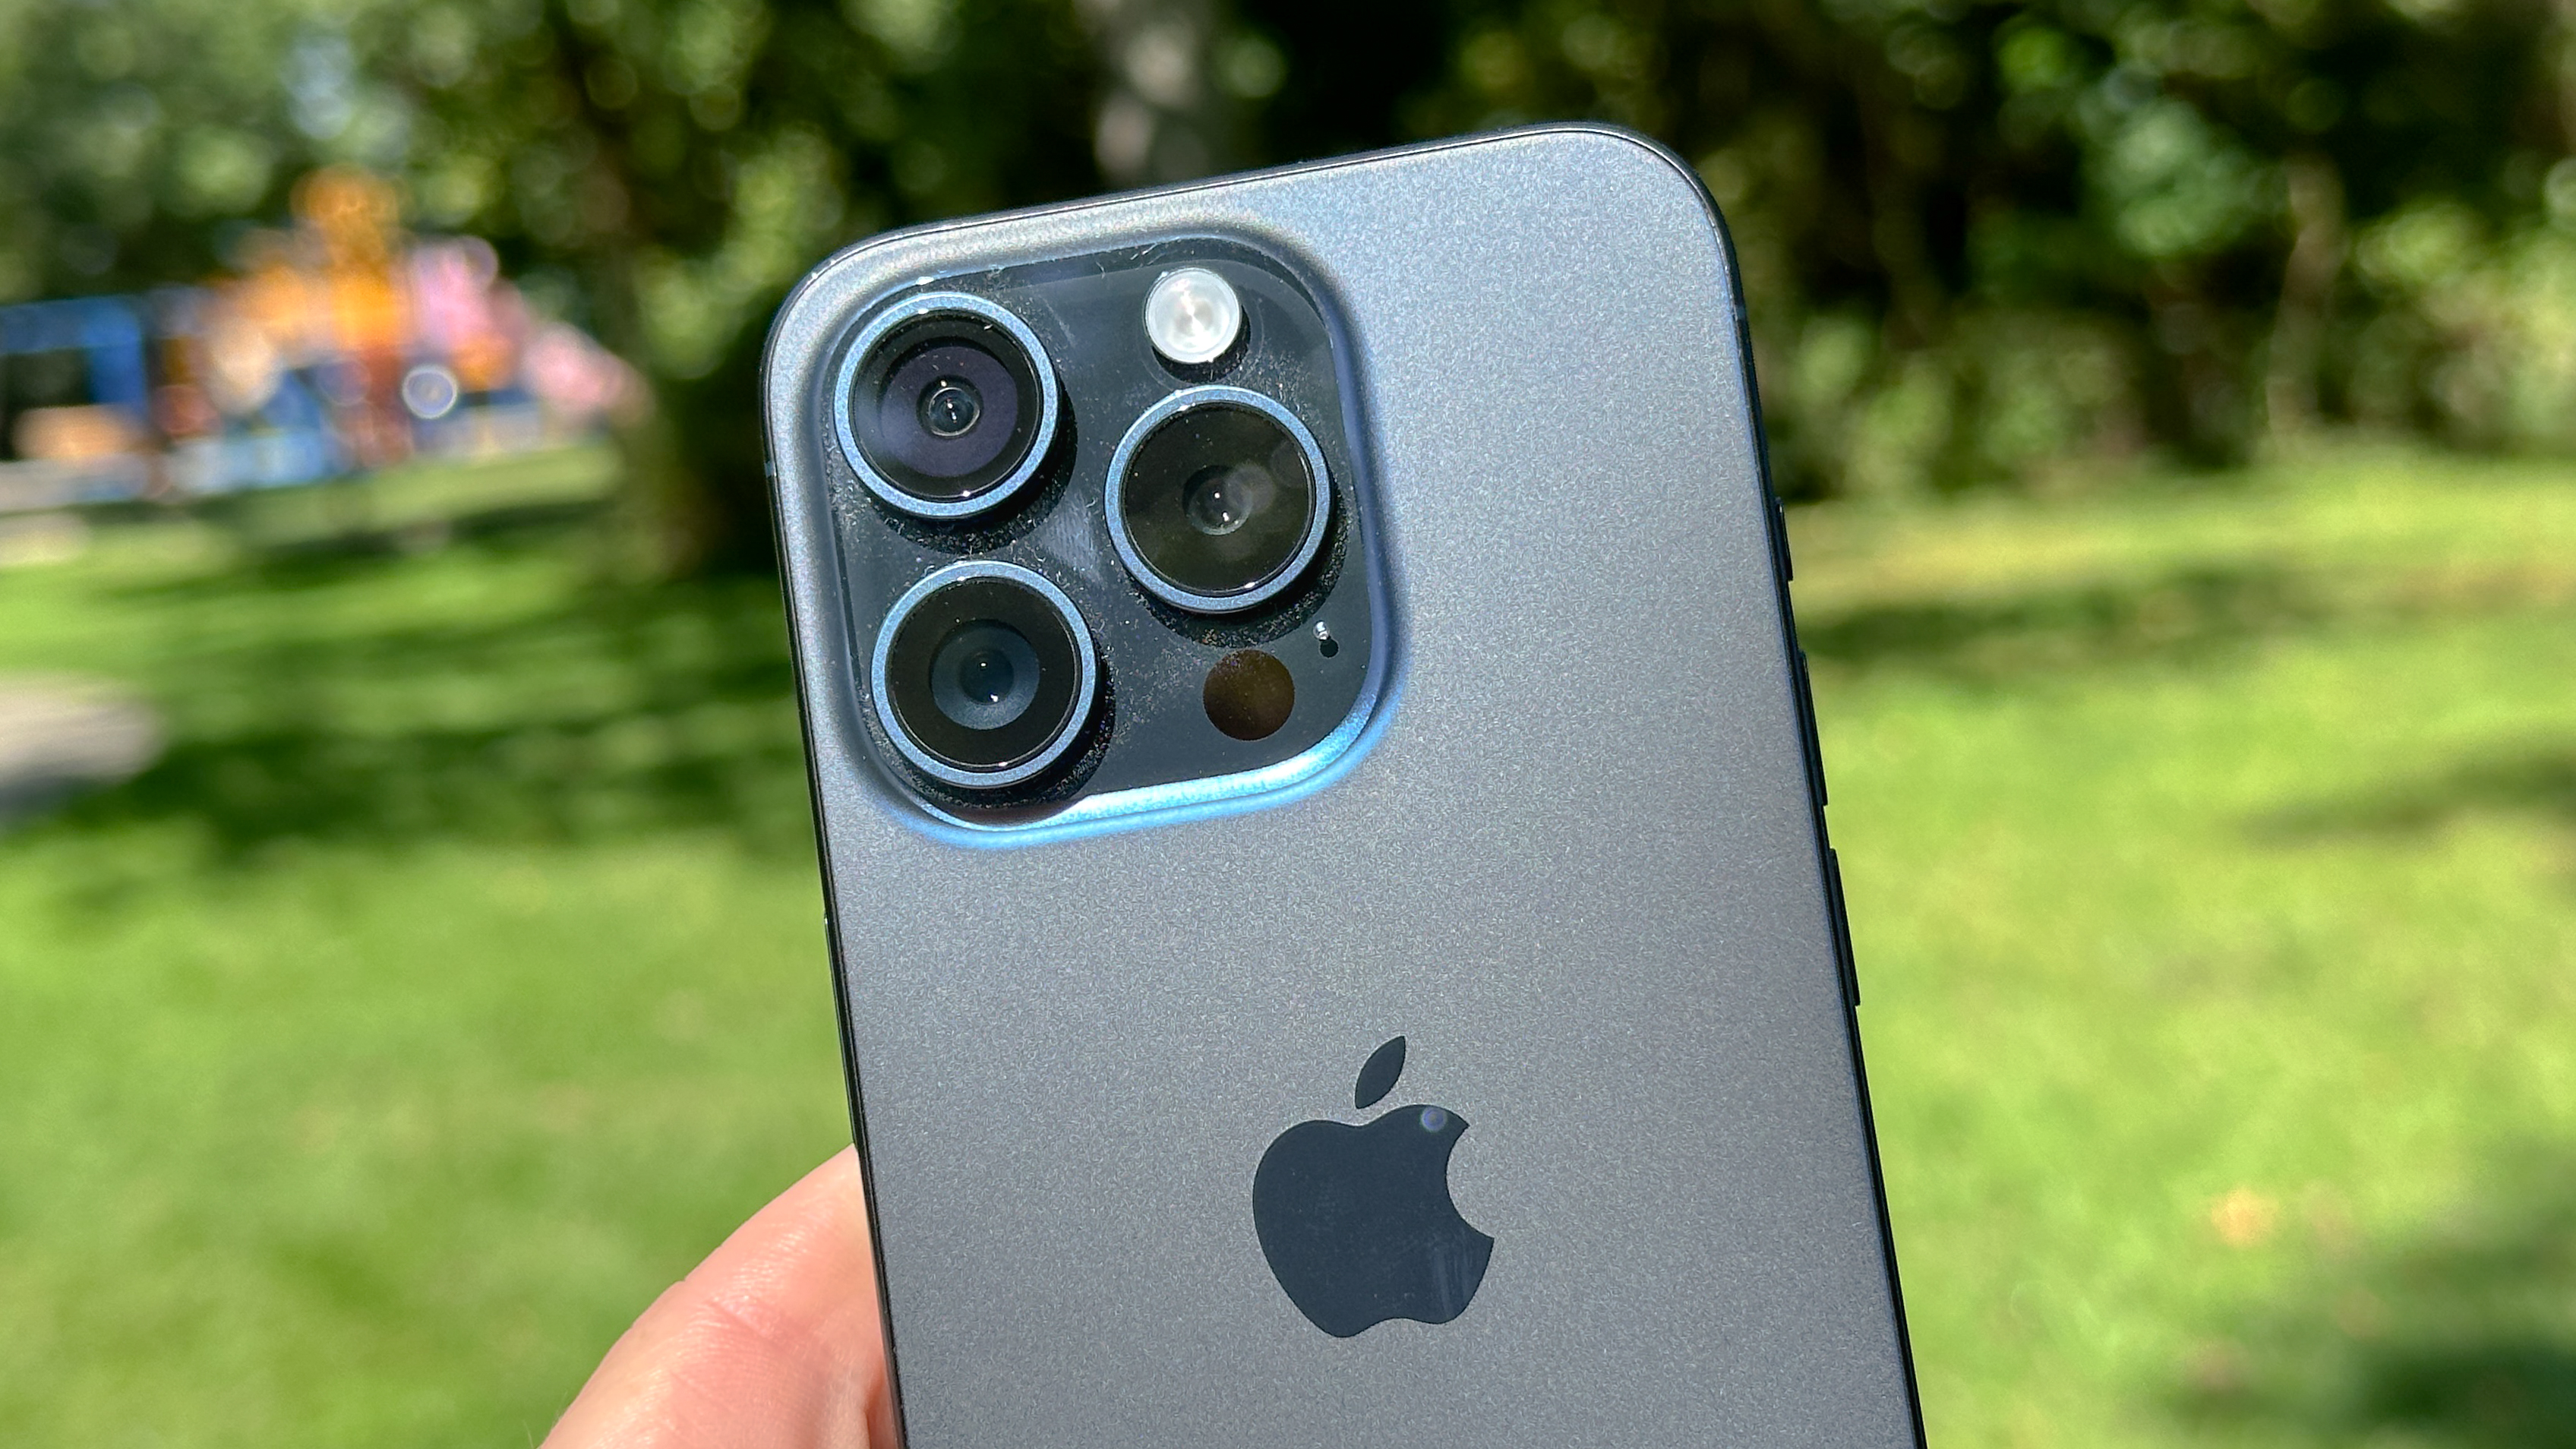
Last Wednesday, my iPhone 15 Pro arrived. After getting it all set up, the first thing I wanted to do was try out the camera and its new features.
Half of my role here at Tom's Guide is as the Cameras editor, which involves testing out some of the best cameras around, from mirrorless beasts like the LUMIX S5IIX through to dinky action cameras like the DJI Osmo Action 4. As such, the thing I care about most in my new iPhone is its camera performance.
Now, it isn't like my previous phone, the iPhone 14 Pro had a bad camera. In fact, the iPhone 15 Pro has the same sensor as the old model. However, with every iPhone release there's usually a slew of new camera features to peak the interest of nerds like me. And the iPhone 15 Pro is no exception.
Granted, there are only a handful of standout new features with the latest model. But I genuinely think there's some really useful iPhone 15 Pro camera features that make this a better camera phone than its predecessor. And these are my five favorites after a week of testing.
1. Change focus point after you shoot
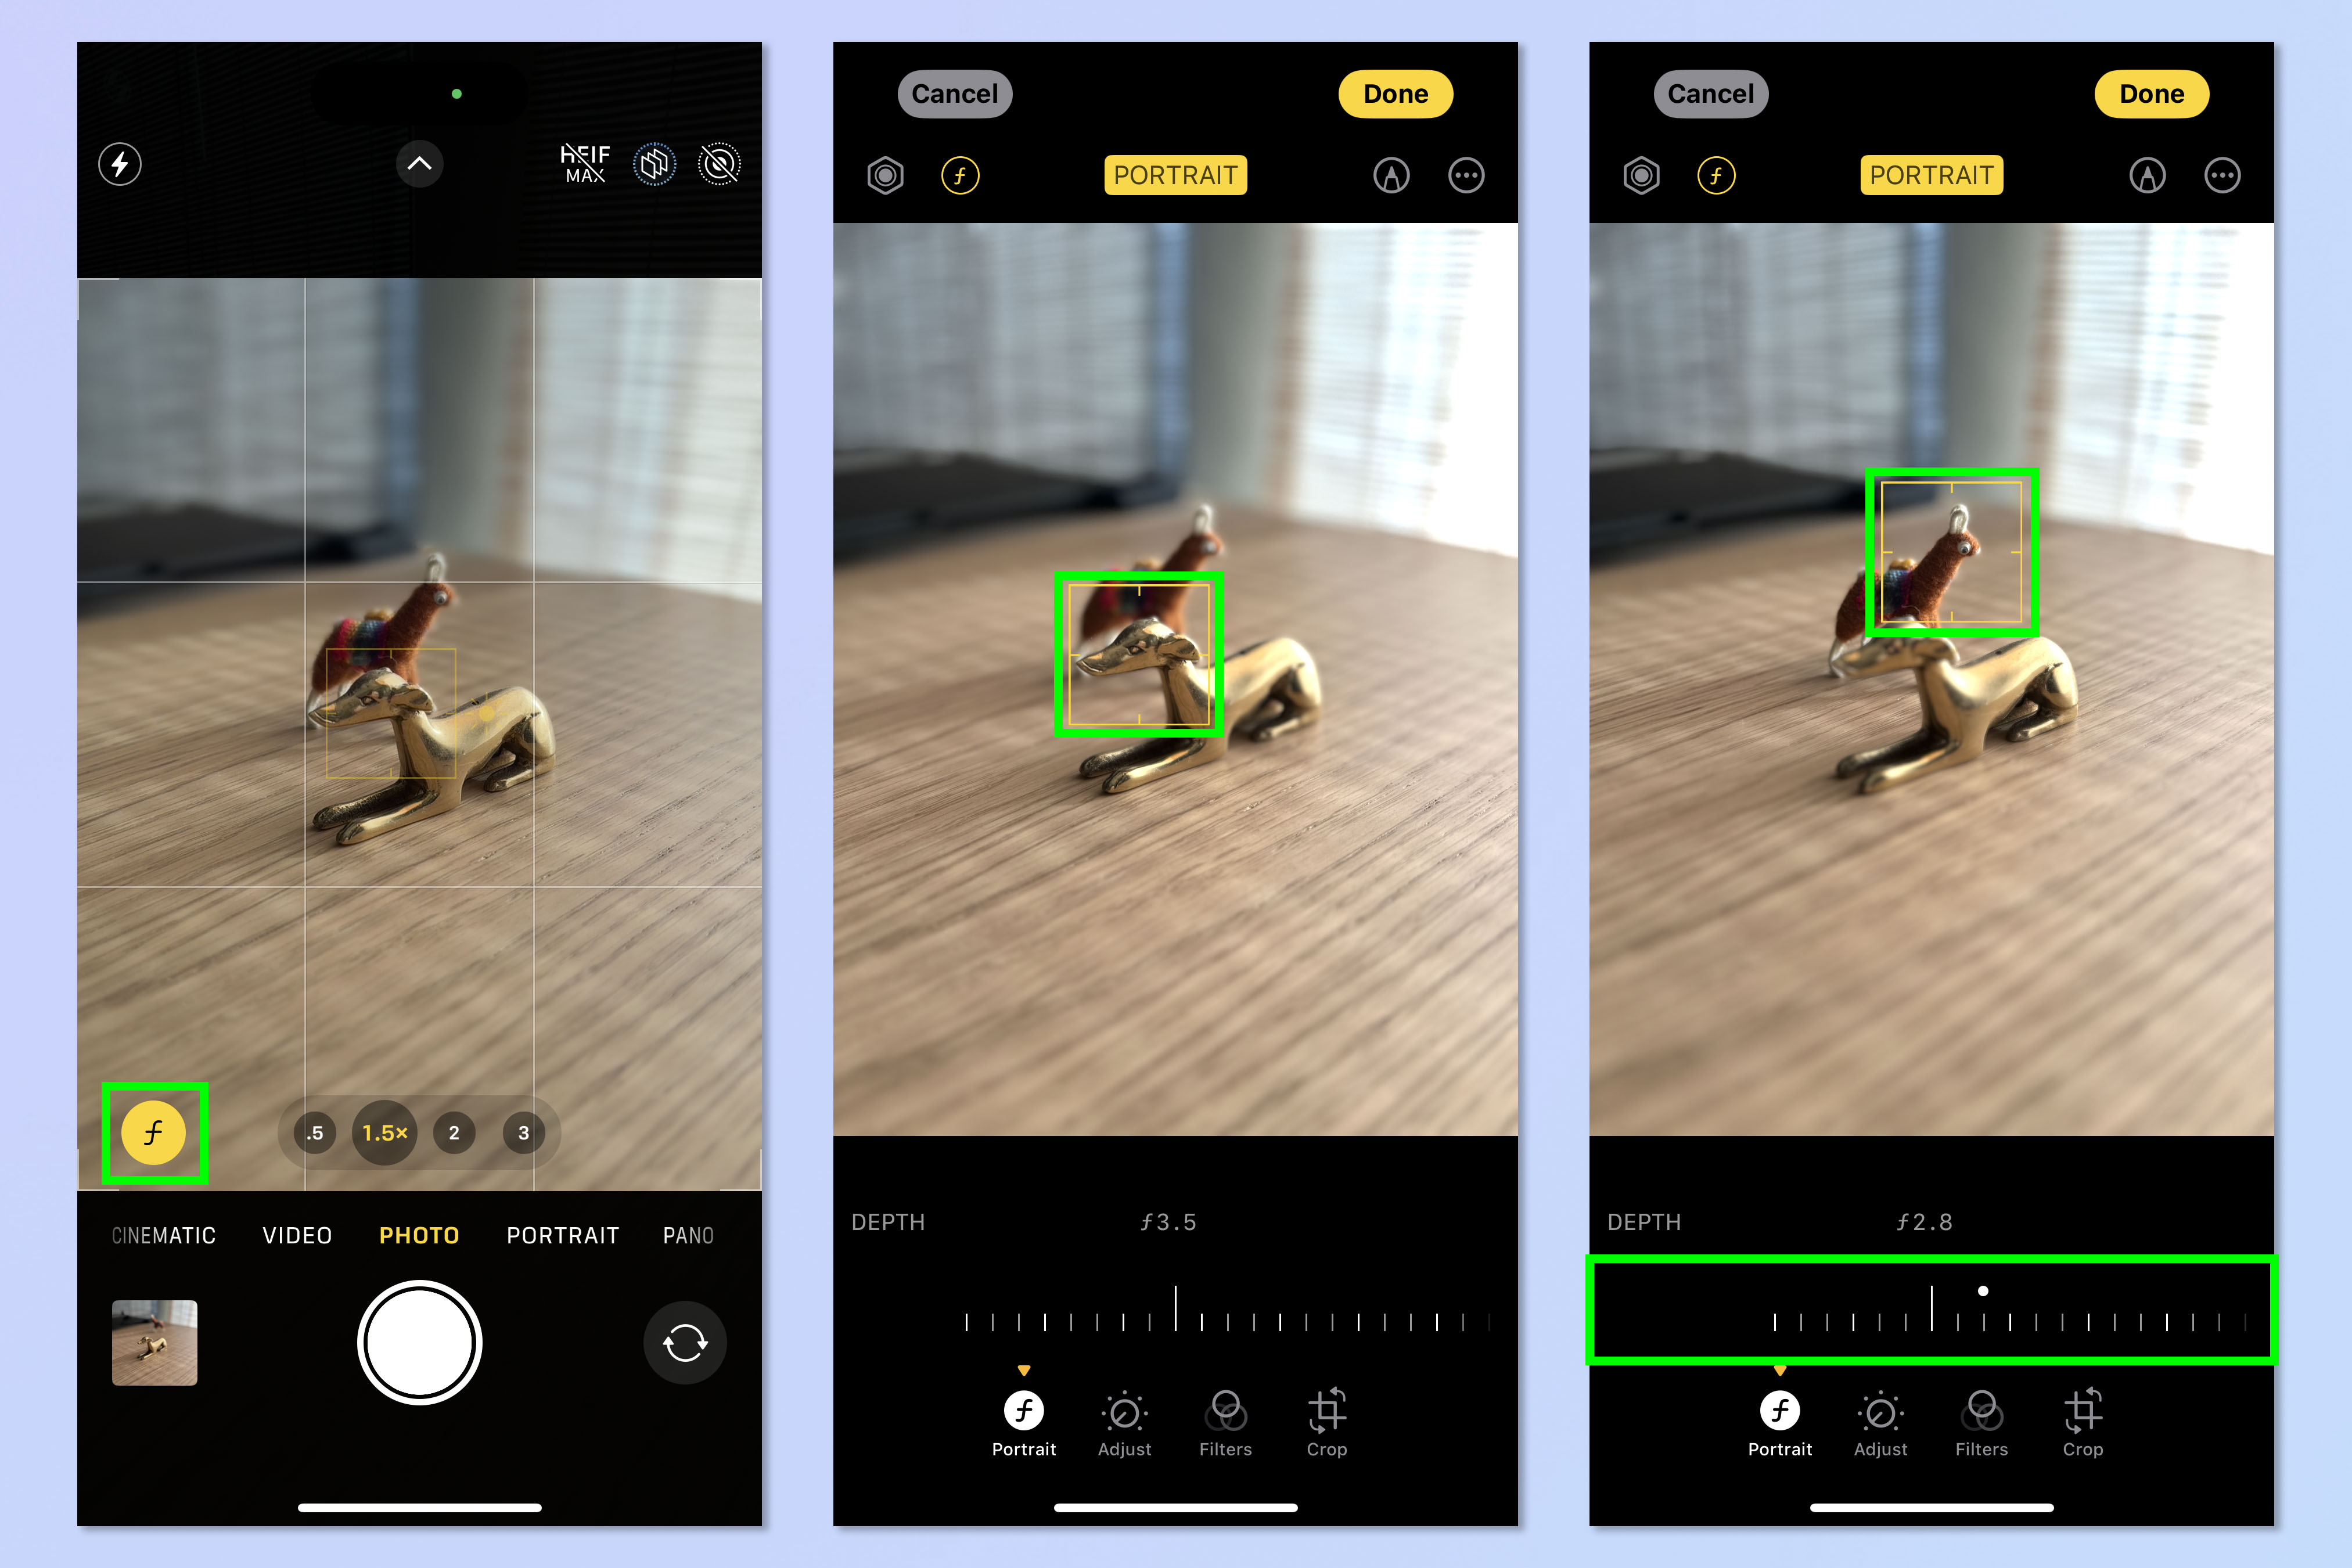
This is hands down my favorite feature of the iPhone 15 Pro. You can now take a photo and retrospectively choose the focal point. That means if you missed focus or if you'd rather the focus was on something else, you can simply change it. As a photographer, I've missed focus on loads of occasions during my time, which this fixes. You can also change the depth of field to bring more or less things into focus than when you took the photo.
Now, with a full-sized camera and lens, you can't do any of this — the focal point is set when you take the photo, while the depth of field is controlled by the physical aperture of the lens, which again is fixed when you press the shutter.
Instead, this feature utilizes Apple's software produced blur, which has been around for a while now in Portrait mode. Historically, it hasn't looked that good to those with a photographic eye, with the blur just not looking quite right and bleeding into areas it shouldn't. It must be said though, that the artificial blur has got a lot better now, and besides, this is such an awesome feature that I'd use it regardless of the quality of the blur.
It's also cool to now be able to use the (artificial) depth of field controls in standard Photo mode, not just Portrait mode.
To use this feature, tap the f button in the Camera app and take a photo. Now open the image editor and tap the screen where you'd like to change focus to. Scroll the f dial to change the depth of field (amount of blur).
2. Swap default primary focal length
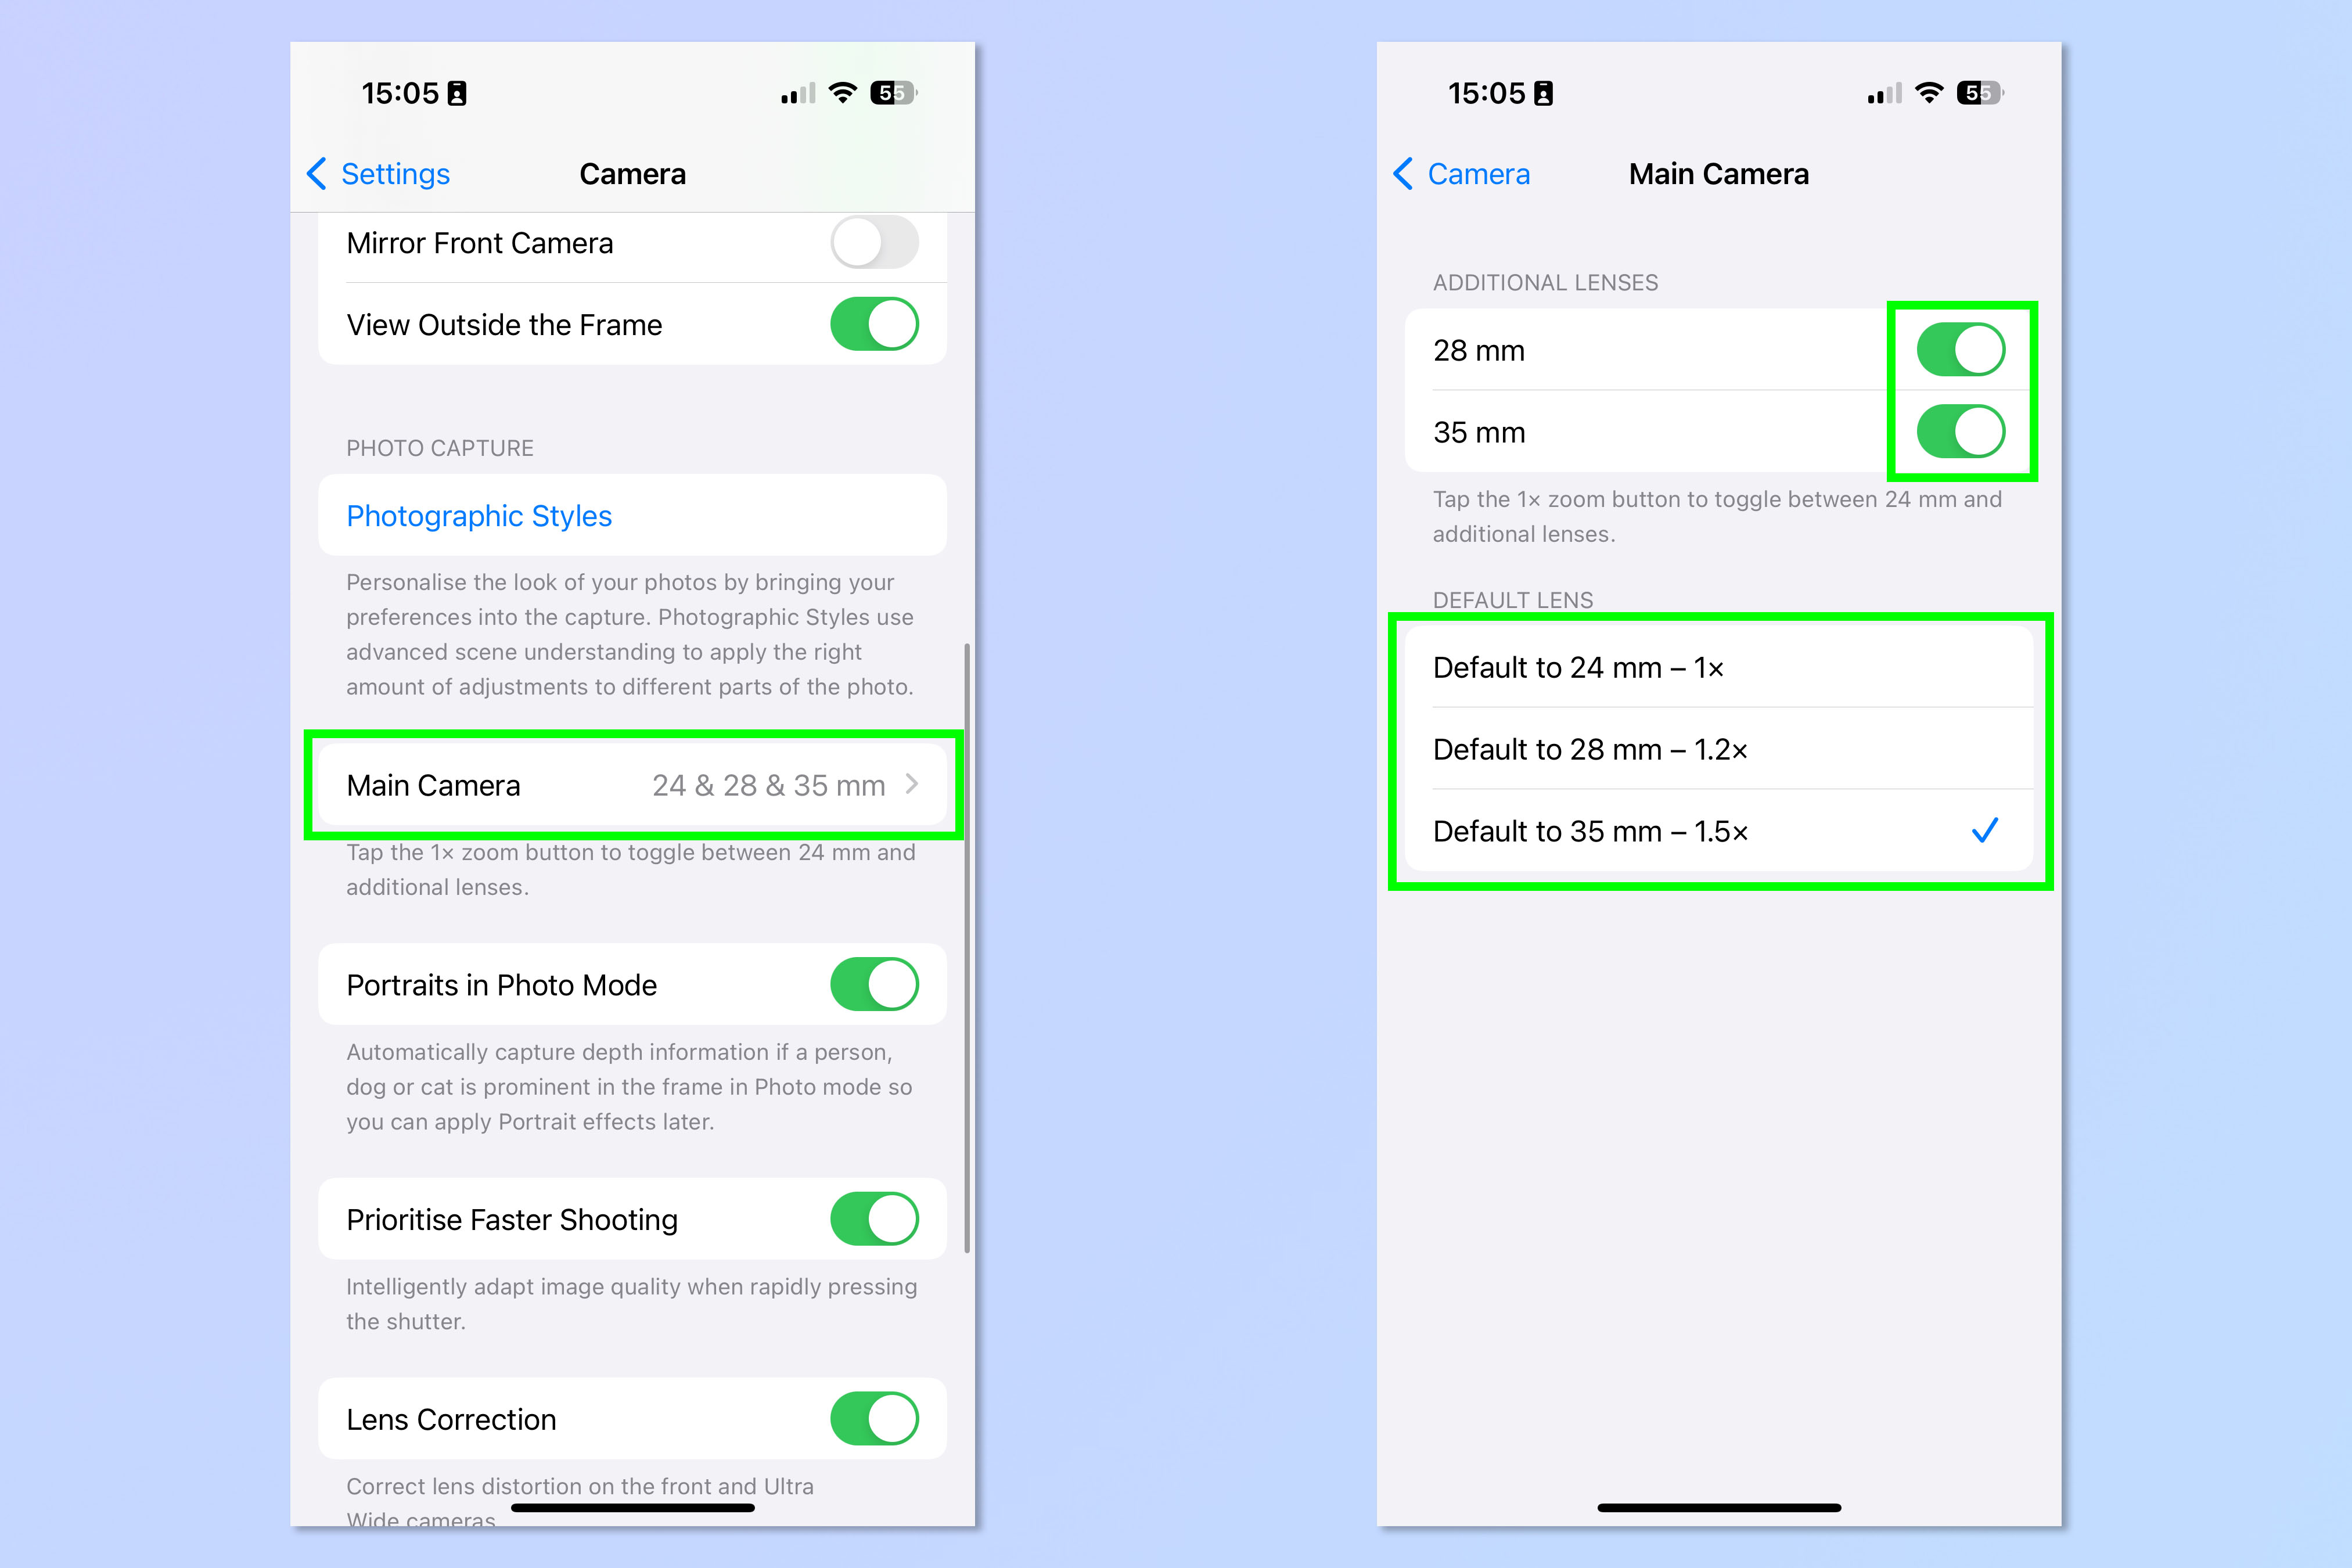
The iPhone 15 Pro gives users the ability to change between three default "lenses". What that actually means is that you can change the zoom that the main lens defaults to. You aren't actually swapping any lenses, but this is still a cool feature despite the inaccurate terminology.
If you, like me, aren't a huge fan of wide angles and prefer a more standard angle like 35mm, this means you can set your camera's default focal length accordingly and not need to zoom every time you want to take a photo. This could help you get shots more quickly that you might've previously missed by fiddling around with the zoom settings.
To change default focal length, open the Settings app and tap Camera. Now scroll down and tap Main Camera. Ensure both of the top two toggles are green and then select a focal length at the bottom.
Full guide: How to switch lenses on the iPhone 15 Pro
3. 48 MP HEIF photos
While the iPhone 14 Pro could technically take 48MP photos, they weren't very usable. You could only take 48MP in the ProRes RAW file format. While I'm a big fan of shooting in RAW photos for my "proper" camera photography, I rarely shot in RAW on iPhone, as I tend to use my phone for quick snaps and therefore rarely bother editing them in Lightroom later down the line. What's more, those ProRes files were annoying to handle — getting them off your phone in their raw state was a pain. As such, I barely used the full 48 megapixels of the sensor.
The iPhone 15 Pro features 48MP HEIF files. HEIF files are compressed, so they don't offer the same benefits as RAW files when it comes to exposure adjustments in post.
However, HEIF images are smaller in file size and Apple hasn't made them difficult to get off your phone like ProRes files. As such, you have access to more usable high resolution images. If you're not editing your iPhone images, this is great!
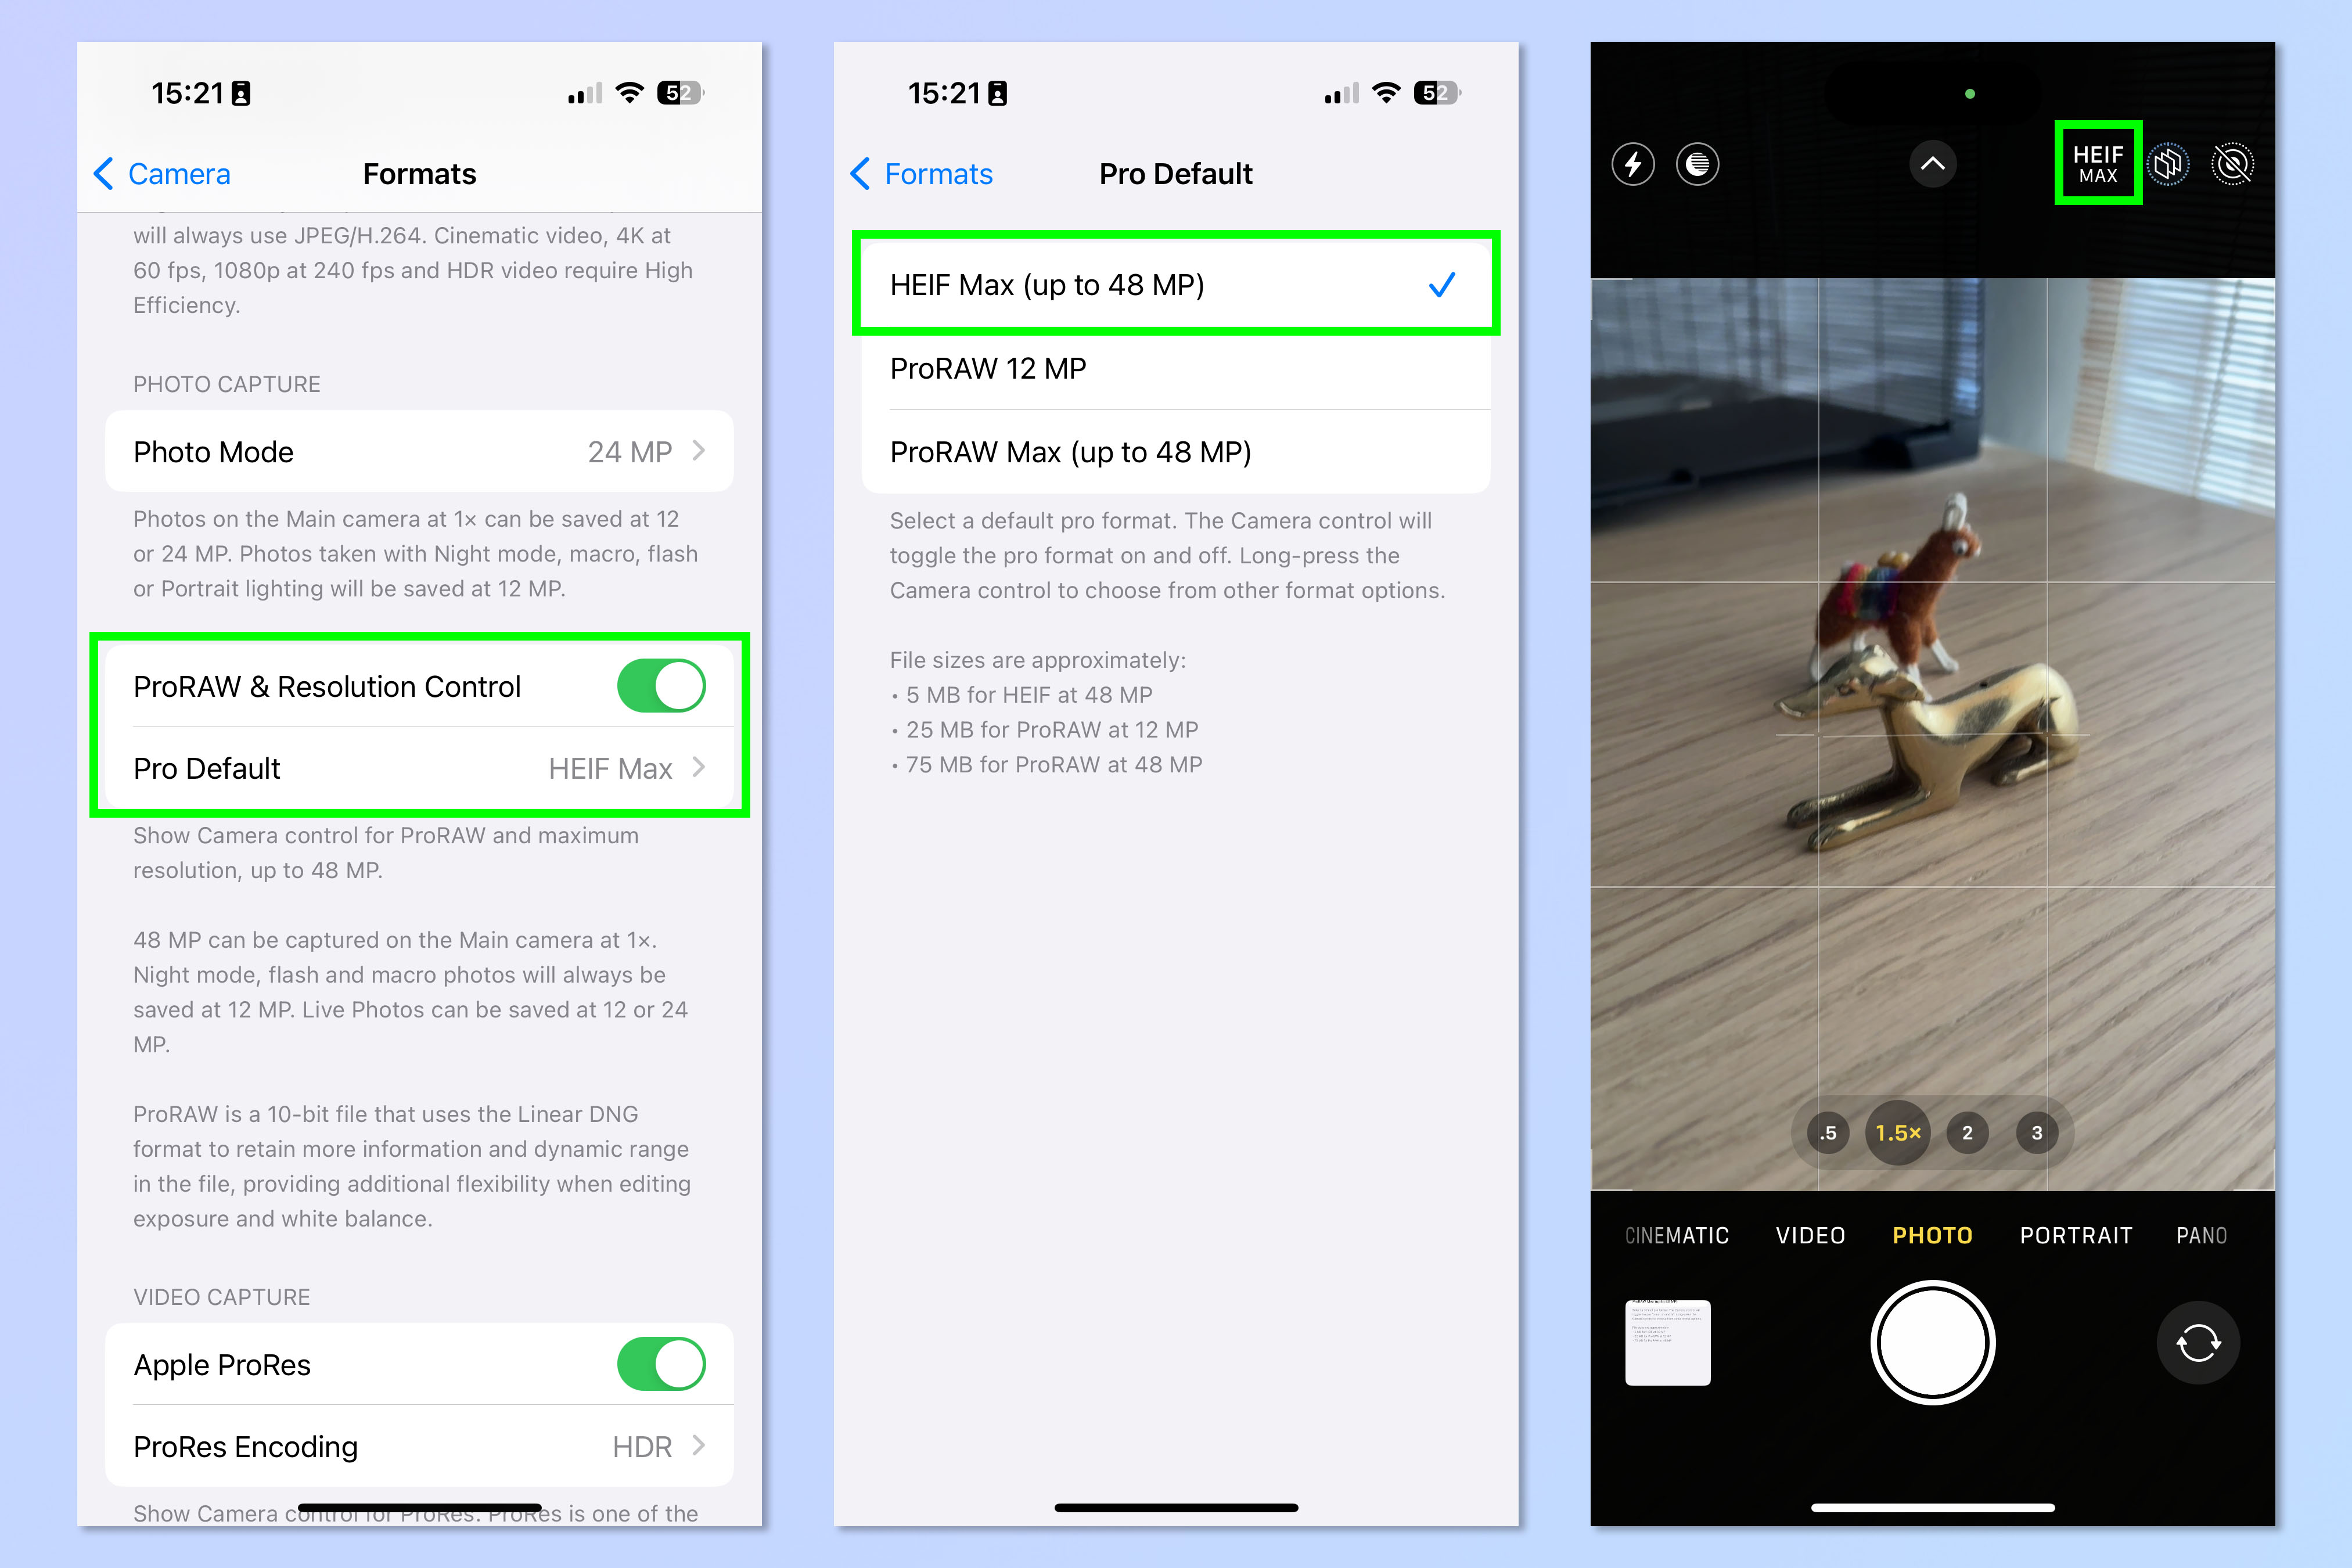
To enable HEIF 48MP images open the Settings app and tap Camera. Now select Formats and tap High Efficiency at the top. Scroll down and toggle on ProRAW & Resolution Control, then tap Pro Default. Now tap HEIF Max, then open the Camera app and tap HEIF MAX at the top.
Full guide: How to enable 48MP MAX photos on the iPhone 15 Pro
4. Action Button camera shutter
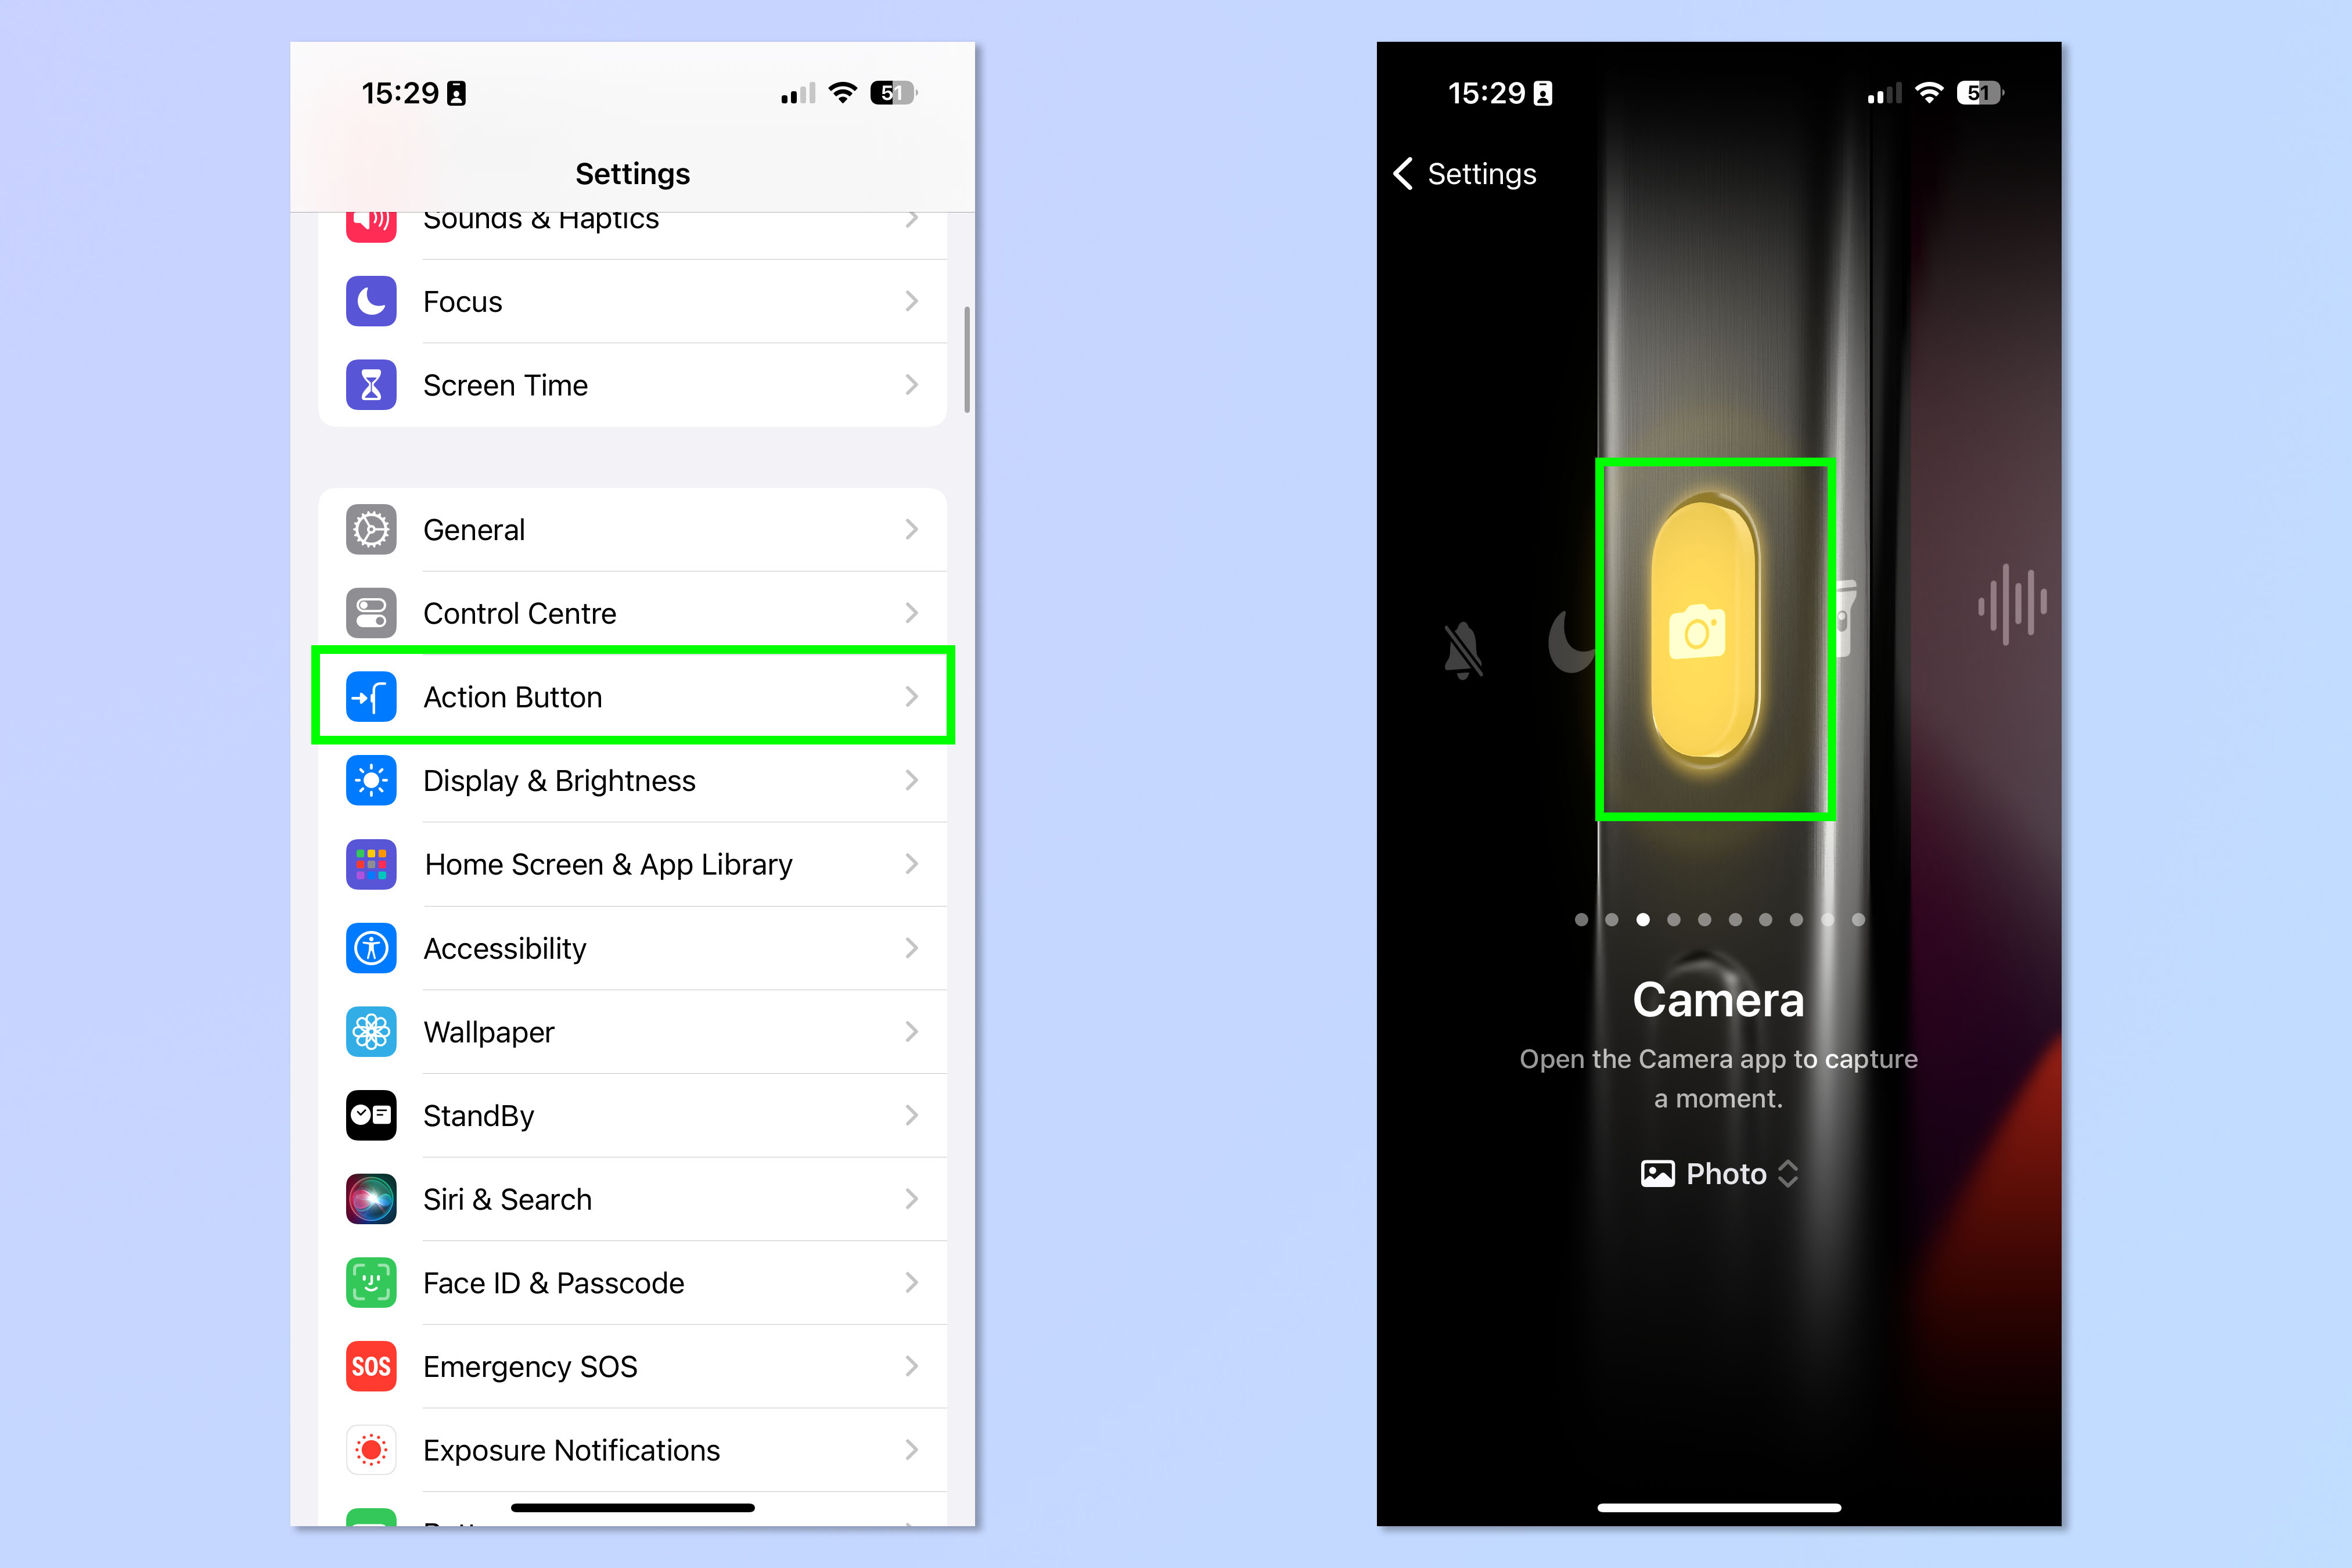
One of iPhone 15 Pro's headline features is the Action Button, which can have a range of functions assigned to it. One of those, of course, is the Camera, which I have set up to open via a long press of the Action Button.
Now, I'd forgive you for thinking this is a little redundant, as of course you could already open your Camera from the lock screen with a screen button. However, I find nudging the Action Button quicker than raising my phone and long tapping the screen. I also find it useful as a super quick way to access the camera when the phone is already unlocked.
What I love most about this feature, though, is that after the camera has opened, the Action button then functions as the shutter/record button. That means you can rapidly open the camera, keep your finger where it is and start shooting immediately. All of these small time savings may help you get a shot you might otherwise miss.
To set this up, open the Settings app, select Action Button and swipe to Camera. Now long press the Action Button to open the camera and either short press the Action Button to take photos or long press the Action Button to start video recording.
Full guide: How to set up the iPhone 15 Pro's Action Button
5. Zoom context panel
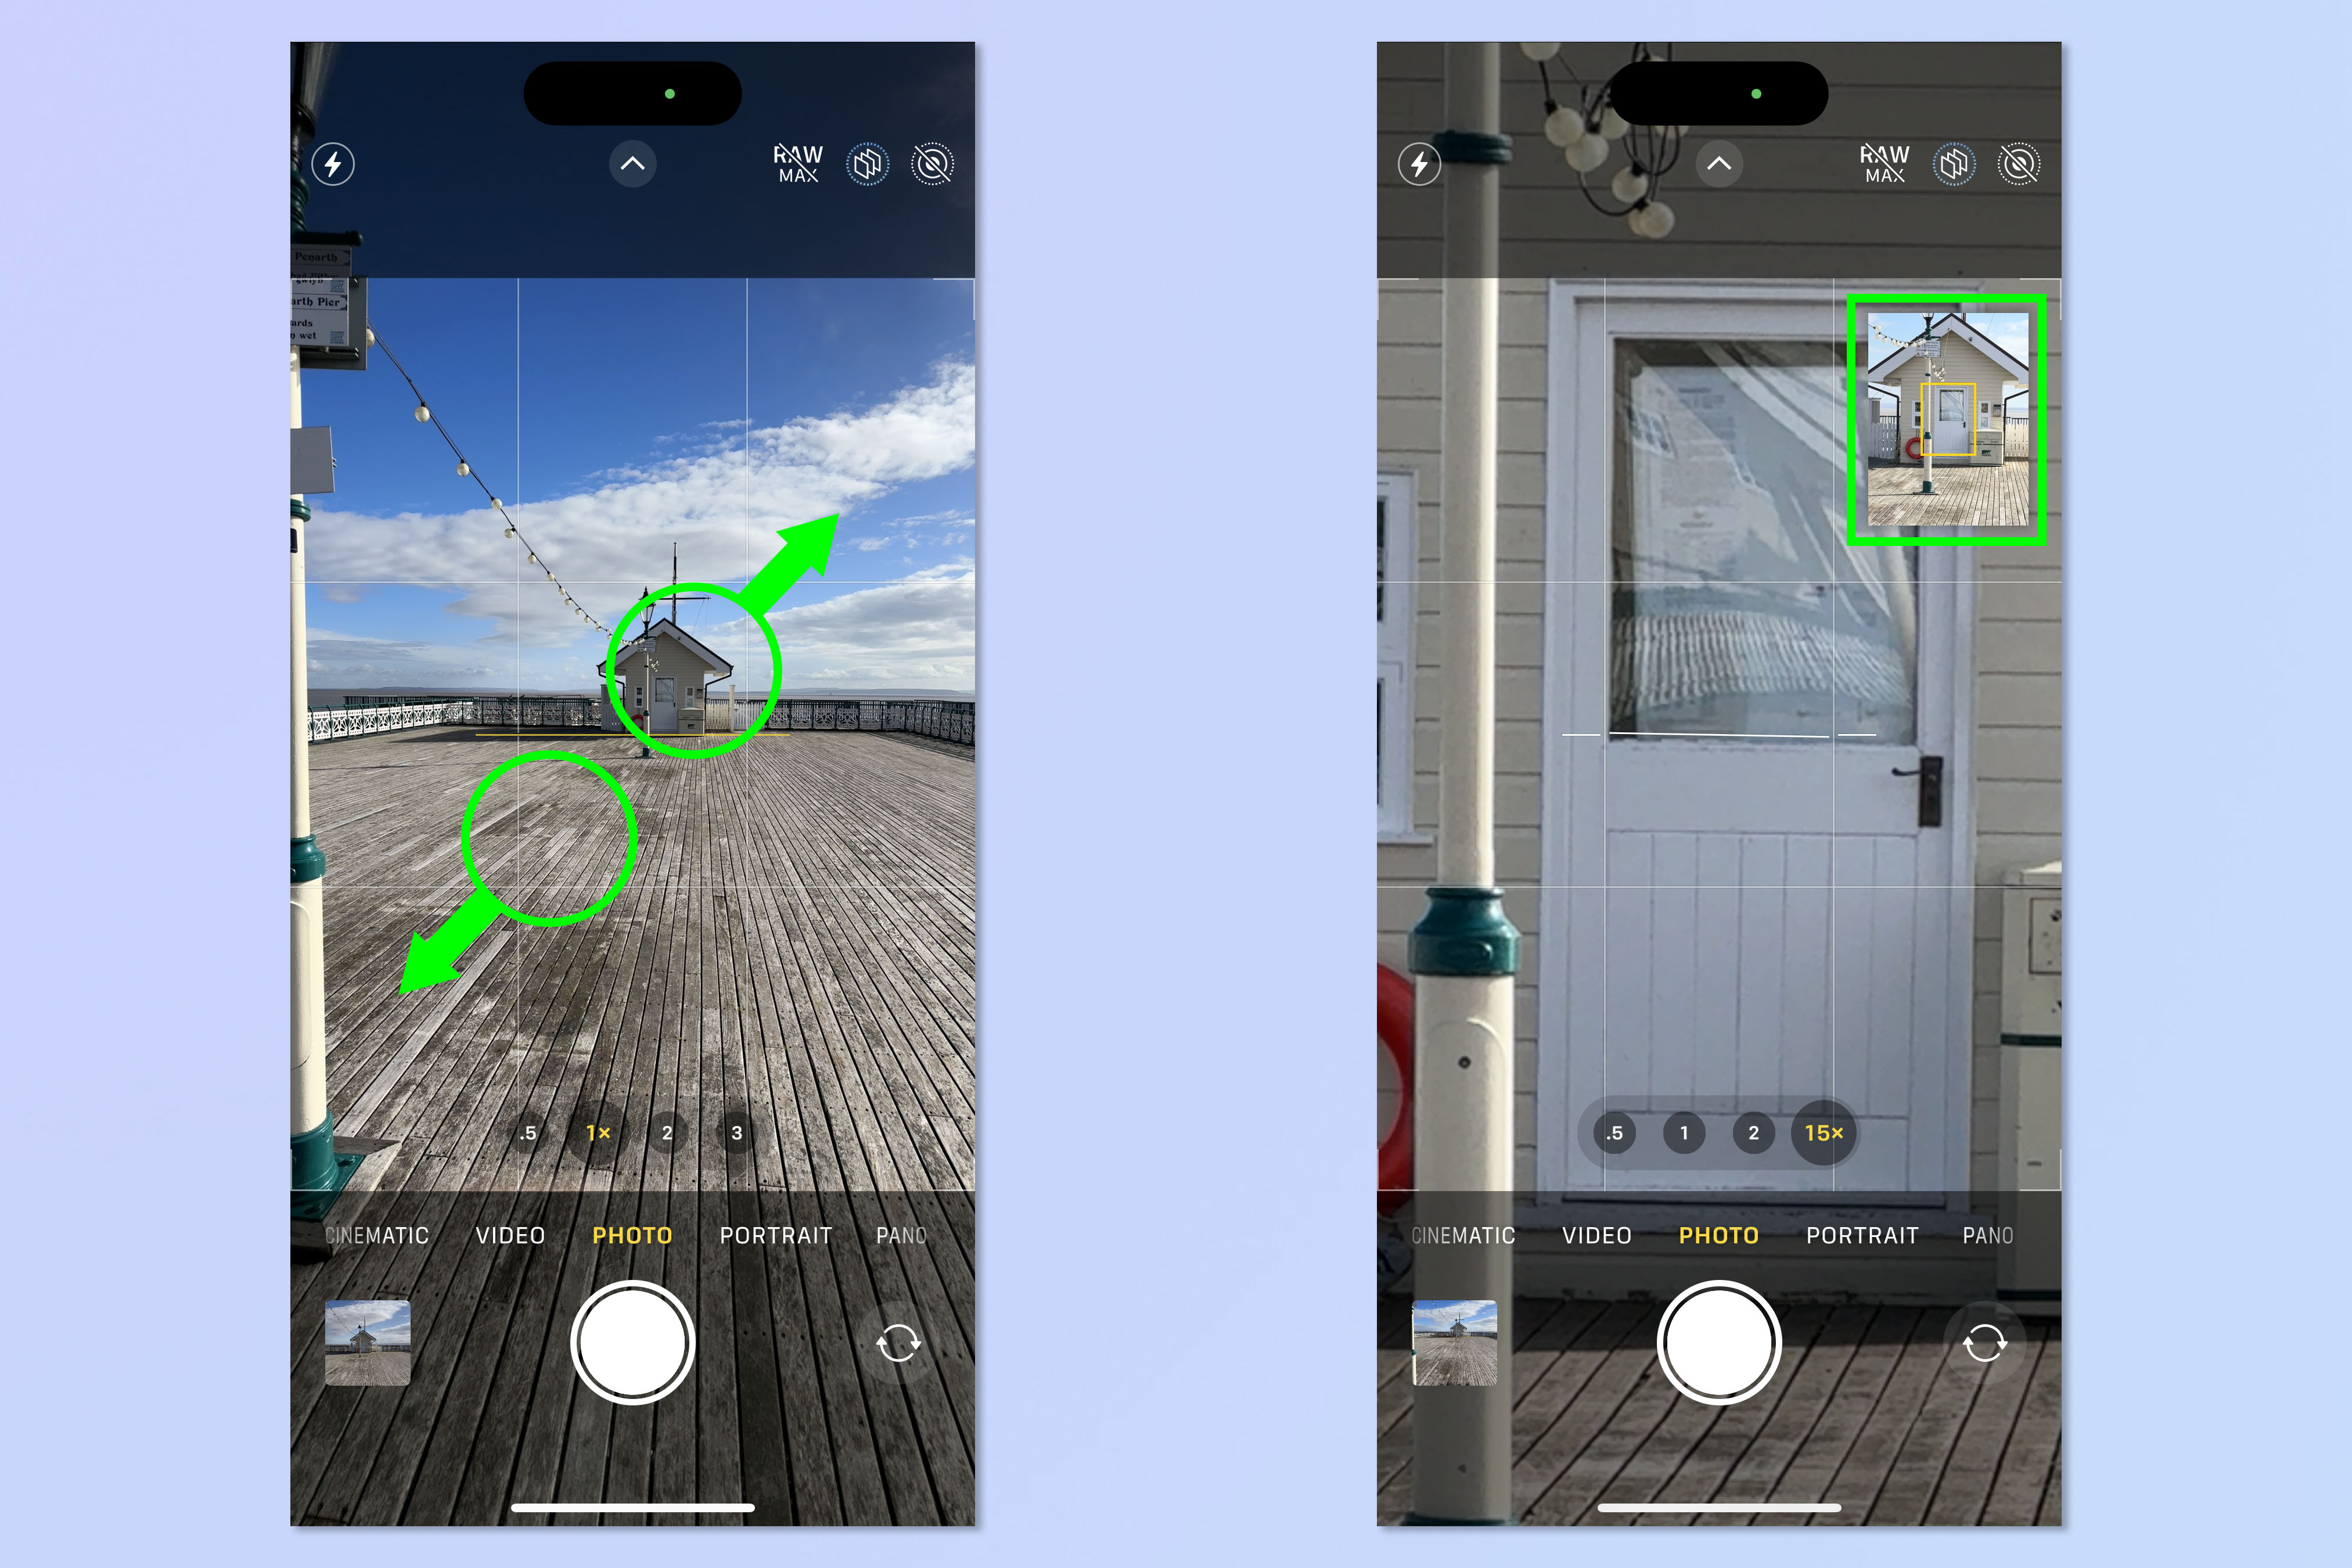
This is a small feature, but it's one that I really like, as it shows a high level of attention to detail. The iPhone's telephoto camera has a pretty long digital zoom length, being able to zoom in 15x.
Naturally, at long zooms like that, it's easy to get a little disoriented as to where you've zoomed into in relation to your original framing. It can be especially disorienting if you've zoomed into the wrong bit, or if you've moved the camera and are trying to figure out where in frame you've ended up.
With the iPhone 15 Pro, Apple has given users a zoom context panel, which is essentially a small window showing the whole image, with a yellow box denoting where you're zoomed in frame. Pretty handy.
To enable this feature, simply zoom into a photo by pinching out on the screen. Once you get past 8x zoom, you'll see the context panel pop up in the top right.
Next up, check out our guide to the iPhone 15 exclusive features you need to know. If you shoot video on your iPhone, you might also be interested in learning how to shoot Log video on iPhone, to capture a wider dynamic range in your footage, and how to lock white balance on iPhone, so you have a consistent look throughout takes.
Get instant access to breaking news, the hottest reviews, great deals and helpful tips.

Peter is a Senior Editor at Tom's Guide, heading up the site's Reviews team and Cameras section. As a writer, he covers topics including tech, photography, gaming, hardware, motoring and food & drink. Outside of work, he's an avid photographer, specialising in architectural and portrait photography. When he's not snapping away on his beloved Fujifilm camera, he can usually be found telling everyone about his greyhounds, riding his motorcycle, squeezing as many FPS as possible out of PC games, and perfecting his espresso shots.
 Club Benefits


