How to set up parental controls on an iPad — everything you need to know
Discovering how to set up parental controls on an iPad will give you greater peace of mind
When you know how to set up parental controls on an iPad, you can rest a little bit easier when your child is using the tablet. Since there are many ways of potentially exposing kids to content that you would rather they didn’t see or hear, being able to alter settings to make the device more kid-friendly becomes pretty much essential.
As well as limiting the amount of time a child should spend on the iPad, you need to take into account the apps they will use, the websites they will browse and the streaming services that they will not doubt become drawn to. You need to ensure children can game safely, especially with titles that allow players to communicate with each other.
It’s also important they don’t rack up big bills on your account.
So let’s check out how to set up parental controls on an iPhone which you can do in tandem with the best parental control apps, if you wish.
Set up Screen Time on iPad
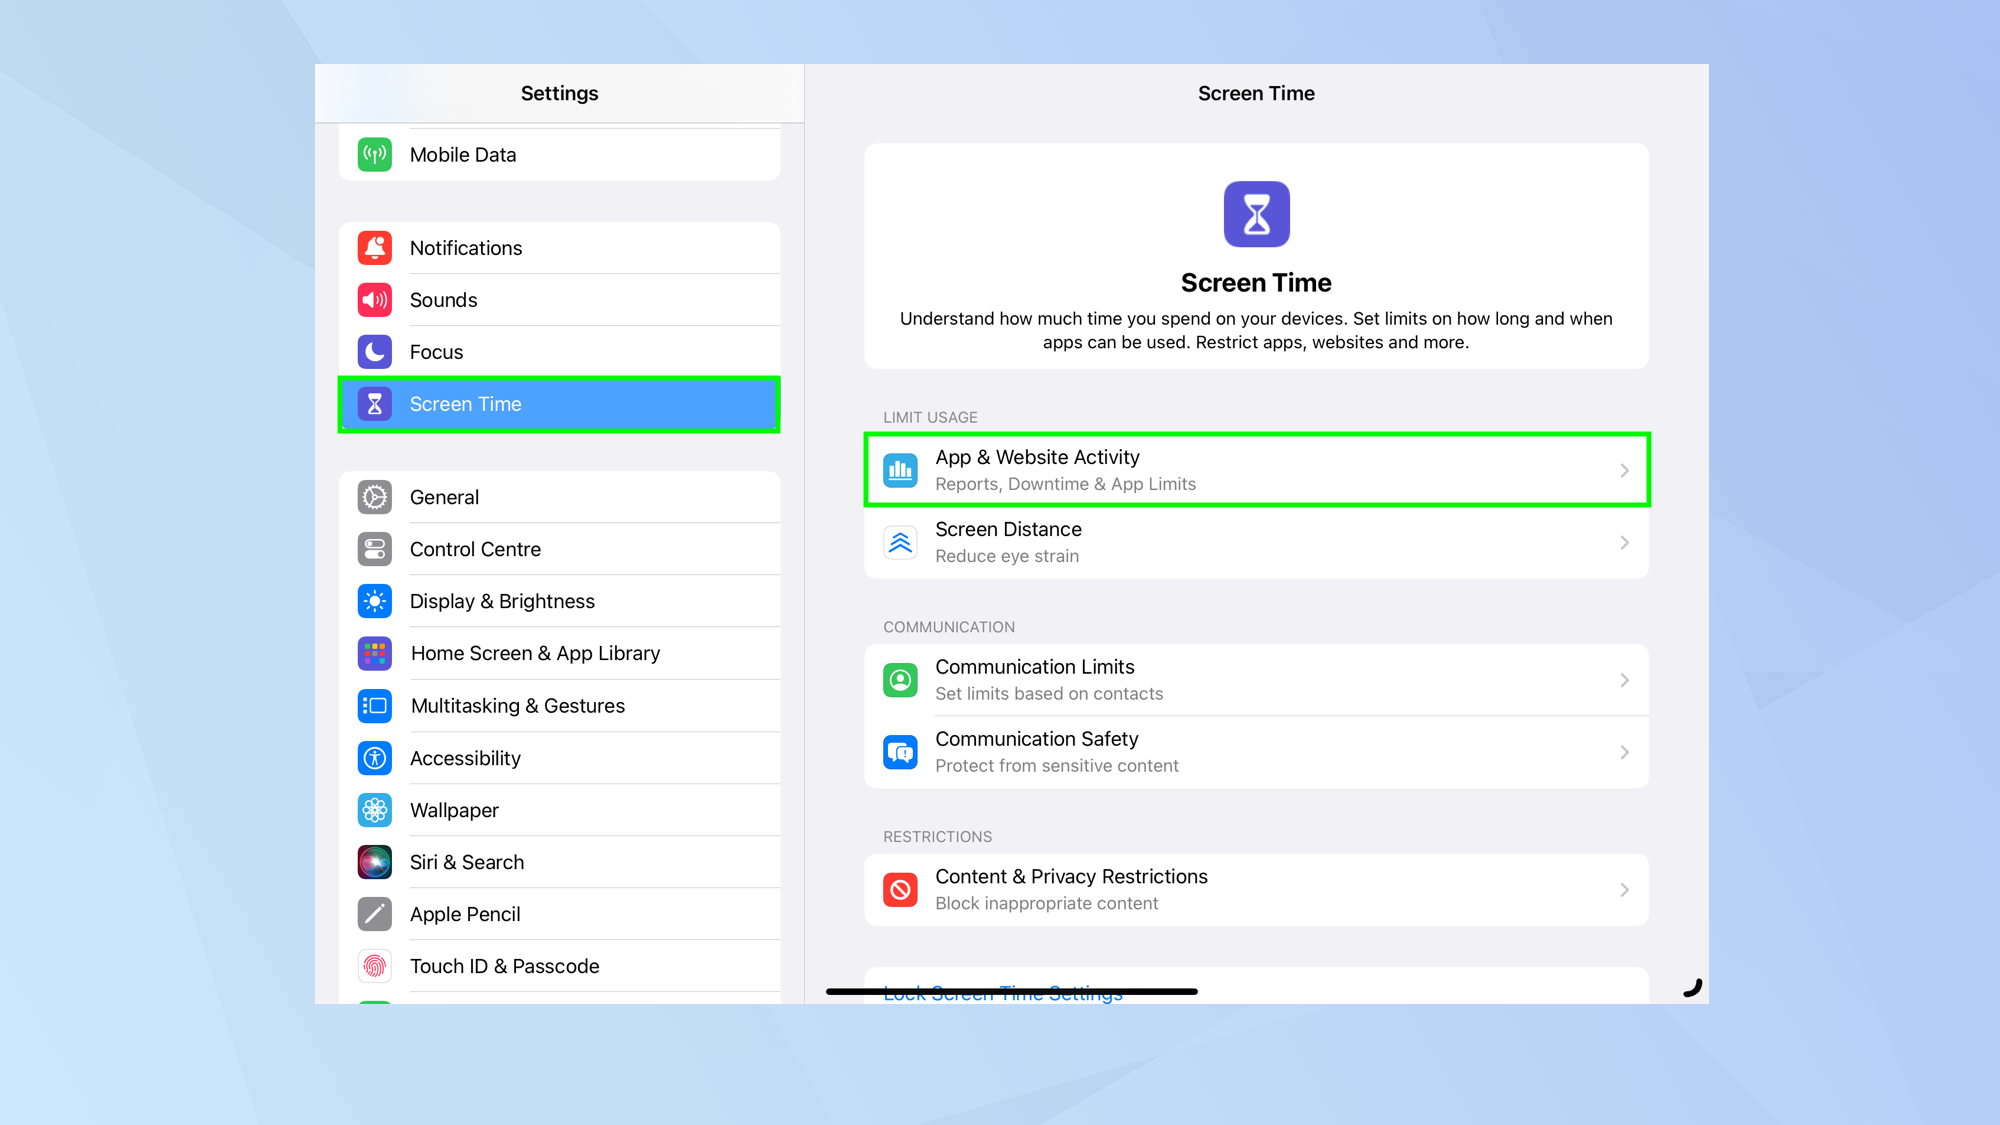
To access the parental controls on your iPad, you need to turn on Screen Time – the built-in Apple service which shows how long your tablet is being used for each day. This is a simple enough process.
You just need to launch the Settings app and select Screen Time from the left-side menu. Next, tap App & Website Activity and select Turn on App & Website Activity.
If you scroll down on the right-hand side of Screen Time settings, you can also protect Screen Time with a passcode. Just tap Lock Screen Time Settings and enter a four-digit passcode.
Get instant access to breaking news, the hottest reviews, great deals and helpful tips.
Full Guide: Screen Time: Everything you need to know
Limit iPad usage
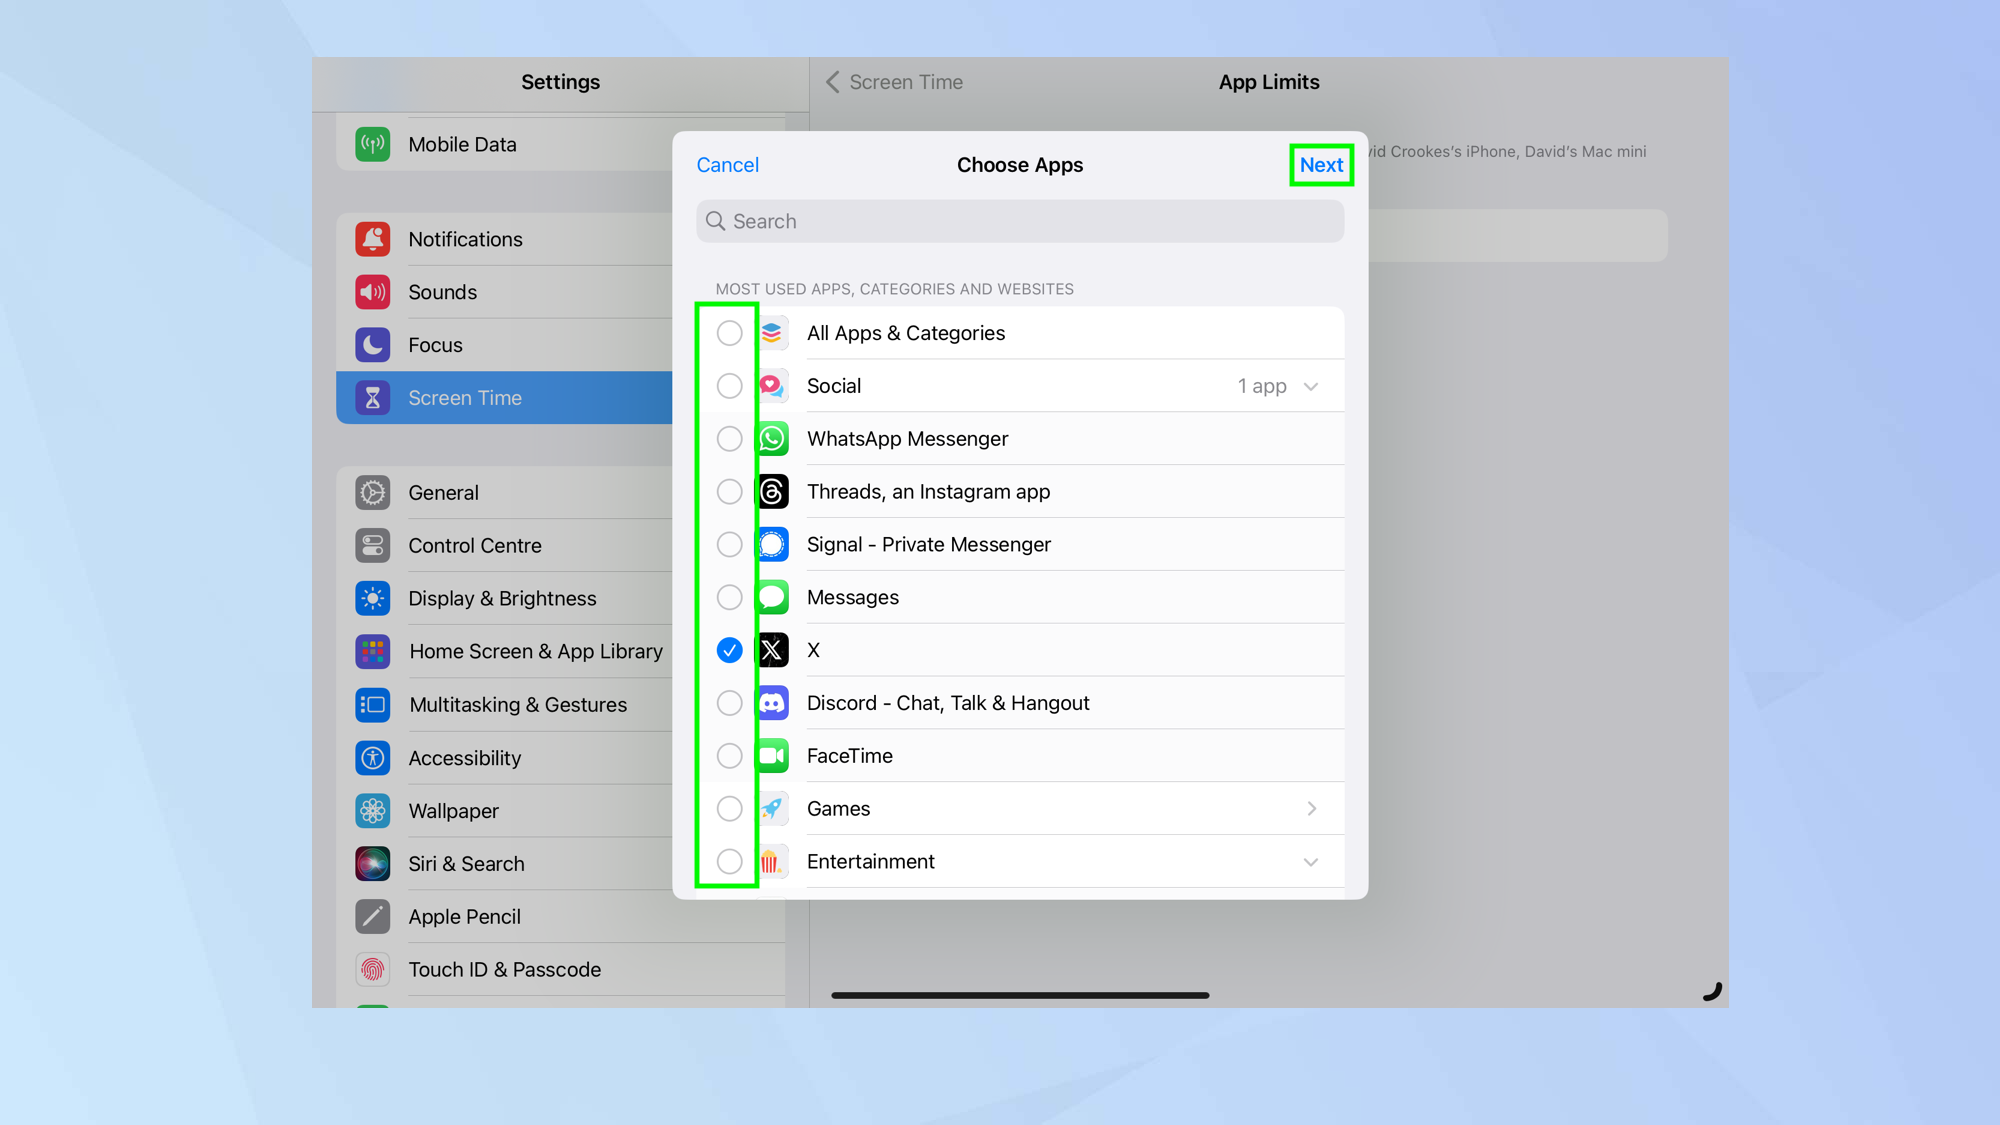
In Screen Time, which you can access if you open the Settings app and tap Screen Time, you will see a section called Limit Usage. This is where you get to control which apps can be used on your iPad and for how long.
Tap Downtime and you can determine when restrictions come into play: you can either turn on Downtime immediately if you select Turn on Downtime Until Tomorrow or you can tap Schedule and set times.
Let’s say, you want to restrict access to X. Once you open the Settings app and tap Screen Time, you just need to tap App Limits, select Add Limit and choose the app. It’s actually possible to select more than one app and you can also choose an entire category of app to limit. When you tap Next, you will be able to use the carousel to set the amount of time. You can also tap Customize Days to set limits for specific days
Your iPad also has an important setting. When the time runs out, a prompt appears asking if you’d like more time. If you have set a Screen Time passcode, you can toggle on Block at End of Limit. This means the Screen Time passcode would need to be entered in order to extend the time – if a child doesn’t know that passcode, then the app cannot be used without your intervention.
When finished, tap Add and Toggle on/off App Limits.
Full Guide: How to set time limits on your apps with Screen Time
Set communication limits
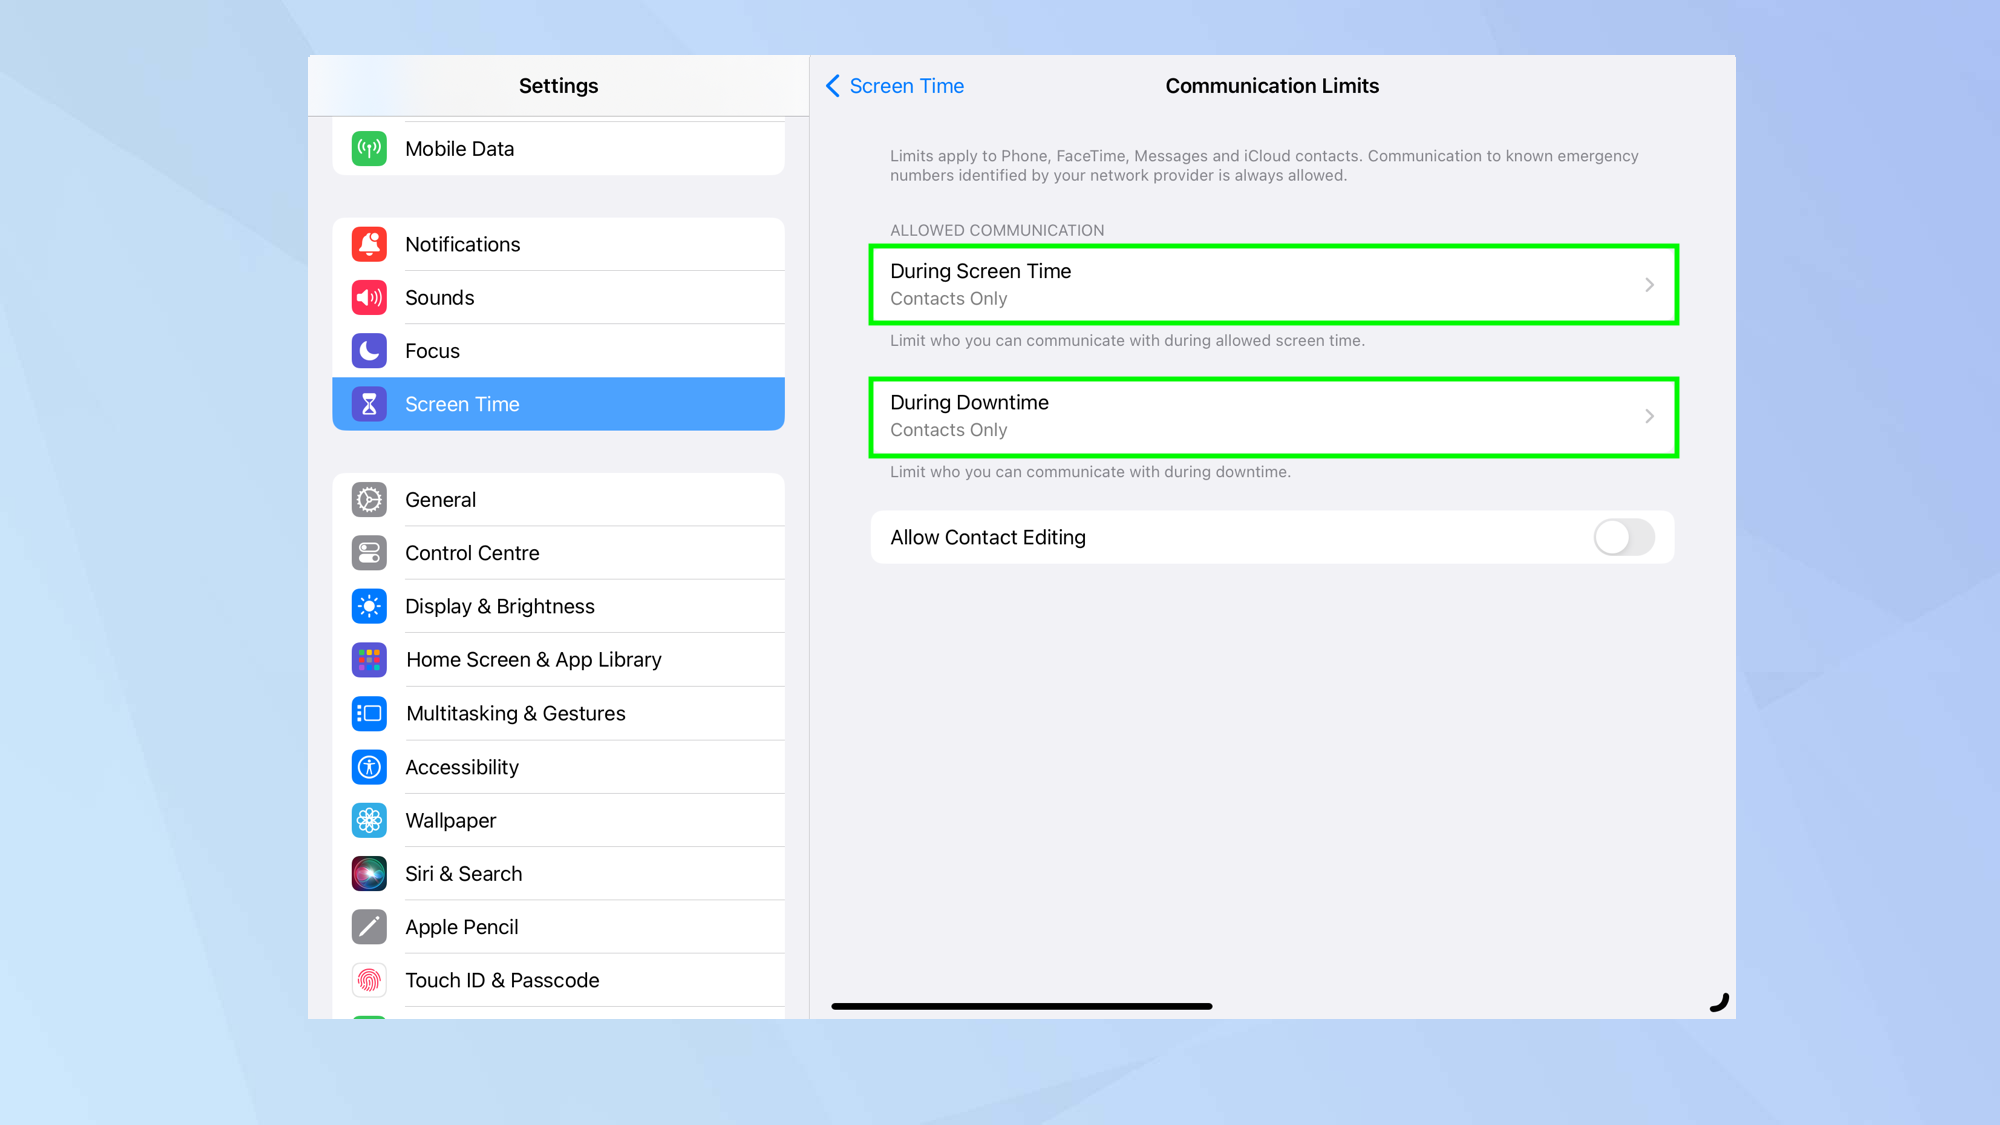
If a child has your iPad, you will likely want to restrict who they can communicate with. In the Communications section (accessed if you open the Settings app and select Screen Time), there are two options: Communications Limits and Communication Safety.
If you tap Communication Limits, you can set restrictions that apply to Phone, FaceTime, Messages and iCloud contacts. You can set these so that they apply at any time in the day or only when the iPad is in DownTime (see the above section).
If you tap Communication Safety, then select Continue, you can also toggle on Check for Sensitive Photos so that age-inappropriate images are not visible.
Hide apps on iPad
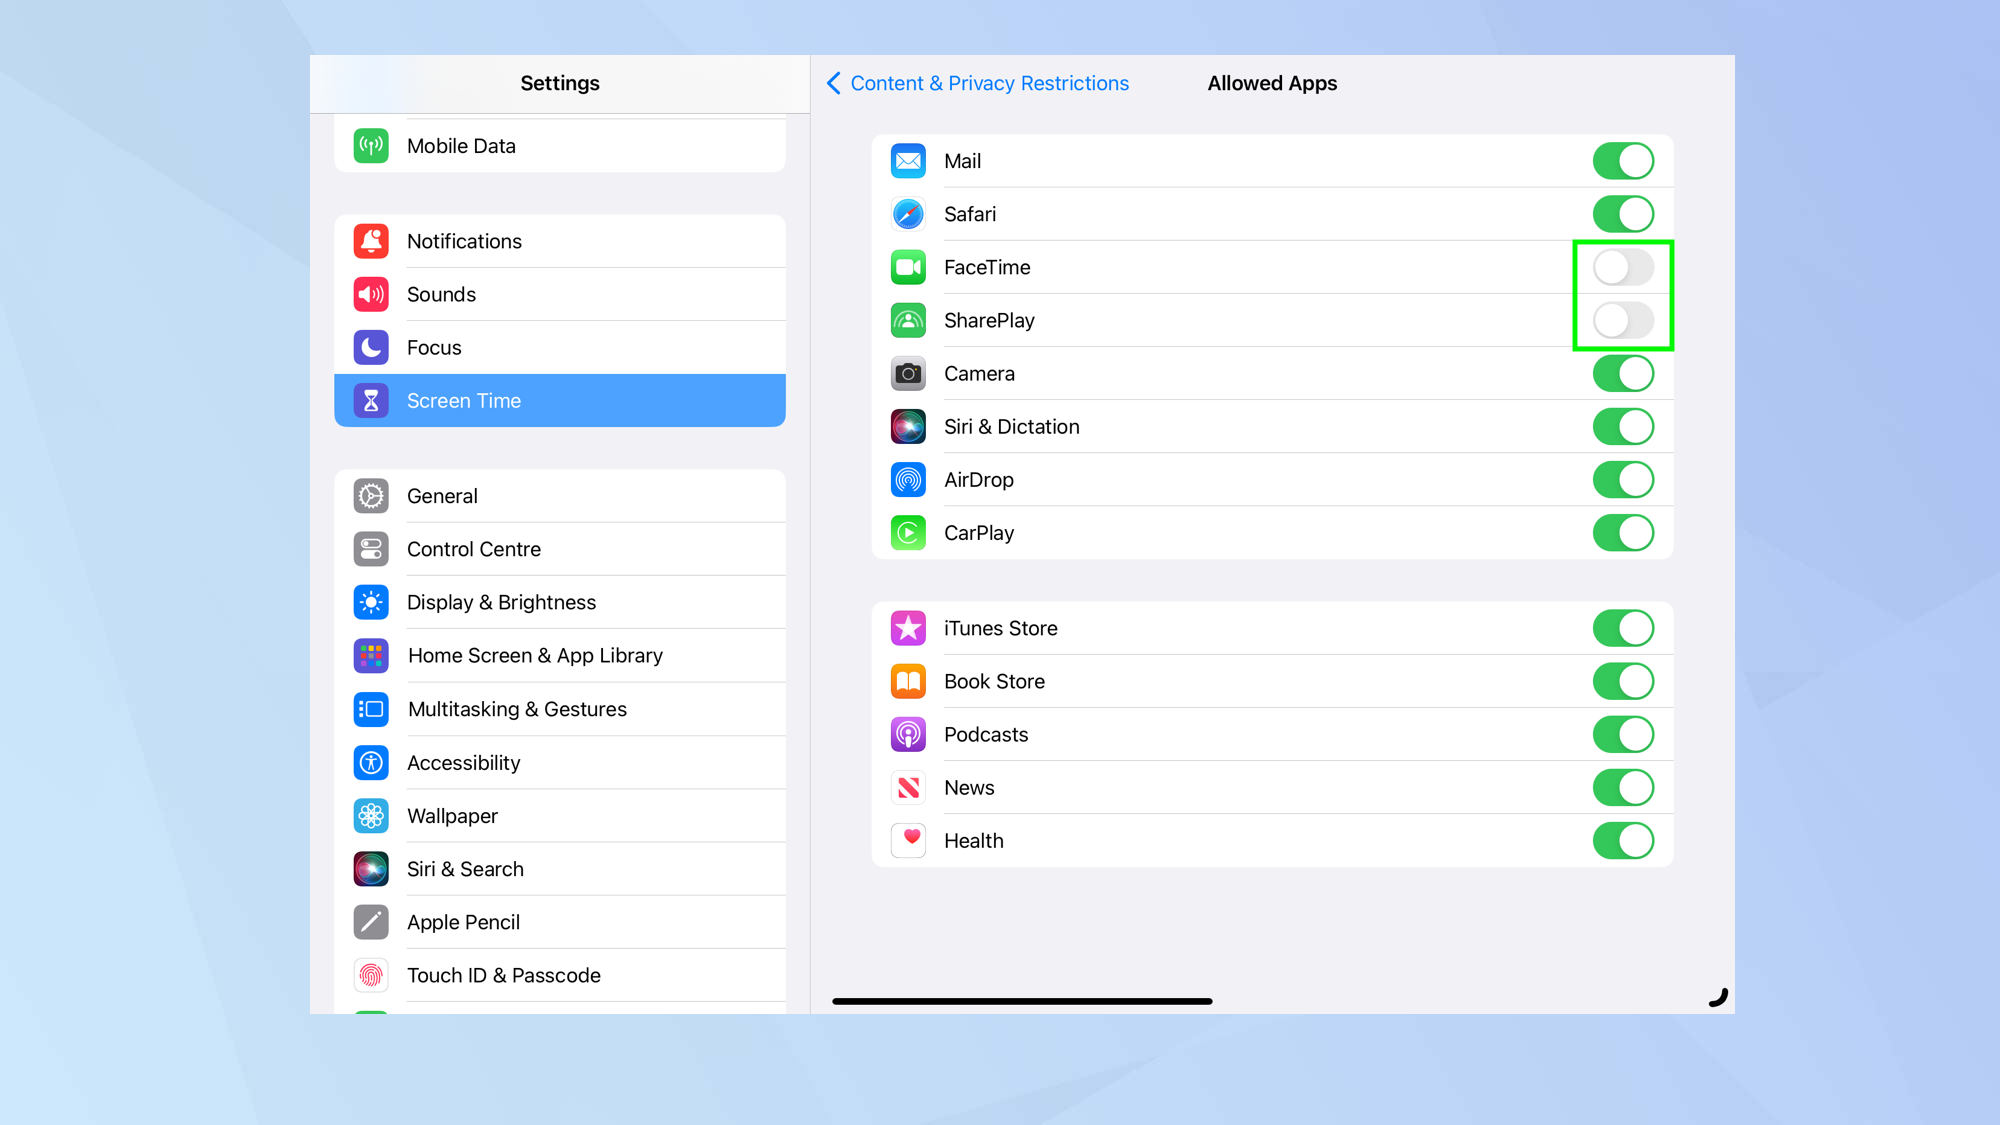
An effective way to stop a child from using an app is to hide it from the Home Screen. It won’t remove the app – you can easily bring it back – but you can hide as many as you like. Open the Settings app and tap Screen Time then tap Content & Privacy Restrictions. Make sure Content & Privacy Restrictions are turned on. Now tap Allowed apps and toggle off apps that you don’t want.
Alternatively, and this also works for apps that you have installed yourself, go to the Home Screen of your iPad and hold down on an app. Select Remove app and select Remove from Home Screen. You will need to go to the App Library (which you will reach if you swipe all the way to the right) to access it as a later date.
Prevent App Store purchases
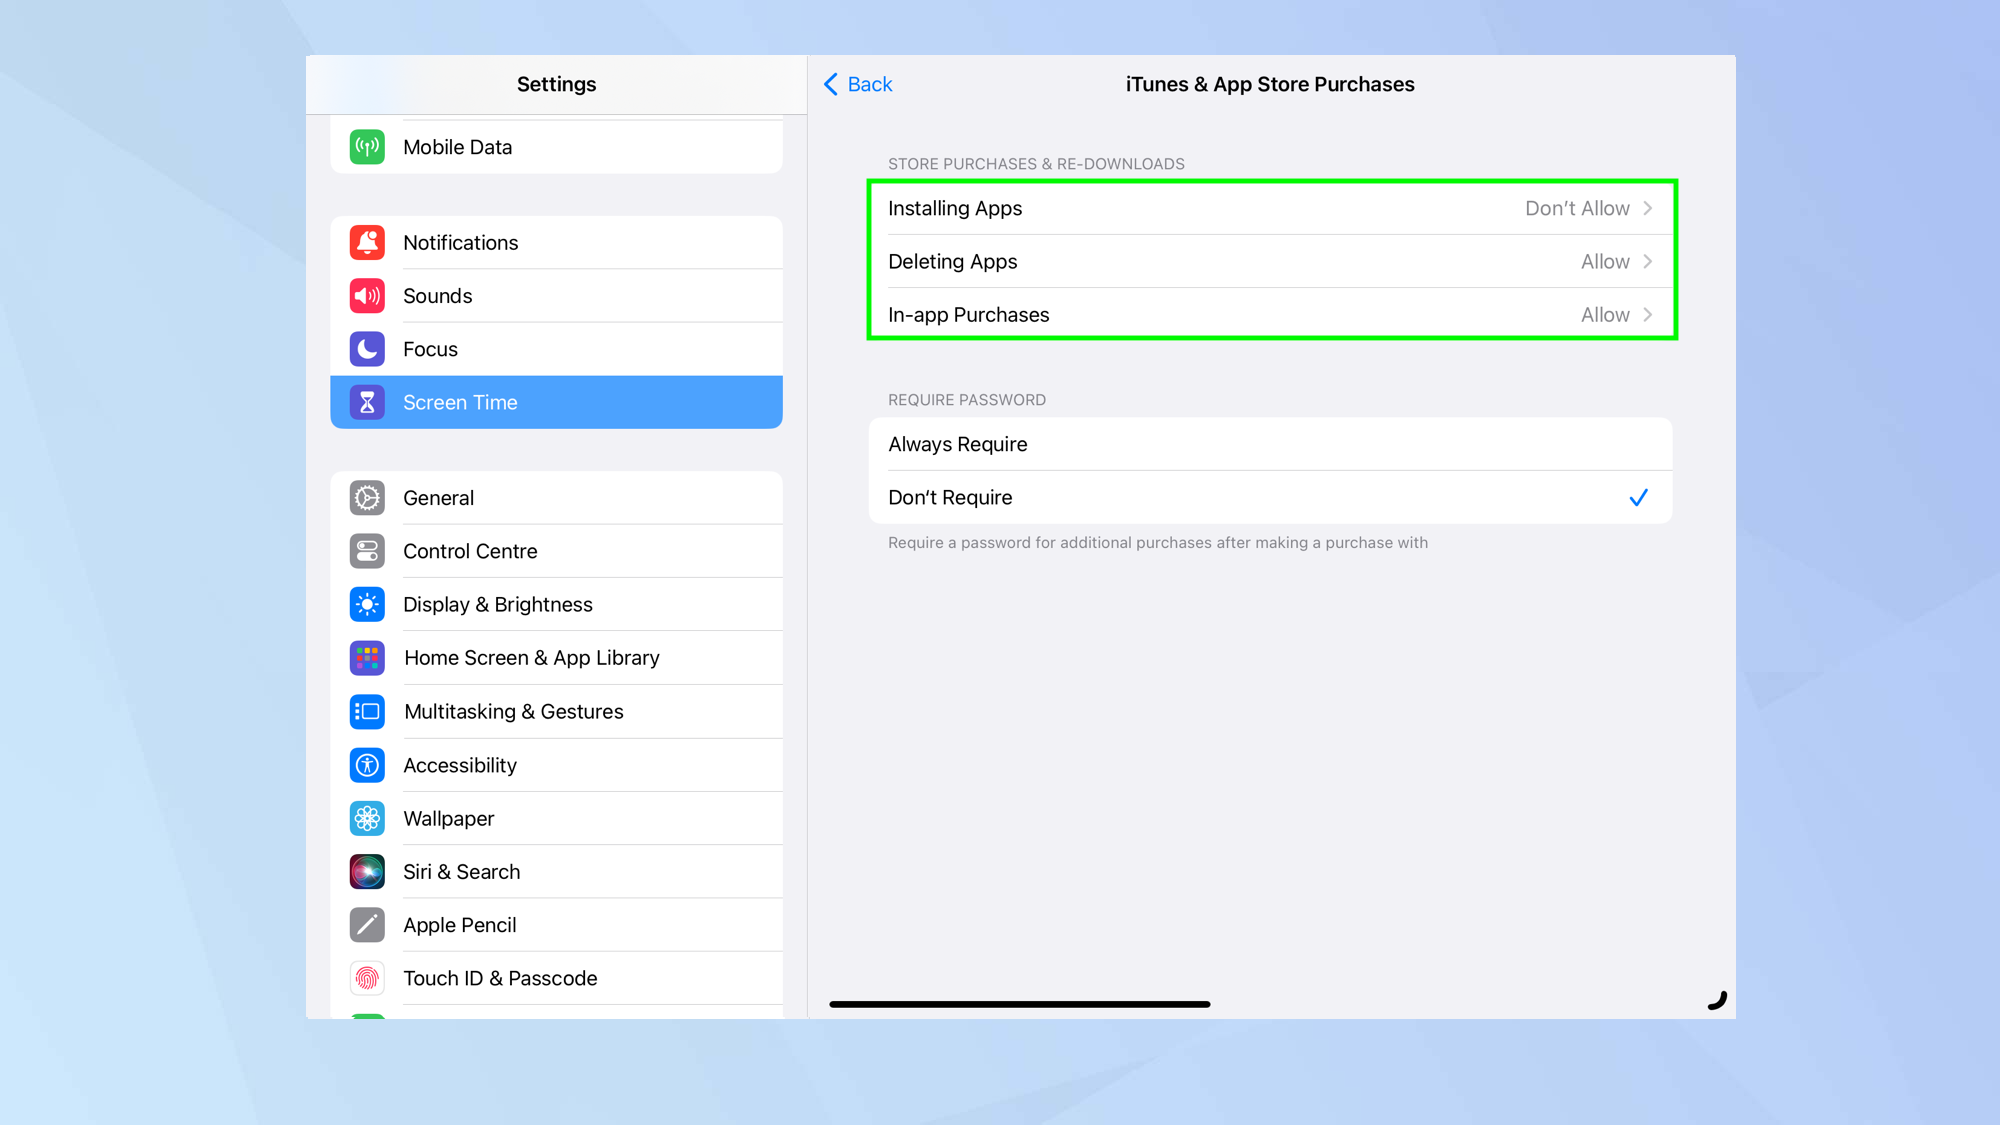
You sometimes see horror stories of children racking up big bills by making in-app purchases without permission. In some cases, they’ve downloaded expensive apps. To prevent children from having full access to the App Store, open Settings and tap Screen Time then tap Content & Privacy Restrictions. Now tap iTunes & App Store Purchases.
There are three choices. You can tap Installing Apps and either allow or don’t allow app installation. You can also select In-app Purchases and also decide if you want to allow or don’t allow. There is also an option that prevents children from deleting apps. Just tap Deleting Apps and select don’t allow.
Block websites
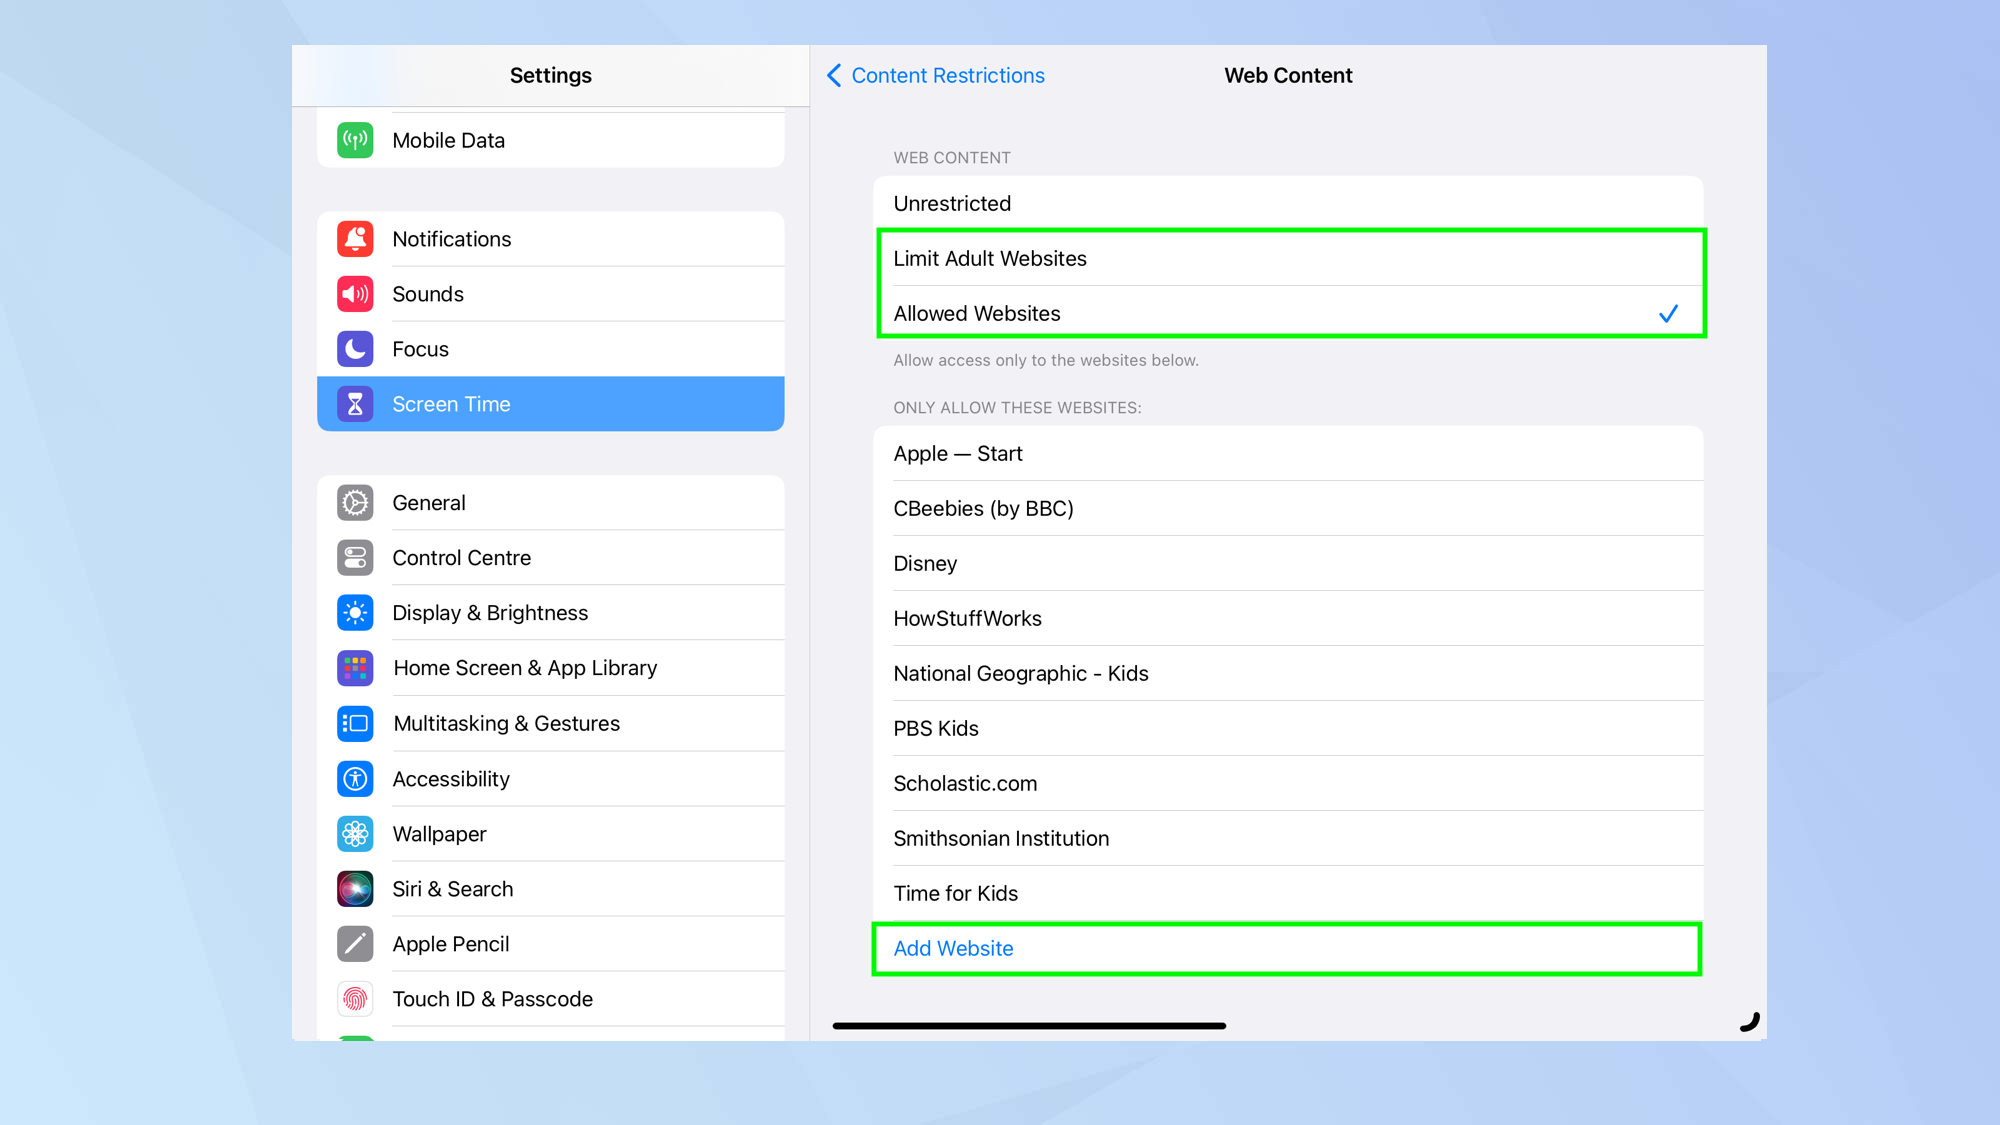
The world wide web is potentially dangerous for children so it’s worth placing restrictions on a child’s browser access on your iPad. If you open Settings, tap Screen Time and tap Content & Privacy Restrictions, you can tap Content Restrictions and select Web Content. At this point, you can choose to limit adult websites or select Allowed Websites.
The first option lets you create a list of allowed and disallowed sites (just tap Add Website under each section). The second option lets you limit access to websites of your choice. Again, tap Add Website to create a list.
You can also restrict Siri from searching the web. After you tap Content Restrictions above, scroll down to Siri and select allow or don’t allow next to Web Search Content and Explicit Language.
Full guide: How to block websites on iPhone
Restrict age-inappropriate content
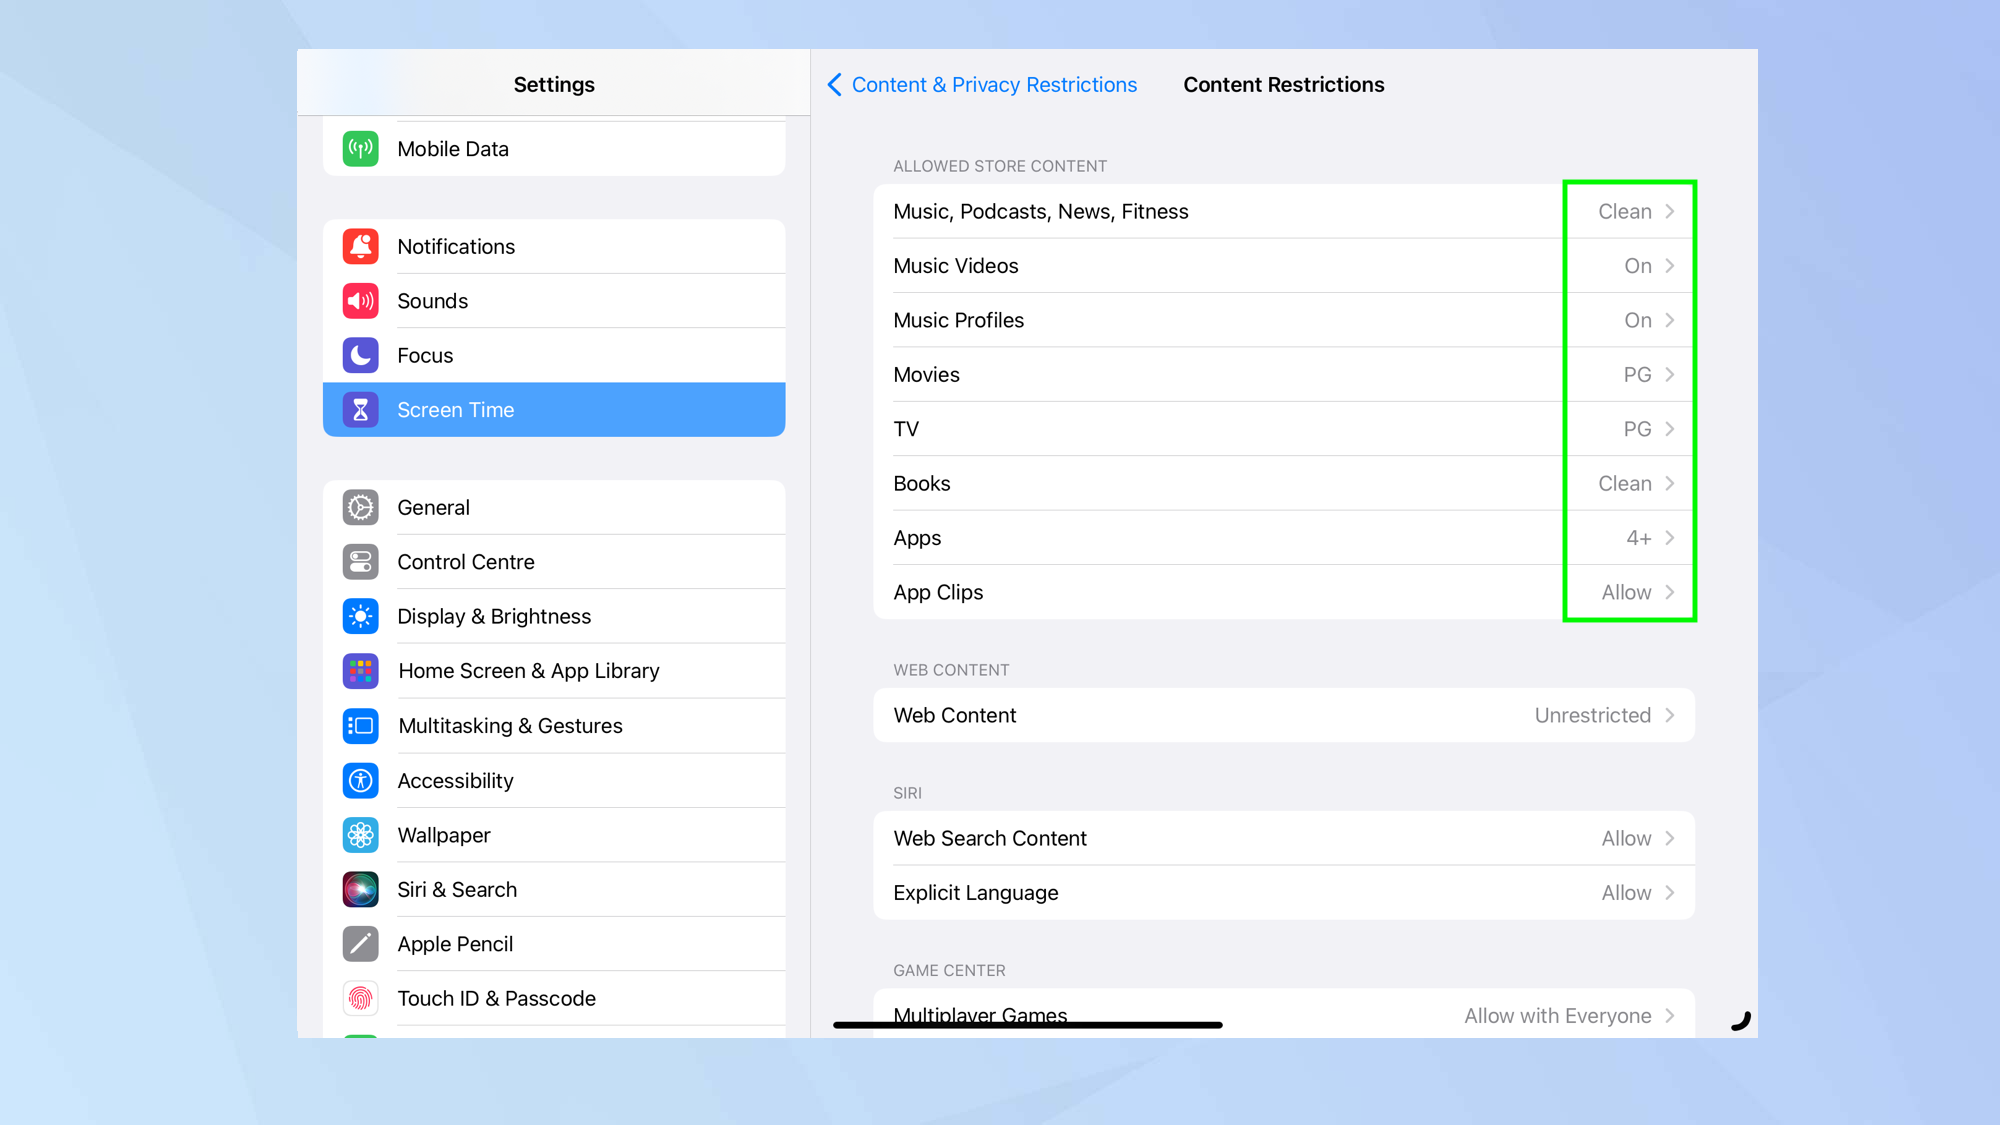
Music, movies, TV shows, games, books, apps and podcasts are rated for their suitability for children and you can take advantage of such classification by ensuring the content kids see and hear is suitable for their young eyes and ears. Again, open the Settings app and tap Screen Time. Then select Content & Privacy Restrictions then tap Content Restrictions. Now select a type of content such as movies or TV and determine the age-rating you are happy with (or select Clean if that is the option available).
Restrict access to games
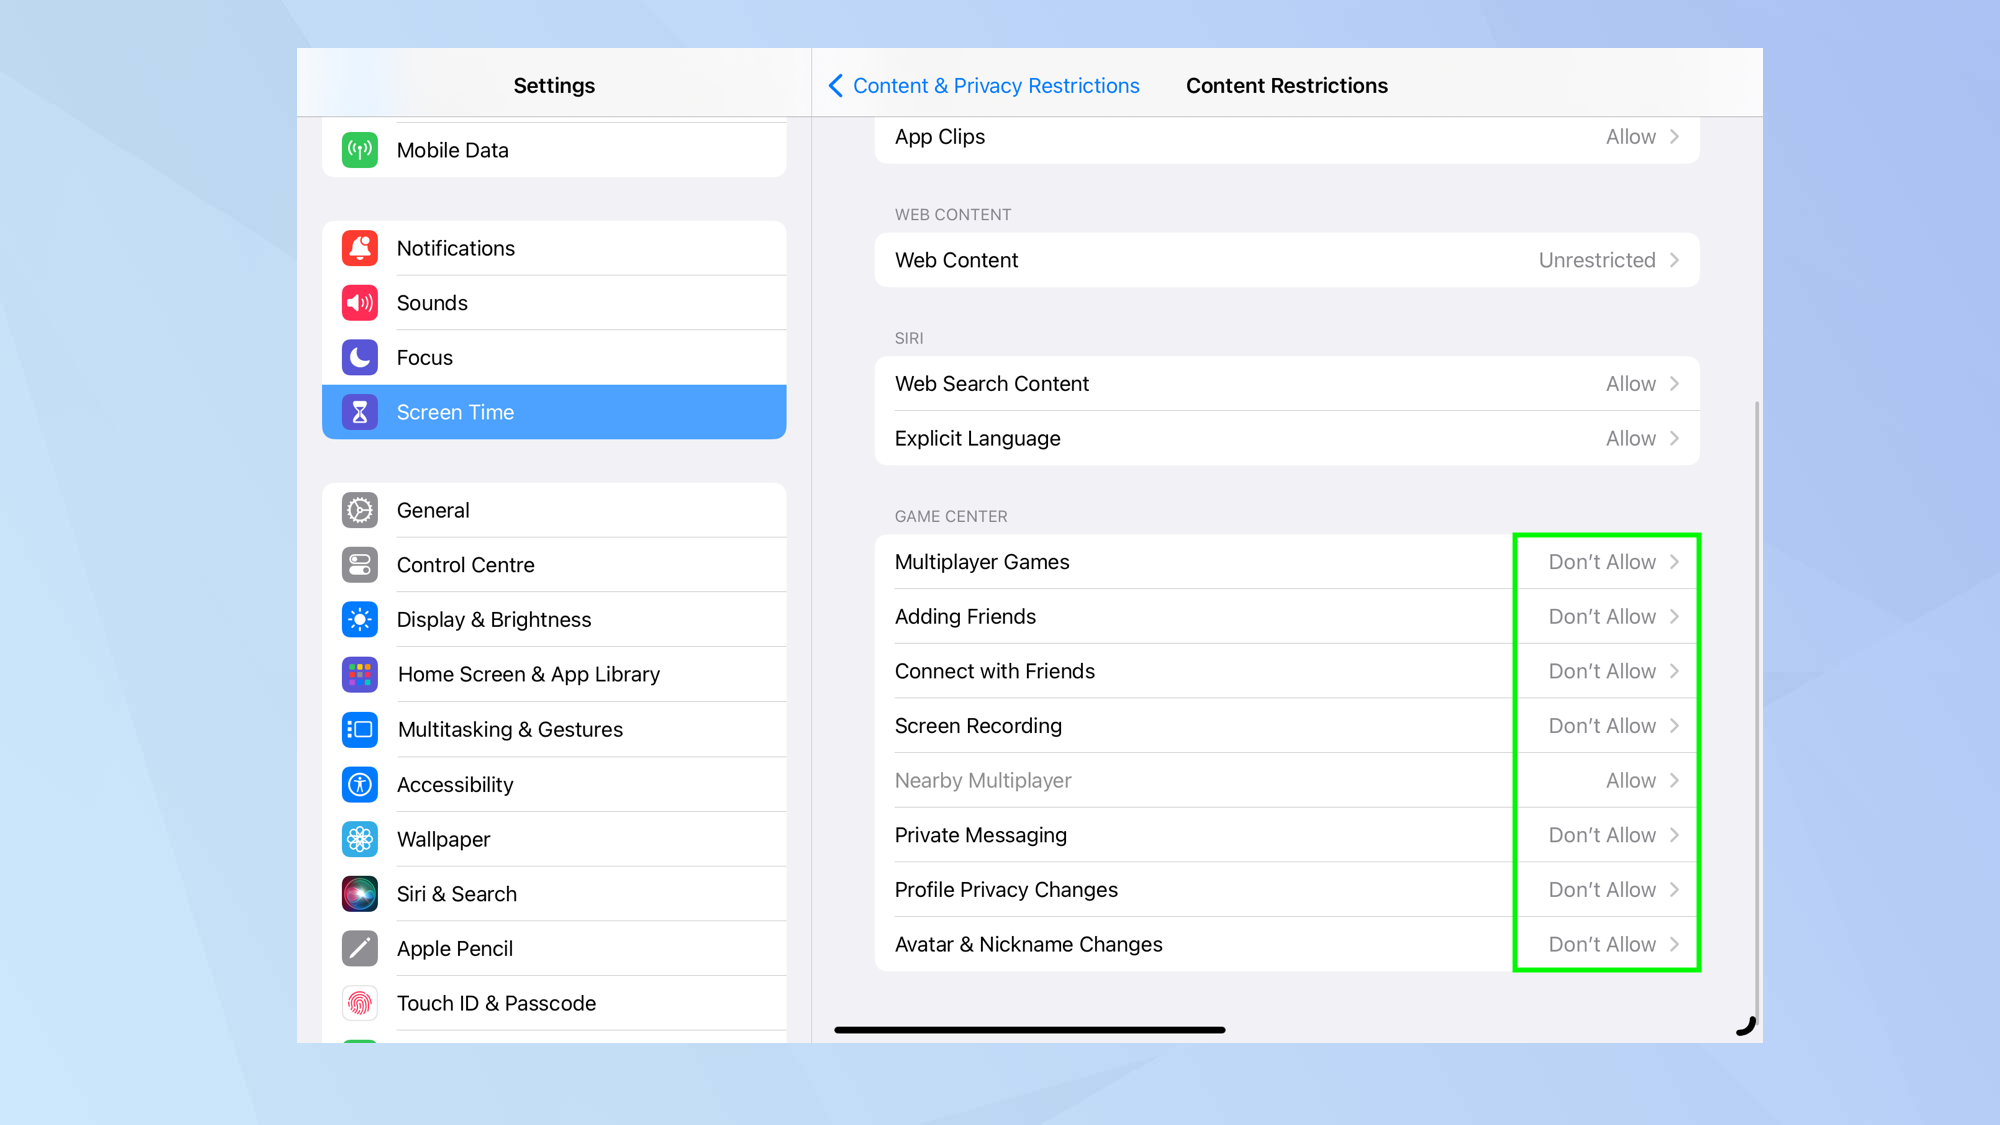
Games are great and one of the reasons why kids will want access to an iPad. But games can also put kids in touch with strangers and that’s something to be concerned about. To tackle this, open the Settings app and tap Screen Time. Now select Content & Privacy Restrictions and tap Content Restrictions. Scroll down to the section called Game Center and go through each option in turn: just tap allow or tap don’t allow for each one.
So now you know how to set up parental controls on an iPad but there is more you can do. For example, why not learn how to set up Netflix parental controls so that you can rest easier if your kids are watching shows and movies via this popular streaming service? You can also learn how to set up Disney Plus parental controls. It’s also worth discovering how to set up YouTube parental controls.

David Crookes is a freelance writer, reporter, editor and author. He has written for technology and gaming magazines including Retro Gamer, Web User, Micro Mart, MagPi, Android, iCreate, Total PC Gaming, T3 and Macworld. He has also covered crime, history, politics, education, health, sport, film, music and more, and been a producer for BBC Radio 5 Live.
 Club Benefits


