How to overlay images on iPhone
A step-by-step guide on how to overlay images on iPhone
When you know how to overlay images on iPhone, it’s super easy to embrace your artistic side and create something fresh and beautiful. Your iPhone's wallpaper will never be the same again!
Superimposing one image onto another is normally a tool reserved for the best editing software on PCs, so it’s features like this that help make the iPhone one of the best phones.
The iPhone’s shortcuts app lets users create their own custom commands to use complex actions like overlaying images with one button press. This is the most tricky part of using overlay images on iPhone but, once it's set up, you never need to worry about it again, and you can get on with creating incredible custom wallpapers, like TikToker imobie does here...
Wondering how to do it yourself? We'll talk you through the process step by step below. After that, you’ll have to use your own creativity! Without further ado, here's how to overlay images on iPhone.
How to overlay images on iPhone
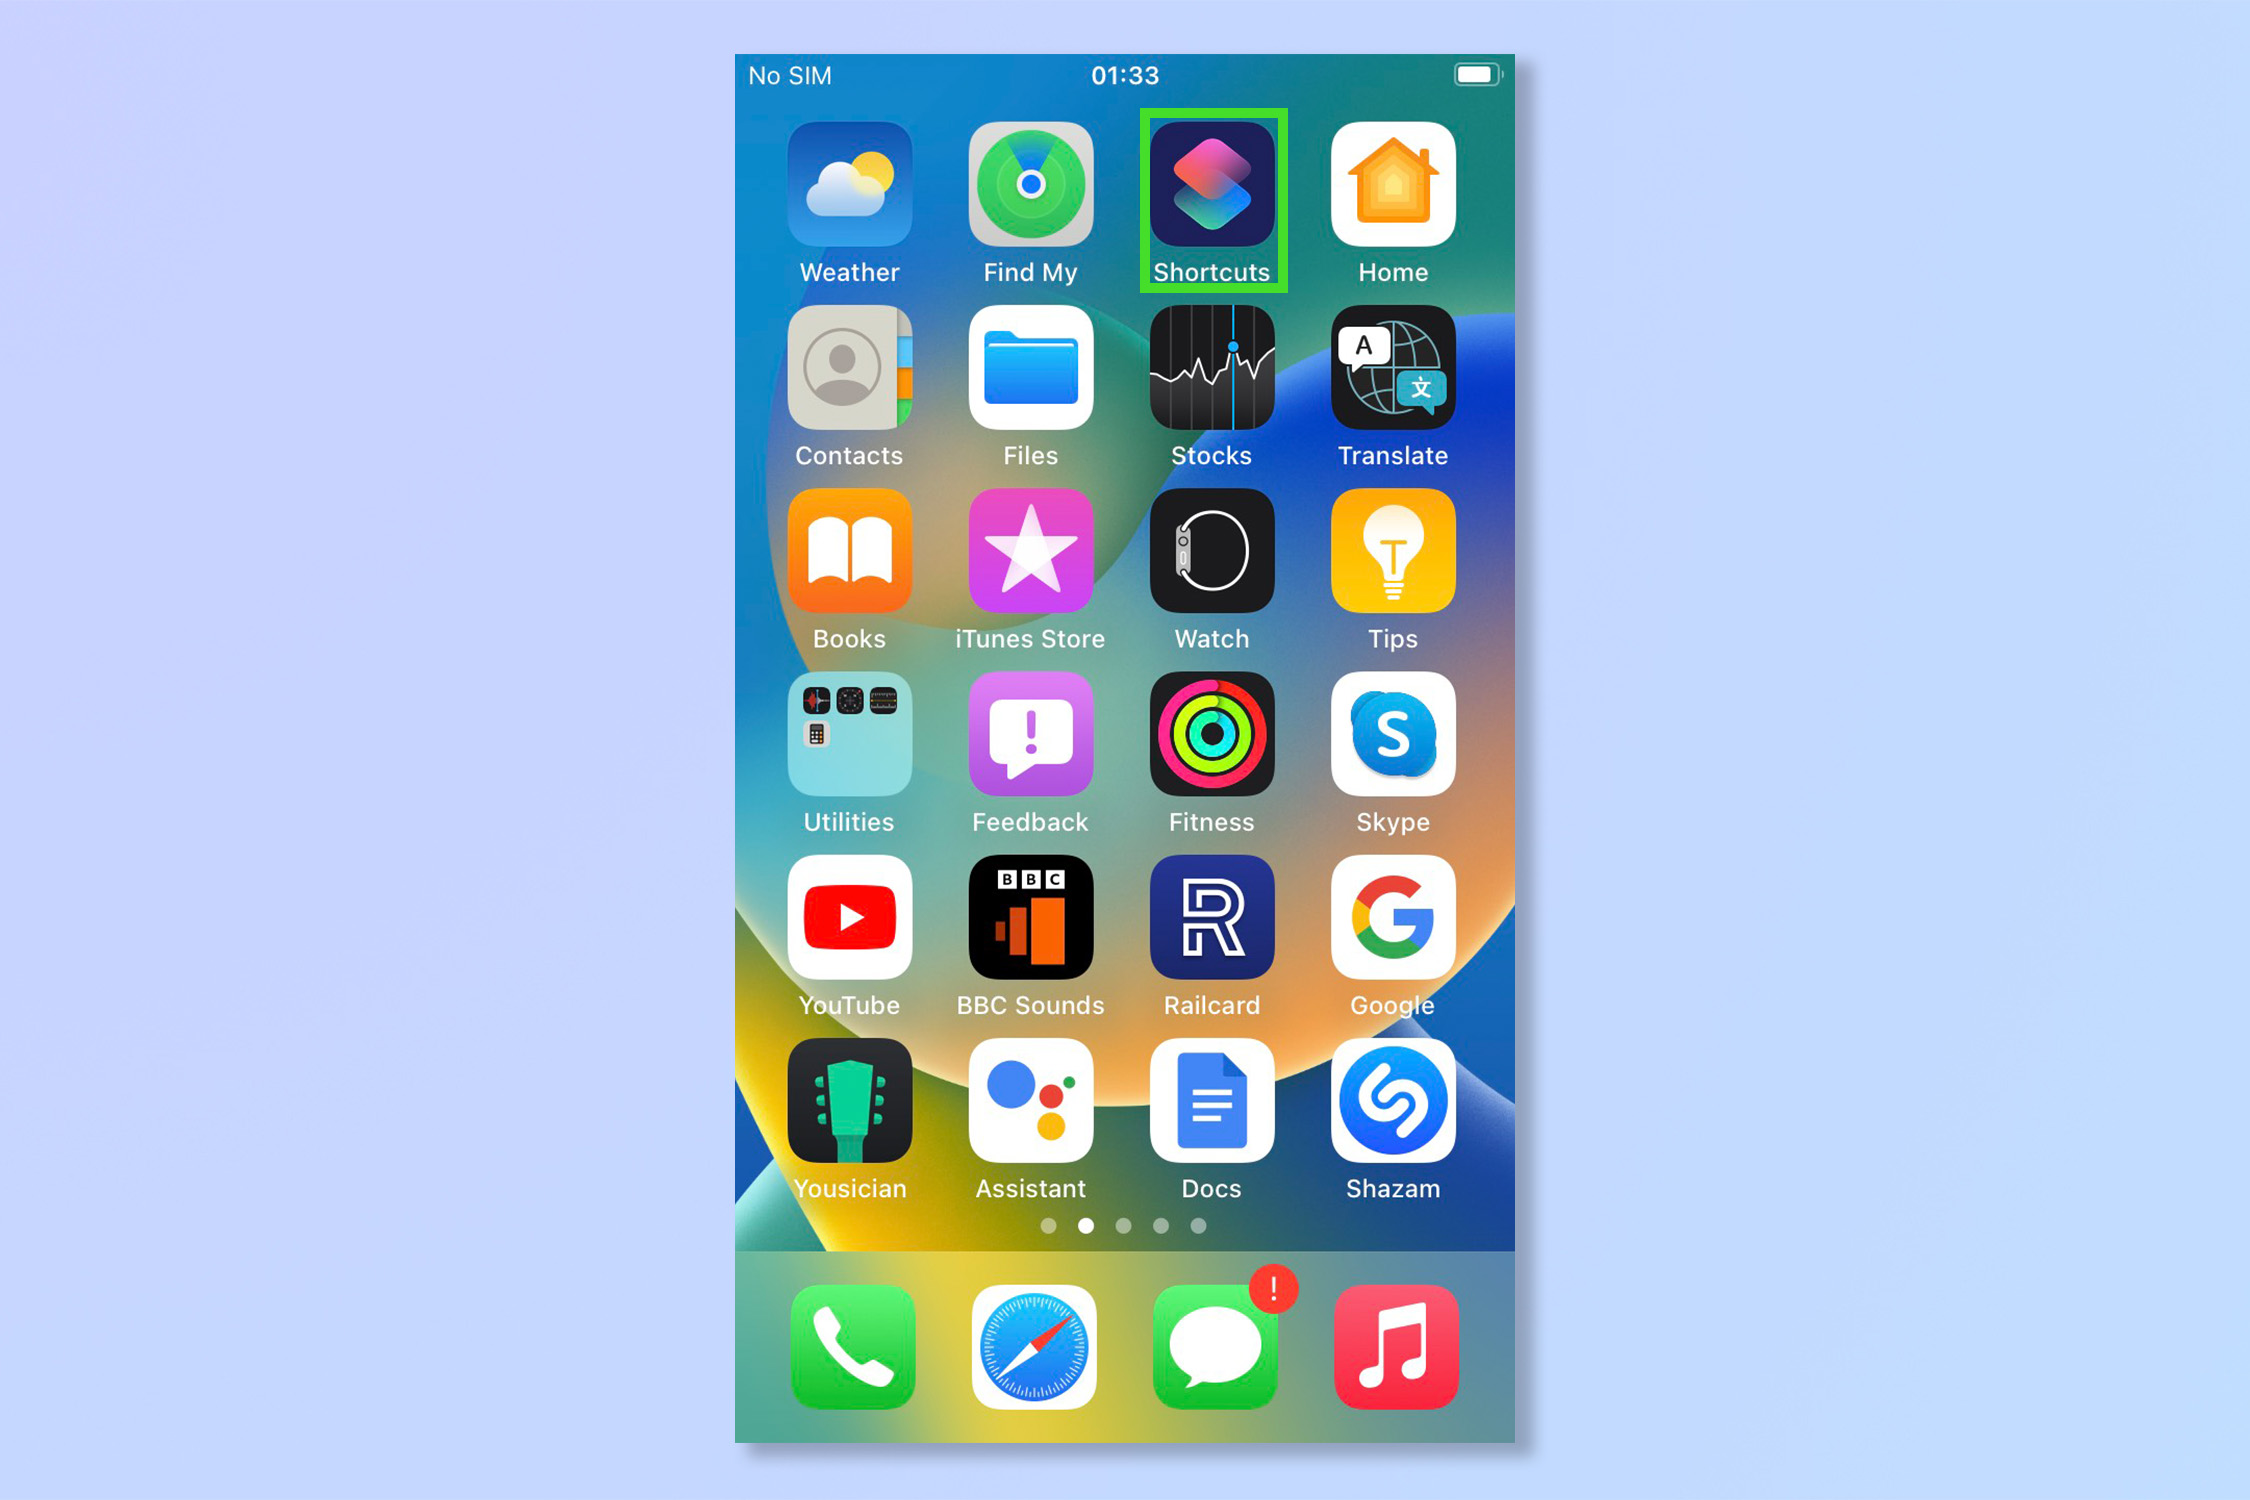
1. Open the Shortcuts App. This is installed by default so may be on your Home Screen. Alternatively, swipe down from the Home Screen to open Search and type "Shortcuts".
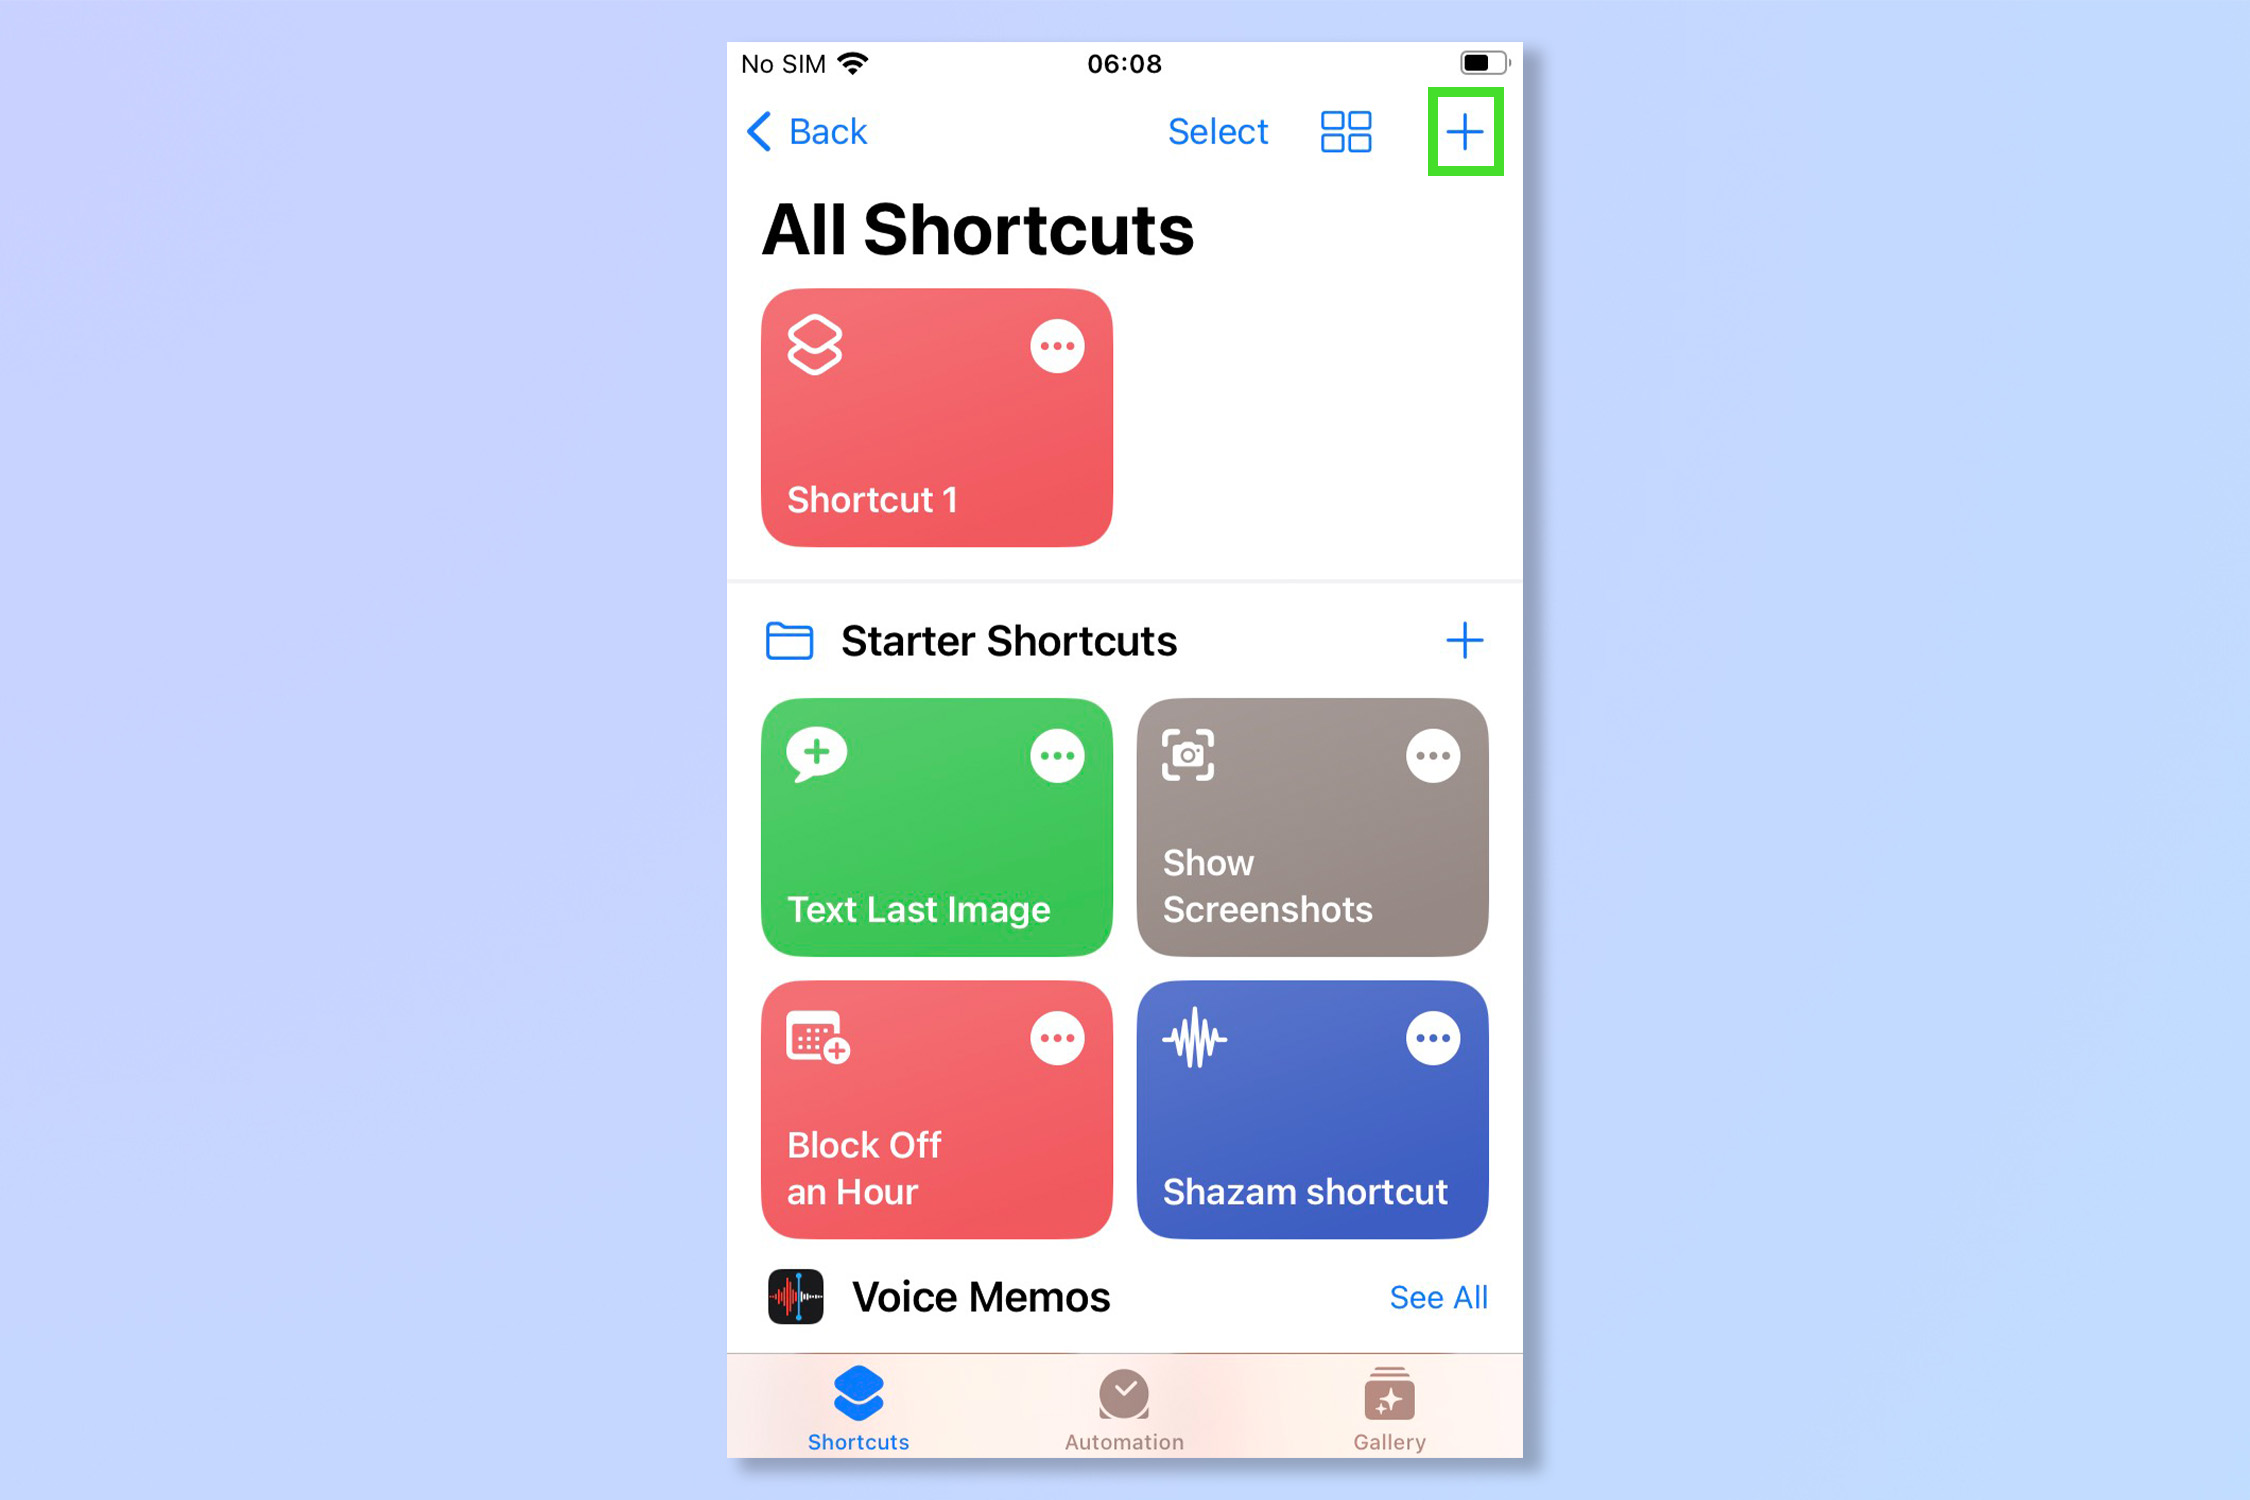
2. Tap the ‘+’ icon, top right, to create a new shortcut.
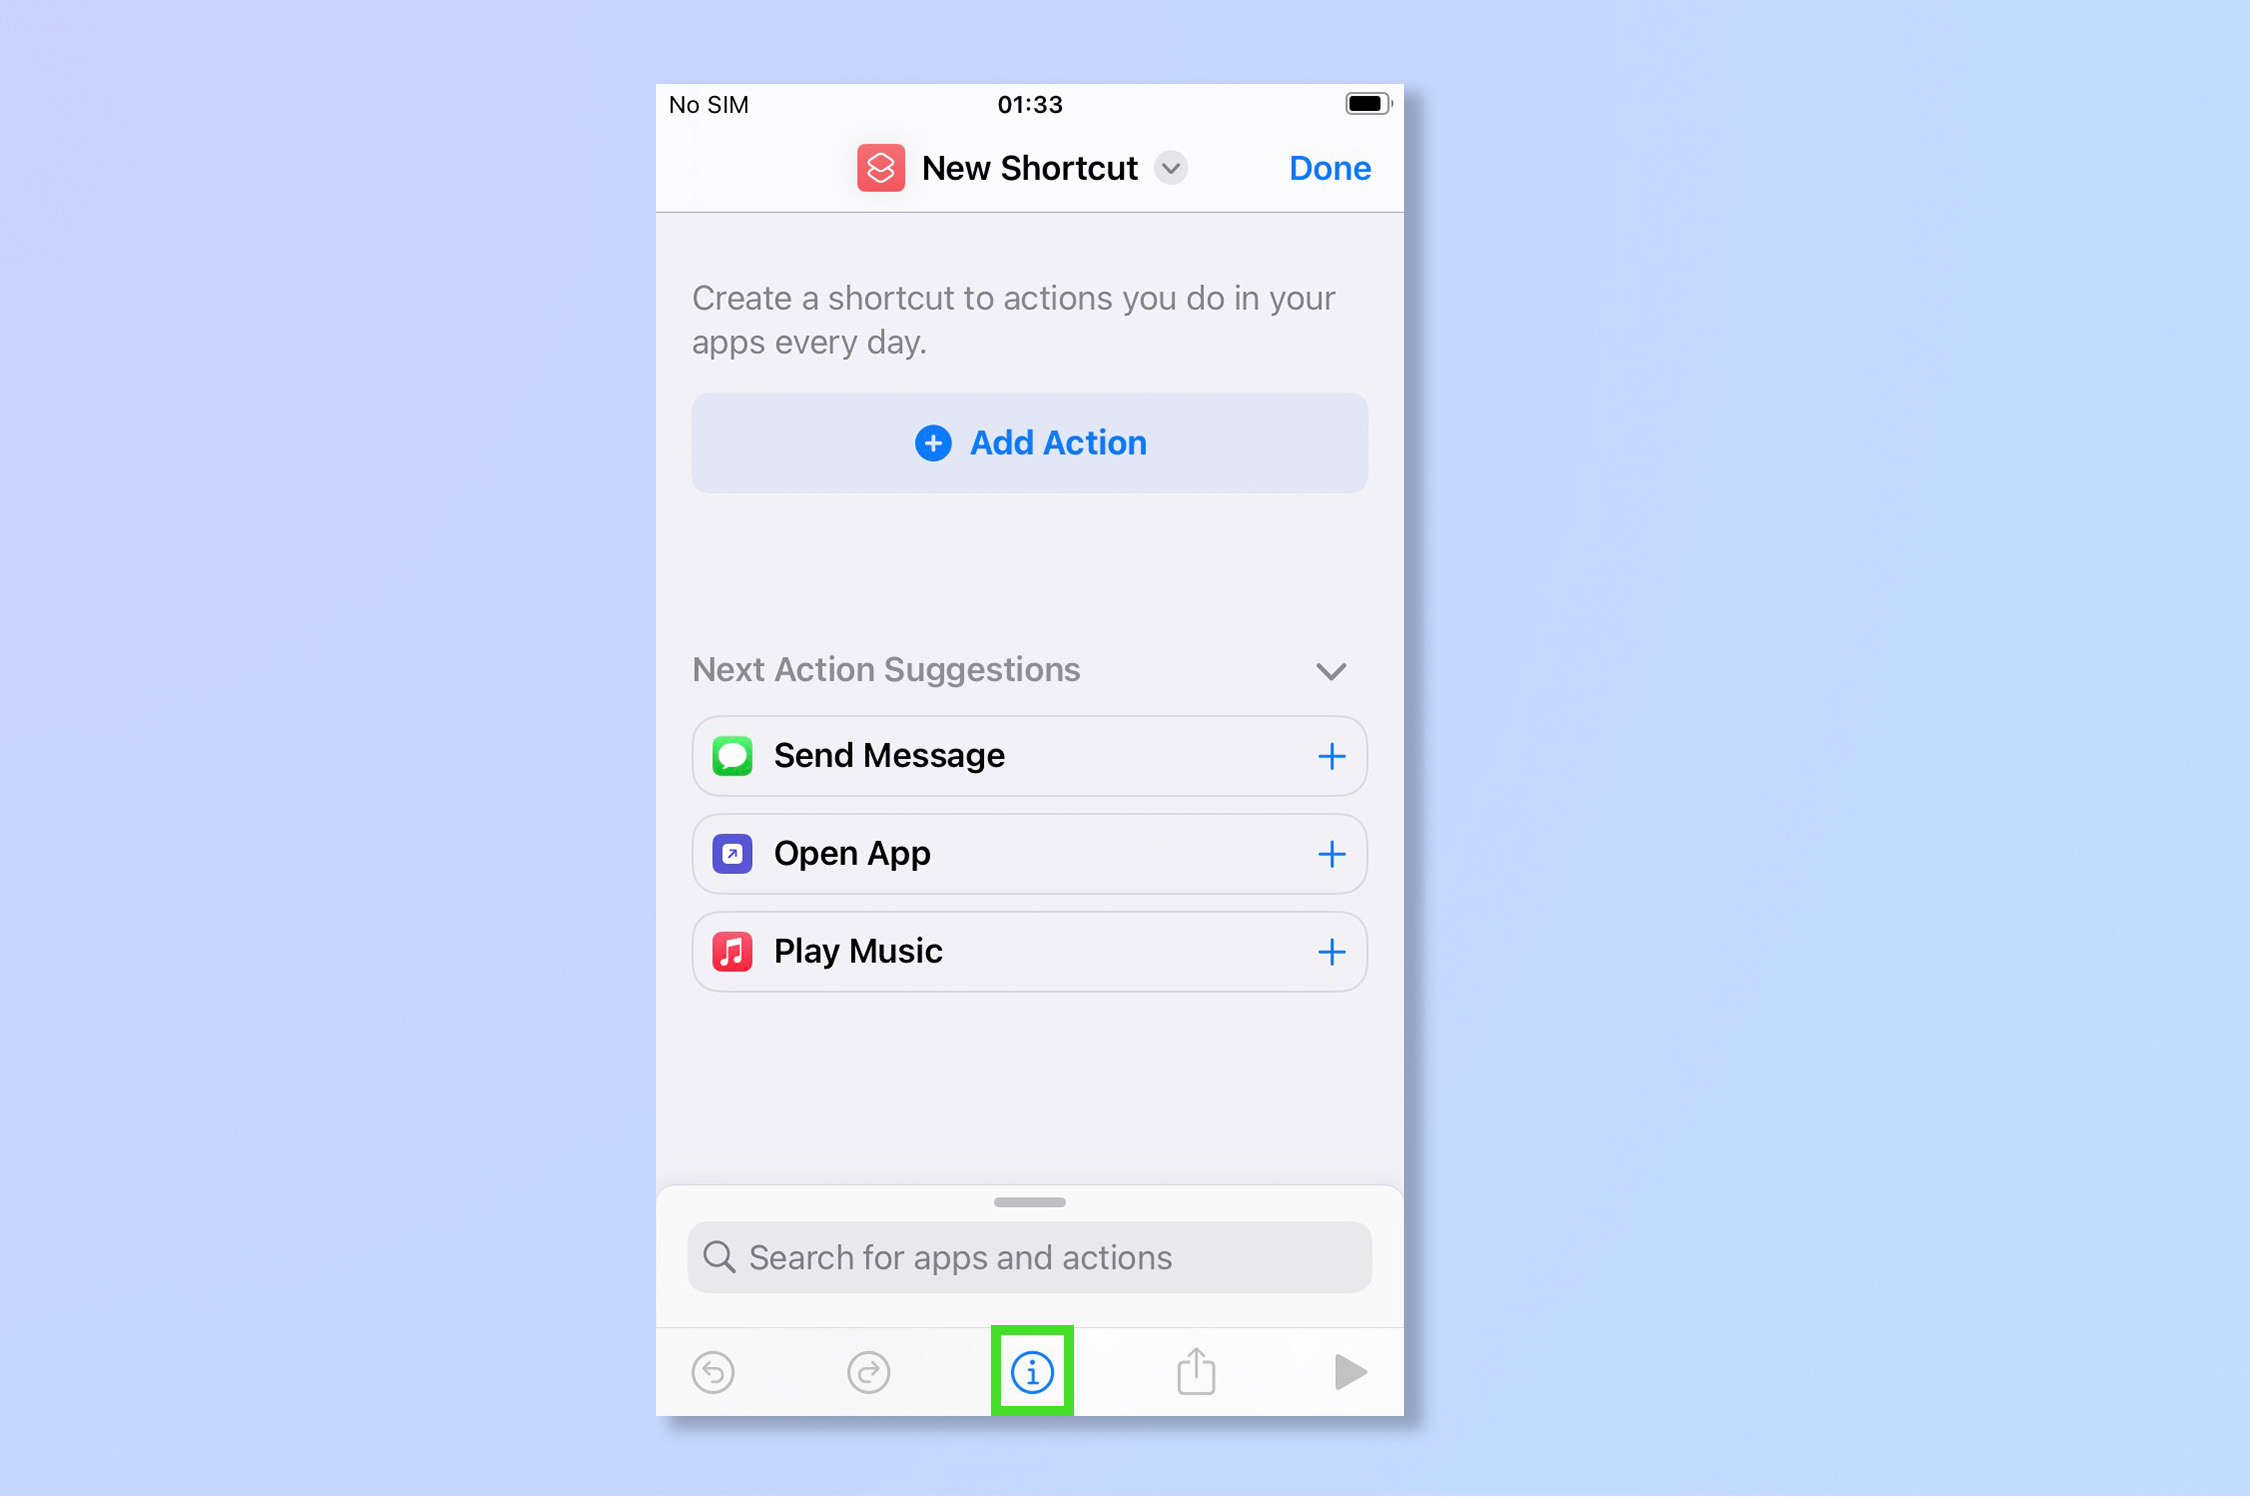
3. Tap the ‘i’ icon at the bottom of the screen.
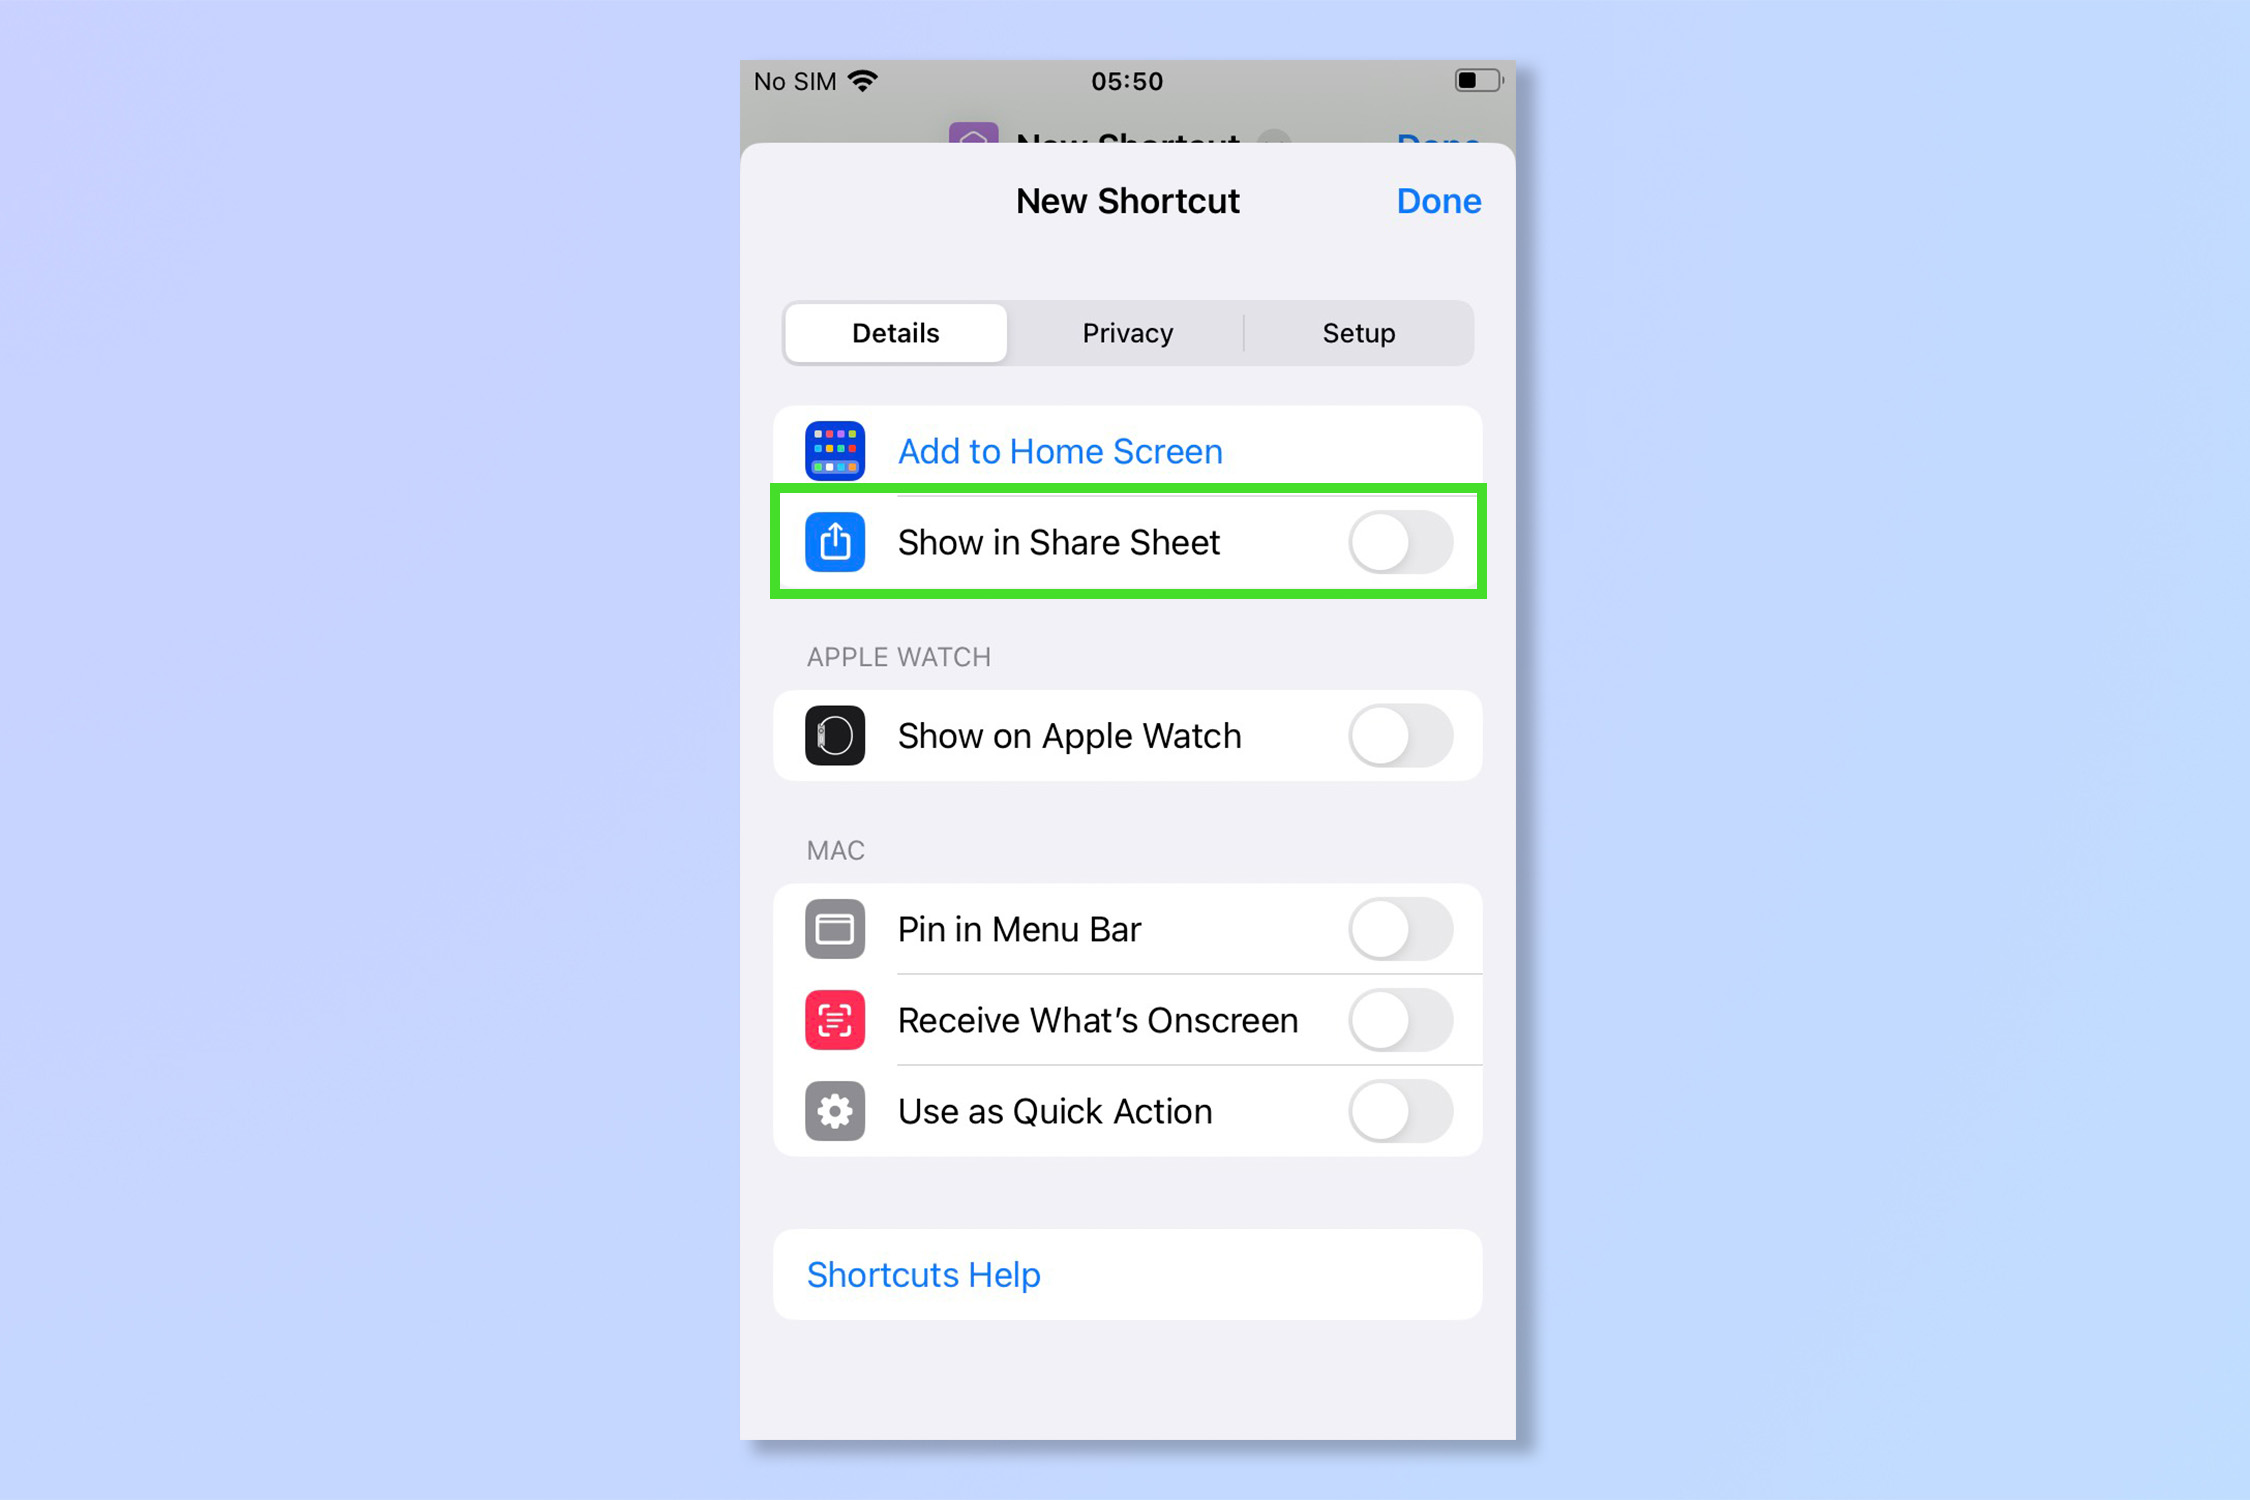
4. From here, select Show in Share Sheet — this will let you use the Overlay function quickly and easily by adding it to the Share menu in the Photos app.
Get instant access to breaking news, the hottest reviews, great deals and helpful tips.
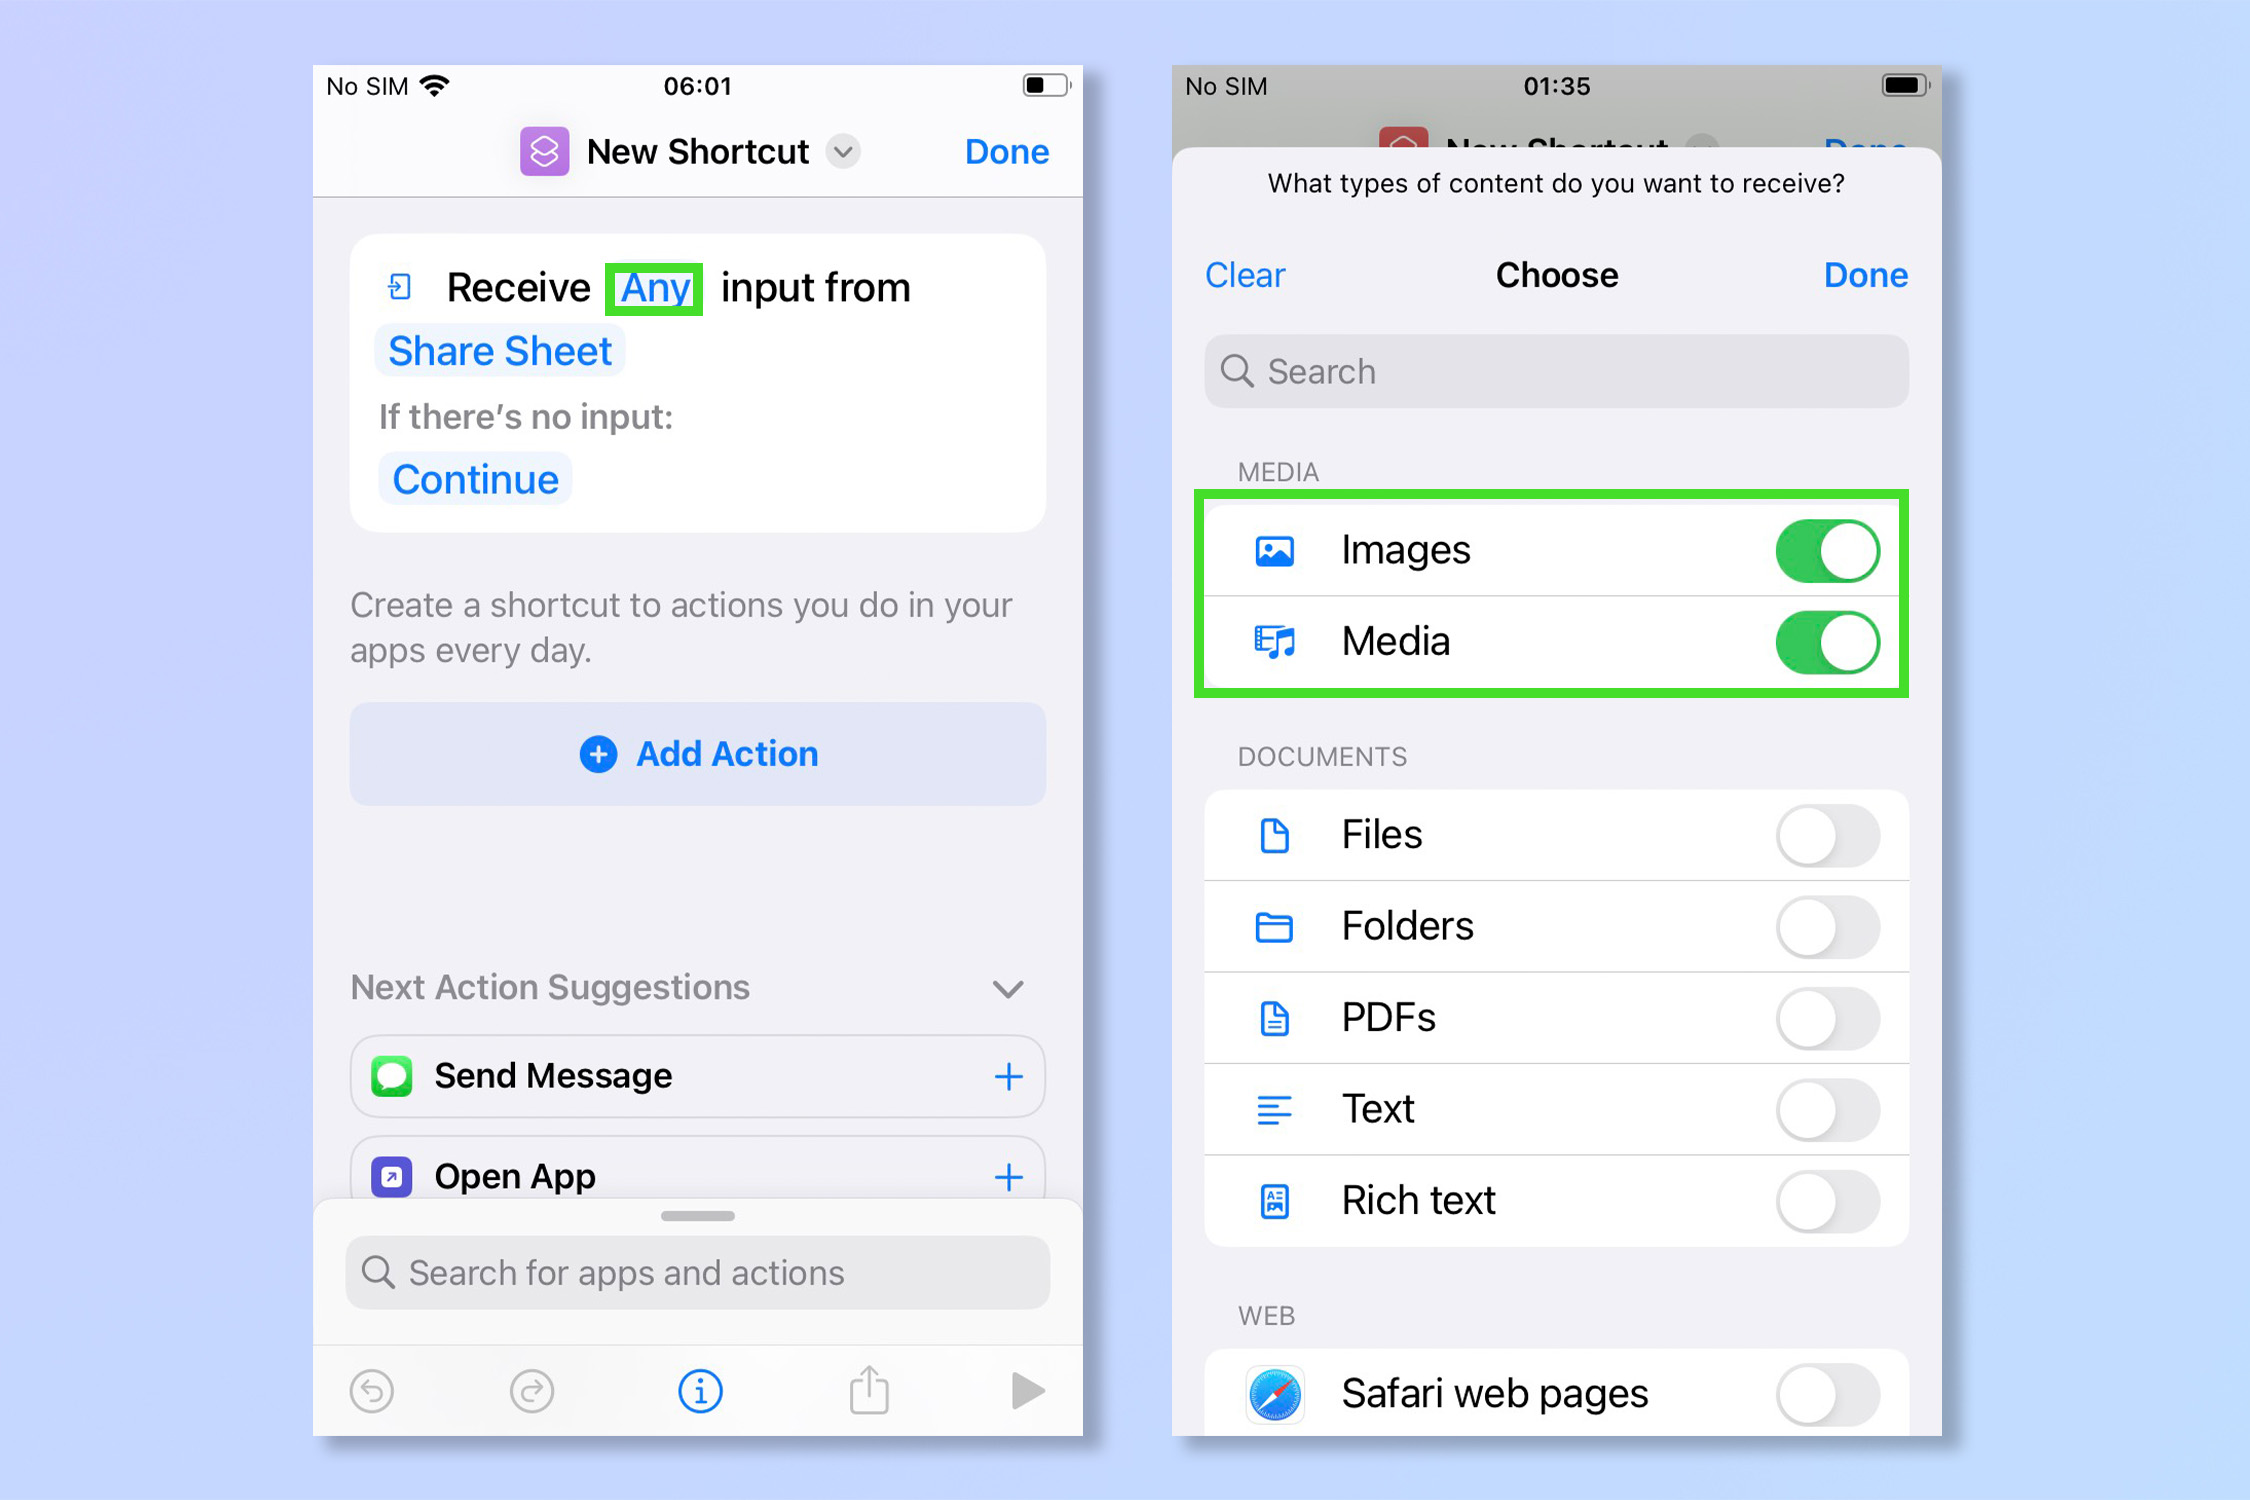
5. Go back to the previous screen and tap on the word ‘Any’, then deselect everything except Images and Media.
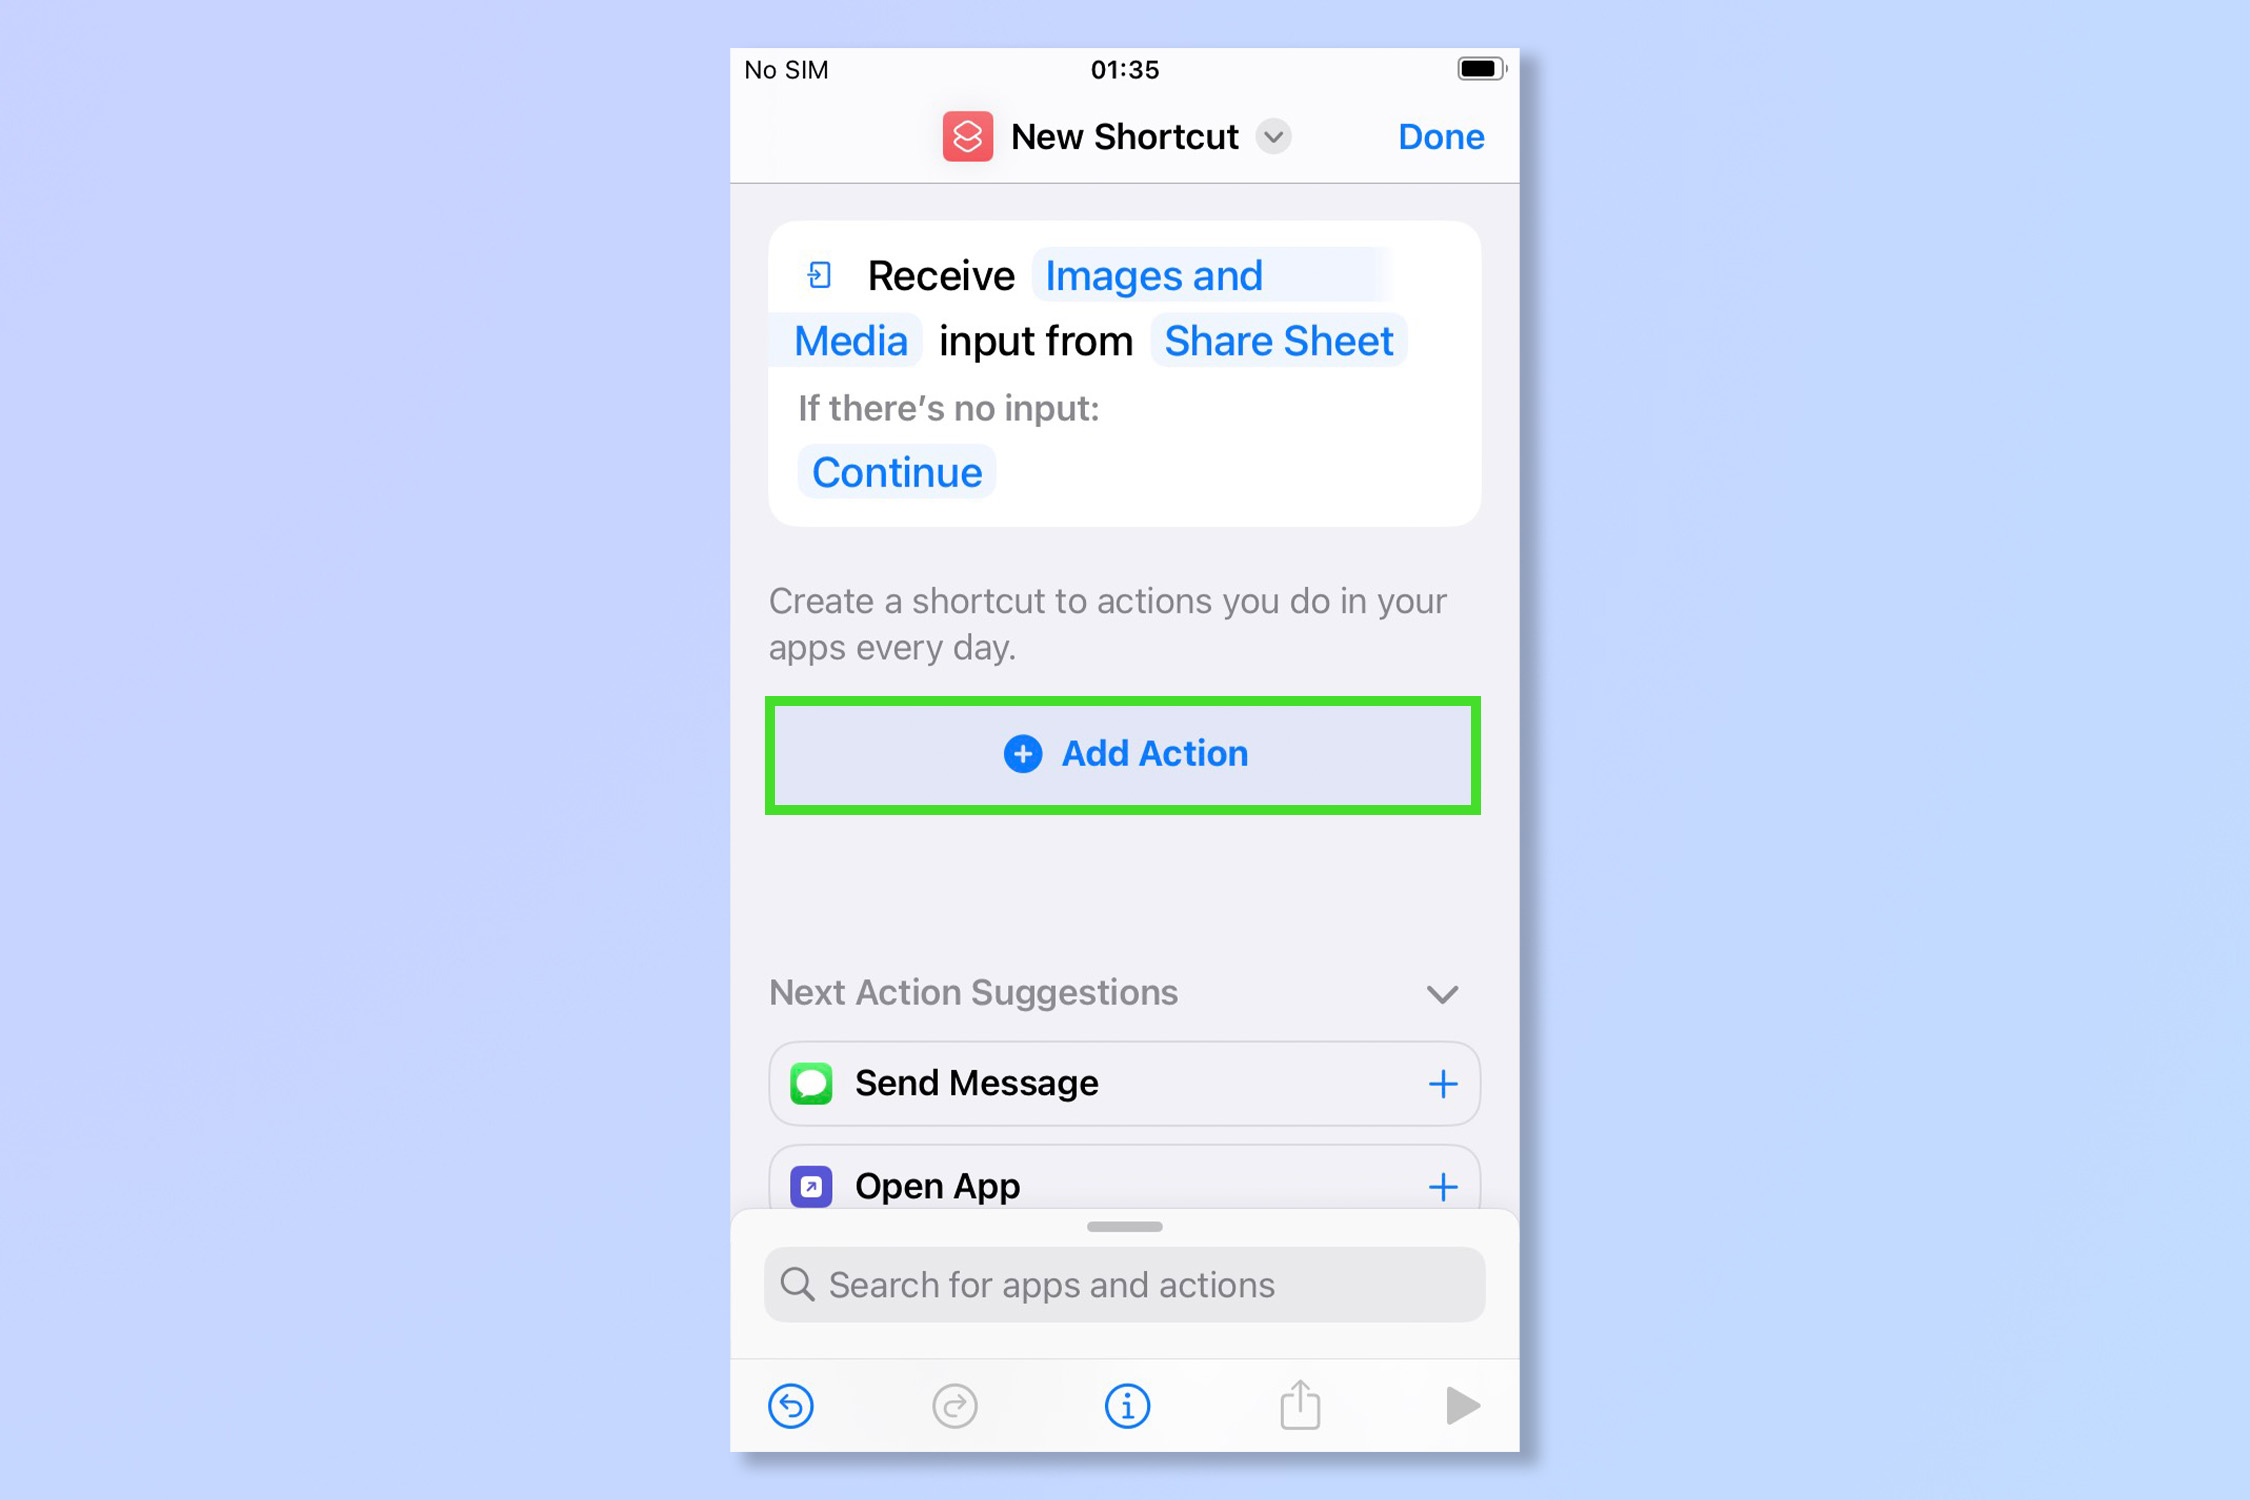
6. From the new shortcut screen, tap Add Action.
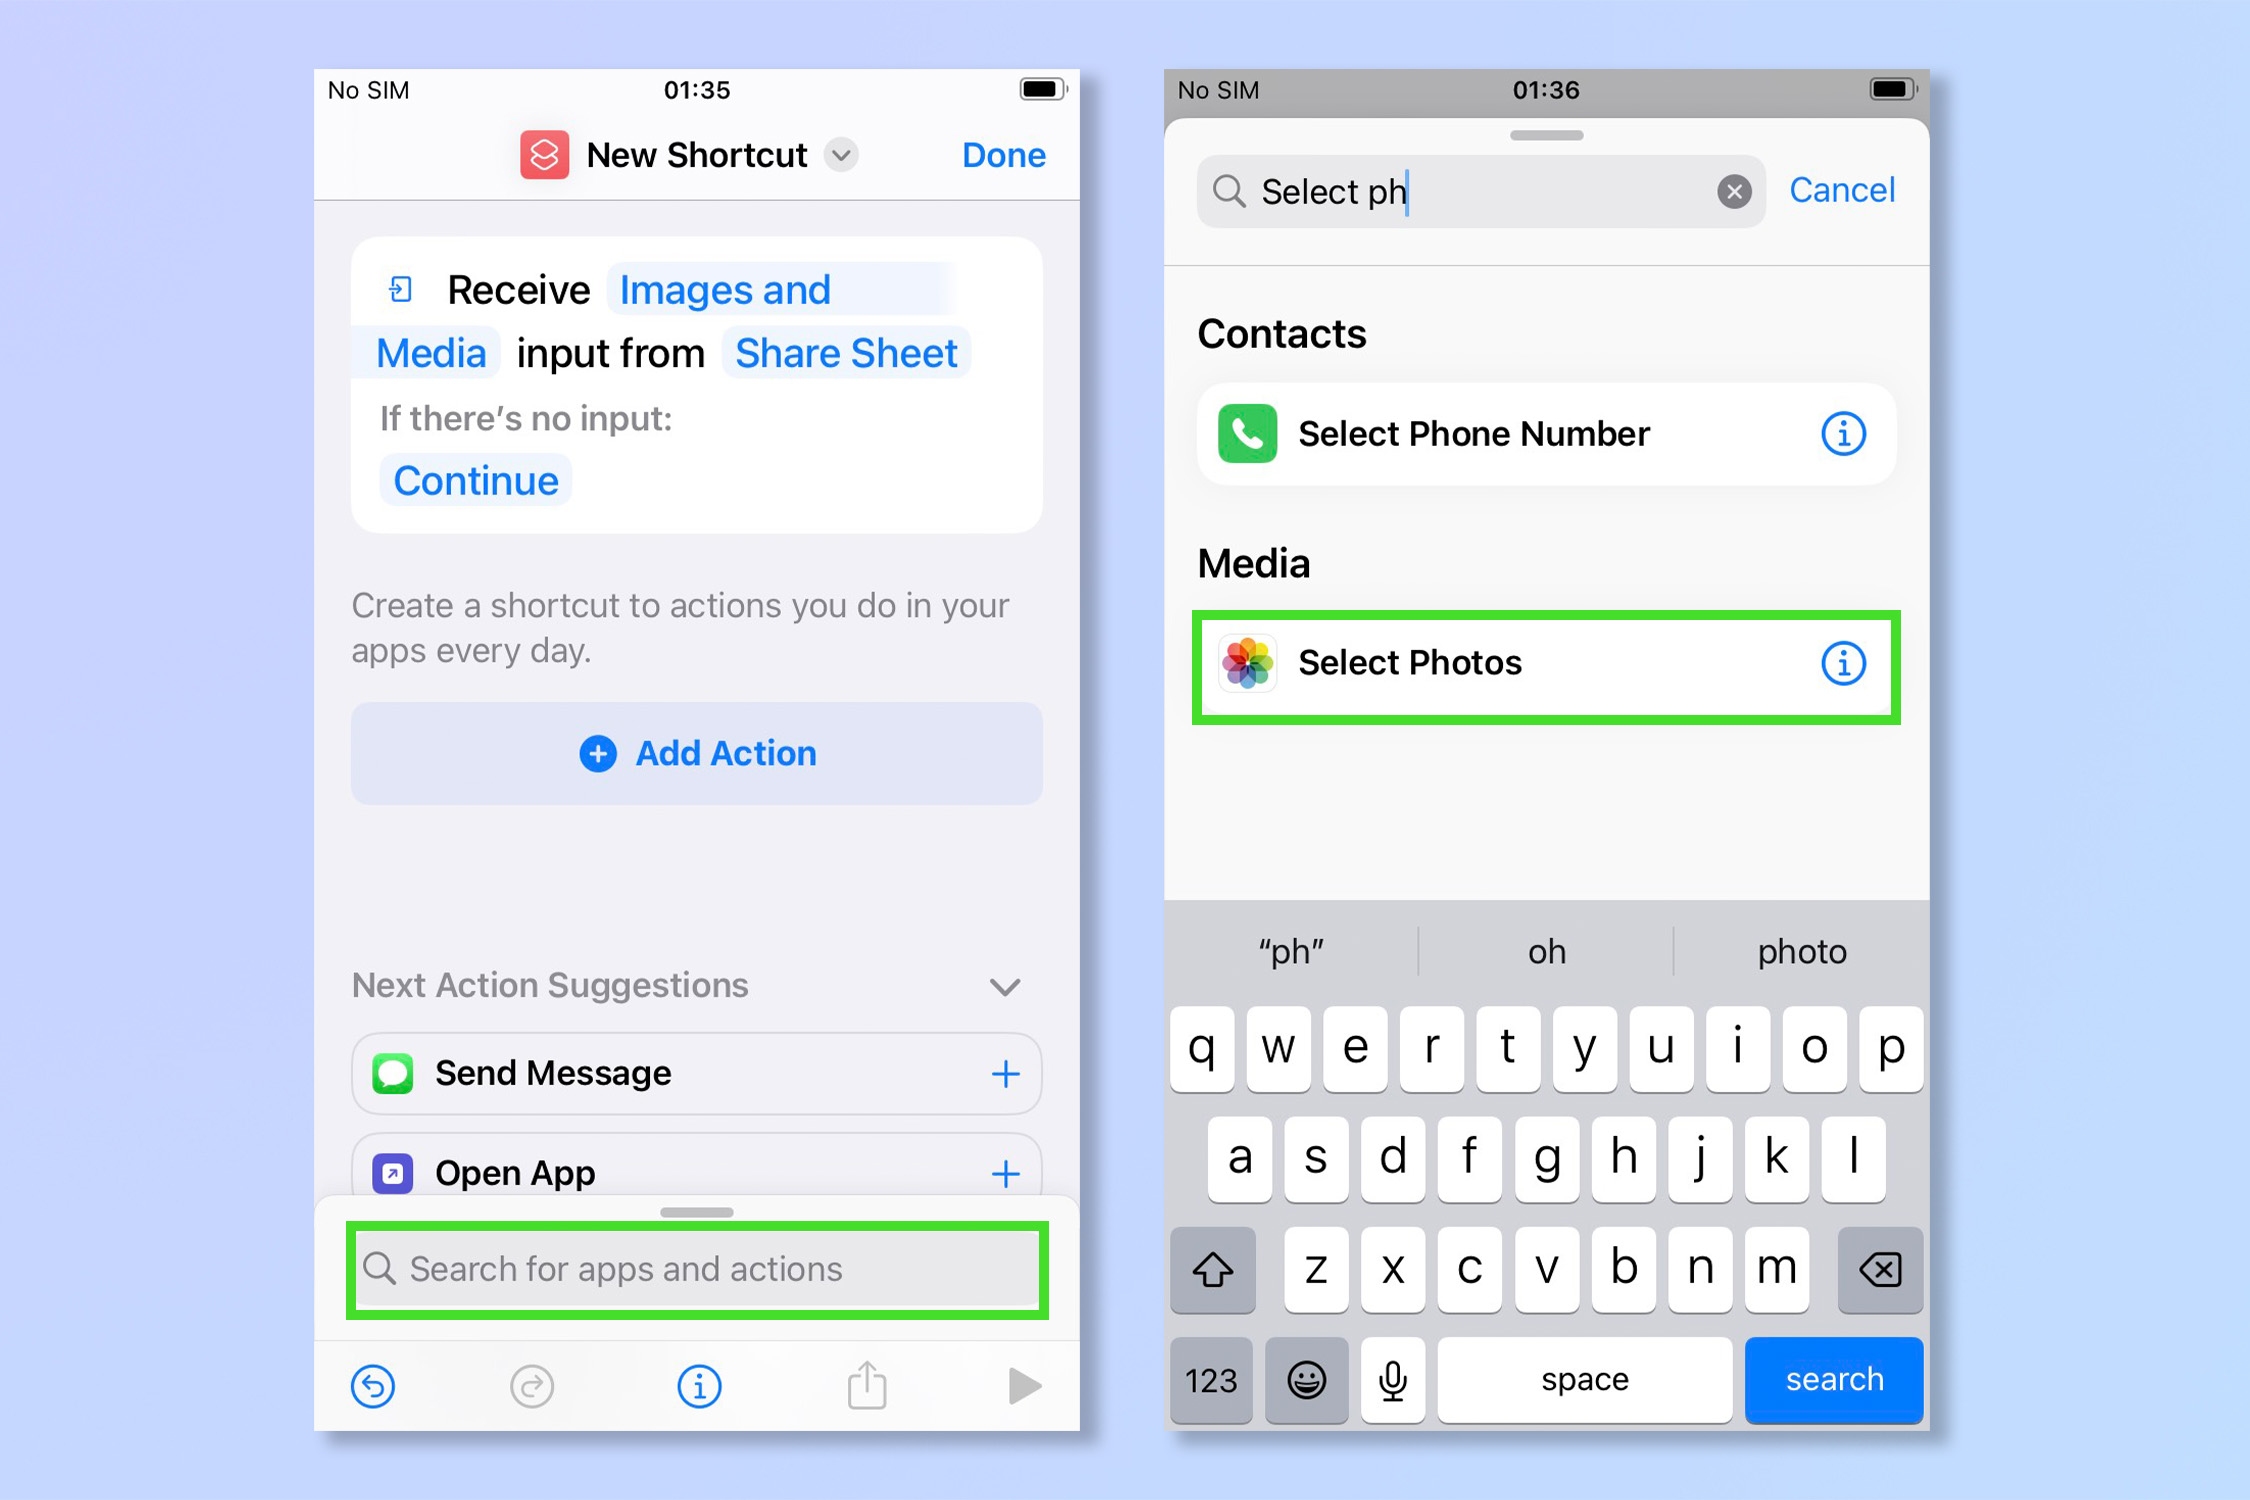
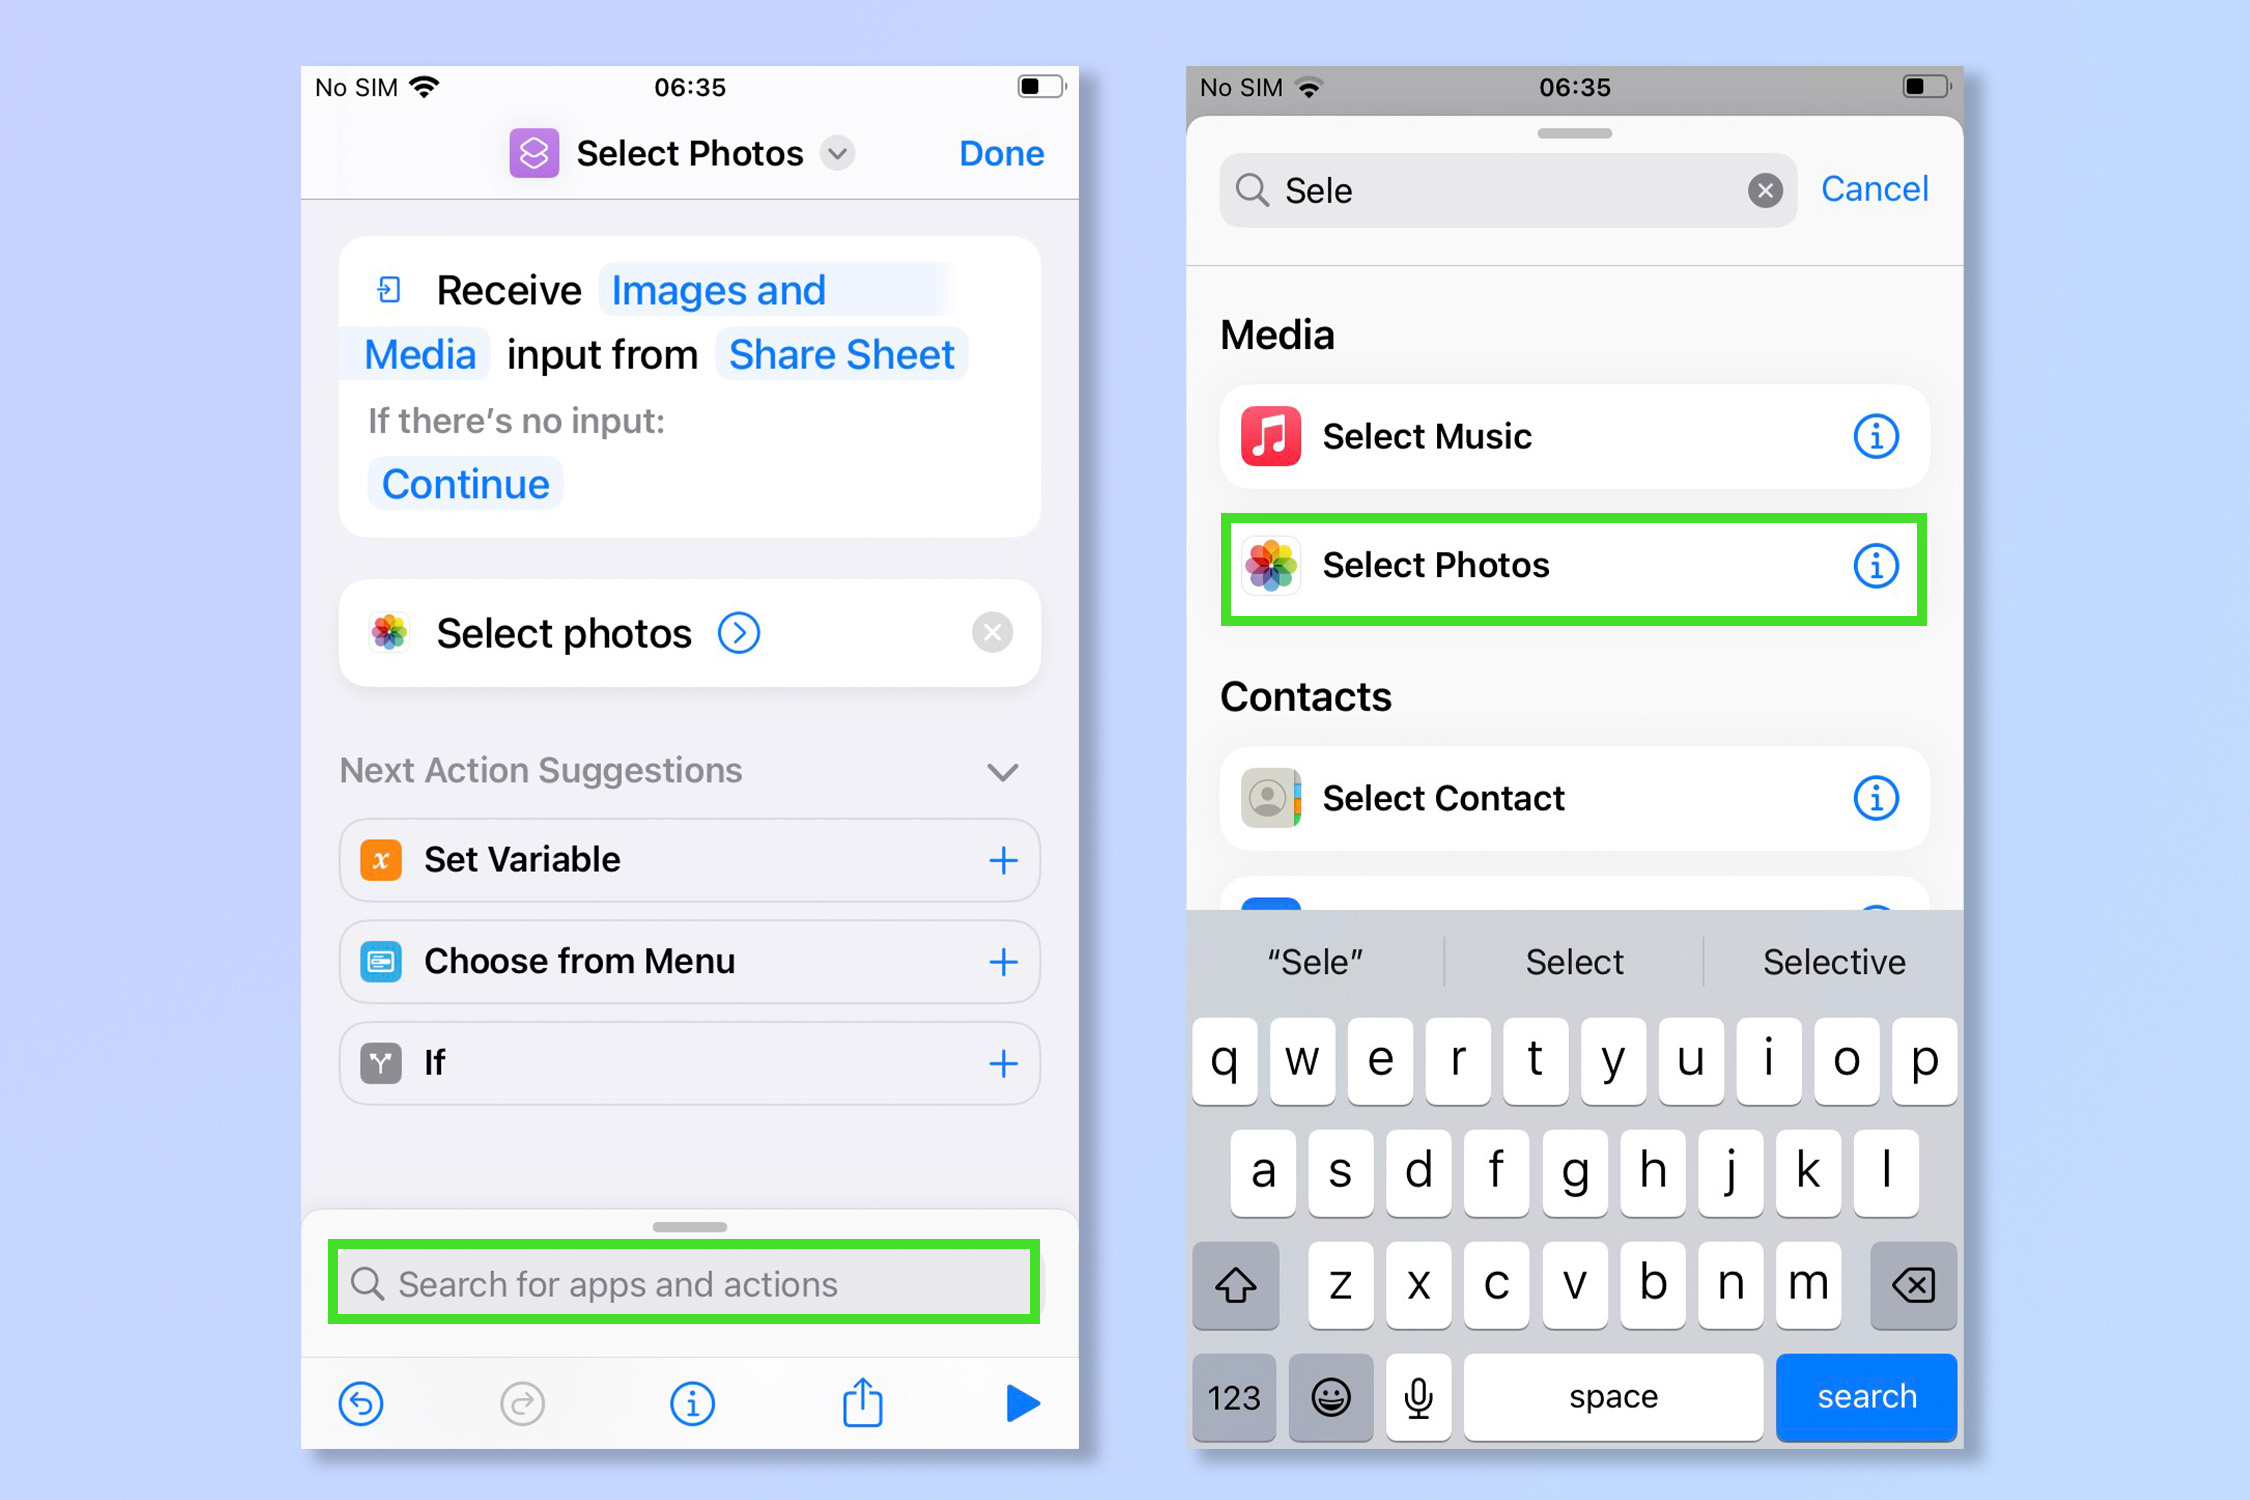
7. Tap the search bar at the bottom of the screen and type "Select Photos". When the option appears, tap Select Photos.
8. Repeat step 7 to add a second Select Photos action. This is will let you choose two photos at once.
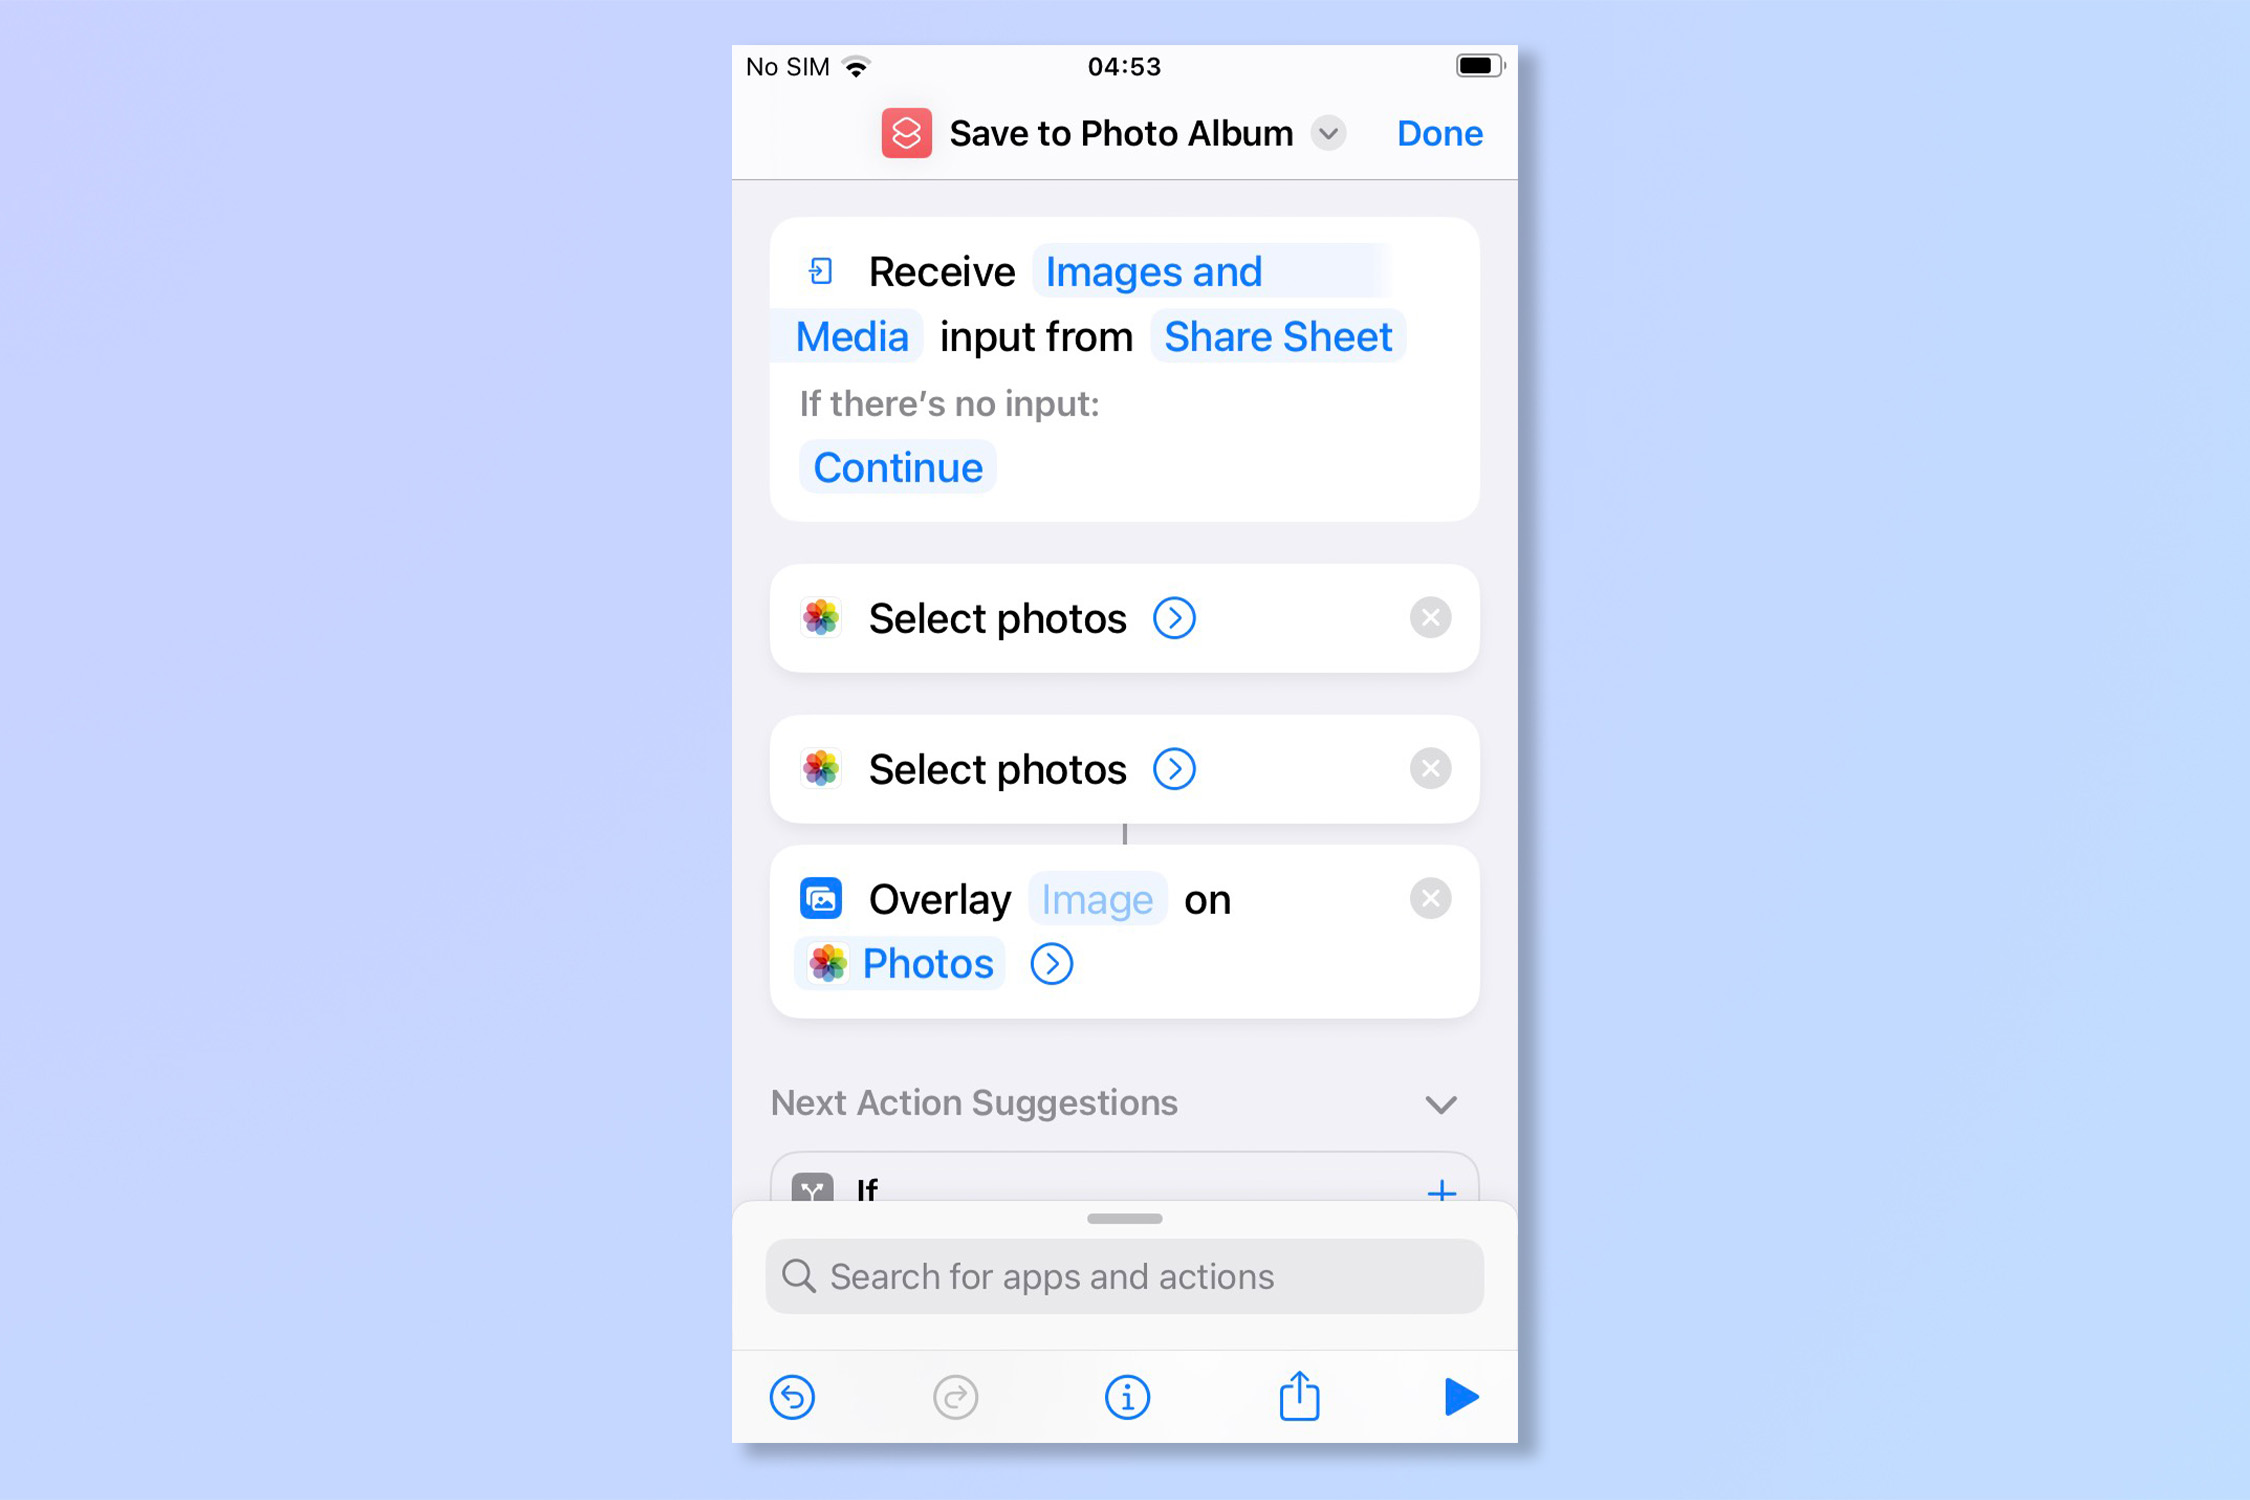
9. Tap the search bar again to add a third action. Type "overlay Images" and then tap Overlay Images once it appears. You should now have a shortcut that looks like the screenshot below.
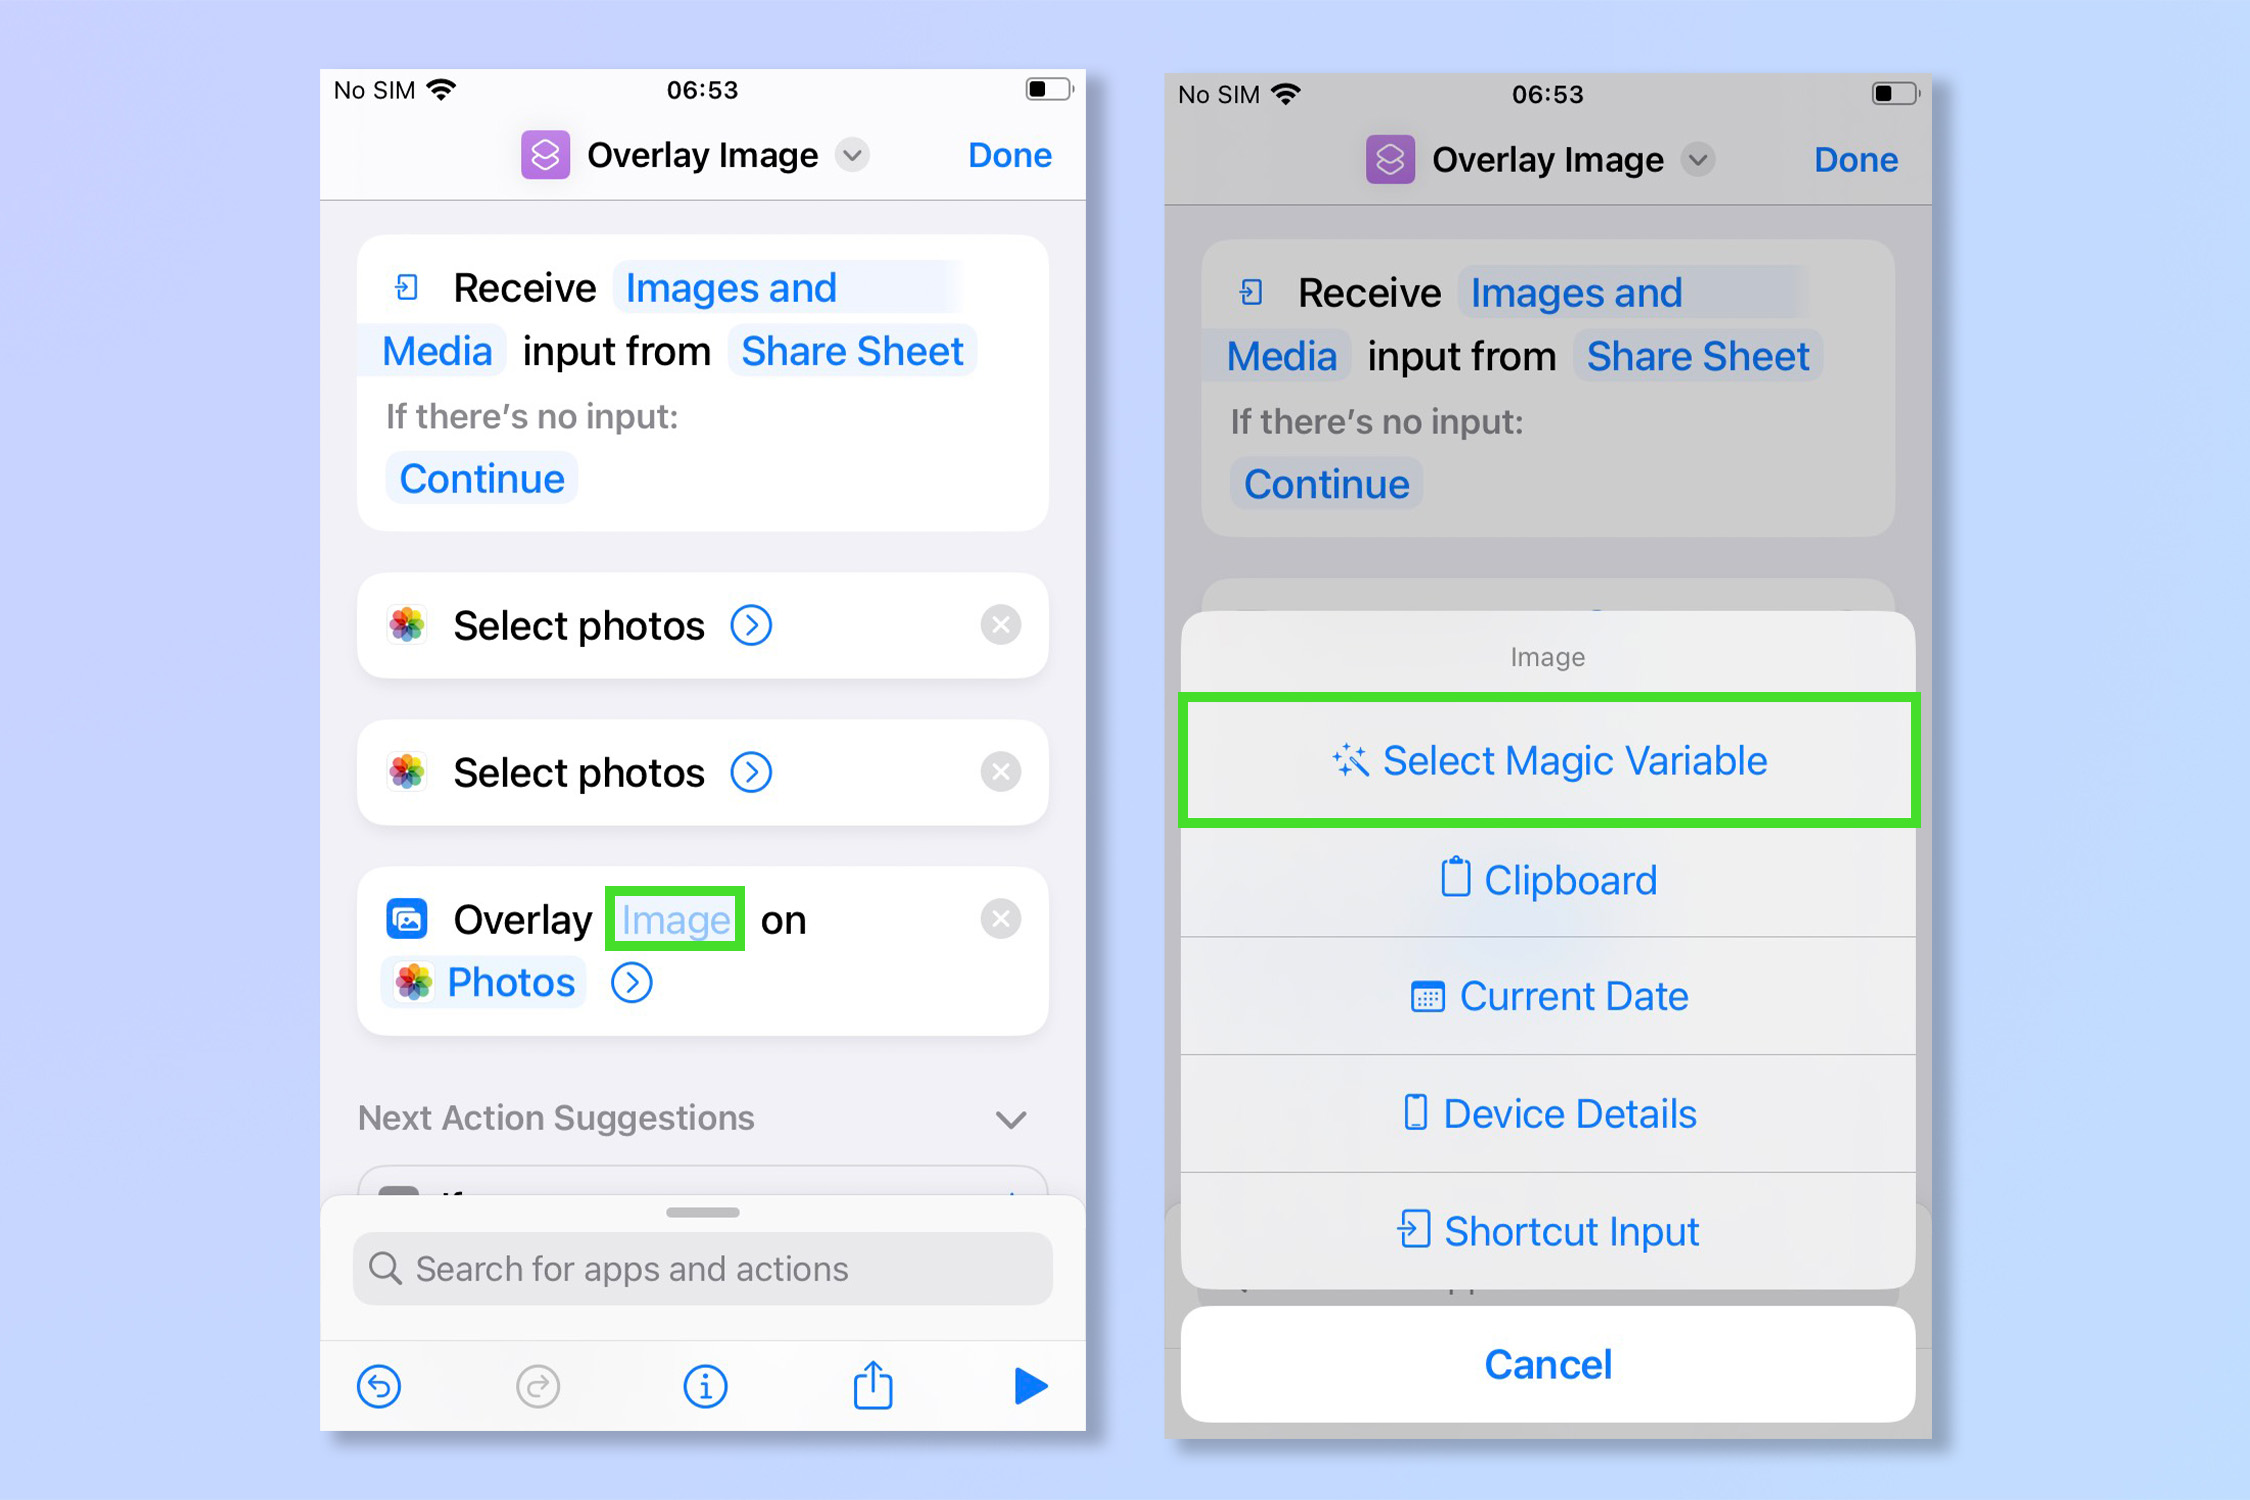
10. Tap on the word ‘image’ (you might need to long press) and then tap Select Magic Variable.
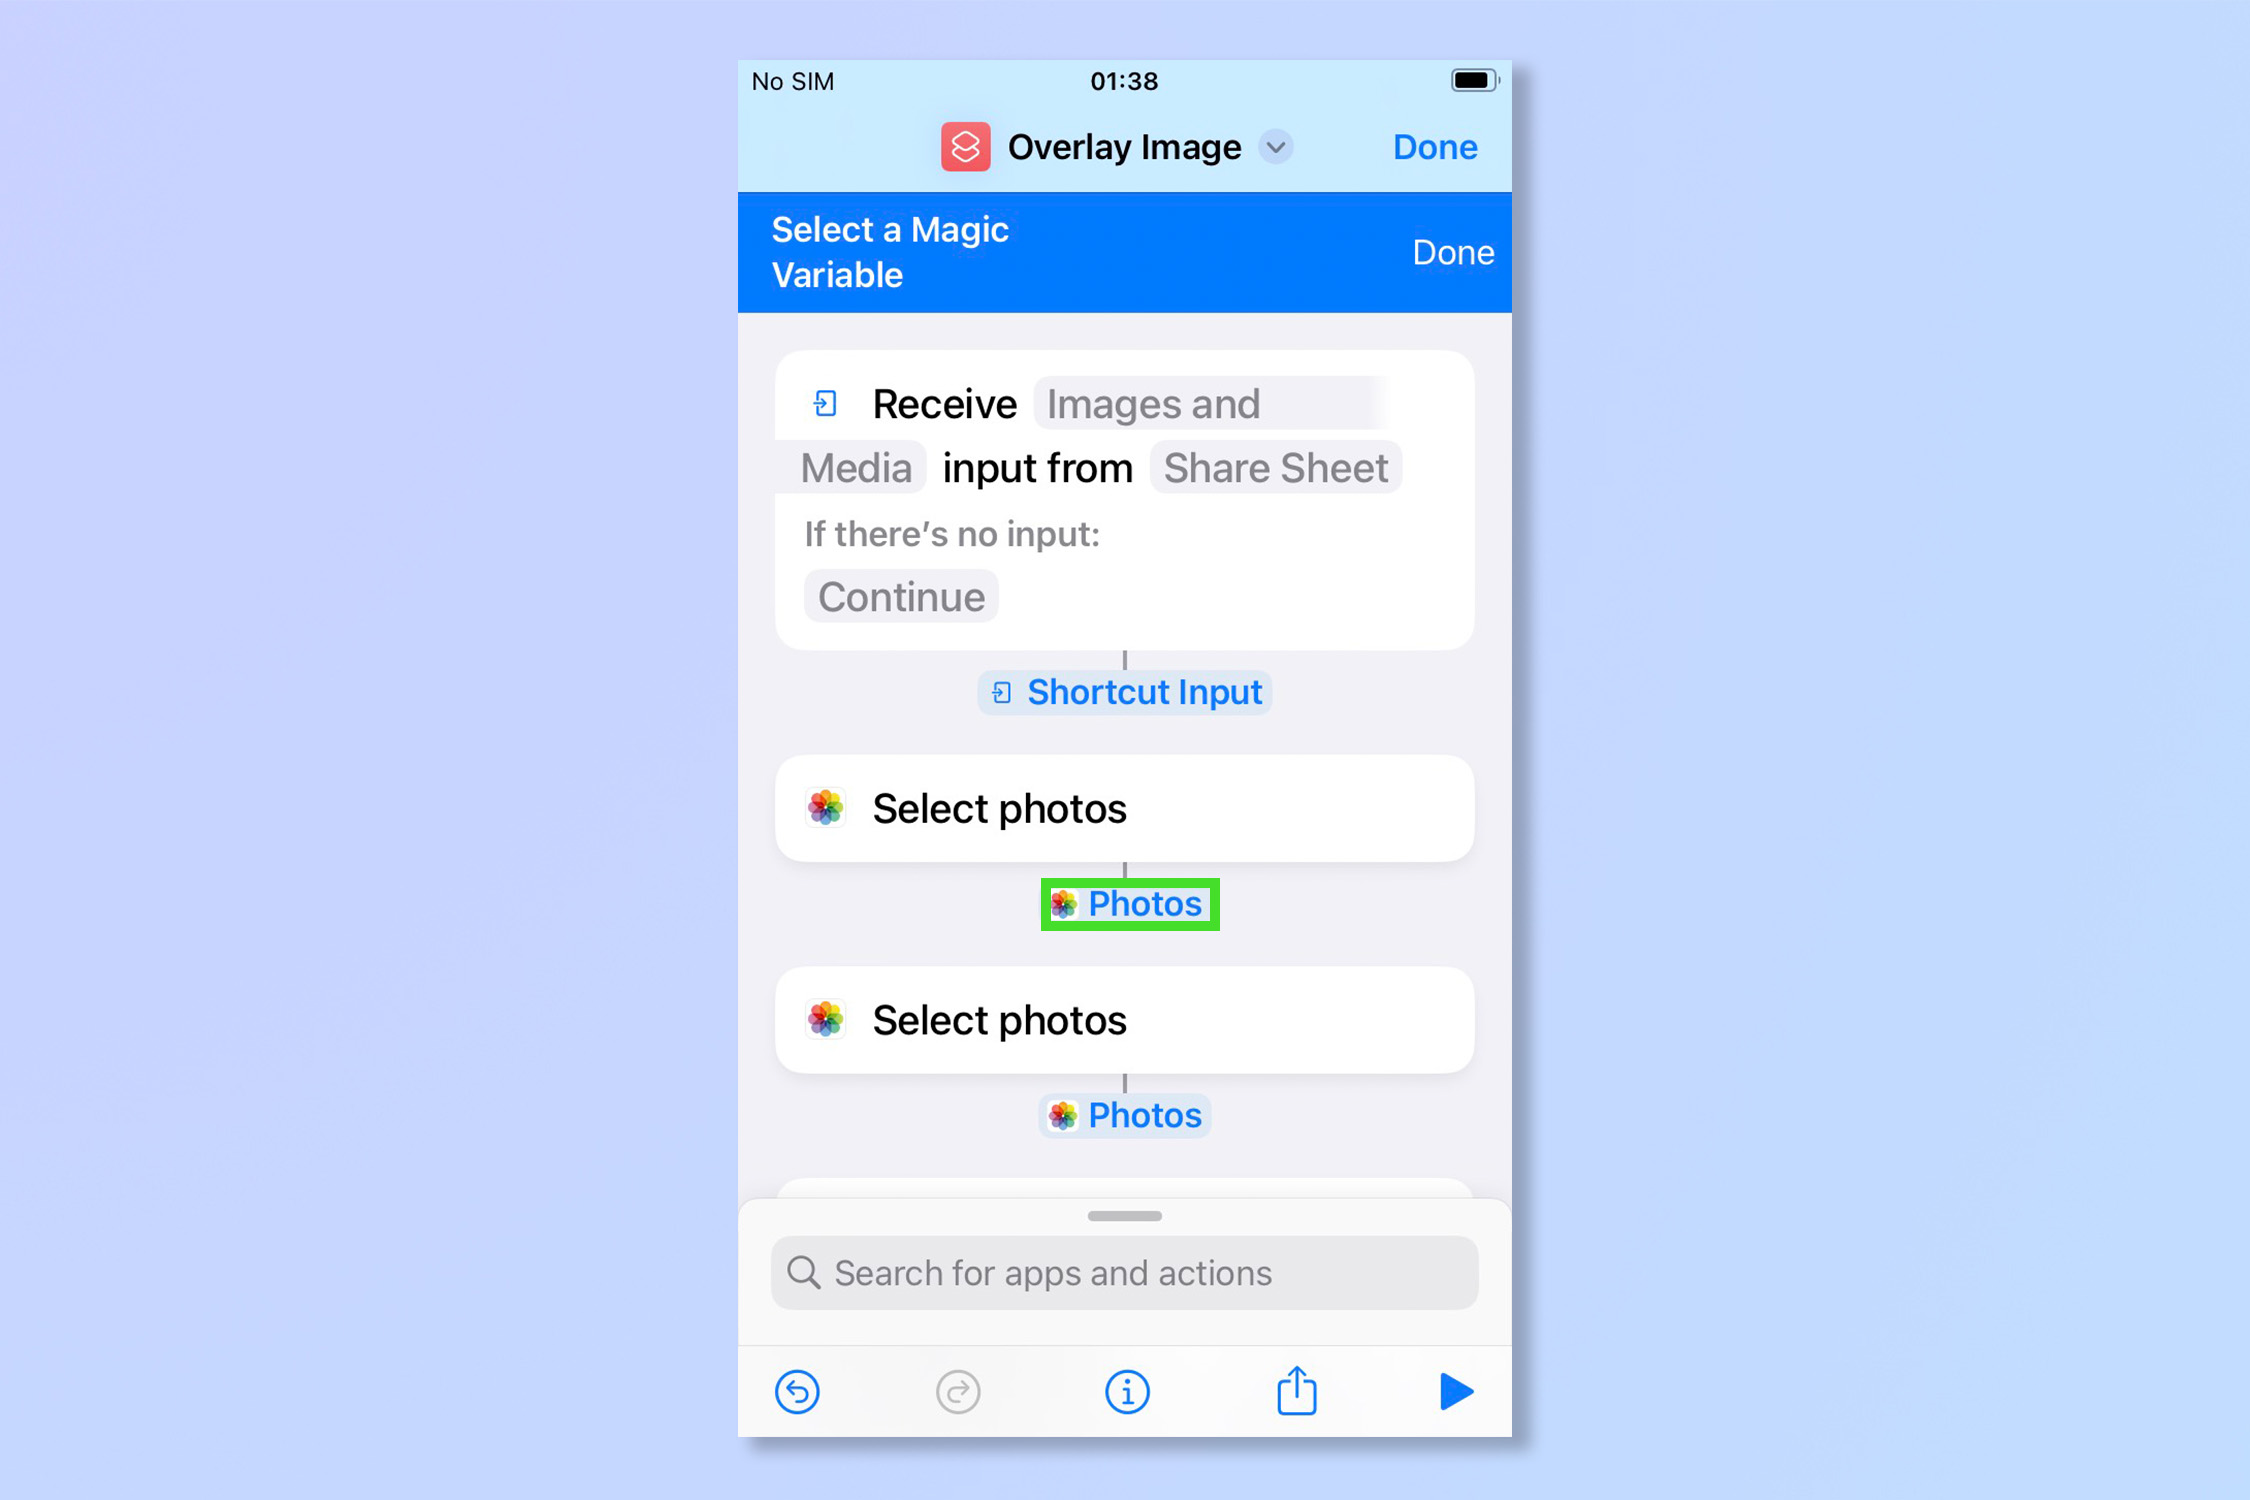
11. Now, tap on the first 'Photos'.
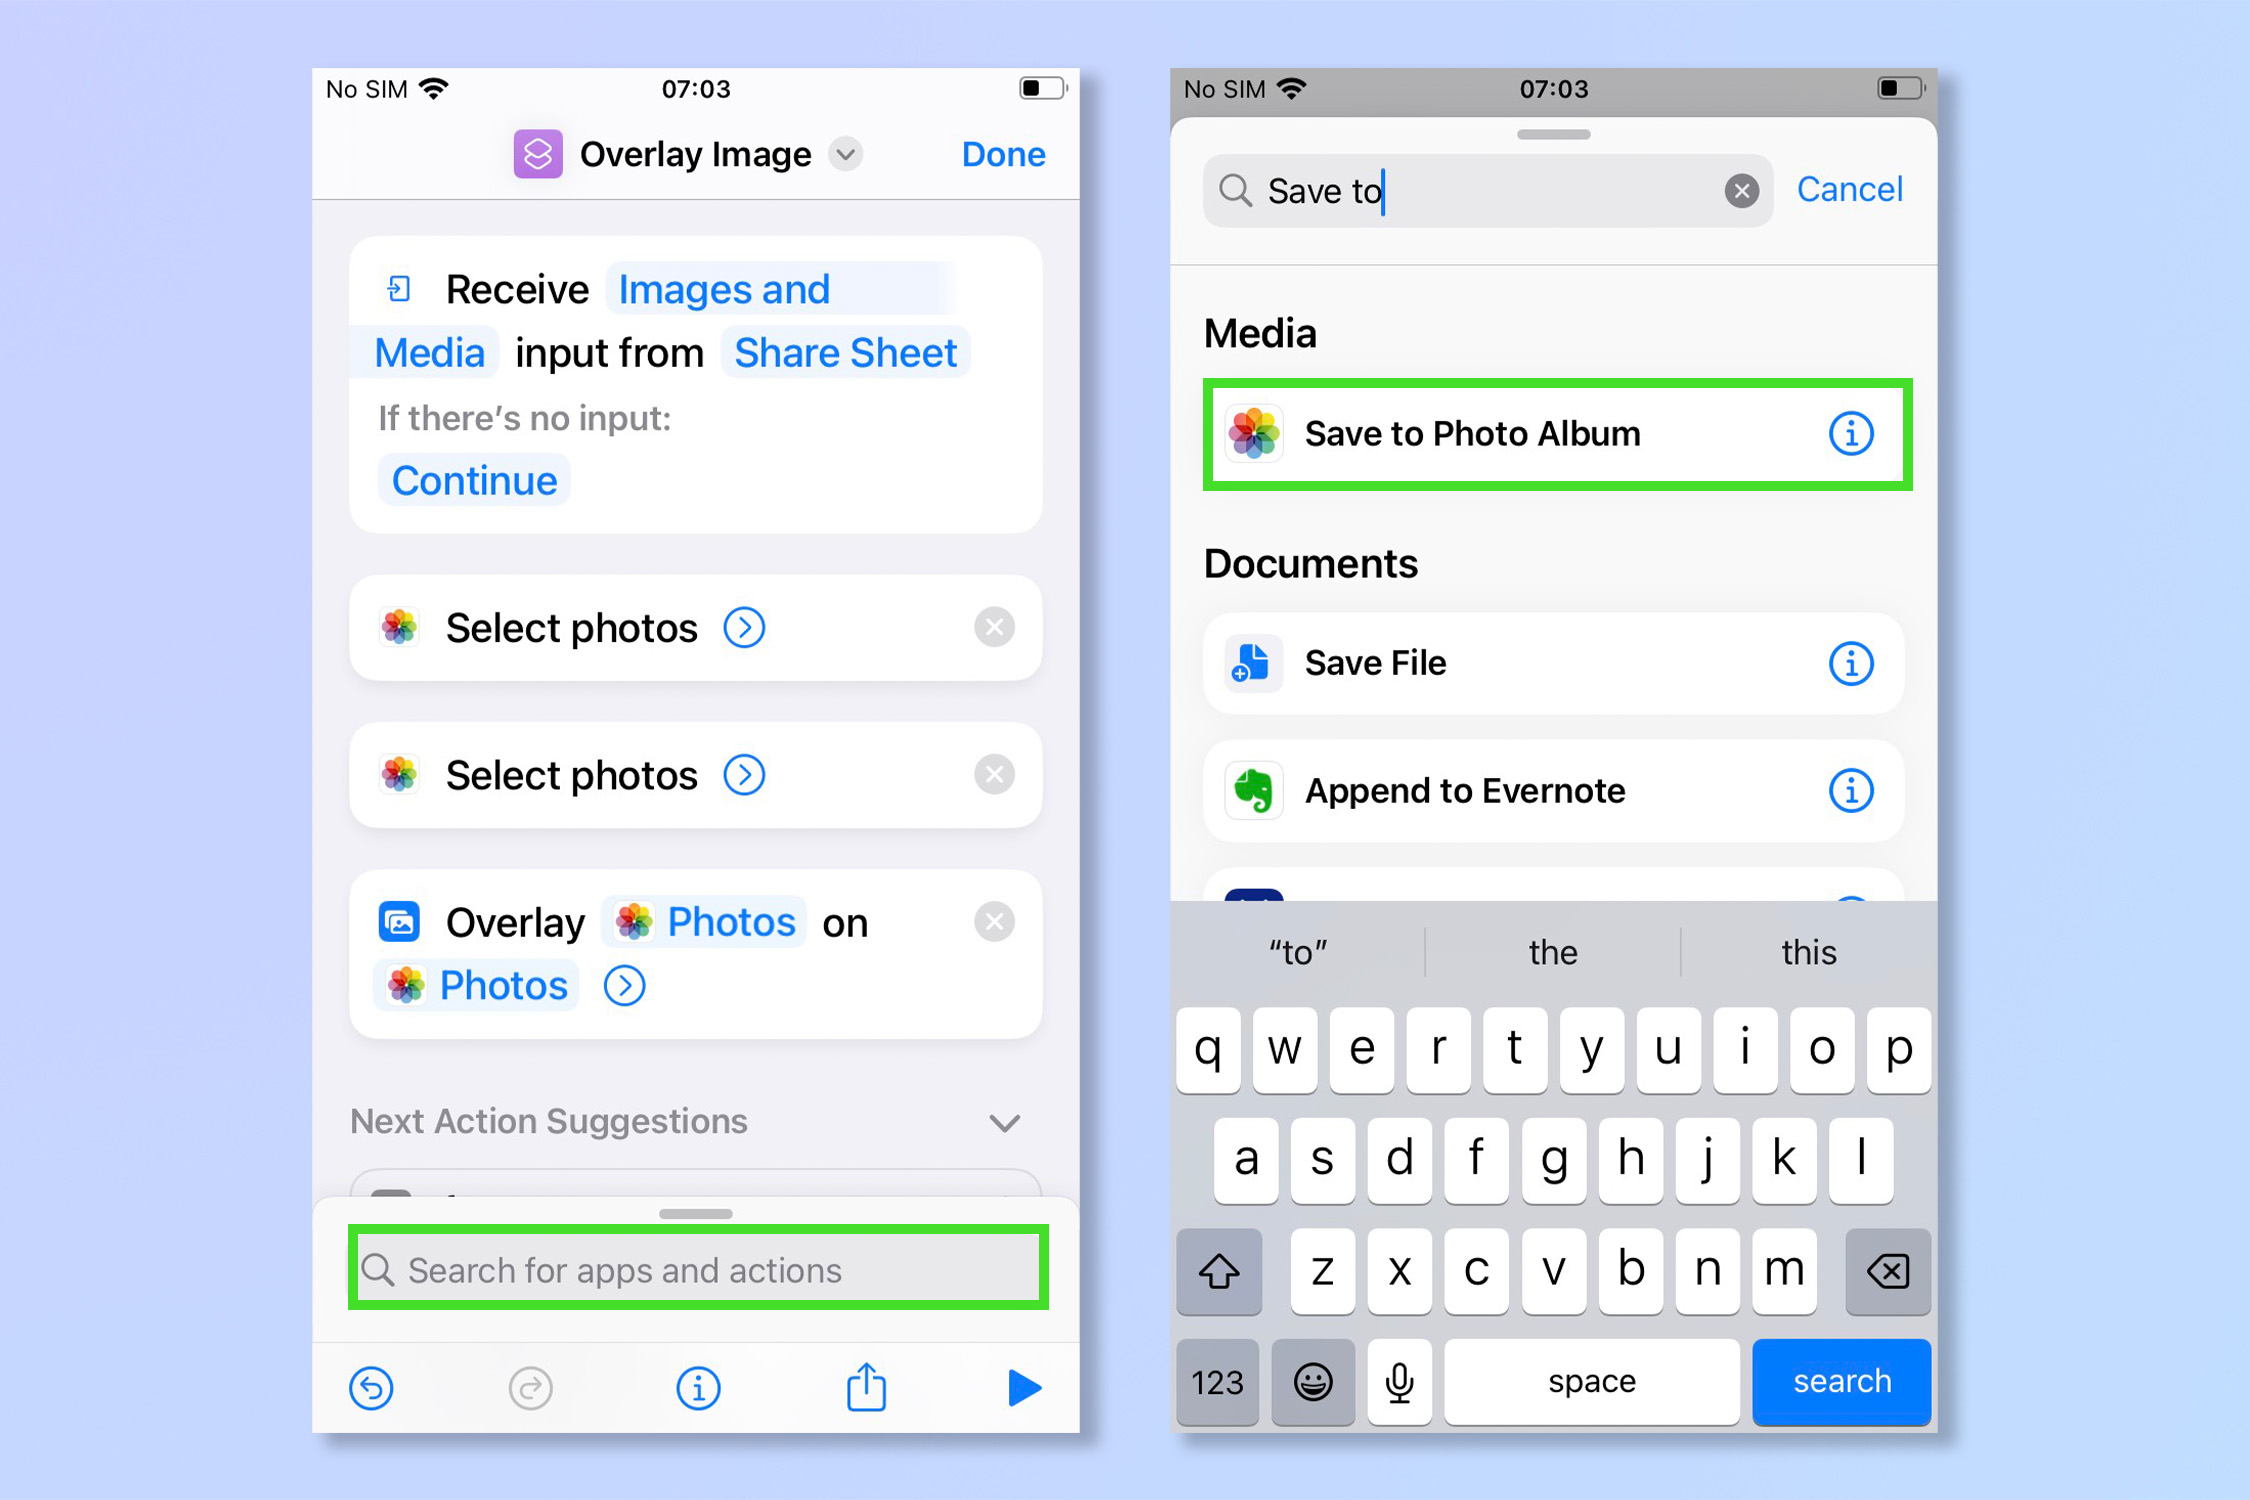
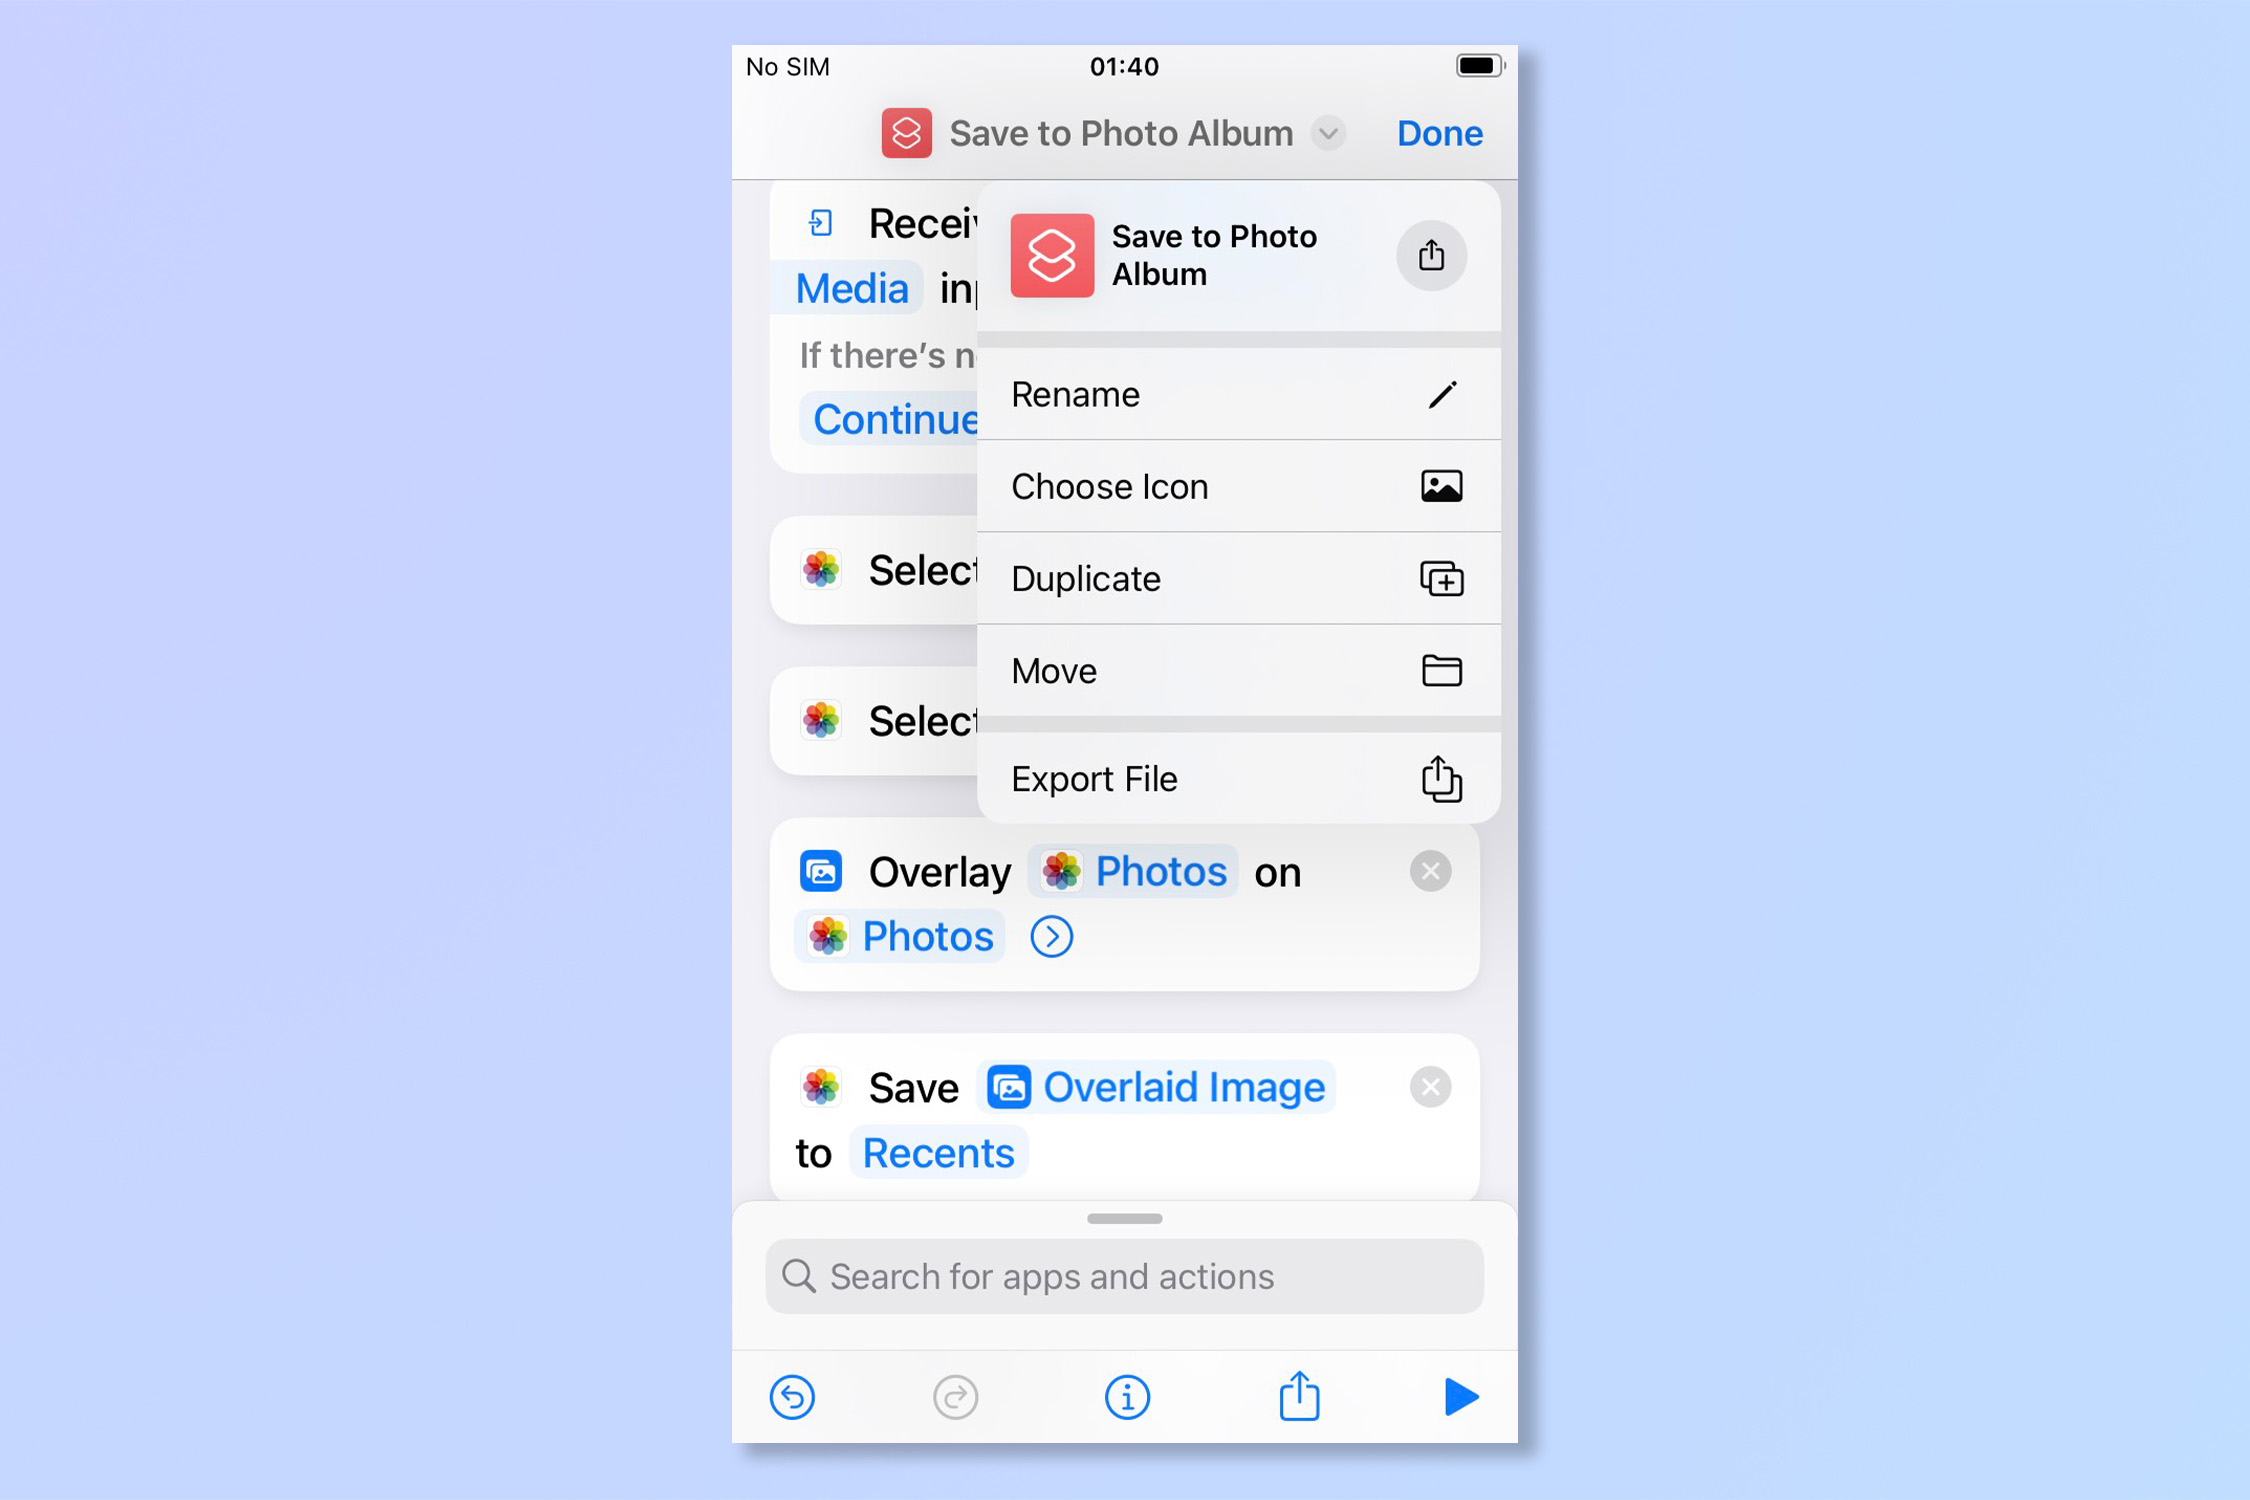
12. Tap the search bar and type "save to photo album", then tap Save to photo album once it appears.
13. Select the name of your shortcut and rename it to something appropriate like "Overlay Images" — this will be the name it appears as under the share sheet when editing images.
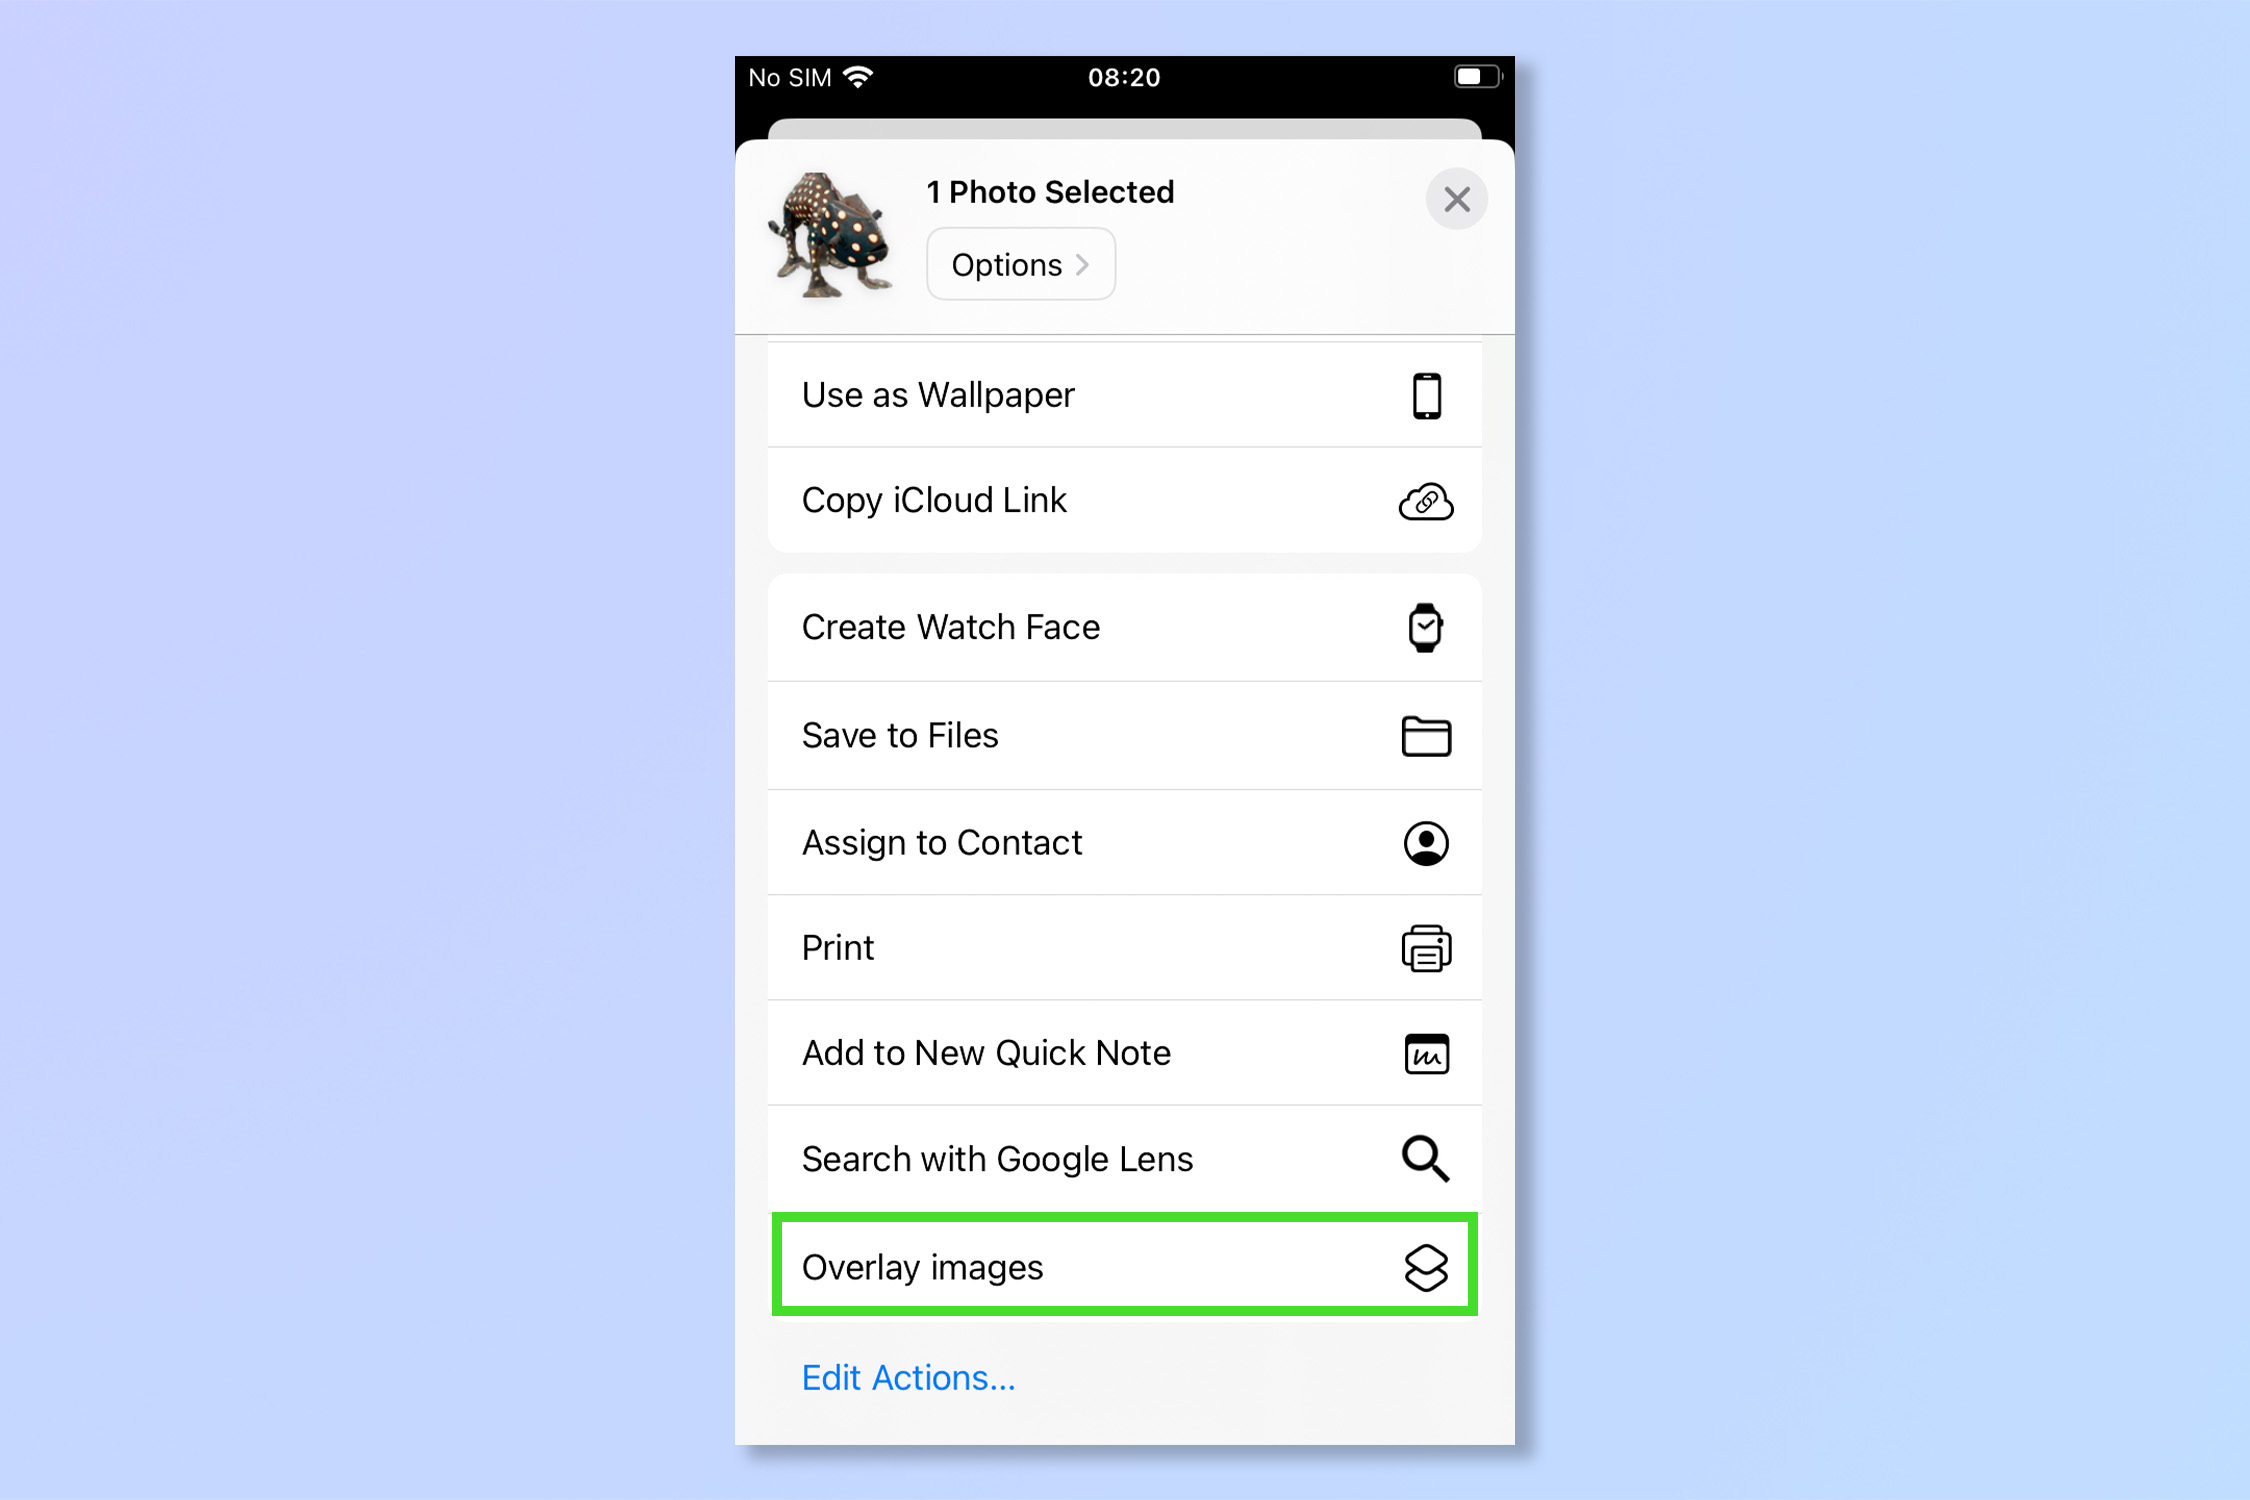
14. In the Photos App, tap the share sheet (bottom left) and you will find your new shortcut.
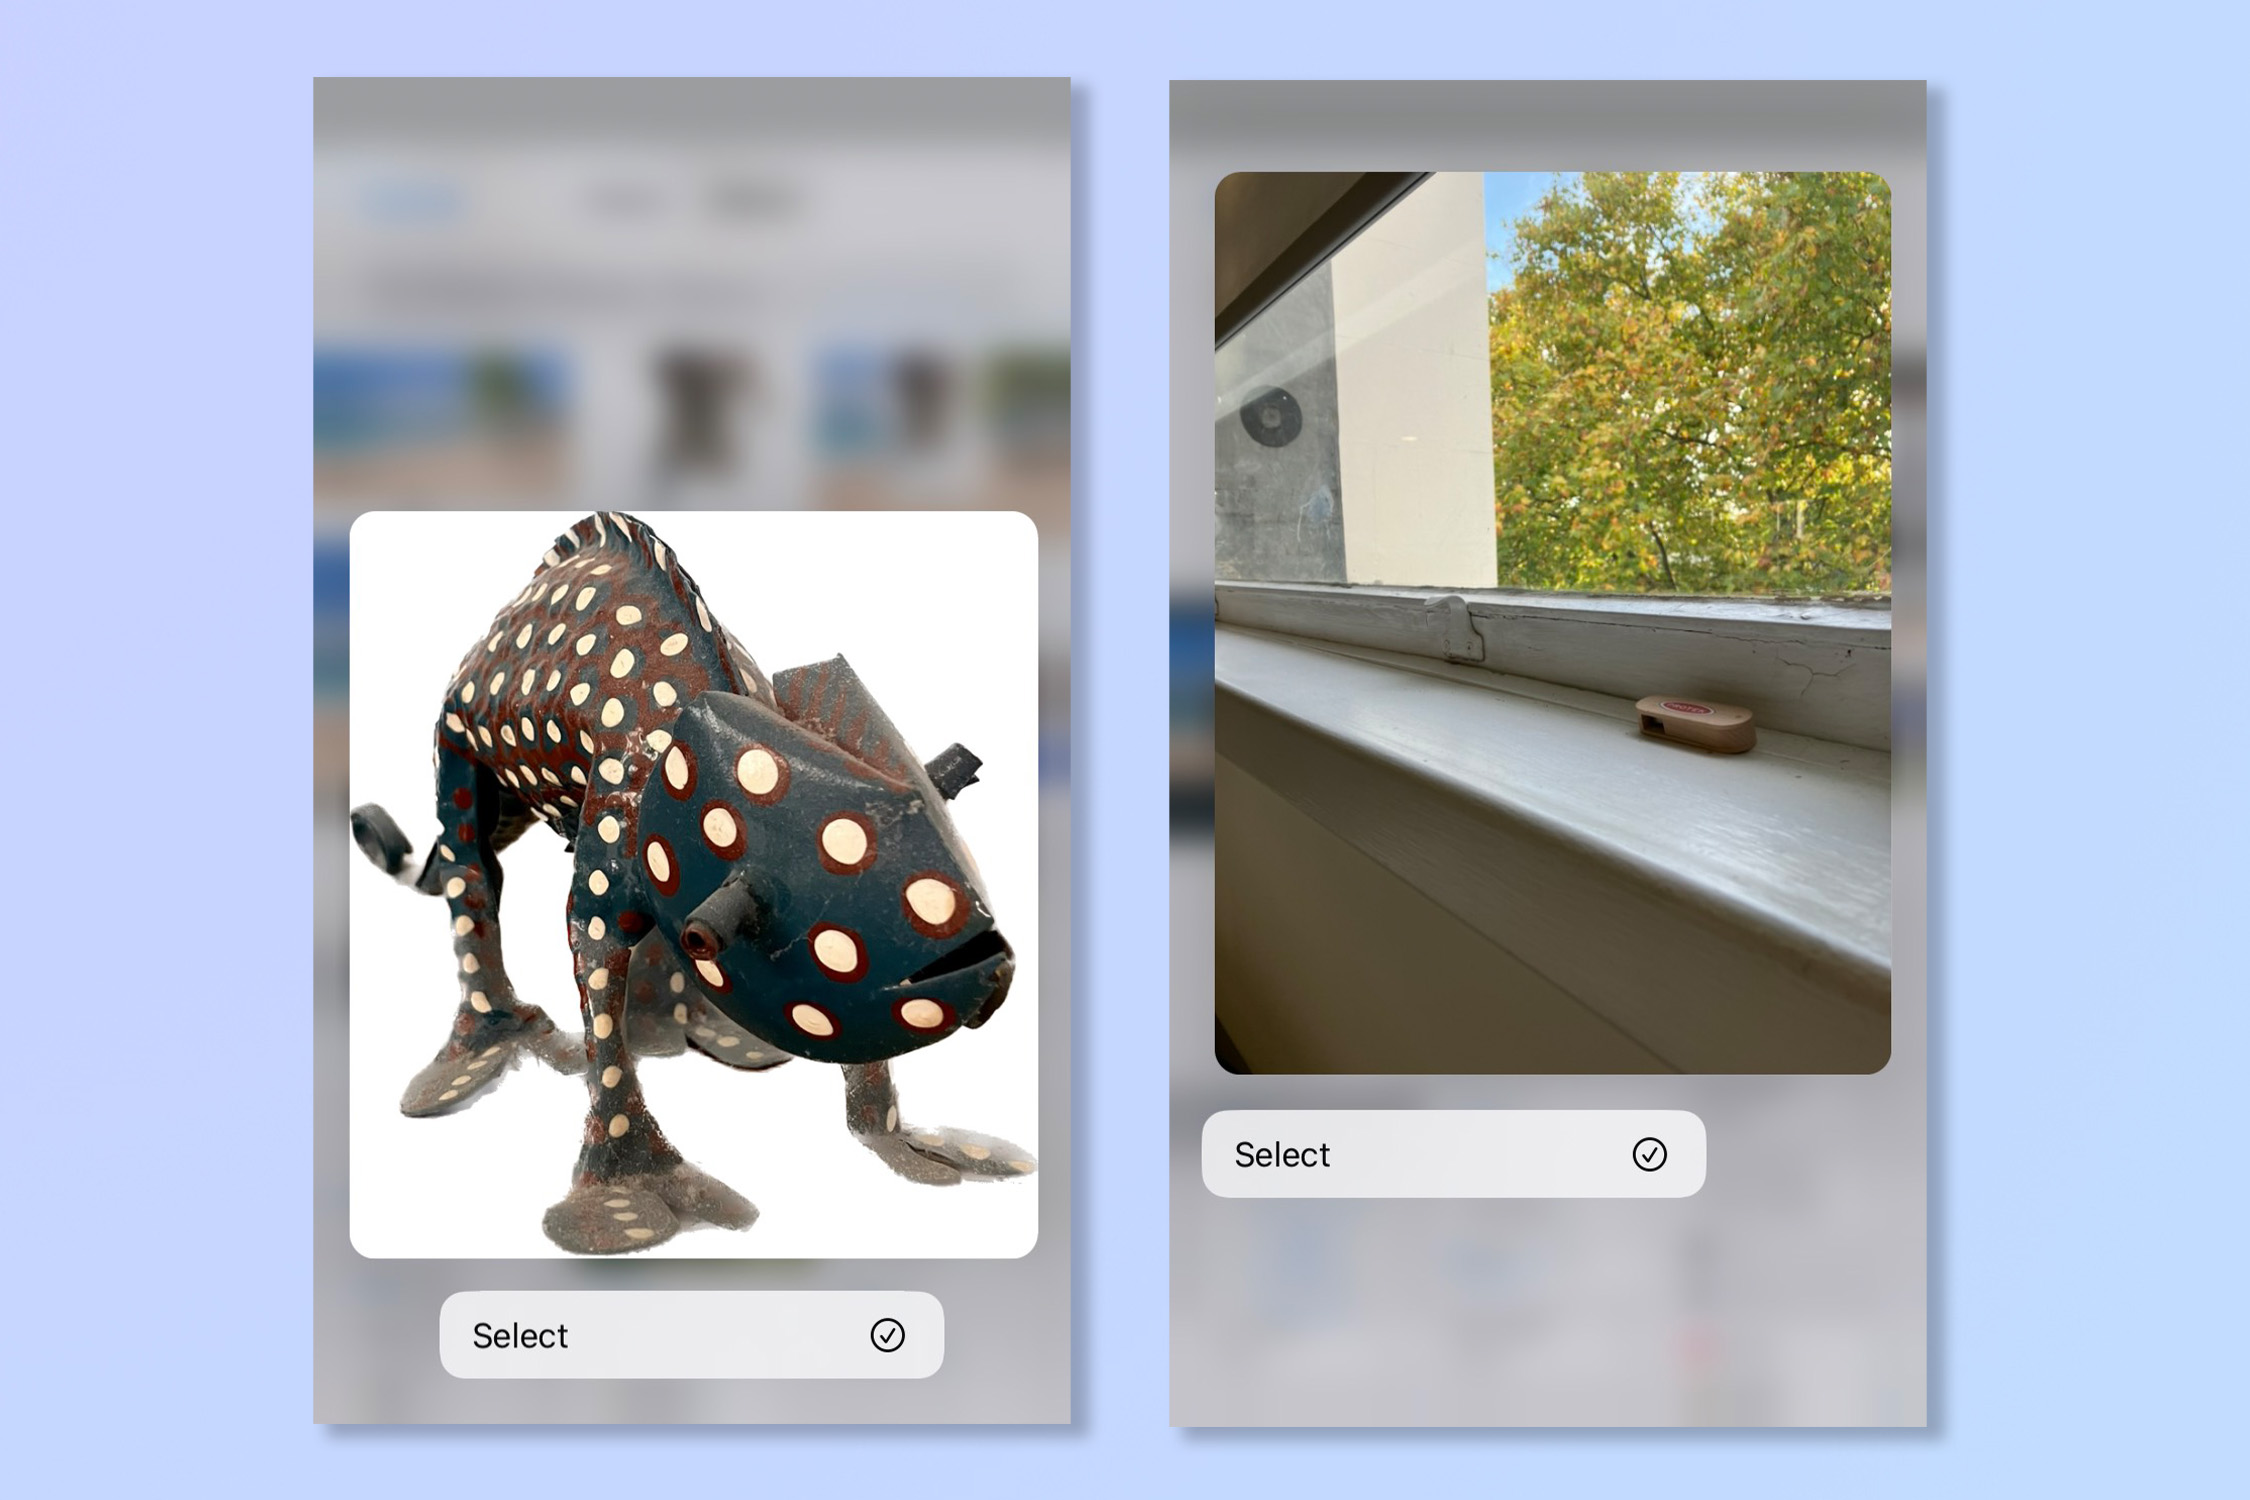
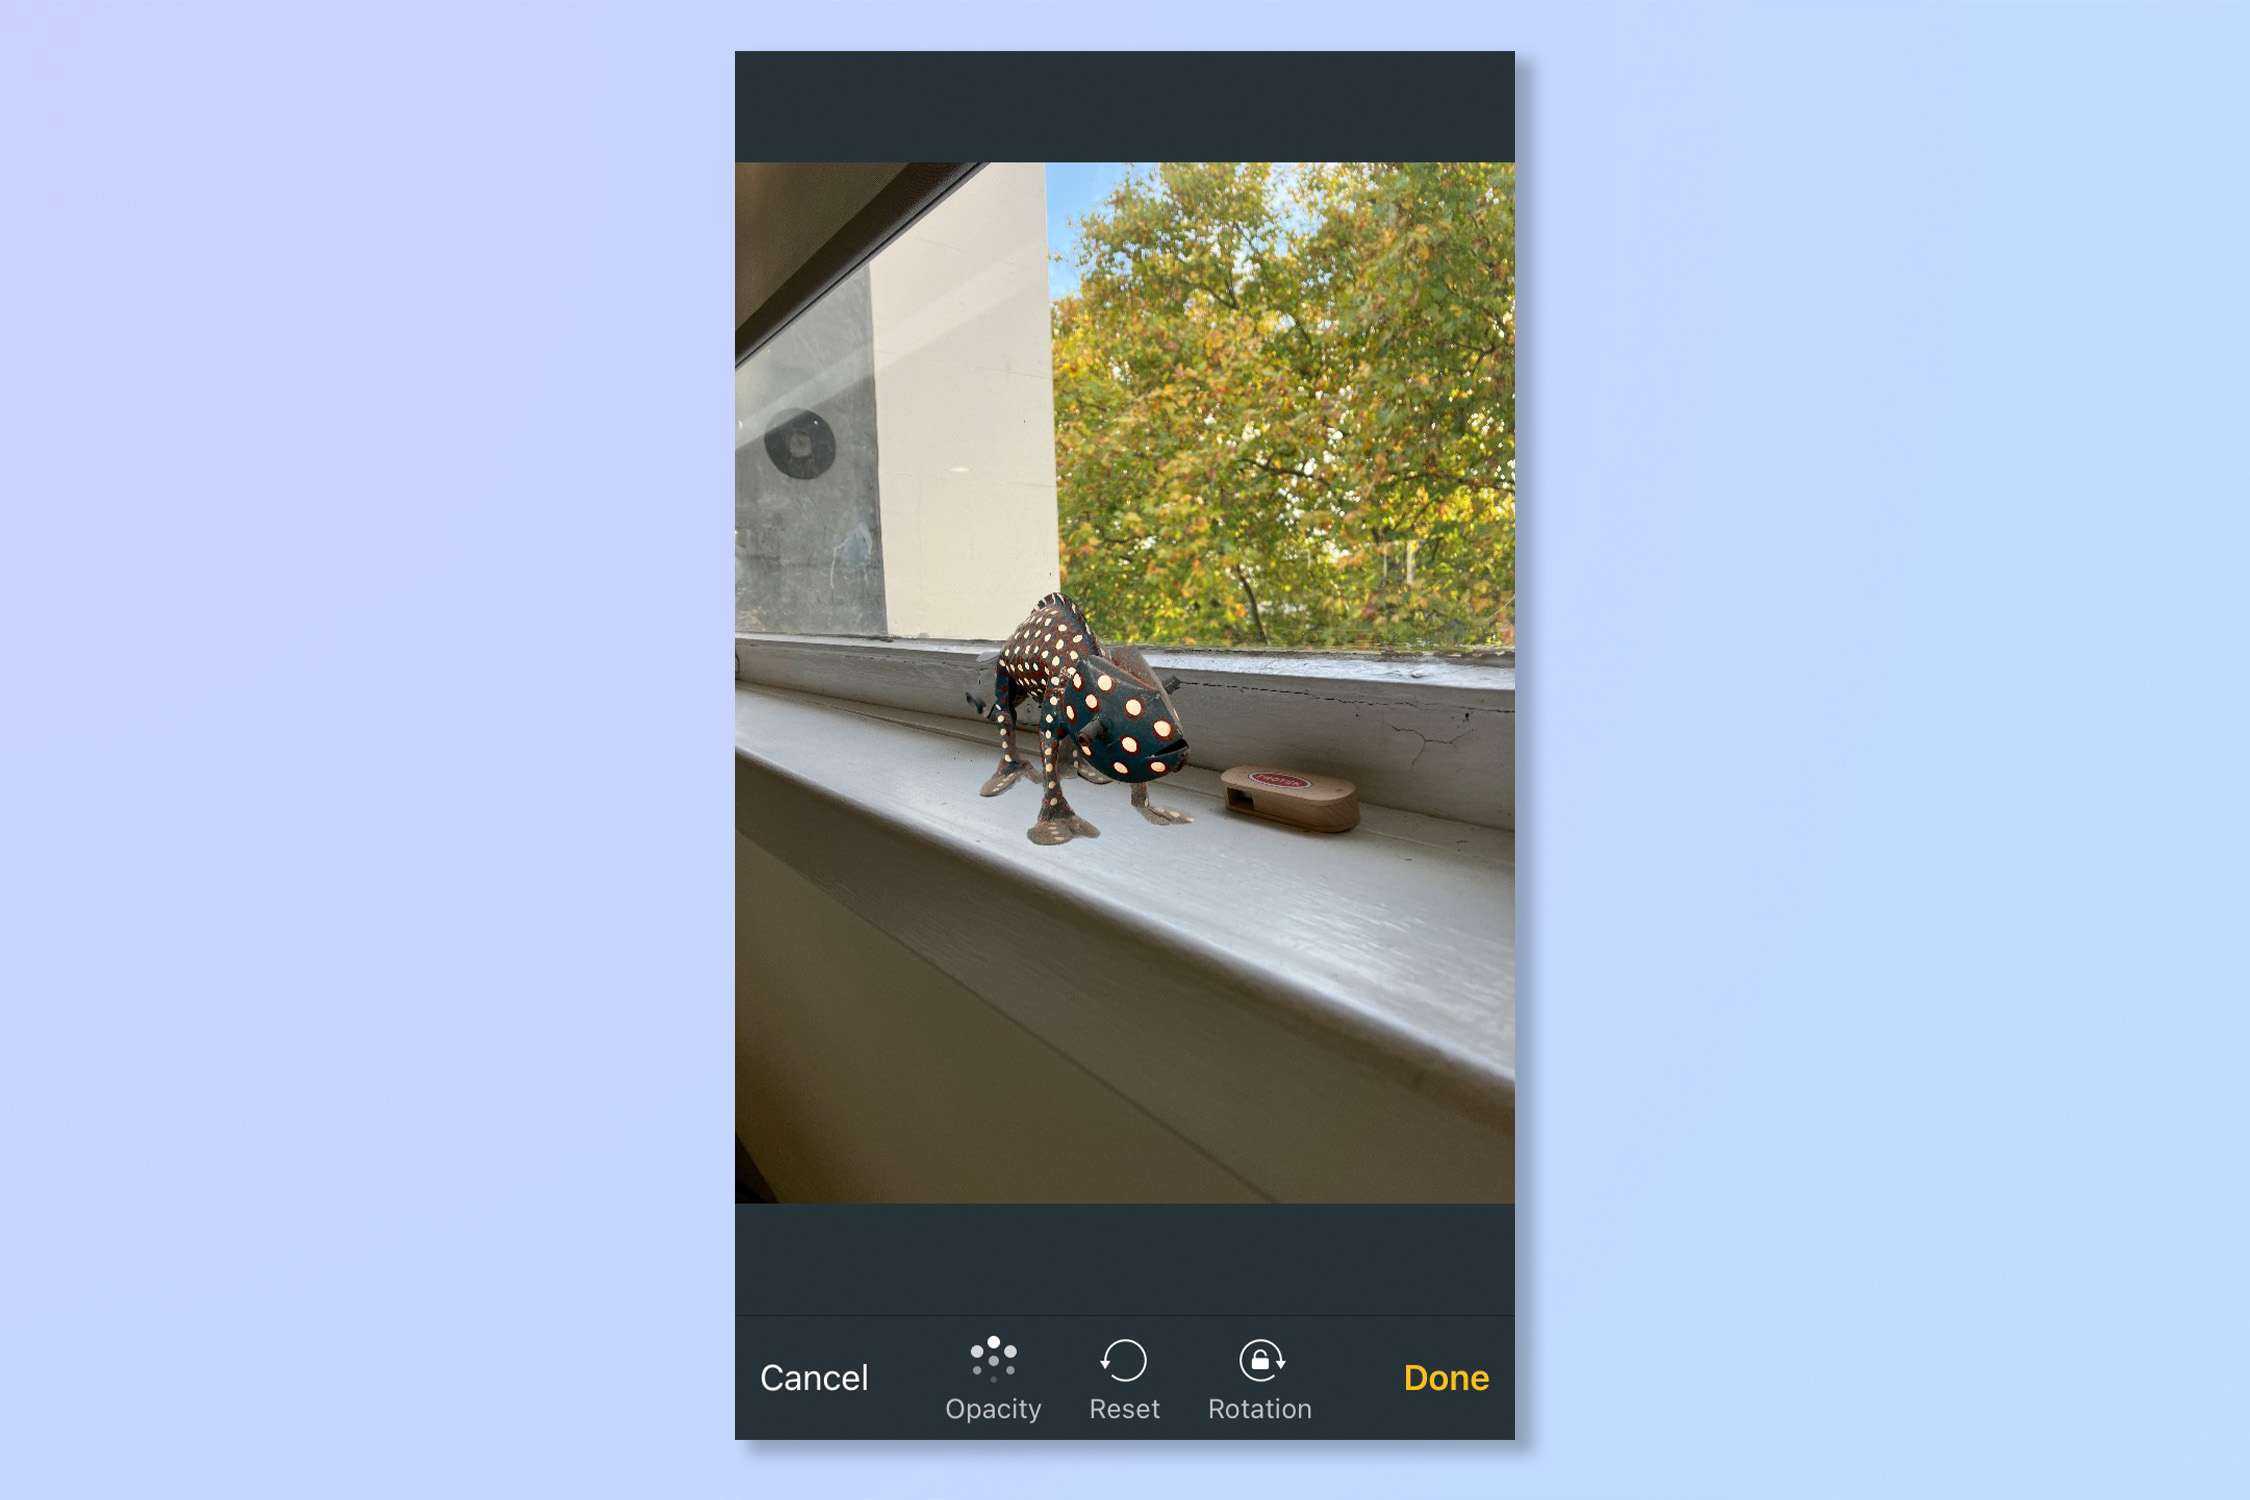
15. After selecting the feature you will be prompted to choose two images from your photos app to overlay one over the other. The first image will be the overlay and the second the background.
16. Enjoy using overlays on your iPhone!
And we're done! Now nothing can hold your imagination back, start taking pictures and have a play with overlays.
Having conquered how to overlay images on iPhone, perhaps you’re looking for some other ways to make your pictures unique, why not check out the best photo editing apps available on your phone. If you want to edit a bunch of photos on your iPhone quickly, check out this how to copy and paste edits on iOS Photos, or if video is more your thing learn how to edit videos on iPhone. For more general iPhone tips and tricks, learn how to enable the Dvorak keyboard on iPhone for faster, easier typing. Just got a new iPhone? Learn how to transfer data from iPhone to iPhone and ensure your stuff gets moved across safely.
Andy is a freelance writer with a passion for streaming and VPNs. Based in the U.K., he originally cut his teeth at Tom's Guide as a Trainee Writer before moving to cover all things tech and streaming at T3. Outside of work, his passions are movies, football (soccer) and Formula 1. He is also something of an amateur screenwriter having studied creative writing at university.
 Club Benefits


