Club Benefits


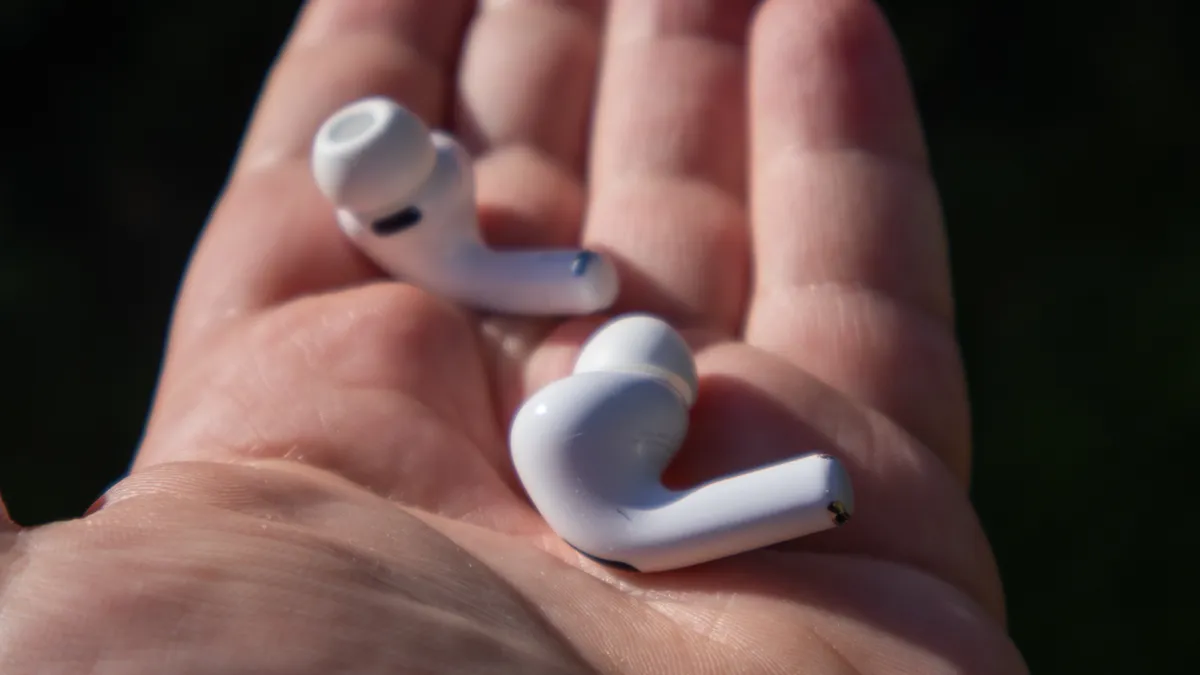
Your earbuds go everywhere: the gym, your commute, the office, even bed. But despite daily use, most people never clean them properly. Earwax, sweat, and dust accumulate in the speaker mesh over time, affecting both sound quality and hygiene.
Worse, common cleaning methods actually damage earbuds. Cotton swabs push debris deeper into speakers, water can ruin internal electronics, and harsh chemicals can degrade protective coatings. What seems like basic maintenance often causes permanent harm.
James Grifo, Owner and CEO of Audio Visual Nation — an AV production company trusted by Microsoft and Nike — explains the proper cleaning process to protect your earbuds while keeping them hygienic.

How to clean earbuds safely
1. Start with a dry, soft brush
Use a soft-bristled brush (a clean, dry toothbrush or dedicated electronics brush) to gently sweep debris away from the speaker mesh. Always brush outward, away from the mesh, so you're not pushing wax and dust further inside.
"The mesh is the most vulnerable part of the earbud," Grifo explains. "Even light pressure in the wrong direction can lodge debris deeper inside, and once it's in there, it's very difficult to remove without causing damage."
Hold the earbud with the speaker mesh facing downward while brushing so that loosened debris falls away rather than settling back into the mesh. Use gentle strokes, as aggressive brushing can tear the delicate mesh or force particles through it into the speaker chamber.
2. Wipe the outer casing with a microfiber cloth

After brushing the mesh, use a dry microfiber cloth to wipe down the earbud's outer casing. Microfiber picks up oils and dust without scratching surfaces or leaving lint behind like paper towels or regular cloths do.
Focus on areas your fingers touch frequently, such as the stem, touch controls, and any textured grips. These spots accumulate skin oils and grime that affect both appearance and grip.
Grifo notes that "a microfiber cloth is one of the best tools you can use on any audio equipment. It's gentle, effective, and won't introduce any moisture to areas that can't handle it."
3. Use minimal moisture only on the casing

For stubborn grime on the outer casing only, slightly dampen your microfiber cloth with water or a small amount of isopropyl alcohol (70% or less). Wring the cloth out thoroughly — it should feel barely damp, not wet.
Never apply liquid directly to earbuds. Spray or pour onto the cloth first, then use it to spot-clean the casing. Keep all moisture away from the speaker mesh, charging ports, microphone openings, and any seams or gaps where liquid could seep inside.
Even water-resistant earbuds have limits. Their ratings protect against splashes or sweat during use, not deliberate exposure to liquids during cleaning. Moisture trapped inside can cause corrosion, short circuits, or adhesive failure over time.
4. Clean removable ear tips separately

If your earbuds have silicone or foam ear tips, remove them before cleaning. These sit directly in your ear canal and collect the most earwax and bacteria, so they need thorough cleaning.
"Ear tips are the part that sits directly in your ear canal, so they need proper cleaning," says Grifo. "They're also the easiest part to clean safely, since you can fully detach them from the electronics."
Silicone tips can be washed with mild soap and warm water. Rinse them thoroughly under running water to remove all soap residue, which can cause irritation if left behind. Air dry completely on a clean towel before reattaching to your earbuds.
Foam tips are more delicate and can't handle water the same way. Wipe them gently with a barely damp cloth instead, or replace them periodically, as they wear out faster than silicone ones.
5. Let everything dry completely before use

Before putting the earbuds back in their charging case or your ears, ensure every component is fully dry. Even small amounts of trapped moisture cause internal damage over time.
Let silicone ear tips air dry for at least an hour after washing. Place them on a clean, dry surface in a well-ventilated area—not directly in sunlight or near heat sources, which can degrade the silicone.
If you used any moisture on the earbud casing, wait 10-15 minutes before use. Check charging contacts and any openings to confirm no water droplets remain.
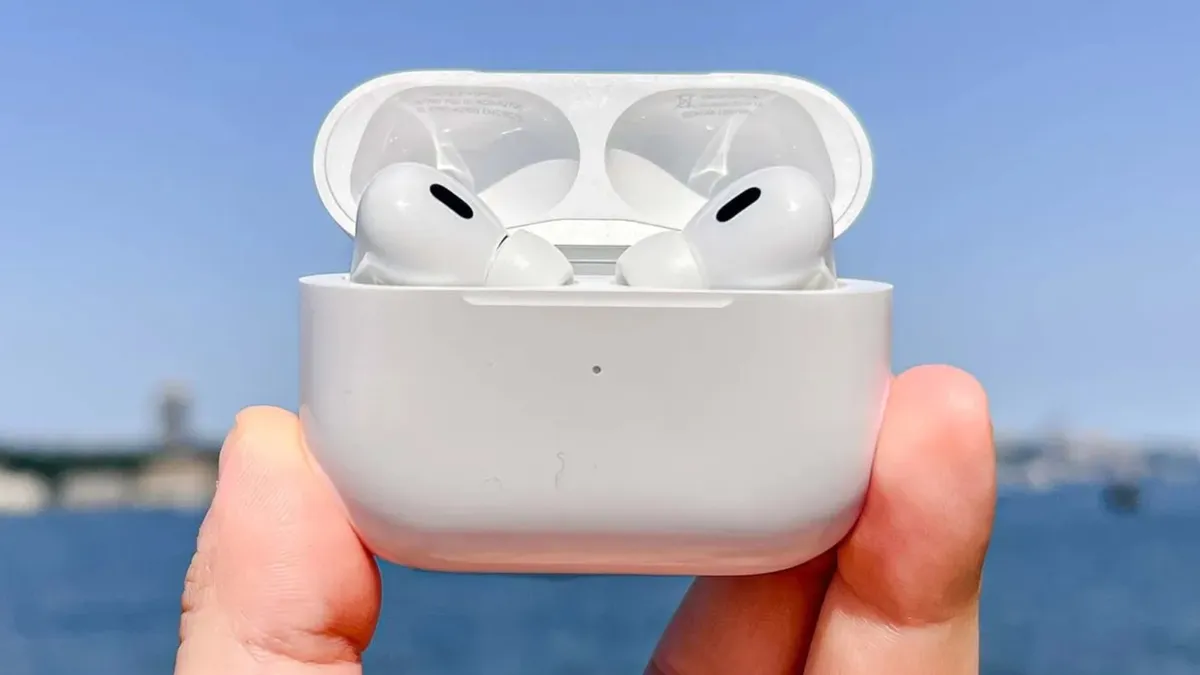
Moisture trapped in charging cases can also cause problems. If your case interior feels damp, wipe it with a dry microfiber cloth and leave it open to air out before putting the earbuds back inside.
Common cleaning mistakes that damage earbuds
Grifo highlights several widespread cleaning habits that cause more harm than good. Avoiding these protects your earbuds from accidental damage.
Using cotton swabs on the mesh

Cotton swabs seem like the obvious tool, but fibers snag on mesh and leave residue behind. Worse, the swab's pressure pushes wax deeper into the speaker instead of removing it. Stick to a soft brush that sweeps debris away rather than compacting it.
Running them under water

Unless your earbuds are rated fully waterproof (most are only water-resistant), running them under a tap risks moisture getting into internal electronics. Even waterproof models can fail if water enters through damaged seals or charging ports.
Using alcohol wipes or harsh cleaners

Pre-moistened wipes are often too wet and may contain chemicals that degrade silicone tips or strip protective coatings from the casing. If using isopropyl alcohol, apply it sparingly to a cloth — never directly to earbuds.
Cleaning infrequently and then over-correcting
"People tend to ignore their earbuds for months and then try to do a deep clean all at once," Grifo says. "By that point, the buildup is stubborn, and they end up using too much pressure or moisture trying to shift it. Little and often is always the better approach."

Follow Tom's Guide on Google News and add us as a preferred source to get our up-to-date news, analysis, and reviews in your feeds. Make sure to click the Follow button!
More from Tom's Guide