How to Transfer Dish DVR Recordings to a New Hopper
How to copy all your recorded DVR content from your old Dish TV Hopper to your new Hopper 3.
Dish TV's Hopper 3 can not only can play 4K content, but also has the ability to record and stream up to 16 shows at the same time. However, if you’re upgrading to a new Hopper, you’ll need to transfer your recorded shows to the new DVR. Otherwise, all those episodes of Teen Mom will be lost forever.
Fortunately, transferring files is relatively easy. The only things you’ll need are a portable USB hard drive and time.

1. Purchase an external USB hard drive. If your DVR is nearly full, you’ll want to get a drive that’s 2TB in size. Fortunately, they generally cost less than $100, and you can use it to backup your computer, or extra storage for your DVR.
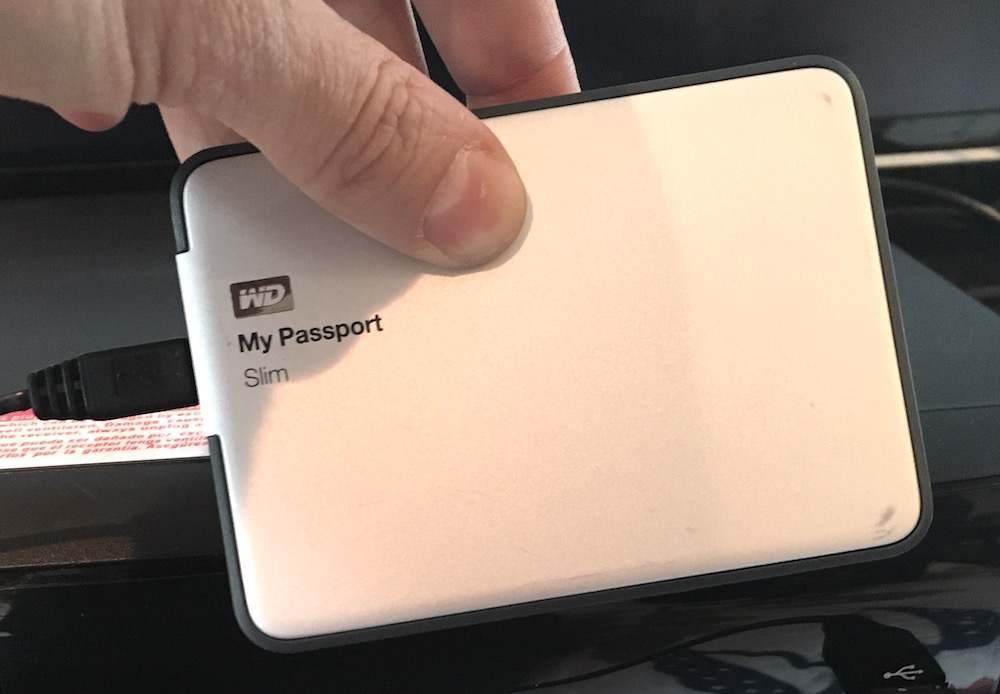
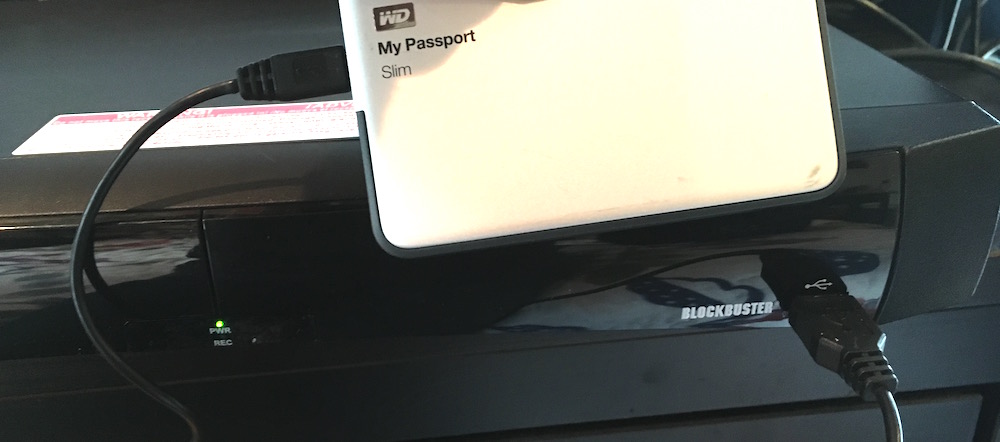
2. Plug the hard drive into the USB port on your old Hopper. On newer models, the USB port will be on the front of the DVR.
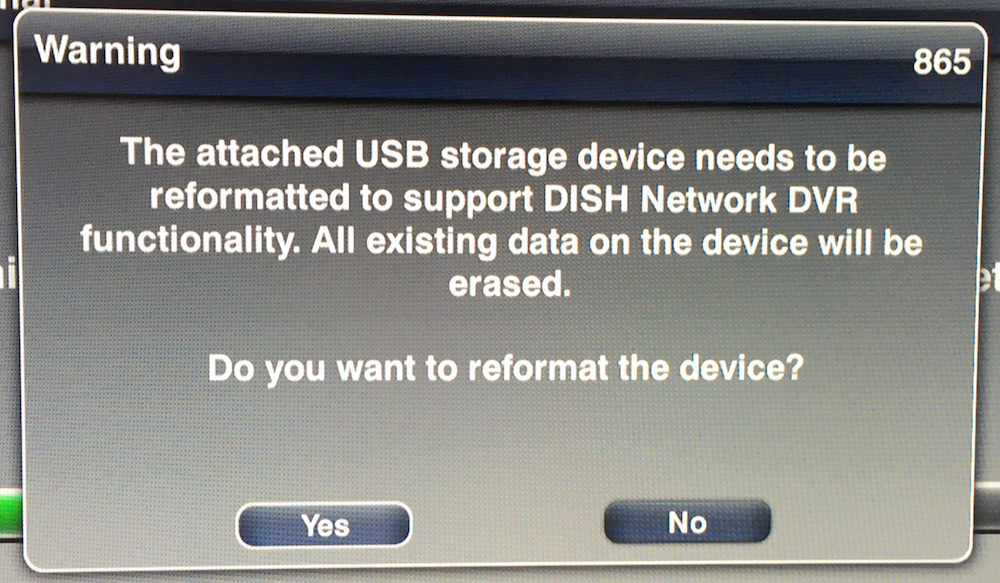
3. Click Yes on the message that appears. This will properly format the external hard drive.
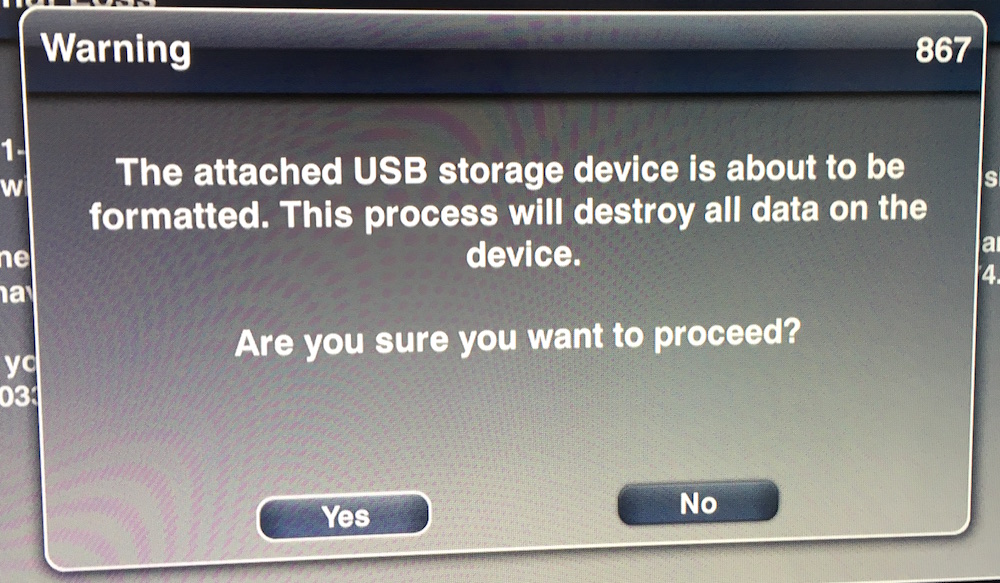
4. A warning will appear stating that the USB drive is about to be formatted. Click Yes.
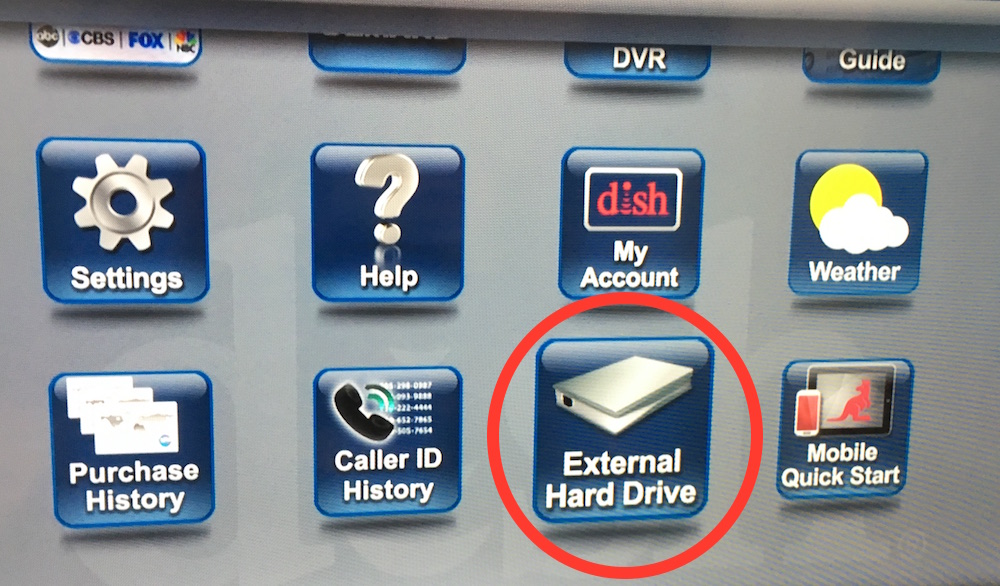
5. After the drive has been reformatted, open the Menu on the DVR and select External Hard Drive.
Get instant access to breaking news, the hottest reviews, great deals and helpful tips.
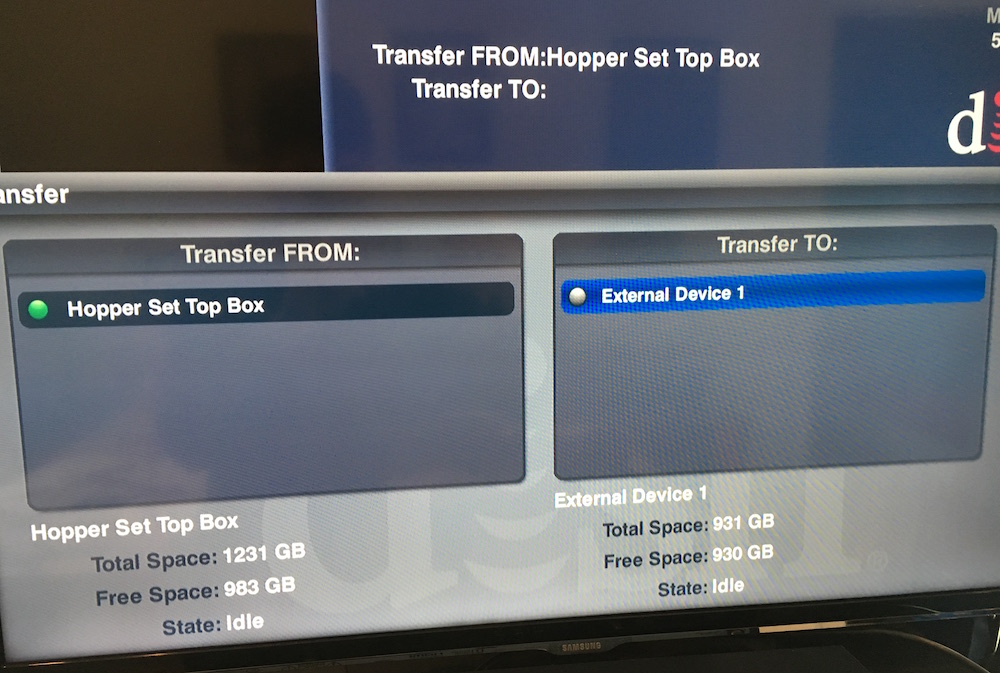
6. Select “Hopper Set Top Box”in the Transfer FROM window, and select "External Device 1" in the Transfer TO window. Below each, you’ll see how much storage is available for each device.
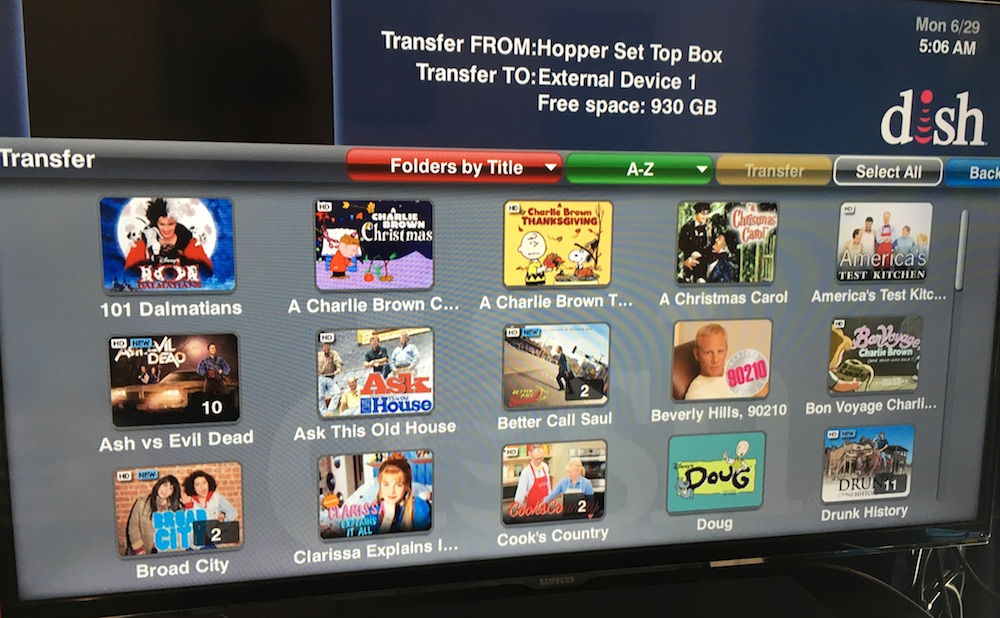
7. Select the shows you wish to transfer. If you want to transfer everything, choose Select All in the top menu.
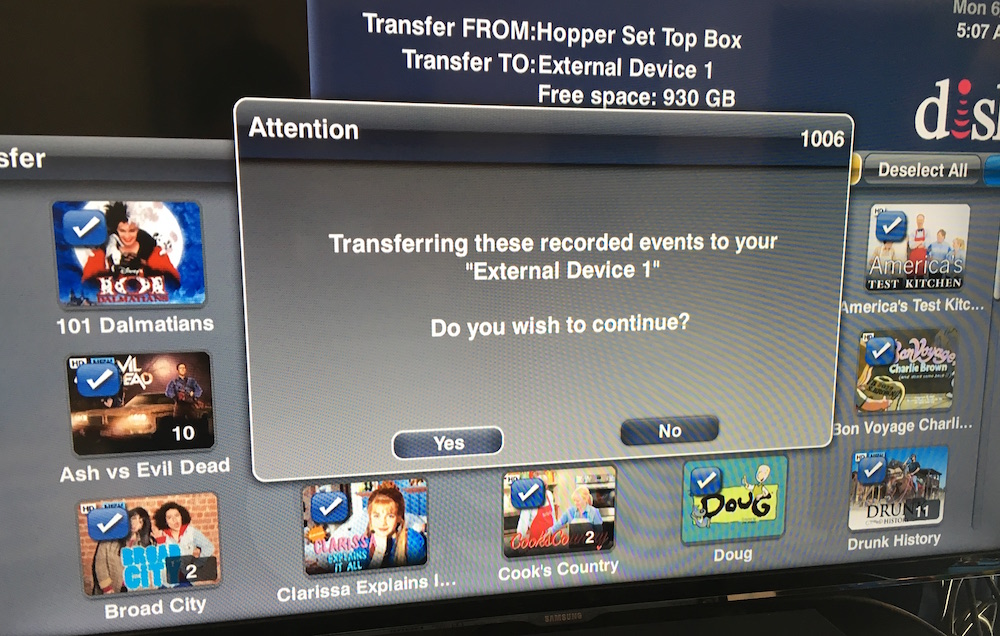
8. A message will appear asking if you want to proceed with the transfer. Select Yes.
9. Go do something else. The transfer usually takes a few hours, depending on how many shows you’ve recorded.
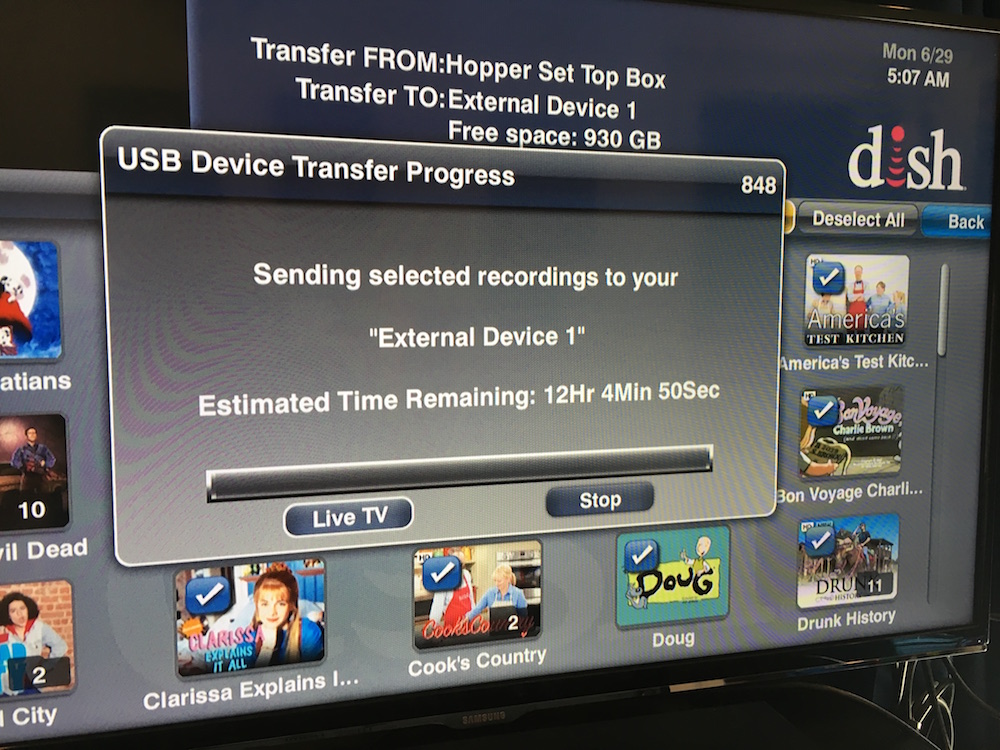
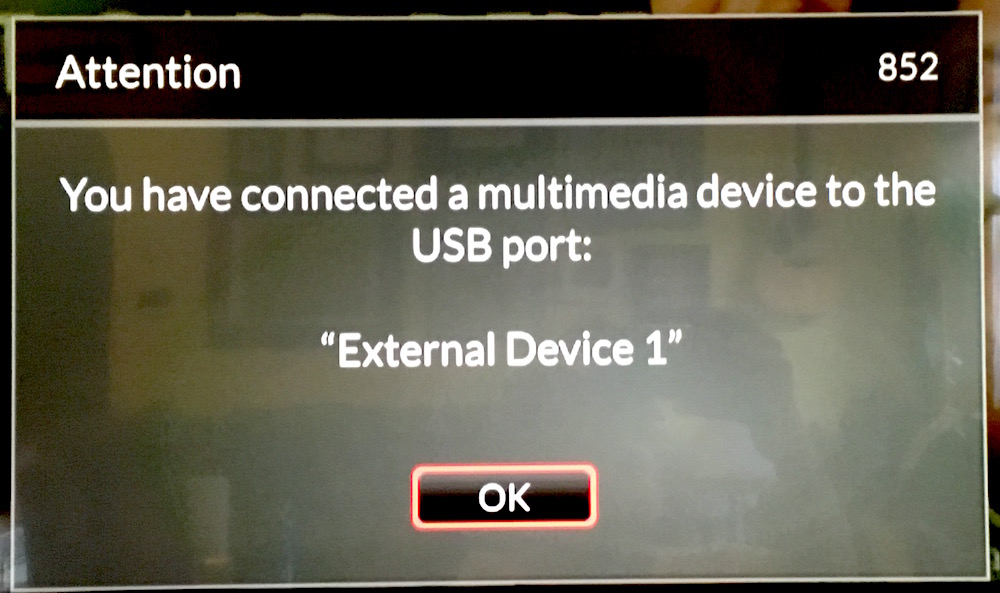
10. Plug the USB drive into your new Hopper. Only do this after everything has been transferred. A message will appear saying that you’ve connected an external device. Click OK.
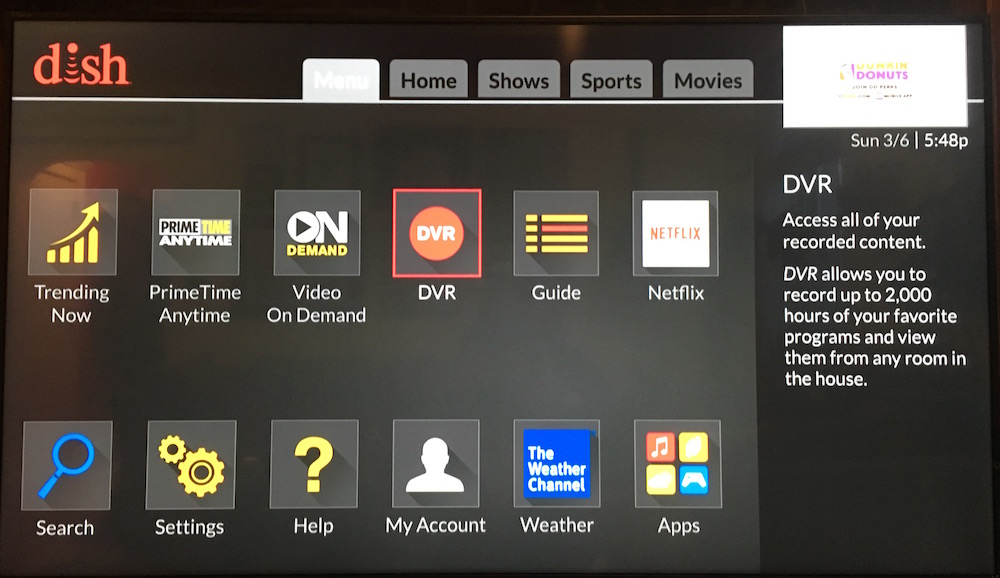
11. Open Menu on the new Hopper, and select DVR.
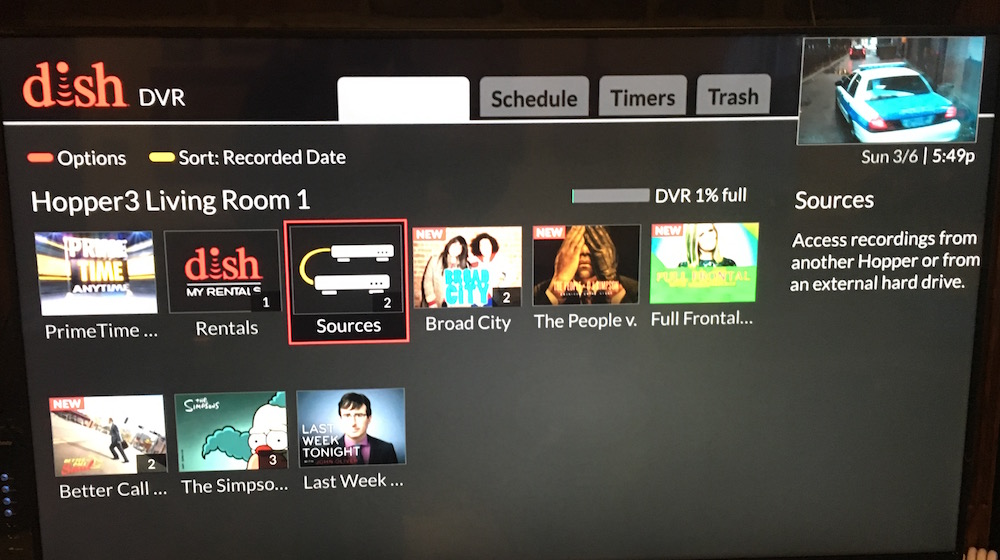
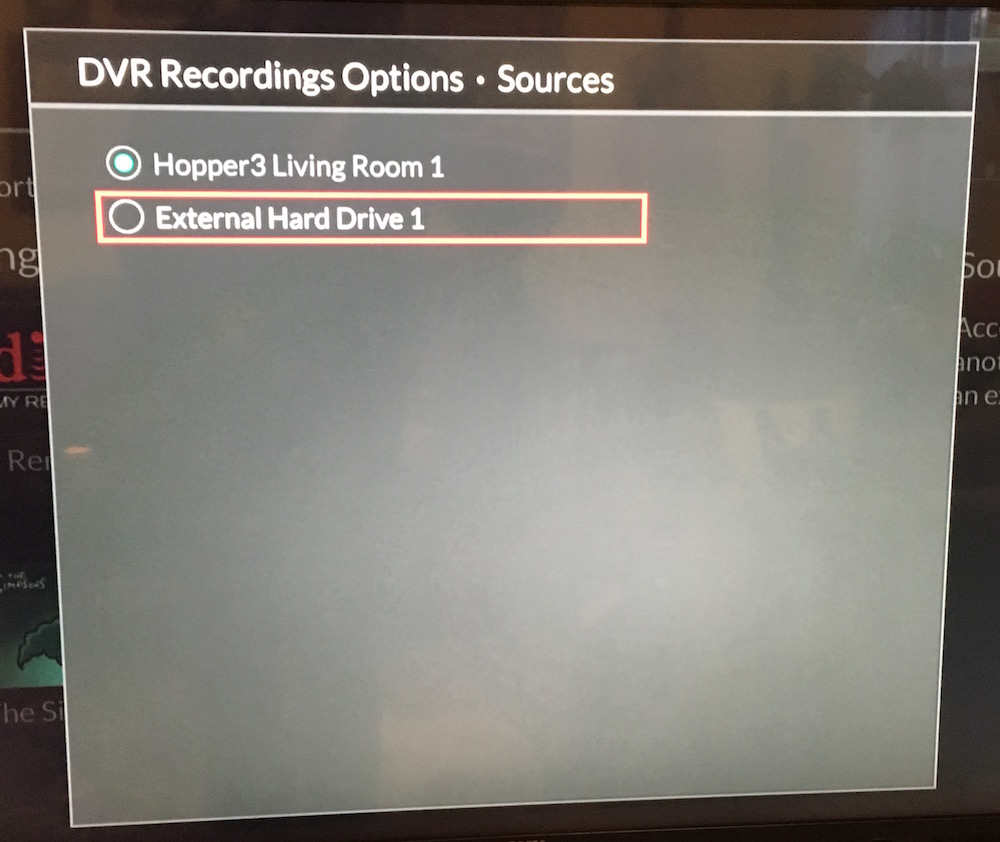
12. Select "Sources" in the window that appears.
13. Select External Hard Drive.
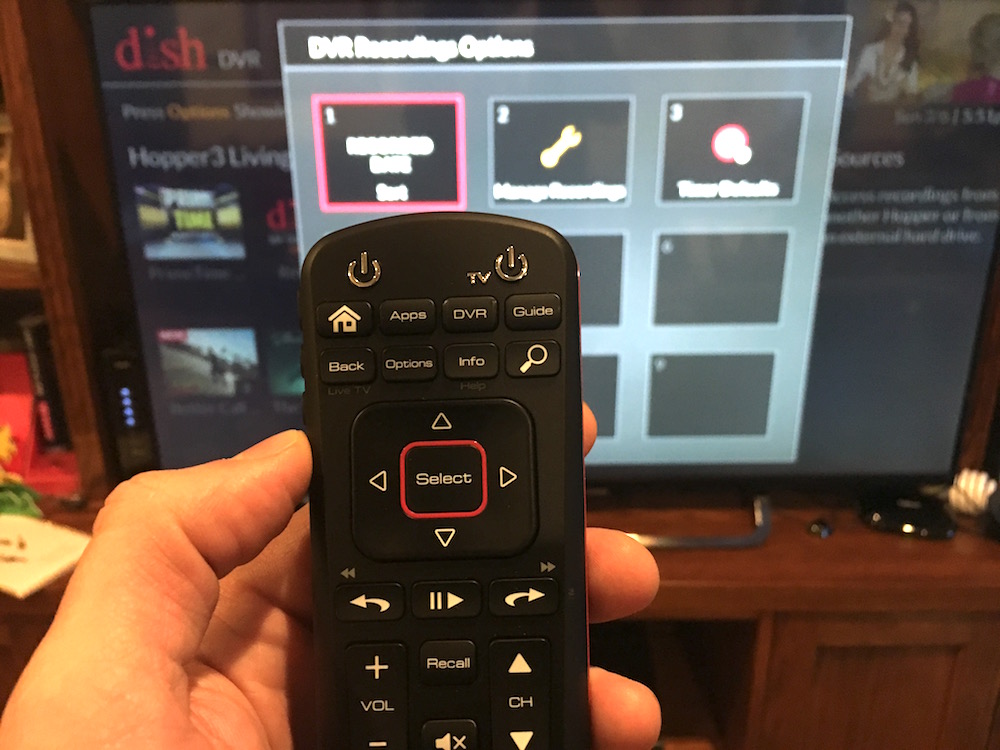
14. Press the Options button on your remote control.
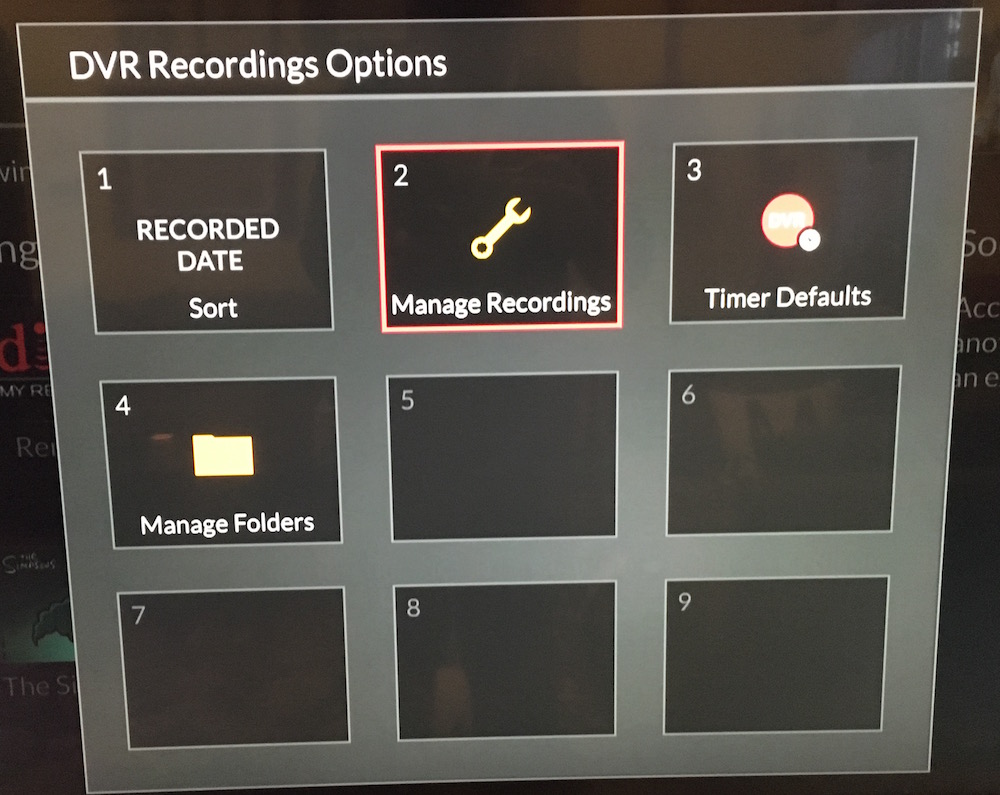
15. Select Manage Recordings.
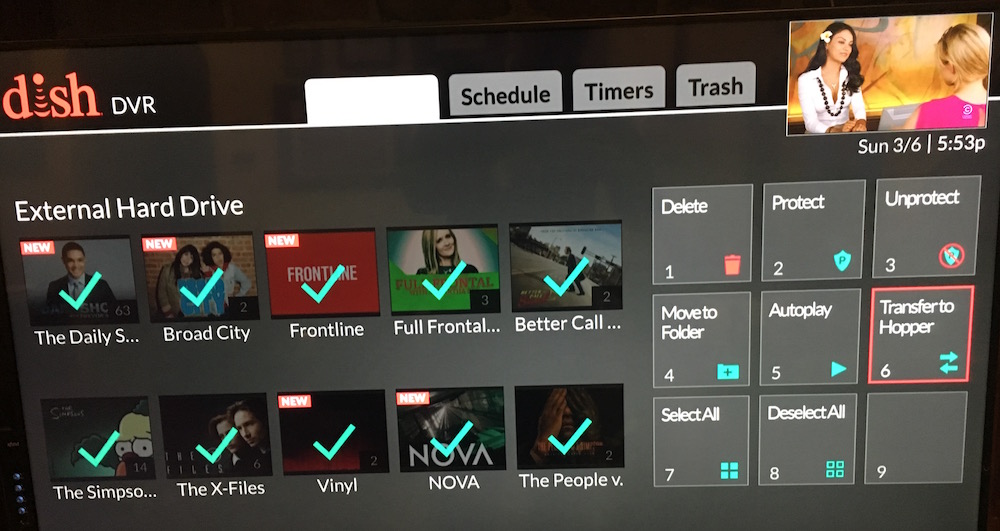
16. Choose the Select All option if you wish to transfer all of your recordings. Otherwise, select those recordings you wish to transfer.
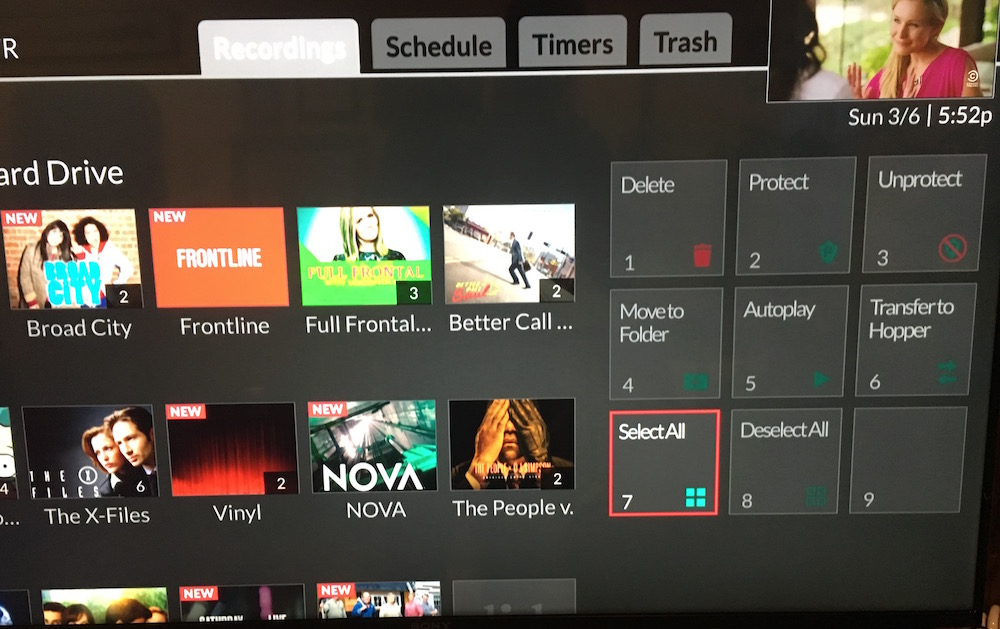
17. Select Transfer to Hopper.
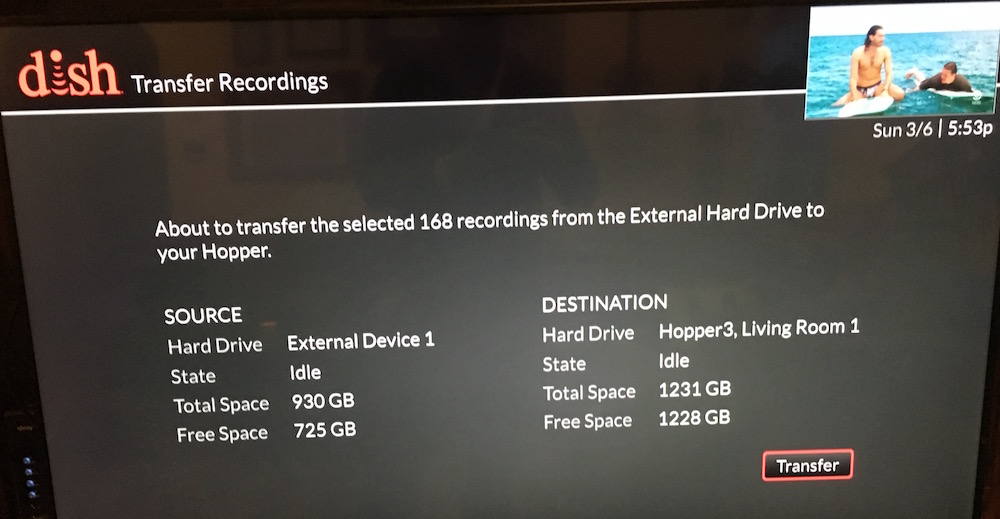
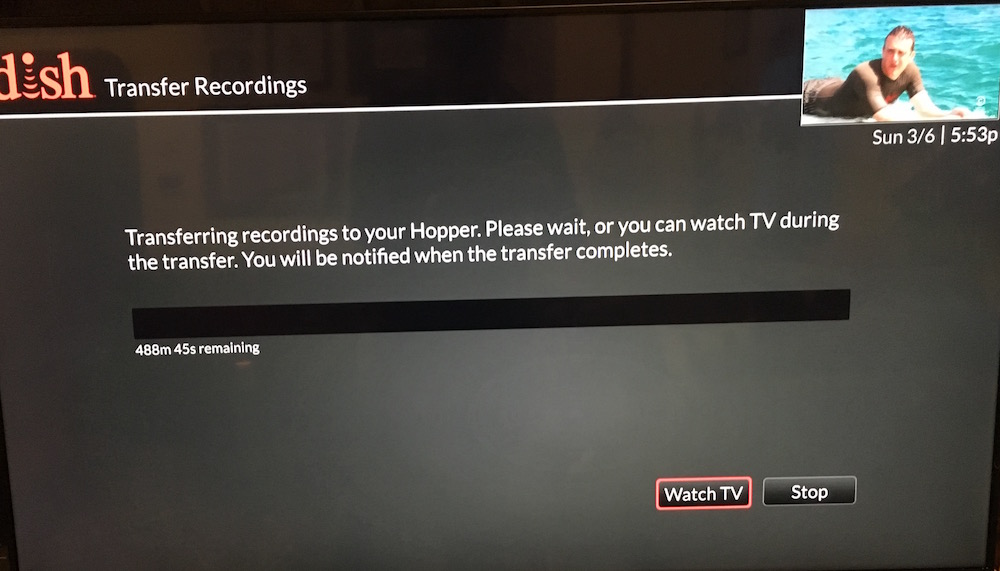
18. Press Transfer on the next screen to start copying all the recordings. Congratulations! Everything should now be copying over. This could take several hours, but fortunately, you can watch TV while this is happening.
19. Disconnect the external drive once all your programs have been transferred. Alternatively, you can keep the external drive connected, and use it as extra storage.
More from Tom's Guide
- Top-Rated TVs for Every Budget
- Best Devices to Sling Your Phone or Tablet to a TV Screen
- Our Favorite Soundbars for Small and Big TVs
- The Best Streaming Media Players and Sticks
- The Best Online-Original TV Shows

Michael A. Prospero is the U.S. Editor-in-Chief for Tom’s Guide. He oversees all evergreen content and oversees the Homes, Smart Home, and Fitness/Wearables categories for the site. In his spare time, he also tests out the latest drones, electric scooters, and smart home gadgets, such as video doorbells. Before his tenure at Tom's Guide, he was the Reviews Editor for Laptop Magazine, a reporter at Fast Company, the Times of Trenton, and, many eons back, an intern at George magazine. He received his undergraduate degree from Boston College, where he worked on the campus newspaper The Heights, and then attended the Columbia University school of Journalism. When he’s not testing out the latest running watch, electric scooter, or skiing or training for a marathon, he’s probably using the latest sous vide machine, smoker, or pizza oven, to the delight — or chagrin — of his family.
 Club Benefits


