
Learning how to make espresso at home opens up a whole new world of possibilities, allowing you to take your coffee drinking to the next level. In the long run, it can also save money if you regularly buy your espresso from a coffee shop.
Espresso brewing can be quite tricky to master, and if you've just bought an espresso machine like the Breville/Sage Bambino Plus, you might find yourself struggling to recreate the rich, dark espresso and thick crema you see in coffee shops. Fear not: learning the basics is actually pretty straightforward, and this guide will teach you how to use an espresso maker like a pro in no time.
How to make espresso in just 4 steps
Here are the main steps when preparing espresso at home:
- Choose which coffee beans are the best for you
- Grind your coffee beans for the perfect shot
- Use a coffee tamp to create a puck
- Experiment to find the best flavor
1. Which coffee beans are the best for espresso?

If you're new to this, you've likely heard that expensive specialty beans are a must. While it's true higher quality beans often produce a better product, it's perfectly fine to use less premium beans to make great coffee. Just ensure you choose either whole beans or pre-ground beans that have been ground for espresso. Pre-ground from the grocery store is often too coarse for espresso, which we’ll cover a bit later, and unless the pack features a roast date, there's no way of knowing how fresh the coffee is.
You’ll need to choose what flavor profile you want from your beans, which is based on the type, origin and roast. Check out the tasting notes on the back of the pack to discover the coffee's flavors. Darker roasts typically produce a bitter taste with rich, chocolatey notes. Medium and light roasts usually yield a sweeter, more acidic profile with fruity and floral flavors.
The choice is entirely yours. Just ensure you buy beans roasted specifically for espresso—not for filter or French press.
2. How to grind coffee beans for espresso
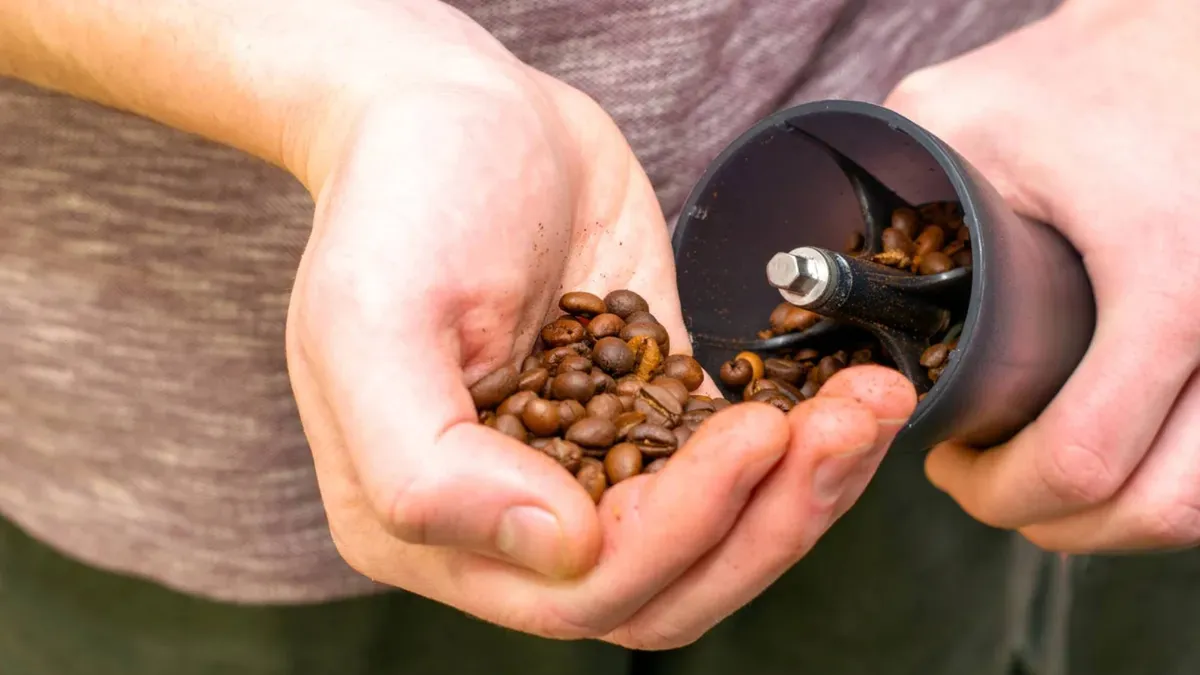
The level your coffee is ground to dictates its resistance to your machine’s pump, varying the time the coffee is exposed to and cooked by the pressure and hot water — this affects the taste, texture and strength of brewed espresso. A finer grind will provide more resistance, resulting in greater extraction of the coffee’s compounds as it spends a longer time exposed to heat, water and pressure. It’s important that your coffee is ground evenly throughout to ensure consistent extraction and results.
Many espresso machines come with a built-in grinder, but it’s also common to own a standalone one, too. If you have a coffee grinder, aim for a grind that is coarser than dust (like Turkish coffee) but finer than for filter or French press. Getting the right grind, also known as 'dialling in' requires trial and error, and the grinder settings will vary for different beans and even separate batches of the same beans. We'll discuss this trial and error process more later on. If you don't own a grinder, many local coffee shops will grind beans for you, although usually only for beans you purchase from them.
Grocery store pre-ground is usually too coarse for pump espresso, resulting in thin and watery coffee without crema. Handily, though, some espresso machines come with pressurised dual wall baskets to help increase the pressure the coffee puck is subjected to, allowing for coarser grinds — these will make a great brew, but will not produce the texture or taste to match ‘true’ espresso.
3. Weigh and tamp your coffee grounds
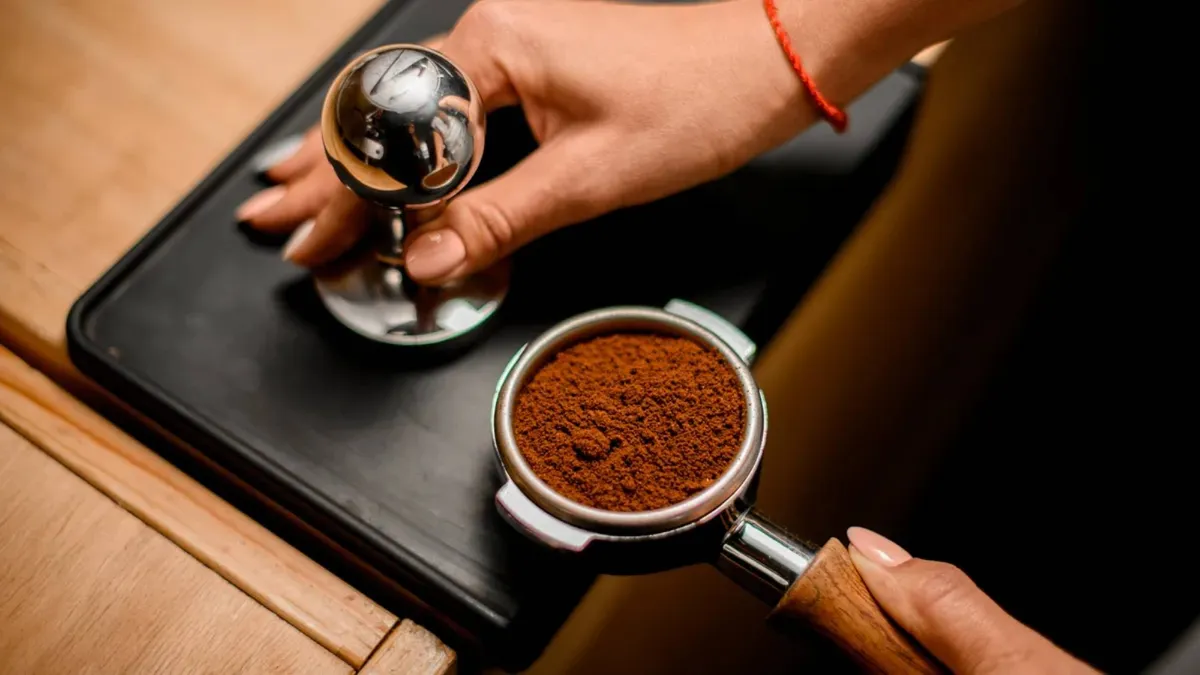
Once you’ve ground some beans, you’ll need to put them into the basket of the portafilter which came with your coffee machine. Weighing the amount of coffee you use is a good idea to ensure consistency with each shot. The amount of coffee also affects the pressure resistance of your puck.
A common starting point is 0.32 oz (9g) for a single shot and 0.64 oz (18g) for a double, although if your coffee machine suggests a weight, use that. A good set of highly accurate espresso scales is useful here to keep things consistent, and coffee scales which include a shot timer are readily available for under $20. Look for one which says it is accurate to 0.1g.
Use a coffee tamp—often supplied with machines—to firmly press your coffee into a puck. This affects the puck's resistance, so ensure you apply even pressure for consistency between shots. You may need to adjust your tamping pressure based on how your espresso pulls later on.
Consider investing in a tamping mat to ensure your portafilter remains stable so you don’t damage either it or your worktop when tamping.
4. How to pour an espresso shot

Before you start, ensure you have a knock box or food waste bin close by to dispose of your grounds afterwards, and treat the hot puck with care to avoid burning yourself.
A good shot will pour with the viscosity of runny honey and should be golden brown in colour. If you’re using a set of coffee scales, which we recommend, place these under your glass or cup and pour until you reach double the weight of coffee you put in. This usually takes around 30 seconds, and you should time your shots to ensure you're taking a similar amount of time to pour each one. Taste your espresso and see what you think.
Here’s where your earlier consistency pays off. It’s unlikely you’ll nail a perfect shot to begin with. It may be too thin, too bitter, or too sour. You may have used too much or too little coffee. Generally, aim for an espresso that balances the flavor profile of your chosen beans. With dark roasts, expect some bitterness with rich, chocolatey notes. With medium and light roasts, anticipate more sweetness and acidity, with floral or fruity notes.
The flavors should be balanced, so if you have overwhelming bitterness or acidity, that’s a sign of over-or under-extraction, essentially too much or too little brewing. If your shot pulls with difficulty or produces very little liquid, your grind is too fine. If there's too much liquid, your grind is too coarse.
Play around with the grind of your coffee, as this is often the most likely cause of any extraction issues, keeping all the other inputs the same, including the beans and weight of coffee used, the tamp pressure, brew time and ratio. If this doesn’t work, try adjusting the other factors individually until you have the perfect espresso. It takes time, but is definitely worth it once you get the hang of it.
If you feel like you’ve bitten off a little too much with espresso, don’t worry. Our best coffee makers features a range of coffee machines to take the effort out of your morning brew.
For more tips on making great coffee, check out our guides on how to make a cold brew coffee, how to make pour over coffee, how to make French press coffee, how to clean your coffee maker and why you should descale your coffee maker.
You can also learn how to make summer treats like ice cream without an ice cream maker at home.

