Create artistic images that pop with double exposure photos on iPhone — here’s how
Take two photos you like and blend them together
Here at Tom’s Guide our expert editors are committed to bringing you the best news, reviews and guides to help you stay informed and ahead of the curve!
You are now subscribed
Your newsletter sign-up was successful
Want to add more newsletters?
Daily (Mon-Sun)
Tom's Guide Daily
Sign up to get the latest updates on all of your favorite content! From cutting-edge tech news and the hottest streaming buzz to unbeatable deals on the best products and in-depth reviews, we’ve got you covered.

Weekly on Thursday
Tom's AI Guide
Be AI savvy with your weekly newsletter summing up all the biggest AI news you need to know. Plus, analysis from our AI editor and tips on how to use the latest AI tools!

Weekly on Friday
Tom's iGuide
Unlock the vast world of Apple news straight to your inbox. With coverage on everything from exciting product launches to essential software updates, this is your go-to source for the latest updates on all the best Apple content.

Weekly on Monday
Tom's Streaming Guide
Our weekly newsletter is expertly crafted to immerse you in the world of streaming. Stay updated on the latest releases and our top recommendations across your favorite streaming platforms.
Join the club
Get full access to premium articles, exclusive features and a growing list of member rewards.
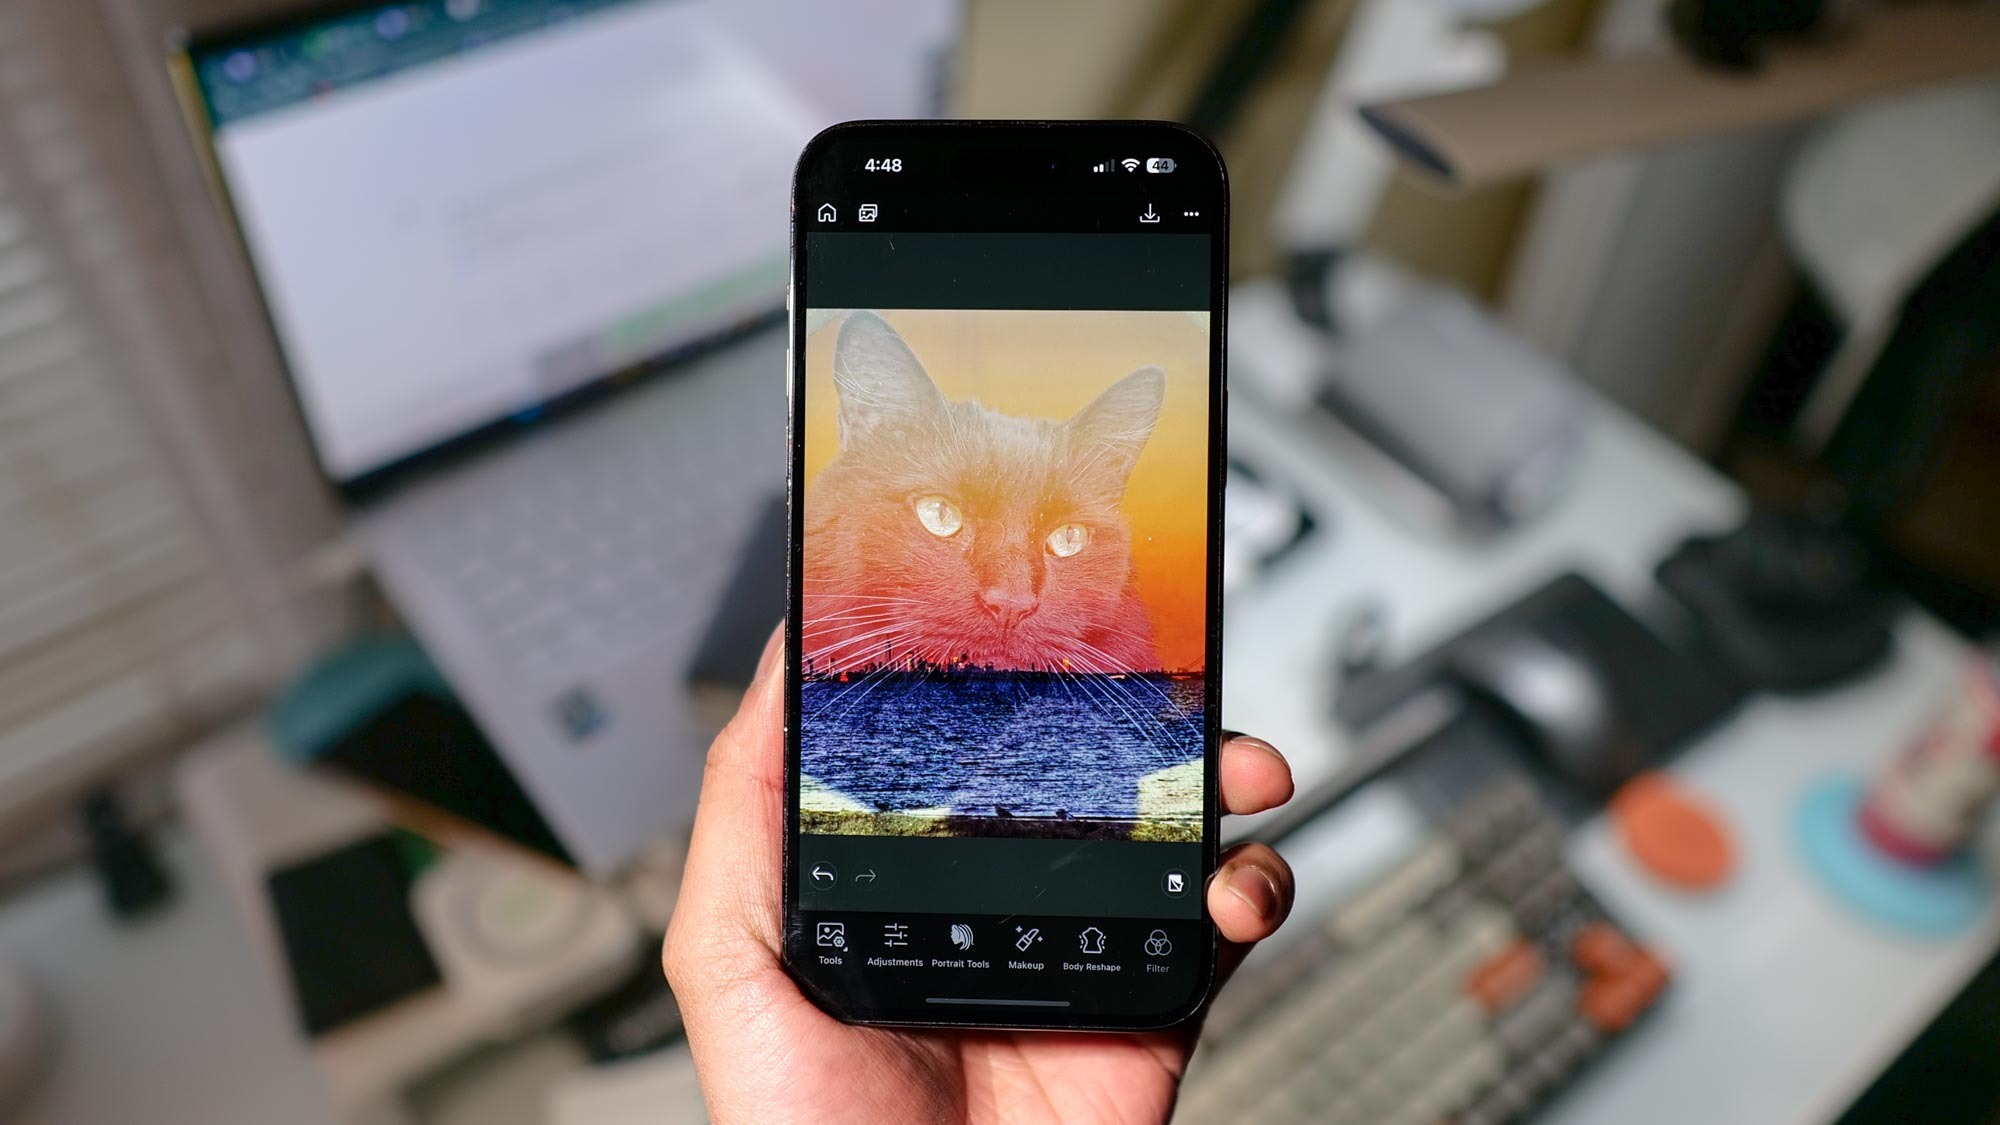
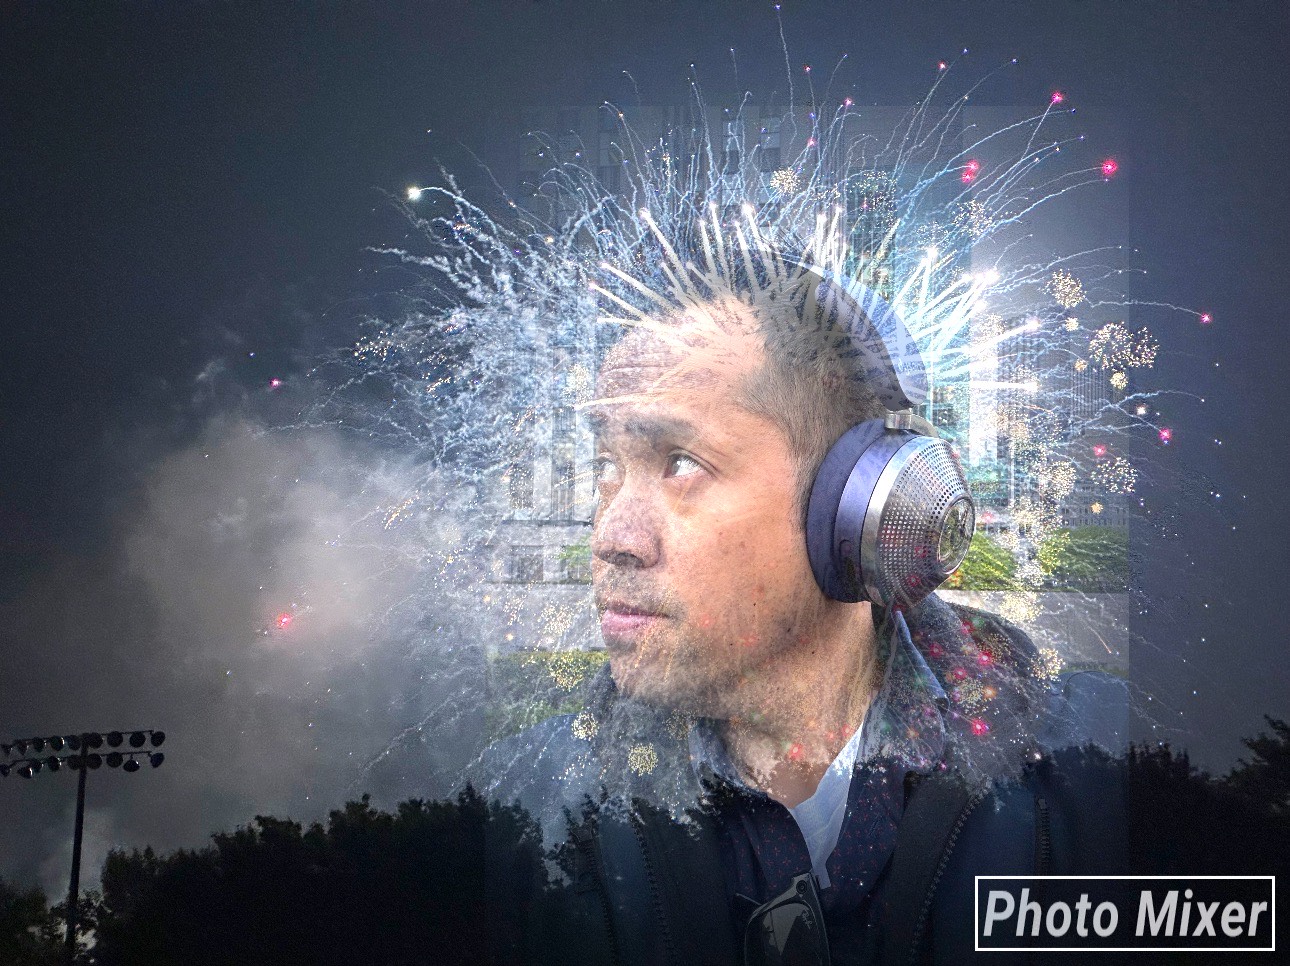
Apple’s most recent iPhones prove they excel at taking snapshots, which comes at no surprise that the iPhone 15 Pro Max tops our best camera phones list. Even those with minimal or zero skill at taking photos can pull off epic looking photos because the iPhone’s quality is so good. However, if you really want to amp up the artistic quality of your photos, then you’ll want to know how to make double exposure pictures on your iPhone.
Double exposure photography is a technique that has been around since the old film days when photographers would take two sets of photos on one piece of film. For the iPhone (and Android phones), though, the process is instant and simpler — albeit, with the help of some of the best photo editing apps.
Essentially, you’re layering two images at different exposures to produce a single one — and as a result — gives the final photo an artistic quality. Perfecting the art of double exposure photos on iPhone does take time and creativity to go beyond just merging two images together. But once you master it, you may never go back to capturing just a static photo.
How to make double exposure pictures on iPhone
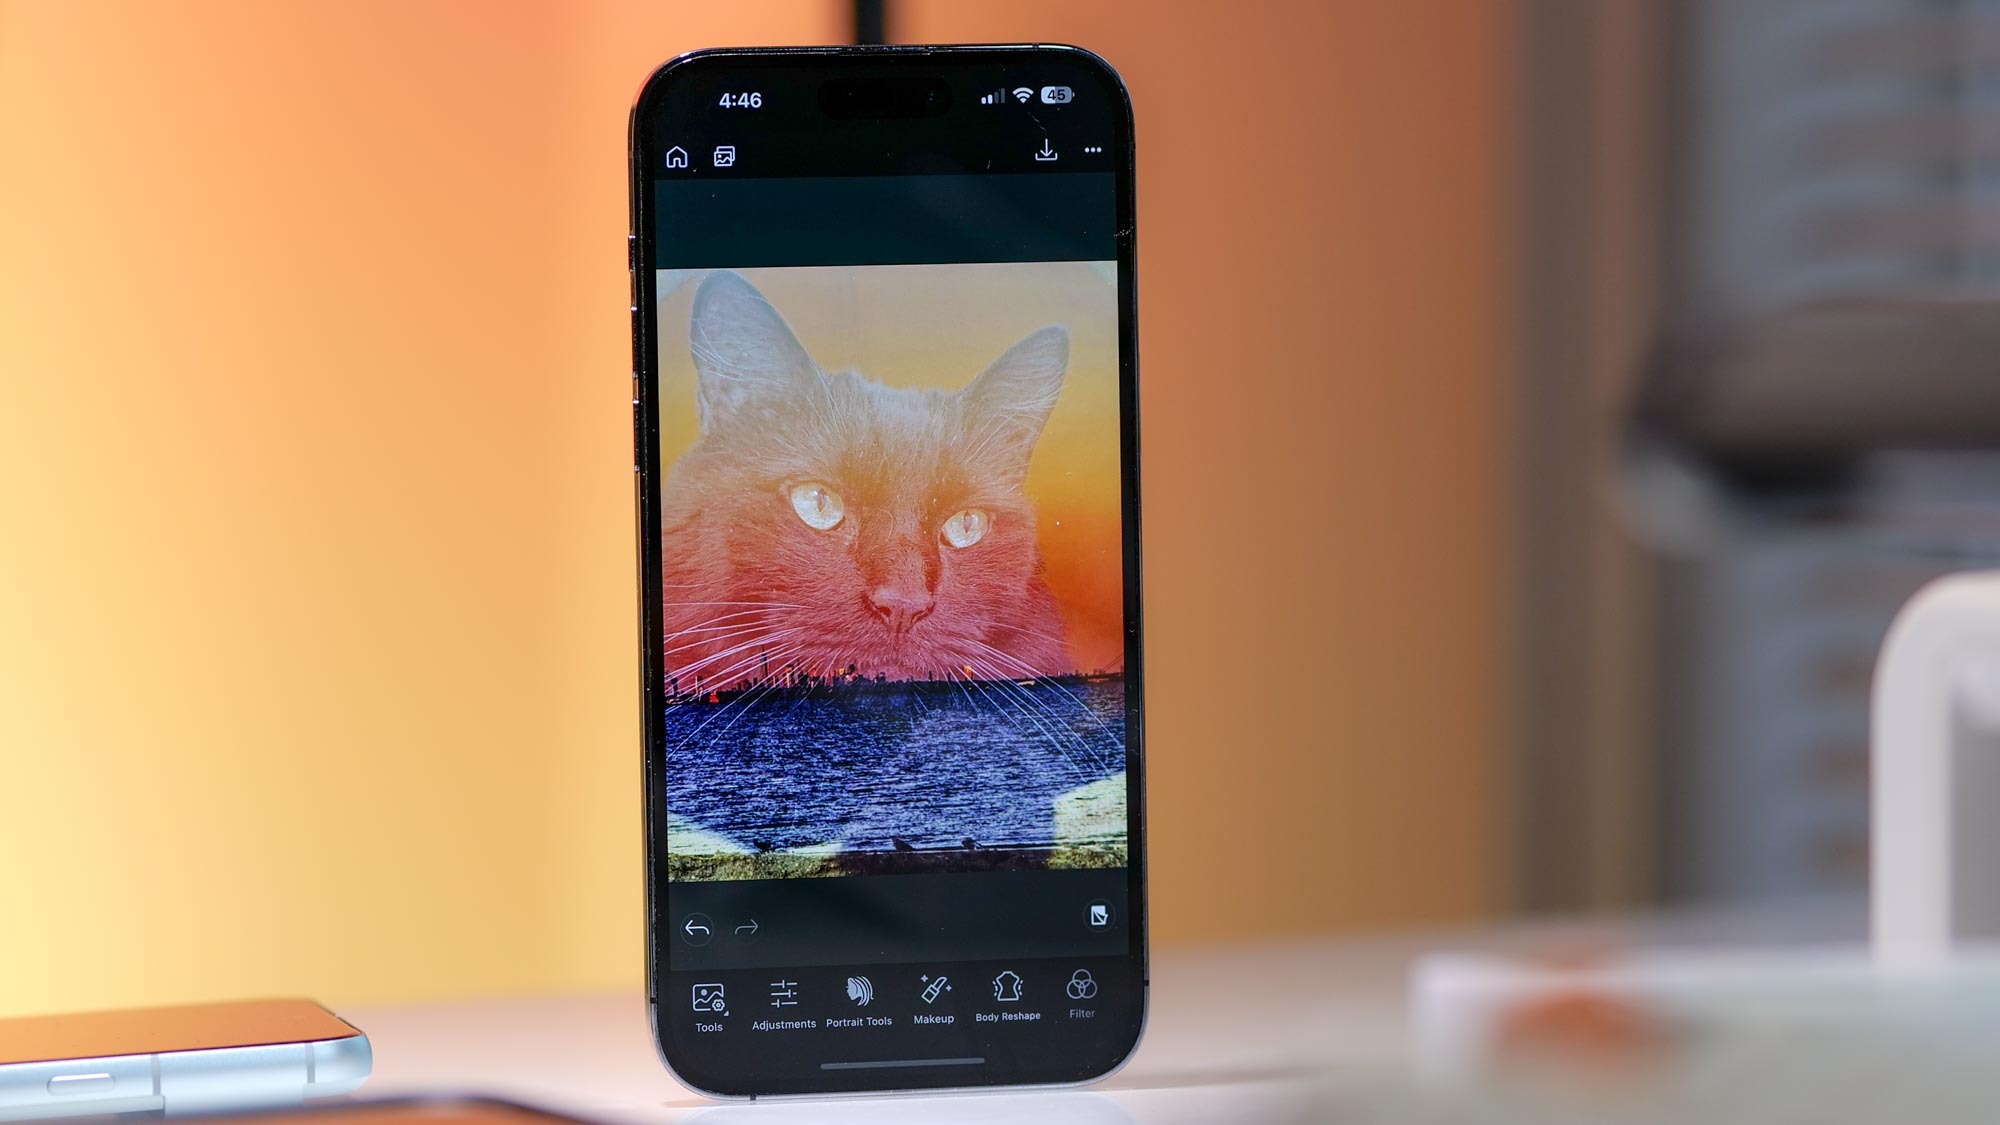
While it can capture stunning photos, you’ll need to use a third party app in order to make double exposure pictures on iPhone. Apple’s native Photos app is limited with its editing abilities, with no real way to produce double exposure photos.
Adobe’s Photoshop Express is one of the most popular photo editing apps on iPhone, but it can sometimes feel overwhelming if you’ve never used photo editing software before. You’ll need to sign up for an account and then choose the free 7-day trial before you can get into the app. After that, you’ll have to pay $4.99/month or $34.99/year for a Photoshop Express Premium subscription.
Download: Photoshop Express
One of the simpler apps is Ultimate Photo Mixer Blender. It’s free to download and incredibly simple to use — with fewer steps too. However, it does apply a watermark to your photos unless you pay a one-time fee of $2.99.
Get instant access to breaking news, the hottest reviews, great deals and helpful tips.
Download: Ultimate Photo Mixer Blender



For this guide, we'll use the Cyberlink PhotoDirector app. It rivals Photoshop Express in terms of features, but it has a slightly lower learning curve — making it a good choice for beginners. The app is free to download with many editing features that are available to users without having the need to upgrade to a PhotoDirector Premium subscription, including the ability to make double exposure photos.
Download: Cyberlink PhotoDirector
Step 1: Run the app, choose your photo
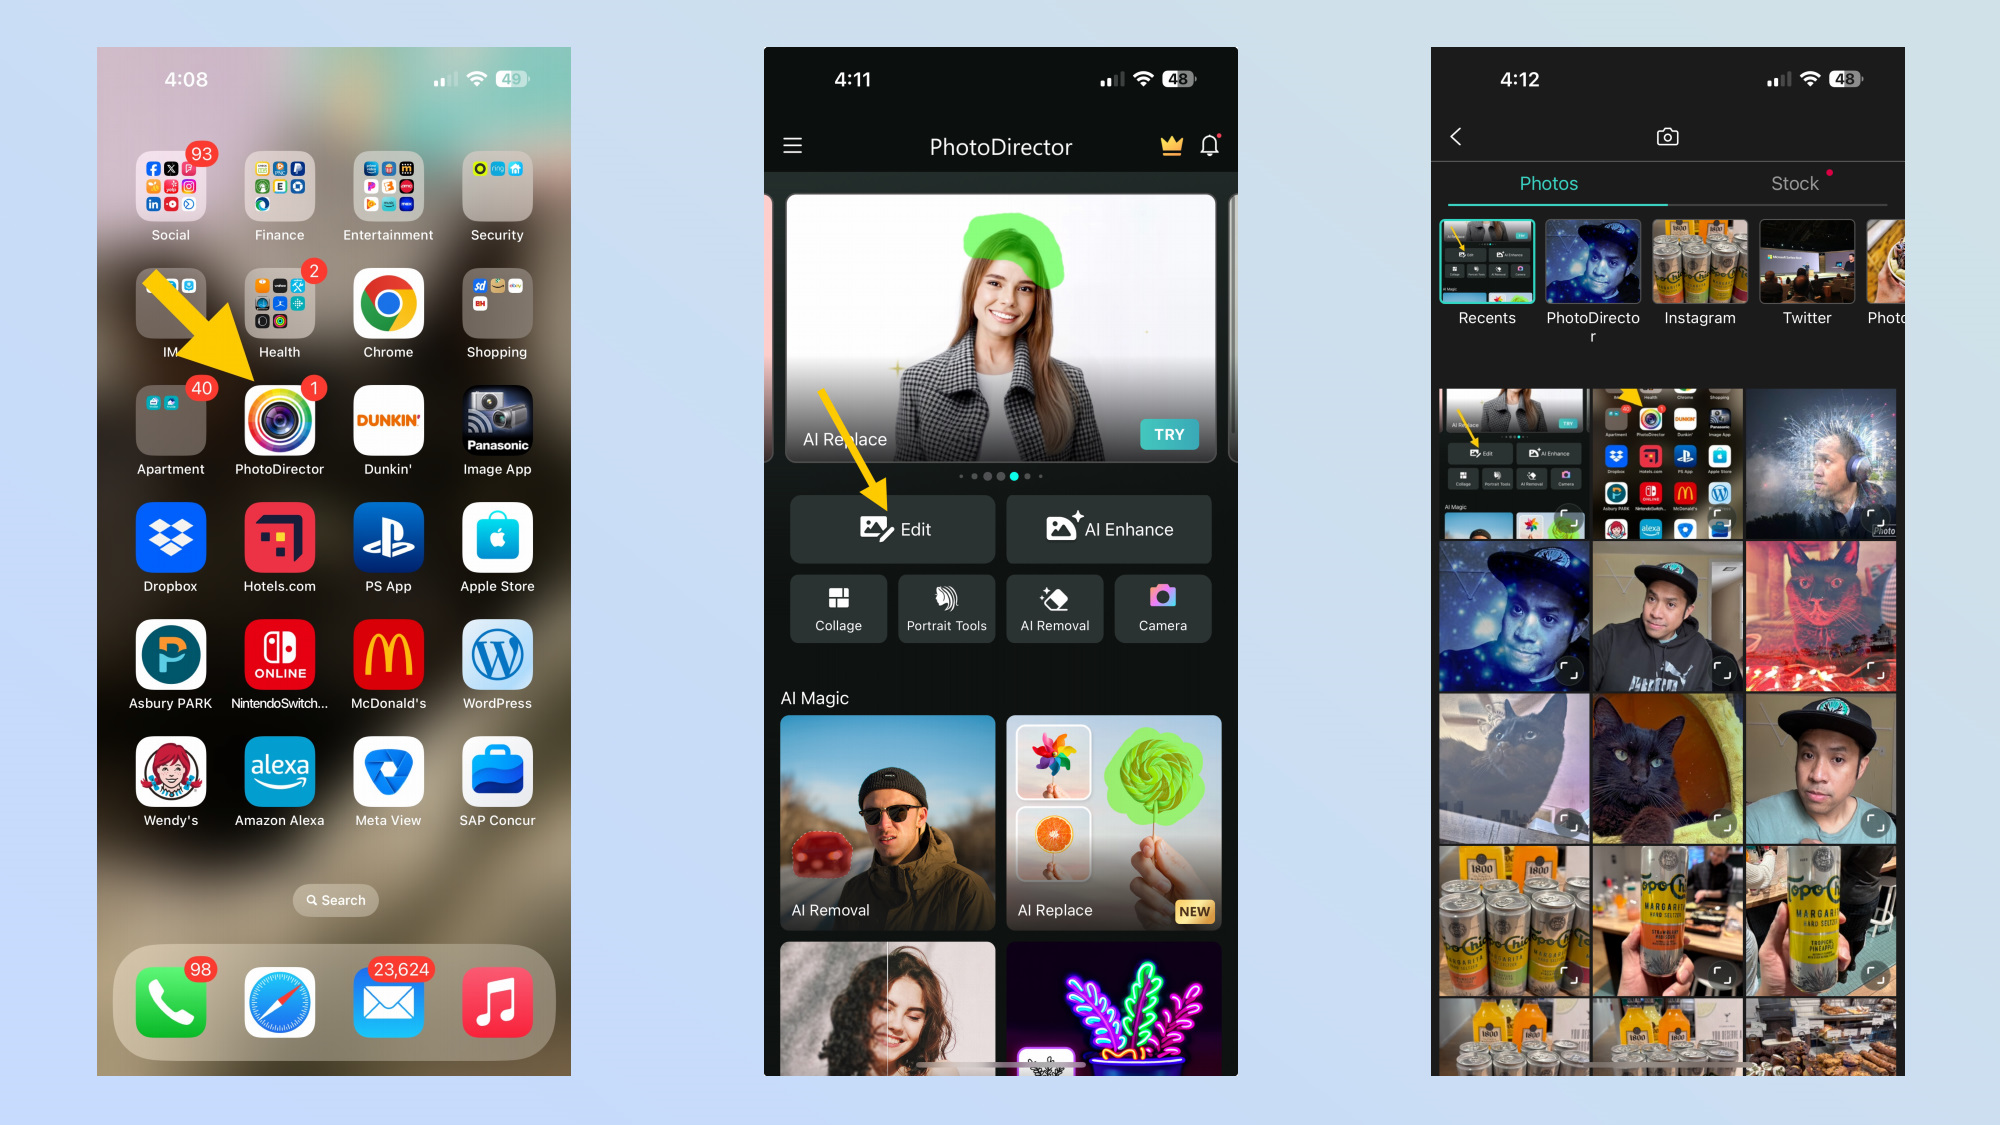
Select the first photo you want to use for this double exposure picture by opening the PhotoDirector app, click on Edit, and then select your photo.
Step 2: Apply your filter

You’ll want to enhance your photo before layering it with another, so we recommend applying a filter to make it pop. Scroll through the bottom set of icons and click the one for filter, then make a selection, and then confirm it by tapping the check mark on the bottom right corner.
Step 3: Blend your photo with another
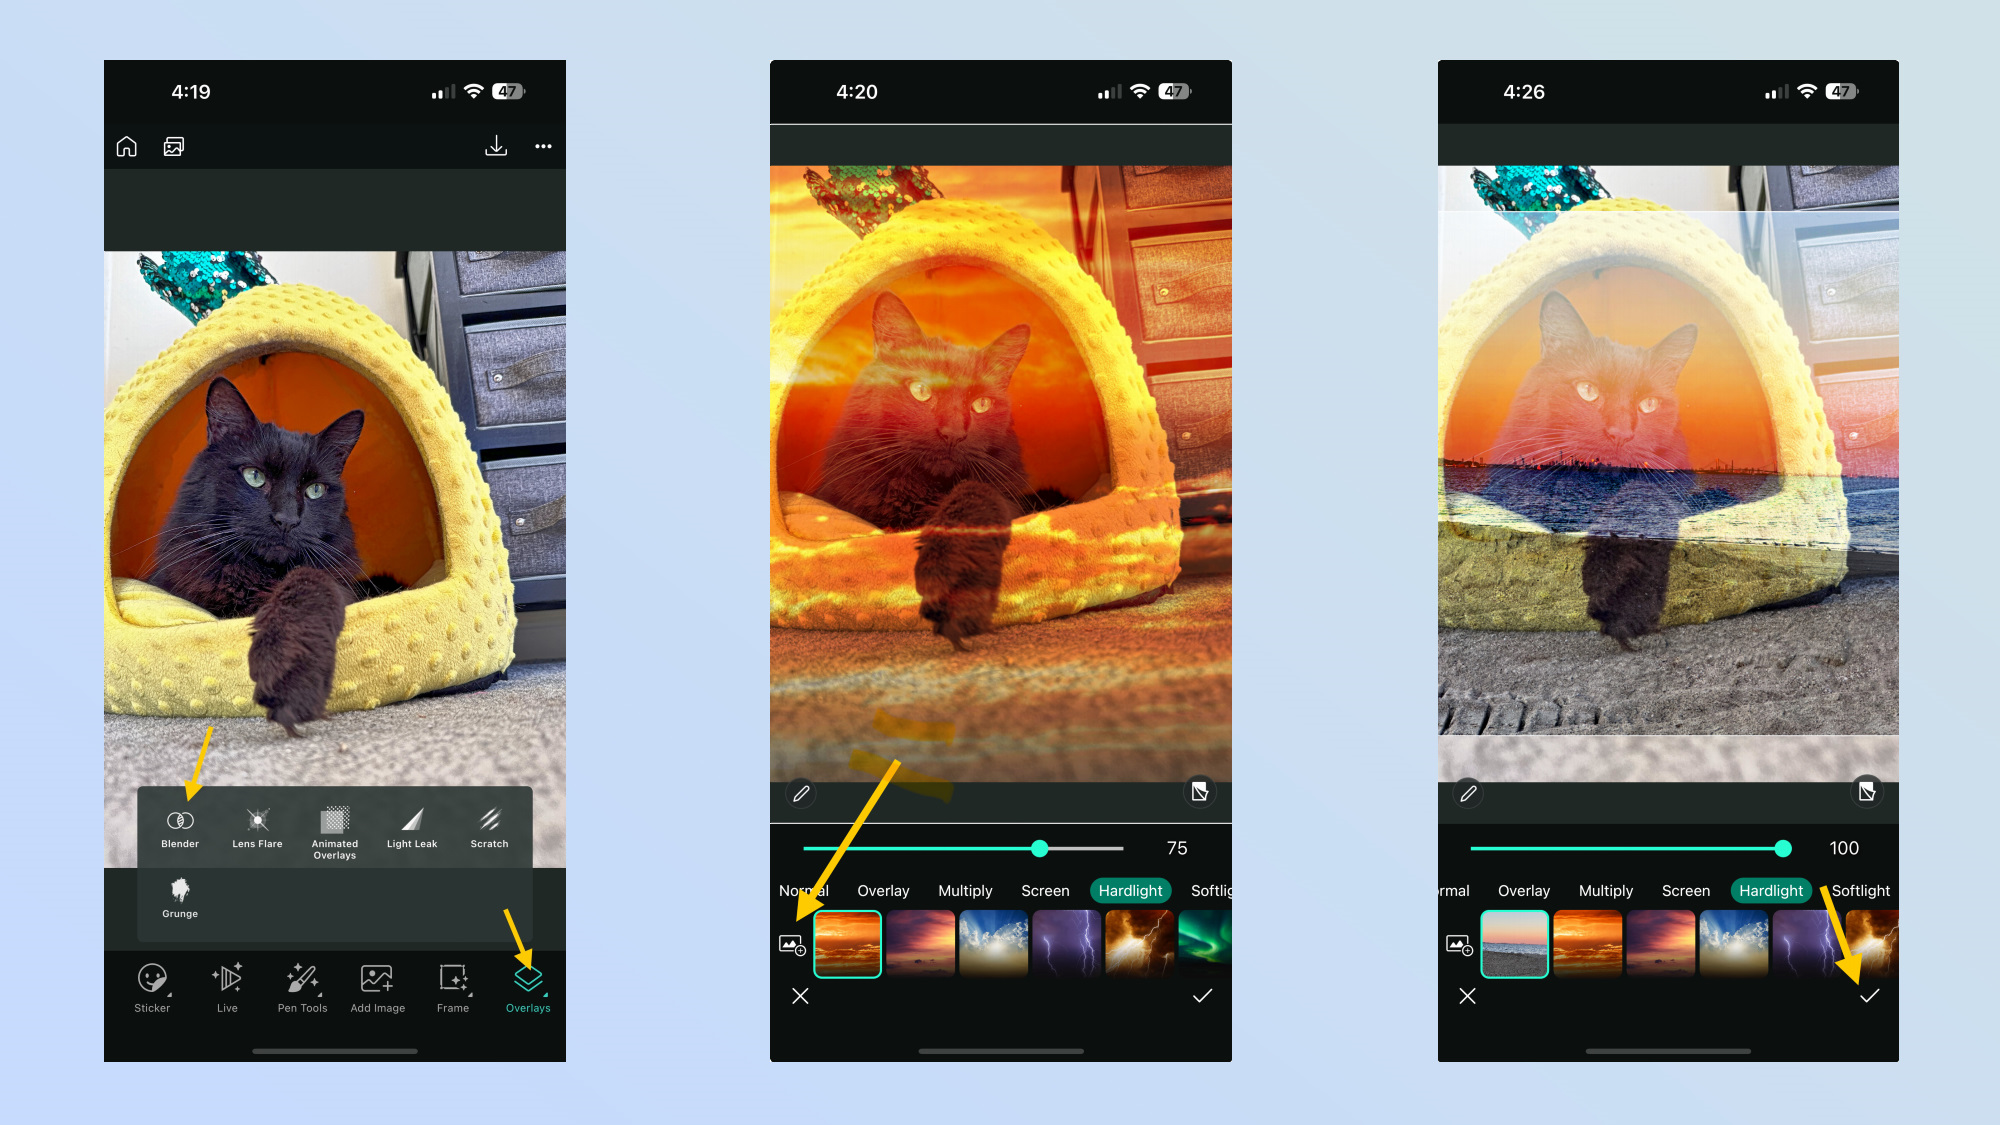
Scroll through the bottom set of icons and tap the overlays icon, then click on the blender icon. You’ll see all the different blending options with several premade backgrounds you can use, but if you want to use your own photo, click on the add photo icon near the bottom left.
Choose the photo you want to use from the gallery, which will then merge the two photos together. You can select any of the available blending options, such as screen, hardlight, or overlay, and then use the slider to increase or decrease the intensity of the blending effect. Once you’re satisfied, tap on the check mark icon on the bottom right to confirm your selection.
Step 4: Cropping the double exposure photo and save it
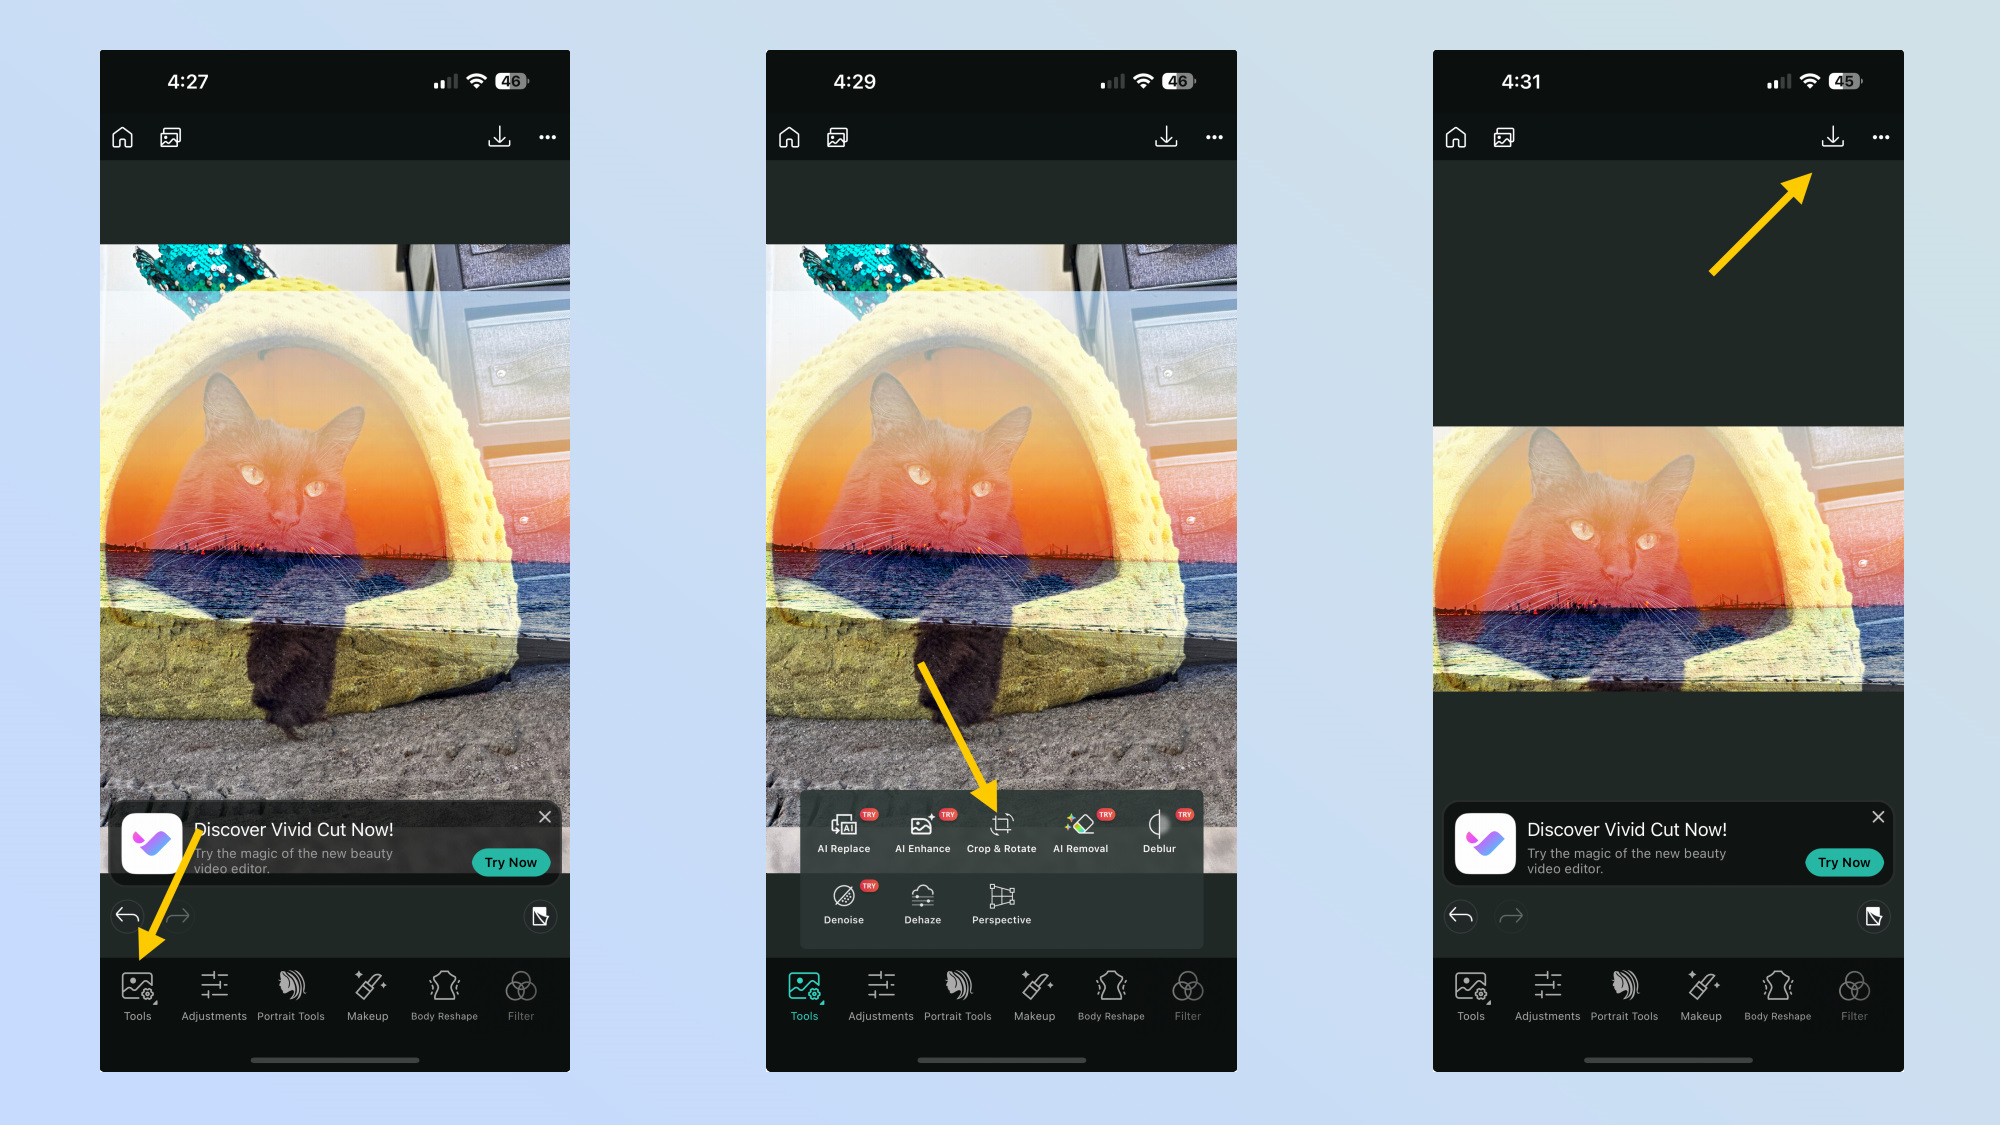
The last step involves doing some minor resizing, which in this case is resizing the photo to your liking. You’ll want to tap the tools icons in the bottom carousel, then click crop & rotate, and make your resizing selections. Once you’re happy, just tap on the check mark to save it. The final step is to export the photo by tapping on the download icon near the upper right corner.
You might notice there are dozens of apps in the App Store for double exposure photography, but we recommend looking at those that have more reviews from user — just because there’s always the chance of those lesser known apps being discontinued.
More from Tom's Guide
- AT&T reveals cause of massive outage — says it was not a cyberattack
- Galaxy Z Fold 6 could be Samsung's thinnest and lightest folding phone yet
- Google Messages could finally let you edit sent texts — what you need to know

John’s a senior editor covering phones for Tom’s Guide. He’s no stranger in this area having covered mobile phones and gadgets since 2008 when he started his career. On top of his editor duties, he’s a seasoned videographer being in front and behind the camera producing YouTube videos. Previously, he held editor roles with PhoneArena, Android Authority, Digital Trends, and SPY. Outside of tech, he enjoys producing mini documentaries and fun social clips for small businesses, enjoying the beach life at the Jersey Shore, and recently becoming a first time homeowner.
 Club Benefits


