How to use AirDrop on Mac
Here's how to use AirDrop on Mac, allowing you to quickly transfer files between devices
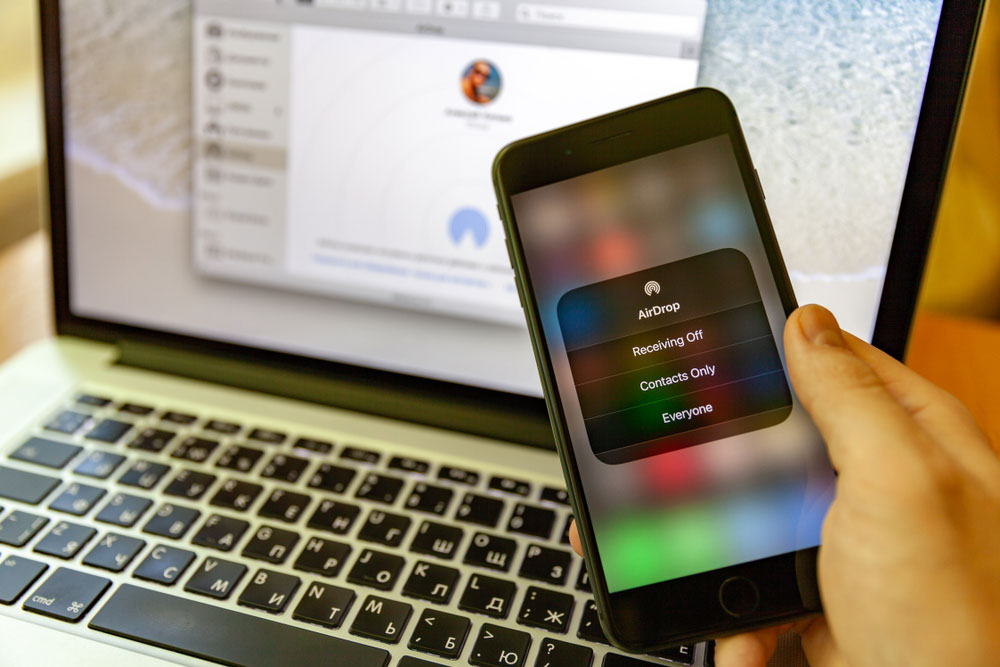
Sharing files is easy if you know how to use AirDrop on Mac. In the same way that learning how to use AirDrop on iPhone and iPad means you can transfer files with just a few taps, this feature means you don't need to fiddle around with attachments. It's just a case of sending the file directly and having it accepted on the recipient device.
To do this, you need to learn how to turn on AirDrop on Mac. You can then make use of one of three ways of AirDropping your files. The method you choose will generally depend on how you're working. If you've opened a photo, for instance, you'll find one method below proves far easier to use than the other two.
But before we get into those different approaches, let's start from the beginning. Once you've learned how to turn on Airdrop on Mac, you'll be able to practice how to use it.
How to use Airdrop on Mac
If you're expecting to receive a file, you'll first need to turn AirDrop on.
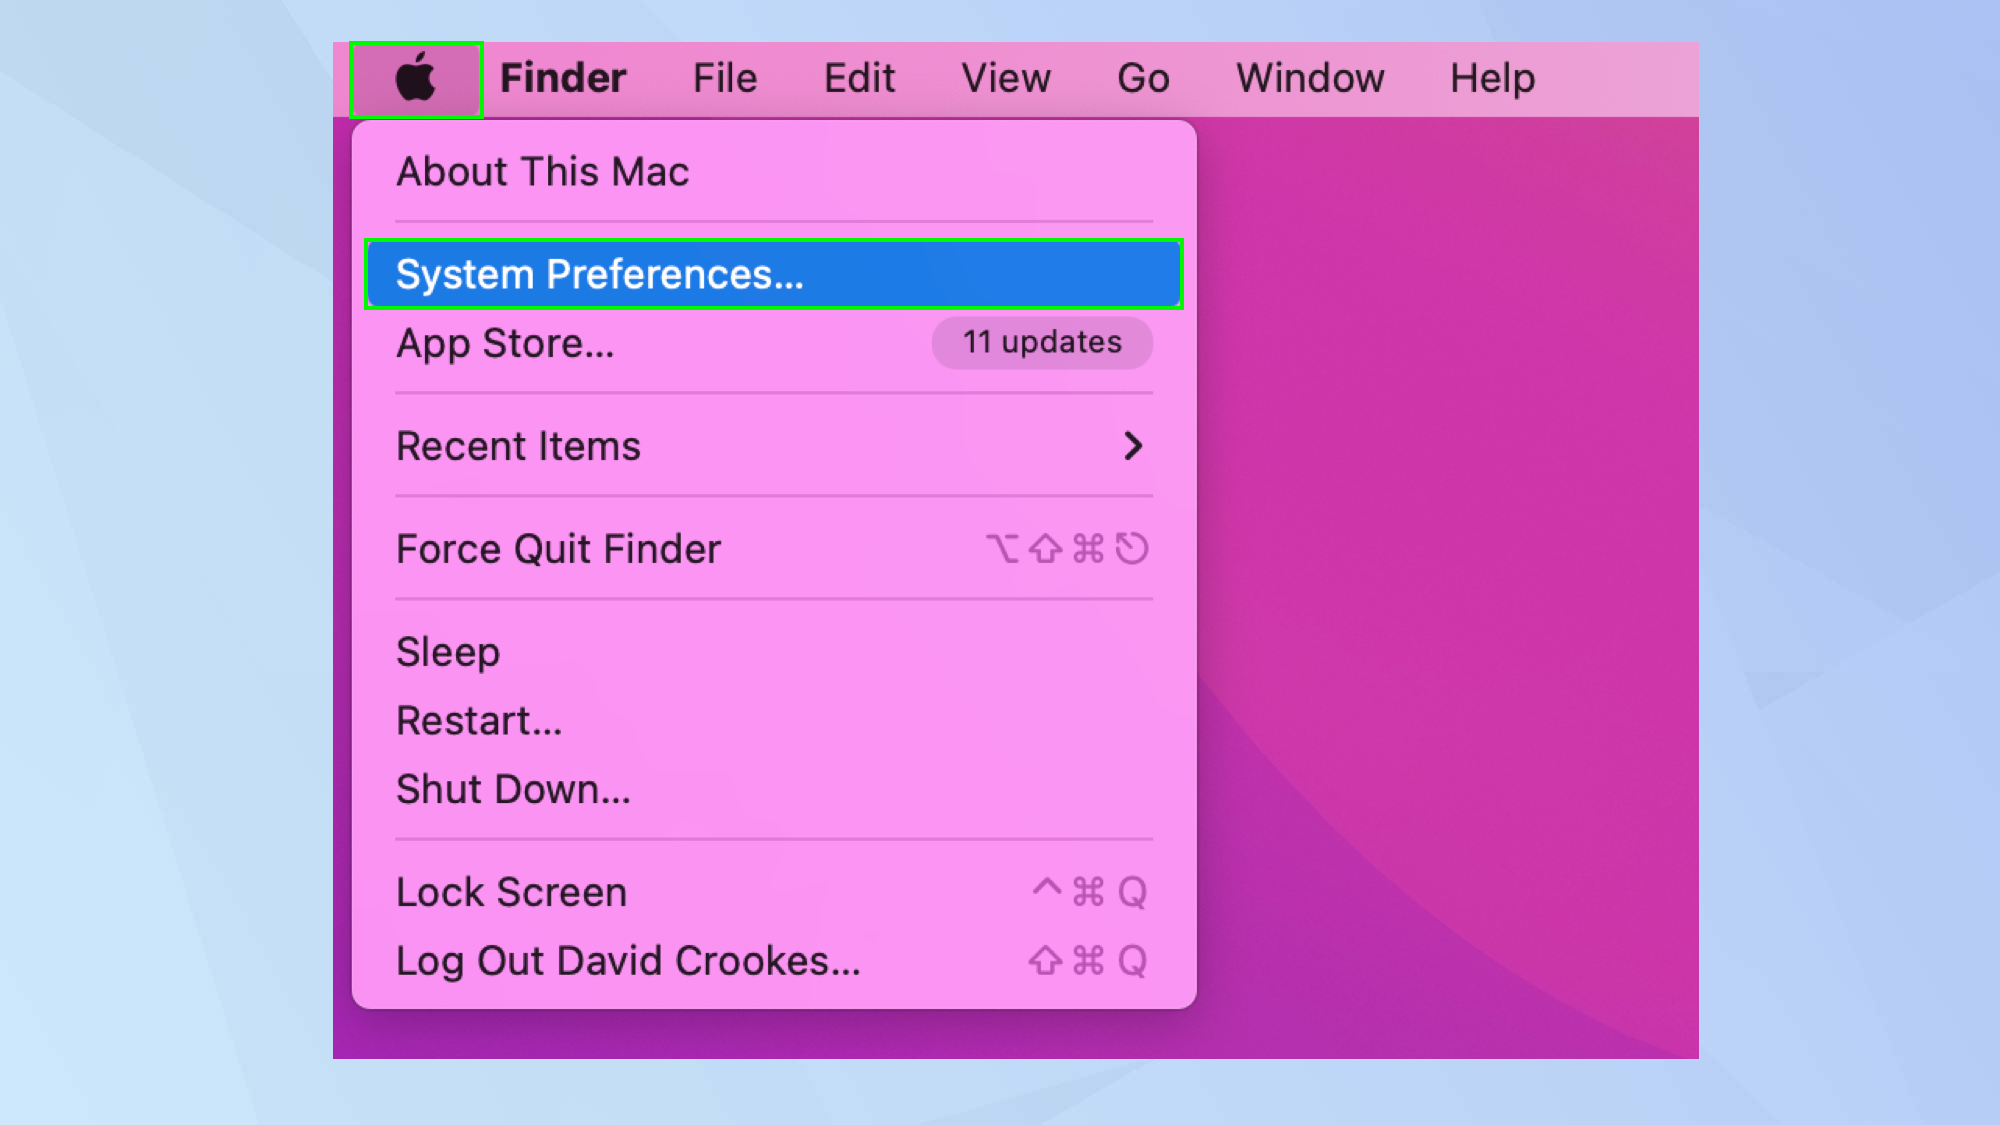
1. First of all, you need to have Bluetooth enabled. Click the Apple icon and select System Preferences.
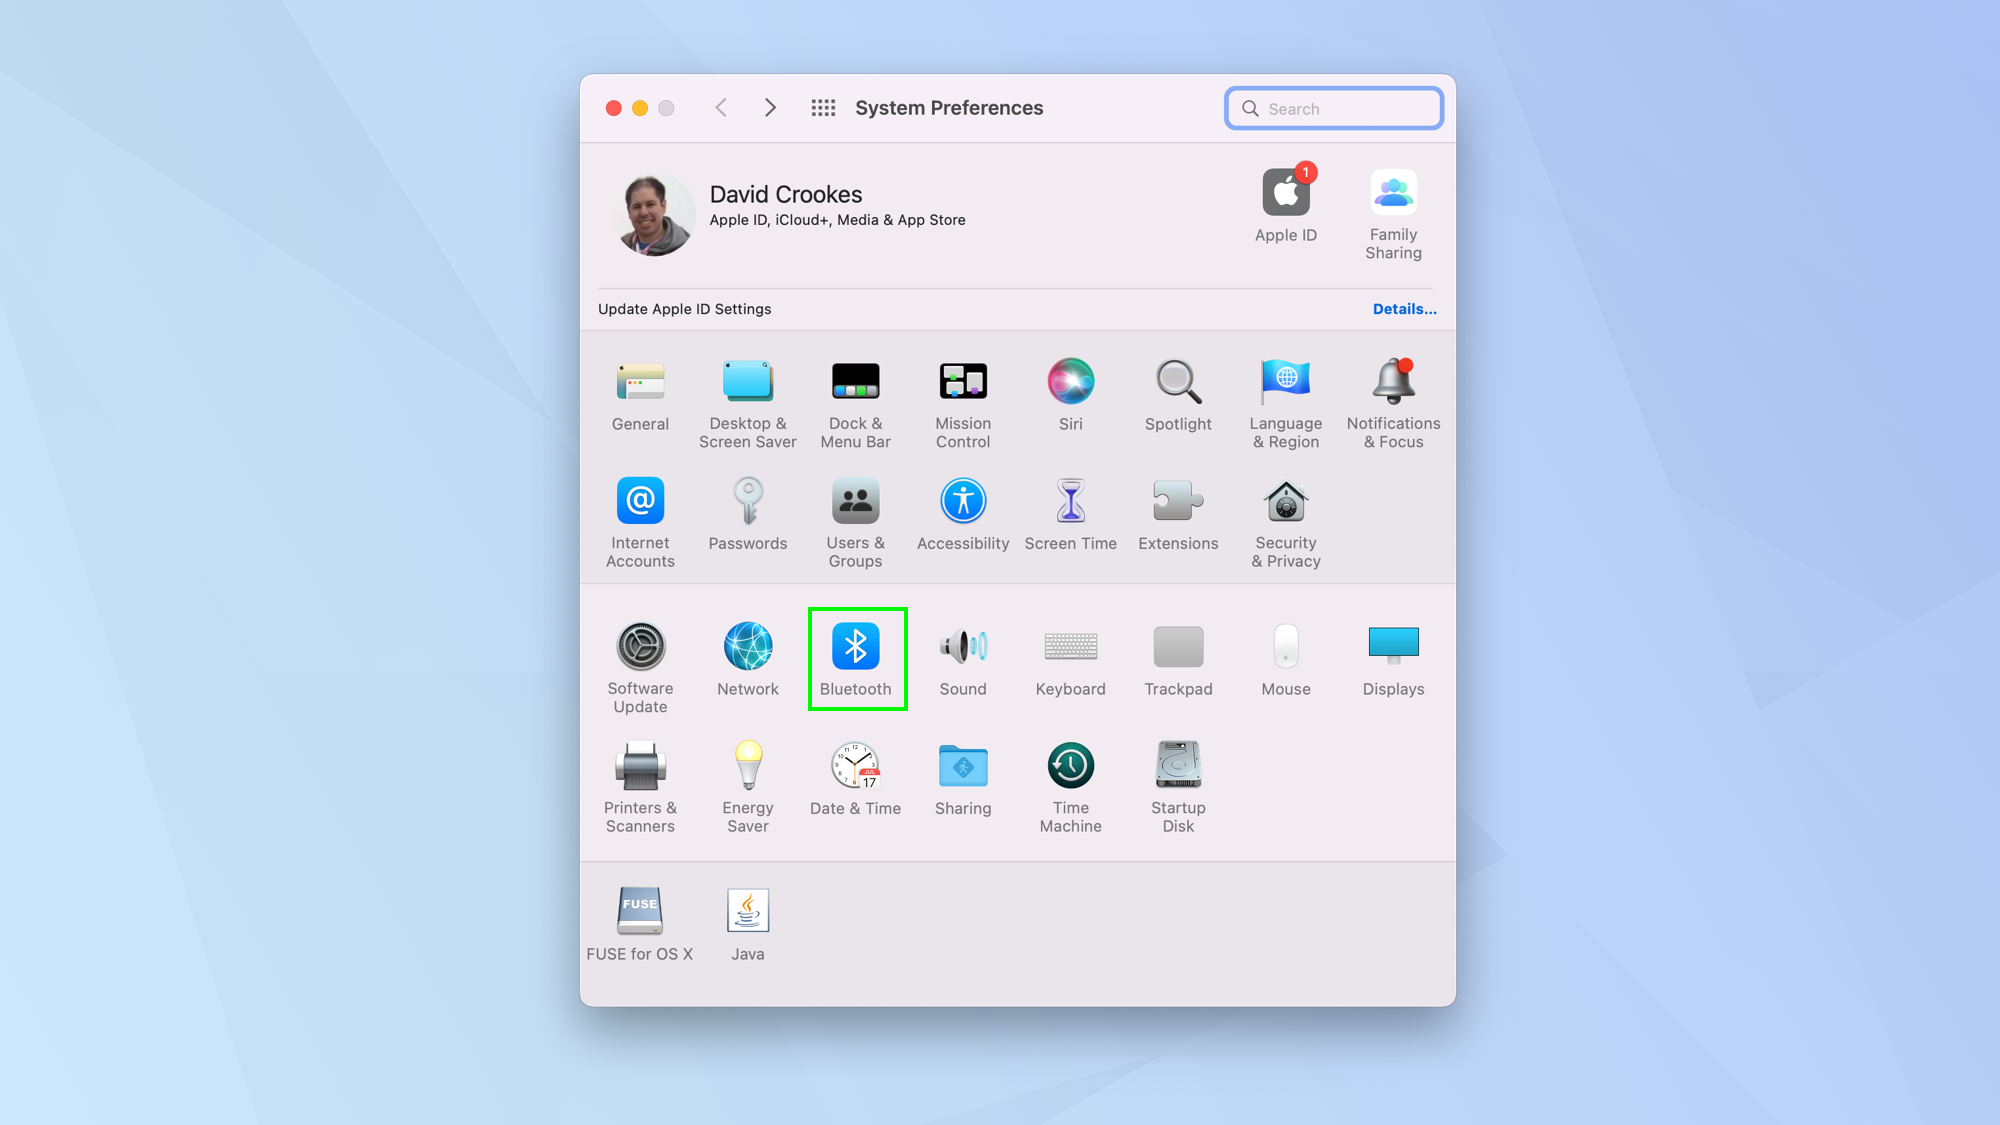
2. Now click Bluetooth from the list of icons.
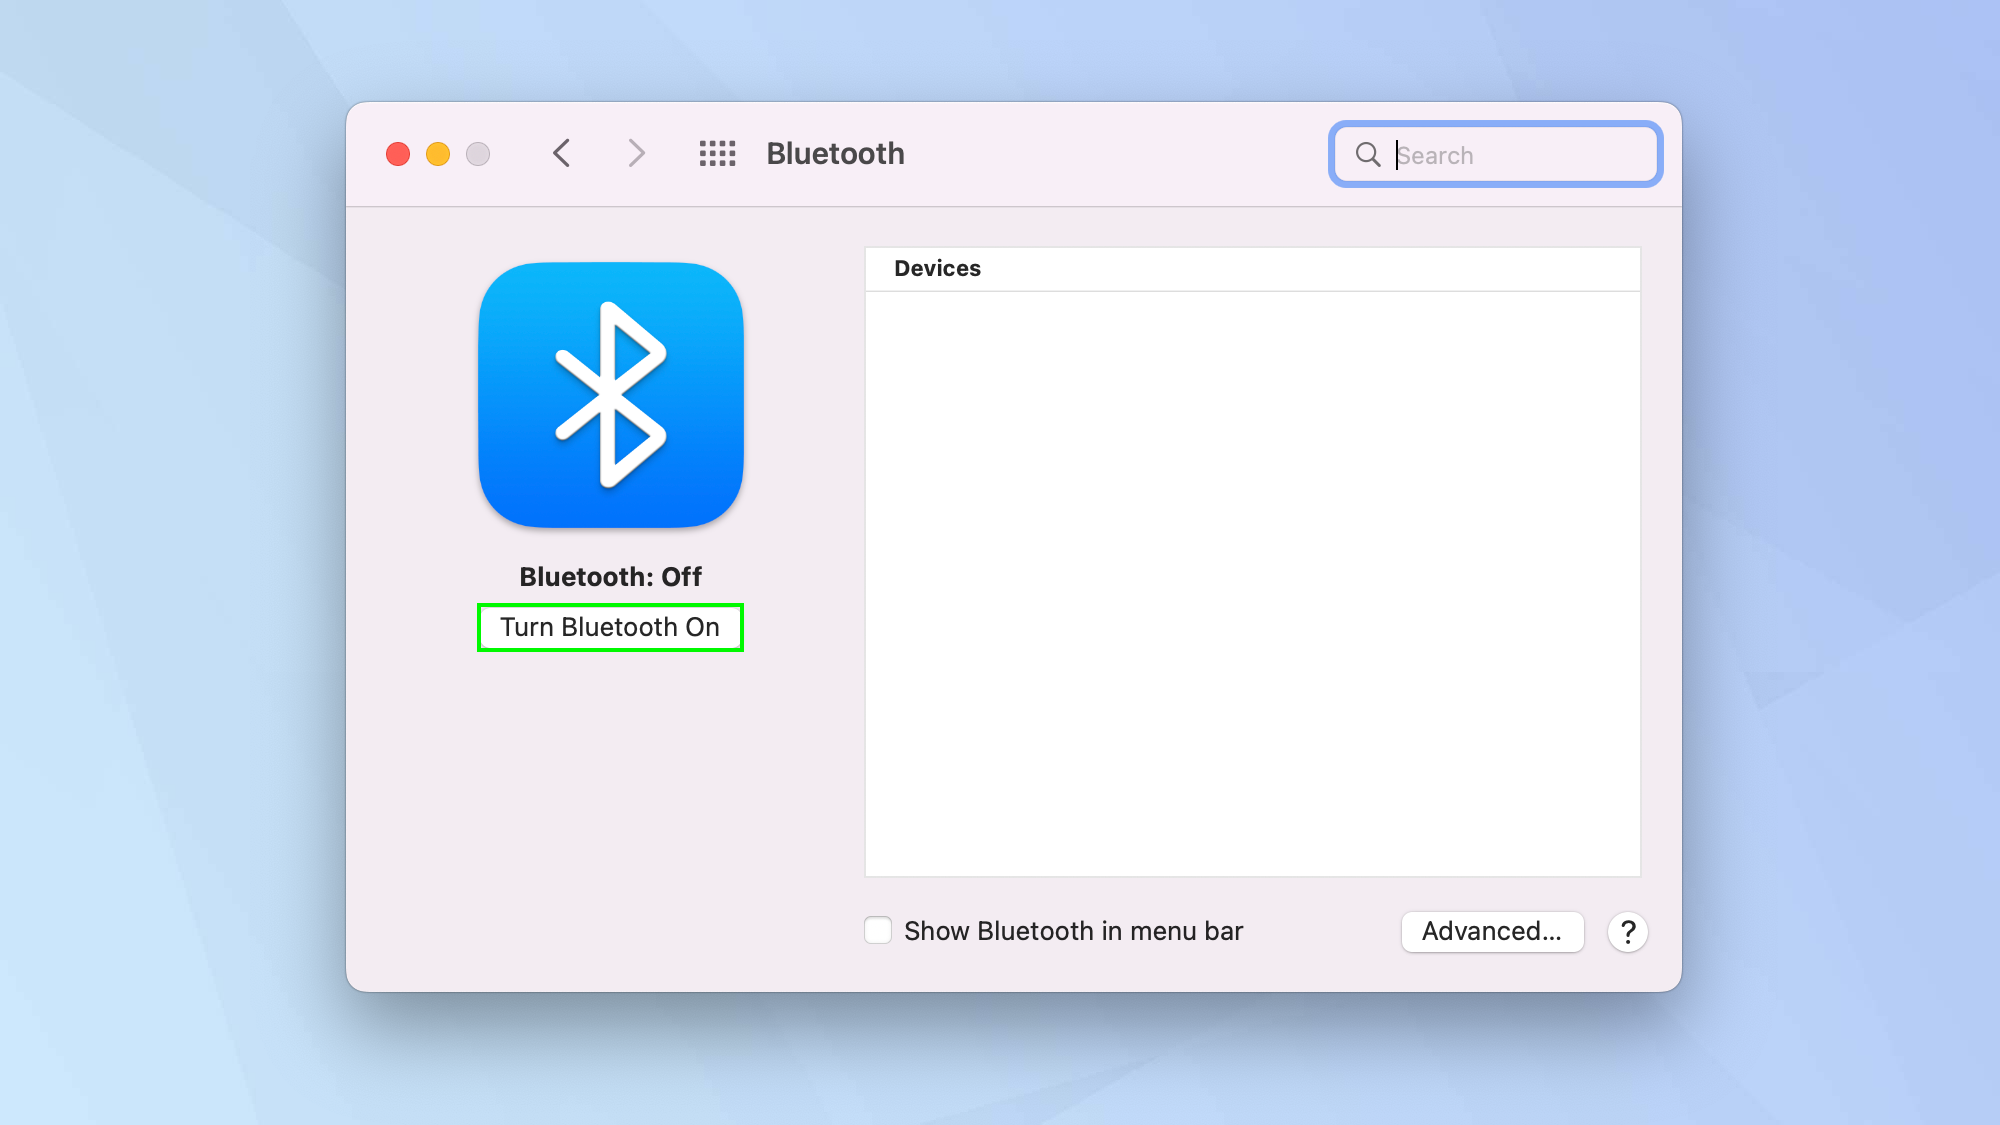
3. Click Turn Bluetooth On and you will find that your Mac is now discoverable. Any devices in range will be listed too.
Get instant access to breaking news, the hottest reviews, great deals and helpful tips.
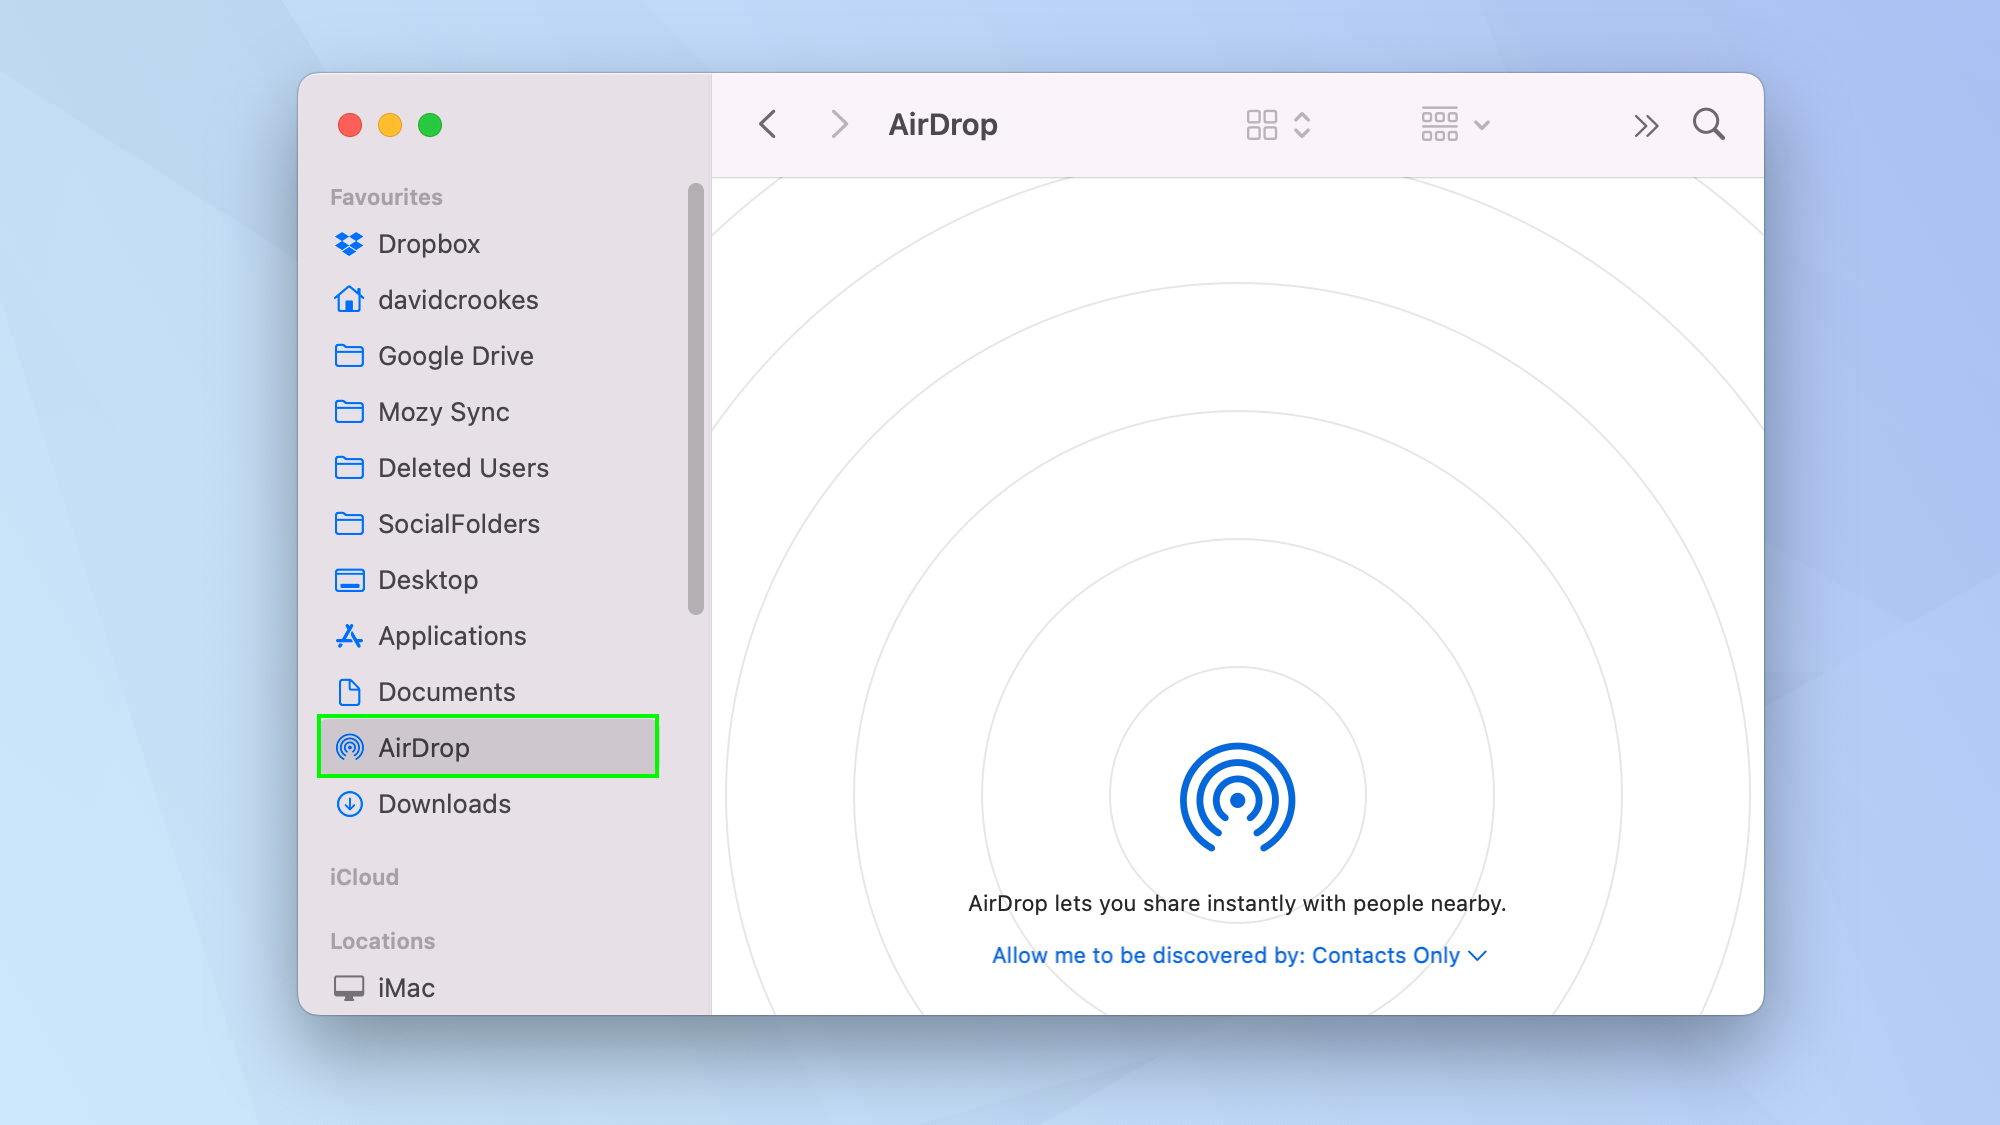
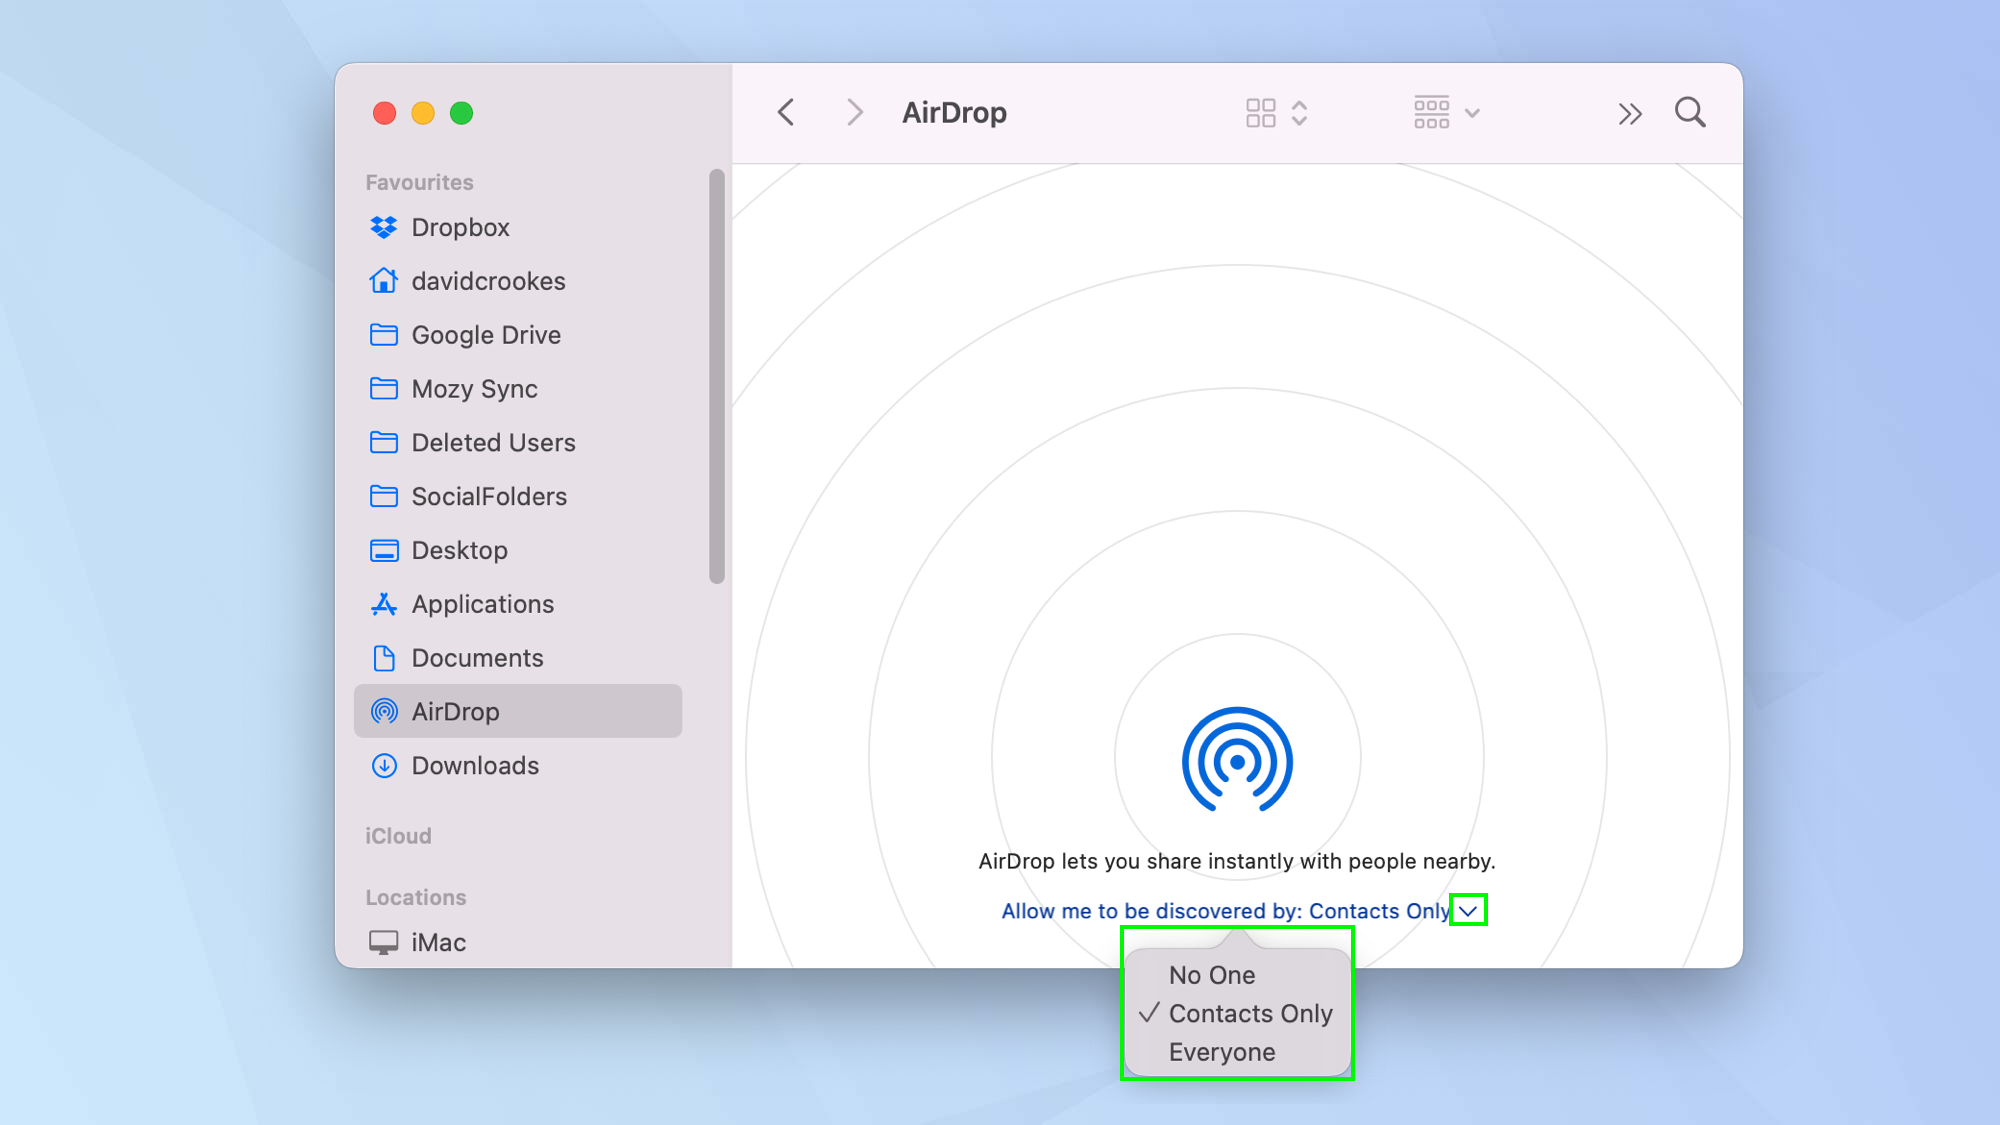
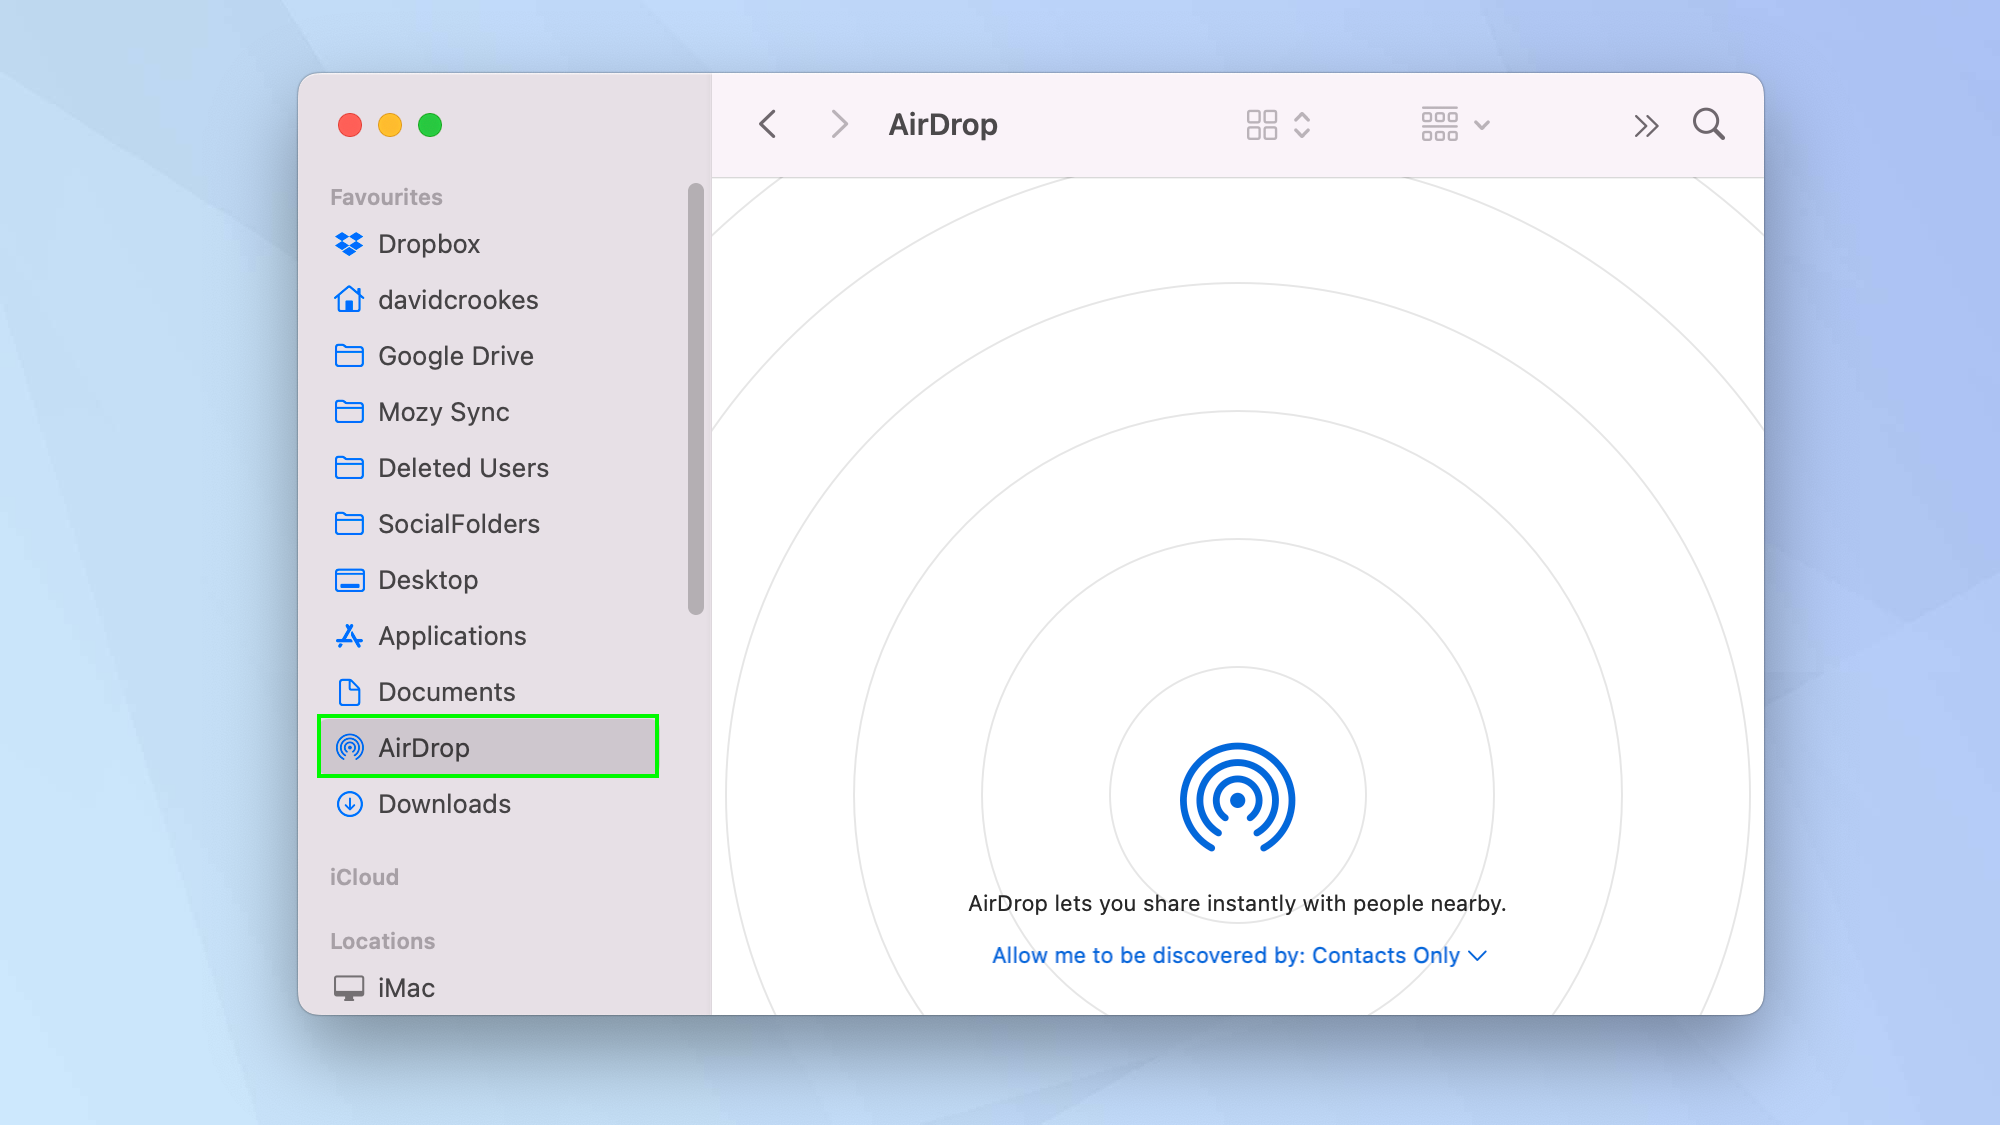
4. Next, open Finder and click AirDrop in the navigation column on the left.
5. Finally, click the dropdown arrow next to 'Allow me to be discovered by'. You can choose No-One (but since we're turning AirDrop on, this isn't advisable). You can also select either Contacts Only or Everyone. The safest option is Contacts Only, which makes your machine visible only to people already in your contacts.
How to share a file using AirDrop on Mac
There are three ways of sharing a file using AirDrop on Mac.
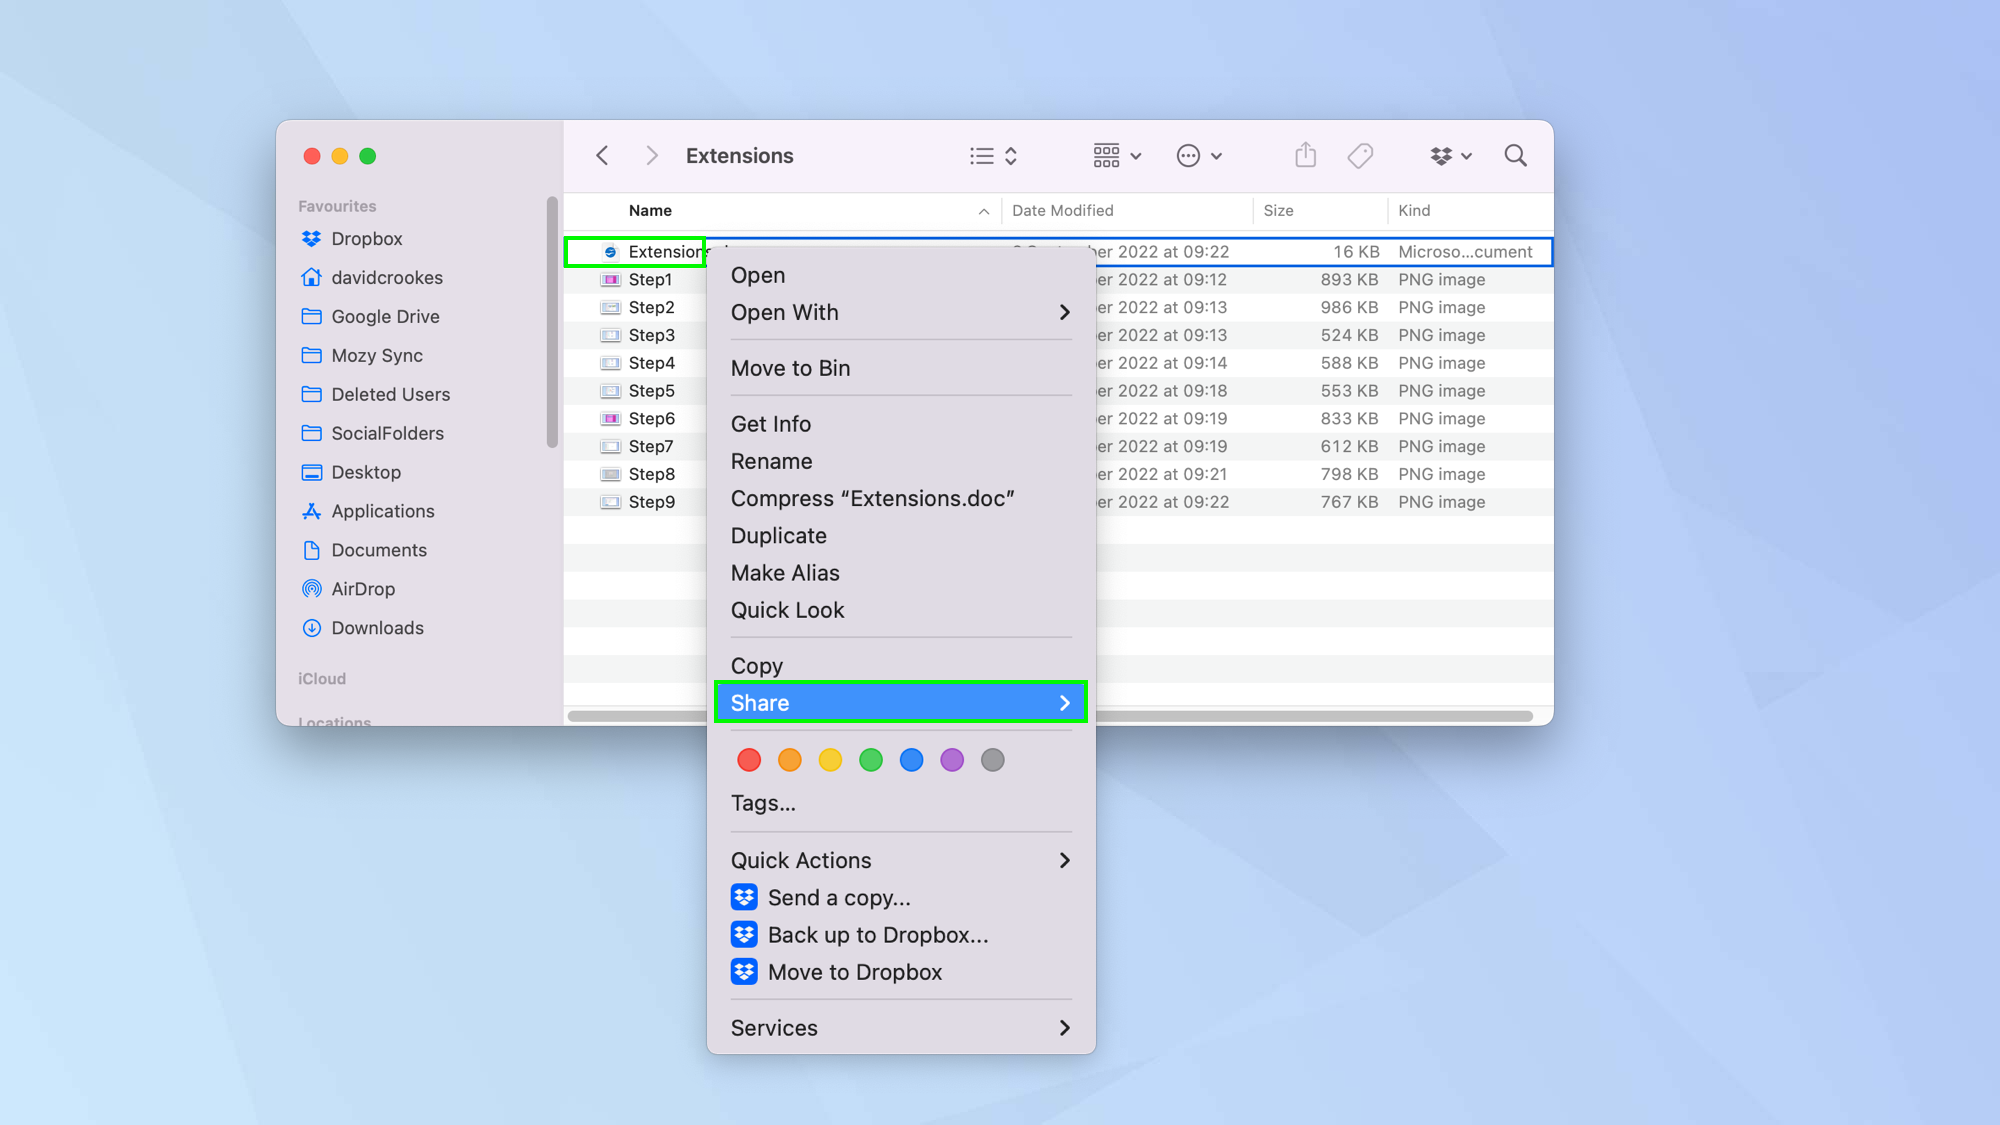
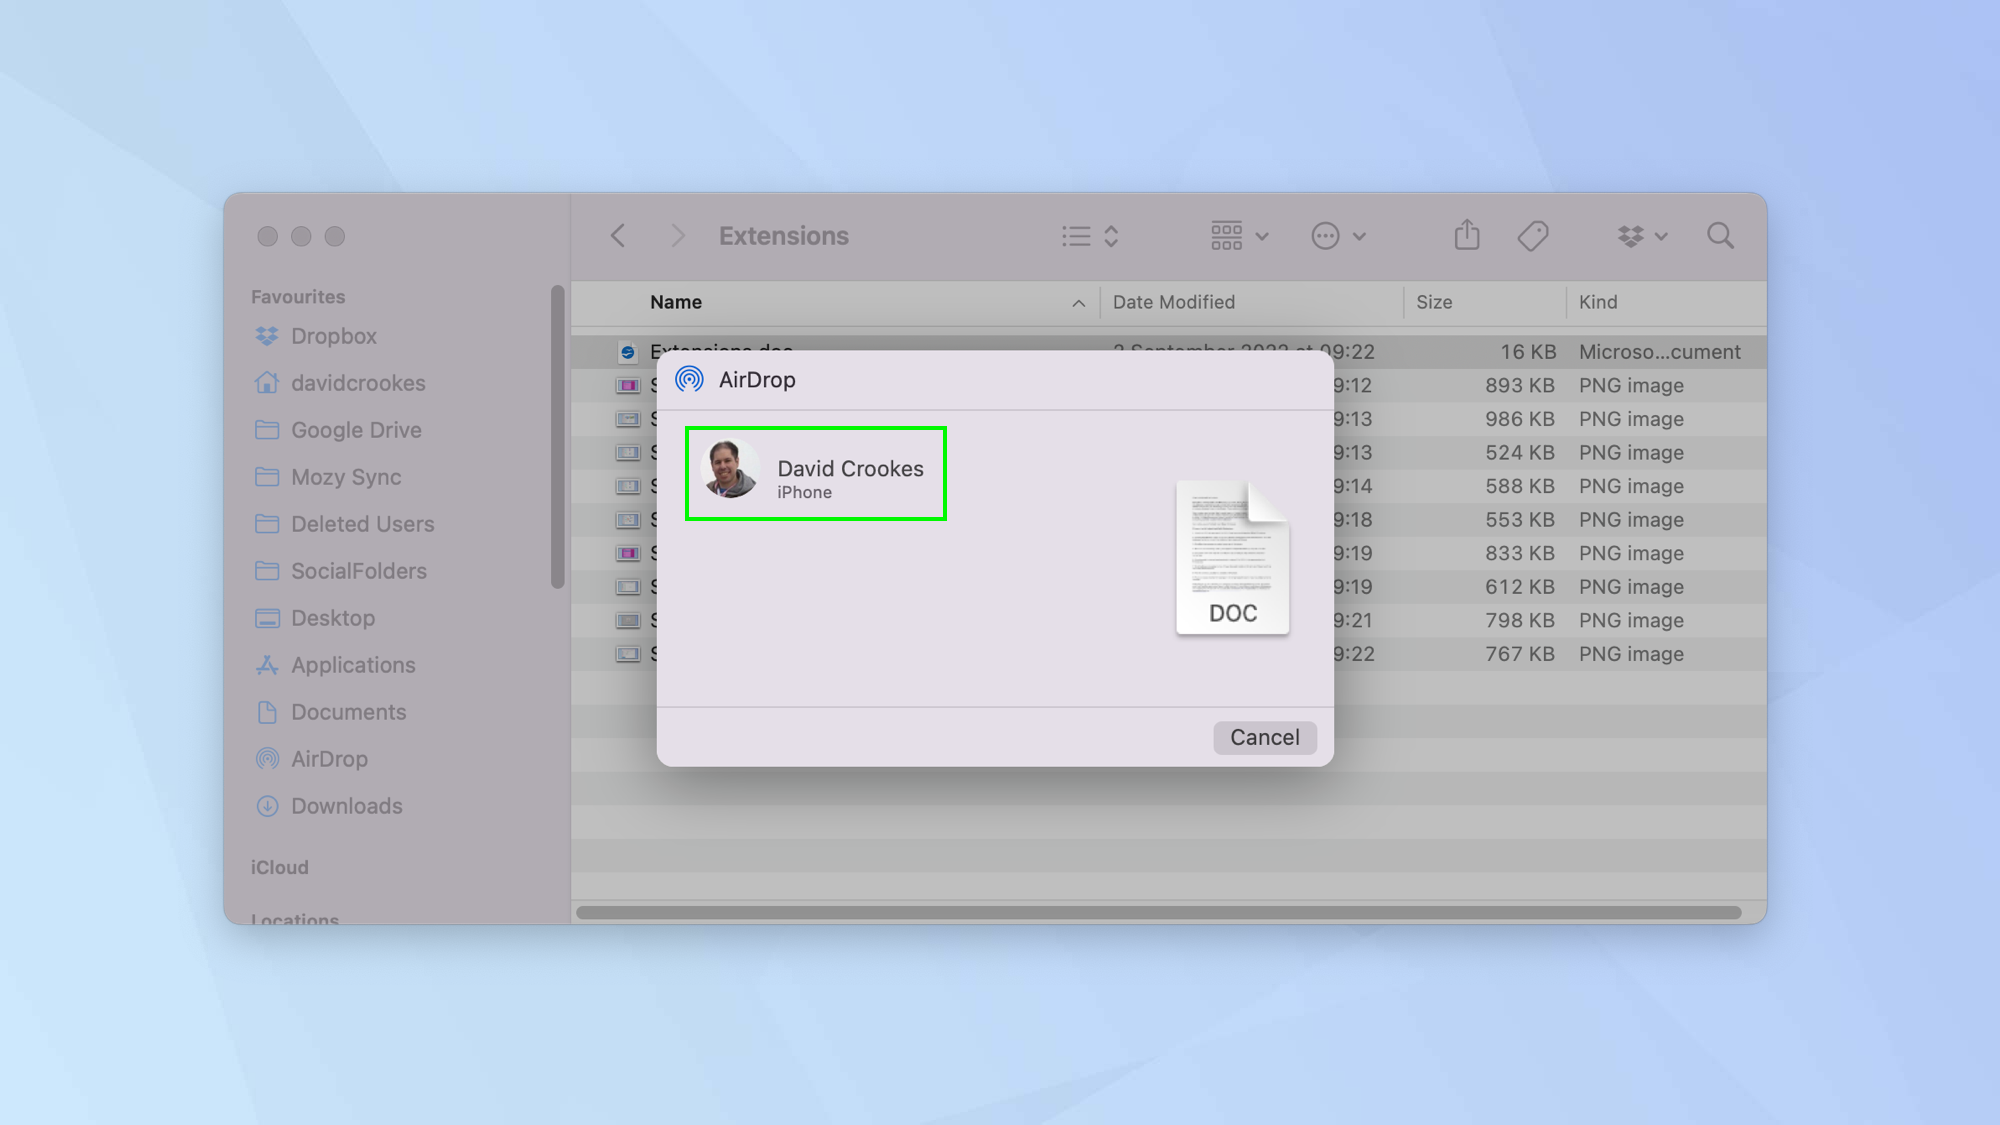
1. The first method is to open a Finder window and right-click on a file (learn how to right-click on Mac if you're not sure). You can then select Share from the menu.
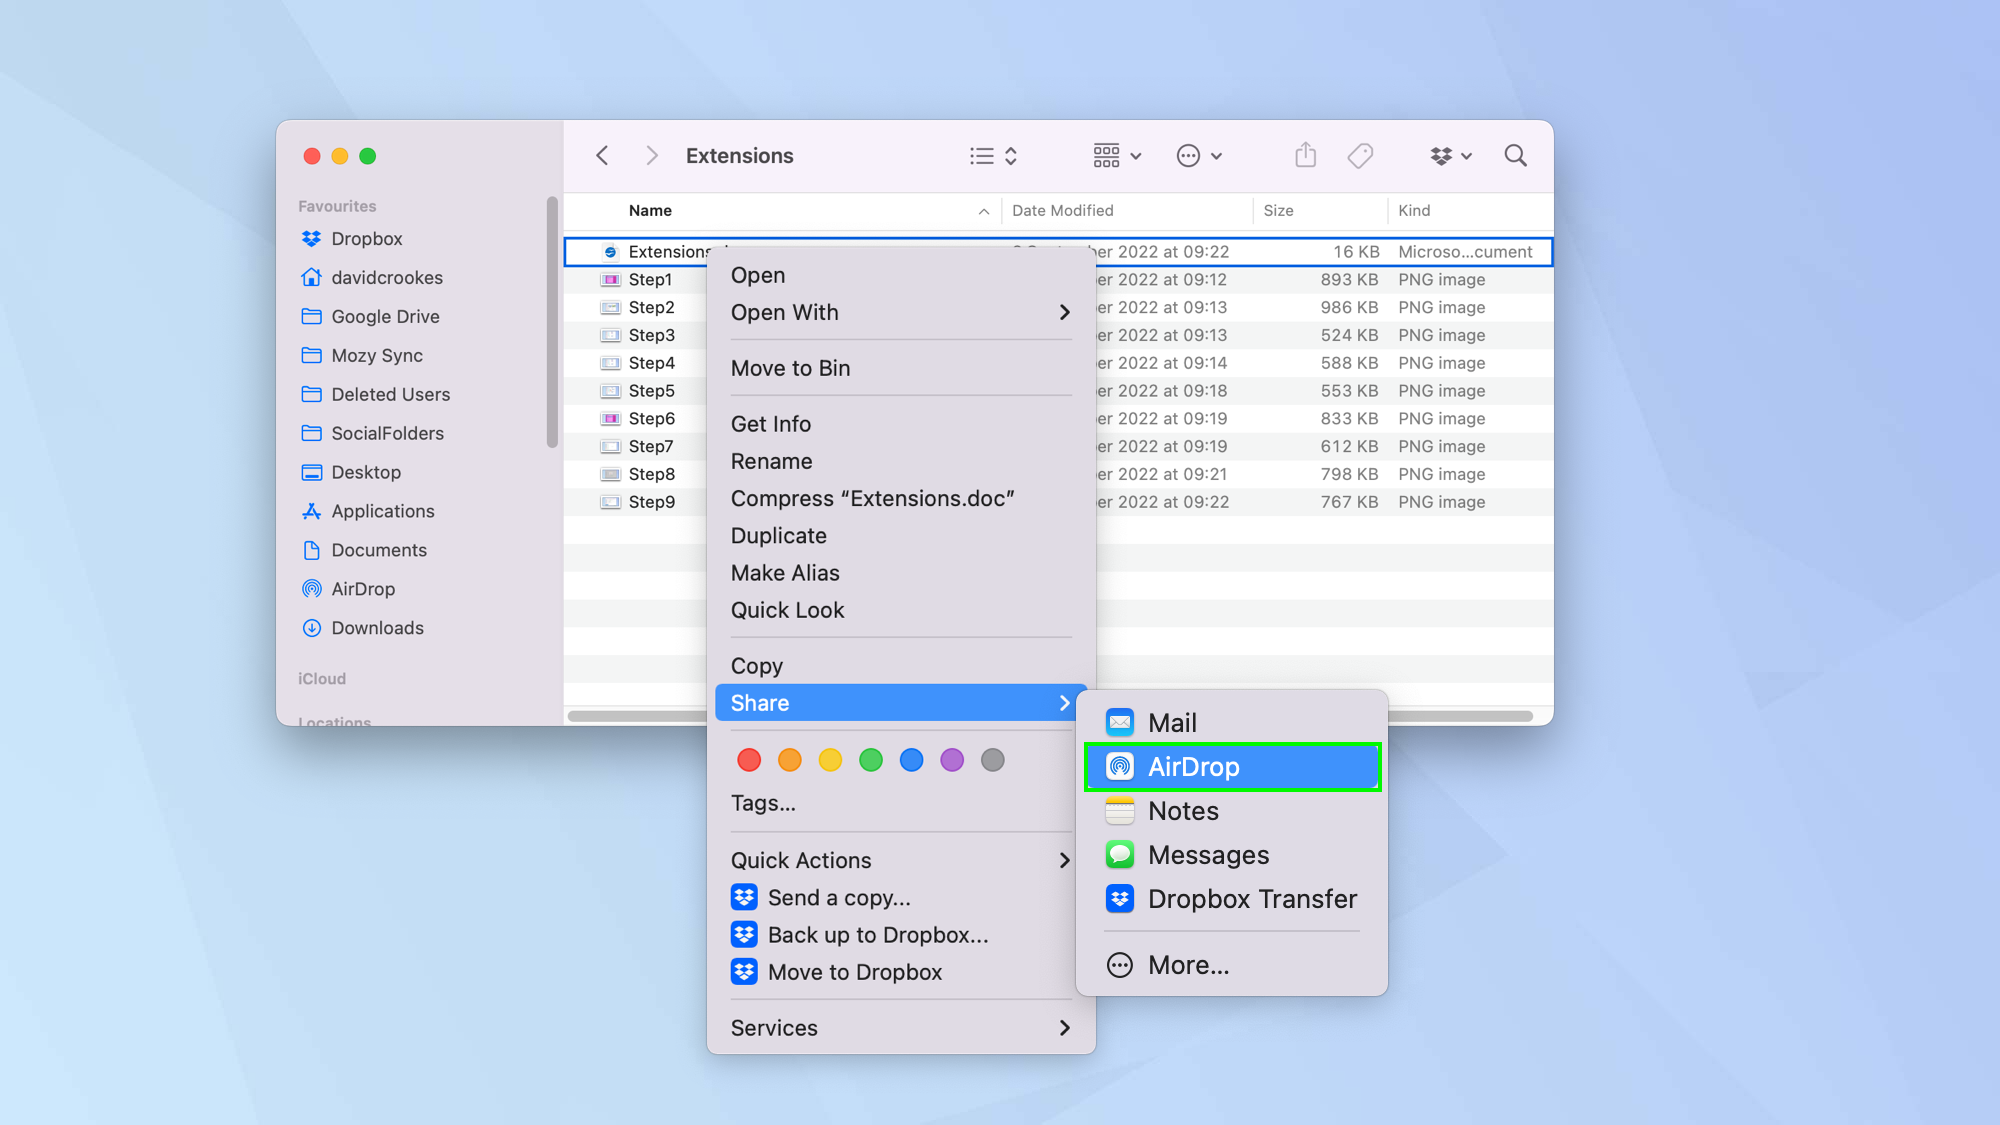
2. Then click AirDrop.
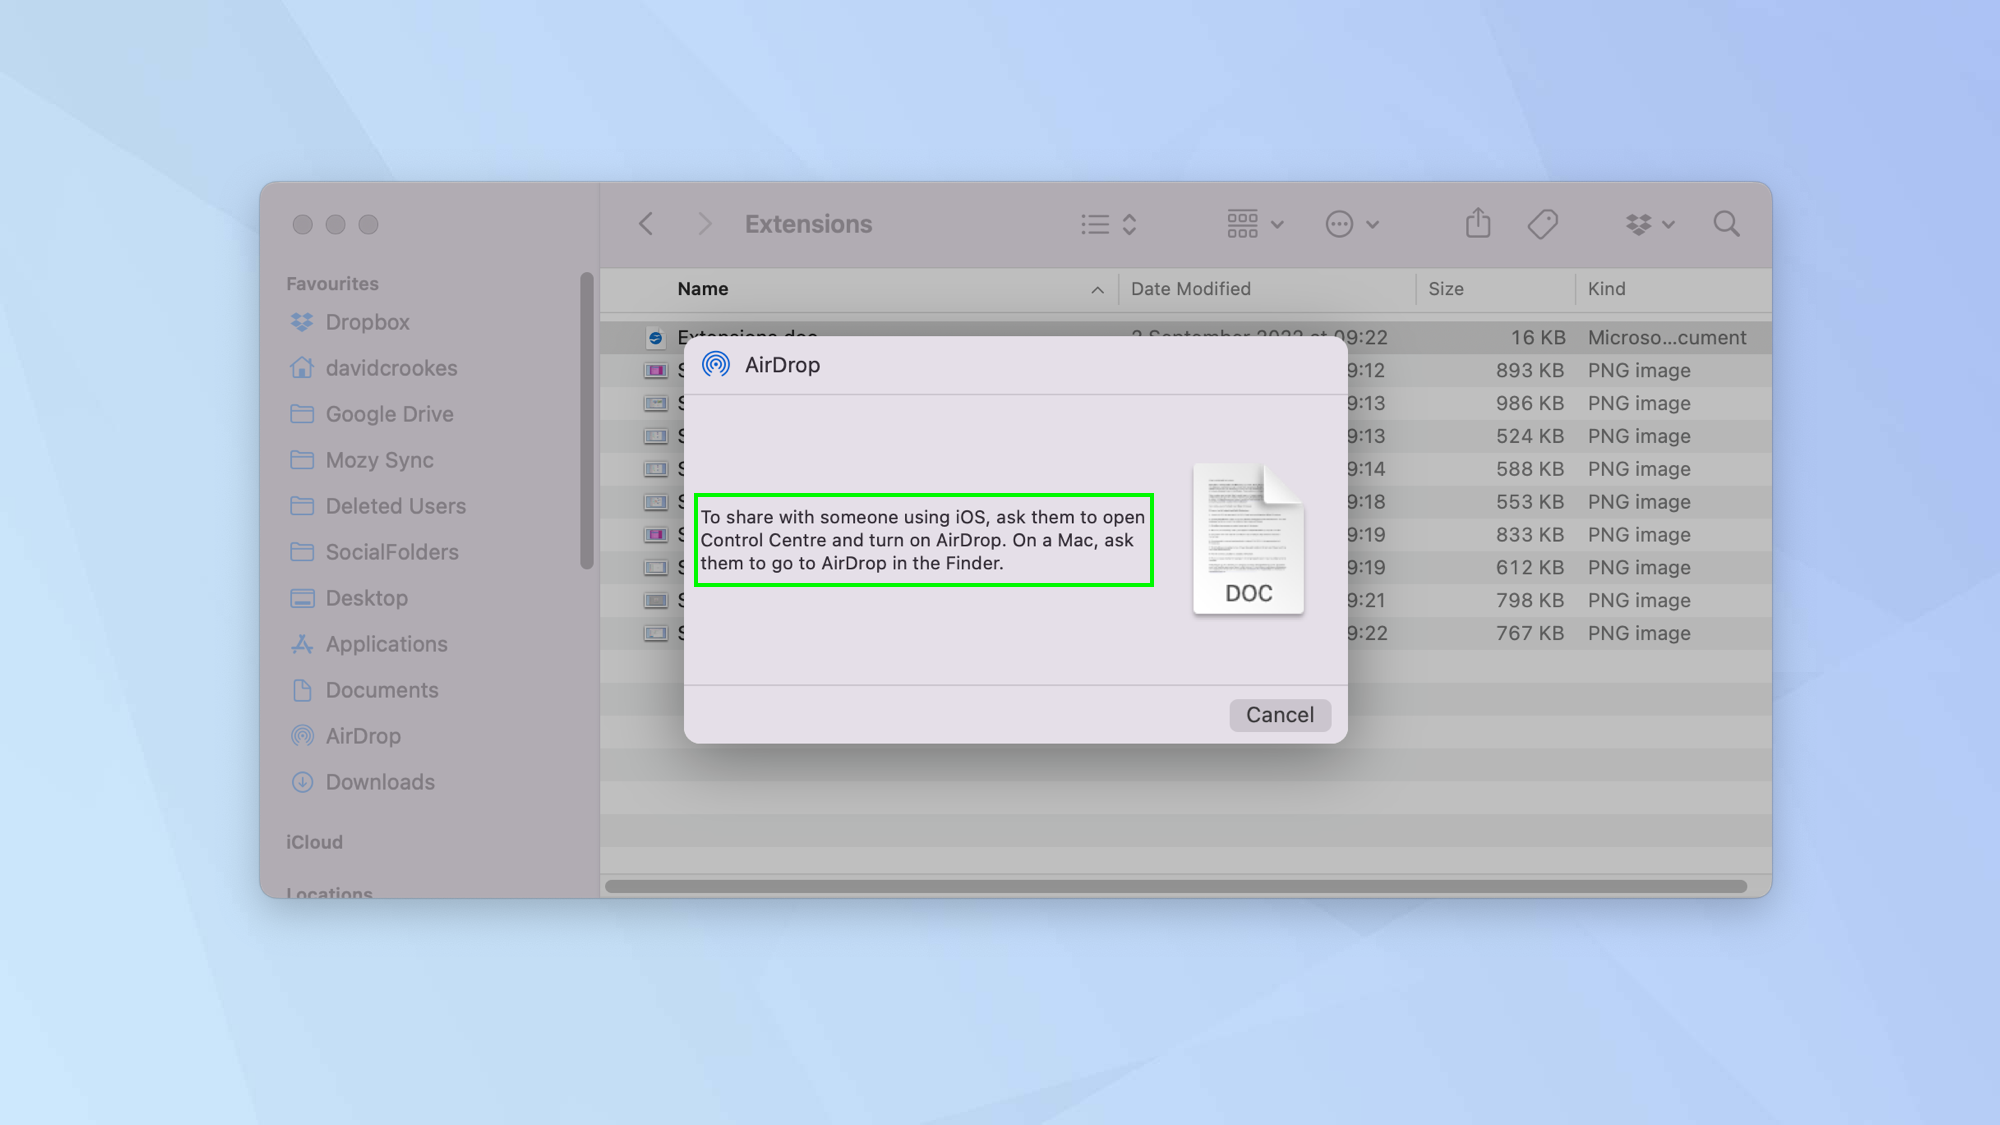
3. You may see a message suggesting there are no nearby devices to AirDrop to. This may simply be because AirDrop has not been activated on the recipient devices.
If it's a Mac, ask the recipient to follow the steps above, otherwise learn how to use AirDrop on iPhone and iPad.
4. If there are nearby recipients, you will see a list of devices. Click the name of the device you want to AirDrop the file to. It will then be sent on its way.
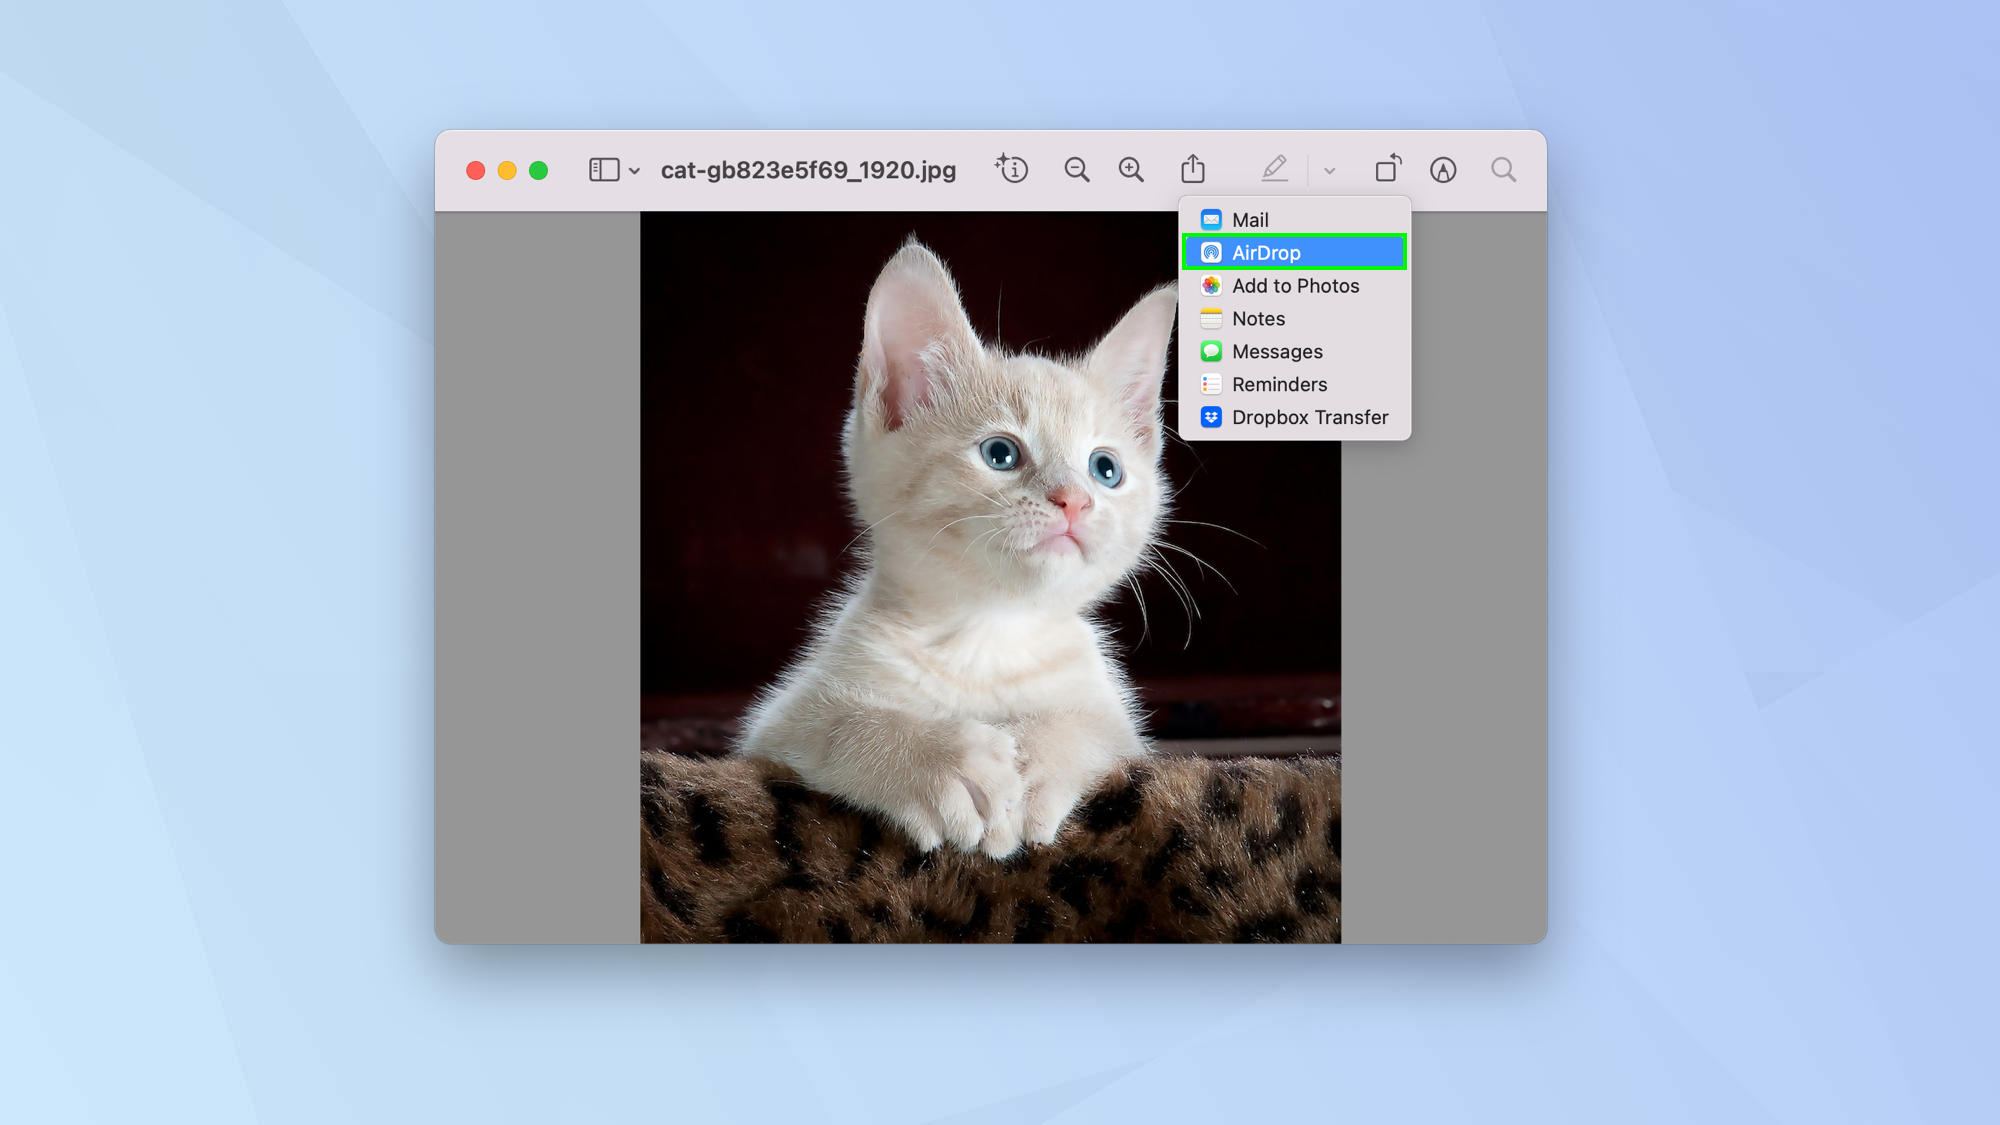
5. The second method is to open a file such as an image and click the Share icon at the top of the window.
6. Select AirDrop from the dropdown menu.
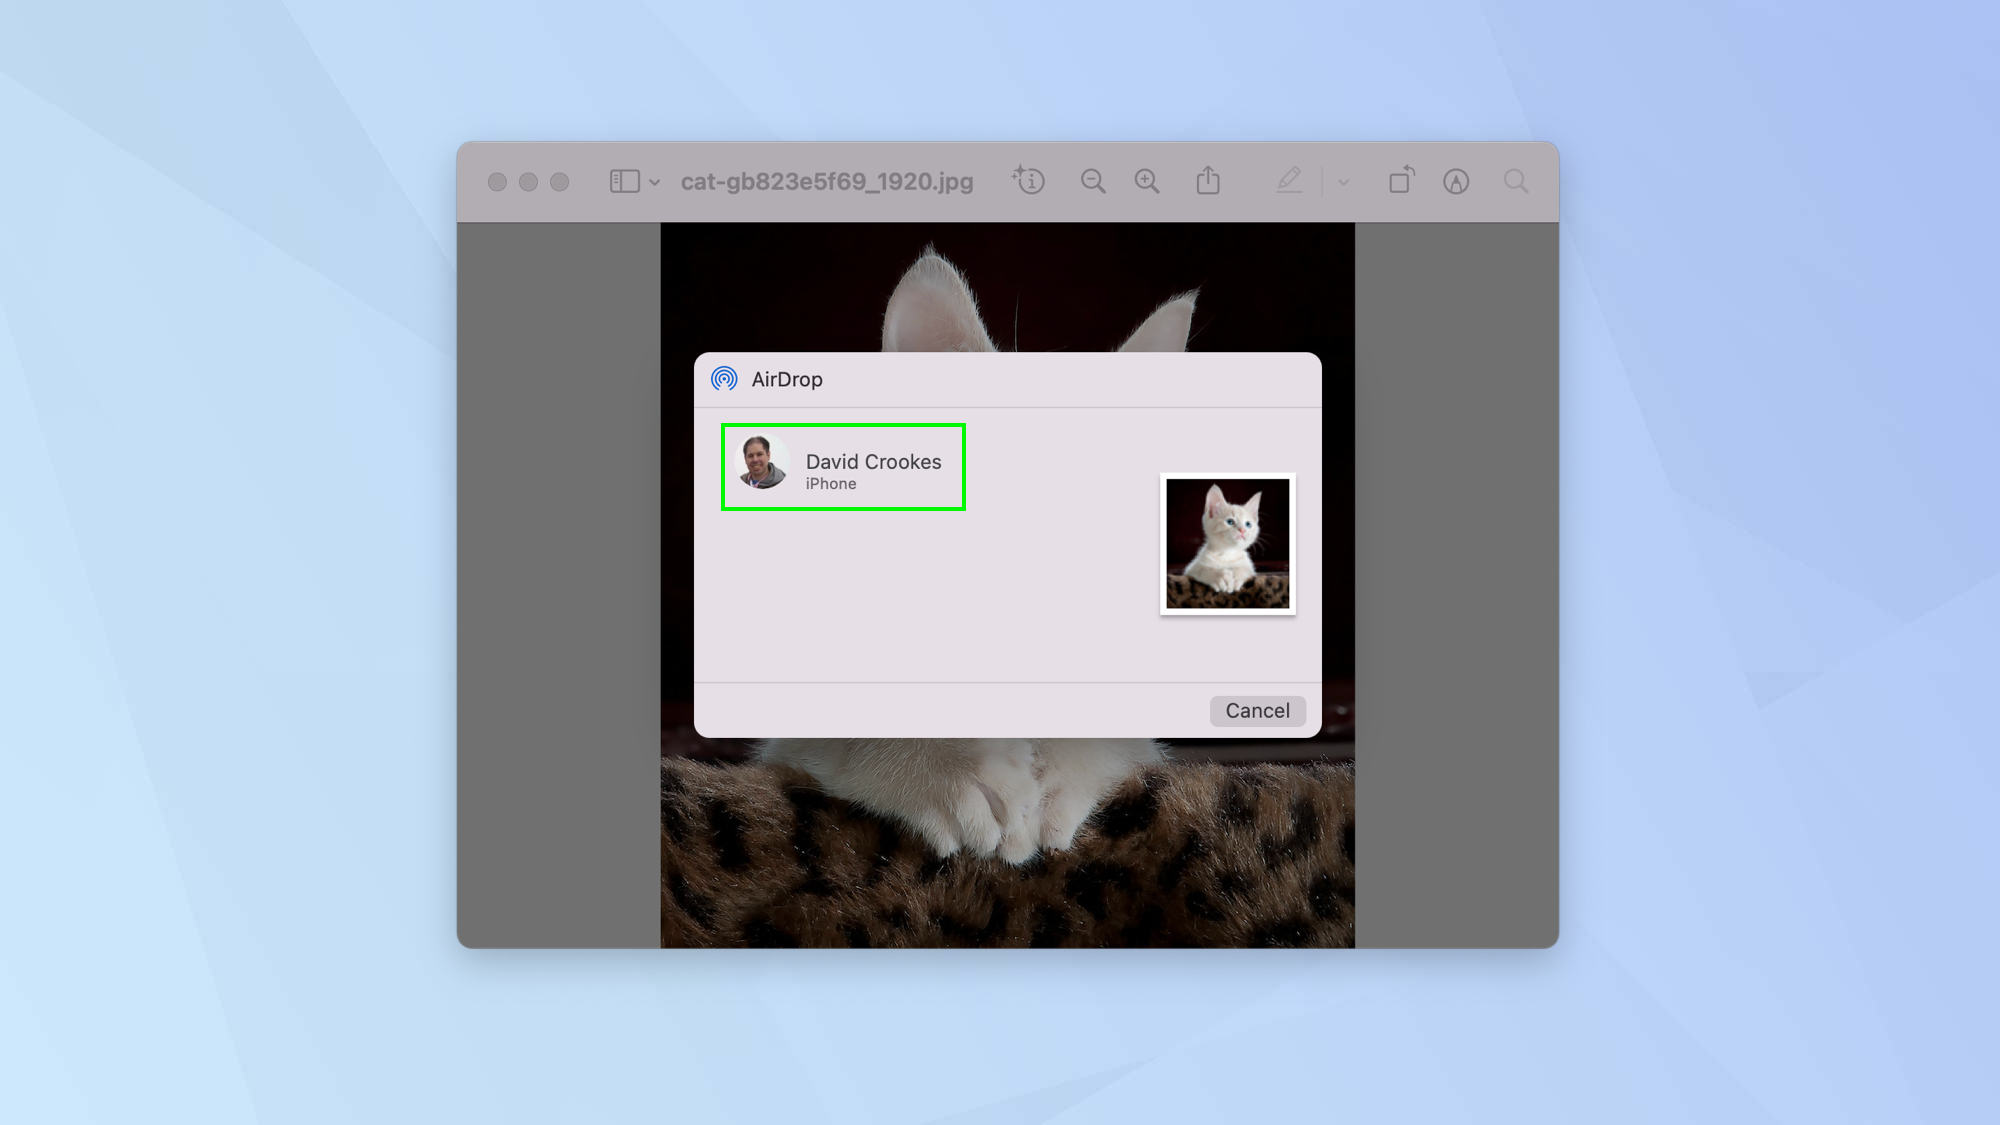
7. Click a recipient to send the file on its way.
8. A third way involves dragging and dropping a file. Open a Finder window and click AirDrop from the navigation column on the left.
9. When you see a recipient appear in this window, drag the file to the profile image and drop it. It'll now be sent to that recipient.
And there you go. You now know how to use AirDrop on Mac. Was AirDrop not working? Here's how to fix it. Want to know how to transfer photos from iPhone to computer in more depth? We have you covered. Files can also be accessed if you know how to remote desktop on Mac.

David Crookes is a freelance writer, reporter, editor and author. He has written for technology and gaming magazines including Retro Gamer, Web User, Micro Mart, MagPi, Android, iCreate, Total PC Gaming, T3 and Macworld. He has also covered crime, history, politics, education, health, sport, film, music and more, and been a producer for BBC Radio 5 Live.
 Club Benefits


