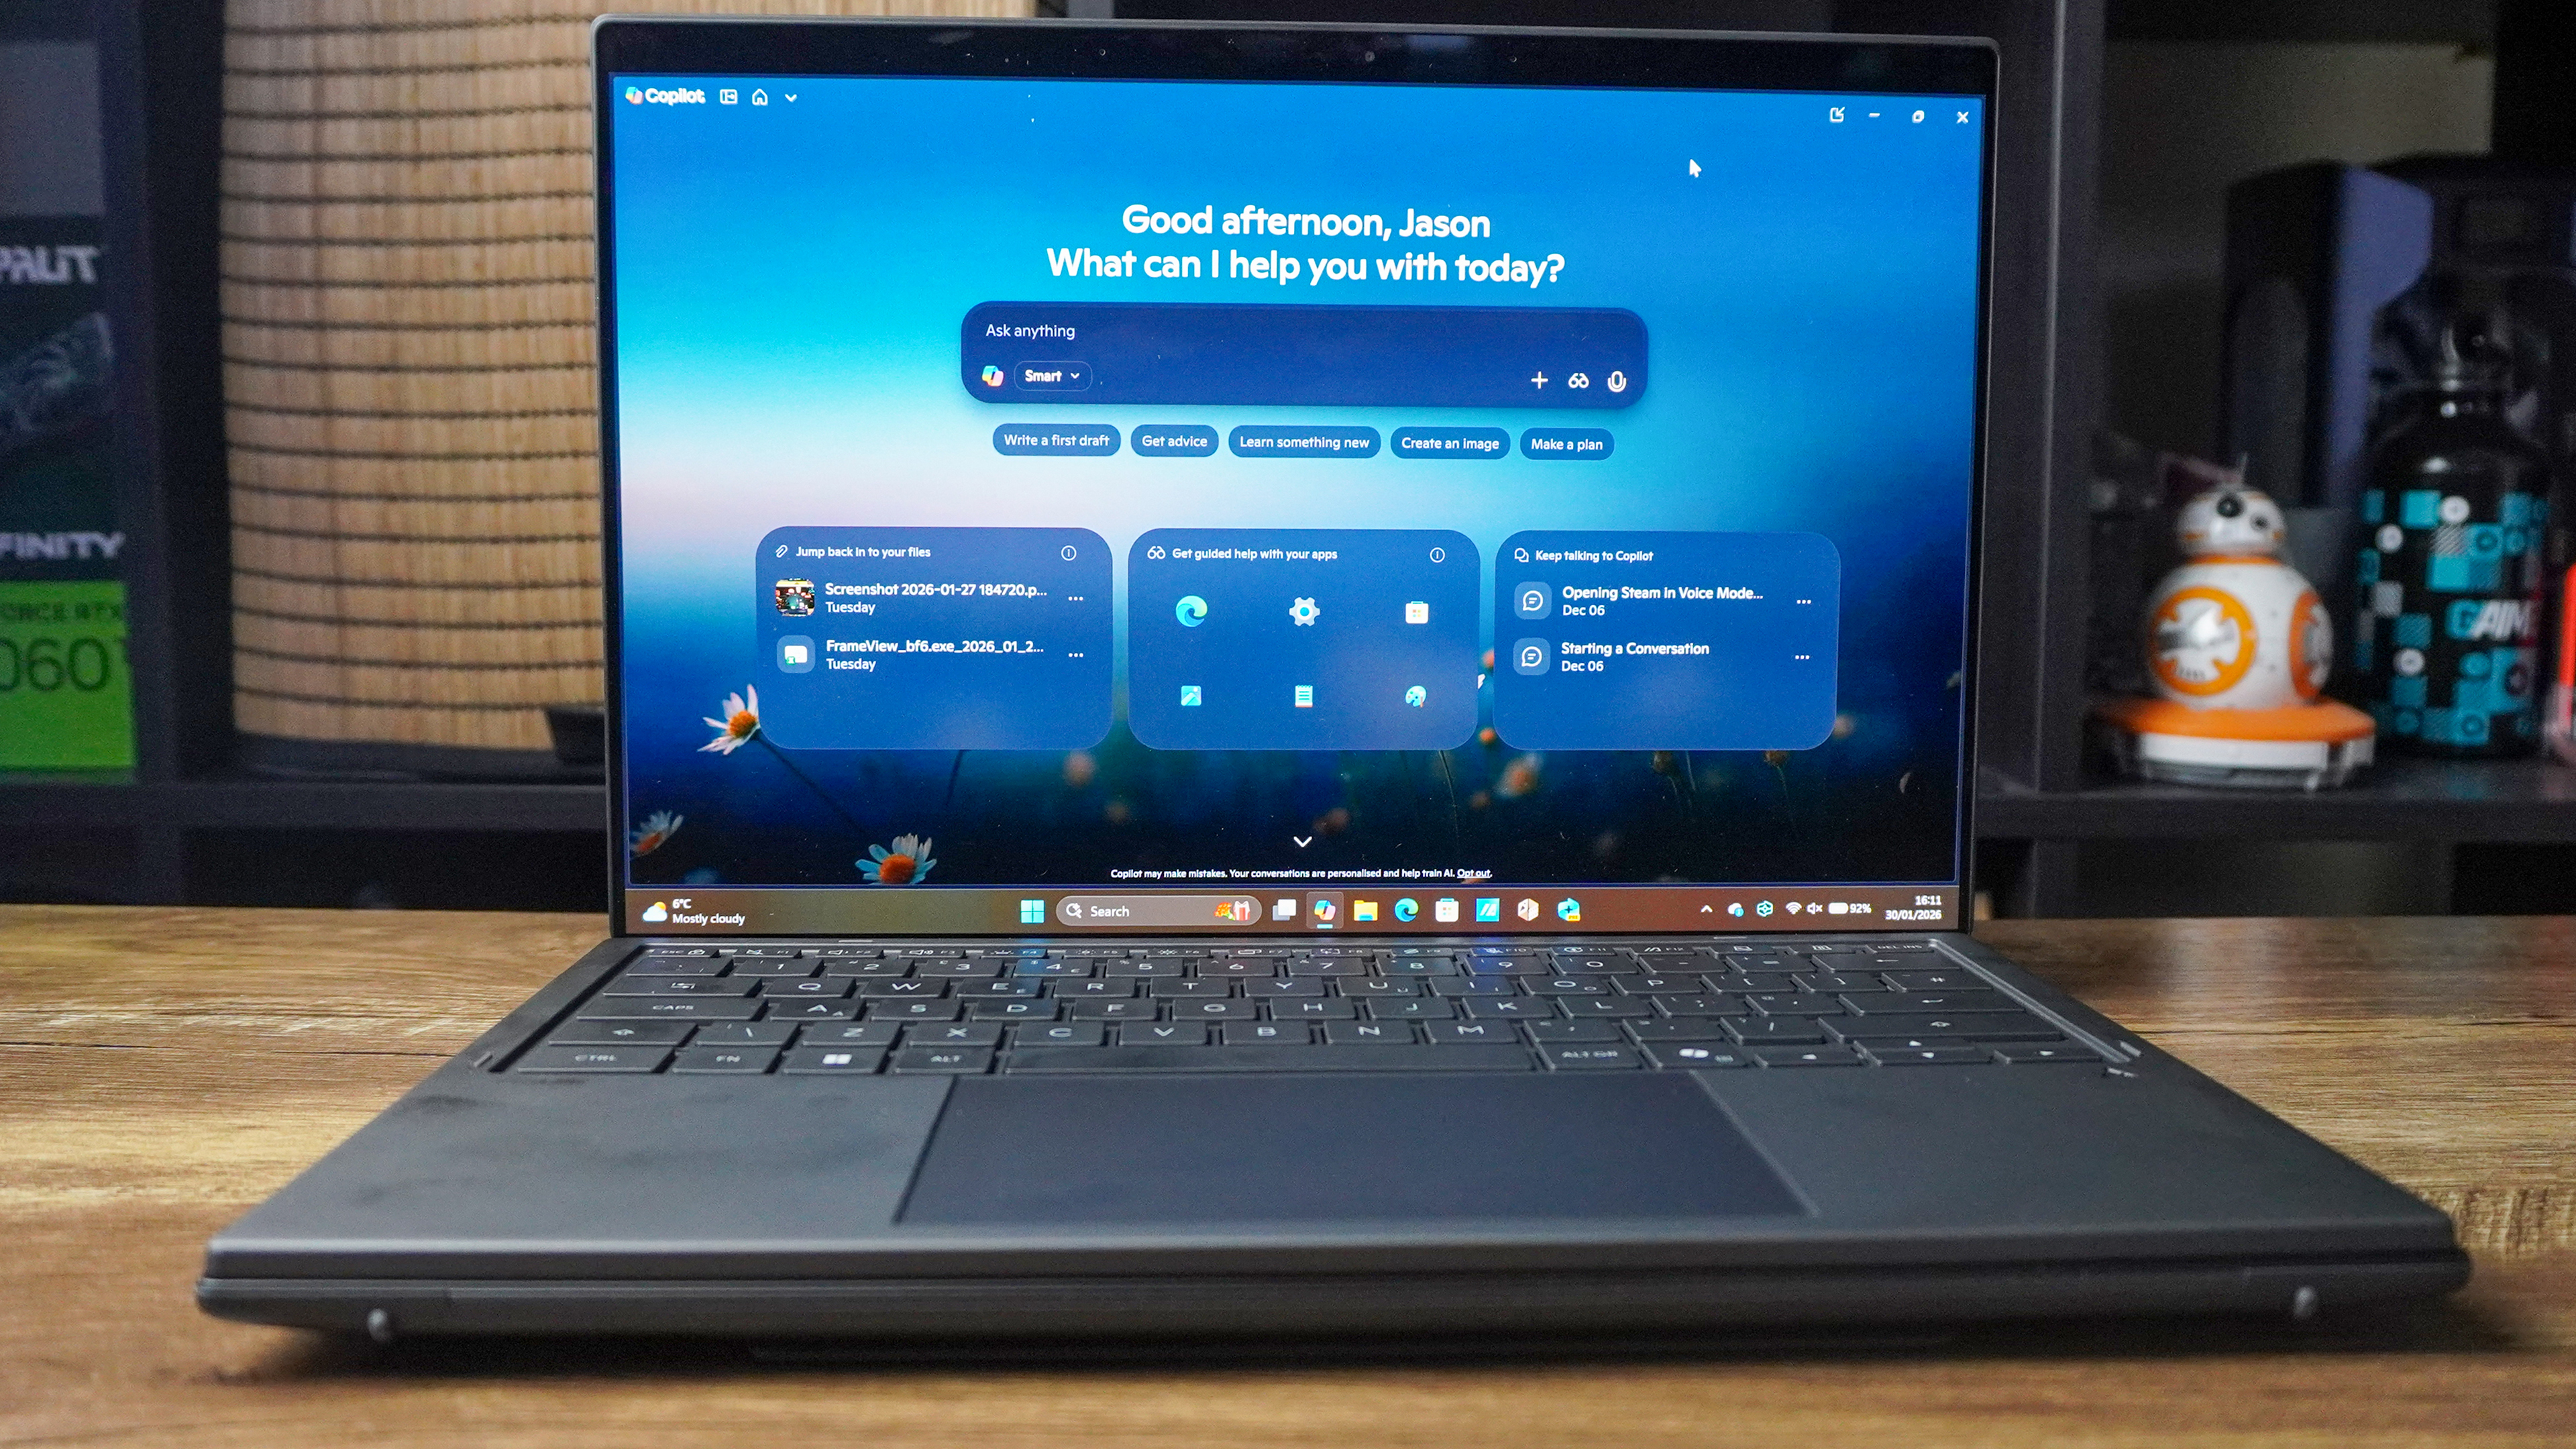
How to split the screen on Windows 10
If you want to know how to split the screen on Windows 10, here’s a guide to help
Knowing how to split the screen on Windows 10 opens up a wide range of options, starting with making a particular tab to take up a specific portion of your screen. Perhaps you’re entering data into a spreadsheet and need two tabs equally visible at once. Maybe you just want to watch a YouTube video while working (no judgement, we’ve all done it).
Whatever you need it for, splitting your screen is extremely intuitive on Windows 10. Microsoft first introduced the ability to set tabs and programs to fill specific portions of your screen back in Windows 7 and has been iterating on the function ever since.
- How to use Windows 10 like a pro
- The best laptops, ranked
- 5 easy ways to upgrade your gaming PC
You’re not limited to just two windows taking up exactly half of your screen either, you can go as far as to have four windows each taking up a quarter if you need to perform some extreme multitasking.
This function is incredibly useful if you don’t have a dual monitor setup, but it can still be used if we’re using more than one display. When you factor in a second screen the number of windows you can have visible at once becomes frankly rather ridiculous, but if you have the need to view a lot of data at once then it’s a vital feature.
Thankfully the process itself is pretty straightforward, and with this handy guide on how to split your screen on Windows 10, you’ll be carving up your screen in no time.
1. Select a window you want to split your screen with

The split-screen function in Windows 10 will work with most applications and tabs, including third-party programs as well as browsers and even file manager. Just select whatever window you want to take up a portion of the screen first. For this tutorial, we’re going to fill half the screen with a Google Chrome tab, the other half with File Explorer.
2. Press Windows + Left (or Right)
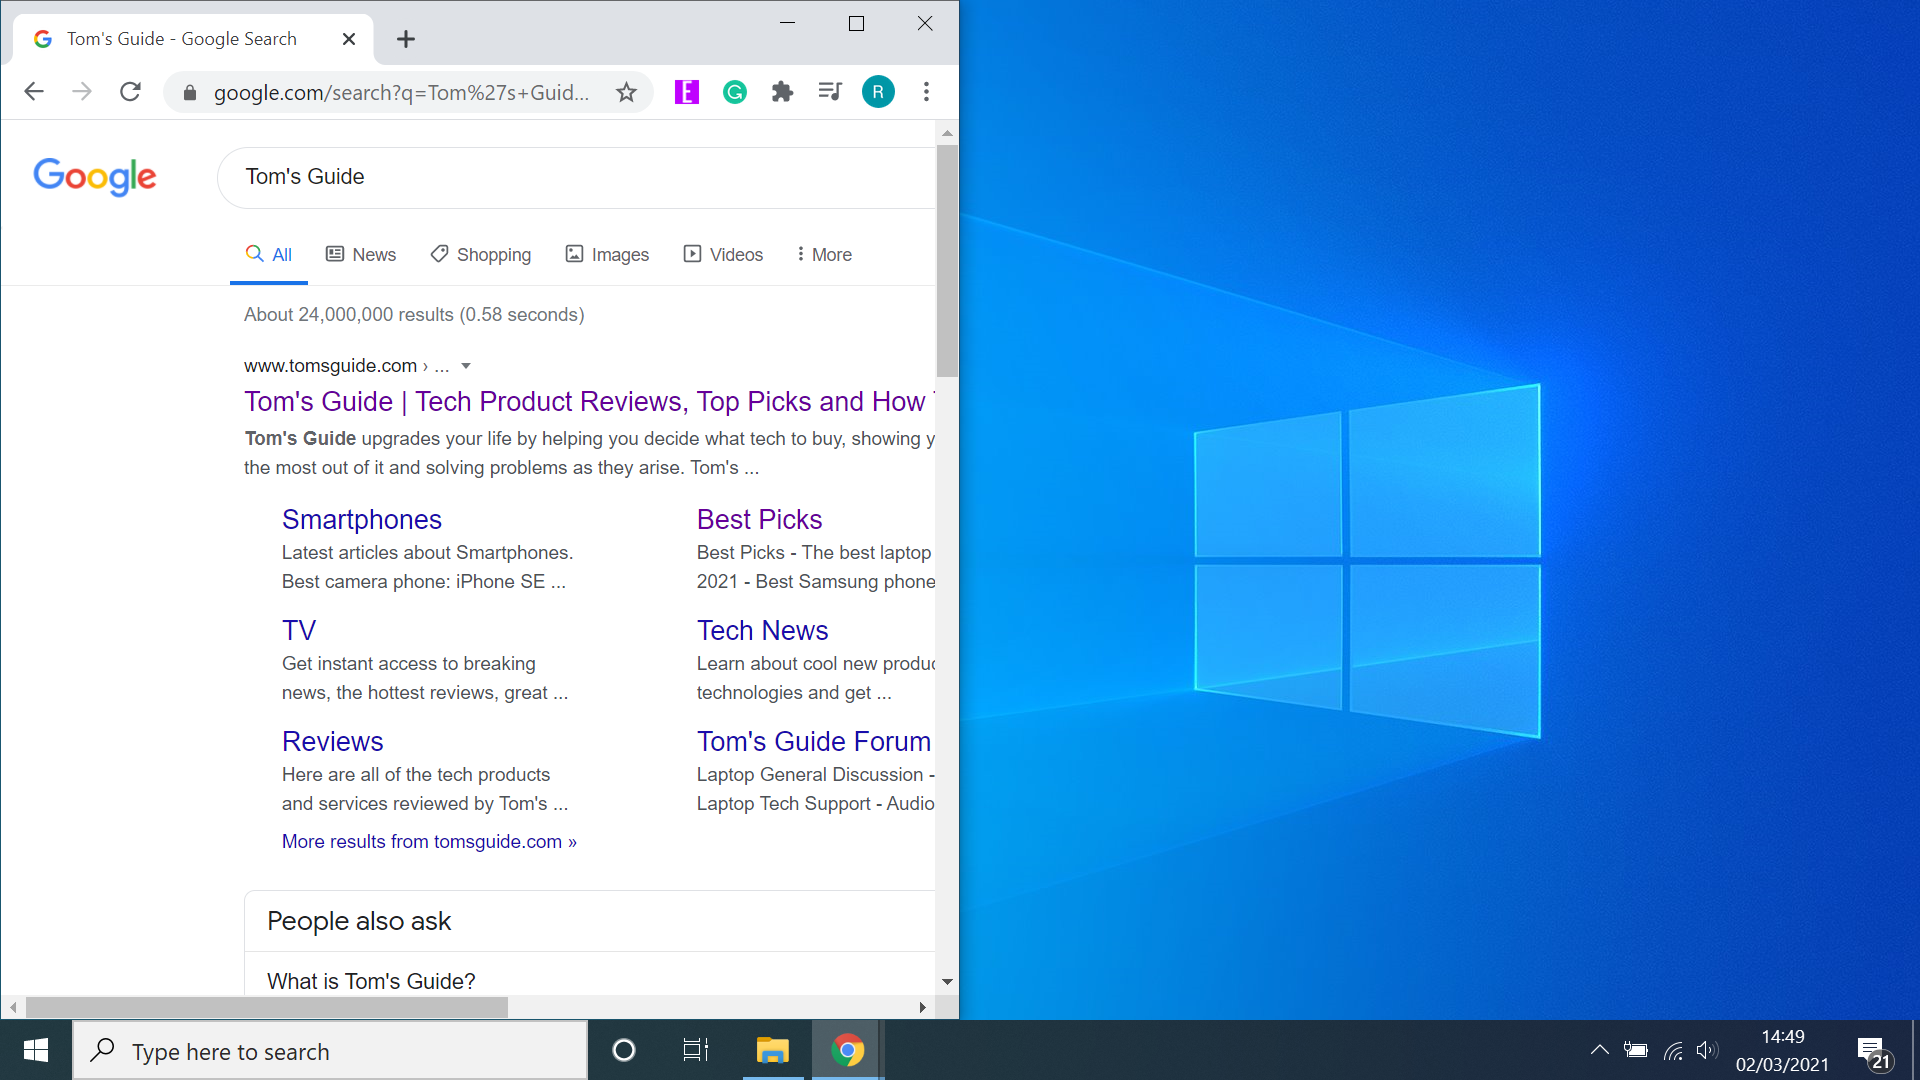
Pressing the Windows key plus the Left or Right Arrow key will make whatever window you have open take up exactly half of your screen. Obviously pressing the left arrow key will make it take up the left side of the screen, whereas the right arrow key will make it take up the right side.
Get instant access to breaking news, the hottest reviews, great deals and helpful tips.
Or you can drag the window to the edge of your screen, and a thin black outline will appear showing you which portion of the screen it will now take up - but using the keyboard shortcut is much simpler and less finicky in our experience.
3. Select a second window
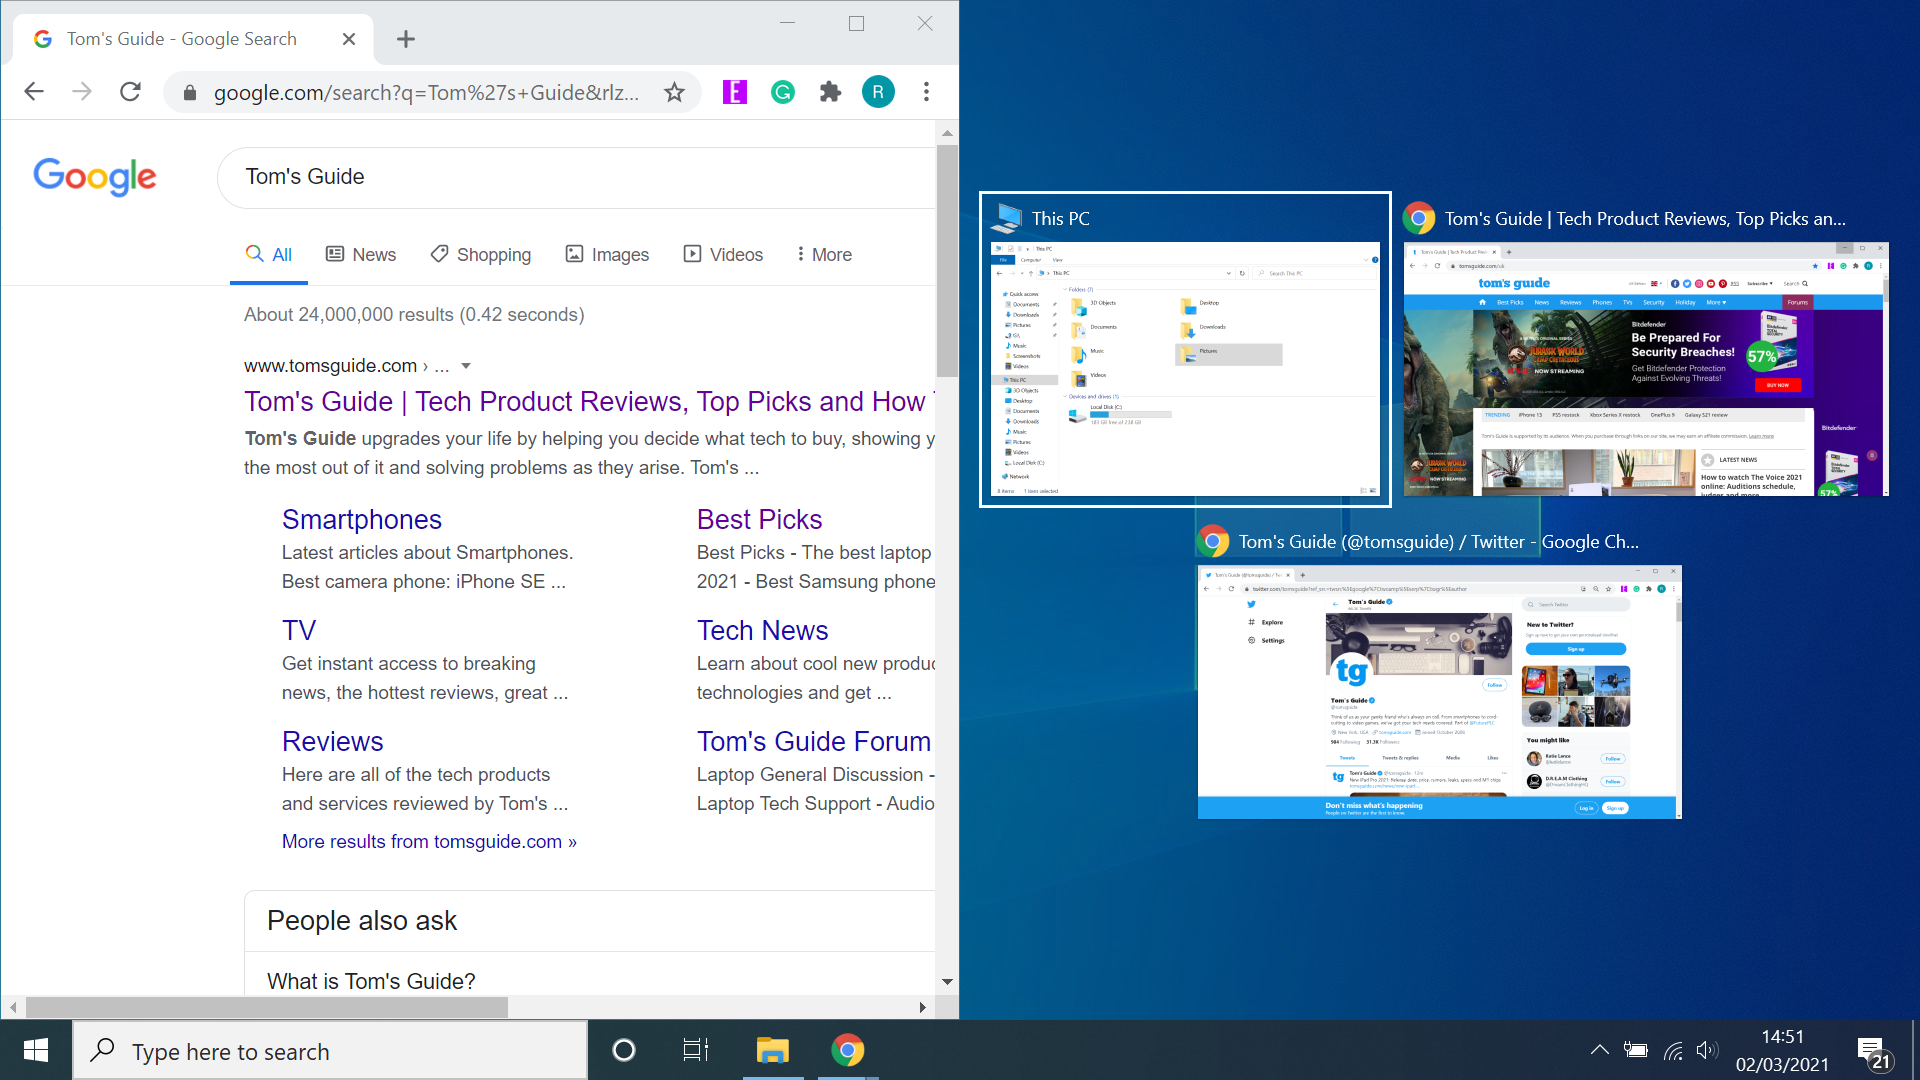
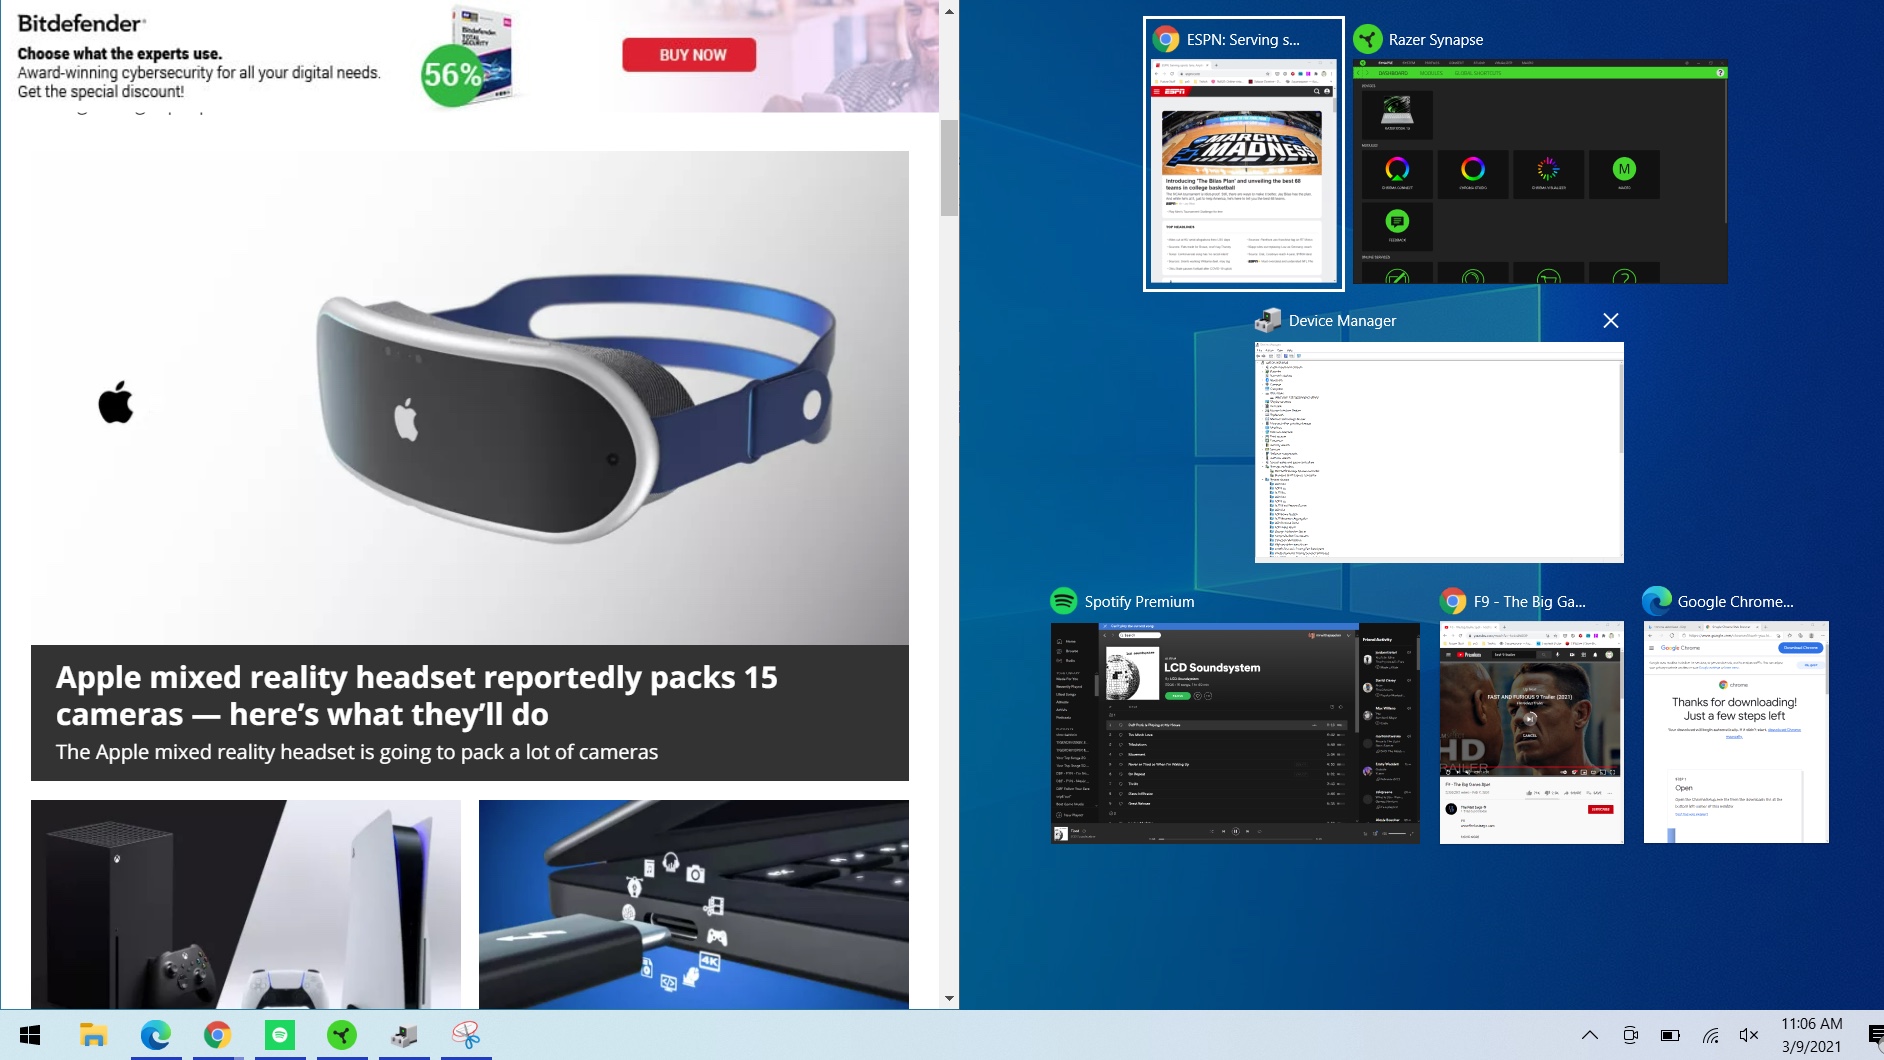
If you have more than one window open when you complete step 2, they should appear as thumbnails on the other half of the screen. Just select whichever one you want to take up the remaining half of the screen and it will automatically fill the space.
Alternatively, you can repeat the process outlined above by selecting whichever window you desire to fill the second half of the screen then press Windows + Left/Right Arrow. Which Arrow key you press should be the opposite one you pressed during the previous step, so if you pressed the Left Arrow key before this time press the Right Arrow key.
4. Drag the divider to your preference
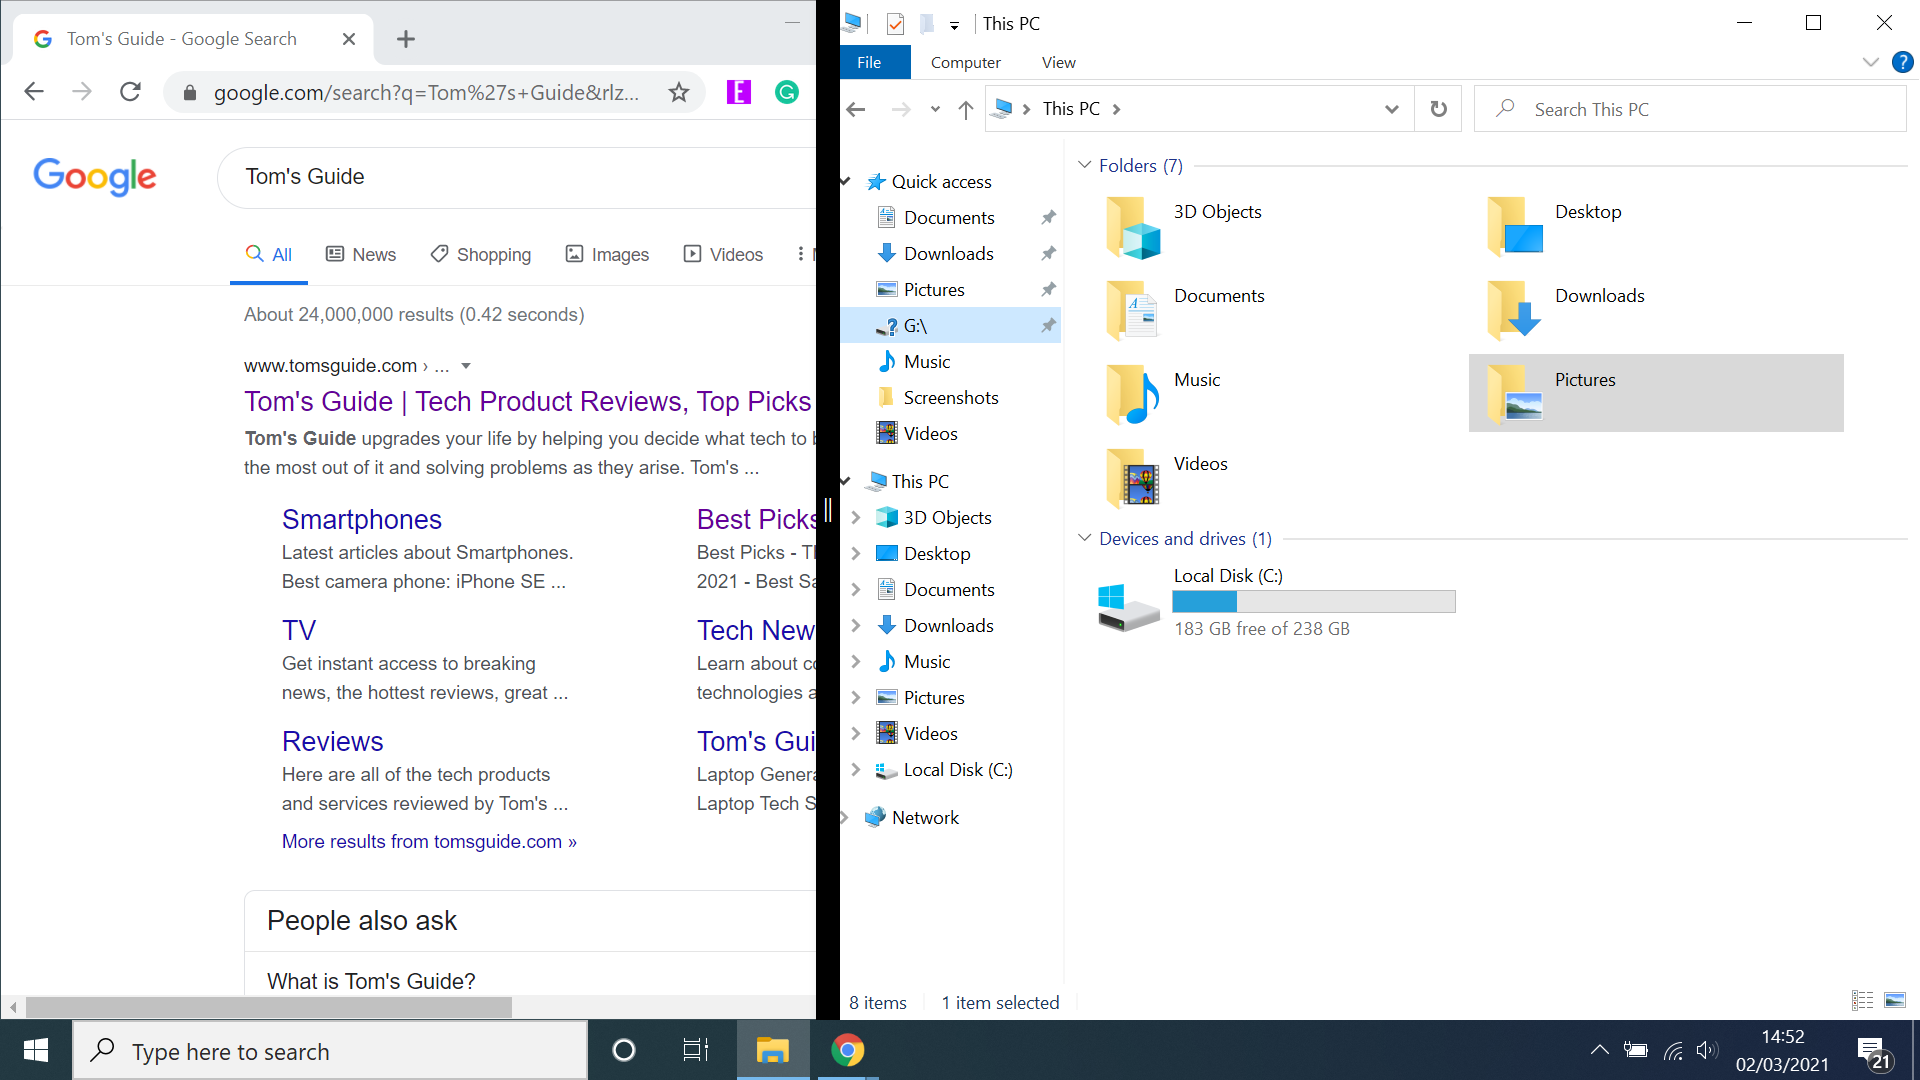
If you don’t want the two windows that are each taking up half the screen to have the same share of the screen, as you need one to be bigger than the other. Just click on the thin dividing line between the two windows and drag it either left or right to match your needs.
5. Split your screen into quarters (optional)
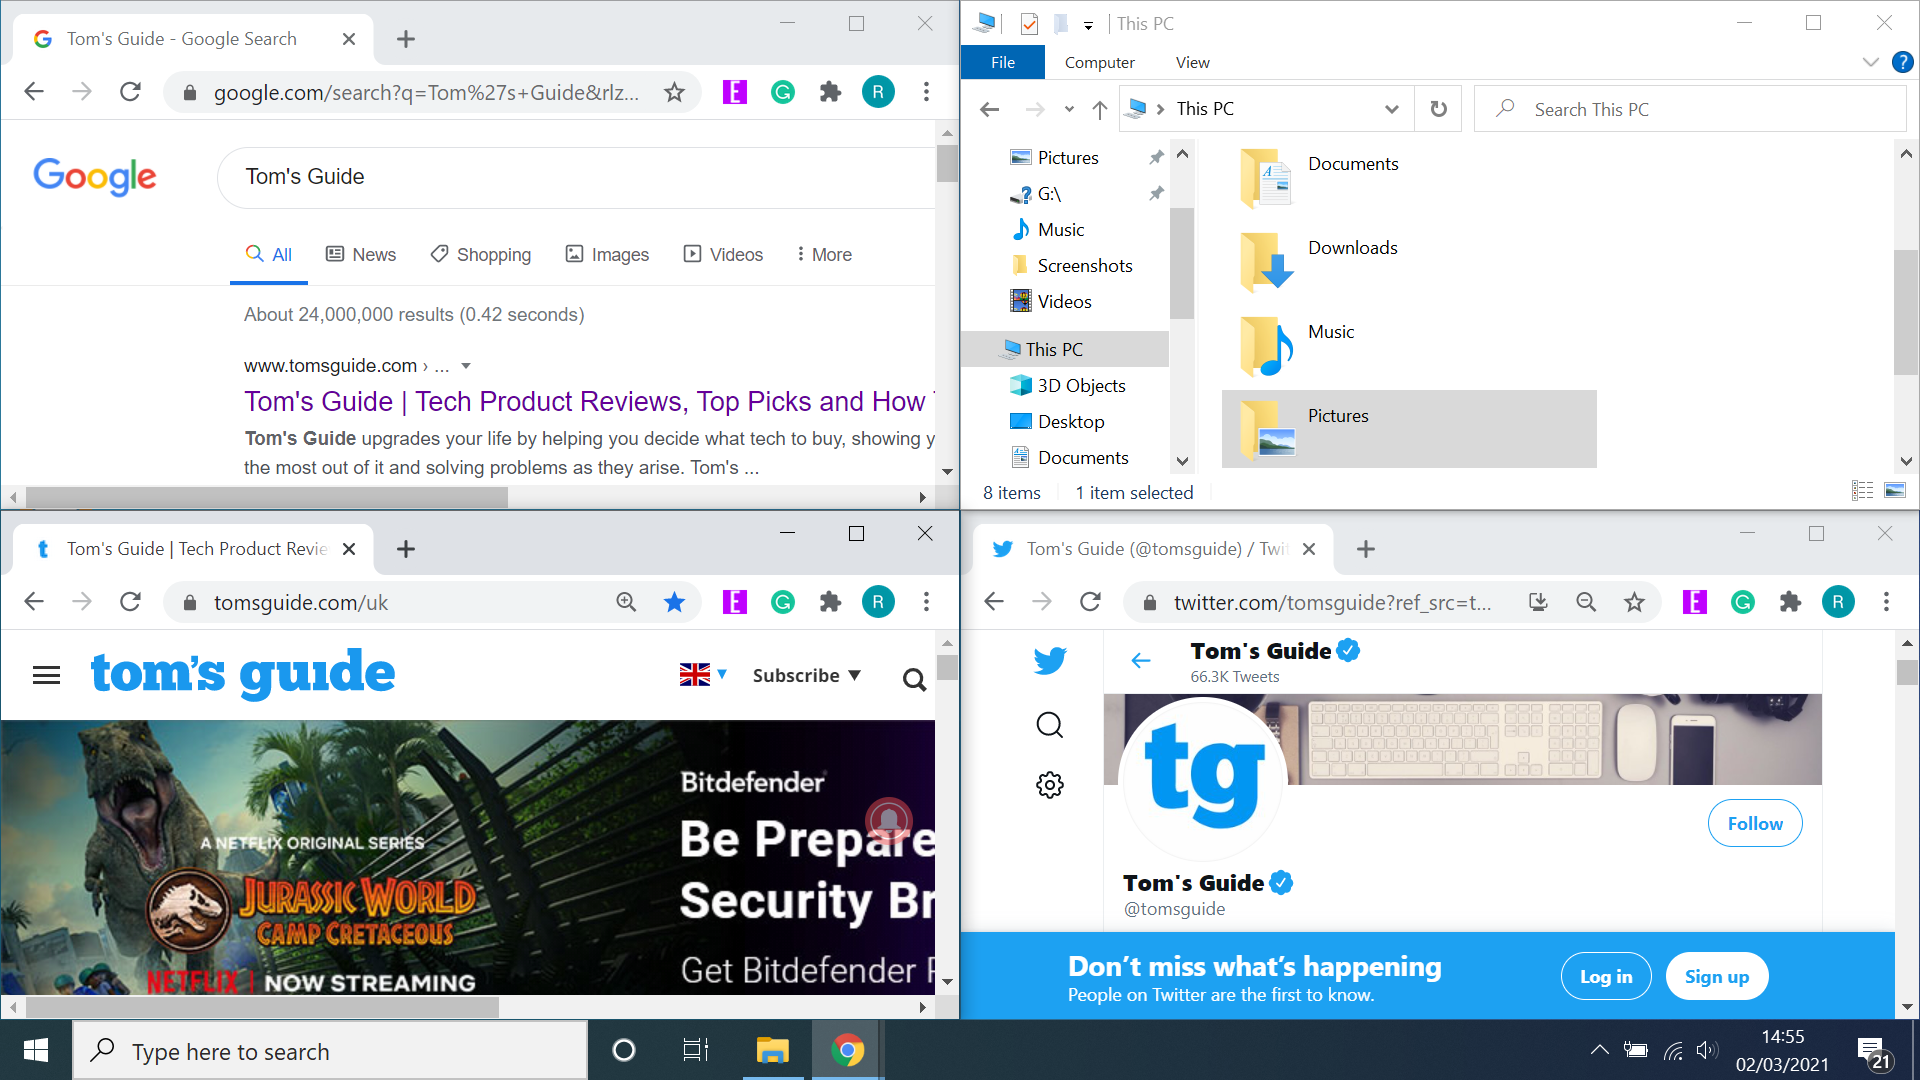
If you need to have more than two windows open at once you can go as far as splitting your screen into quarters, but do note this function is only really useful on a sizable HD screen. On a smaller screen, the tab will be too small to be useable.
To get a window to take up a quarter of your display, first press Windows + Left/Right Arrow key, this will make the window take up half of your screen. Next press Windows + Up/Down Arrow key and it will automatically snap to fill just a quarter.
Once again the alternative option to perform this task is to drag the window to the top or bottom corner of your screen instead of using your keyboard, but this method can be imprecise so we’d recommend just using the shortcut as it’s much more straightforward.
After you set your first window to take up a quarter of the screen, any other tabs you have open should again appear as thumbnails. Just select the ones you want to fill the remaining screen space. Or you can repeat the steps outlined above if the selection grid disappears.
You can also have one window taking up half the screen, while two tabs split the remaining half if that’s more convenient.
More Windows 10 tips
How to find your Windows 10 product key | How to encrypt files on Windows 10 | How to install Windows 10 | How to turn on Bluetooth for Windows 10 | How to screenshot on Windows 10 | How to boot into Windows 10 safe mode | How to record a screen on Windows 10 | How to update drivers on Windows 10 | Mapping a network drive in Windows 10 | How to update Windows 10 | How to change the password on Windows 10 | How to factory reset on Windows 10 | How to speed up Windows 10 | How to reinstall Windows 10 | How to rotate the screen in Windows 10 | How to check your PC specs in Windows 10

Rory is a Senior Entertainment Editor at Tom’s Guide based in the UK. He covers a wide range of topics but with a particular focus on gaming and streaming. When he’s not reviewing the latest games, searching for hidden gems on Netflix, or writing hot takes on new gaming hardware, TV shows and movies, he can be found attending music festivals and getting far too emotionally invested in his favorite football team.
 Club Benefits


