
 Club Benefits


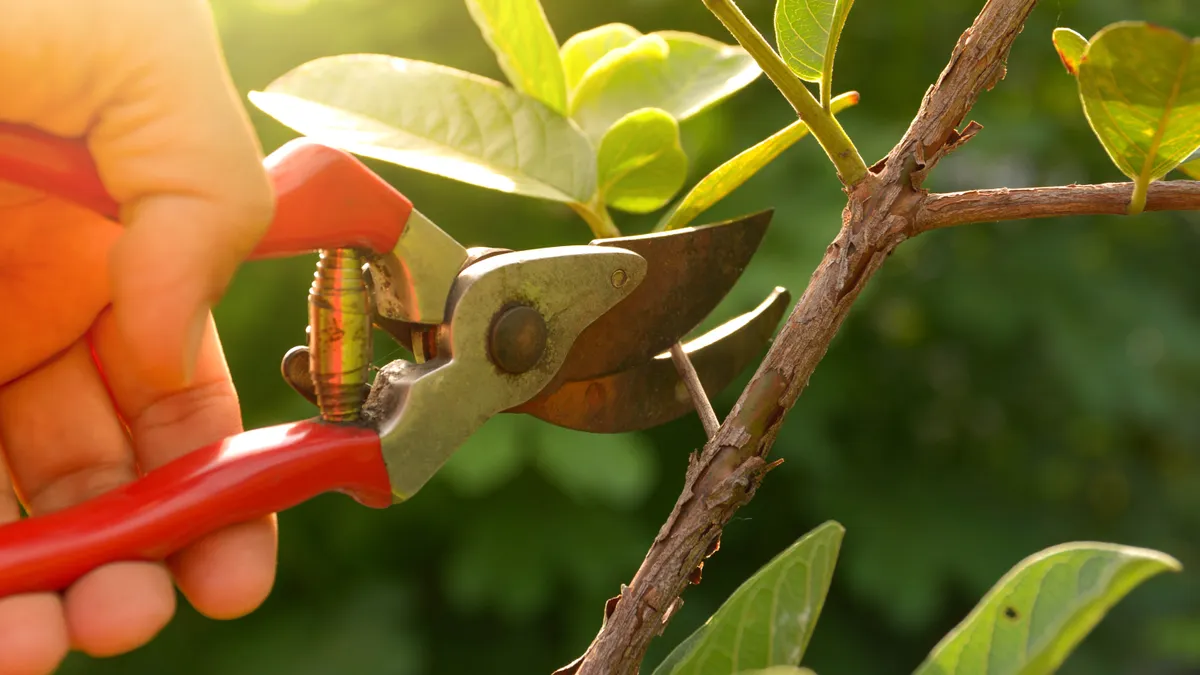
Pruning shears are a quintessential tool for every keen gardener. Whether you use a pair of bypass pruners to cut back live growth or anvil pruners to break up dead wood, these tools can come in use all over the yard at this time of year.
Trouble is, even with a pair of the best pruning shears, regular use will inevitably dull the blade. Eventually, your shears won't cut cleanly, which will slow down the pruning process and take your plants longer to heal from.
An unclean cut encourages disease as well, so you really want to avoid it.

Diamond tool, whetstone or metal file
Safety goggles
Safety gloves
Screwdriver or wrench
WD-40
Microfiber cloth
Small brush
But, before you go running out to buy a new set of pruning shears, you should know this problem can quickly be resolved. With the right tools and method, you can sharpen the blade yourself and get your pruning shears cutting like new again.
We’ve pulled together step-by-step instructions on how to sharpen pruning shears, looking at when to do it as well as how often. We will also cover best care tips, so you can make sure your shears are in top condition for pruning this spring.
Before you start, check out these 5 easy tips for cleaning pruning shears and anvil vs bypass pruning shears — which is right for you?
How to sharpen pruning shears
Before we begin, we must flag that if you’re uncomfortable or don’t feel confident attempting to sharpen the blade of your pruning shears yourself, don't attempt to. You can pay for this to be done professionally at a local gardening center.
If you proceed to sharpen the blade yourself, do so with care and patience and make sure to wear all the necessary safety equipment. Pruning shear blades are very sharp, and it’s all too easy to cut yourself in an accident.
1. Know when to do it

First, you need to know when this task is necessary. You can tell when the blade of your pruning shears has dulled because making a cut will be tougher, requiring more pressure and time. In the case of bypass pruners, the cut itself won’t be as clean either, potentially tearing the foliage and leaving it more open to disease. Anvil pruners will crush wood by design, but a dull blade will make the task more difficult
2. Gather your materials

To sharpen your pruning shears, you will need a diamond tool, a whetstone or a metal file. These use much the same method to sharpen the blade, but handheld tools such as the Sharpal All-in-1 Knife Garden Tool ($19.99, Amazon) are also popular.
You will also need adequate safety gear, including protective gloves and goggles. A screwdriver or a wrench which fits the screw or bolt holding your pruning shears together will also be necessary, as will tools to clean the blades, including WD-40, a small brush and a microfiber cloth.
You will need to take your pruning shears apart during this process as well, so it’s a good idea to find a quiet space with adequate light. Lay down a dish towel as well, so you won’t lose any of the parts as you work.
3. Disassemble

Now that you’ve established that your pruning shears need sharpening, it’s time to disassemble them. Some may skip this step and go straight to sharpening the blades, but if you can, we recommend taking your pruners apart. it’s best to do this — it will provide a more thorough clean, which is necessary as you will see, and will give you better control while sharpening too. Plus, in doing this you can check the quality of each of the parts and replace as necessary.
Before taking it apart, It’s a good idea to take account of where each of the parts fit into place for reassembly later — take a photo if needed. Modern pruning shears usually have one main screw or bolt holding each side together. While wearing your safety gear, use your screwdriver or wrench to carefully release this until your pruning shears come apart into two halves. Organize all of the parts, so nothing gets lost, including the spring coil which may fall away.
If you can't take your pruning shears apart, you can still proceed onto the next steps.
4. Clean the parts

Before you sharpen your pruning shears, you will need to give them a clean. This is necessary because sap and dirt will impair the process. By removing this, you also get a better view of the condition of your blade.
Spritz the blades with WD-40 and leave to soak to help remove stubborn dirt. Then scrub with your brush or use a microfiber cloth to clean. Sandpaper can also help with removing sticky sap, while steel wool will take care of any rust. These can work the other way around as well — whatever works for you. Following this, use warm, soapy water to wash the parts and then rinse and dry carefully. Your blade should be spotless before continuing to the next step.
5. Sharpen the blade

Now comes the main event — sharpening the blade. Once again, make sure you’re wearing your safety gear before attempting this. Depending on the type of pruning shears you’re sharpening the method required will differ. Bypass pruning shears work like scissors and have one angled side on the sharp blade, while the predominant blade on anvil pruning shears will be angled on both sides. The angled side is what you need to sharpen, so anvil shears will technically require sharpening on both sides.
Holding the handle part of your pruning shears, you need to take your sharpening tool and drag it against the beveled side, working from the thickest part of the blade to its point, maintaining the same angle as that given on the blade. Keep an even pressure on the edge and push it away from you as you work, in one direction. You will notice you need to curve the tool as you sharpen to match the angle. If you’re using a file with a coarse and fine edge, begin with the coarse side and once you’re happy with that, switch over to fine for the finishing touches.
The bevel will shine as you work to show your progress. There’s no exact guidance on how long this takes — the more dull the blade, the longer it takes to sharpen. Continue to check its condition every few swipes, using a microfiber cloth to remove any shavings. You can test the sharpness of your bypass pruning shears by attempting to cut a piece of paper, a bit like scissors. If it cuts through, you’re done.
Pruning shears that can't be taken apart can be sharpened in the same way, but you must take extra care during the motions to make sure the shears are held firmly in place and pointed away from you as you sharpen.
If you're sharpening a bypass design, remember to check the flat side of the blade before you finish too — if there's a burr, you will need to remove this with your sharpening tool by running it flat against the blade. Make sure not to sharpen as you do this, or else it will impair your pruner’s cutting ability. Don't forget to sharpen both sides if you're dealing with anvil pruning shears as well.
6. Reassemble

Give your blade a quick polish with a microfiber cloth before you start to reassemble. Then put all of the parts back together, referring to the images you took earlier if necessary. Give the blades a test to check that they’re functioning properly. If they feel stiff, you may need to apply some oil to the spring or bolts. Now’s your chance to also tighten or loosen the blades, depending on how they sit. Make sure bypass blades closely pass one another, while anvil blades should make contact.
7. Finishing touches

Make sure your pruning shears are clean before storing them in a dry and protected space. They should be kept with the safety lock on and out of reach of children. Wiping down your shears with some mineral oil can help extend their life too.
How often should you sharpen your pruning shears?
You should sharpen your pruning shears as often as necessary. As a rule of thumb, once a year tends to be enough. But, with regular use, more often may be required.
The main thing here is not to ignore a dull blade — this can lead to uneven cuts, damaging your foliage more so than necessary, leaving it to take longer to heal and encouraging disease in the process. Dull blades can also make the pruning shears awkward and unsafe to handle, so this chore will need addressing one way or another.
Pruning shears maintenance tips
- Remember to disinfect your pruning shears between each cut to avoid spreading disease — Rubbing the blades with a cloth soaked in denatured alcohol will prevent this. It sounds excessive, but pruning can quickly spread disease between plants if you're not careful.
- Don’t cut anything your pruning shears can’t handle — The manual or packaging should state the largest size of branch the blades are prepared to handle. Don’t attempt to cut anything bigger than this or you could damage the tool.
- Tighten the blades when required — The blades of your pruning shears will naturally loosen with regular use and form a gap, so be prepared to tighten the hinge screw when necessary.
- Replace the shears when necessary — If the blade is beyond repair, it’s time to invest in a new pair of pruning shears. Check out our list of the best pruning shears for guidance.
More from Tom's Guide

