How to make a GIF on iPhone
A picture paints a thousand words but knowing how to make GIF on iPhone can make a bigger impact
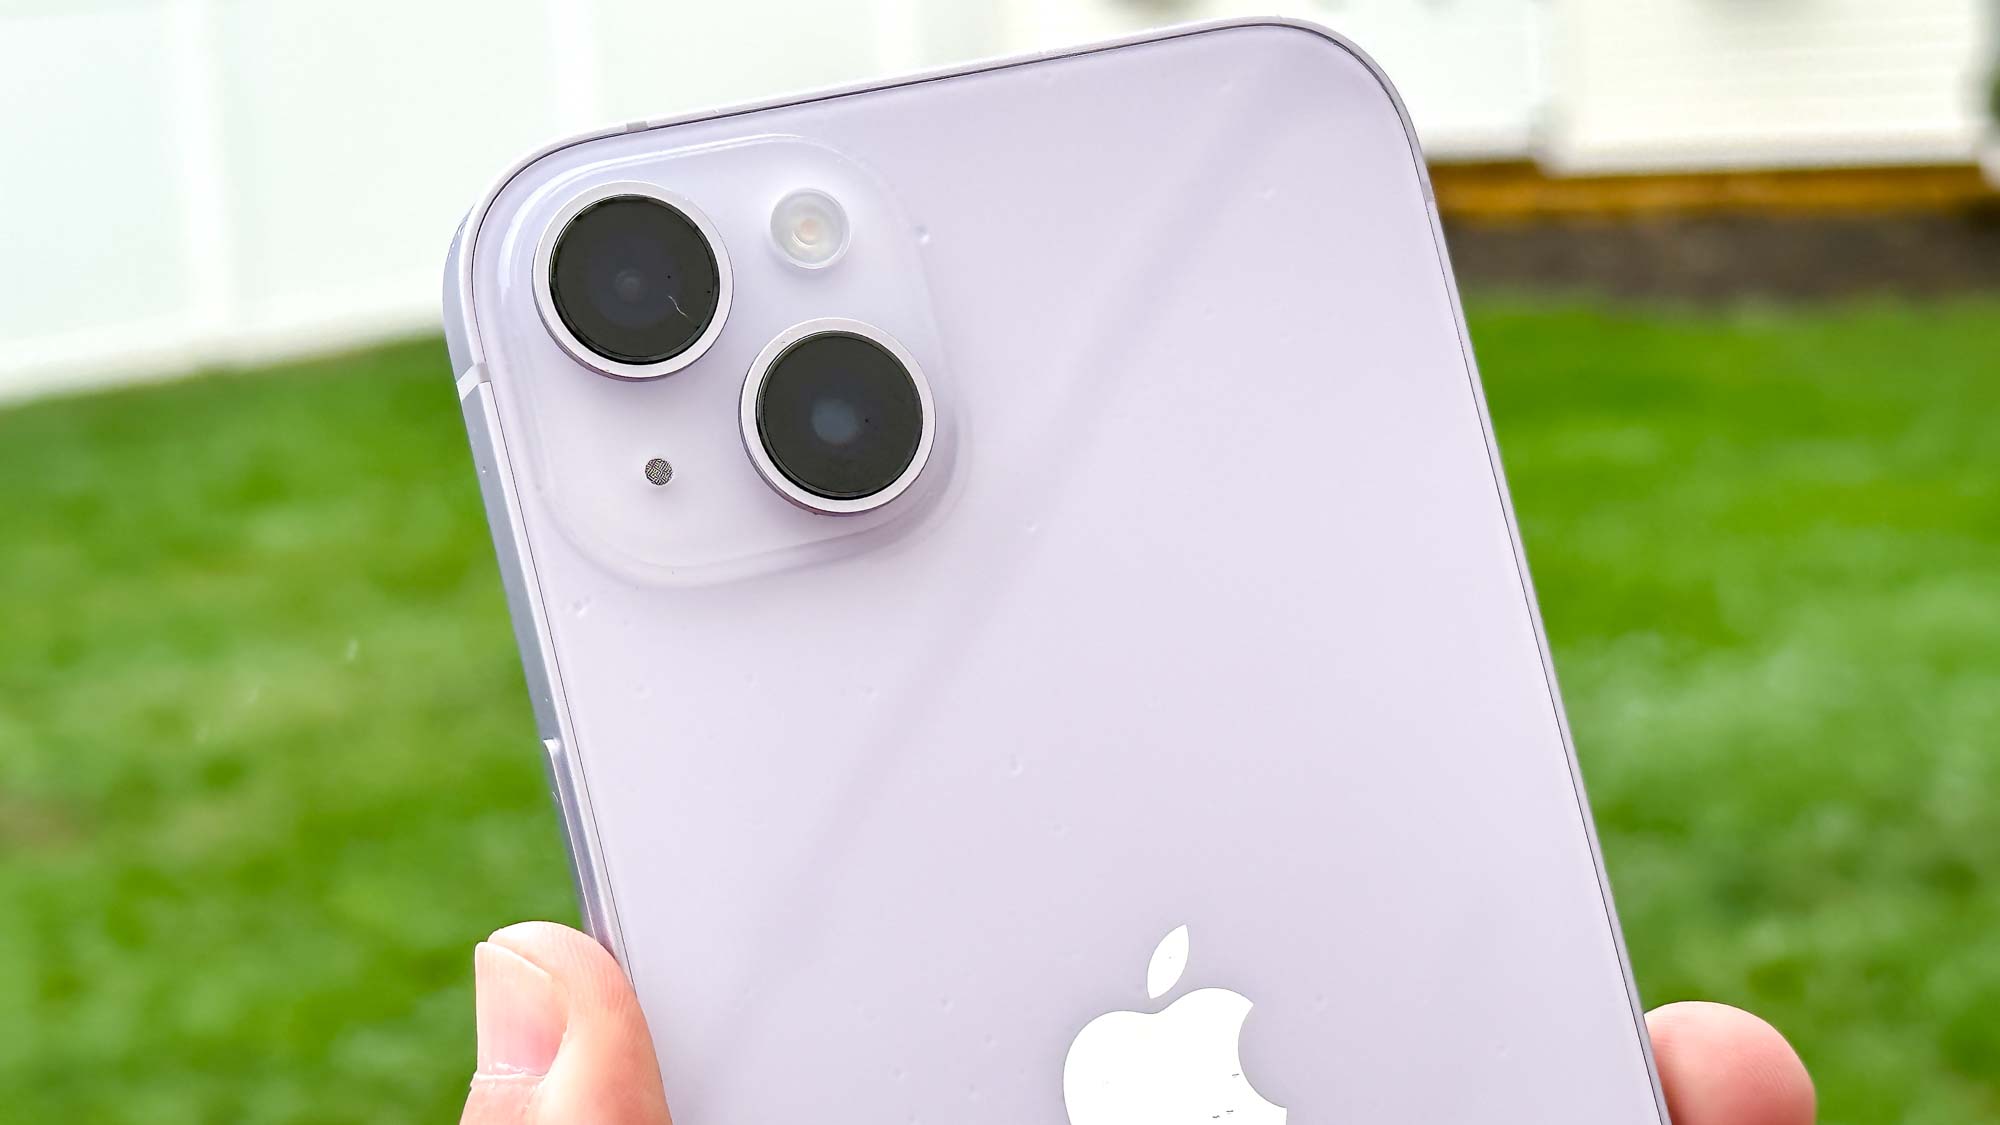
Knowing how to make a GIF on iPhone may not sound particularly useful – after all, hundreds of thousands of GIFs have already been created so why add some more? But if you would rather your GIFs felt more personal or if you've thought of something funny that you'd like to share, producing your own can be very satisfying.
There is certainly no harm in giving it a go. Making GIFs on iPhone is more straightforward than you may imagine and it only takes a few taps to progress from snapping a photo or grabbing an image to admiring your handiwork ready for sharing. Here we take a look at how it's down via the Photos app before explaining a method that takes GIFs to another level via GIPHY.
How to make a GIF on iPhone in the Photos app
Note: You won't need to download any extra software to your iPhone if you use this method
1. Create a Live Photo
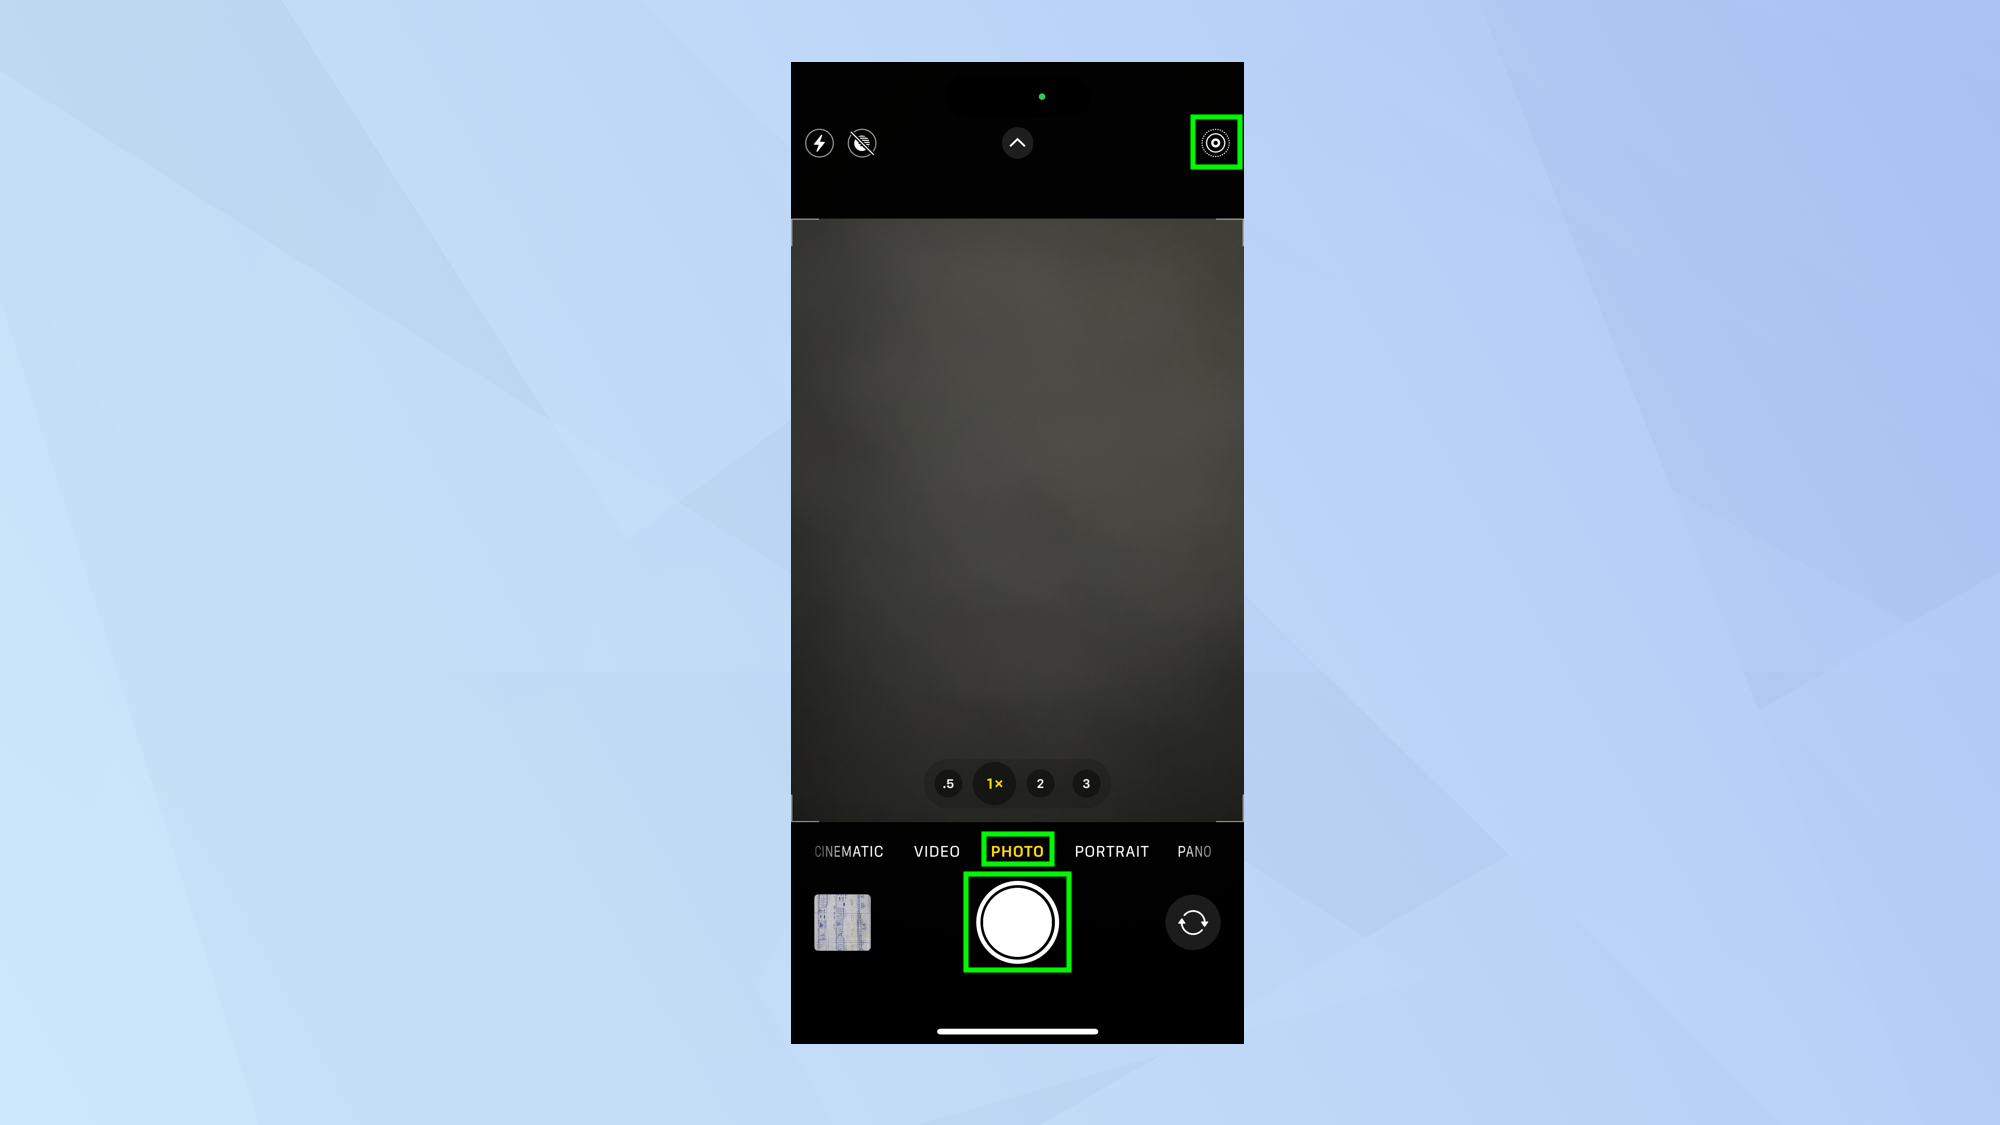
To make a GIF on iPhone, you will need to use a Live Photo. These are images that feature movement since they include recorded footage lasting 1.5 seconds before and 1.5 seconds after a photo has been taken.
Simply open the Camera app and make sure you set the camera to Photo mode. The Live Photo button is in the top-right of the screen. If it has a line through it, tap the Live Photo button to turn it on. Now tap the Shutter button to capture footage that you want to use in your GIF.
2. Launch Photos app
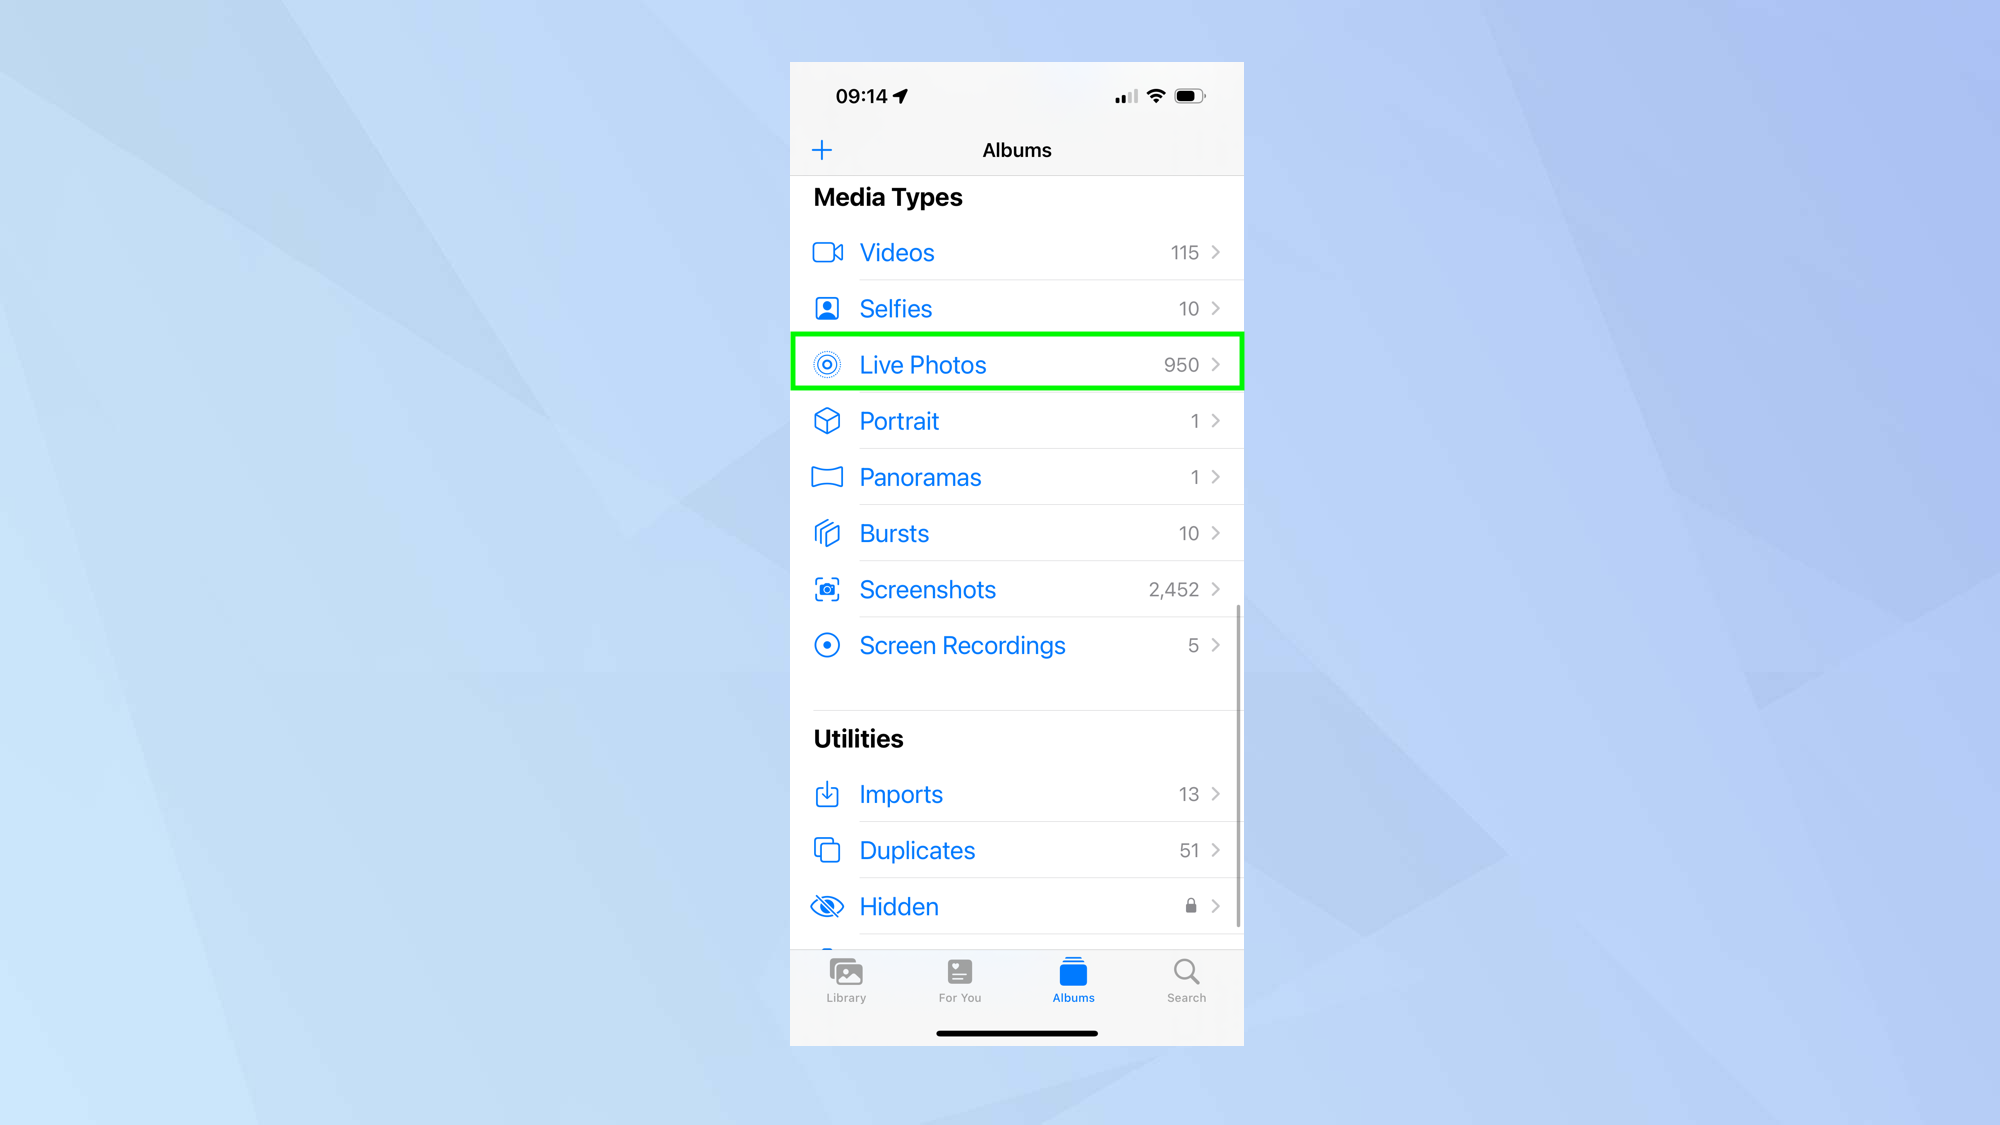
Once you have a Live Photo (whether you've just taken one fresh or you have a Live Photo from the past), launch the Photos app. Select Albums and scroll down to the list of Media Types. Now tap Live Photos.
3. Find an image to use
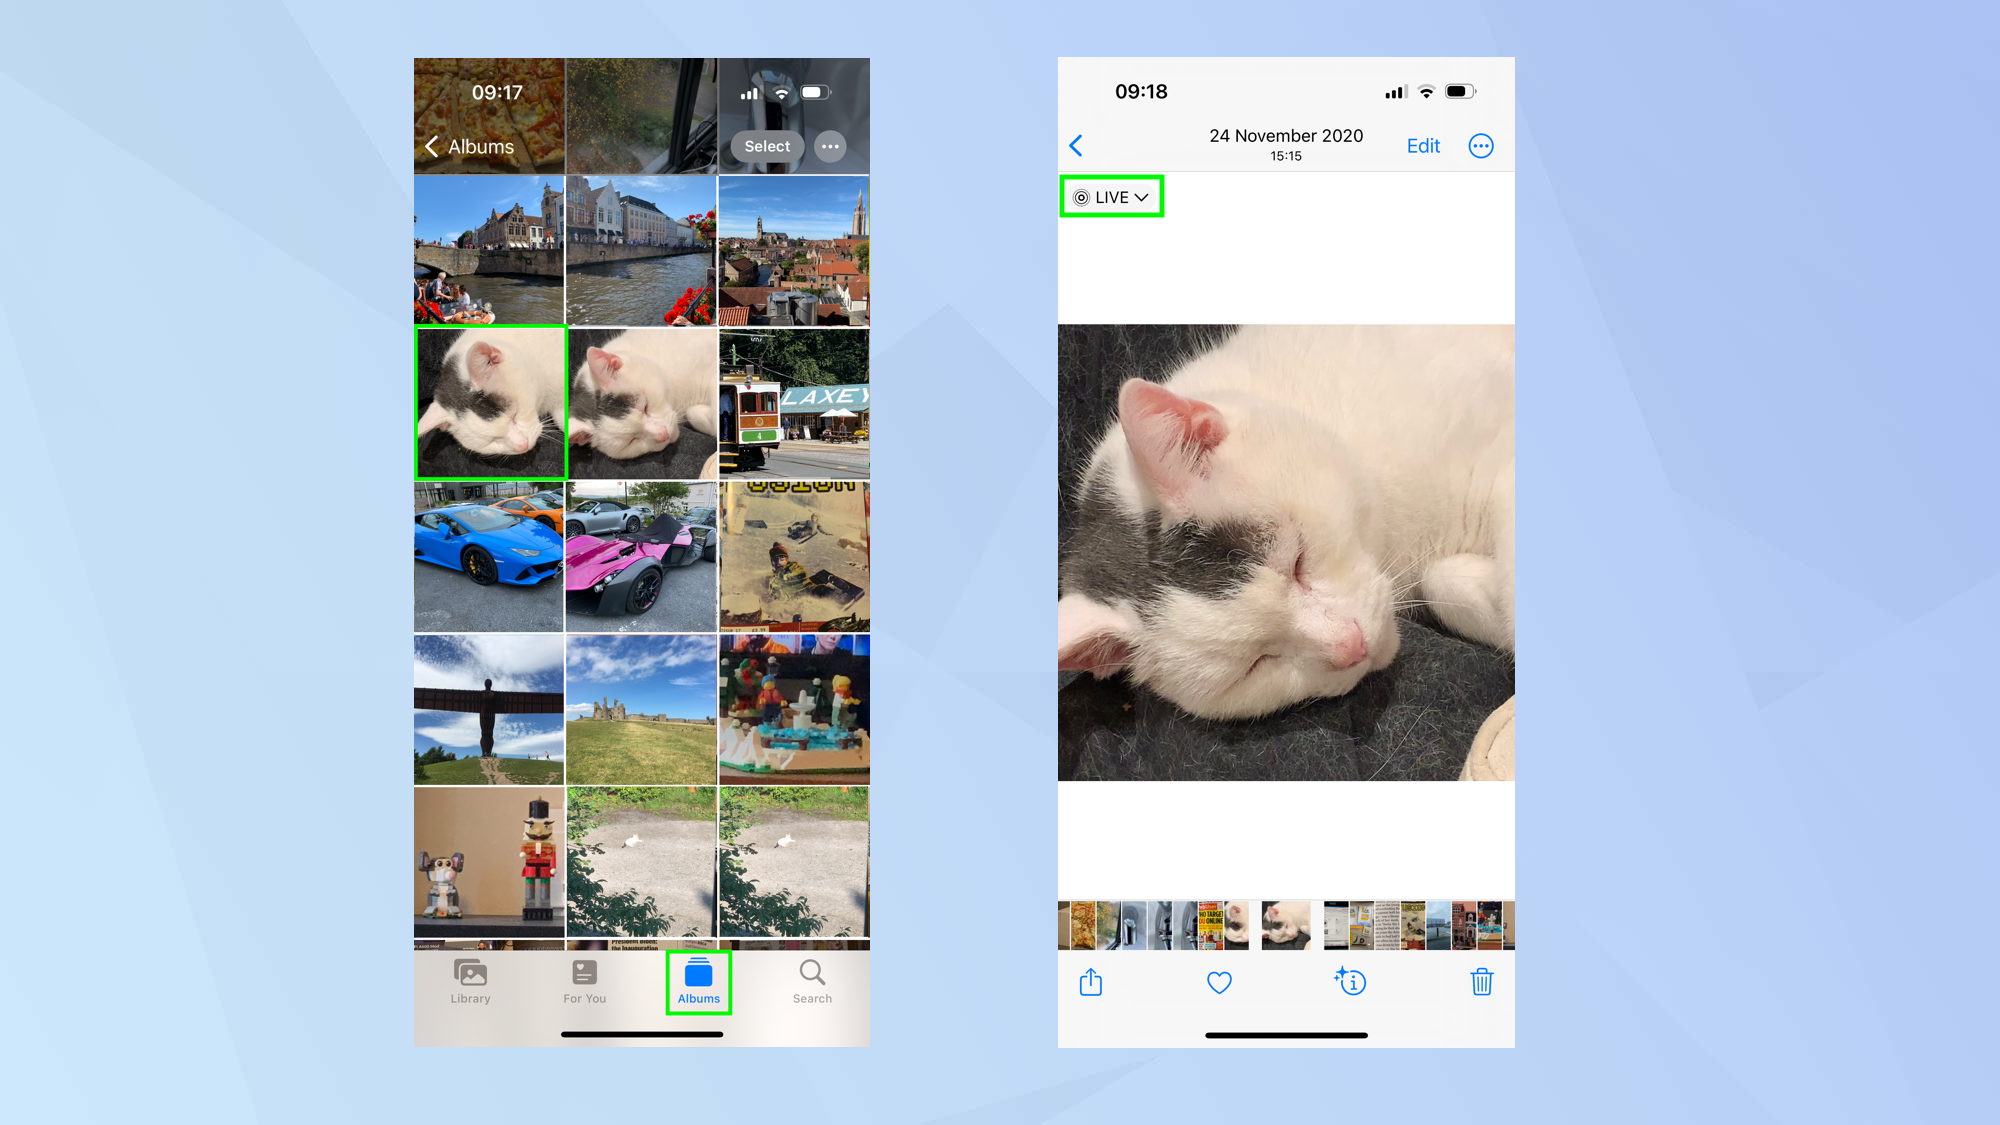
Look through your images and select the photo that you would like to use. Now tap the Live icon in the top-left of the screen to display the menu.
4. Loop or bounce the image
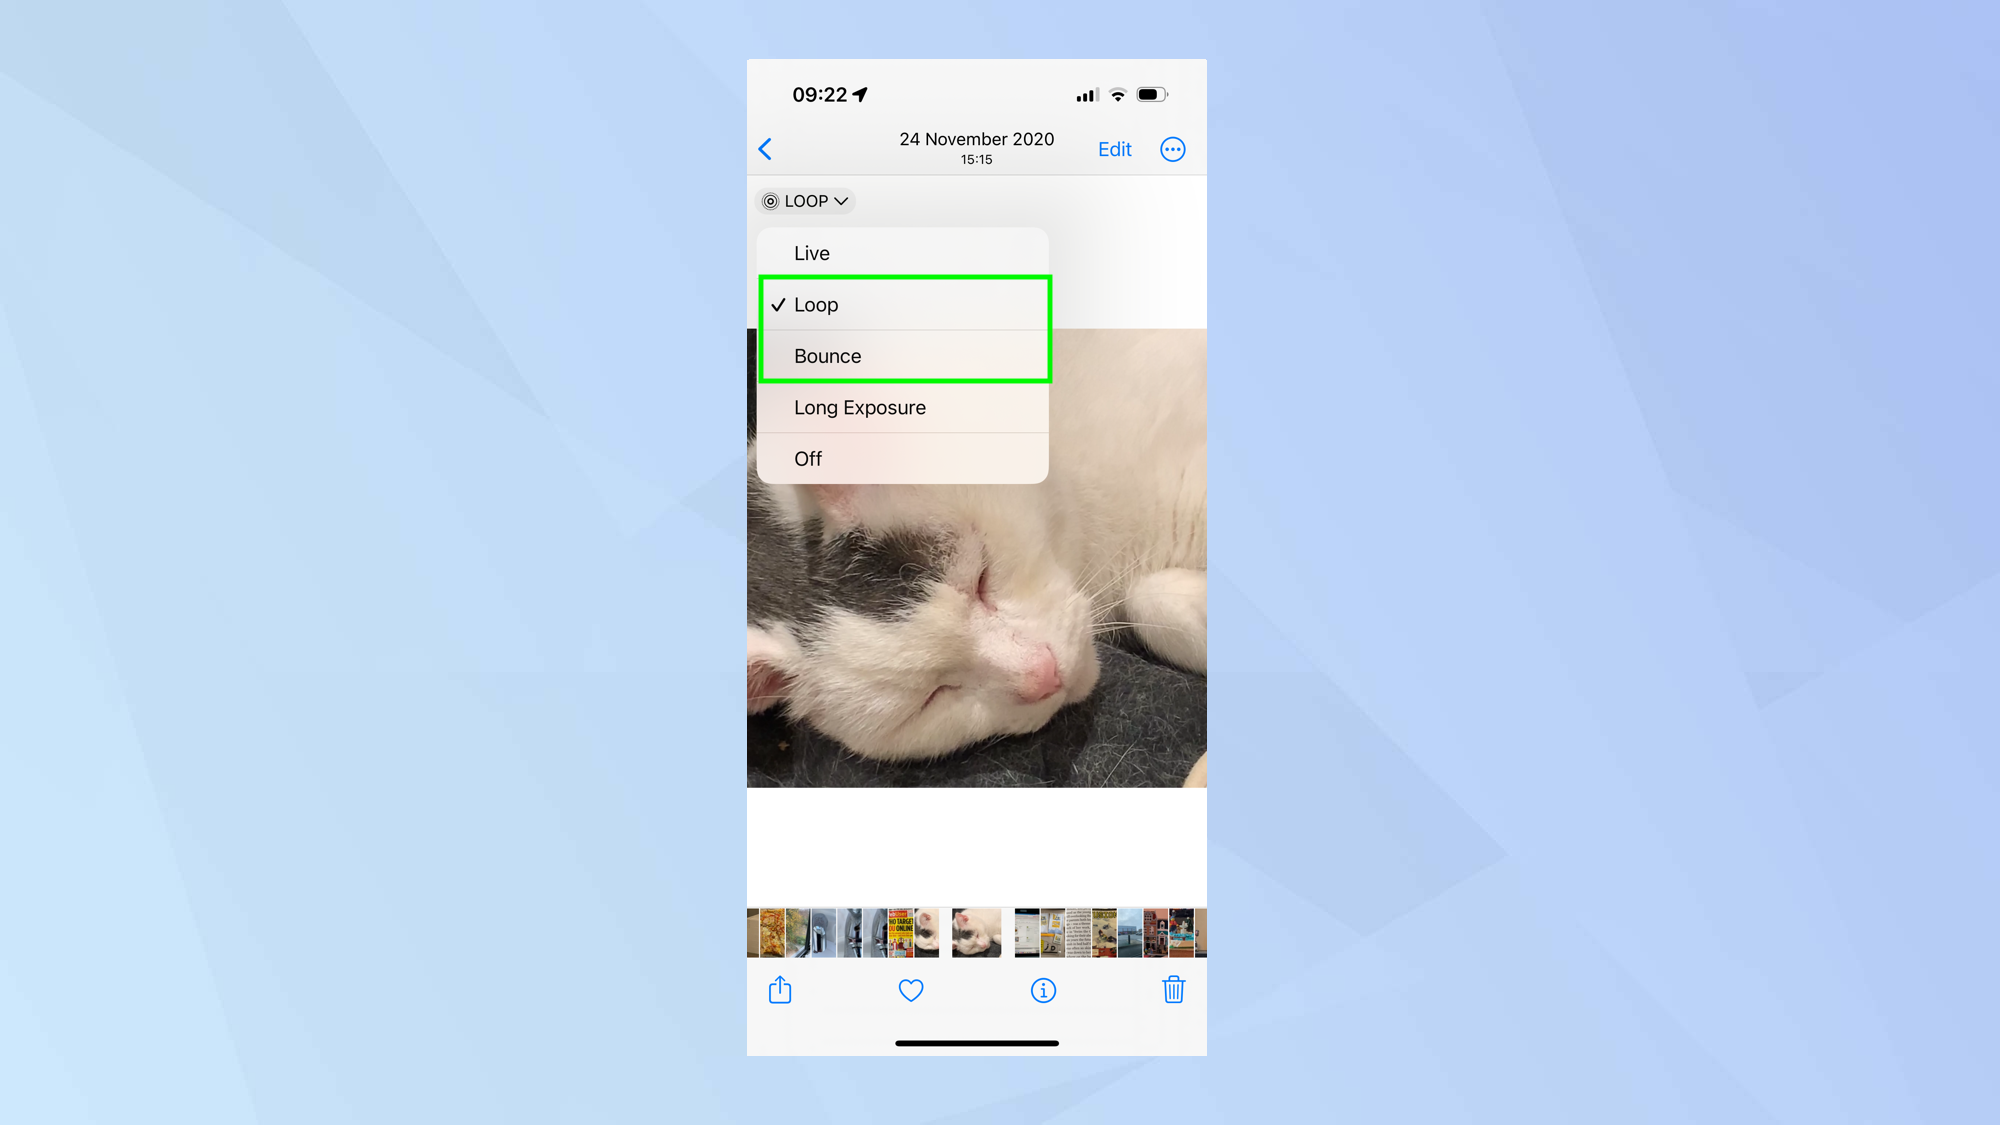
You can make use of one of two options.
If you select Loop the footage in the Live Photo will continue to play over and over again.
If you select Bounce, then the Live Photo will play forward then play in reverse and continue to do so, creating an odd but compelling video.
5. Share your GIF
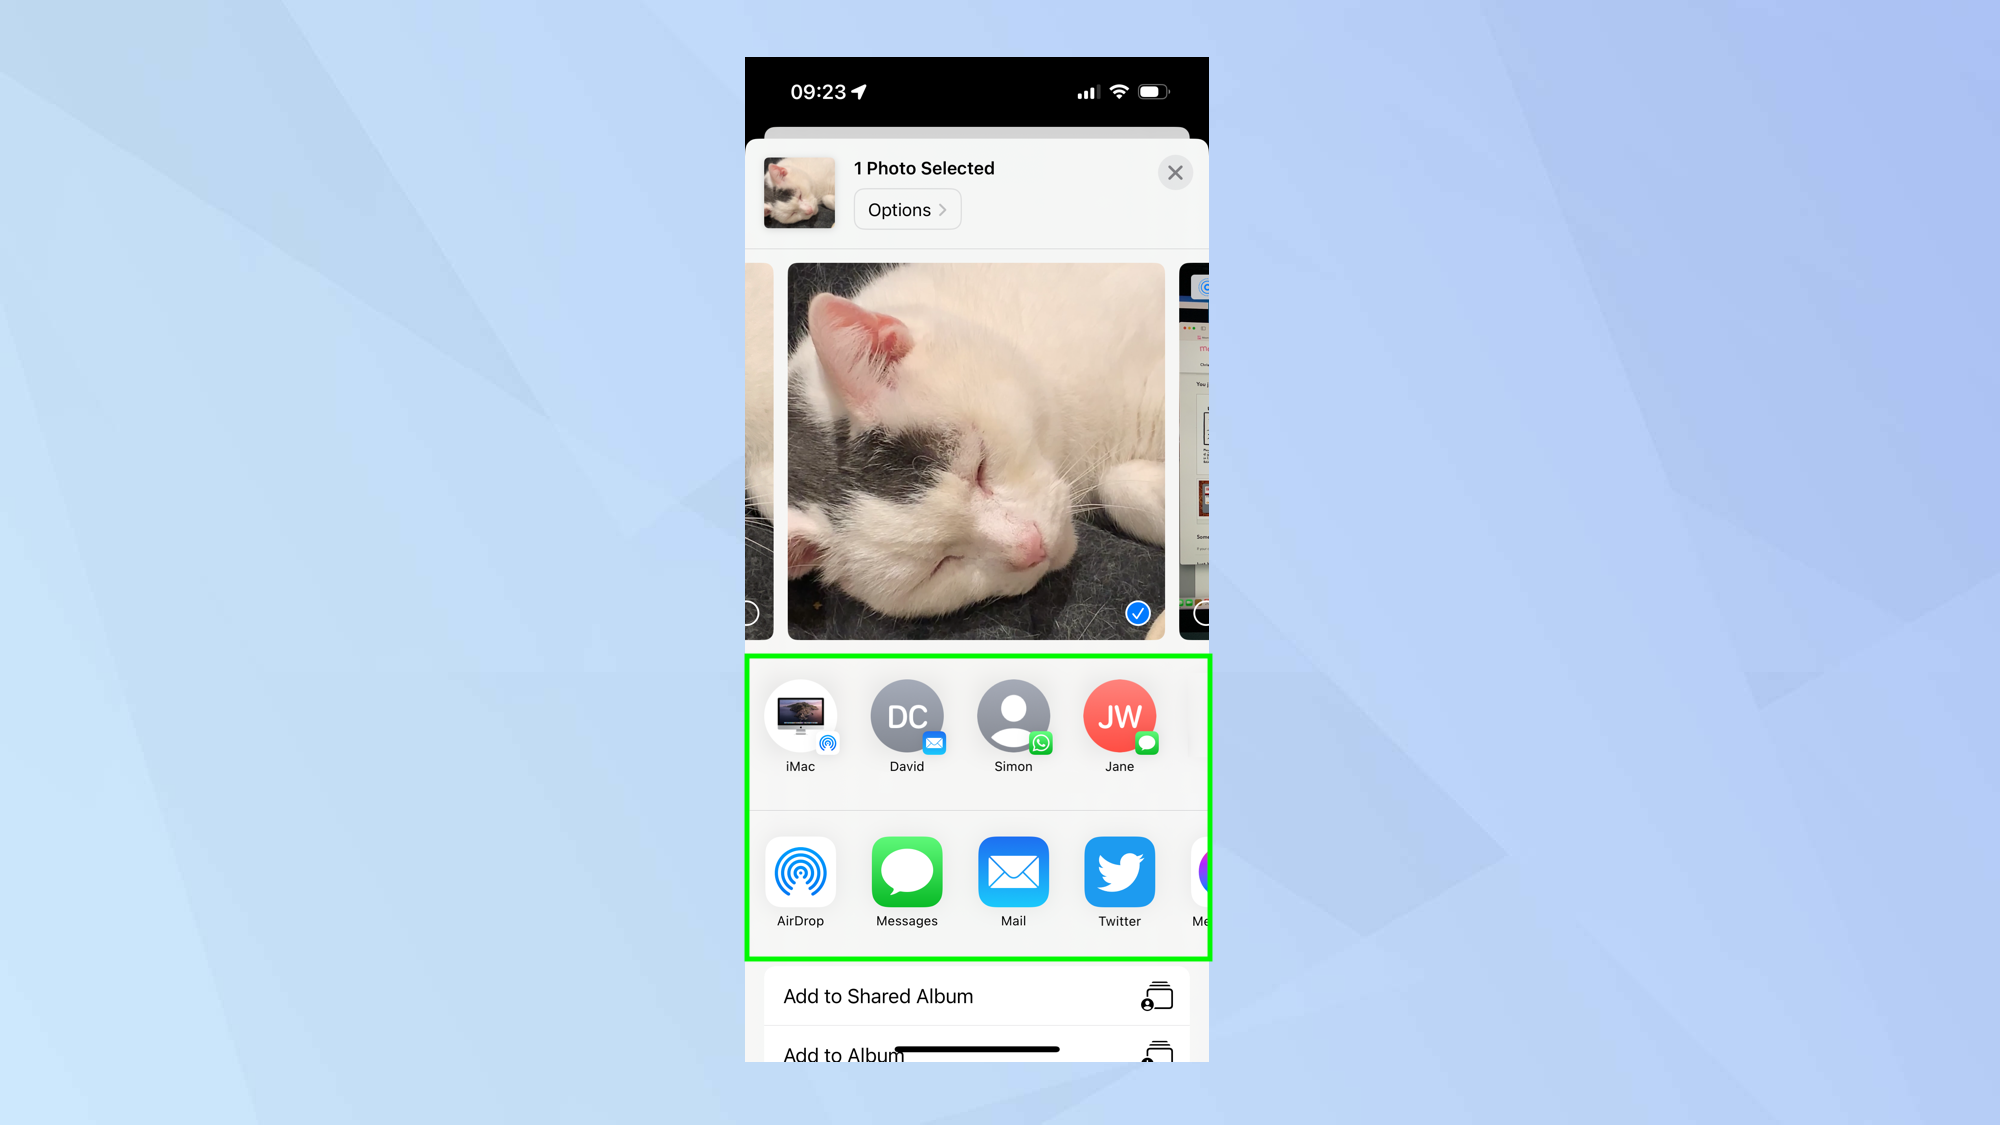
You don't need to save the image – it will automatically add and save the effect (you could revert back if you select Live Photo from the menu). Now you can tap the Share icon and send the GIF to others.
6. View GIFs you’ve made
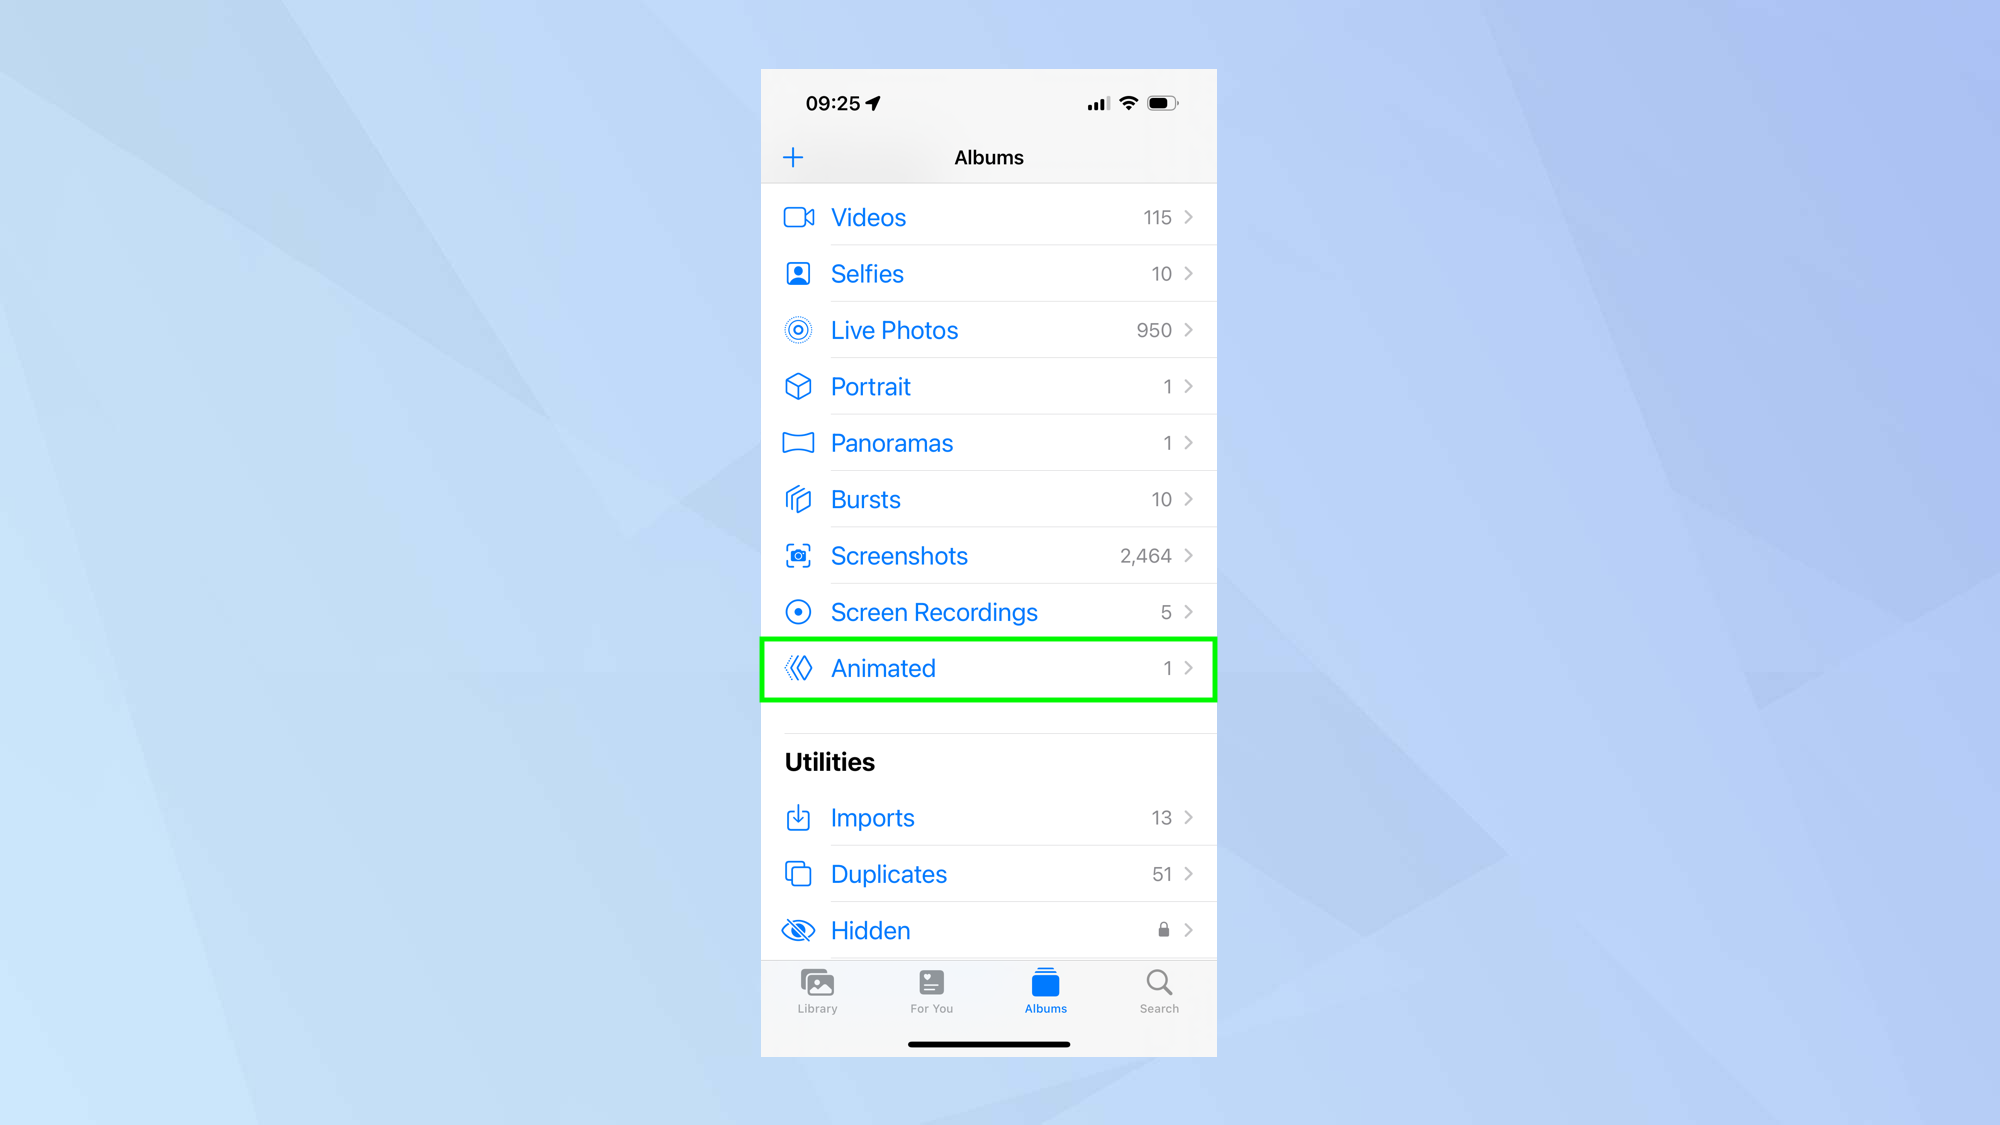
Any GIFs you create in this way can be easily accessed. Just tap the Albums tab, scroll down and select Animated to view them.
How to make a GIF on iPhone using GIPHY
Note: If you want to dress up your GIFs with captions and special effects, then the GIPHY app is worth a go.
1. Get the GIPHY app
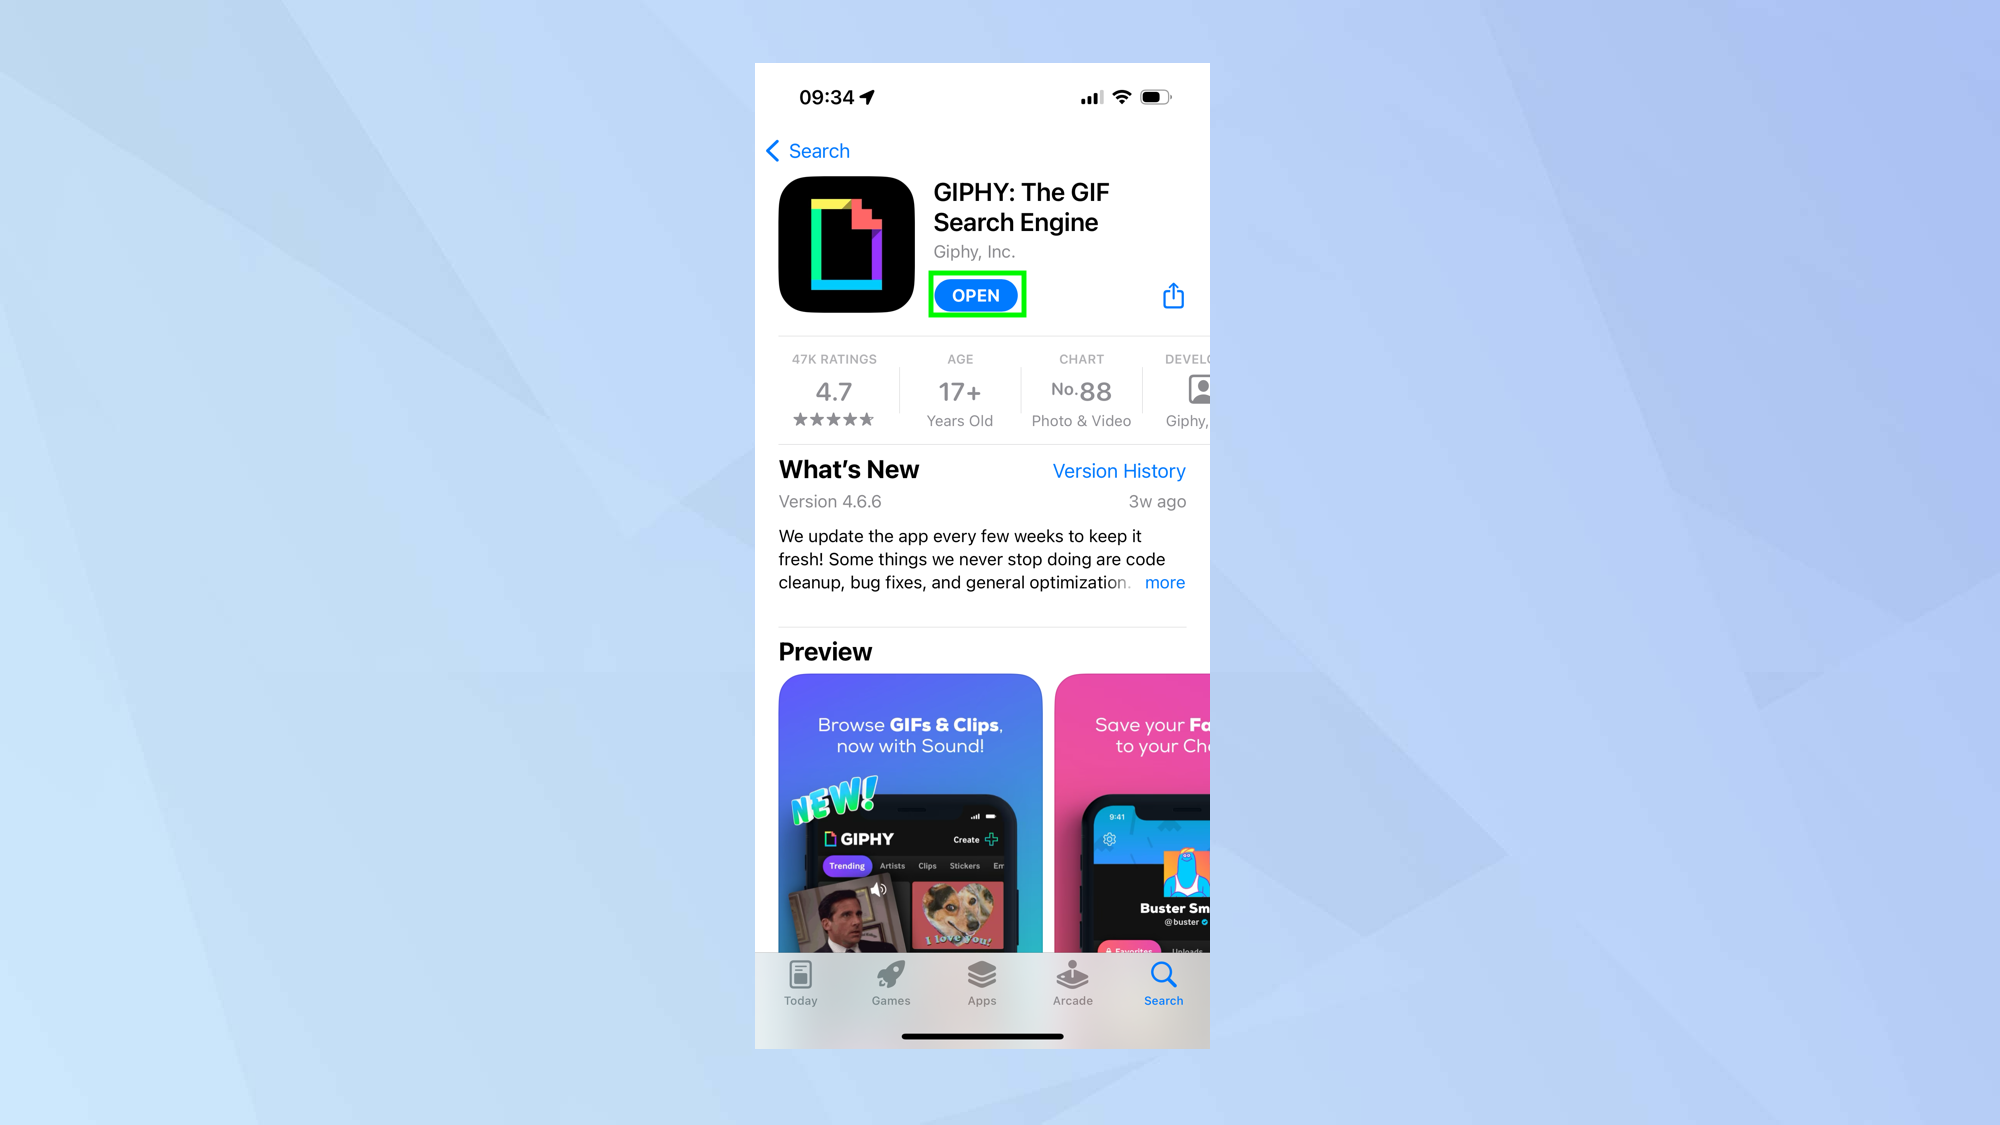
Download the GIPHY app from the GIPHY app store page.
2. Hit the Create button
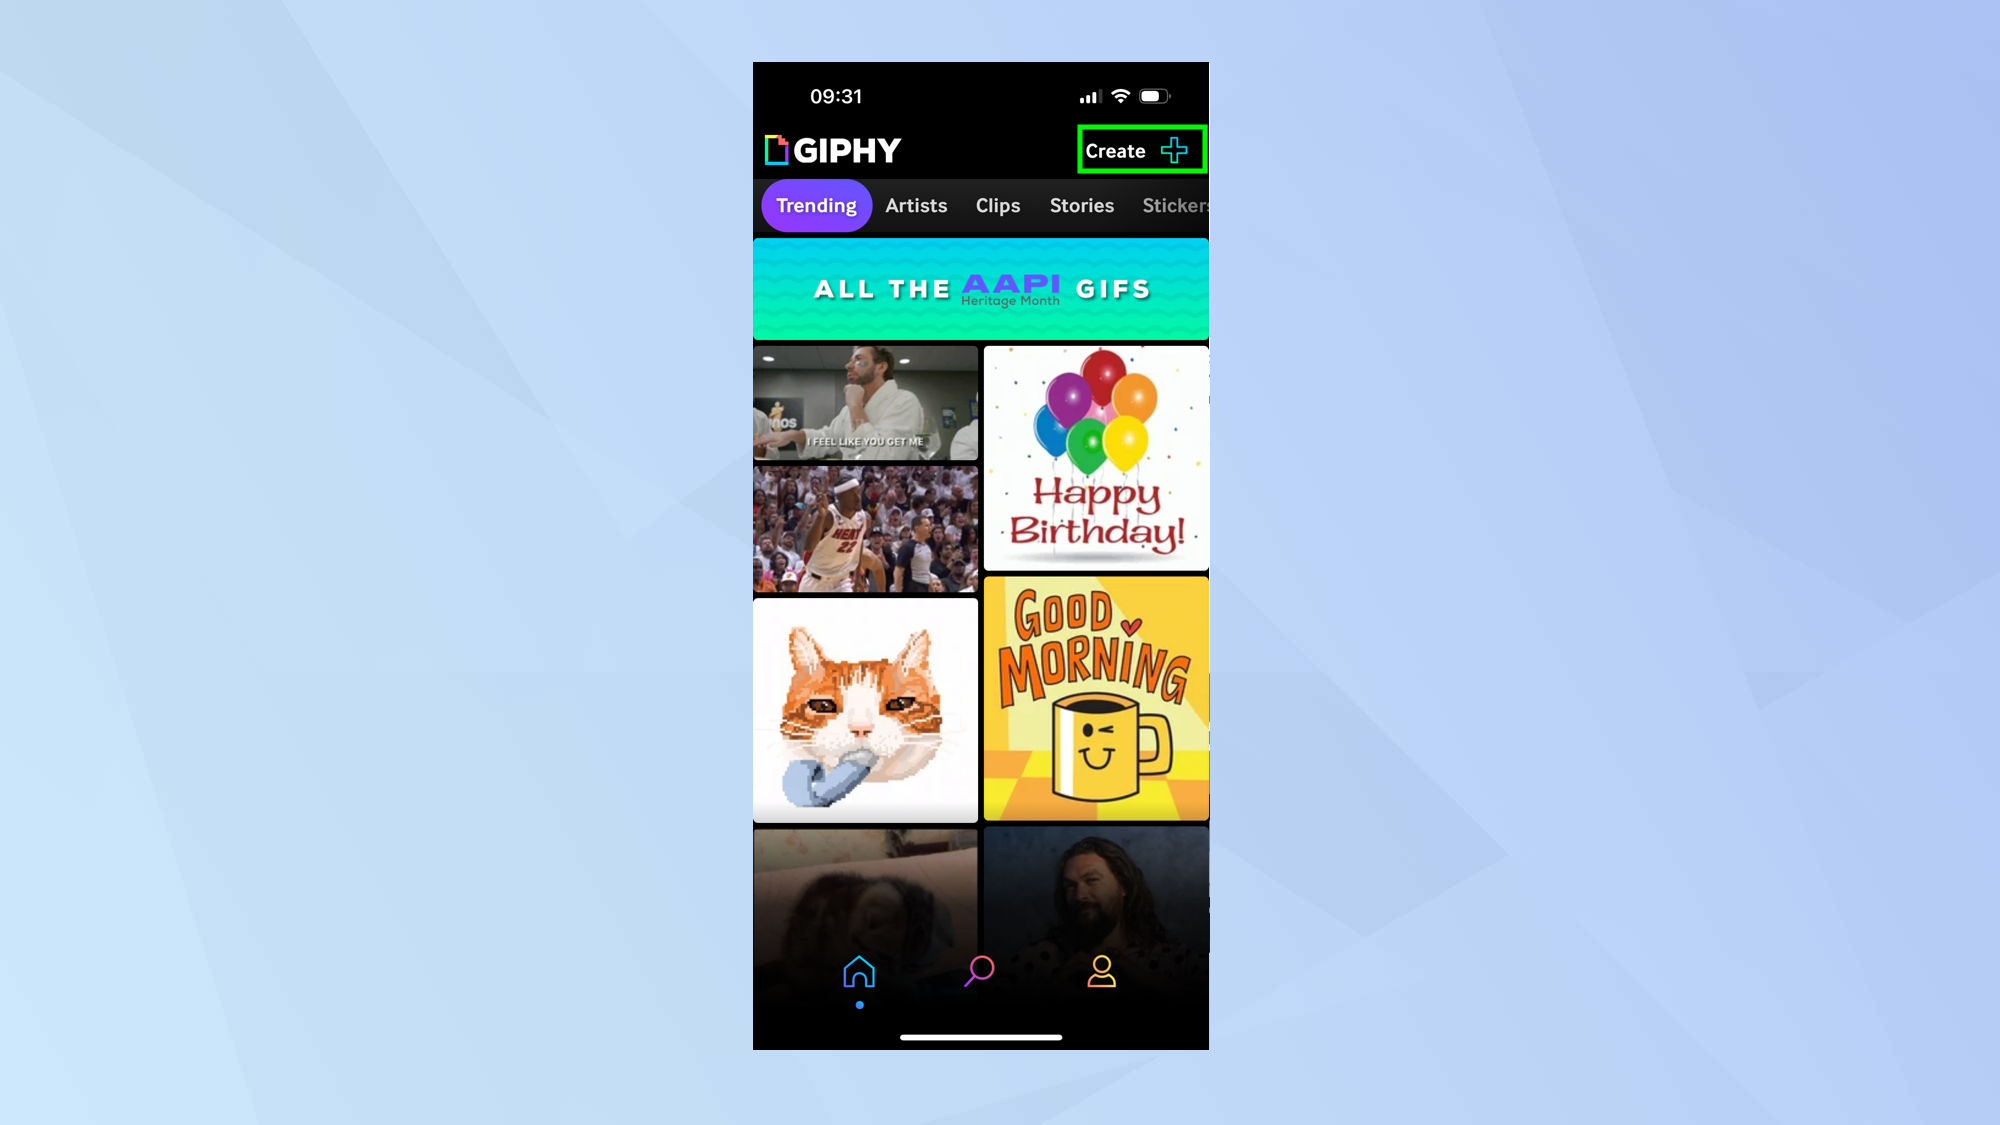
When you're ready to make a GIF, tap Create in the top-right corner of the screen
3. Allow Camera access
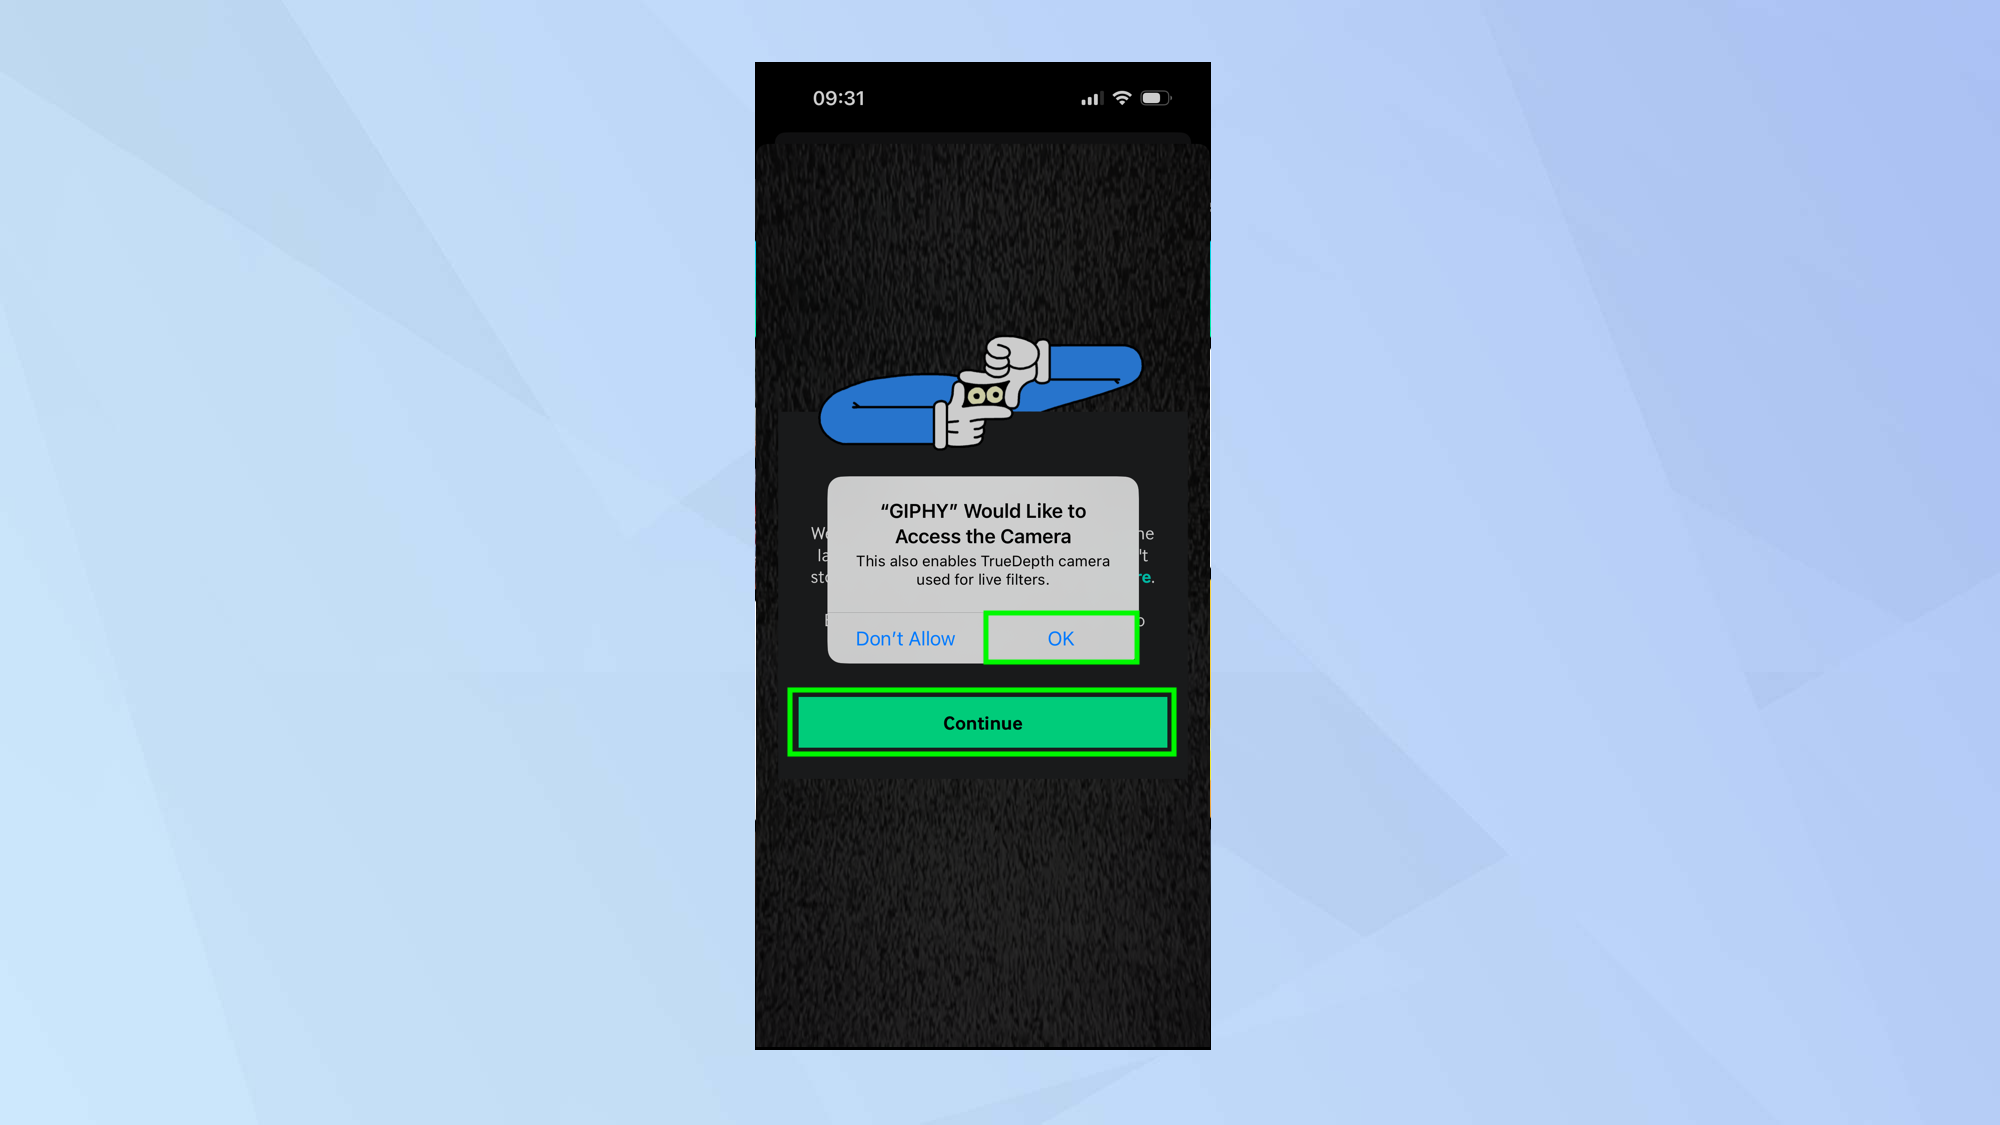
Allow GIPHY to access your iPhone's camera: select Continue and tap OK when prompted.
4. Record some footage
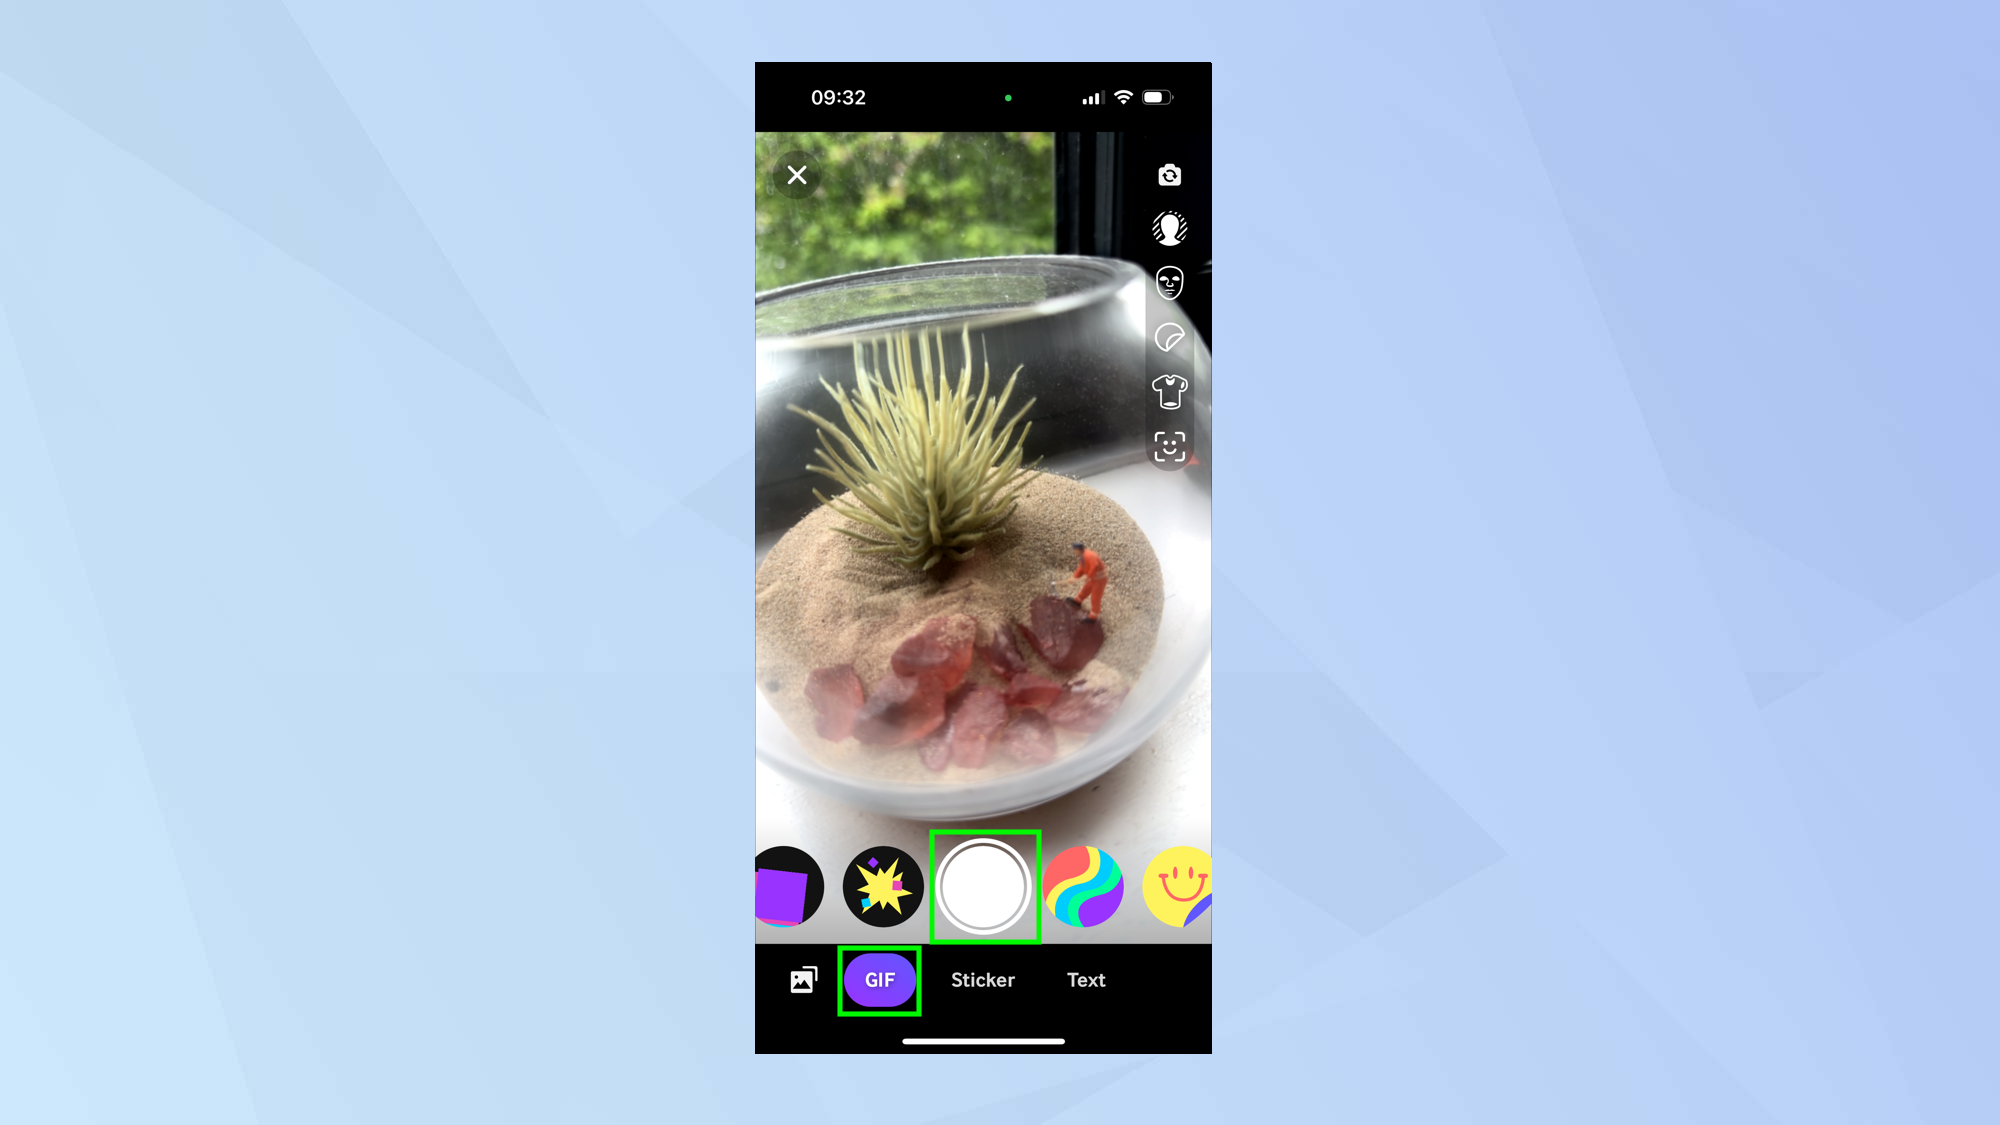
Select the GIF tab at the bottom of the screen. You will be able to use your camera to line up a shot, making use of the various fun filters and options on the screen. Tap the Shutter button to record video.
5. Find existing footage
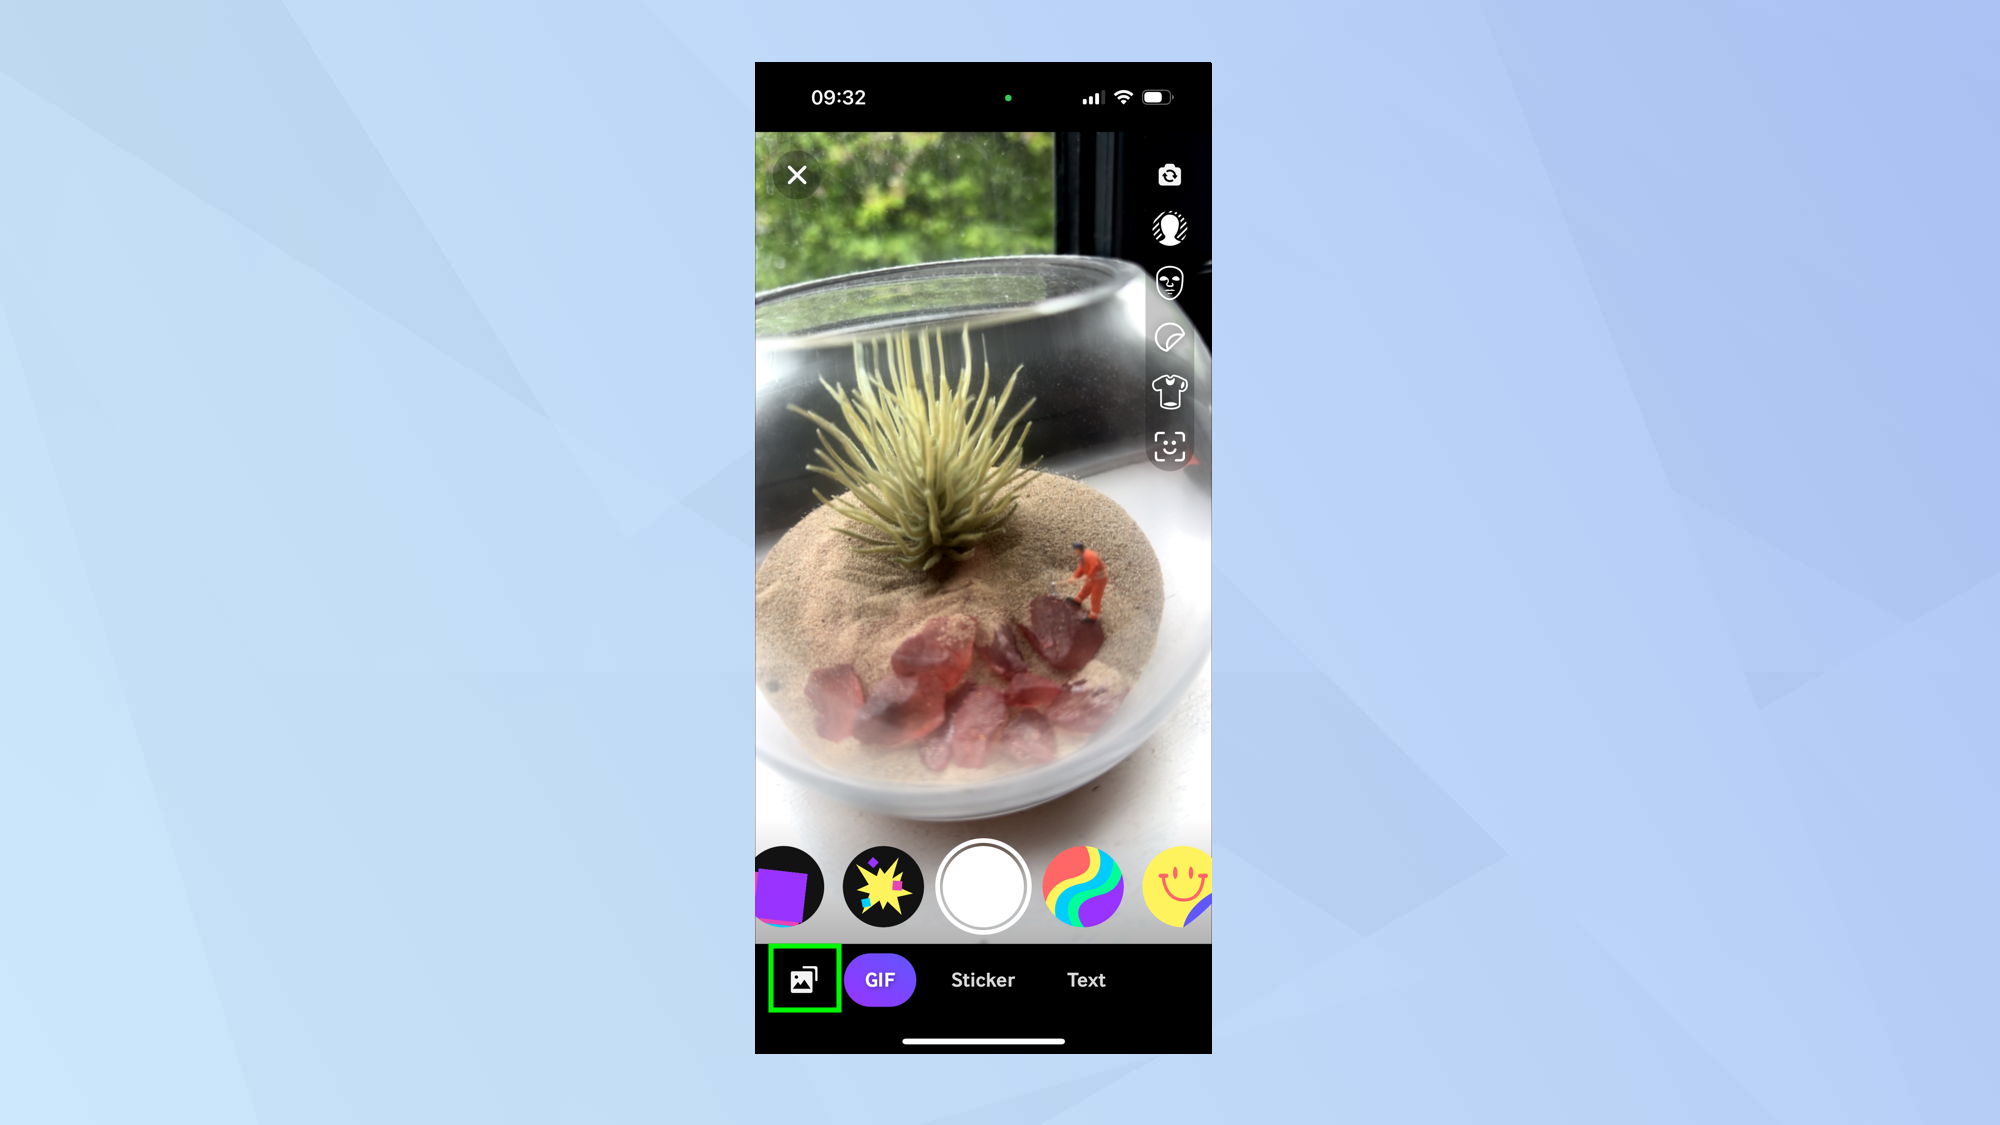
Alternatively, tap the Photos icon. This will allow you to select content from your iPhone's camera roll.
6. Add effects
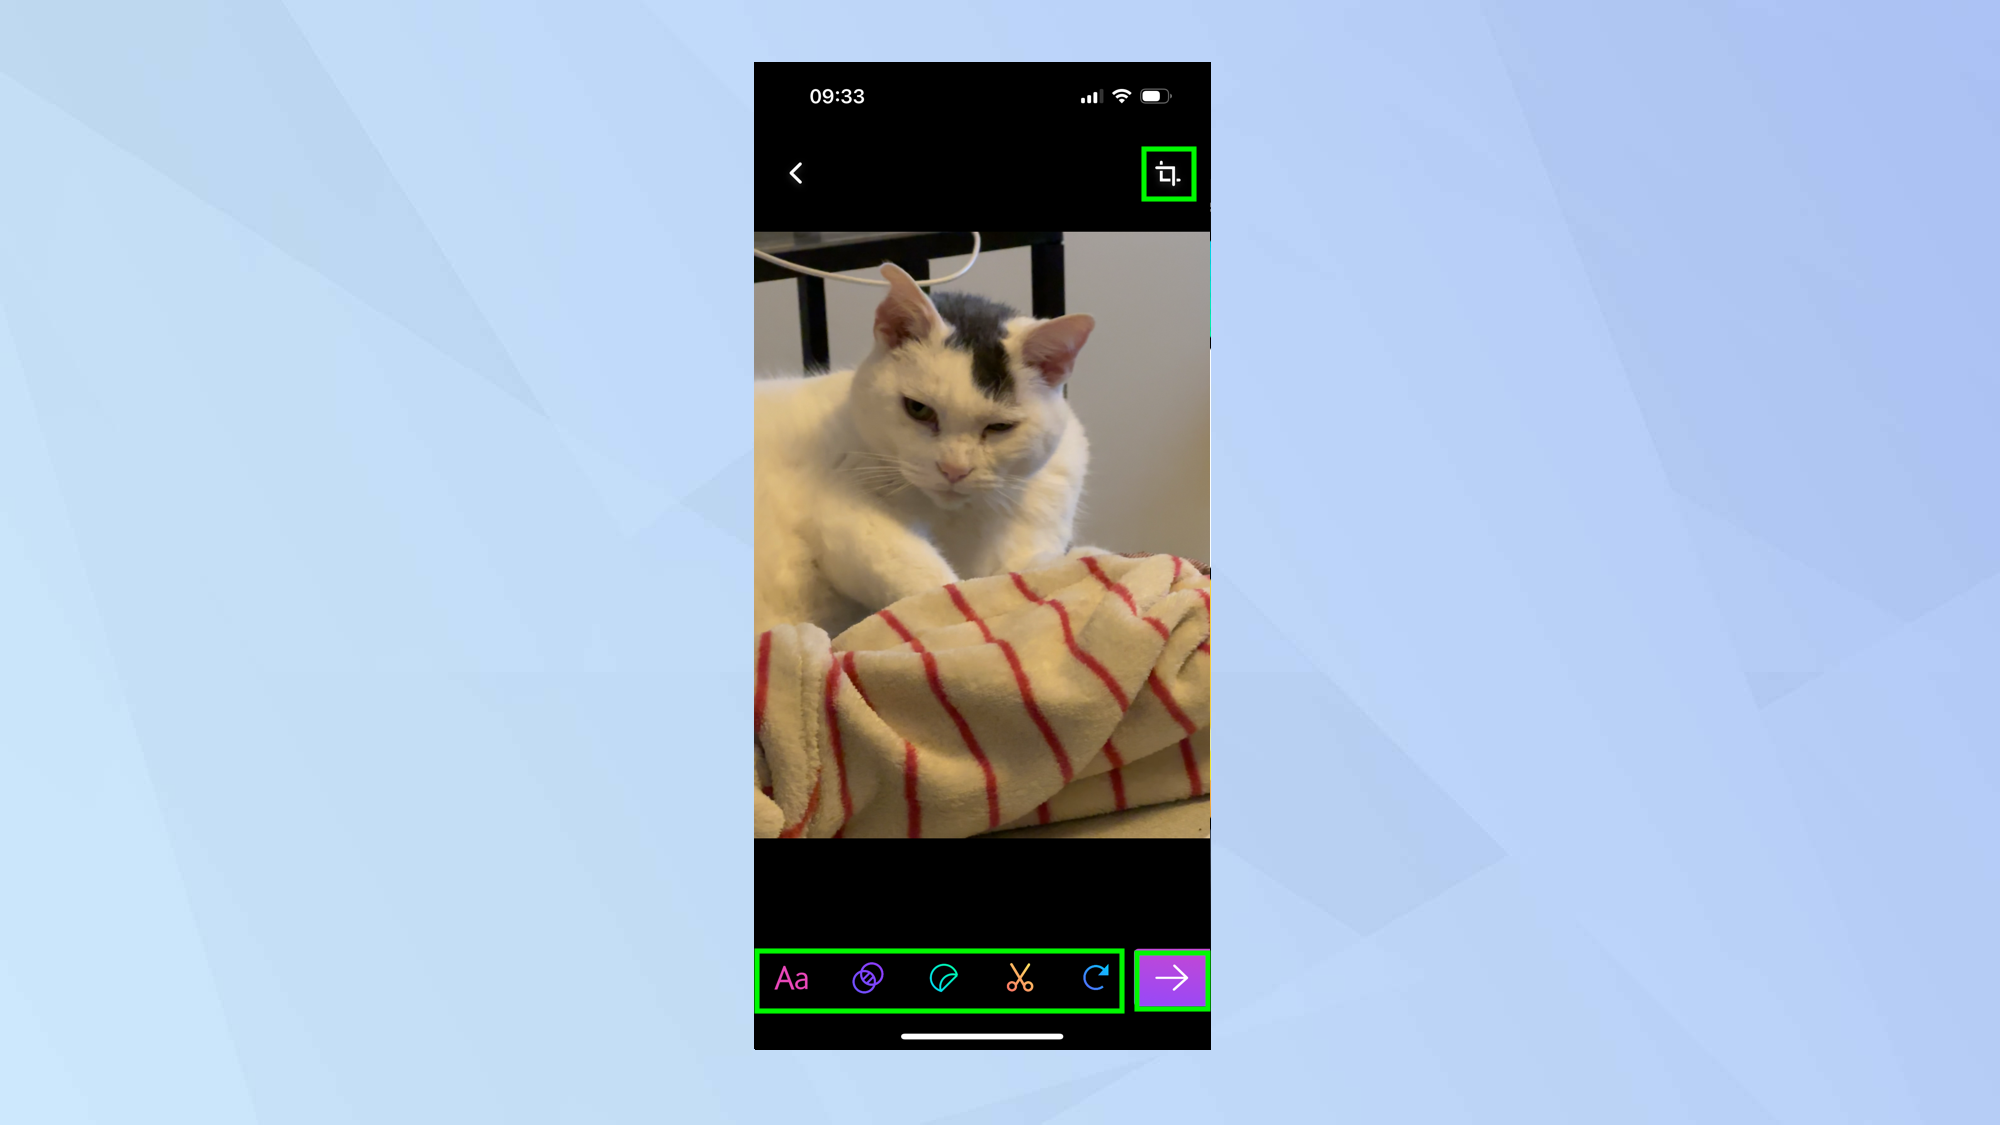
You can add various effects to your GIF and, when you are finished, tap the arrow icon.
7. Share your GIF
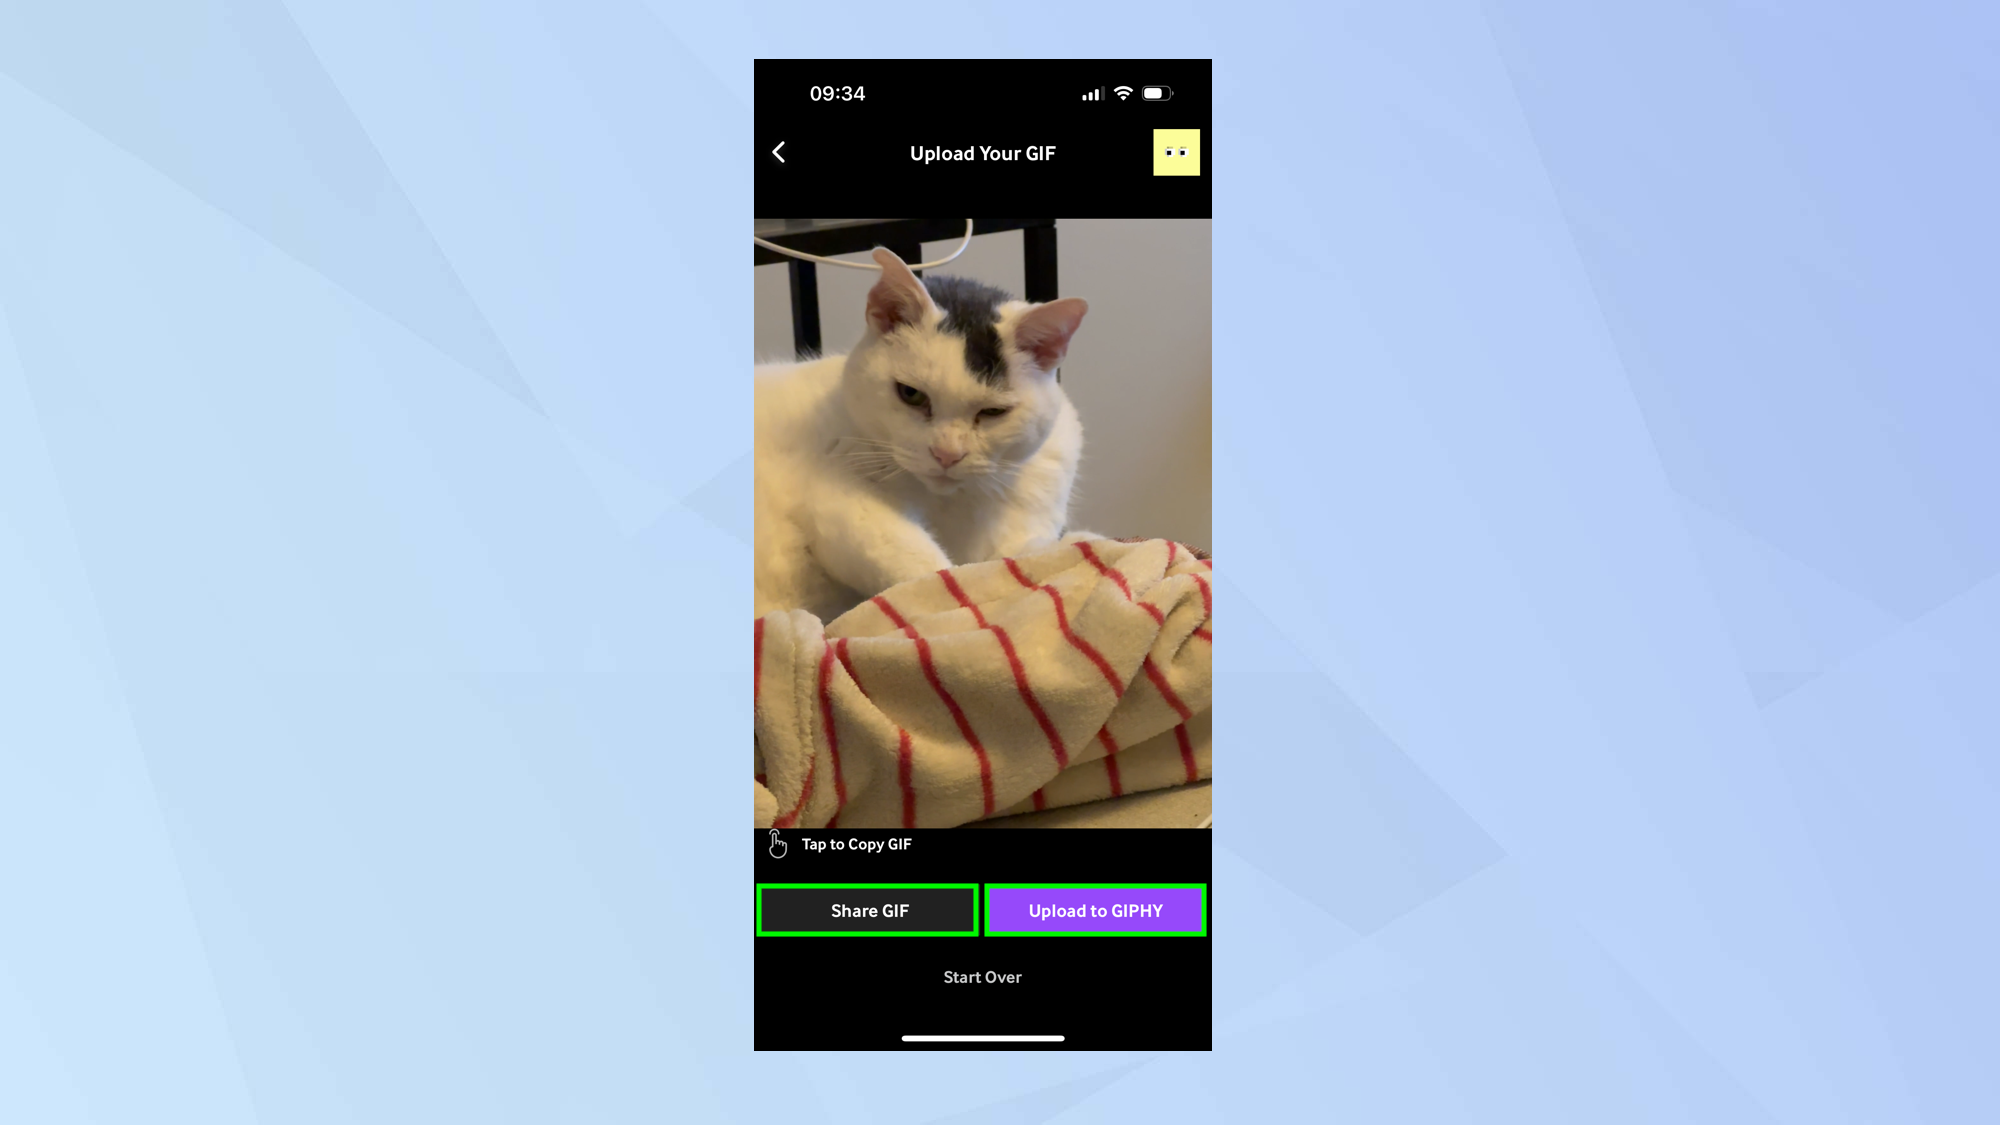
You will be able to tap Share GIF if you want to send it to others via social media or privately. You can also select upload to GIPHY if you want to send, store and share content via the GIPHY app.
And there you have it. You now know how to make a GIF on iPhone but don't leave just yet. Why not learn how to send a GIF in Facebook Messenger or figure out how to create a GIF in Photoshop? You can also do more with Live Photos – here you can discover how to set a Live Photo as your iPhone's wallpaper, for example, which this hidden iPhone trick lets you edit multiple photos at once! Ever forget to reply to emails? Learn how to set email reminders on Apple Mail. Can't get enough of TikTok? Find out how to add the TikTok widget to your iPhone's Home Page.
More from Tom's Guide
- Apple issues Rapid Security Response update for iPhone and Mac — download it now
- I wish I knew about this hidden Samsung Galaxy camera feature earlier
- iOS 17 leak reveals big changes to Apple's apps and wallpapers
Get instant access to breaking news, the hottest reviews, great deals and helpful tips.

David Crookes is a freelance writer, reporter, editor and author. He has written for technology and gaming magazines including Retro Gamer, Web User, Micro Mart, MagPi, Android, iCreate, Total PC Gaming, T3 and Macworld. He has also covered crime, history, politics, education, health, sport, film, music and more, and been a producer for BBC Radio 5 Live.
 Club Benefits


