How to set up a virtual router
A virtual router is the best way to share VPN with unsupported devices
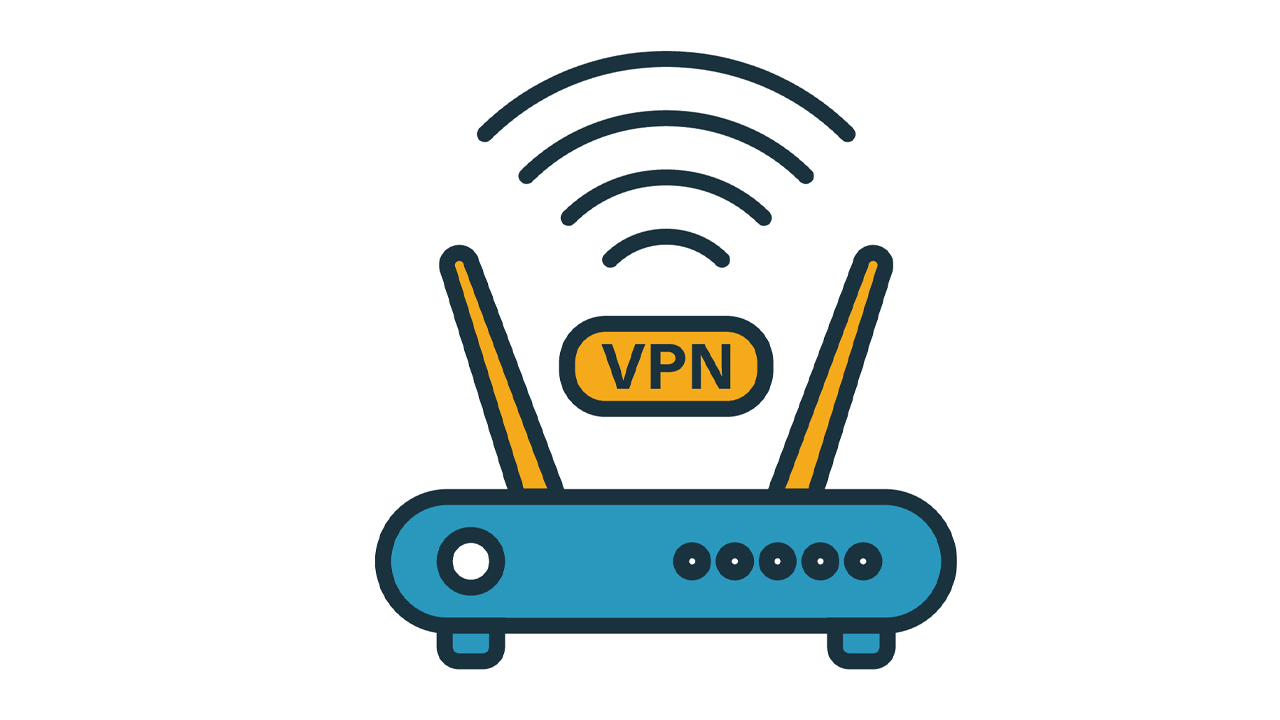
So, you want to use the best VPN to change your location and stream geo-restricted content, but your device doesn't support VPN connections. You might think that you may as well forget about it and just settle for streaming on your laptop, but by setting up a virtual router, you can share VPN connections with any device that can connect to Wi-Fi.
Using a virtual router has a bunch of benefits over setting up a true router VPN, not least the fact that you don't have to buy any expensive hardware to get up and running. All you need is a PC or Mac, a subscription to a VPN, and a decent Wi-Fi connection.
Below, we'll run down exactly what you need to do to get started in order to set up a virtual router and share VPN connections with devices like Roku, Chromecast, Smart TVs, and just about anything else that doesn't directly support VPNs. Then you can stream anything you want, wherever you are.
Why do I need a virtual router to share VPN?
To set up a Roku VPN, some gaming VPN for consoles, and certain Smart TV VPN, a virtual router is essential. That's because these devices don't natively support VPN connections, and some don't even support Smart DNS, which is a tool offered by some VPN services that's used for changing your location to watch restricted streaming content. So, users of these devices have to look for other ways of changing their location to access blocked Netflix libraries and geo-restricted streaming sites like BBC iPlayer.
Essentially, a virtual router functions in the same way as a mobile hotspot (tethering) does on your smartphone – once set up, you can connect any device to your virtual router instead of your regular Wi-Fi.
If you want to share VPN connections, all you need to do is follow the steps below, and the virtual router connection will offer the same privacy, encryption, and location spoofing attributes as the computer you're using.
Then, when you connect your device that would normally be unable to use VPN connections, it'll be on a VPN-protected network, and get all the benefits.

How to set up a virtual router to share VPN – Windows 10
Before you start, you'll need to have a current subscription to a VPN. If you don't, our top pick is ExpressVPN, and it works perfectly as a virtual router, too.
Below is a gallery of images, numbered correlating to each step.

Step 1
Step 2
Step 2
Step 3
Step 4
Step 5
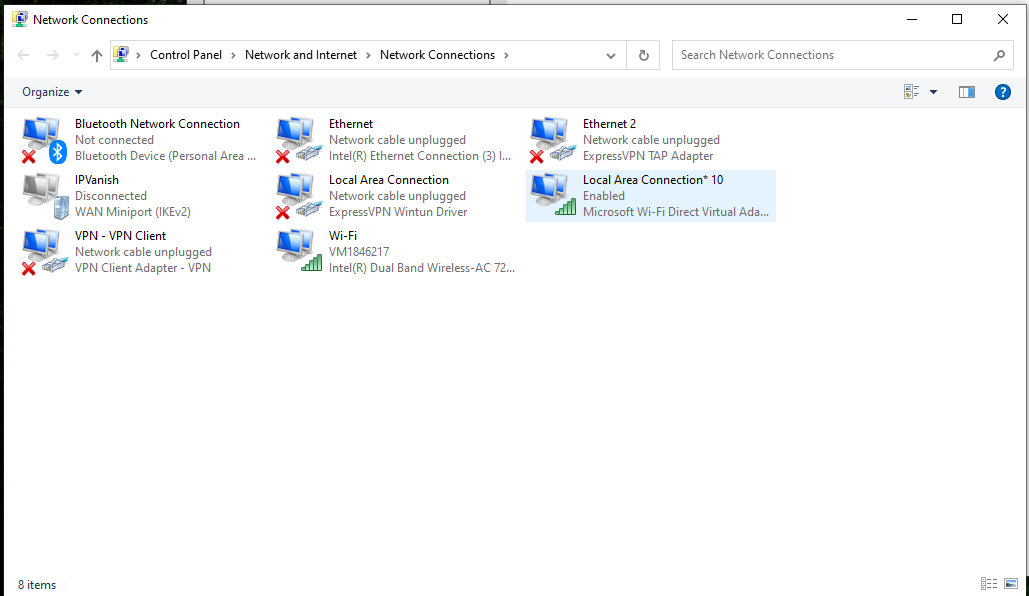
Step 6 – make a note of this connection
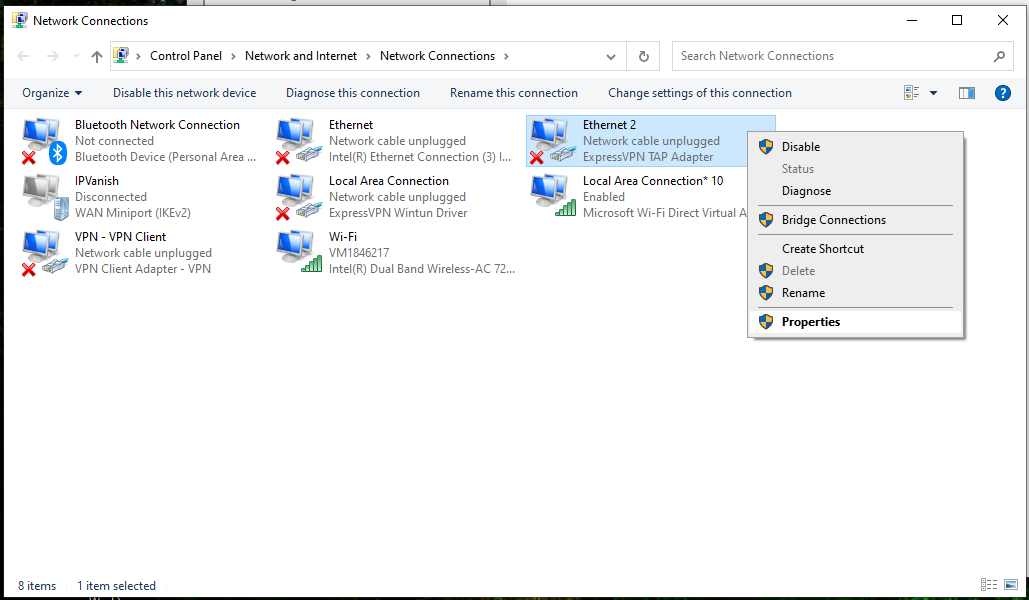
Step 7
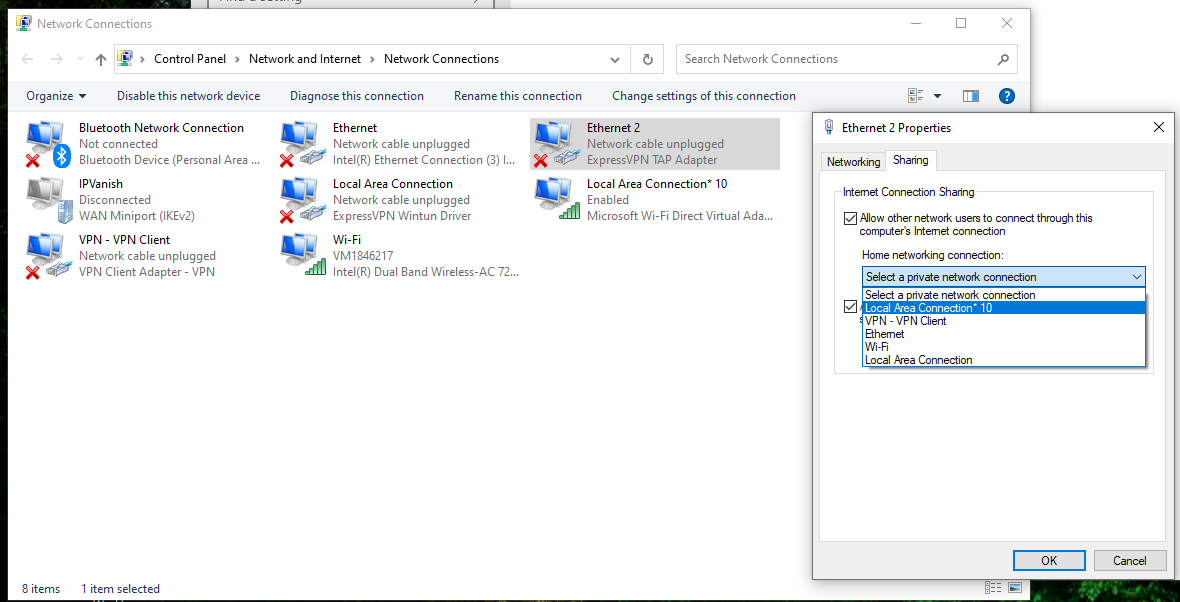
Step 8
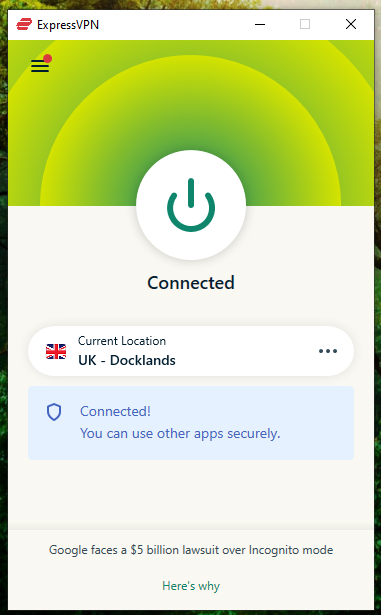
Step 9
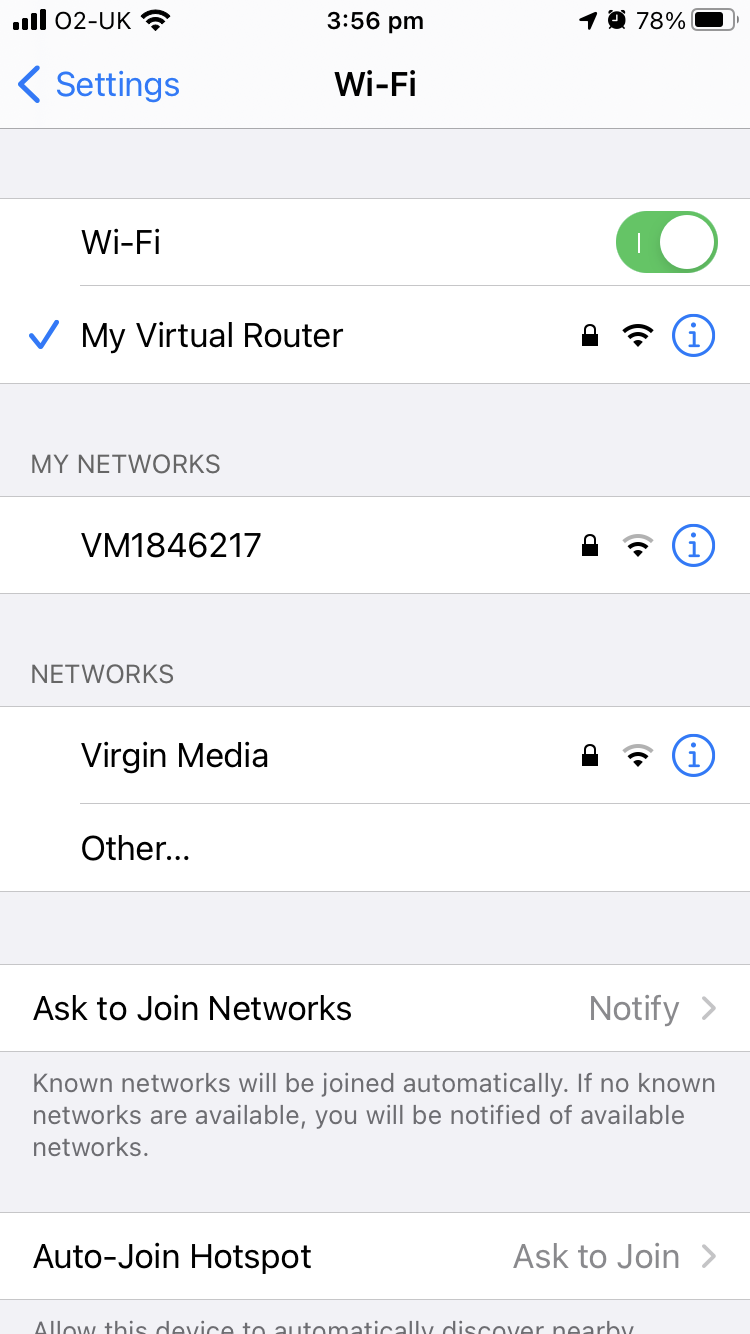
Step 10 – we've demonstrated on an iPhone SE, but this will work on any Wi-Fi enabled device
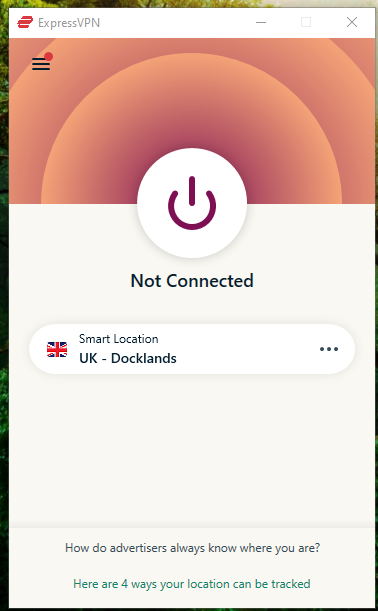
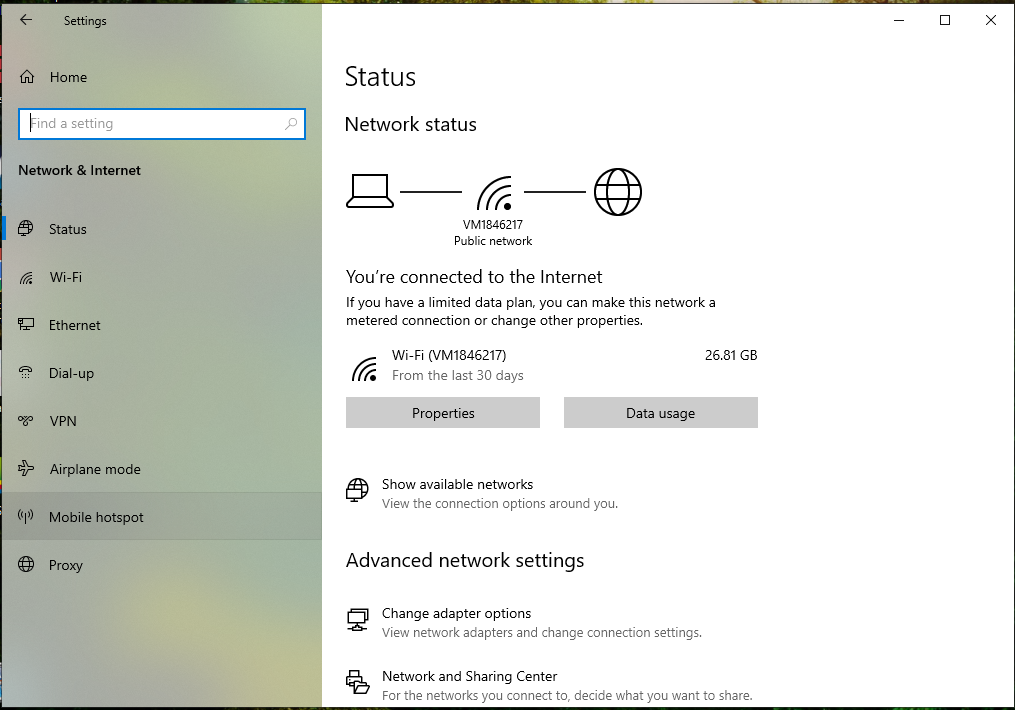
1. Make sure your VPN is installed, but not connected.
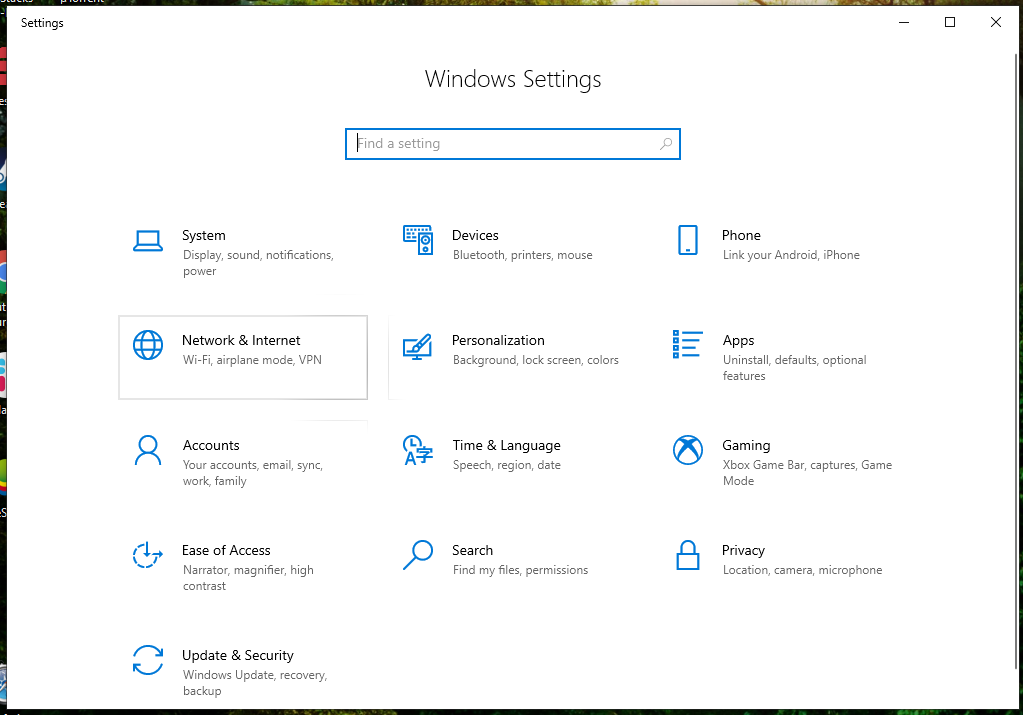
2. Head to Settings, and on the left select Mobile hotspot.
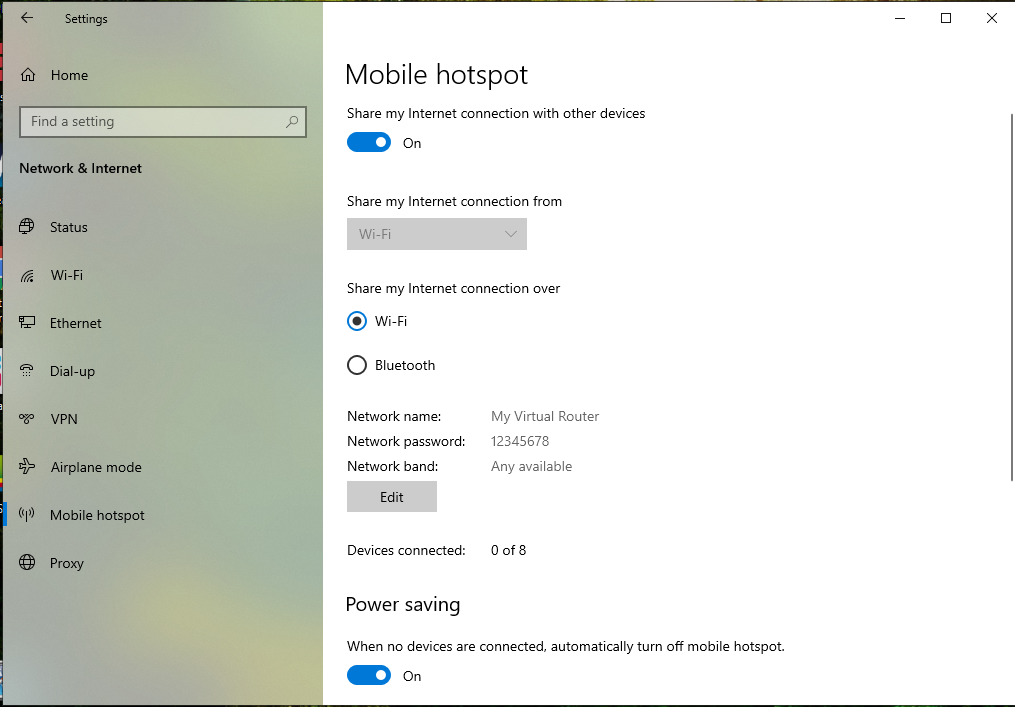
3. Click the Share my Internet switch.
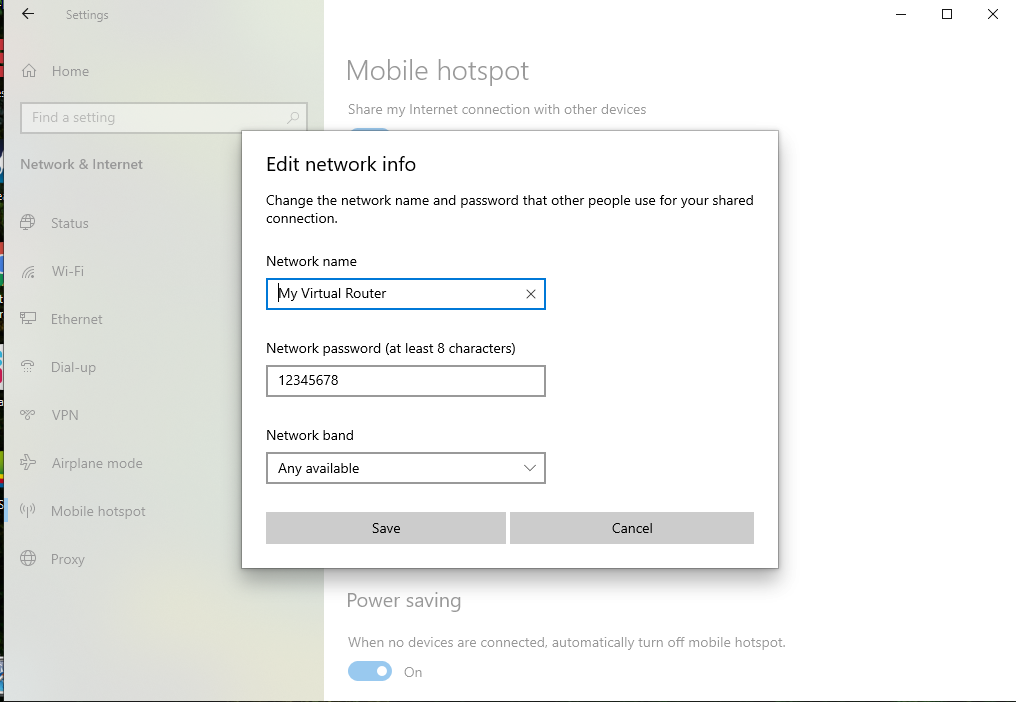
4. Edit your network name and choose a suitable password. We called ours 'My Virtual Router', and chose the incredibly safe password '12345678'. Do as we say, not as we do...
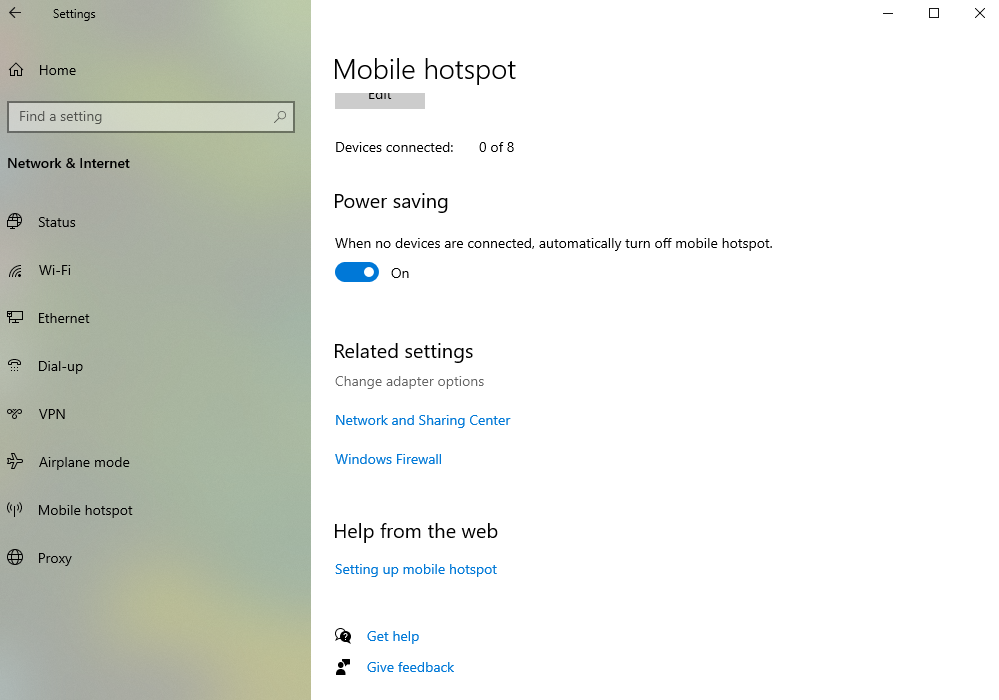
5. Scroll down to Related settings, and click on Change adapter options.
6. Make a note of the name of the connections that are showing the green 'connected' bars. One will be Wi-Fi, and the other will likely be a Local Area Connection.
7. Right-click the connection that says 'ExpressVPN TAP Adapter' (if you're using a different VPN, you'll have a similar option). Click on Properties from the right-click menu.
8. Head to the Sharing tab, and check Allow other network users to connect. From the drop-down list, select the Local Area Connection that you noted in Step 6. Press OK.
9. Open up your VPN, and connect to your desired server. Now your virtual router is ready to use! (Note that the virtual router will only work when the VPN is switched on and connected.)
10. On the device you want to connect to your virtual router, head to the Wi-Fi selection screen and choose your virtual router. Connect to it.
11. You're ready to go! Your device is now connected to a VPN-protected connection without the need to install a VPN on the device itself. If you want to change location, all you need to do is hop back on your PC, and reconnect to a different server on your VPN.
The above steps outline the process for Windows 10 users – who have it pretty easy, all things considered. However, if you want to set up a virtual router on Windows 8, check out this walkthrough, and if you need a virtual router on Mac, follow this guide.
Which VPN do we recommend?
ExpressVPN – our top-rated service today
With over 3,000 servers worldwide and excellent speeds on just about all of them, ExpressVPN is a versatile, secure solution. You can test it out risk-free for 30 days and claim your money back, and now Tom's Guide readers can get three months absolutely FREE. What more could you ask for?
- Stay protected on iOS with the best iPhone VPN

Get instant access to breaking news, the hottest reviews, great deals and helpful tips.

Mo has been rigorously testing, reviewing, and analyzing VPN services at Tom’s Guide for more than five years. He heads up the three-person Tom's Guide VPN team, and is passionate about accessibility: he believes that online privacy should be an option that’s available to everyone. NordVPN and ExpressVPN are the products he uses most on a daily basis, but he experiments weekly with all the top services, evaluating their privacy features, connection speeds across various protocols, and server reliability – among other things – so that he can make confident VPN recommendations that are backed by data. To see his latest advice, head over to Tom’s Guide’s best VPN and best free VPN guides.
 Club Benefits


