Since I started a regular Pilates routine at my local studio, my core strength has never been better. And for once in my life, after years of throwing heavy weights around, I can also see improvements in my posture.
One move I credit with building bulletproof core muscles is the Pilates knee tuck, or Pilates plank tuck, depending on who you ask. It can be done on the reformer machine, or if you don’t have one, using sliders or a towel. Basically, anything that allows you to draw your feet toward your hands from a plank position.
I will never promote an exercise unless I feel it’s worth it, and this one is certainly worth a place in any core routine, regardless of whether you do Pilates or your core muscles are strong already. Those pesky "Pilates girlies" are onto something, damn it.

Here’s everything you need to know, and why the Pilates crew really does have it all figured out when it comes to building abs of steel.
How to do the Pilates knee tuck
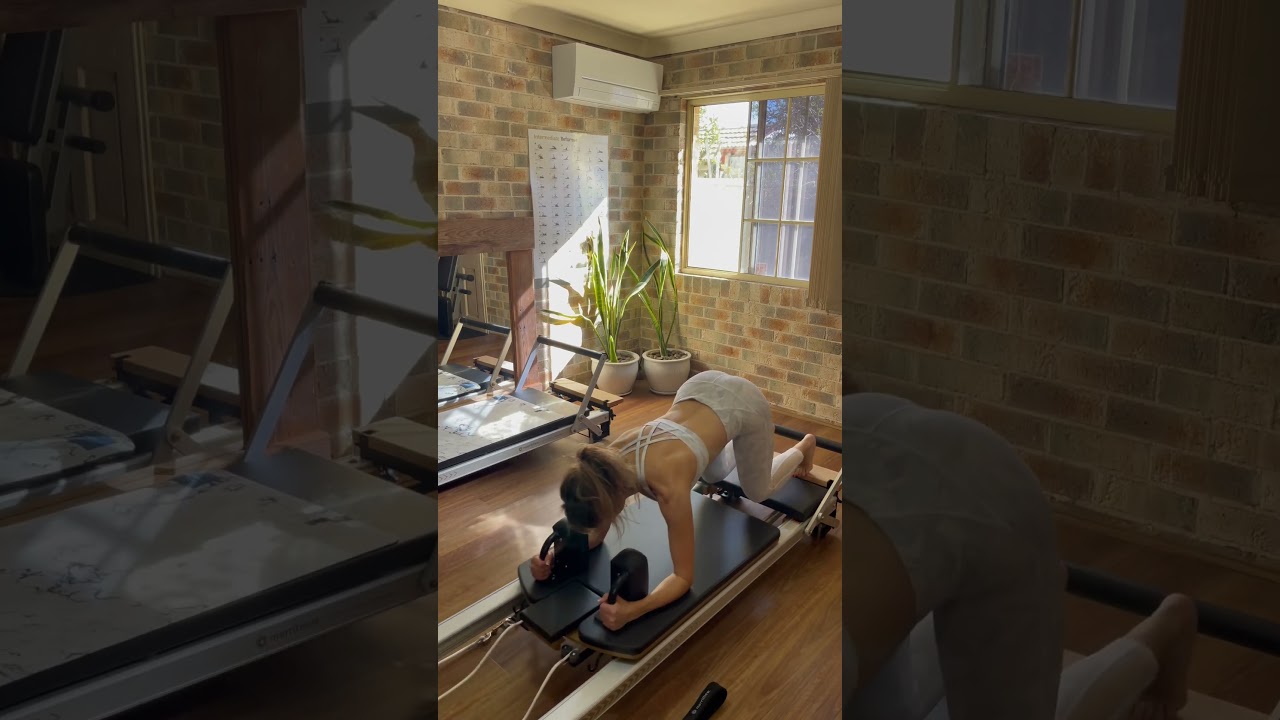
Check out the video above, shot on the reformer. Focus on the second exercise (the first is a pike and can be added if you want an extra challenge).
The demonstration features a reformer in two ways, both of which employ resistance in both directions to challenge your stability, balance and control as you draw the Pilates bed toward your hands and tuck your knees toward your body. It isn't easy because your feet are balanced on the bed or the board, and you are in charge of moving in both directions, both forward and backward.
This is a classic example of time under tension, where muscles stay held under tension throughout an exercise and your reps, which means you'll feel this move in your muscles very quickly.
A floor-based variation that closely resembles this move is the plank tuck jump, which is far more cardio-based and less about slow, controlled reps. If you wanted to perform the plank tuck on the floor, position your feet on a towel or sliders and focus on pulling your feet toward you across the ground.
Here's how to do it the traditional way:
- Start kneeling on the reformer bed facing the bar, then place both your hands on the bar shoulder-width apart
- Step your feet back into a high plank position with your toes tucked under, hips aligned with your shoulders and shoulders stacked directly over your hands. You can align your feet against the shoulder pads for support
- Brace your core by sucking your belly toward your spine, like you are wearing a corset and it's being tightened around your midsection
- Push through your hands and shoulders to slightly hollow out your torso and broaden your upper back
- Draw your knees toward your hands with control, bending them as you do
- Once in the tuck position, pause for a moment, then extend your legs behind you, returning to the plank position
- Continue for 8-12 reps and 3-4 sets, with 30 seconds rest between sets.
Why it works
Pilates classes typically adopt an endurance strategy, which means high reps and overall volume during classes.
Plank tucks engage many core muscles, including the abdominals, obliques and deeper stabilizers like the transverse abdominis. Many people don't realize that their hips and glutes are also part of their core network, and these muscles are also active during this move.
Your shoulders and arms will be worked to help keep you stable, as will the muscles that surround and support the spine. I tend to feel this more in my upper abs and in my quads during the tuck.
To engage the legs more, focus on shooting them straight behind you as you extend into the plank pose again, squeezing your glutes at the same time. Try not to drop your hips or send your butt skyward, as you want to maintain a strong and straight position. Essentially, your body should stay still and stable while your legs bend and extend.
Pilates classes typically adopt an endurance strategy, which means high reps and overall volume during classes. If you perform this in a studio under the instruction of a qualified Pilates teacher, you could be here for far longer than 8 to 12 reps. As you breathe, try to expand your breath outward and sideways into your ribcage, helping to engage your core and diaphragm as you move.
Since taking up Pilates, I have seen a lot more of this move, and much less of the ol' crunches and sit-ups, and I'm not sad about it. These types of exercises, like most Pilates moves, teach stability and controlled movement, which will build a strong, stable core that can support your back and resist injury.

Follow Tom's Guide on Google News and add us as a preferred source to get our up-to-date news, analysis, and reviews in your feeds.
More from Tom’s Guide
- My dad is 72, and these are the 3 strengthening exercises I use to build his strong core and improve balance
- 5 compound core exercises that sculpt strong obliques
- Who needs running? These 5 compound exercises burn fat and build muscle after 50