How to rename multiple files on Mac
Learn how to rename multiple files on Mac so you don't have to change each one individually

Here at Tom’s Guide our expert editors are committed to bringing you the best news, reviews and guides to help you stay informed and ahead of the curve!
You are now subscribed
Your newsletter sign-up was successful
Want to add more newsletters?

Daily (Mon-Sun)
Tom's Guide Daily
Sign up to get the latest updates on all of your favorite content! From cutting-edge tech news and the hottest streaming buzz to unbeatable deals on the best products and in-depth reviews, we’ve got you covered.

Weekly on Thursday
Tom's AI Guide
Be AI savvy with your weekly newsletter summing up all the biggest AI news you need to know. Plus, analysis from our AI editor and tips on how to use the latest AI tools!

Weekly on Friday
Tom's iGuide
Unlock the vast world of Apple news straight to your inbox. With coverage on everything from exciting product launches to essential software updates, this is your go-to source for the latest updates on all the best Apple content.

Weekly on Monday
Tom's Streaming Guide
Our weekly newsletter is expertly crafted to immerse you in the world of streaming. Stay updated on the latest releases and our top recommendations across your favorite streaming platforms.
Join the club
Get full access to premium articles, exclusive features and a growing list of member rewards.
So you want to know how to rename multiple files on Mac? Well, we know why — you want to make life easier for yourself. After all, renaming files on an individual basis is time-consuming, cumbersome and prone to errors.
Luckily, Apple is aware of that, which is why it ensures your Mac includes a feature built into the Finder app that does the hard work for you in just a few seconds.
Here we explore the different ways you may want to rename a file. In some cases, you will want to add text to an existing filename, in other cases, you want to replace text entirely.
You can also create a fresh format for your files by entering a name and having the Mac automatically order or date each one. Whichever system you choose you've come to the right place — so let's look at how to rename multiple files on Mac.
How to rename multiple files on Mac
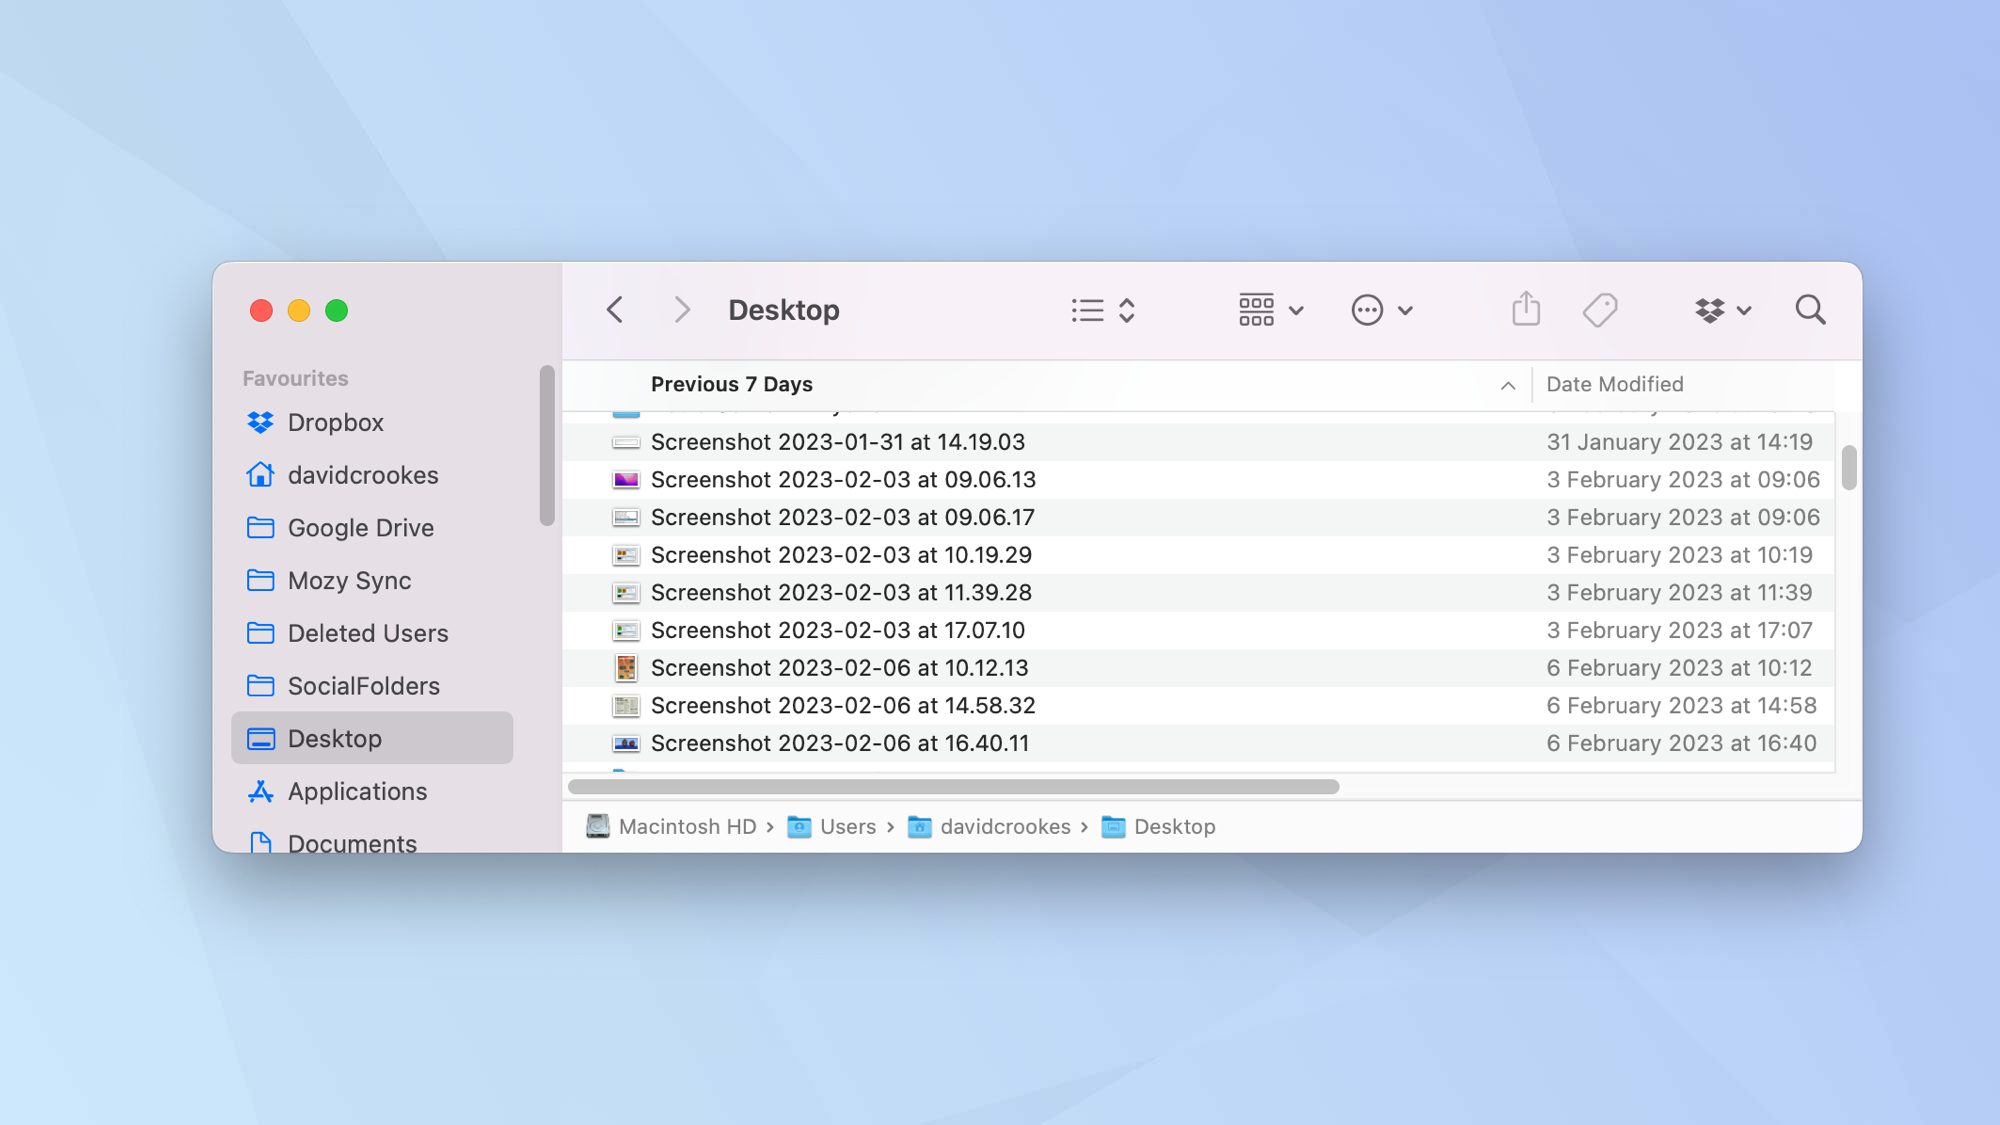
1. First of all, find a bunch of files that you want to rename in the Finder app.
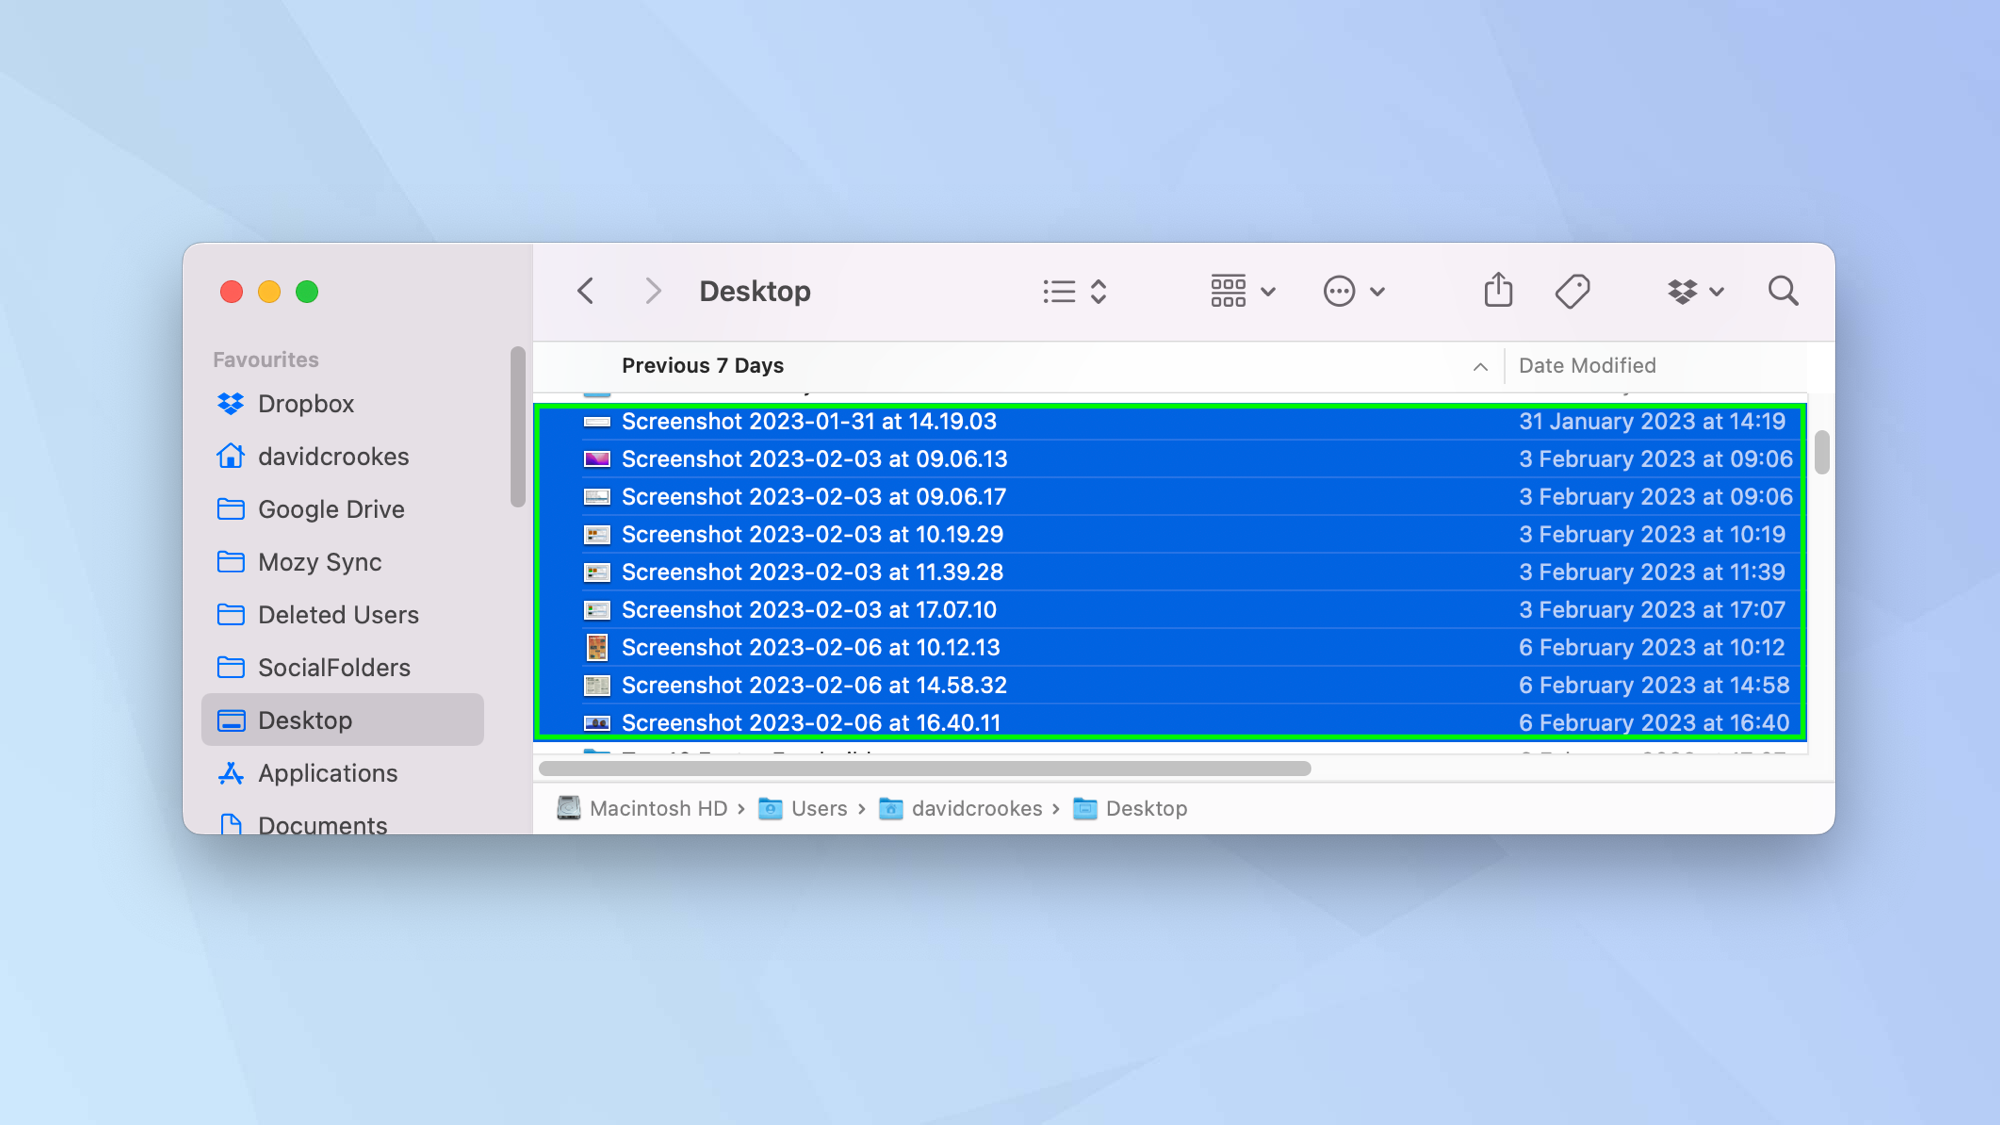
2. Next, select the files that you want to work with. Discover how to select multiple files if you are not sure of the method.
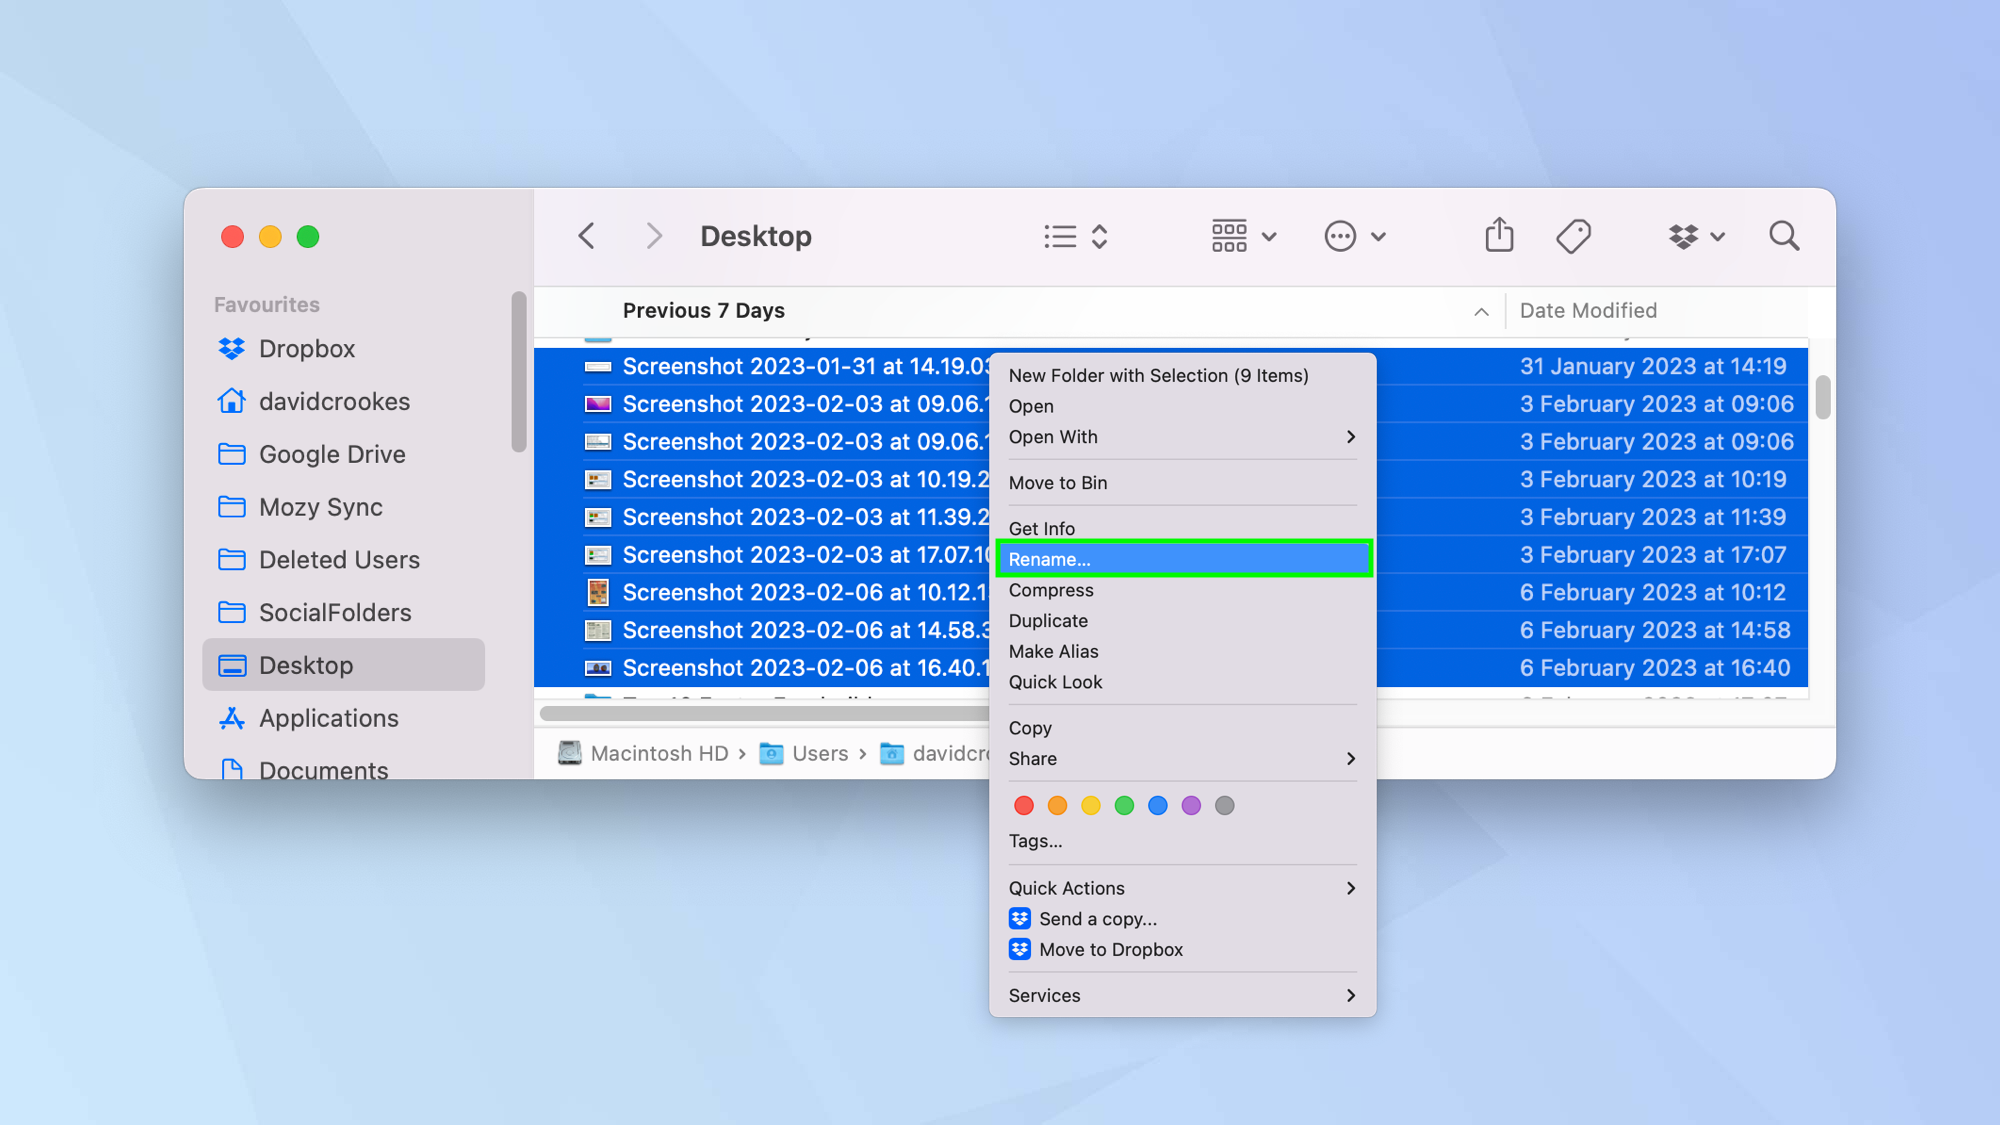
3. Right-click on one of the selected files. Again, if you're not sure, find out how to right-click on Mac. Once you've done this, select Rename.
Get instant access to breaking news, the hottest reviews, great deals and helpful tips.
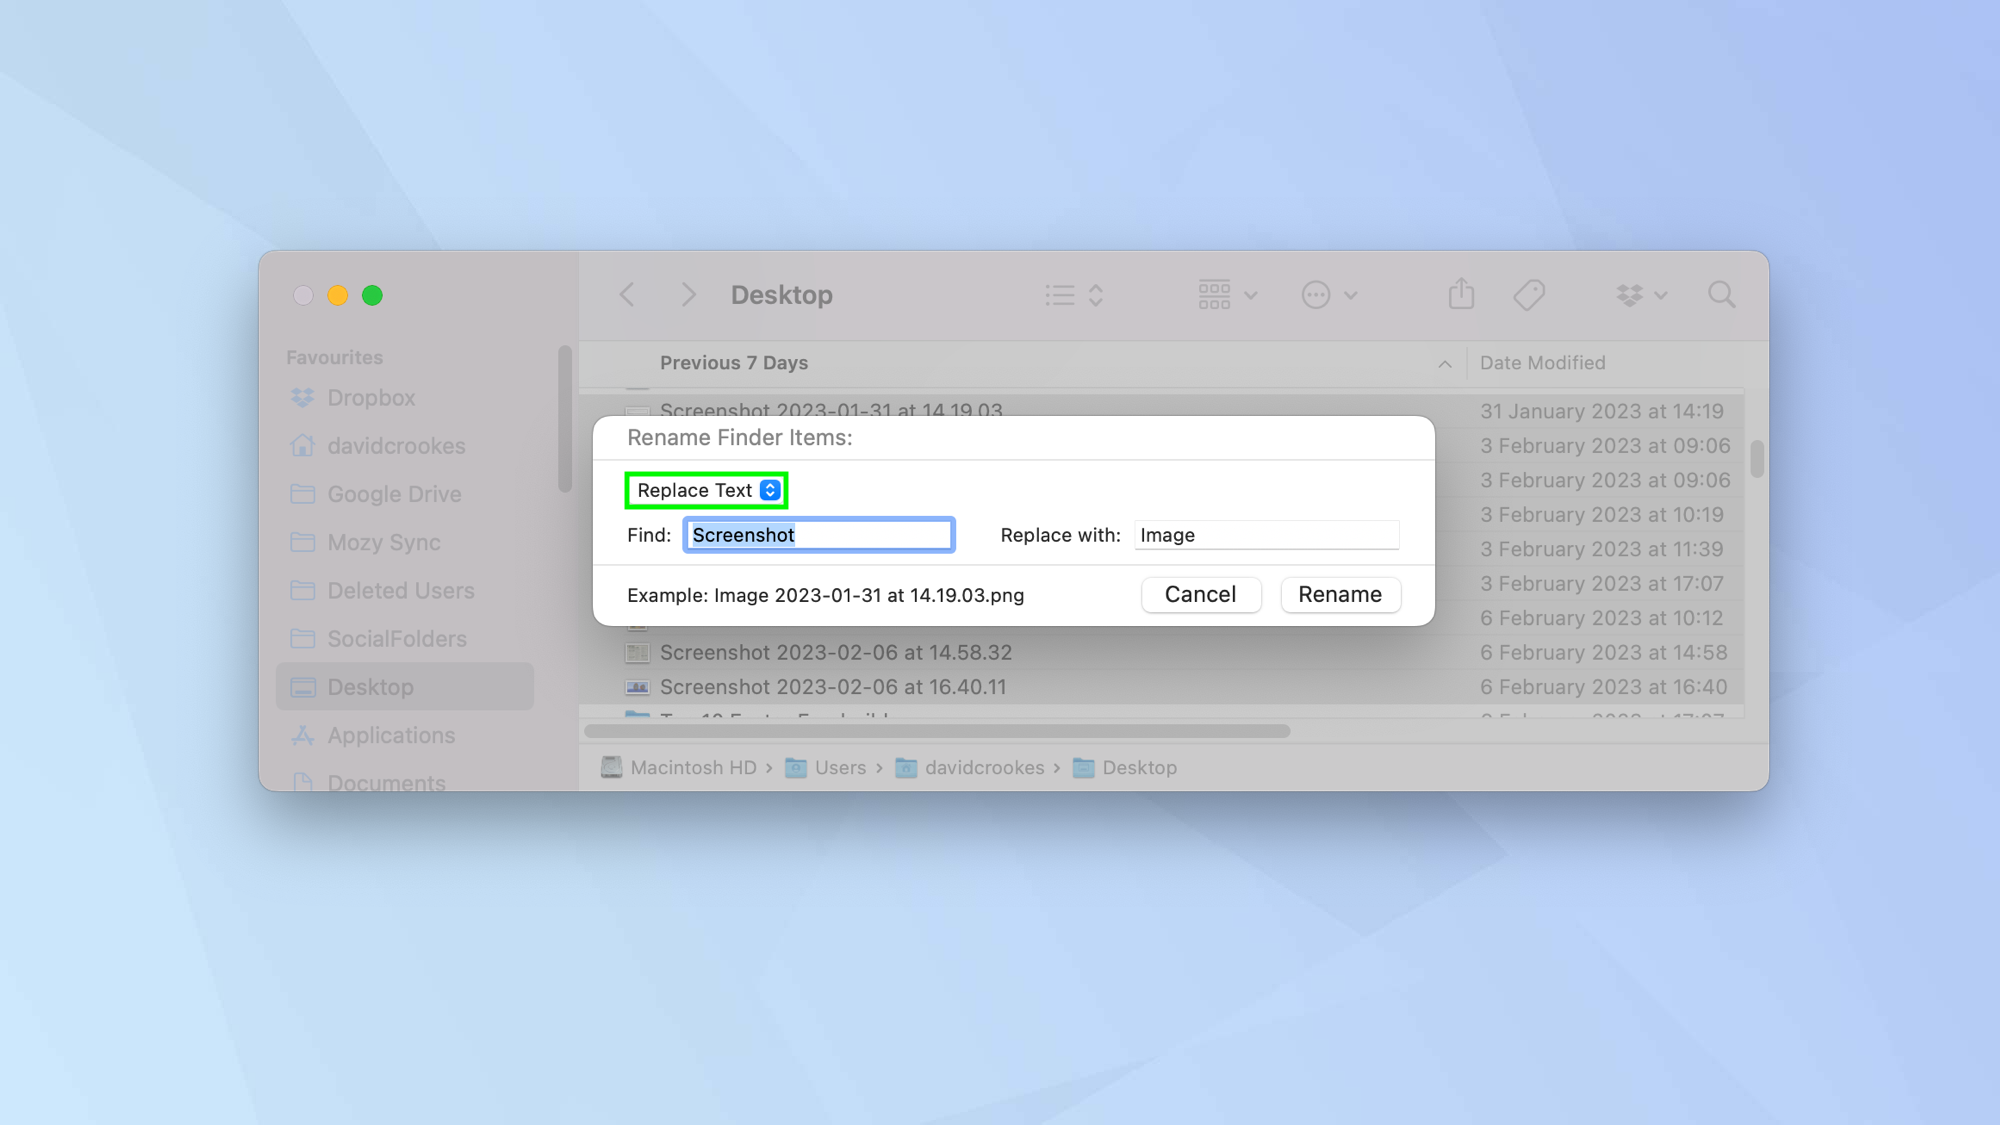
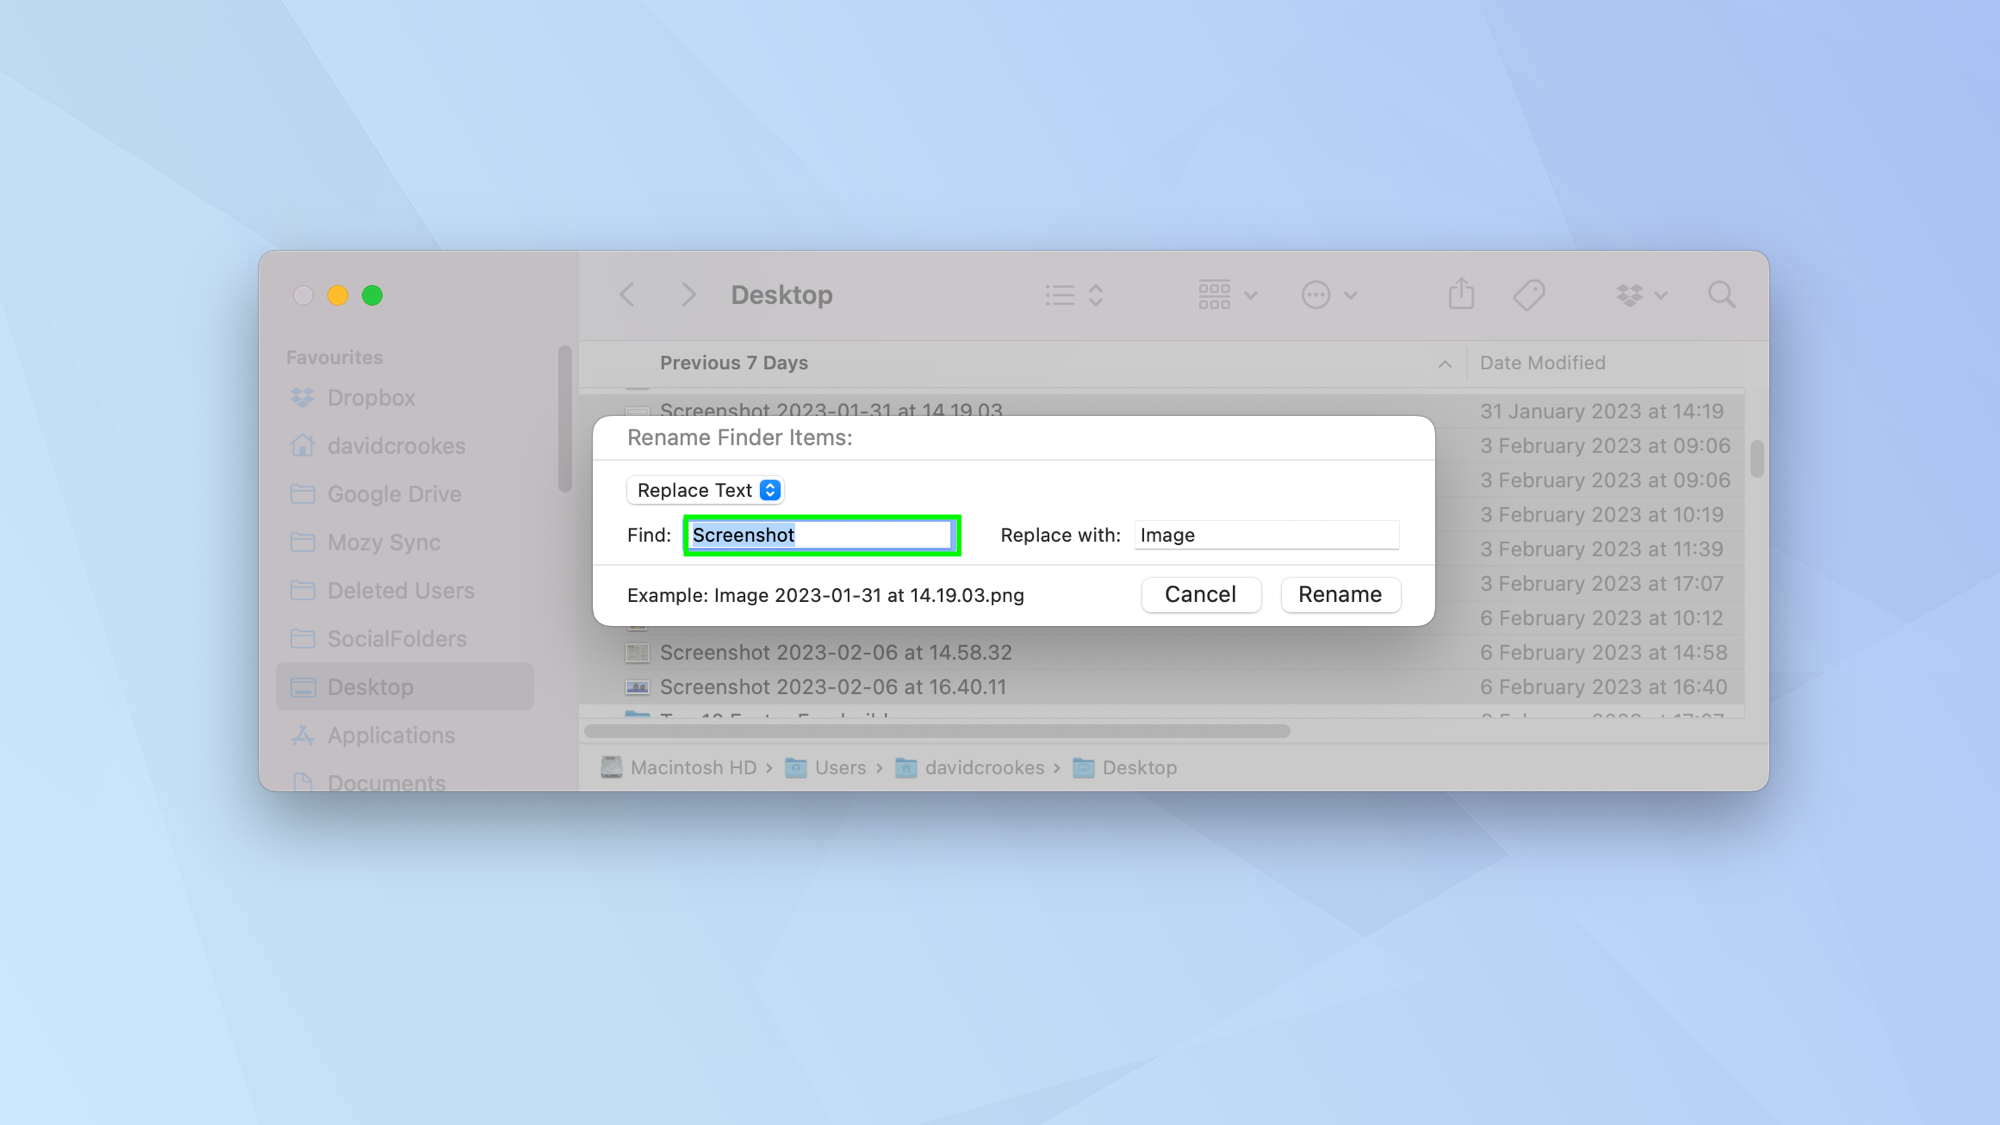
4. You have a few options at your fingertips. First, you can replace text.
To do this, click the drop-down menu and select Replace Text.
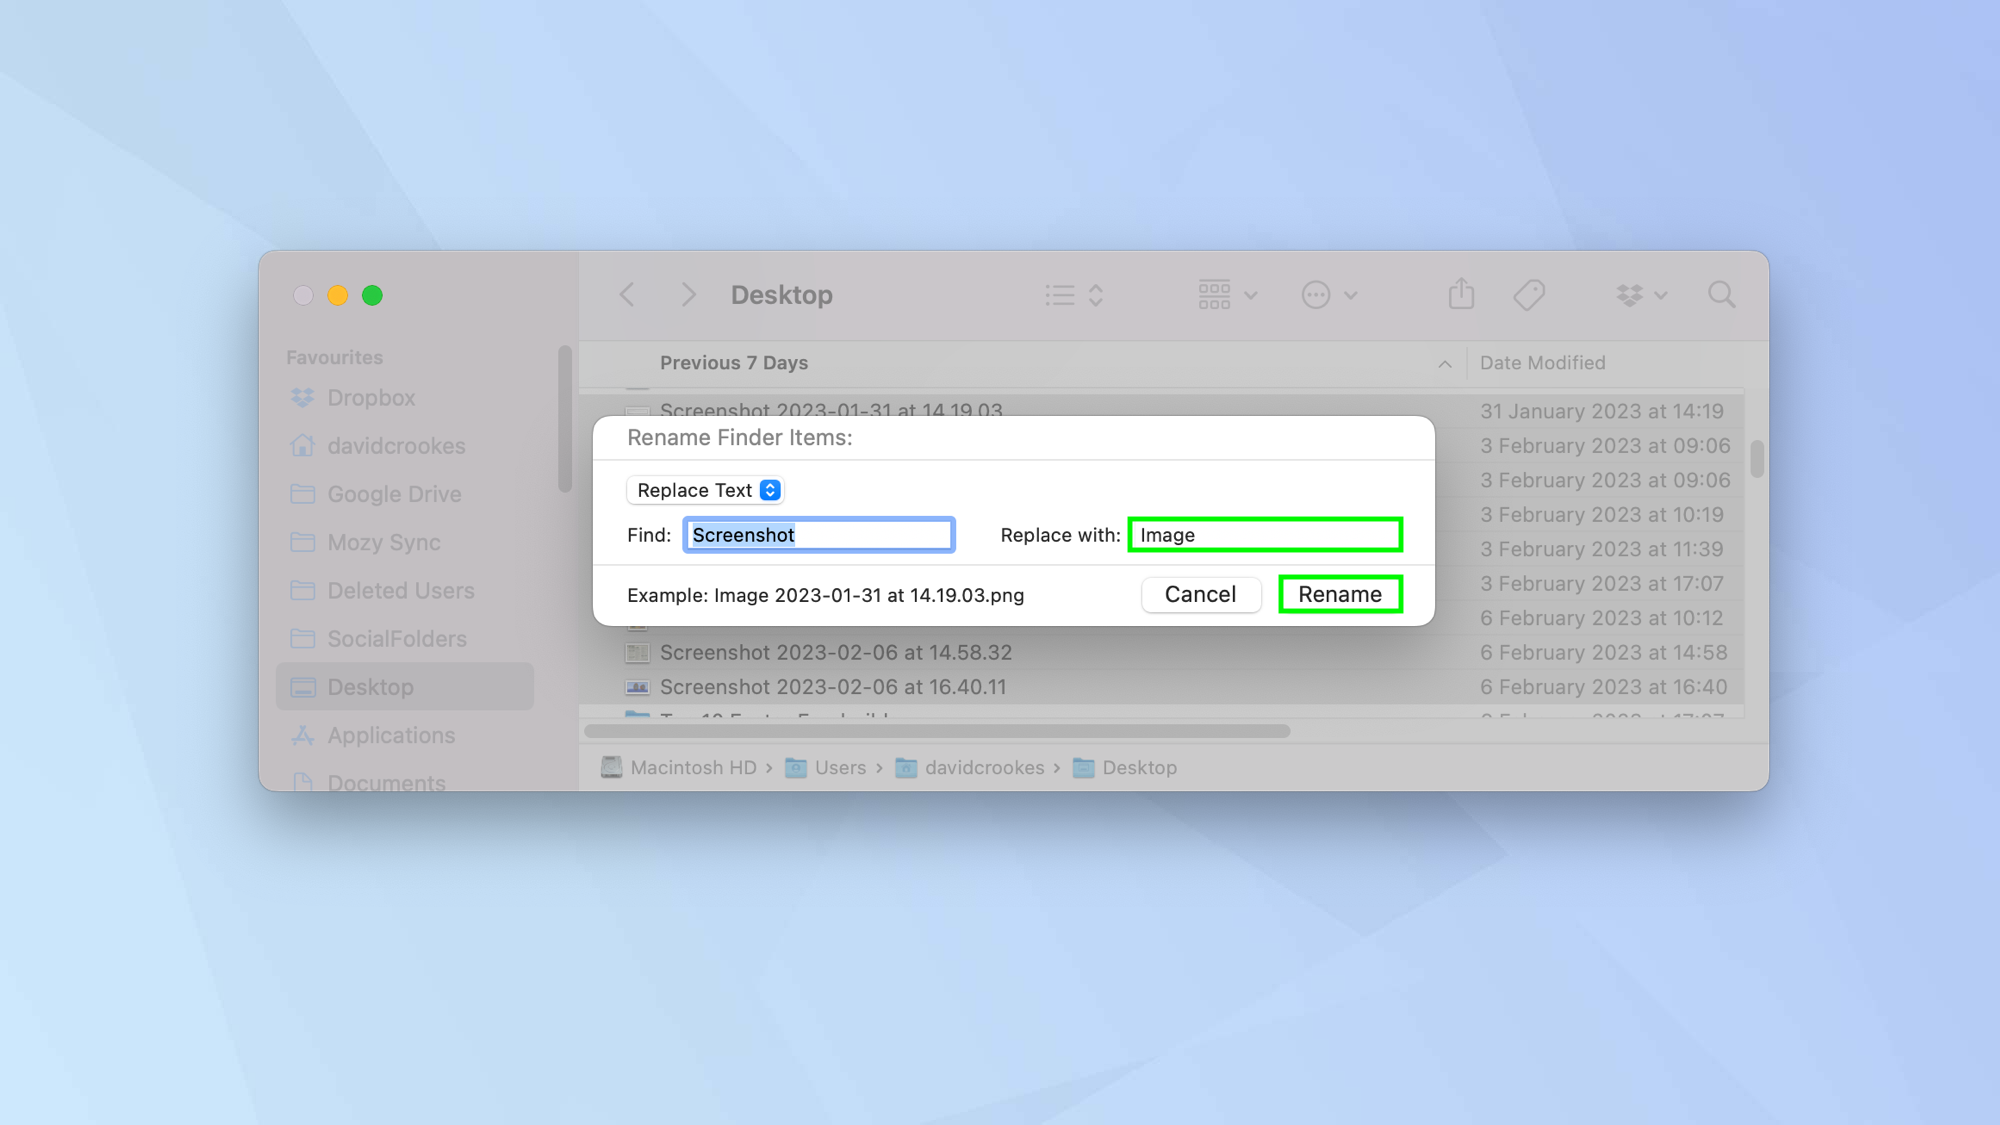
Then, enter the text you want to remove in the Find field (for example, if you may have taken a bunch of screenshots, these will have Screenshot in their name so you can enter that).
You can now enter the replacement text in the Replace With field. Click Rename when you're done.
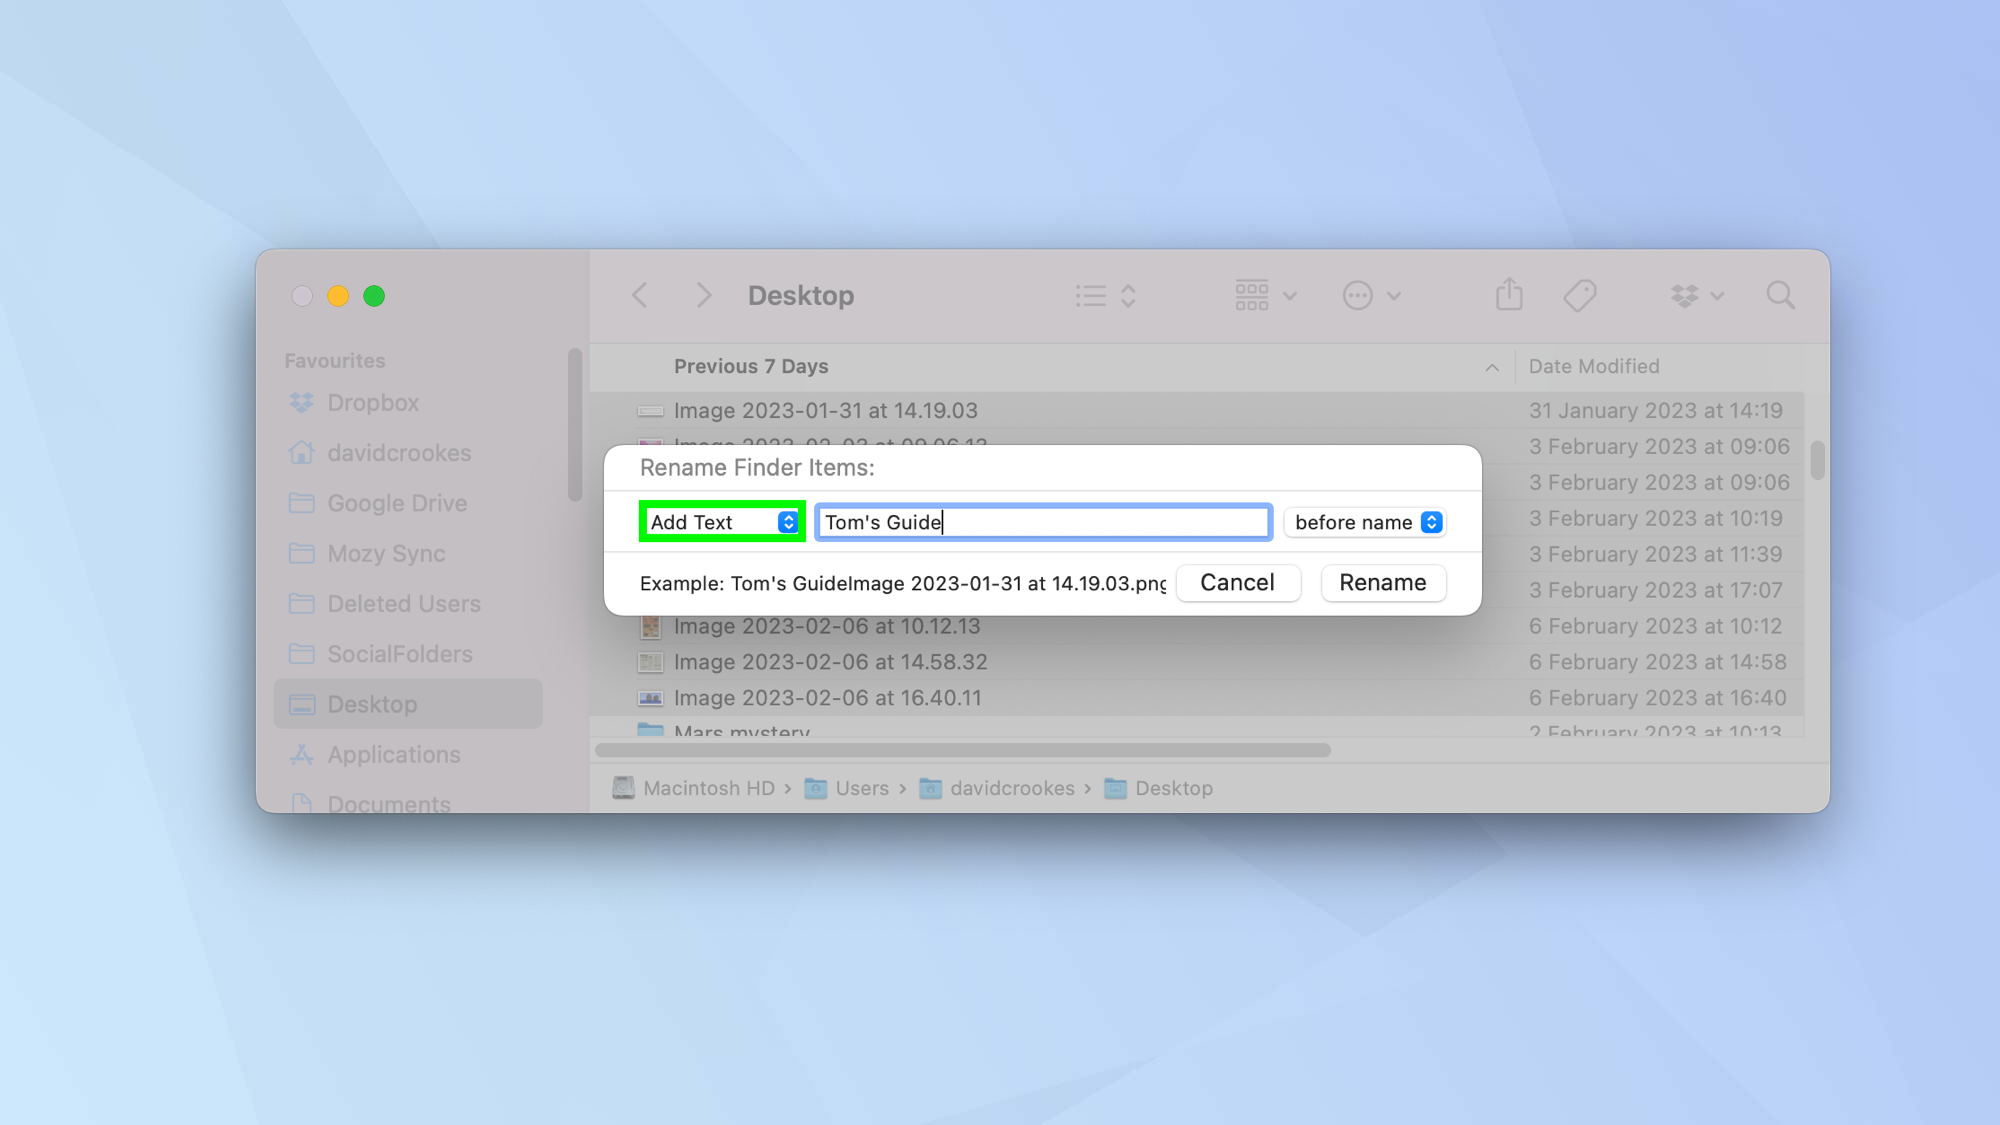
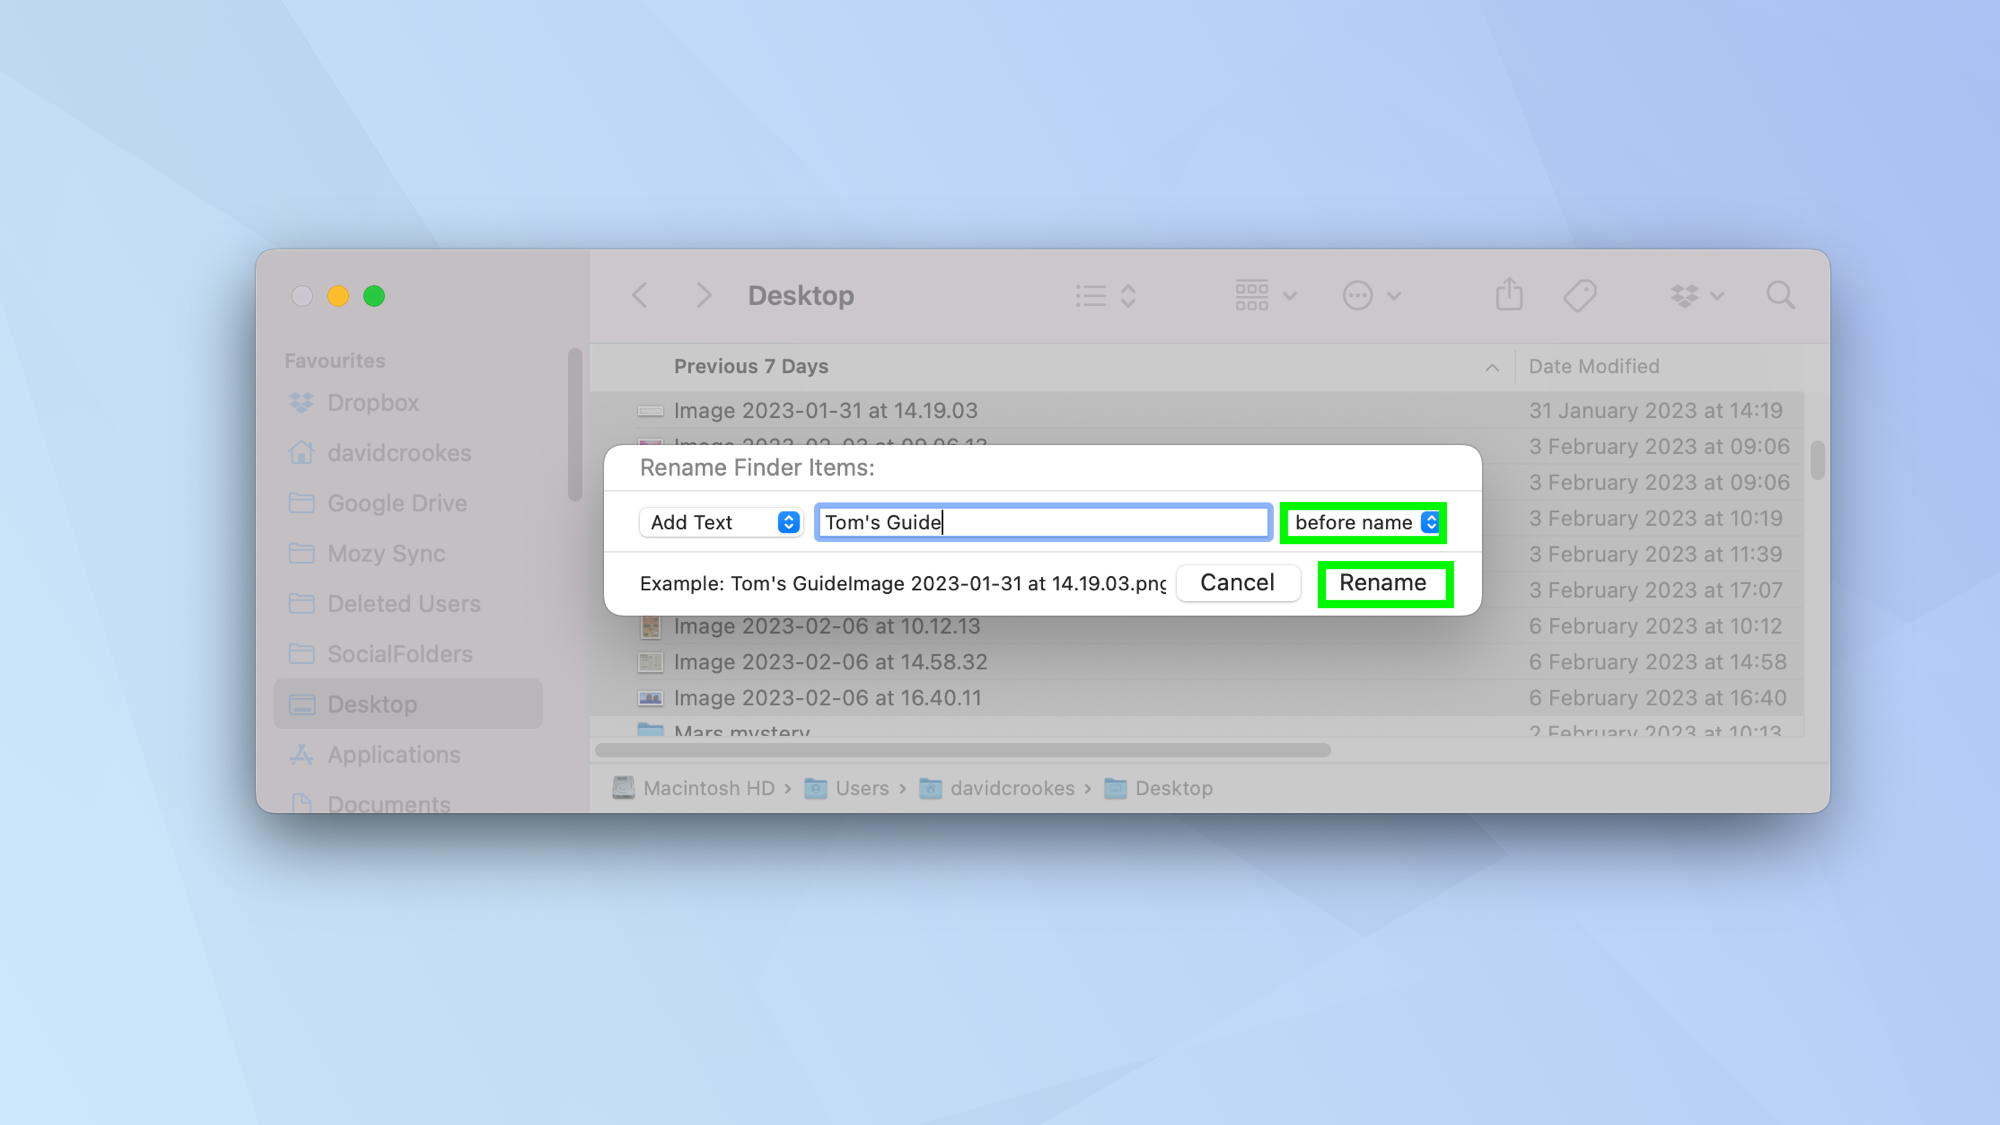
5. If you want to add text to a bunch of filenames, select Add Text from the drop-down menu.
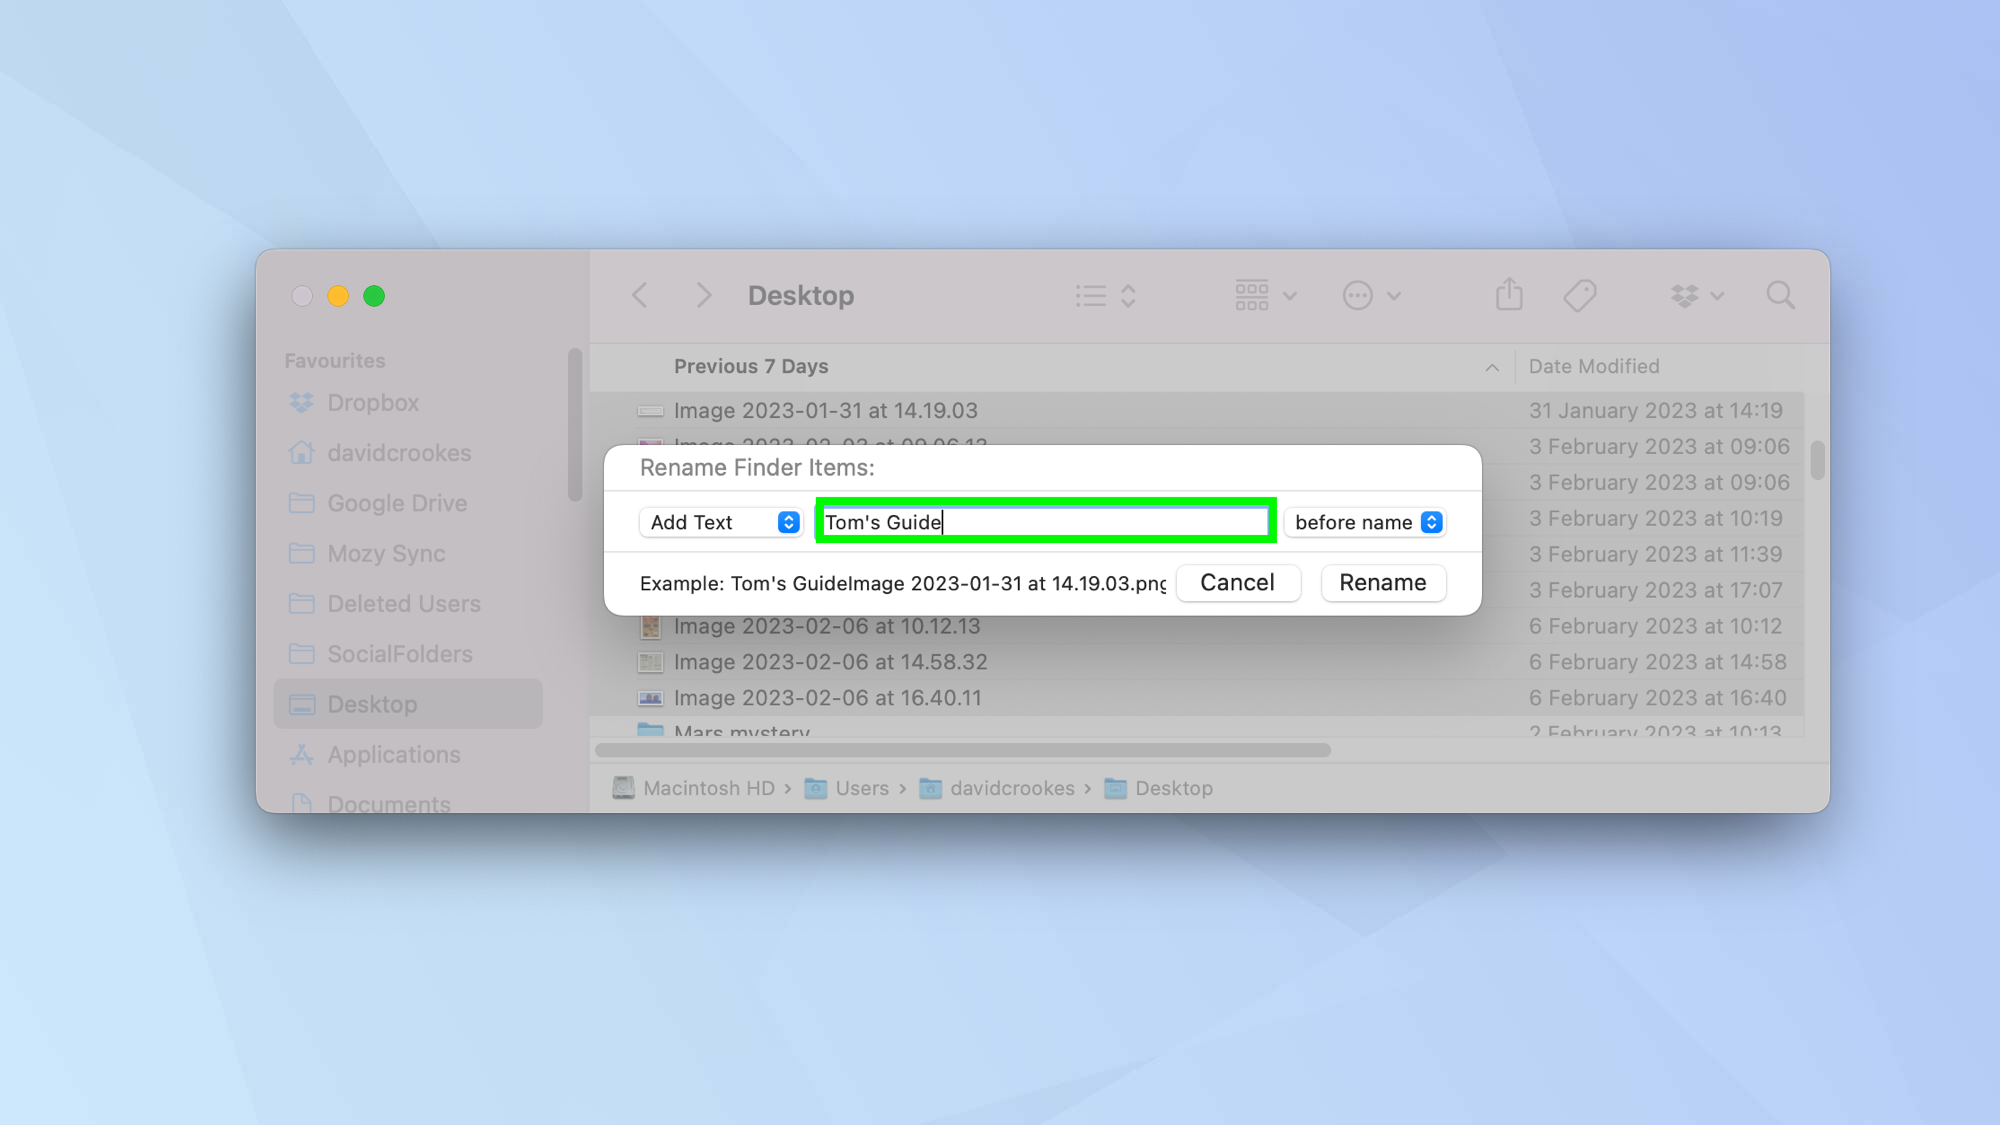
6. Now, enter the text that you want to include in all of those filenames (for example, we want "Tom's Guide" to appear in every name).
7. Next, indicate whether you want the text to be added before the current filename or after. To do this, click the drop-down menu and select before name or select after name.
Click Rename when you're done.
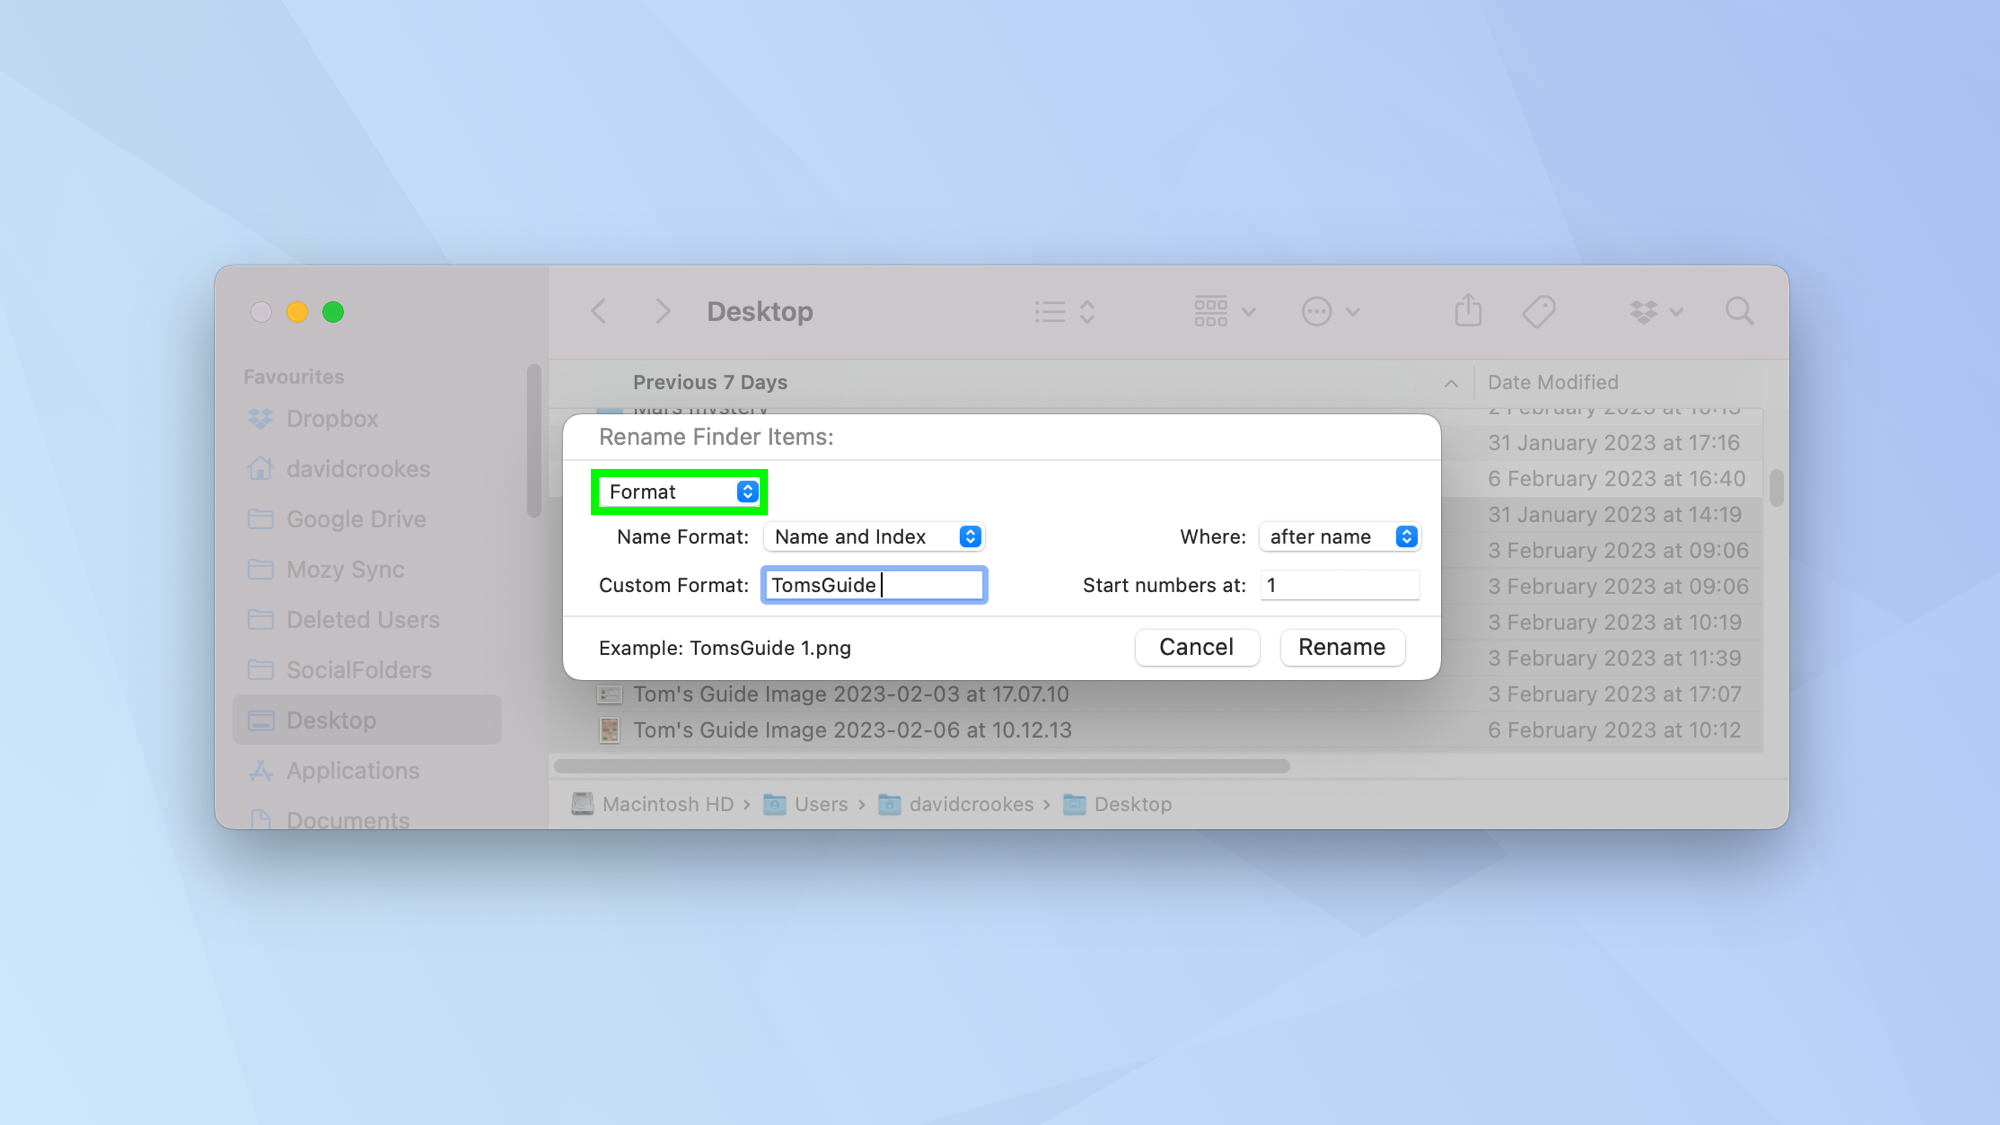
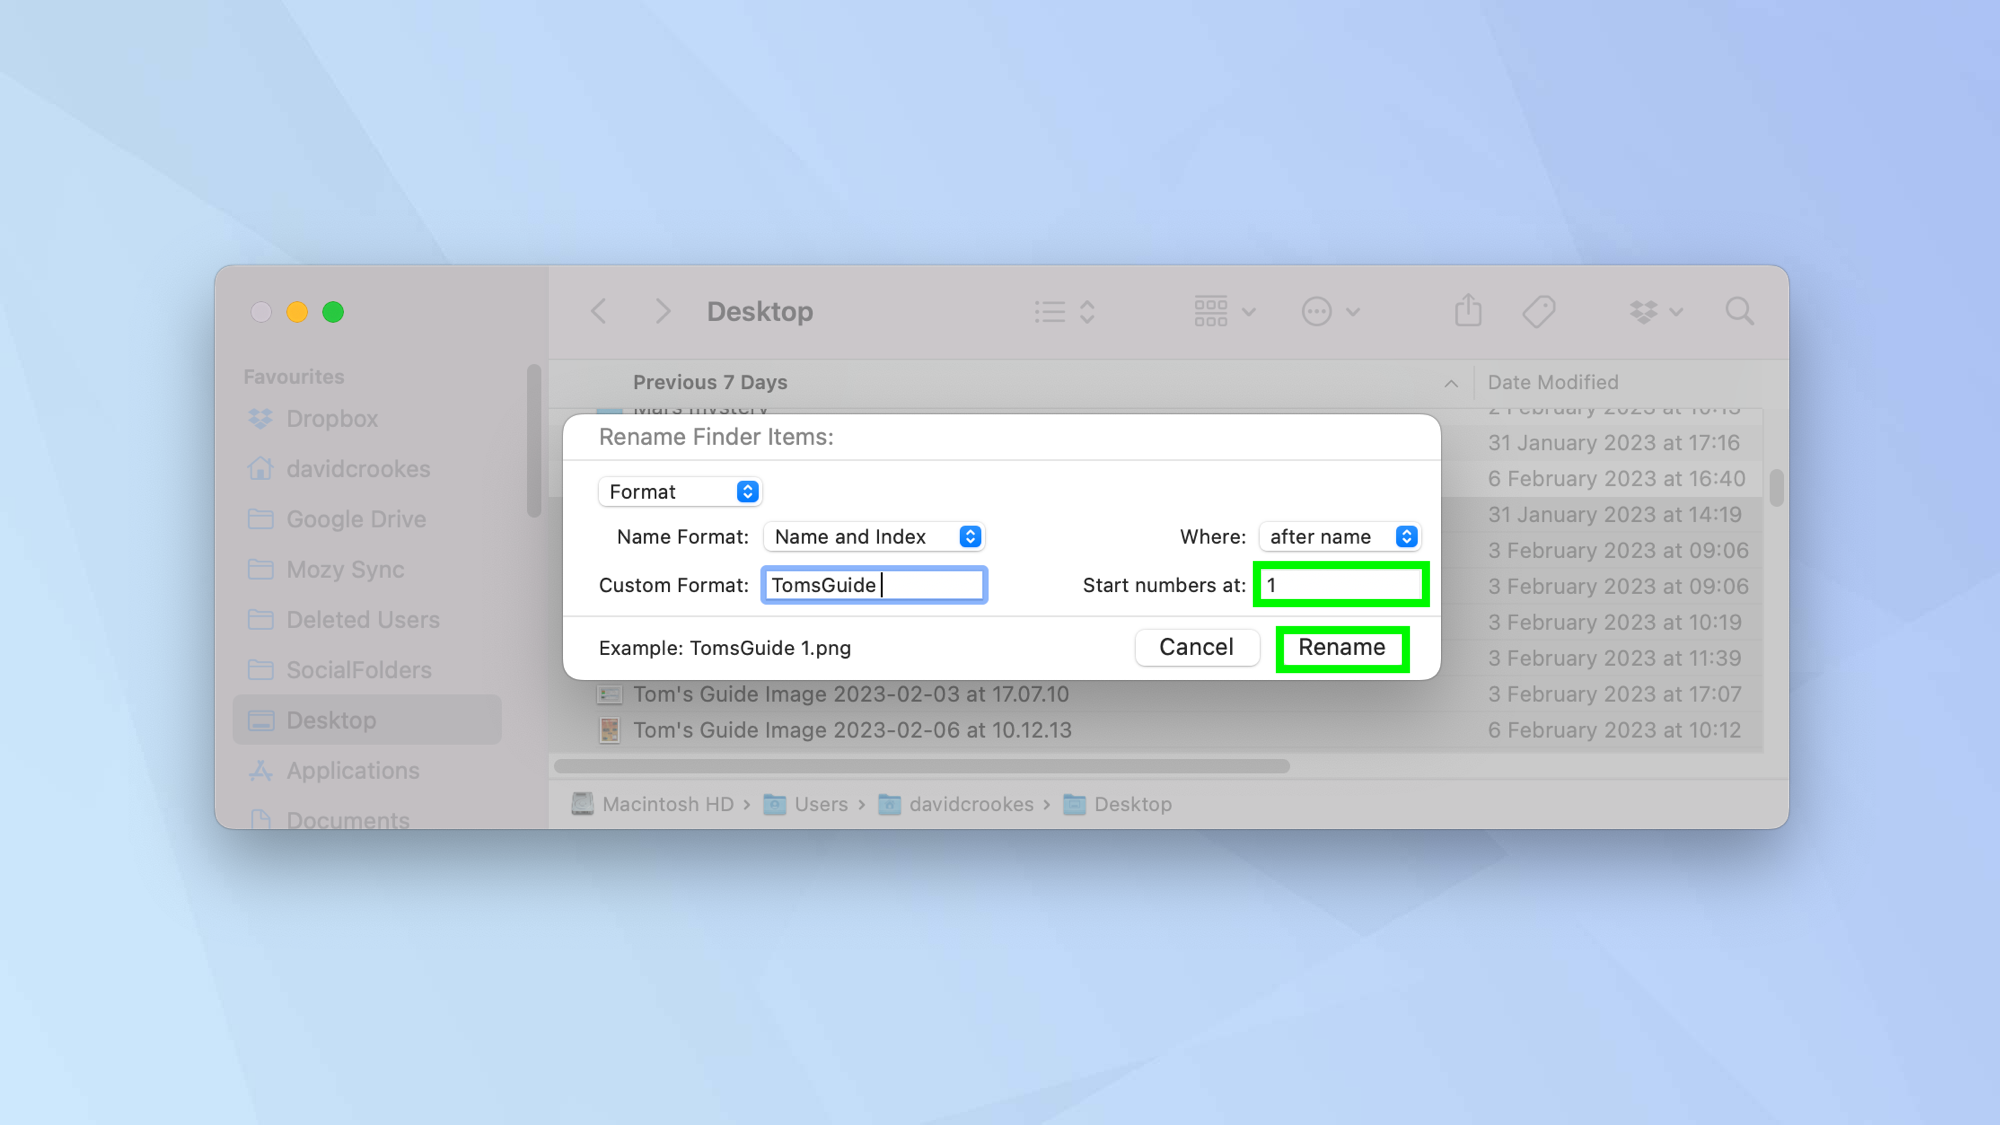
8. You can also use a specific name format for your files. Select Format from the drop-down menu.
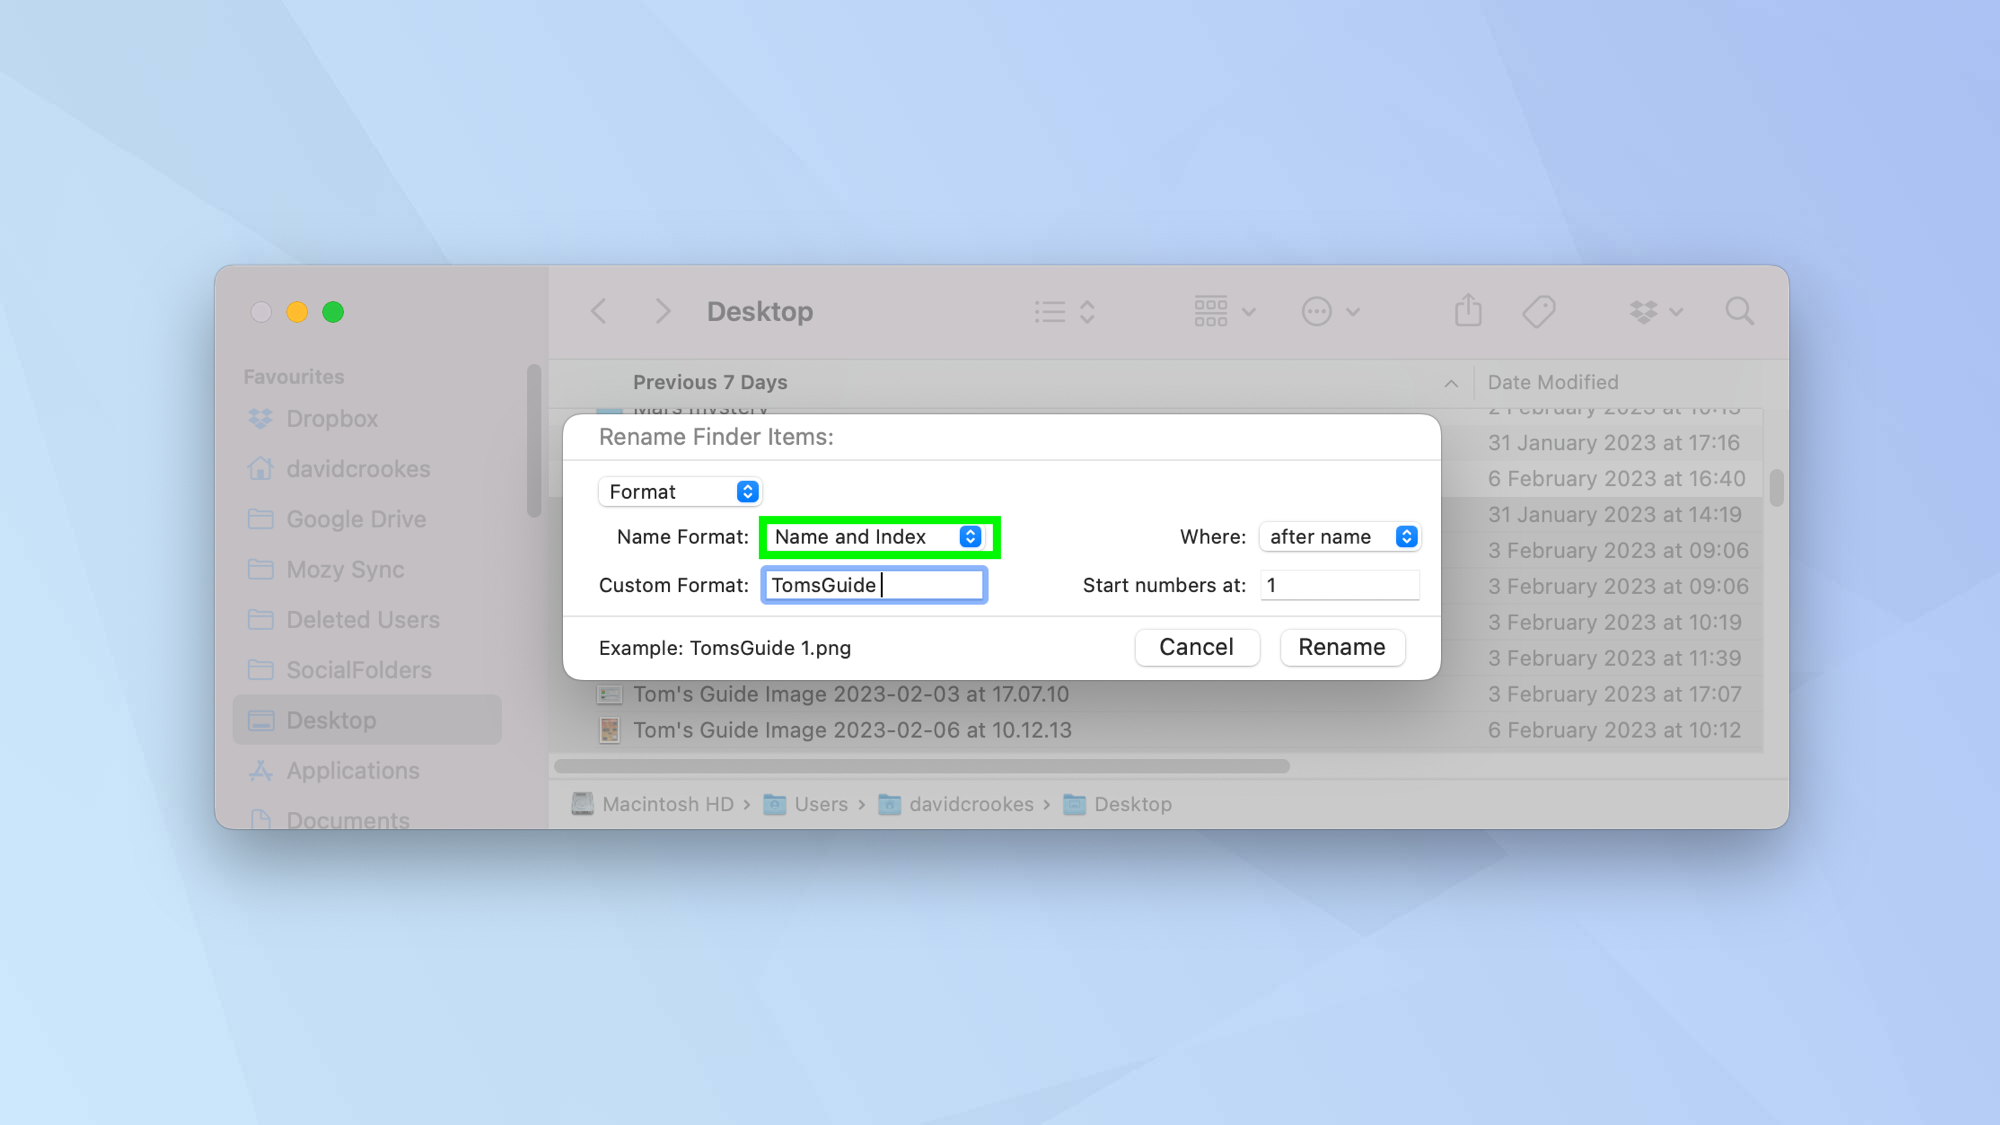
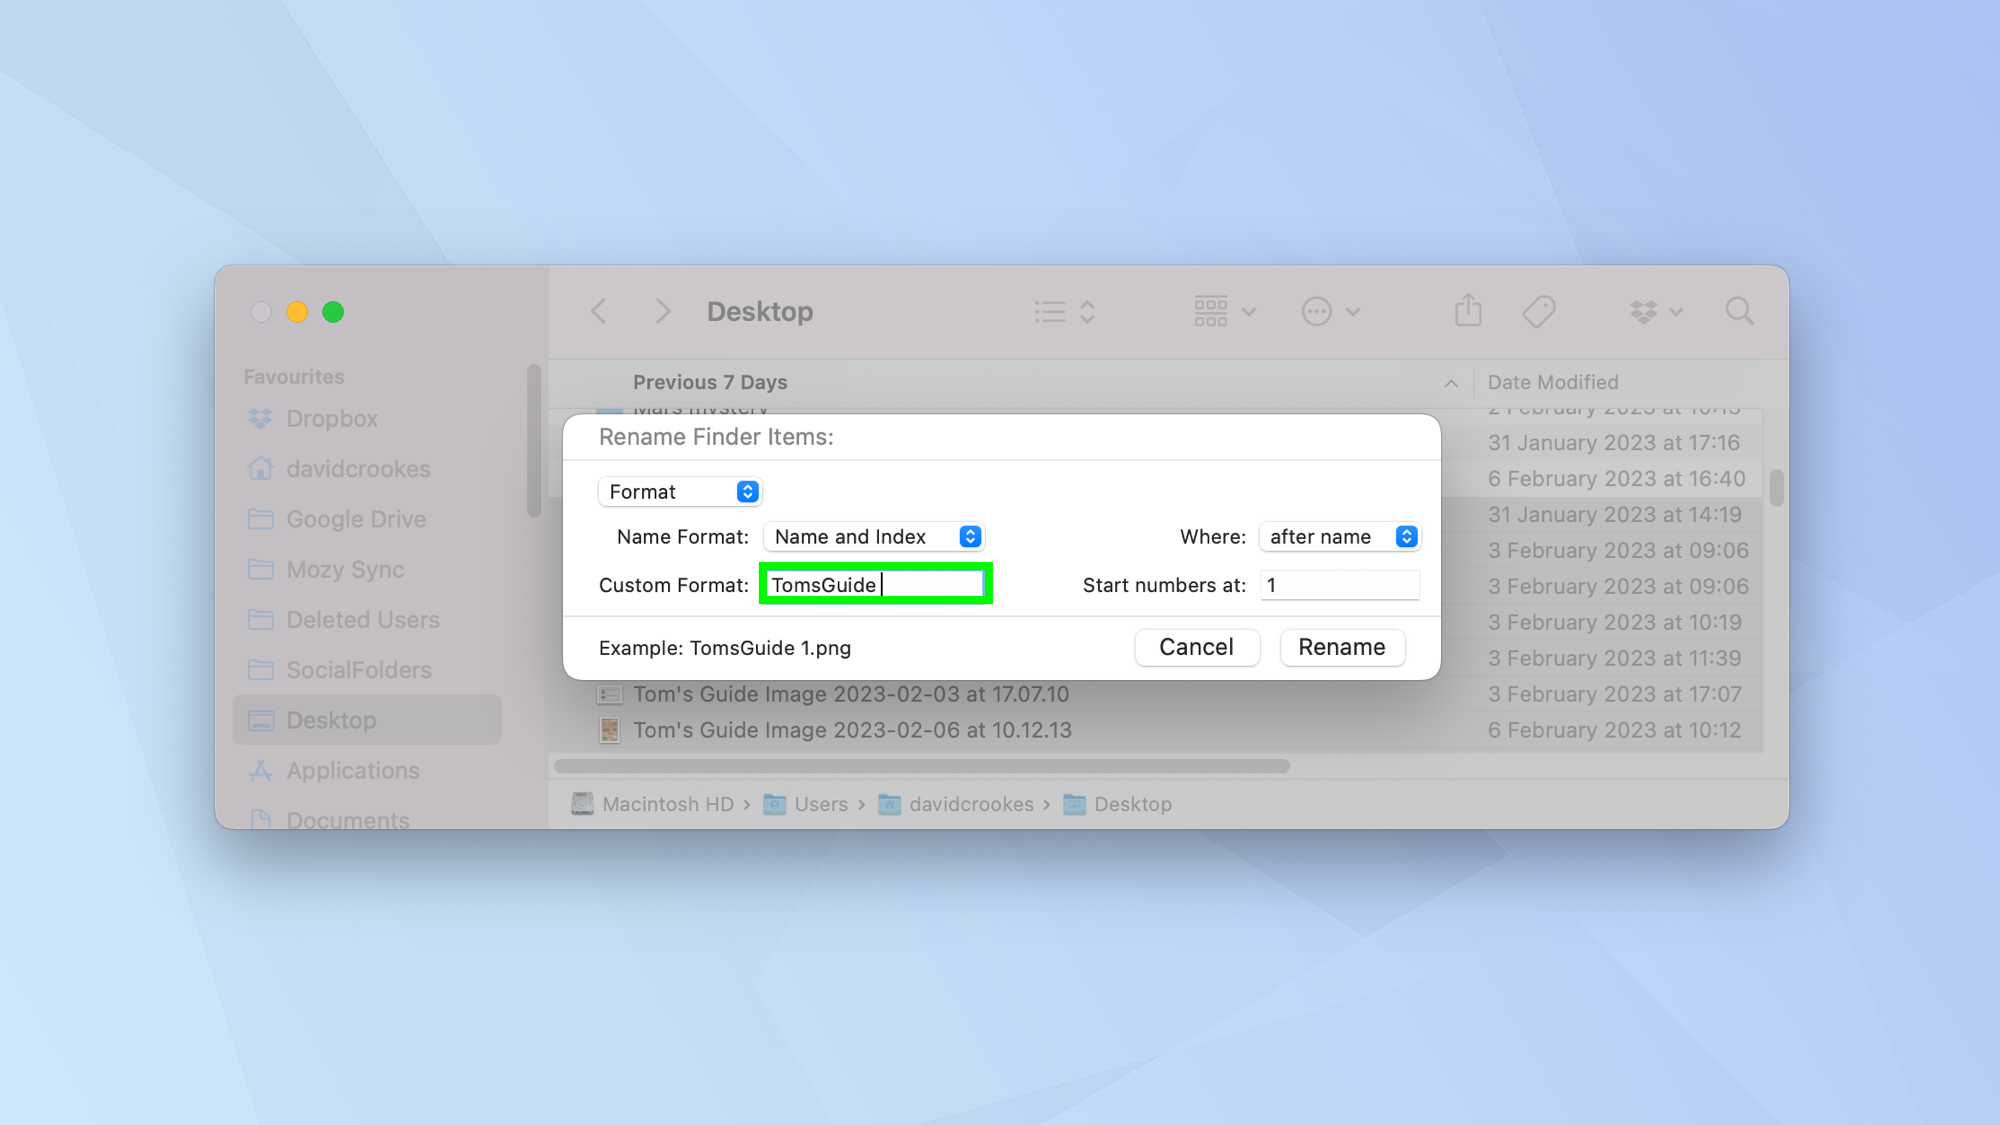
9. For example, you may want all of your screenshots to relate to one project so you could enter a single name (for example, TomsGuide) and then use a number, counter or date to distinguish between each one (so TomsGuide 1, TomsGuide 2 and so on).
Use the drop-down menu and select the name format. You can choose between Name and Index, Name and Counter or Name and Date.
10. Add the filename you want to use in the custom format field.
11. If you select number or counter, you can indicate the number you want to start with. If you choose date, this will be automatically added depending on when the file was saved.
Click Rename when you're done.
And there you go. You now know how to rename multiple files on Mac.
Before you go, why now learn how to quickly convert image files on Mac which is great if you want to change a JPG to a PNG. You can also learn how to encrypt files on Mac and figure how to password protect a folder on Mac. It's also worth knowing how to zip a file or folder.
Next up: customize which apps open which file types with how to set default apps on Mac.

David Crookes is a freelance writer, reporter, editor and author. He has written for technology and gaming magazines including Retro Gamer, Web User, Micro Mart, MagPi, Android, iCreate, Total PC Gaming, T3 and Macworld. He has also covered crime, history, politics, education, health, sport, film, music and more, and been a producer for BBC Radio 5 Live.
 Club Benefits


