How to make a website with the HostGator website builder
Build a website in minutes with HostGator's builder
Here at Tom’s Guide our expert editors are committed to bringing you the best news, reviews and guides to help you stay informed and ahead of the curve!
You are now subscribed
Your newsletter sign-up was successful
Want to add more newsletters?

Daily (Mon-Sun)
Tom's Guide Daily
Sign up to get the latest updates on all of your favorite content! From cutting-edge tech news and the hottest streaming buzz to unbeatable deals on the best products and in-depth reviews, we’ve got you covered.

Weekly on Thursday
Tom's AI Guide
Be AI savvy with your weekly newsletter summing up all the biggest AI news you need to know. Plus, analysis from our AI editor and tips on how to use the latest AI tools!

Weekly on Friday
Tom's iGuide
Unlock the vast world of Apple news straight to your inbox. With coverage on everything from exciting product launches to essential software updates, this is your go-to source for the latest updates on all the best Apple content.

Weekly on Monday
Tom's Streaming Guide
Our weekly newsletter is expertly crafted to immerse you in the world of streaming. Stay updated on the latest releases and our top recommendations across your favorite streaming platforms.
Join the club
Get full access to premium articles, exclusive features and a growing list of member rewards.
Building a website from scratch can be an overwhelming task, especially for those with close to zero knowledge of coding and web design. While engaging a web designer is an option, it’s not necessarily the most budget-friendly choice for creating a professional-looking website.
Thankfully, the best website builders out there can help any novice build a site with just a few button clicks, and many of these are also included with the best web hosting services. One of these is HostGator, and if you’re ready to take advantage of the popular Gator Website Builder’s design flexibility and beginner-friendly interface, here’s a step-by-step guide on how to make a website with the HostGator website builder, with tips to help you build and customize your ideal site.
Step 1: Visit HostGator’s website
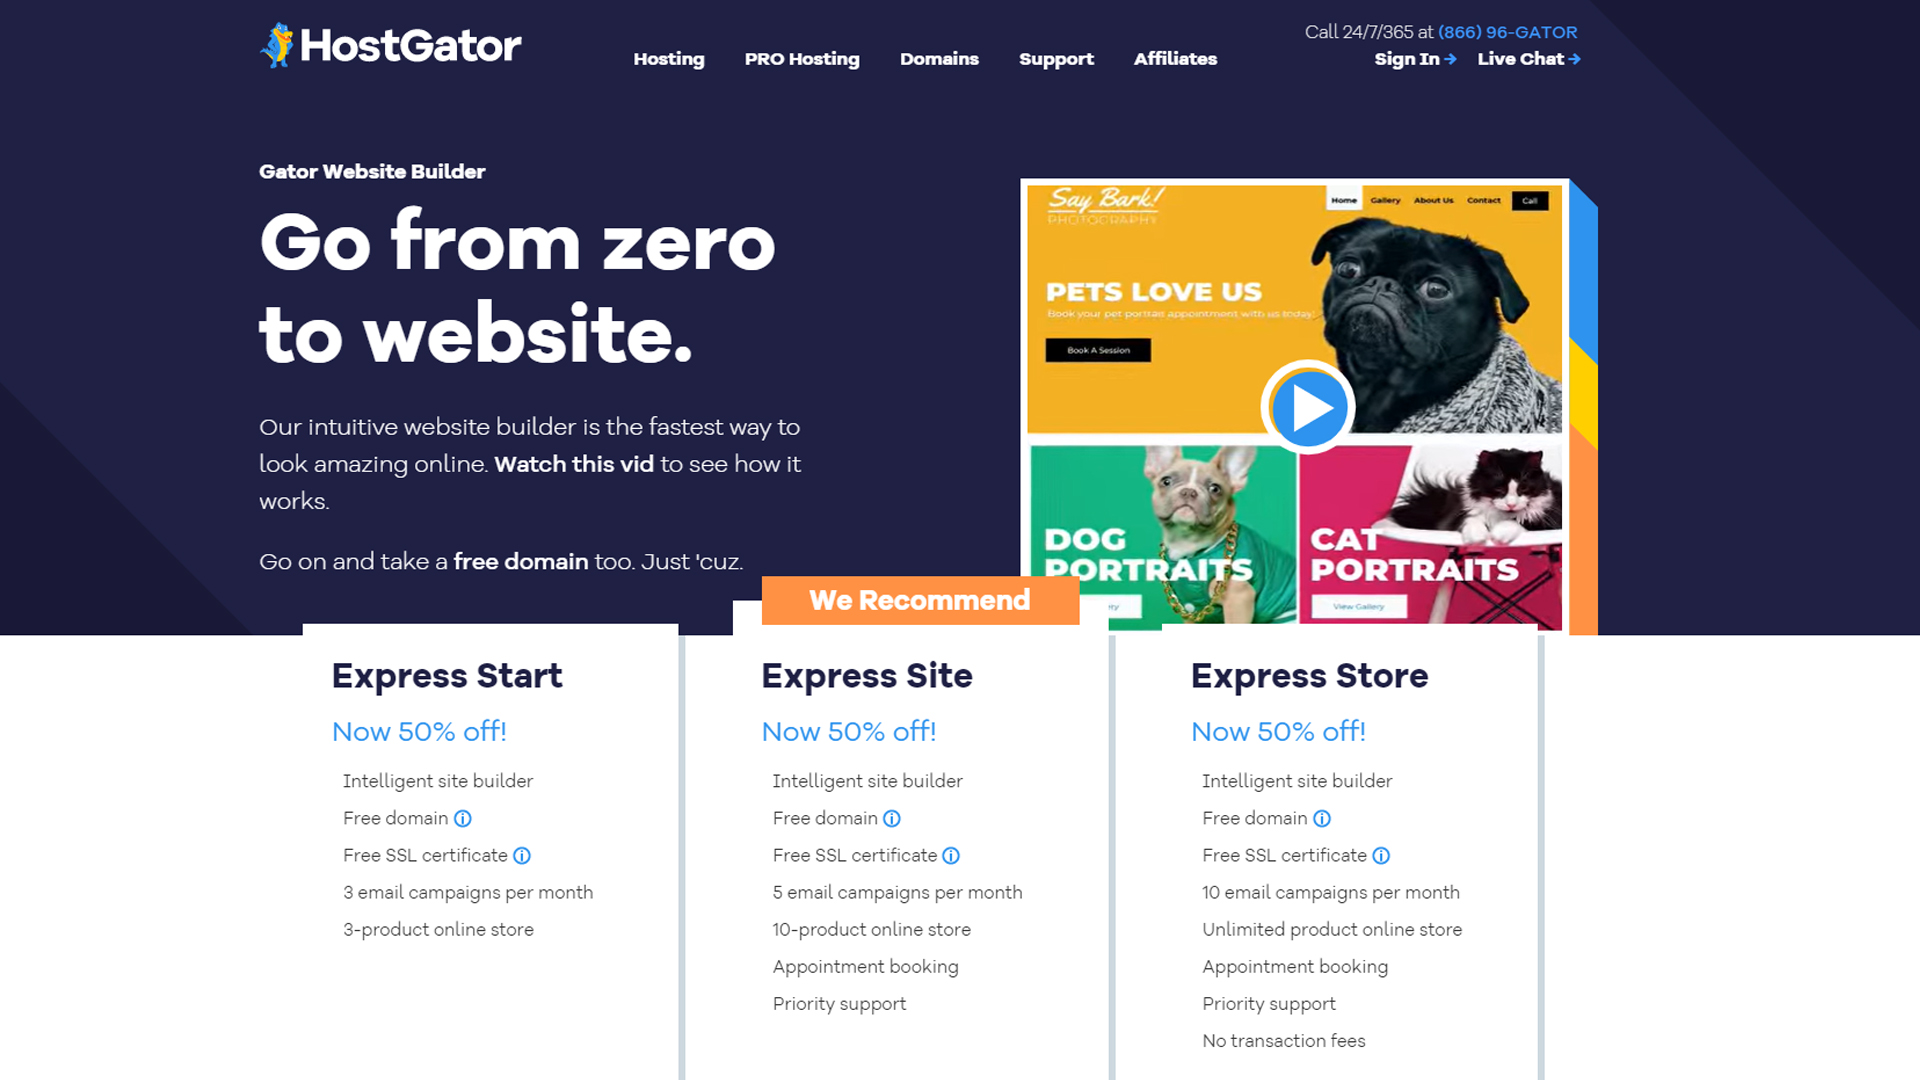
When you’re on HostGator’s main page, hover your cursor over the "Hosting" option in the top panel. From the drop-down menu, select "Website Builder". You’ll then be redirected to HostGator’s pricing plan page, where you can browse through its various website builder subscription options. At a glance, you’ll easily be able to compare the cost and features of each plan on offer.
Step 2: Select a pricing plan
HostGator offers three different plans—Start, Site, or Store. All three come with a free domain and SSL (Secure Sockets Layer) certificate. At $3.94 a month, HostGator’s basic Start plan is great for beginners, with simple features such as access to the Unsplash image library, email marketing, marketing tools, and basic ecommerce capabilities. The Start plan also comes with a powerful AI-based website builder.
HostGator’s Site ($5.99 a month) and Store ($9.22 a month) plans come with all of the above and more. With the former, you get extra appointment-booking features. The latter is designed specifically for ecommerce store users, and includes enhanced features such as unlimited product listings and advanced shipping management. These two plans also offer priority support.
Once you’ve decided which plan is right for you, click "Buy Now" to be directed to the next step.
Step 3: Choose a domain name or connect an existing domain
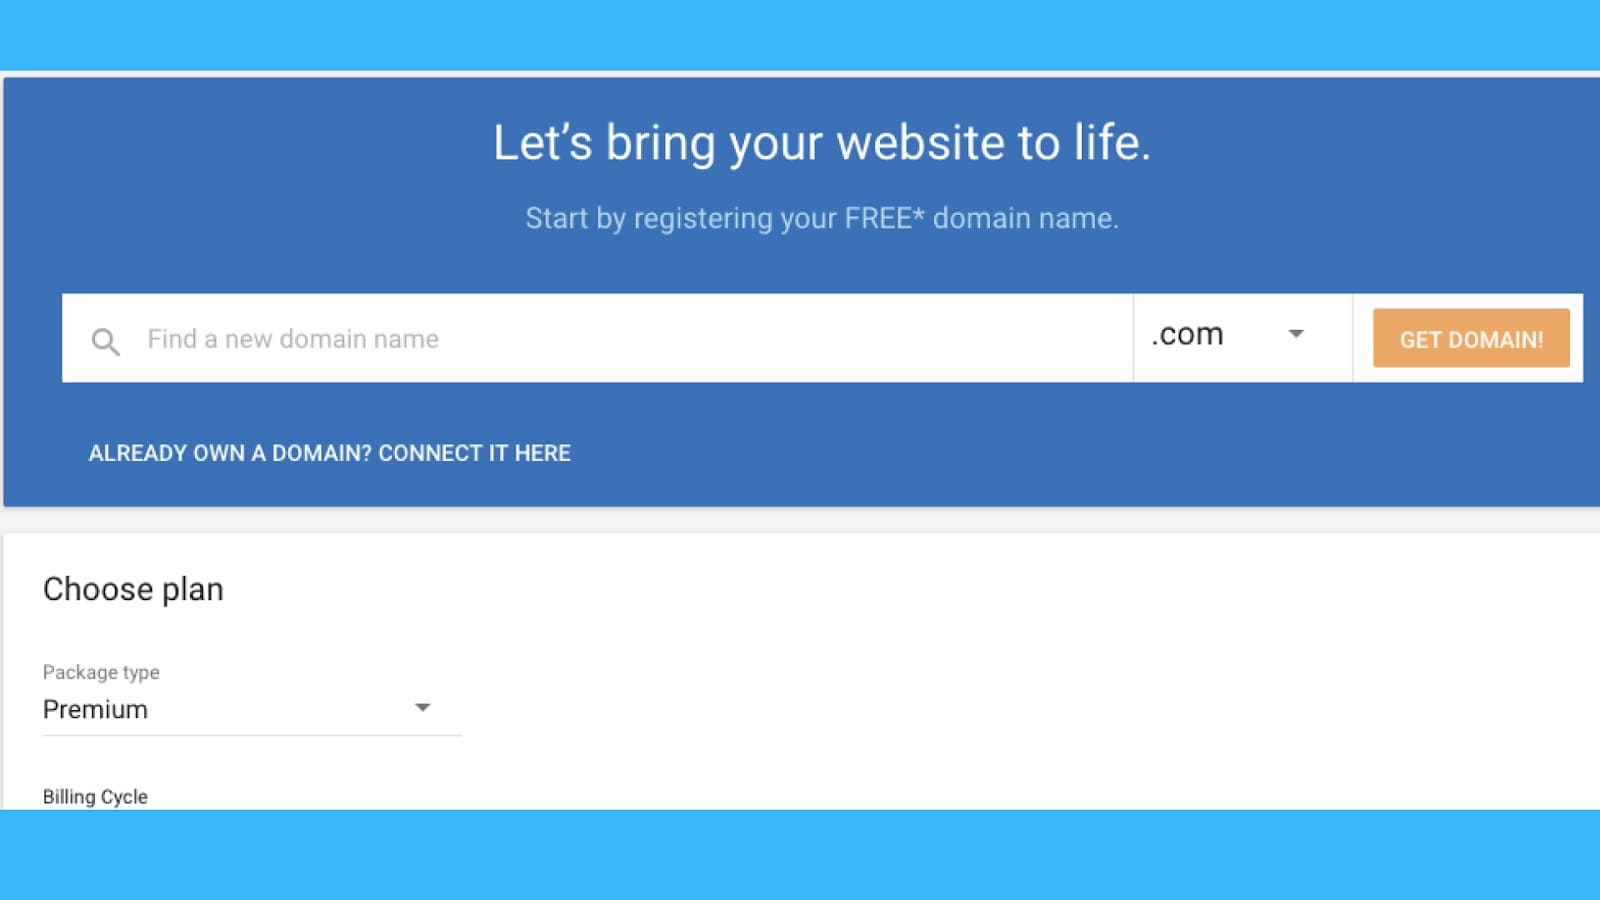
Your domain name is essentially your website’s address. If you don’t already have a domain, HostGator comes with a free one. Be sure to choose a domain address that is easy to remember and representative of your business.
Get instant access to breaking news, the hottest reviews, great deals and helpful tips.
After entering your chosen name, click "Get Domain". HostGator’s team will search the web to see if your preferred domain name is available. If it is, you’ll see a congratulatory message. Otherwise, type a different domain name and try again.
If you have an existing domain, you can quickly connect it to your HostGator website by clicking "Connect It Here".
Step 4: Account creation
You’ll be prompted to create a username and set a password for your new HostGator account. As with most paid platforms, you’ll have to enter your payment information. You can pay with Visa, Mastercard, American Express, or PayPal. After selecting your preferred billing cycle, you’ll be shown an order summary. Enter any discount code that you may have before confirming your purchase.
Step 5: Enhance your site with apps
After your purchase goes through, you’ll be prompted to add recommended apps to your site. These apps aren’t included with your subscription and will incur additional monthly charges. You can skip this step if you aren’t interested in extra apps.
Step 6: Choose between the Express or Traditional site builders
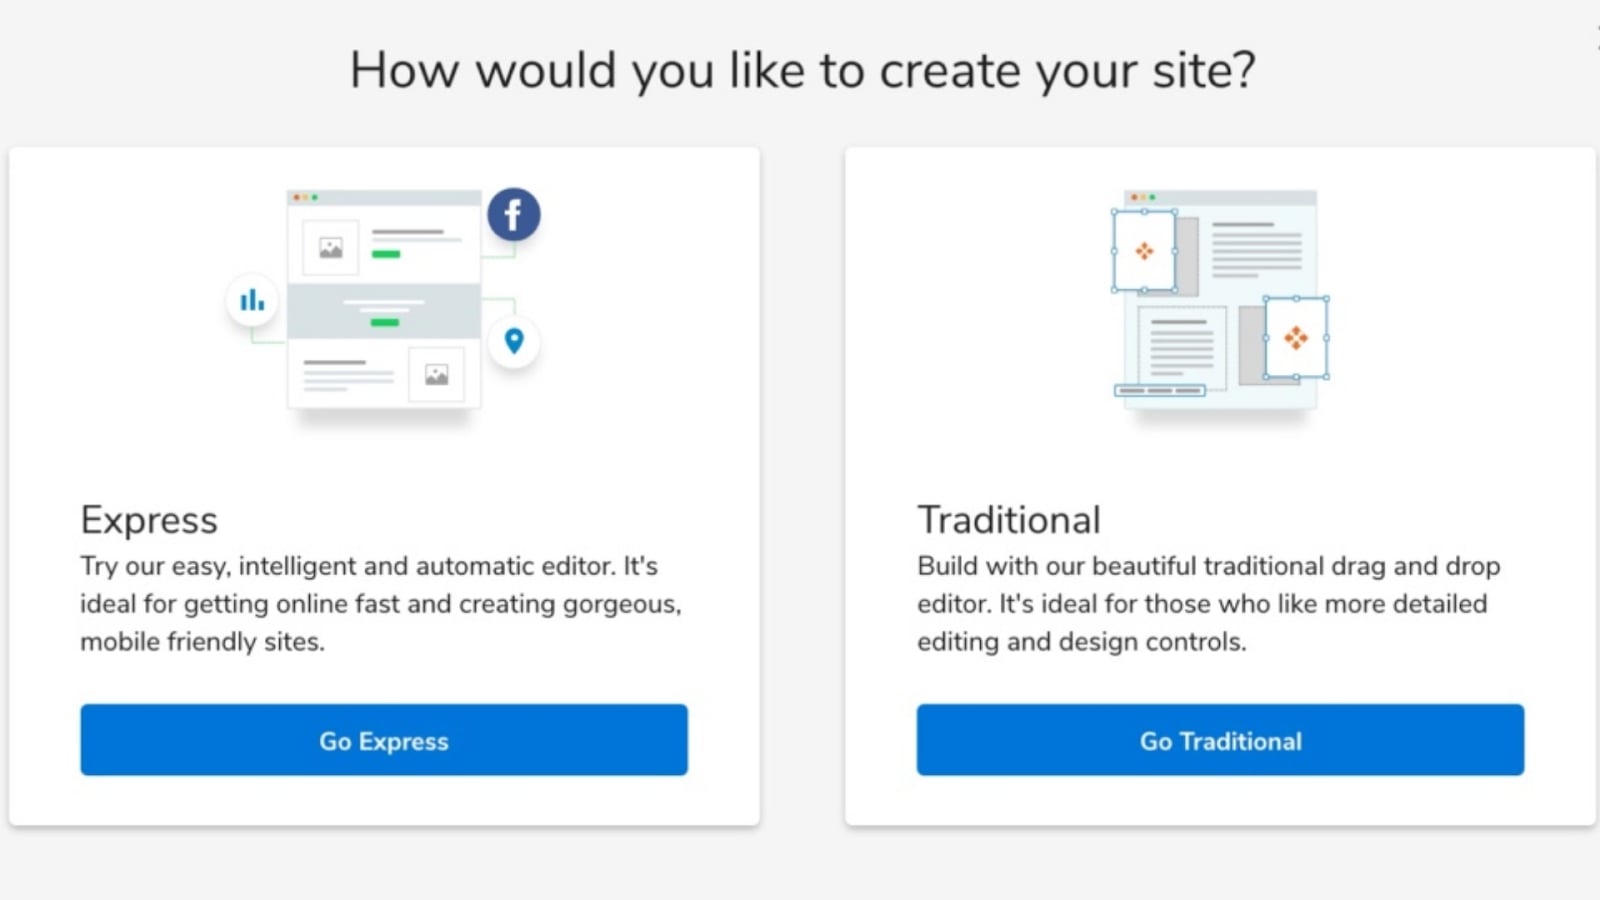
With HostGator, you’ll get to choose between two site-building options: Express and Traditional. The Express Site Builder is an AI-powered tool. The automatic editor is easy to use and perfect for beginners looking to create a website quickly and without any hassle.
The Traditional Site Builder features HostGator’s original drag-and-drop editor, and is great for those who prefer detailed editing functionality and more control over the site’s design. Whichever option you choose, you’ll be able to add and edit your site content later.
Step 7a: Express Site Builder
If you selected Express Site Builder, you’ll be asked some questions about your intended website, so that HostGator’s AI can build your site based on your needs. You’ll need to provide information such as a site title, what your website’s about, and what features you’d like it to have.
You’ll also be directed to upload a cover image and brand logo. Simple customizations can be made here, like selecting your preferred font, site colors, and navigation style. Finally, you’ll be asked to fill in your contact details as well as a Google Maps location. Click on "Finish" to go ahead.
Step 7b: Traditional Site Builder—template selection
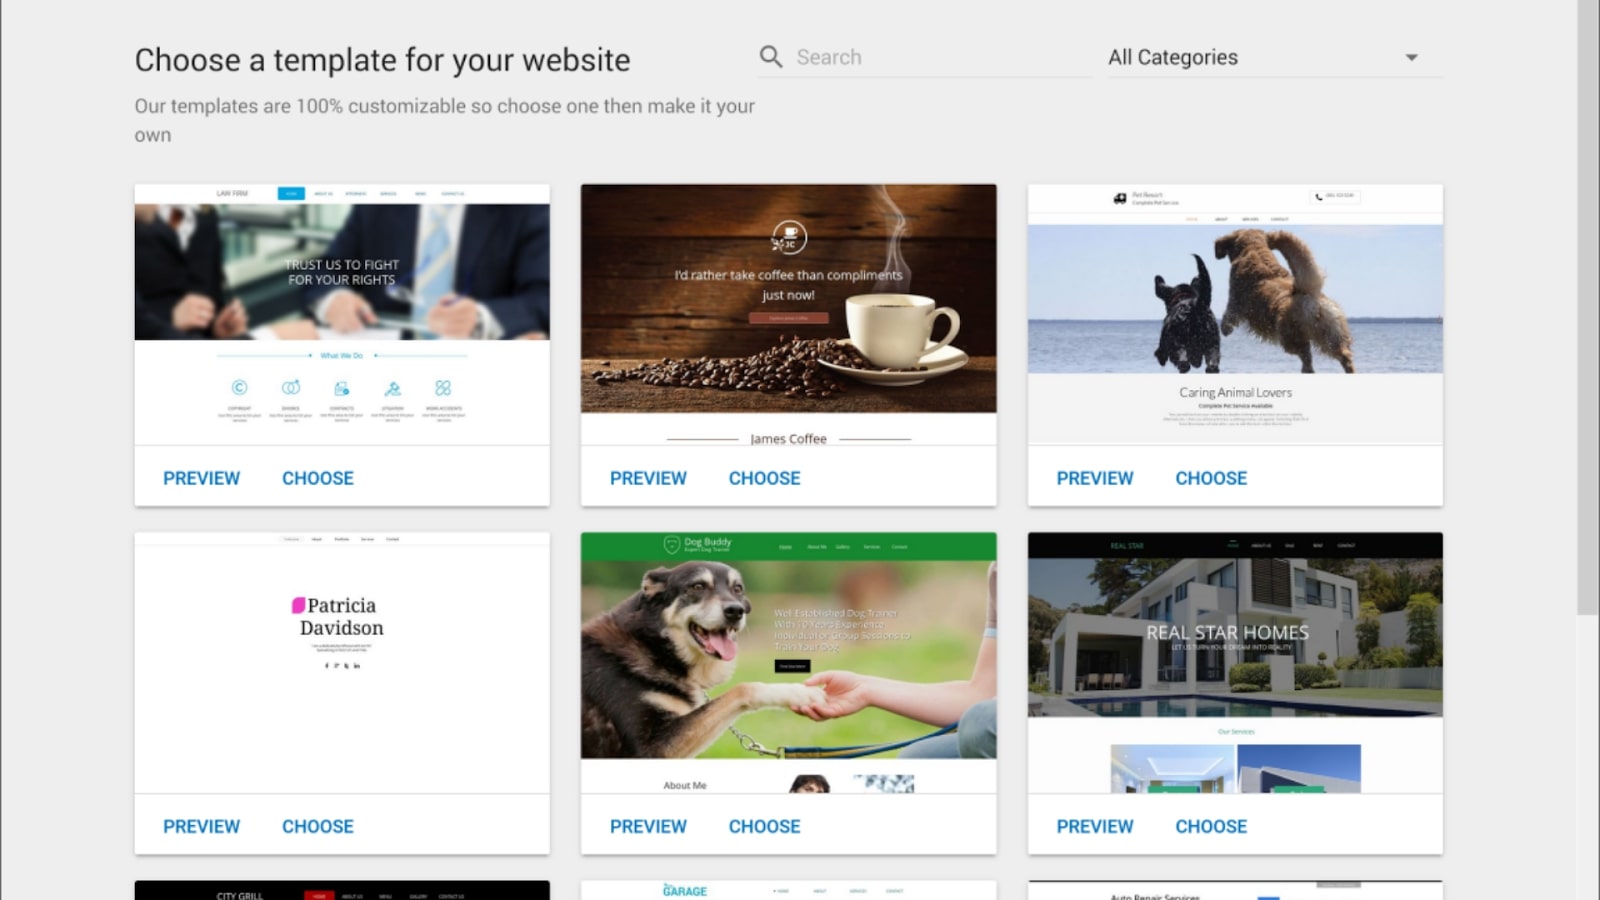
If you selected the Traditional Site Builder, you’ll be redirected to HostGator’s template selection screen where you can choose the base template that best fits your business. With more than 200 professionally designed templates included for free, you’ll probably spend some time scrolling.
You can get a full-screen preview to see all the features and secondary page layout options for your favorite themes. You can then quickly change the color scheme, fonts, or text style to match your business. After selecting a template, click on "Start Editing".
Step 8: Add content and start editing
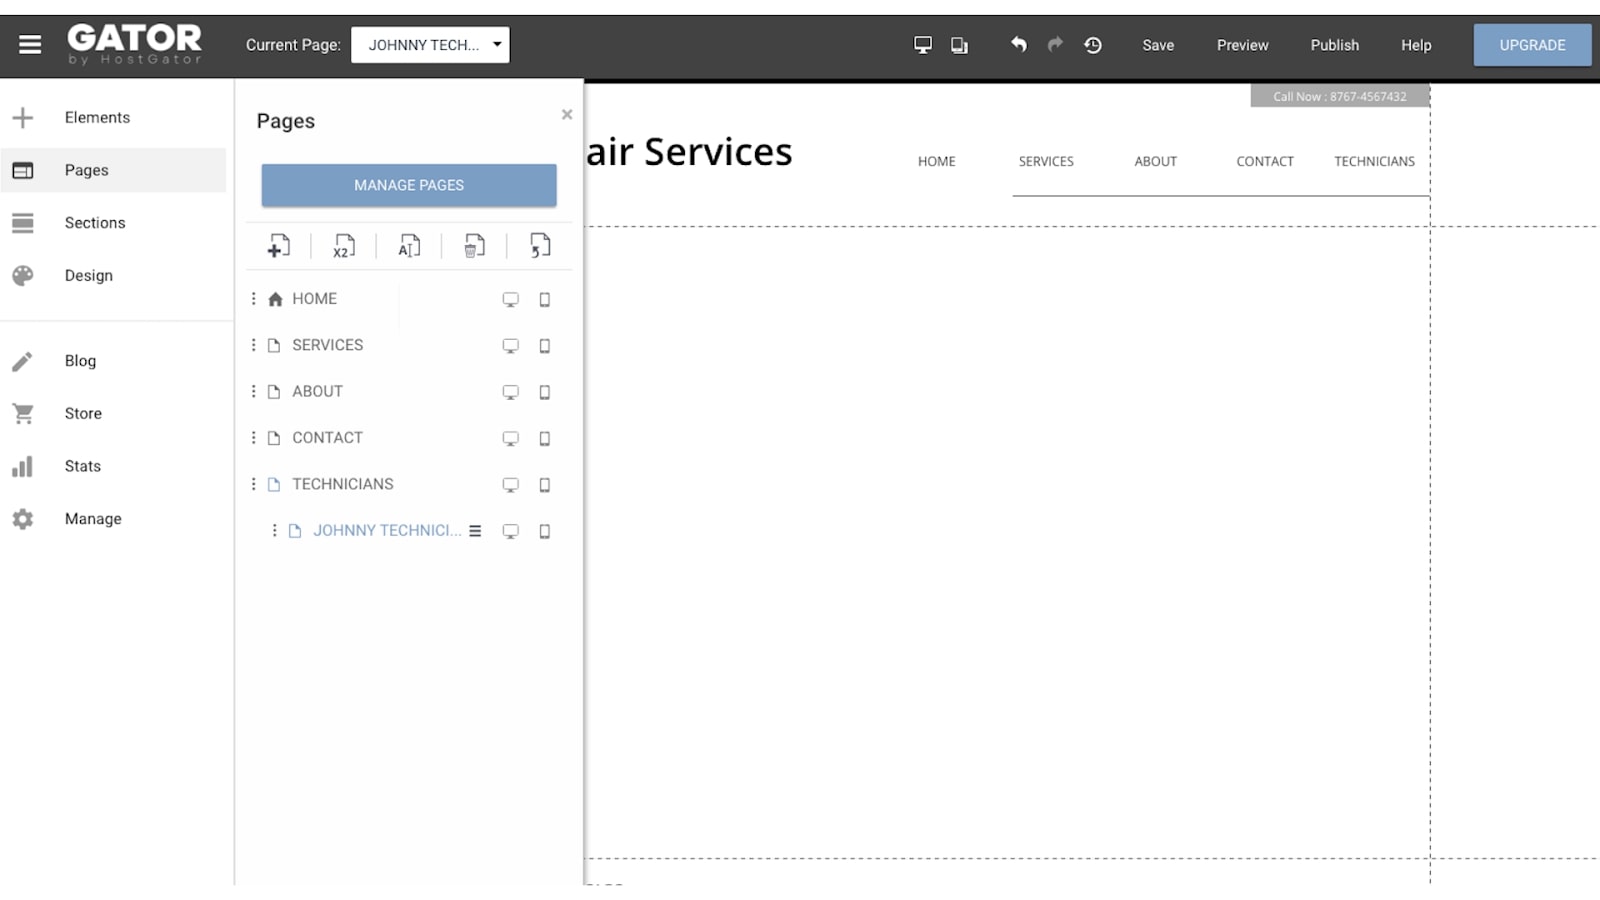
A short step-by-step tour will teach you how to edit pages and add elements such as text blocks, images, buttons, and more to your site, using the eight icons (Elements, Pages, Sections, Design, Blog, Store, Stats, and Manage) you’ll find on the left of the main dashboard.
Click on the option that you’d like to add to your site. For example, to add a button or contact form, just drag and drop it anywhere on the page. You can also easily add a new section by clicking the plus sign at the bottom.
On the right, you’ll find the settings for each specific feature you can edit. A preview of your site can be found at the center of your screen.
Step 9: Publish your site
When you’re satisfied, it’s time to put your site live. But before that, do a final review by clicking "Preview" at the top of your dashboard. If the design and content look good, click "Publish".
Users subscribed to HostGator’s Store plan will be asked to add products to their site. You can choose to do this later by selecting "Publish Without Store".
Congratulations, your site is now live!
How to make a website with HostGator: Summary
With its competitive introductory pricing, neat interface, and design flexibility, anyone can build a professional-looking website with a HostGator website builder. No matter what type of site you want to create, you’ll be able to get it up and running by following the above steps.
Further reading on website builders and web hosting
Make sure to read our comparison feature that pits three leading web hosts' website builders against one another: HostGator vs IONOS vs GoDaddy.
Joanne is a freelance writer based in Singapore, with a background in Sociology and a keen interest in technology. A seasoned and passionate writer, Joanne has worked with such global publications and TechRadar, Tom's Guide, CreativeBloq, and more. When she's not writing, she's usually binge-watching trashy reality shows on Netflix.
 Club Benefits


