




If there’s anything I’ve learned in my 15 years as a certified personal trainer, it’s this: the way you work out now will affect your longevity and independence as you age.
It’s tempting to focus on bigger muscles, visible six-packs, and new PR’s every week. But if you aren’t paying attention to the “less flashy” aspects of your fitness routine, you could be paying the price when you hit your senior years.
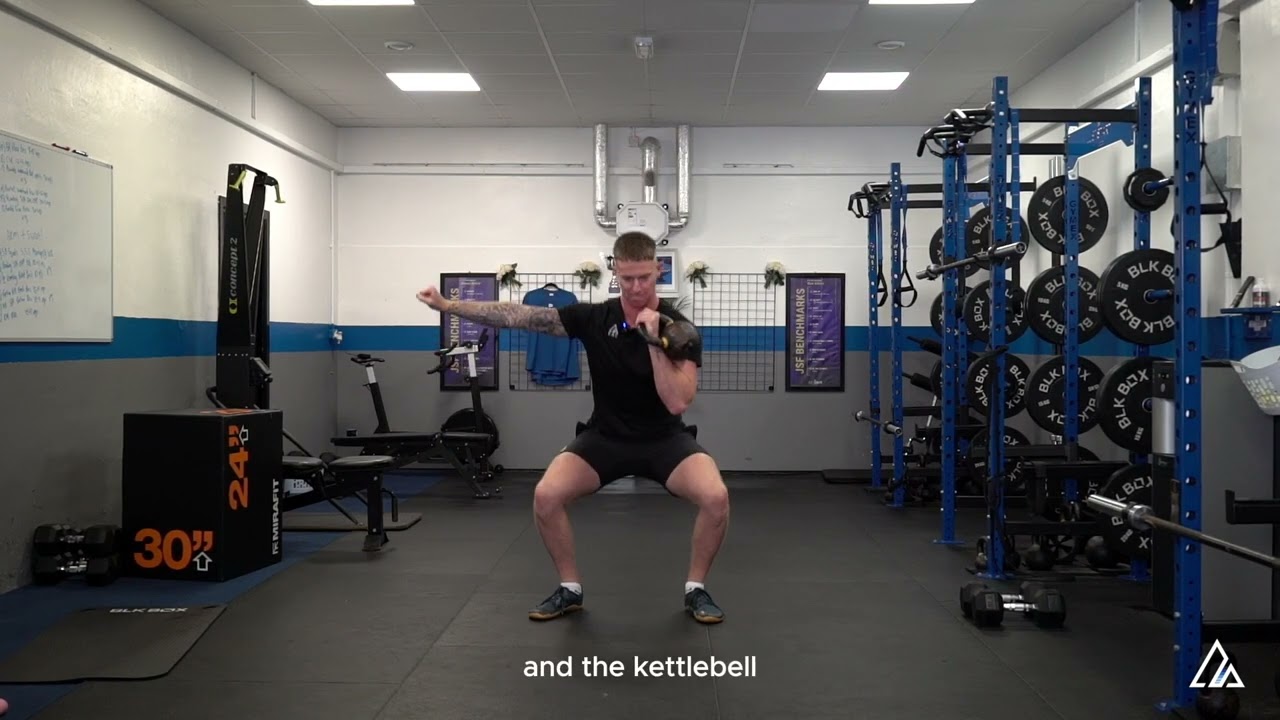
That’s why I make all of my clients – especially those in or approaching their 40’s – practice exercises that promote full-body strength, stability, and power. One of those exercises is the offset front rack squat. It’s a great move to target the deep core, glutes, quads, and even the upper back and shoulder stabilizing muscles. If you’ve got a kettlebell nearby, you can give it a try for yourself.
How to do offset front rack squats
Consult a doctor before trying any new exercise or workout program. Depending on your health history, they may suggest alternatives or advise you to limit your activity.
Beginners should consider meeting with a certified personal trainer to learn how to do the exercise correctly. Offset front rack squats aren’t extremely difficult, but you should be comfortable with basic squat form before attempting them.
You’ll need one moderately heavy kettlebell for this exercise. You should be able to complete 8-12 repetitions with good form. If you’re unable to do 8 reps without pausing to rest, choose a lighter weight. If you can do 12 reps easily without feeling fatigued, use a heavier weight.
Start by doing offset front rack squats for one set of 8-12 reps, 2-3 times per week. As you build strength, you can add an additional 1-2 sets of the exercise.
Offset front rack squats can be done on their own or as part of your current exercise routine. Just be sure you’re including appropriate rest days between each attempt.
Here’s how to do the exercise:
- Hold a kettlebell in your left hand.
- Bring the kettlebell to a “front rack” position – the kettlebell should be aligned with your left shoulder, with your left elbow parallel to your rib cage.
- Stand with your feet hip-width apart and engage your core.
- Hinge your hips behind you, as if you were about to sit down.
- Bend your knees and lower your hips towards the floor.
- Stand back up to the starting position.
- Continue for 8-12 reps, then repeat holding the kettlebell in your right hand.
Benefits of offset front rack squats
Basic squats work your quads, glutes, hamstrings, and hip stabilizers all at once, training your lower body for better strength, stability, and power.
The addition of a kettlebell not only challenges your lower body to a greater degree, but also engages the upper back, shoulder stabilizers, and deep core muscles like your transverse abdominis and internal obliques. Since you’re holding the weight on one side, your core must work to keep your body upright and balanced. This enhances your full-body stability and can lead to better overall balance with a reduced chance of certain injuries.

Common offset front rack squat form errors
Offset front rack squats may look simple, but they can be tricky to do with proper form. These are the most common errors I see beginners make when attempting the exercise.
Leaning too far forward
As you descend into the squat portion of the exercise, your torso and chest should remain tall. Think of your spine forming a diagonal line from the top of your head to your tailbone.
If the core muscles are weak, the hips are tight, or the kettlebell is too heavy, you may find that your torso and chest fall forward during your squat, leaving your spine in a more parallel position to the floor.
To fix this, focus on strengthening your deep core with exercises like planks and bird dogs, stretching your hips with moves like the figure 4 stretch and kneeling hip flexor stretch, and using a lighter kettlebell until you’ve built up the appropriate strength.
Allowing the spine to round
Another form error that can indicate a weak core is allowing the spine to round throughout the movement. You should be able to maintain a neutral, tall posture at each point of the exercise.
If your shoulders start slumping forward and your back gives as you descend, drop the weight and focus on building strength in your core. You may also want to include exercises that target upper and mid back, like prone extensions and lat pulldowns.
Practice basic squats until you can keep proper alignment with each rep, then start working with light weights as you perfect the form.
Tilting towards the weighted side
Deep core weakness is also the culprit when your body tilts towards one side.
Again, ditch the weight and focus on building deep core strength, specifically the interior obliques with moves like side planks.
Use a lighter kettlebell until you’re able to keep the spine upright and balanced in the proper position.

Follow Tom's Guide on Google News and add us as a preferred source to get our up-to-date news, analysis, and reviews in your feeds. Alternatively, you can read our content on the Tom's Guide app available now for iOS and Android.
More from Tom's Guide
- I'm a personal trainer who works with clients over 50 — these are the 3 mobility exercises I never skip
- After 60, this is the 10-minute routine I use with my clients to stay strong, mobile and independent
- 'I’m a Pilates instructor, and I recommend these 5 core exercises to help older clients build strength and improve posture'