


 Club Benefits


Tom's Guide Verdict
The Olympus PEN E-PL7 is more than a modest step above its predecessor and is versatile enough to appeal to the beginner or the enthusiast.
Pros
- +
Good still image quality
- +
Easy to use Wi-Fi
- +
Fast autofocus
- +
Responsive touch-screen LCD
Cons
- -
No built-in electronic viewfinder, and add-on EVF is pricey
- -
Custom menu and custom options buried deep within the camera
Why you can trust Tom's Guide Our writers and editors spend hours analyzing and reviewing products, services, and apps to help find what's best for you. Find out more about how we test, analyze, and rate.
Who it's for: Beginners, whether they want just a point-and-shoot experience or want to grow their skills.
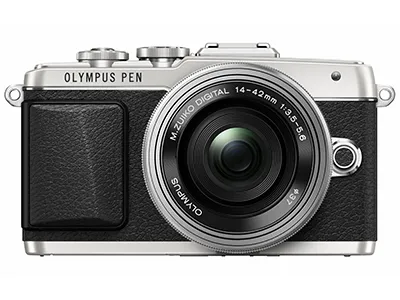
The 16-megapixel Olympus PEN E-PL7 has multiple personalities, but that's not necessarily a bad thing. With its flip-down selfie LCD and built in Wi-Fi, Olympus bills this successor to the E-PL5 -- which we named best beginner mirrorless camera -- as "photography for the smartphone user." But the E-PL7 ($600 body only; $700 with 14-42mm f/3.5-5.6 lens) offers much more. While some will opt to use it as a point-and-shoot, the semi-manual and manual modes make this one camera one you can grow into. In price and features, the E-PL7 is a competitor to Sony's a6000 mirrorless camera, although the E-PL7 may be a bit friendlier for beginners.

Design: Solid and Ergonomic

Measuring 4.5 x 2.6 x 1.5 inches and weighing 12.6 ounces (with battery and card but no lens), the E-PL7 camera body is slightly larger and heavier than the E-PL5's. But, it's nicely compact, especially when paired with a small, light lens like the kit 14-42mm or the Olympus M.Zuiko 12mm, f2.0. The camera's mostly metal-build quality is sturdy but without a lot of heft.
MORE: Sony a6000 Review: Fast and Feature Rich
At first glance, there's little physical difference between the E-PL7 and the E-PL5. Upon closer inspection, however, you'll notice a permanently attached grip, which offers a more solid — and less slippery — handhold than the E-PL5's screw-in grip.

The camera features a 3-inch, 720 x 480 touch-screen LCD that tilts up to 80 degrees and flips down 180 degrees to face forward for shooting selfies. It's more convenient this way, because it won't be blocked when a flash or electronic viewfinder is attached to the E-PL7's accessory port.
Like its predecessor, the E-PL7 does not have a built-in flash or a viewfinder; a small flash (FL-LM1) is bundled with the camera and fits snugly into the camera's accessory port. If you prefer a viewfinder over the LCD, you can pick up the optional VF-4 electronic viewfinder ($280) that attaches to the camera's accessory port, but this prevents you from attaching the flash: It's an either-or proposition. Thanks to its tilt adjustment, the monitor can be angled in bright sunshine to get a better view. Generally, though, the LCD works well under most conditions.

The responsive touch-screen LCD lets you tap to isolate a focus point or trigger the shutter. You can enlarge the focus area via a slider. Sometimes it's a little too responsive: I got some strange photos from accidentally touching the screen when holding the camera by my side. But you can turn the touch-shutter off and just enable touch-focus or turn both options off.
Image Quality: Solid Throughout
The Olympus E-PL7 provided very satisfying image quality overall, with richly saturated but true-to-life colors and, for the most part, accurate exposures. The Olympus (and Panasonic) image sensor, known as Four Thirds, is much smaller than a full frame-camera sensor, with the result that a lens delivers an equivalent focal length that's twice as long as indicated in the specs. I tested the camera with three different lenses: the kit 14-42mm (equivalent to 28-84mm), the $800 M.Zuiko 12mm (24mm) f2.0, and one of my favorites, the $209 Sigma 60mm (120mm) f2.8 DN A.
MORE: Best Mirrorless Cameras 2014
I shot most images using aperture- or shutter-priority modes, to see how the camera adjusts exposure. I also shot a few images in full manual mode when I wanted total control.

Exposure: Good Overall
The E-PL7 excelled under most daylight conditions, delivering even exposures and respectable dynamic range, retaining detail in both shadow and highlight areas. Under some high-contrast conditions, the camera's metering favored shadows, occasionally overexposing and clipping highlights (turning them pure white).
Even in bright, late-morning sunlight, the E-PL7 managed to hold onto both highlights and shadows in this photo of a mural. The camera and lens ably captured the fine details of the various surfaces, including the brick building.

This is a subtle example of clipped highlights in an otherwise well-exposed image. Notice that the white flower is blown out, but the white vase and the off-white window molding visible in the top portion of the image have retained detail.

Color: True to Life
Set to the default Natural picture mode, the E-PL7 delivered accurately rendered but rich and bright colors. Although the camera offers other options for more vivid or more subtle tones, I prefer the Natural mode for the most pleasing and realistic colors. At the other extreme, the EPL-7 also offers 14 art filters that apply special effects, such as Grainy B&W and Pop Art.

Low Light: Now with Less Noise
Image noise at high ISO settings has been one of my major complaints with the early PEN cameras, but the E-PL7 performed surprisingly well at higher light sensitivities. The range on this camera starts at an extended "low" setting of 100, with the native, selectable ISO available from 200-25,600. I left the built-in noise reduction at Auto (which kicks in during long exposures) and the Noise Filter (which counteracts high ISO noise) at Standard. The former can be turned on or off and the Noise Filter can be set to Off, Low Standard or High. While some of the pictures shot at ISO 3200 looked pretty clean, you'll get the best results at ISO 1600 and below. If you need only a low-res Web image, feel free to go to about ISO 5000.
MORE: These are the Best DSLR Cameras of the Year
This playhouse was in deep shadow, requiring me to push the ISO to 1000 to get a relatively fast shutter speed of 1/320 second and an aperture of f8. Even in shadows, where noise is generally most visible, the image showed only minor graininess. This was shot with the 14-42mm kit lens — which delivered good results but wasn’t quite as sharp as the two prime lenses I used.

I shot this copper wall hanging at ISO 3200, 1/25 second at f4.0. Given its smooth surface and a bit of overhead room light, there’s little evidence of noise, except in the corners. Even at this slow shutter speed and with my shaky hands, I was able to capture this shot with no image blur, thanks to the E-PL7's excellent in-camera image stabilization, which works regardless of what lens you use.

Autofocus and Speed
Performance improvements such as the inclusion of 81 contrast-detection focus points make the E-PL7 quite nimble. Autofocus is responsive, particularly in bright light, and I frequently used the touch-focus on the LCD to get accurate placement of the focus point. AF is still dependable under lower-light conditions, even with higher ISOs.
Continuous shooting speed is respectable at up to 8 frames per second, but keep in mind that the high speed is achieved in part because focus and exposure are set at the first frame. If lighting and subject position are likely to change, it's better to switch to the slower 3.7fps continuous shooting to ensure exposure and focus adjustments for each image.
MORE: Camera Wars: Why Autofocus is the New Megapixel
When shooting at high speed, you can capture up to 16 RAW images in a sequence; that number jumps to about 20 at 3.7fps continuous shooting. With the smaller file size of JPEGs, the E-PL7 can capture up to 36 frames at high speed and an unlimited number at 3.7fps (depending on the SD card's capacity).
Video Quality
The E-PL7 has an assortment of video options, including program, semi-manual and manual exposure modes. You can choose the focus point, and you can also record movies using some of the camera's art filters.
I used the Program exposure mode for shooting movies, as well as continuous autofocus. You can select the focus target manually if you like, but I found that the camera's AF kept up well with most moving subjects. These samples were shot in full HD, 1920 x 1080, Fine quality setting at 30fps. Footage would be a little smoother if the E-PL7 were capable of shooting at 60fps, but these clips were fine for casual viewing.
I decided to really challenge the camera's movie mode by shooting a moving train on an elevated track. While the straight lines and grids on the train cars look a little wavy in the footage (from a common effect known as shutter roll), the camera exposed the train quite well given the bright blue sky backdrop.
As this hayride came through the shadows, the E-PL7 picked up focus right away and tracked the wagon well as it came very close and then moved away. The camera also did a pretty good job of smoothly adjusting exposure when the wagon emerged from the shadows into a brighter environment. The latter part of the footage is a little overexposed, but details are still visible.
Controls: Highly Customizable
A baker's dozen of physical controls dot the rear and top surface of the EPL-7. Most are within easy reach, although photographers with larger hands may want to try the camera on for size before purchasing: Some of the buttons, like the red Movie button, are a little small. In upgrading from the EPL-5, Olympus wisely decided to move the control dial from the back panel, where it was too easy to bump, up to the top panel of the camera, surrounding the shutter-release button.
Many users may be content to operate the camera with the default settings, programming only the Fn (function) button atop the camera's right shoulder to quickly access a single function such as ISO or White Balance. The center OK button, by default, calls up an on-screen menu to change settings but there are also other configuration and customization options.
Beginners may want to use the Live Guide, available only in iAuto mode. The Guide uses nontechnical terms to describe various actions such as stopping motion or blurring motion (which depend on the shutter-speed setting). This screen display uses the touch controls and the four-way controller to make changes.
Another option is the Super Control Panel, an on-screen display of settings that can be changed by tapping the screen, including assigning them to the physical controls. To access the Super Control Panel and the ability to assign different functions to the mechanical controls, you have to activate the custom menu, which is hidden within the menu system. Hit the Menu button and scroll down to the wrench icon to enable the custom menu.
This places a gear icon in the main menu list and contains a long list of more advanced controls, such as image stabilization and white balance options, and customization options for various physical controls. For example, you can reprogram the Fn, Magnify or even the Video Record buttons to instead bring up the ISO or White Balance settings.
The chart below represents the number of steps or button presses to access a setting in the camera's default mode. (If there is a dedicated button or knob, the number of steps is zero.) However, the ability to customize buttons, dials and menus can streamline the process for most functions.
| Setting | Steps/button presses | Function |
| Shutter | 0 | Length of exposure |
| Aperture | 0 | Amount of light let in |
| ISO | 1 | Light sensitivity |
| Focus Mode | 1 | Point or points used for focus |
| Light metering | 1 | Part of image with optimized exposure |
| White balance | 2 | Overall color cast of image |
| Exposure compensation | 1 | Set auto exposure to be darker or lighter |
| Wi-Fi sharing | 4 | Send images to smartphone, activate remote viewfinder |
| Video recording | 1 | Switch from photo to video and back |
| Play | 1 | View images or videos you've shot |
| Delete image | 2 | Erase photo from card |
| Photo capture resolution | 2 | Amount of megapixels |
| Photo capture quality | 2 | Amount of JPEG compression/detail, or RAW |
| Video capture resolution | 3 | Lines of resolution and frame rate |
| Video capture quality | 3 | Amount of compression/detail |
| Drive | 1 | Single photo, burst, timer, etc. |

Wireless Access: Very Easy
The E-PL7's Wi-Fi setup is one of the easiest and most intuitive I've ever used. Although there's no one-touch setup using NFC (near field communication, which ever-more Android phones support), setup is quick whether you enter the Wi-Fi settings manually or scan an on-screen QR code (You'll need a QR reader for your smartphone, available free for iOS and Android devices.)
MORE: Olympus OM-D EM-1 Review: All-Weather Champ
The OI Image Share app is free and available for iOS and Android devices. It lets you easily transfer images from the camera to your mobile or use your handset to take full remote control of the E-PL7. The OI Image Share app offers lots of options ranging from setting exposure modes and ISO to focusing and choosing a drive mode (Single, Burst, Self-timer). You can even access some of the camera's art filters.
Battery Life: Don't Trust the Battery Indicator
The E-PL7 is rated at 350 images per charge, with image stabilization enabled, but Wi-Fi off. That's typical for a camera in this class, and the estimate jibed with my experience. Unfortunately, the battery charge indicator on the camera is not very accurate. Before leaving the house to shoot one day, I checked the battery indicator. It read full, but once I started shooting, the indicator quickly dropped to about half full. After that, I shot a couple of short video clips, and the battery was dead. Be sure to fully charge the battery before a day's shoot so you don't get fooled by the indicator and run out of power. I much prefer Sony's more accurate use of percentages to display how much juice is left in the battery.
Lenses and accessories
A broad range of Micro Four Thirds lenses are readily available from Olympus, Panasonic and third-party vendors. If you can't find what you like in a Micro Four Thirds mount — or you have other lenses that you'd like to use, check out adapters available from Olympus and other vendors. Olympus adapters include the weather-sealed MMF-3 ($180) and the MMF-1 ($210) for mounting the larger Four Thirds lenses Olympus used on its DSLR cameras. (Check compatibility before you buy one, though).
One of my favorite lenses is Olympus' M.Zuiko 12mm, f2.0 lens ($800). It’s wide (24mm-equivalent), relatively small, fast (enables a large aperture) and sharp — albeit a little pricey. The E-PL7, with the M.Zuiko 12mm lens, showed no signs of purple fringing, an optical aberration that often appears as a purple line along high contrast edges. When viewed on-screen at 100 percent, there is a slight (almost invisible) halo along the edges of the wire but you'd only notice it if you looked very, very closely.

Sigma recently lowered the price on my favorite third-party lens, the 60mm f2.8 DN A ($209) with an equivalent focal length of 120mm, which is a razor-sharp modest telephoto that's great for portraits.
I'm not a fan of the kit 14-42mm lens, because it's not particularly sharp. If you like the focal range of this zoom (24-84mm equivalent), get the EPL-7 body only, and add the M.Zuiko ED 14-42mm, f3.5-5.6 EZ lens ($350). It is less than 1-inch thick when retracted, which makes the E-PL7 even more compact.
Other accessories include the VF-4 EVF (electronic viewfinder), priced at $280. You can also pick up an accessory flash like the FL-600R ($300) that will cover a greater area than the small add-on flash bundled with the camera can.
New for the E-PL7 are two pieces of underwater gear: the PT-EP12 ($750) housing and the FUL-3 flash ($500). The housing is compatible with a number of lenses and can withstand pressure down to 45 meters (approximately 146 feet); the flash will operate to a maximum depth of 75m (approximately 246 feet). Check out Olympus' website for other accessories as well.

Bottom Line
With its wide range of features, the Olympus E-PL7 can wear a point-and-shoot cloak or serve as a highly sophisticated interchangeable lens camera. In testing, the E-PL7 has proved itself a worthy competitor to cameras like the Sony a6000. It's small, fast and capable of delivering solid image quality. I wouldn't hesitate to recommend either camera to a family member or friend looking for an affordable and compact interchangeable lens camera.
The Sony a6000 ($598 with 16-50mm lens, $448 body only) has a beautiful on-camera electronic viewfinder and a built-in flash, as well as a lower price. On the other hand, the E-PL7 offers easier and more sophisticated Wi-Fi options as well as some wonderful Art Filters for the creative artist. The choice comes down to which of those strengths are more important to you.
Specifications
Model name: Olympus PEN E-PL7
Megapixels: 16.1
Type: Mirrorless
Price: $600 body only; $700 with 14-42MM kit lens
Shots per second: Up to 8fps with focus and exposure set at first shot; 3.7 fps with AF and exposure for each shot
Sensor type: Four Thirds Live MOS
Kit lens offered: 14-42mm, f3.5-5.6
Autofocus: 81 contrast-detection points
Shutter speed range: 1/4000-60 sec, Bulb 1 minute-30 minutes
ISO range: 100 (low)-25,600
Main video resolutions/frame rates: 1980 x 1080p, 1280 x 720 (.MOV); 1280 x 720, 640 x 480 (AVI Motion JPEG) all at 30fps
Video file format: AVCHD, AVI Motion JPEG
Built-in flash: No, external unit included
Hot shoe: Yes
Card type: Single slot: SD/SDHC/SDXC
Ports: USB 2.0, Micro HDMI
Shots per charge: (CIPA) 350
Wireless capabilities: Wi-Fi, Pen Pal (an optional Bluetooth attachment for transferring images)
Image stabilization: In body, works with all lenses
Dimensions and weight: 4.5 x 2.6 x 1.5 inches, 12.59 ounces with battery and card, body only
Writer and photographer Theano Nikitas has been covering photography for almost 20 years and has reviewed hundreds of digital cameras as well as other digital imaging hardware and software. Follow her @TNikitas1 and on Google+. Follow us @TomsGuide, on Facebook and on Google+.
