
Tom's Guide Verdict
Serious 3D print users and well-heeled amateurs will love the speed, quality and flexibility of the LulzBot TAZ 6.
Pros
- +
Fast, high quality printing
- +
Automatic bed leveling makes setup very easy
- +
Support for a wide range of print materials
Cons
- -
Expensive
- -
Some minor printing glitches
- -
Software underestimates print times
Why you can trust Tom's Guide Our writers and editors spend hours analyzing and reviewing products, services, and apps to help find what's best for you. Find out more about how we test, analyze, and rate.
The TAZ 6 is the latest version of LulzBot's flagship 3D printer, a $2,500 high-end device that can handle prints large and small while supporting an impressive range of materials. This new version of one of the most popular filament deposition manufacturing (FDM, also known as FFM) 3D printers adds a number of new features that make it more flexible, faster to print and easier to set up.
Design: Upgrades All Around
The TAZ 6 has the same industrial-looking design of previous models, with an open framework built from extruded aluminum. Most of the printer's nonmetal parts are 3D printed themselves, and as with previous models, the plans to build your own TAZ 6 are available online for free.
Still, the new TAZ 6 offers a lot of improvements and new features not included on the previous model, the TAZ 5. Foremost is the addition of an automatic print bed leveling system that uses four metal discs at the corner of the print bed to detect its level. The extruder touches on each disc in turn, completing a circuit that ultimately detects the location of the print bed those discs hold in place. This avoids the need to level the print bed manually, which makes it much, much easier to set up and calibrate the printer. In addition, a small felt pad automatically cleans the extruder before each print, removing any blobs of filament that got stuck to the printhead that could ruin a print. Both of these automatic features worked flawlessly in our tests.
The large print bed is covered in a plastic material called polyetherimide (PEI), to which most 3D-printing materials will stick, especially when the print bed is heated. The print bed can reach a maximum temperature of 248 degrees Fahrenheit, and it can withstand the application of white glue that helps some materials (such as polystyrene) stick to the print bed. The usable area of the print bed is an impressive 11.7 x 10.8 inches, and prints can be up to 9.8 inches high. That gives you a total print volume of 1,238 cubic inches — more than double the volume of the $2,499 Makerbot Replicator.
The extruder that melts the print material to form the print also got an upgrade, with a bigger heater to melt the material, and three fans to cool the extruded material. The extruder can heat up to an impressive 572 F, which means it can handle print materials that need high temperatures to melt, such as nylons.
The TAZ 6 can work with an incredible range of materials.
The TAZ 6's SD card slot and large LCD screen allow the printer to work in stand-alone mode without a connected PC. However, there is no Ethernet or wireless connection; you have to use the LCD screen or USB connection to control the printer. Many 3D-printer companies, such as Formlabs and Polar 3D, are now offering software that allows groups of users to operate a single printer out of the box. However, the TAZ 6 does not; third-party software (such as Octoprint), which will work with the TAZ 6, does offer these features, though.
Print Materials: An Impressive Range
The TAZ 6 can work with an incredible range of materials. Out of the box, the Cura software supports 29 types of filament, ranging from old favorites like ABS and PLA to more exotic materials like conductive PLA, nylon and wood-like filament materials.
LulzBot sells these materials in 1-kilogram reels of 3-millimeter filament, but the TAZ 6 will work with 3-mm filament from any supplier. Any damage to the printer caused by untested materials is not covered by the warranty, though, so do some research on the very active LulzBot forum.
The only materials that LulzBot actively warns against using (so far) are filaments that use carbon fiber, as they can damage the extruder. We tested the TAZ 6 using ABS, high-impact polystyrene (HIPS) and plasticized copolyamide TPE (PCTPE), a new and very tough, nylon-like material.
Setup: A Little Hands-On Time
The TAZ 6 is simple to set up, but you do have to handle parts of this process yourself. While the printer comes mostly built, you have to do the final steps yourself, installing the base of the printer and the print head using a few screws and connecting a few cables. The well-documented process takes an hour or so.
Once the printer is ready, you install the Cura software, plug in the USB cable and add the filament. This involves heating the printhead, feeding the filament through the guide tube, popping the printhead feed mechanism open and pushing the filament into the extruder. Again, the process is relatively simple, but it is much more hands-on than the cartridge-based filament installation process of printers such as the 3D Systems Cube 3.
Interface: Solid, with Some Glitches
You control the TAZ 6 by using either the LCD screen on the device or the open-source Cura software. LulzBot offers a slightly customized version (available for Windows, Mac and Linux) that loads 3D models, processes them for printing and then either saves the files to an SD card for later printing or directly controls the printer over a USB 2.0 connection. It's a powerful but easy-to-use program that offers a lot of features in a simple interface.

The main window of Cura presents a virtual view of the print bed, with the loaded 3D model placed on it. You can easily load multiple models at once to print at the same time (what 3D-printer users call "plating"), and move, scale, rotate and shift the models with the mouse.
The program can also automatically orient the model to the best angle for 3D printing. Several different views of the virtual print bed are also available, allowing you to have an X-ray view of the print (so you can see one object behind another) or see if there are any overhanging areas that might be difficult to print.
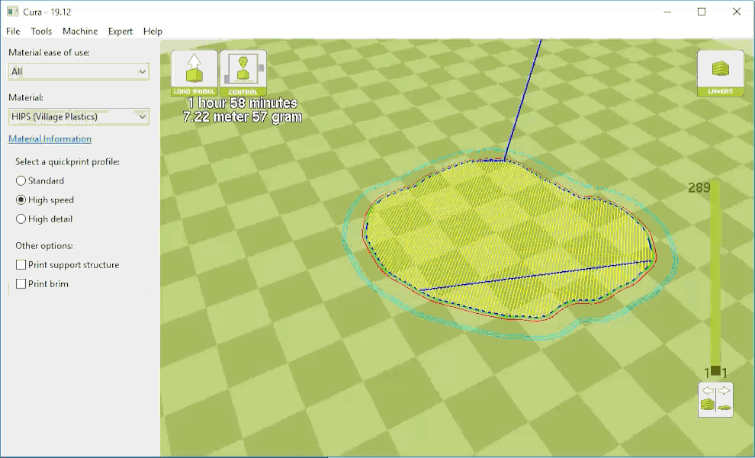
The most useful view is the layers, which provides a preview of the print process. Using the layer slider on the right, you can see how the printer will actually create the model, one layer at a time.
Cura makes it simple to pick a print material: Just select the filament material you want to use from a drop-down menu. The supported filaments are divided into types such as Beginner, Intermediate and Expert, and there's a link to a web page that shows more information on material, including the required temperatures and if your selection needs additional glue on the print bed in order to stick properly.

Additionally, you can choose from three presets for print speed and quality: Standard, High Speed and High Detail. The High Detail setting uses a very small (0.18 mm) layer height, while the High Speed setting uses a much larger 0.38 mm layer height for much faster printing.
Although Cura is generally easy to use and responsive, it does have some glitches. For example, when we performed more complex operations (such as scaling down our model of Rodin's "The Thinker" for printing), the program sometimes locked up for about 5 to 10 seconds, not responding to key presses before responding to all of the key presses at once. This can be frustrating when you're doing things like entering a new measurement to scale the print to; you have to wait and see if you typed in the number correctly.
Print Process: Hassle-Free
You control stand-alone printing via the LCD screen and control dial on the printer body; it's a fairly simple interface to use. When printing directly from Cura, you use a Control screen that pops up when you hit the Control Printer button; it presents a simple, point-and-click way to control the printer. You can move the printhead, set temperatures and extrude filament with a click or two, which is important because you need this access to unload and load new filament into the extruder.
We did have a few failed prints on the TAZ 6, but these were much more the exception than the rule.
The Control screen doesn't provide a lot of feedback about the print process — just a "percent complete" count, a progress bar and a few technical messages. A more visual indication, such as a preview of the layer or an estimated time to finish, would be useful here.
Generally, the process of printing on the TAZ 6 was simple and hassle-free. We did have a few failed prints, but they were much more the exception than the rule, and less frequent than what we've seen with other printers. A couple of thin, tall prints failed to stick to the print bed and fell over, and the layers failed to stick together on another, producing a goopy mess that stuck to the print head. But most of the prints in our tests were produced flawlessly, sticking well to the print bed and staying still as they were built up. The approach of moving the print bed backward and forward, rather than moving the extruder, can sometimes cause issues with large prints rocking back and forth from this motion, but that didn't happen here.
The TAZ 6 is not a quiet printer. It produces a fair amount of bzzzup-bzzzup and clunk-clunk-clunk noises as the print head moves around. The fans that cool the extruded material also produce a very audible whooshing noise, so you won't want to set this up on your desk or dining-room table.
Print Speed: Quality Takes Time
The TAZ 6 can be both a very fast and very slow 3D printer, depending on what you need. If you don't mind the somewhat rough finish of the high-speed print preset, the TAZ 6 can crank prints out faster than most of the 3D printers we have tested, producing a 4.5-inch-high copy of our "The Thinker" test print in just 2 hours and 35 minutes. That's about the same as the 2 hours and 28 minutes the TAZ 5 took, but it's much quicker than the results from other 3D printers. The Polar 3D took 5 hours and 19 minutes to make the same-size model.
The TAZ 6 produced impressive-quality prints, handling the smooth curves of organic shapes and the sharp edges of geometric shapes with equal aplomb.
If quality is your aim, the High Detail preset of the TAZ 6 produces better-looking prints, though it's much slower, taking a little more than 8 hours to produce the "Thinker" print.
The Cura software produces grossly optimistic estimates of the time a print will take. It estimated that our "Thinker" model would take a little less than 2 hours to print on the High Speed preset, and 6 hours and 23 minutes in the High Detail setting.
Print Quality: Impressive, After Some Cleanup
The TAZ 6 produced impressive-quality prints, handling the smooth curves of organic shapes and the sharp edges of geometric shapes with equal aplomb.
Our 3D scan of Rodin's "The Thinker" statue tests how well a 3D printer can handle smooth, organic and complicated shapes. The TAZ 6 aced this test, producing prints that accurately captured the smooth curves of the original. We did notice some layering on all of these prints, though. Even on the High Detail preset, the shoulders of the Thinker had a distinct stair-step look. All filament 3D printers show this, though, and it can often be removed by processing the print in acetone to smooth the surface.

Next, we tried a set of planetary gears — a complex set of interlocking cogs and gears that tests how well the printer can handle fine details. We had no problems there; the finished gears fit together easily, smoothly locking together to produce the working-gear set. Some parts of the gears did require a little cleaning, though. The top of the long screws that hold all of the other parts in place had some filament threads attached that had to be removed, and some of the holes in the gears that these screws fit into had to be scraped with a sharp knife to remove odd bits of printing material that were blocking the screw thread. These were minor issues, though, and the prints from the TAZ 6 required significantly less cleaning than most.

Finally, we used a 3D model of a geometric sculpture to see how well the printer could handle sharp edges and fine points. The TAZ 6 produced an impressive print there as well, giving clean, sharp edges to the vanes of the sculpture. The tips of these vanes were a little rough, though, with some loose threads of filament trailing from the tip, caused by the material stretching as the print extruder moved away from the tip. Other tips and some edges had small blobs of filament attached. Both of these can be removed easily with a sharp knife but can leave marks that detract from the quality of the final print.
Bottom Line
The TAZ 5 represented the state of the art for FDM 3D printing, and the TAZ 6 does nothing to lose that crown. It is the best FDM 3D printer we have tested. While print quality remains the same, the TAZ 6 is more reliable and easier to use than its predecessor. Plus, the self-leveling print bed and extruder cleaner make printing more consistent and reliable.
Of course, quality has its price. At $2,500, this is a very expensive printer that is nearly double the cost of the $1,350 LulzBot Mini, which remains a better pick for casual users. The TAZ 6, though, is the king of the hill when it comes to 3D printing for the well-heeled enthusiast, experimenter or professional who wants fast, reliable 3D printing.
