I can’t confess to being an avid bird watcher, but I regularly feed the birds in my yard and enjoy watching them pecking away and hearing their songs. So when I got the chance to review Kiwibit’s latest solar smart bird feeder, the Kiwibit Bird Feeder 2, with a 4K camera, I couldn’t refuse.
However, when you learn that its MSRP is $269 you might spit out a few feathers! Currently it’s reduced by 30% to $189 at Amazon, slightly less than the Birdbuddy Pro Solar smart birdfeeder, which is $239 at Amazon, and has an MSRP of $299.
Although I’ve used several different types of bird feeders before, I’ve never used a smart bird feeder, so I was intrigued by how I’d find it and whether I’d find the tech capability a bonus.

My experience with smart bird feeders is the same as my colleague, Nikita Achanta, who also recently tested a smart bird feeder for the first time, and reported her findings on the Birdfy smart bird feeder earlier this year.
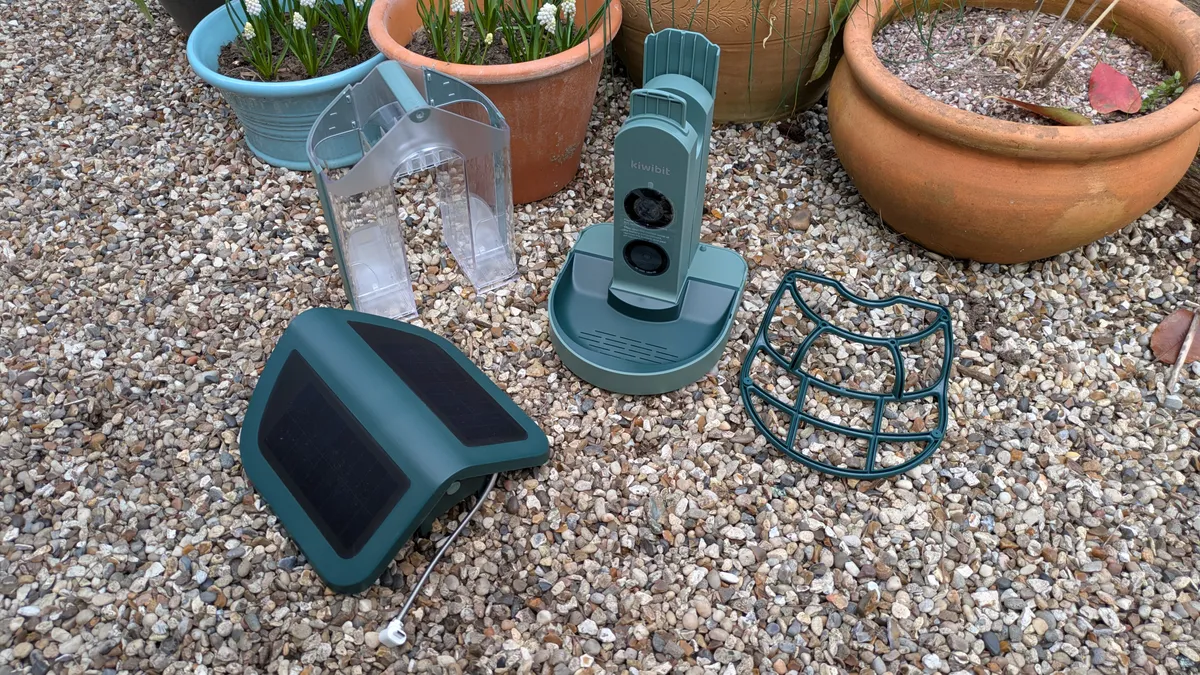
Unboxing and set up
Don’t think you’ll be able to get set up in five minutes. Although everything was boxed up incredibly neatly and it comes with clear instructions, it will take you a little while to sort everything out and decide whether you want to strap the feeder to a tree, attach it to a post, or to a wall or fence.
The bird feeder comes with a few elements that need to be assembled, but this is fairly simple. The dual seed hopper slides onto the feeder body; you attach the feeder tray, then the roof. You can also add the optional perch. However, unless you are hosting larger birds, I didn’t feel this was necessary, even though I attached it for testing purposes.
Mounting the feeder
I was disappointed that the setup didn't include a pole, as this would have been my preferred mounting option. So if you do want to mount your bird feeder in this manner, you will need to purchase a pole with a 1-inch diameter. However, it does come with a wall mount, pole mount and tree mount strap.
Since I have a yard with trees, I decided to use this method, but once mounted, you may find the feeder tilts slightly depending on your tree's alignment. I positioned my feeder to point towards my house, so I could watch the activity from my home office, without using the camera function.
If you do place the feeder on a tree, ensure the solar panels on the roof of the feeder are still exposed to the sun; if not, you won’t gain the full benefit of this free energy. And of course, keep the solar panels clean to prevent interference with energy absorption.
While you’re assembling the feeder, it’s a good time to charge the battery, which inserts into the underneath section of the feeder. It takes 9 hours to charge, via a USB-C cable, so you’ll need to factor this in before you can use the full functionality of the feeder.
Filling the feeder

It’s fairly easy to fill the feeder, but you will need to release the roof and add the food from the top. Simply, press a button, located at the back of the feeder, just below the roof, and the roof will lift up towards the back. Add your food to the two hoppers, then close and lock the roof before releasing the food valve.
The food values are located at the base of each hopper, and allow you to release a small amount of feed at a time, saving you from constantly filling up the hoppers. Once the birds have munched through all the seeds, you can then release some more.
Connecting the Kiwibit app
Once I’d filled the bird feeder, I paired the feeder up with the Kiwibit App. It took me some time to get everything connected, but if you follow the instructions, you should be good to go within about 10 minutes. You'll also need to remember to press the sync button on the back of the feeder, located under a rubber seal.
One thing I love
After loading the app I quickly discovered you can turn on an alarm if you want to scare off unwelcome guests. For me, this means activating an alarm when squirrels make a beeline for the seeds. It's not as loud as a house alarm, but it's certainly got some clout. I half-expected my neighbors to check in on me to see if I was OK.
There are plenty of other settings in the app, like whether to put it into sleep mode, whether to use solar or battery power, and selecting the recording quality and length.
You have to pay more for bird identification

Even though this bird feeder has a 4K camera and solar panels, for the price, I was expecting it to include bird identification. However, when I uploaded the app, I realized this comes at an extra cost.
To unlock advanced AI detection, intelligent alerts and more, and intelligent alerts I was going to have to pay more. I'm in the U.K., and it costs £6.99 a month or £71.99 a year. In the U.S., you can expect to pay $7.99 a month or $79.99 a year.
The first month is free, which is a pretty good way to discover if it’s worth the expense, and you can cancel at any time. However, isn’t the bird identification function one of the prime reasons why you’d buy a smart bird feeder? Others, such as the BirdBuddy, offer this feature for free.
The little birds in my yard prefer suet balls

There’s another problem I’m having, which I’ll need to experiment with. I’ve been feeding the little birds in my yard with suet balls — and they love them. This has meant that they've ignored the Kiwibit feeder entirely, as they prefer suet balls to seeds.
And even though the feeders are positioned close to one another, I haven't been able entice them to the new alternative feeding spot. However, having the camera close by has enabled me to capture the small birds on my original feeder.
All is not lost, because the smart bird feeder with its tasty seeds has attracted pigeons and collared doves. And apart from munching on the seeds, they enjoy sitting on the roof!
Read the Kiwibit Bird Feeder 2 full review.
What's next?
There are still lots of functions in the app that I want to test, so I’m going to remove my traditional bird feeder to reduce distractions and experiment with the Kiwibit Plus app features. This should unlock further potential and allow me to experience the full potential of the Kiwibit Bird Feeder 2.
Smart bird feeder deals

Follow Tom's Guide on Google News and add us as a preferred source to get our up-to-date news, analysis, and reviews in your feeds. Subscribe to Tom's Guide on YouTube and follow us on TikTok.
More from Tom's Guide