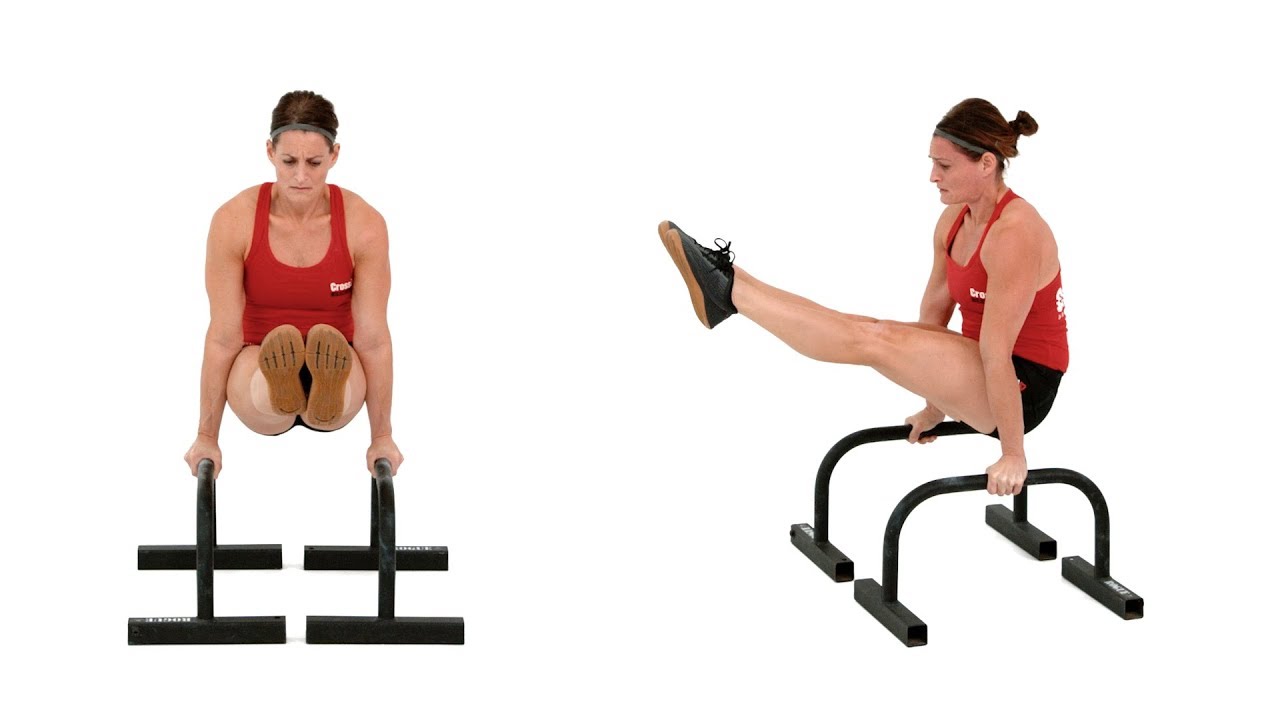
The L-sit might be categorized as a bodyweight core exercise, but this fiery full-body move also targets your quads, hamstrings, hip flexors, back, arms and shoulders, strengthening muscles all over the body.
To do the L-sit, you’ll sit on your bum and place both hands on the floor or an elevated surface. As you take a deep breath, you’ll push the ground away and lift both legs, extending them away from you to create an L-shape with your body.
If you plan to add the isometric exercise (meaning a static hold) to your routine, we encourage you to read below to find out how to do the L-sit with proper form, the benefits, common mistakes and the best L-sit variations to try.

What are the benefits of the L-sit hold?
If you haven’t heard of the L-sit hold before, the isometric exercise is demanding on your core muscles and your muscle groups won’t lengthen or shorten while under contraction, which means it's also low impact.
You’ll sit without moving, holding muscles under tension while bracing your stomach, keeping your legs raised and posture tall. It’s particularly demanding on your core and hip flexors and relies on some existing flexibility to maintain posture.
Commonly used in CrossFit workouts, gymnastics, and calisthenics programs, the L-sit teaches core stability, muscular strength, balance and coordination from a holding position.
All in all, the bodyweight calisthenics exercise builds full-body strength and control. But don’t be put off if it sounds too challenging because there are plenty of ways to scale it to suit your ability.
How to do the L-Sit hold
- Start in a seated position with your hands placed on the floor close to your hips and legs extended away from you.
- Sit tall, lift your chest and lengthen your spine, keeping your back neutral without leaning backward or forward.
- Lock out your arms and pull your shoulders back and down.
- Brace your stomach as if expecting an impact and suck your belly button toward your spine.
- Push through your hands and lift both legs into the air, keeping them straight and pointing your toes. Your bum should be hovering above the ground.
- Remain tall without hunching your shoulders, and hold the position.
- Slowly lower down to the floor.
Common L-sit hold mistakes
Regardless of your fitness ability, this move requires skill and it's super easy to get wrong. Here are the most common mistakes we see.
Throwing yourself in too soon
If you launch your legs away from the floor to do the L-sit, you’re not ready for the full version. You should be able to maintain complete control of your body weight throughout, lifting your legs slowly with full control and holding the position, then lowering back down again. At no point should you be throwing your weight into it.
Lack of flexibility
Many people trying the L-sit may struggle with tight hips, hamstrings, or both. We recommend following the variations below to help you progress to the full L-sit and build enough strength and flexibility in the relevant muscle groups first.
If you have trouble lifting one or both legs, it might be down to tight hips. And if you struggle to extend your legs, it could be down to tight hamstrings. We vouch for these stretches for hip flexors and hamstring exercises to help with tightness.
A crucial part of nailing the L-sit involves back mobility and keeping your spine straight. If you suffer from a tight back, we recommend some lower back exercises. We also strongly advise using a shoulder mobility routine if you have tight shoulders and struggle to press down during the exercise.
Over-leaning
Another sign you may not be ready for the L-sit is if you excessively lean forward or backward to maintain your position. Try to sit tall and press through your hands at all times.
L-Sit hold variations to try
If you’re ready to give the L-sit hold a try, here are some ways to get started. Just be sure to keep an eye on your form to get the most from your training and avoid injury.
Lift one leg at a time
Adopt the starting position with your legs extended on the floor, then try lifting one leg away at a time while pointing your toes. Lift the leg as high as possible, hold for a few seconds, then lower the leg and switch sides. This will help you get used to the leg position of the L-sit and recruit the hip flexors.
Knee tucks (supported)
Next, try bending both knees and tucking them close to your chest, keeping your toes on the ground and your legs pressed together. Keep your back tall and drive your thighs toward your chest. Now practice lifting the toes of one foot away from the ground and holding the position. Bring the toes down again and practice lifting on the other side. Keep the knees bent.
Knee tucks (unsupported)
From the tuck position, try lifting both feet away from the ground and holding the position for a few seconds each time. Practice building up to a longer hold. If you prefer, you can lift one foot away, then the other.
Transitions
Now that you feel comfortable in the knee tuck, extend one leg at a time from the knee tuck position. Practice holding one leg off the ground, then switch sides; this should allow you to build toward the full L-sit. See how you feel reaching a point where you can hold one leg fully extended away from the floor while keeping the other knee tucked close to the chest.
Once this becomes comfortable, you might be ready to extend both legs away for the full variation. Work over your progressions, then look at the equipment you might choose.
You can use the floor for the exercise or a set of bars, gymnastics rings, benches, or boxes to elevate your body away from the ground. Gymnastics rings require greater stability and muscular engagement to keep the rings in position, while the floor is challenging because your body starts closer to the ground.
Bars or benches help elevate the body and provide more space while taking some pressure off the wrists. We recommend trying each approach and seeing what works best for you.
Ready to do the L-sit hold?
Anyone approaching this exercise for the first time will face a challenge, whether that is lower body flexibility or upper body strength, so finding the right L-sit hold variation for you is crucial to developing the skillset.
If you plan to add the exercise to your routine, practice several times a week as a warm-up or finisher using one or more of the variations above. Don’t rush and stick to the best variation for your abilities. When that becomes comfortable, move to the next stage.
Hold the L-sit for as long as possible each round, then rest between. Either build up to 3-5 minutes or break it into sets of your choice. Paying attention to your body and building this way should help improve your overall proprioception (awareness of your body in space) and build strength, flexibility, and endurance, helping you to nail the L-sit.
More from Tom's Guide
- REI Presidents’ Day sale — 5 deals I’d buy right now from Arc’teryx, The North Face and Patagonia
- Farmer's walk: How to do it and the benefits of walking with weights
- Forget crunches — 3 reasons I ditched ab workouts for compound exercises