How to Create a Photo Book with Mixbook
Making a photo book doesn't have to be a chore. Here are simple, step-by-step instructions for using our top service, Mixbook.
Here at Tom’s Guide our expert editors are committed to bringing you the best news, reviews and guides to help you stay informed and ahead of the curve!
You are now subscribed
Your newsletter sign-up was successful
Want to add more newsletters?
Daily (Mon-Sun)
Tom's Guide Daily
Sign up to get the latest updates on all of your favorite content! From cutting-edge tech news and the hottest streaming buzz to unbeatable deals on the best products and in-depth reviews, we’ve got you covered.

Weekly on Thursday
Tom's AI Guide
Be AI savvy with your weekly newsletter summing up all the biggest AI news you need to know. Plus, analysis from our AI editor and tips on how to use the latest AI tools!

Weekly on Friday
Tom's iGuide
Unlock the vast world of Apple news straight to your inbox. With coverage on everything from exciting product launches to essential software updates, this is your go-to source for the latest updates on all the best Apple content.

Weekly on Monday
Tom's Streaming Guide
Our weekly newsletter is expertly crafted to immerse you in the world of streaming. Stay updated on the latest releases and our top recommendations across your favorite streaming platforms.
Join the club
Get full access to premium articles, exclusive features and a growing list of member rewards.
A lot of us like the idea of creating a photo book, but we either don't know how to get started or get frustrated with the process. So how do you make a photo book that you'd be proud to share with family and friends, without the hassle? We're here to help.

For the past several years, Mixbook has won our Editors' Choice award as the best online software and printing service to create a highly personal, customized photo book. One of the great advantages of Mixbook is that it is fun and easy to explore your own creativity by trying out the many options available. As you work on your photo book, the service automatically saves your project frequently, so you don't have to worry about losing your work.
Here are some tips for making a very personalized, beautiful photo book.
10 quick tips for creating a photo book
- Make sure the photos you want to use have a high enough resolution. Mixbook recommends that photos be at least 4MB at 300 dpi; otherwise, they won't look good when printed.
- Pick your book shape wisely. Do you want it to be square, portrait (like a traditional book) or wide? Once you make your selection, you can't go back.
- Choose the right type of paper. For most projects, the semigloss option will suffice, but when you want a more elegant book, consider the pricier matte papers.
- Select a cover style. As with the paper type, a hardcover or leather-bound book gives the finished product a more luxe feel.
- Know that, if you make a mistake, you can undo your actions by pressing the Undo button at the top. Change your mind? Hit Redo to undo the Undo.
- Need help? Click the small Chat icon in the lower left to talk to a customer service representative.
- To view your entire book, click on the All Pages icon on the lower-left cover of the central workspace.
- To change the order of your pages, click on any page spread in the All Pages view, and drag it to its new location in the book.
- If you want to add more pages, you have to add them two at a time. That's just the way book printing goes.
- Be sure to order your book well in advance of when you'll need it. Even with express shipping, it will take at least seven days to arrive.
Choose your template
Mixbook has more than 370 photo book templates. Even though they are intelligently categorized by subject — such as Family, Kids, Travel, Wedding and Yearbook — it can be difficult to choose the perfect template for your book project. The good news is that whichever template you select, it will be completely customizable.
MORE: The Best Photo Book Printing Services
The one nearly irrevocable decision you need to make is which shape your book will be. Will it be a square or rectangle? And if it's rectangular, will it be horizontal or vertical? However, you don't choose the page size of your book until you place your order.
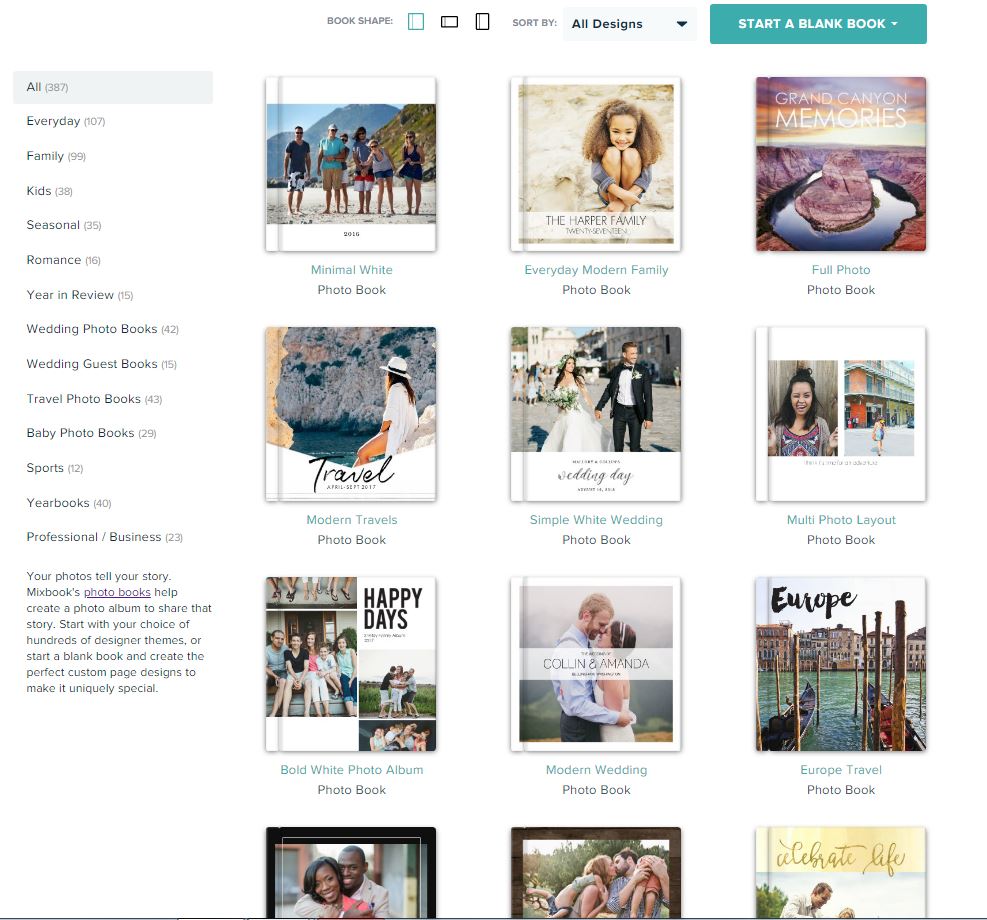
- Click on a template thumbnail to open a pop-up preview that will allow you to flip through sample pages.
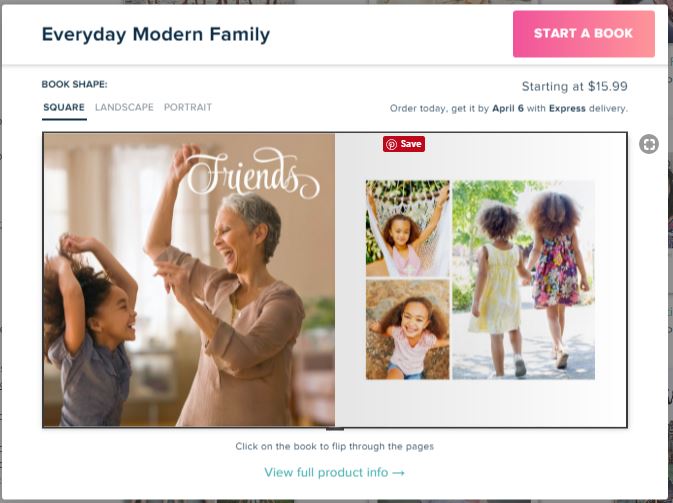
Or, if you wish, you can simply start with a blank book and still have access to all the design options you would have with any of the templates.
Get instant access to breaking news, the hottest reviews, great deals and helpful tips.
Upload your photos
After you select your template (or decide to start with a blank book), Mixbook will prompt you to upload your photos.
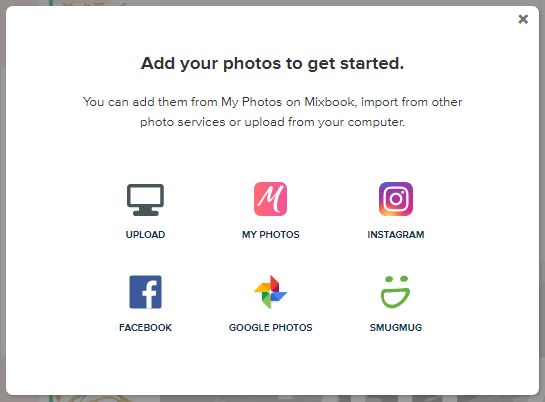
- You can add photos in three ways: Upload photos from your computer, select My Photos to choose from previous Mixbook projects or Import Photos from your accounts on Facebook, Instagram, Google Photos or SmugMug.
Whichever method you choose, your uploaded pictures will appear in the sidebar to the left of your photo book workspace. - Click on the Add Photos button at the top of the sidebar if you want to import more photos.
- Auto-insert photos into your book. After importing your photos to your book project, you are given the option to have your pictures auto-inserted into your book. If you don't plan to do much customization, that can be the easiest and shortest path to creating your photo book.
If you're the type of person who likes to edit and customize, then you may find it less time-consuming to make all of your photo placements manually rather than correct the auto-placement.
Take a quick tour of your book interface
The Mixbook interface is straightforward and logical. When your project is opened for the first time, the central workspace is filled with the cover of your book.
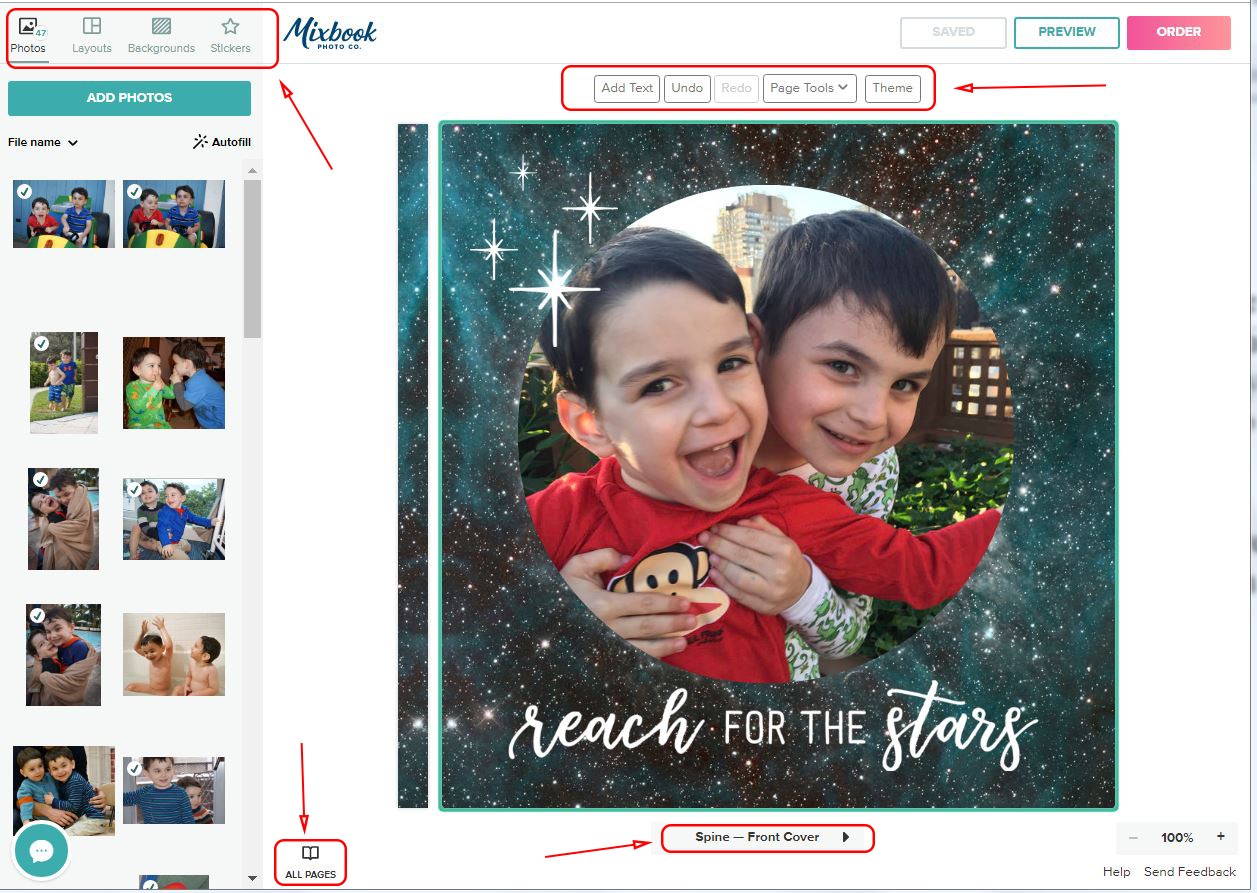
Below the workspace are navigation arrows for flipping through the pages. (Initially, only the forward arrow is shown below the cover.)
Above the central workspace is a ribbon of buttons. Note the Undo for reversing any of your edits. We'll discuss other buttons in this ribbon below.
In the tabbed left sidebar are all the ways you can customize your book: Your Photos, Page Layouts, Backgrounds and Stickers.
Choose a layout
Layouts are page design ideas, which include such things as the number of photos per page, as well as more general themes that are applied to the book as a whole, such as Birthday or Wedding. You can choose Theme Layouts, which are based on the theme you choose (such as Birthday or Wedding), and Page Layouts, which are sorted by the number of photos you want on a given page.
To apply a Page Layout or Theme Layout to a page, click on a page to select it. Then, click on the layout or design in the sidebar.
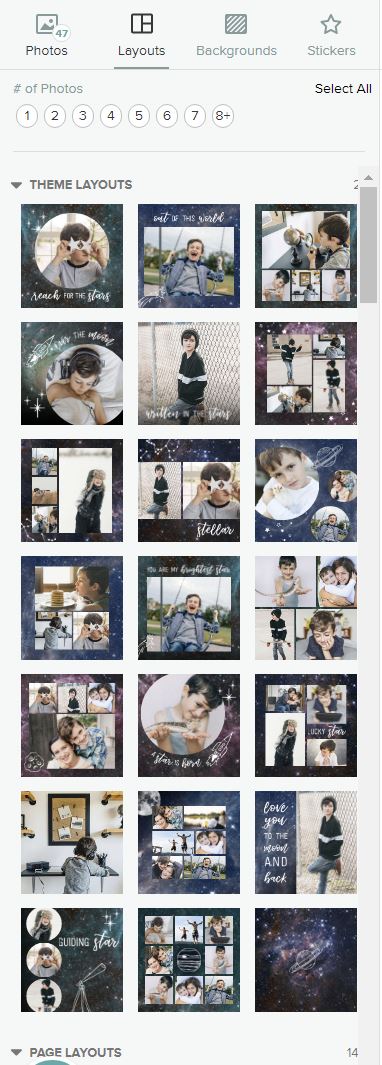
For Theme Layouts, click on the Theme button at the top of the central workspace (above the two-page spread), and select a template from the pop-up window.
MORE: Best Photo Storage and Sharing Sites
To select a page layout, click on the Layouts tab. To view layouts for, say, four photos, click on the number 4 at the top of the sidebar.
Add photos
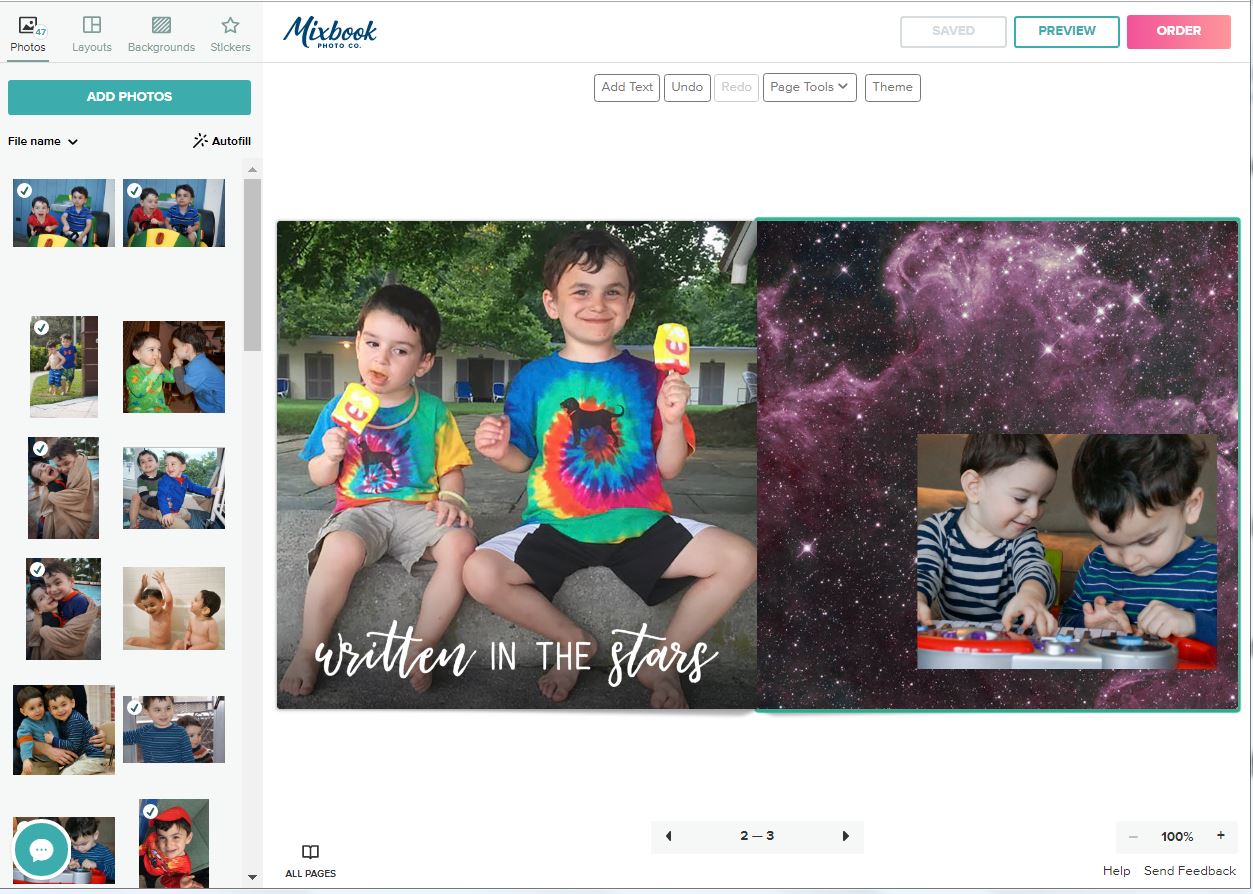
Mixbook's page layouts use photo placeholders to indicate where to place a picture. However, unlike most other photo book software, Mixbook doesn't require a photo placeholder to be on a page for you to insert a picture.
To add a photo to a page:
Drag and drop a picture from Your Photos in the left sidebar onto a page layout's photo placeholder or simply place it anywhere on the page.
To replace a picture:
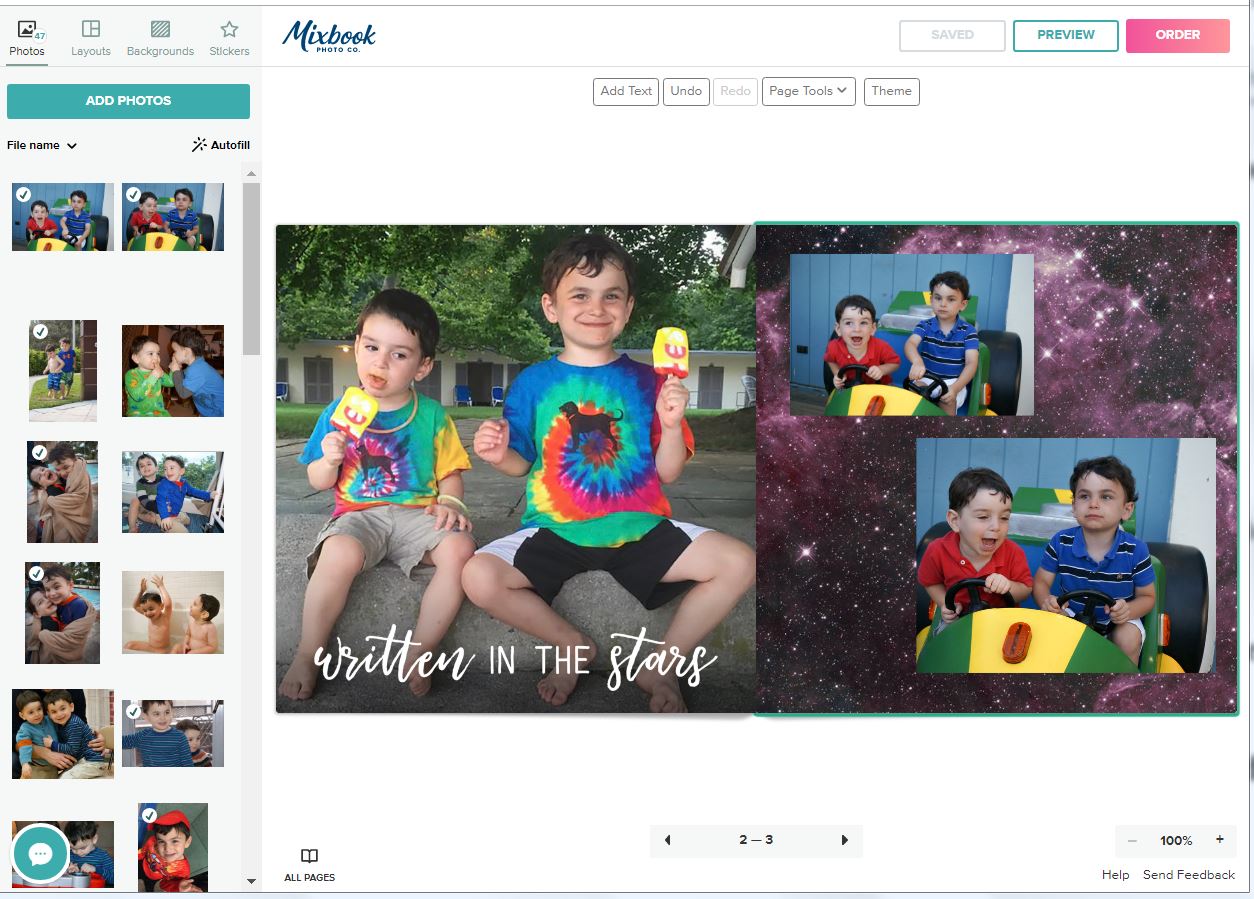
Drag and drop one of your photos onto an existing picture on the page. The previously placed photo will be returned to the Your Photos sidebar.
Edit photos
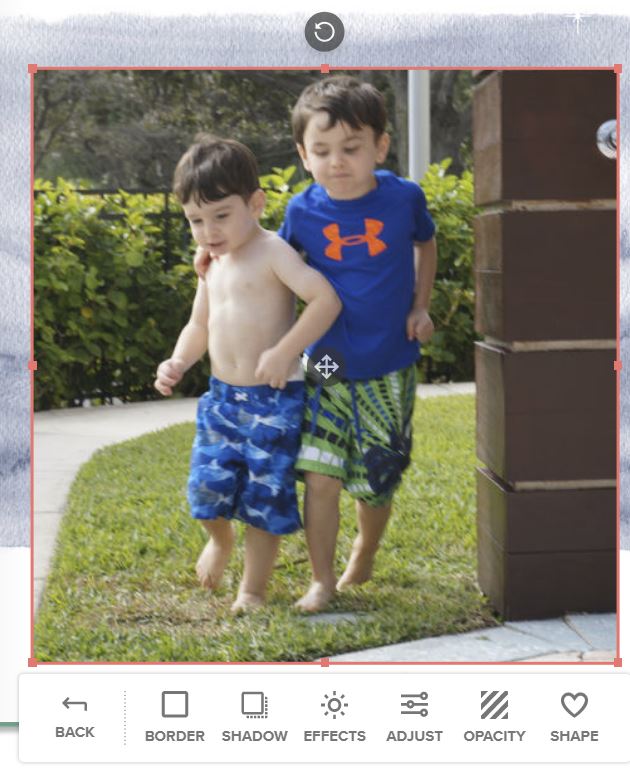
Clicking on aphoto displays all the tools for altering and editing the photo:
- A red box around the photo
- A rotate icon above the box
- A pop-up menu
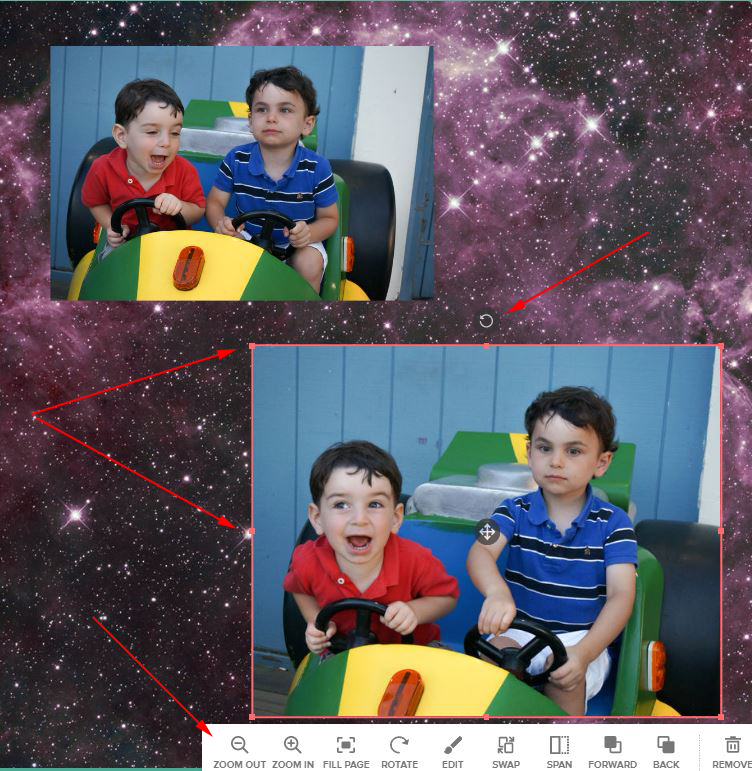
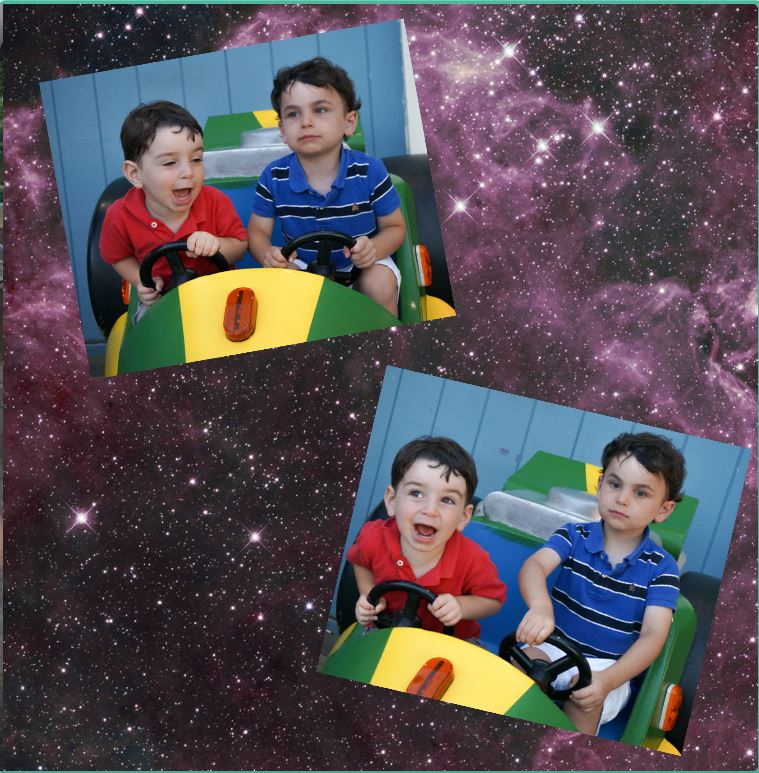
To move, resize, and rotate photos:

When you click on a placed photo, the red box that appears will have eight small "handles" (tiny squares): four in the corners and four in the middle of the sides. Click and drag on any of those handles to resize and reshape the photo.
MORE: Best Photo Calendar Printing Services
To rotate a photo, click and drag on the rotate icon above the box. To move a photo,click anywhere on the picture (except on the center icon), and drag it to your preferred position.
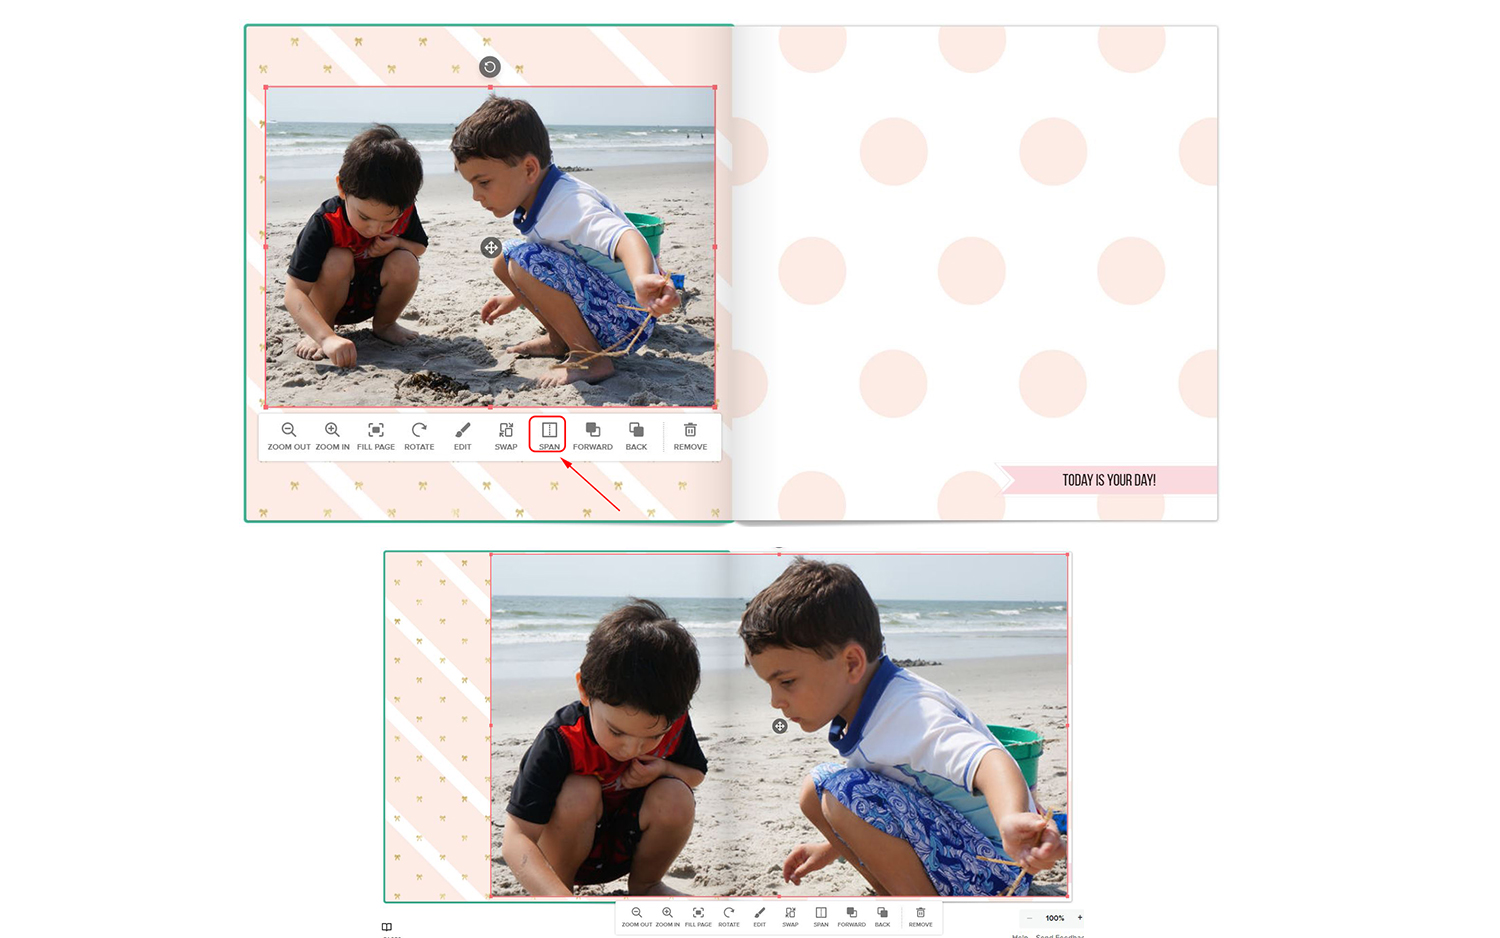
To spread a photo across two pages,click on the Span icon. Click and drag the handles on the bounding box to position the photo across the spread. Remember that the split between the two pages will break up your photo, so don't position a face or other key element where it will be caught in the fold.
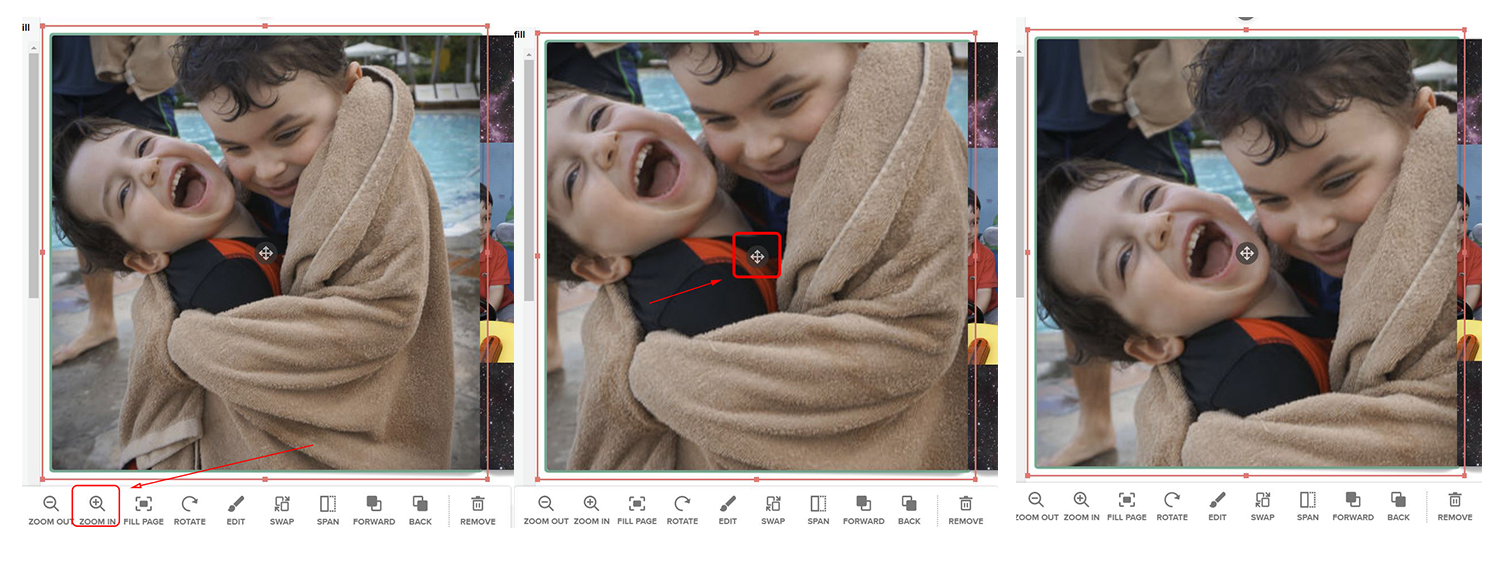
You can also magnify or shrink a photo within a box. To do so, click on the Zoom In icon to enlarge the view of the picture (which, in turn, removes outer portions of the picture). Then, click and drag the four-arrow icon in the center of the photo to move the zoomed-in picture within the placeholder. The Rotate icon on this pop-up menu rotates the picture within the placeholder.
Apply filters
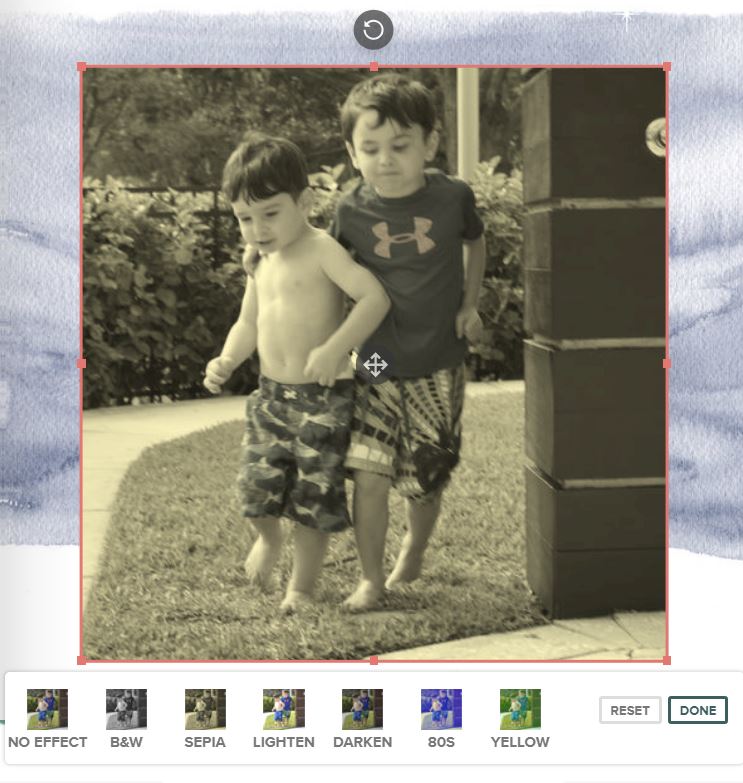
Click on Edit in the pop-up menu. Then, click the Effects icon. This opens a small selection of color filters: B&W, Sepia, Lighten, Darken, '80s and Yellow. Click a filter to apply the effect to your photo. Click on the Adjust icon to access sliders that let you edit the brightness, saturation and contrast of the photo. To remove the effect or filter, click on the No Effect icon.
Apply borders, shapes and drop shadows
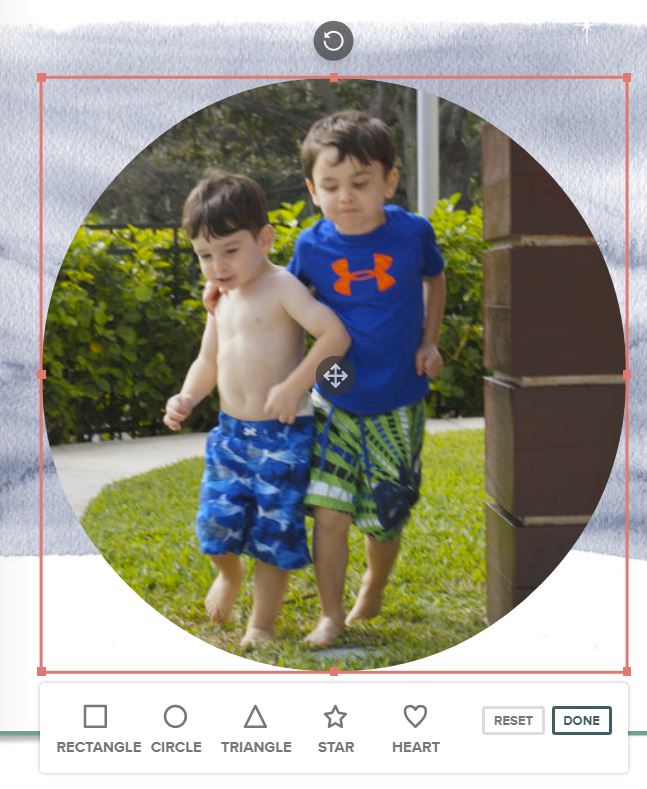
To use a shape — such as a star or a heart — as a photo border, click on Shape in the Edit menu; then select the shape you want to use. Click and drag the Move icon in the middle of your picture to adjust what portions of your photo will show through the cutout.
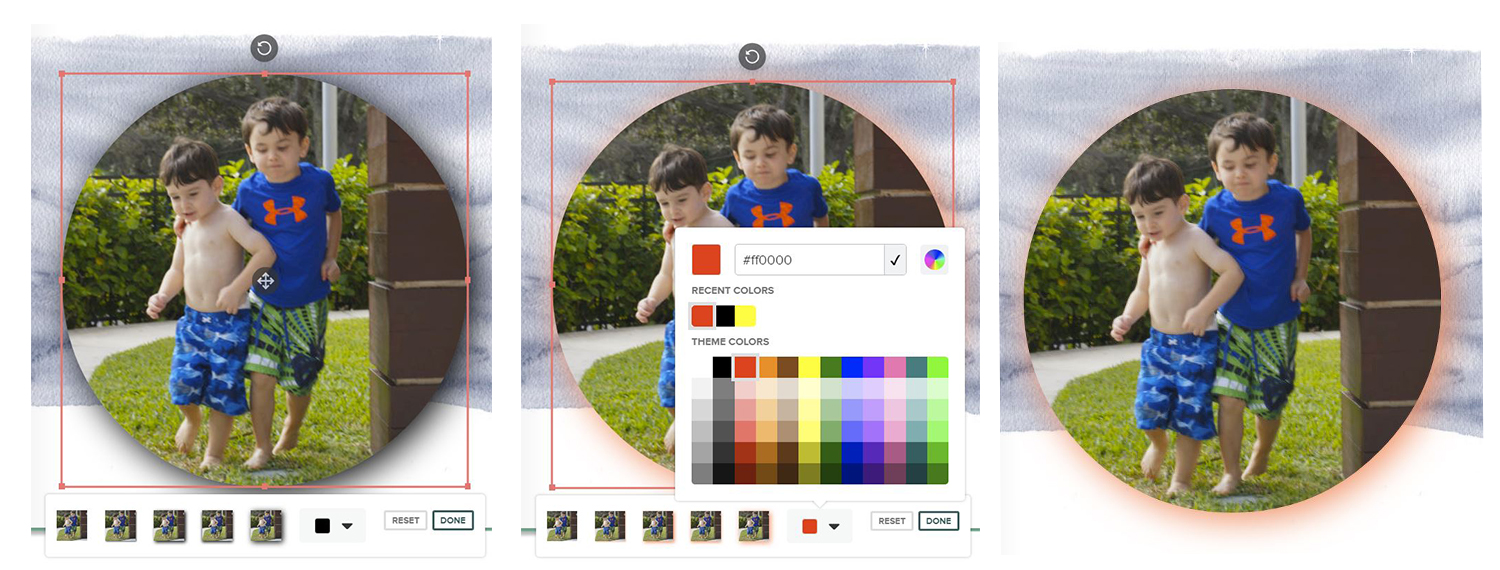
To apply a drop shadow to your picture:
- Click on Shadow.
- Click on each of the thumbnail options to see how they affect your picture.
- Click on the black box in the shadow options to select a different shadow color or to create a highlighting effect.
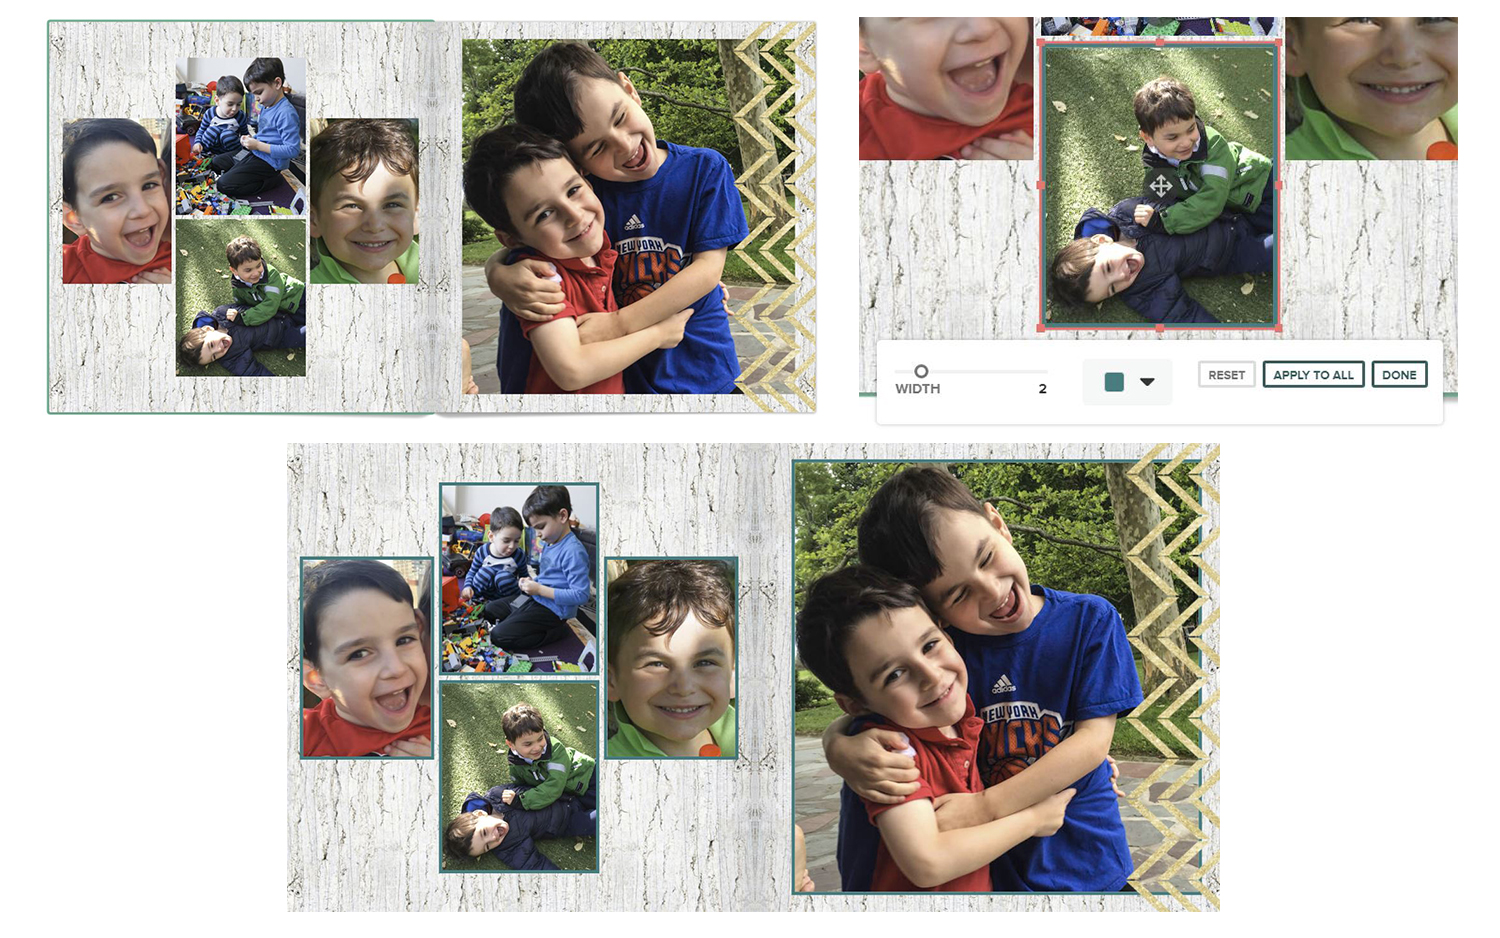
To apply the same border to all of the photos in a spread:
- Select one photo in the spread, and choose Border from the Edit menu.
- Choose the size and color of the border.
- Click on Apply to All to add the same border to all of the photos in the spread.
Change backgrounds
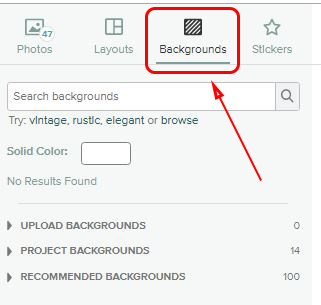
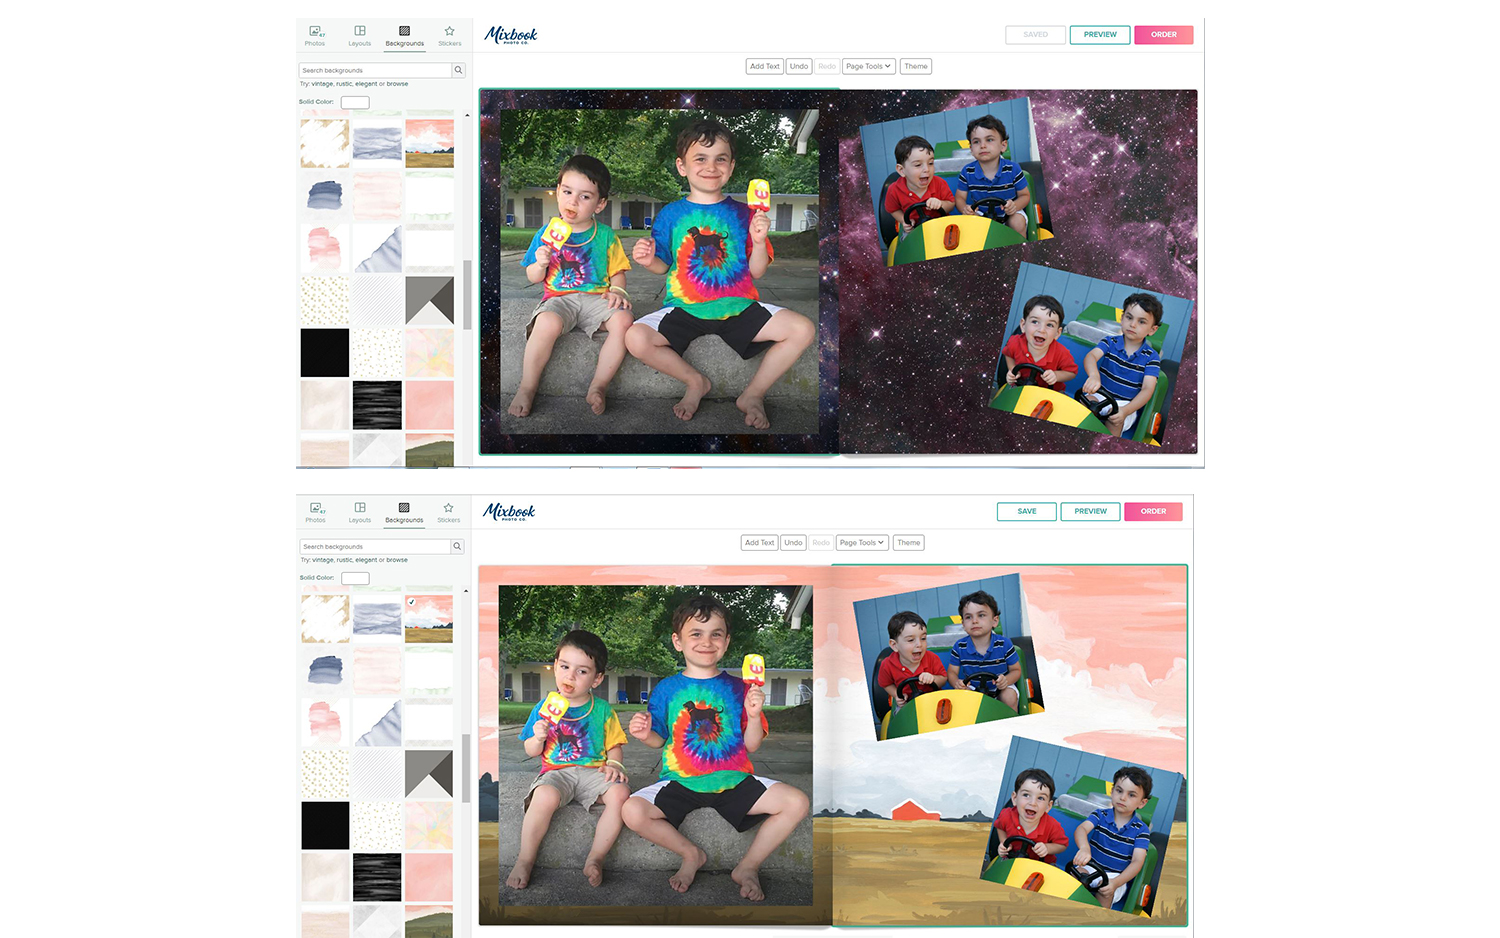
You can change the style and entire mood of your book by customizing the background of a page. First, click on the Backgrounds tab in the left sidebar. Project Backgrounds shows the backgrounds you've already used in your book, while Recommended Backgrounds displays backgrounds that Mixbook feels might fit your current design. To set the background to a solid color, click on the box next to the words "Solid Color" below the Search field.

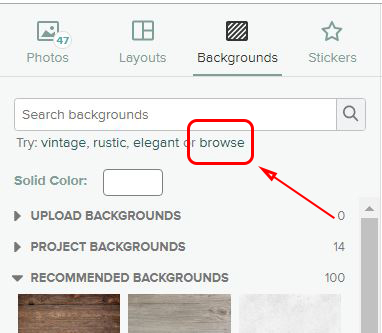
These options barely scratch the surface of the large library of available backgrounds. At the top of the Backgrounds tab in the sidebar is a search field. However, the search function is relatively weak, because it works only with proprietary categories rather than common keywords, such as "beach" or "stars." Instead, use the Browse button, located between the search field and the color picker.
To narrow down your selection, you can browse through specific categories, such as Style, Type or Theme.
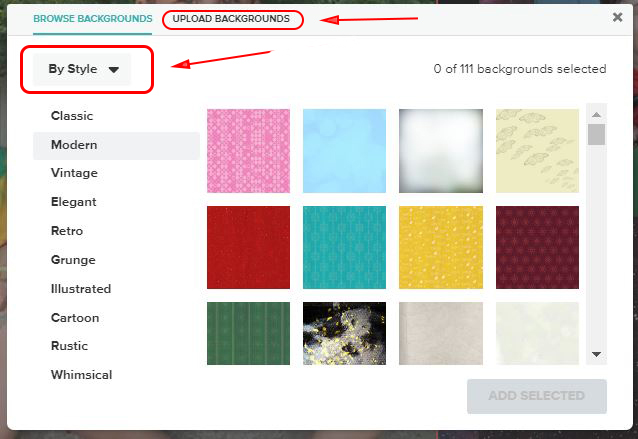
To add a background to your project, click on any background thumbnail that appeals to you. Doing so places a check mark on the thumbnail. Then, click Add Selected to add the checked backgrounds to the Project Backgrounds in the sidebar.
To apply a background to a page:
- Click on the page you wish to apply the background to.
- Click on the Background thumbnail in the sidebar to apply the background.
- Note that if you want to change the background of both pages in a spread, you'll need to select each page and apply the background one page at a time.
To upload your own images, photos or drawings to use as page backgrounds:
- Open the Browse Backgrounds pop-up window.
- Click on the Upload Backgrounds tab.
- Mixbook recommends that your custom backgrounds be exactly 4429 x 4499 pixels and include a 295- to 299-pixel bleed area.
Add and edit stickers
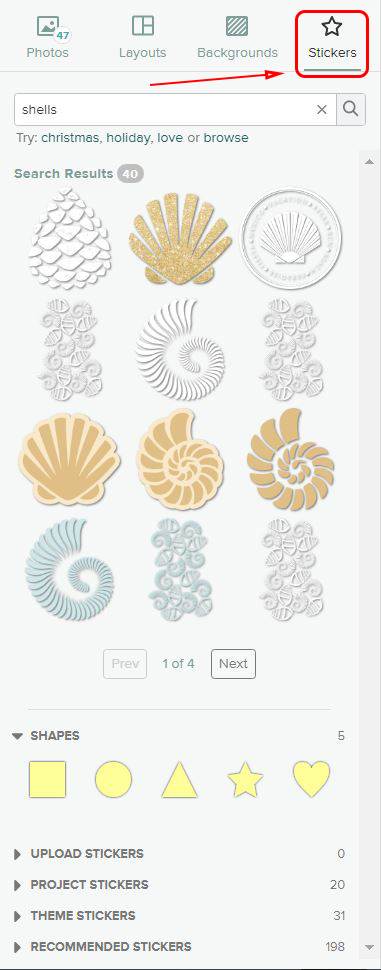
Mixbook's Stickers (which is what it calls its library of clip art) are organized in a very similar manner to the backgrounds. They include the ability to browse the full library and upload your own designs and photos. However, the search engine for clip art is more functional than that for backgrounds, because it uses common keywords, such as "shells," "stars," "hearts," and "beach."
To add a sticker:
Click on the Stickers tab in the left sidebar. Then, click and drag a sticker onto a page.
To edit a sticker:
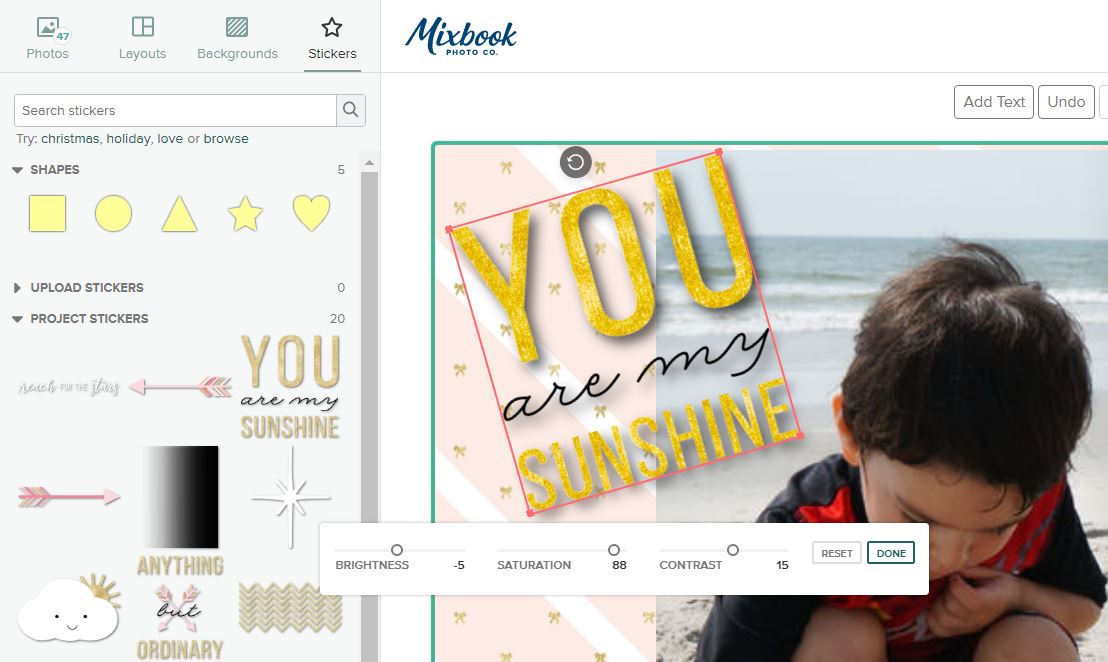
You can work with Stickers in the same manner as photos. For instance, clicking on a placed sticker displays a red bounding box around it, with which you can resize, reshape and rotate the sticker. In addition, a pop-up menu opens, providing access to editing tools.
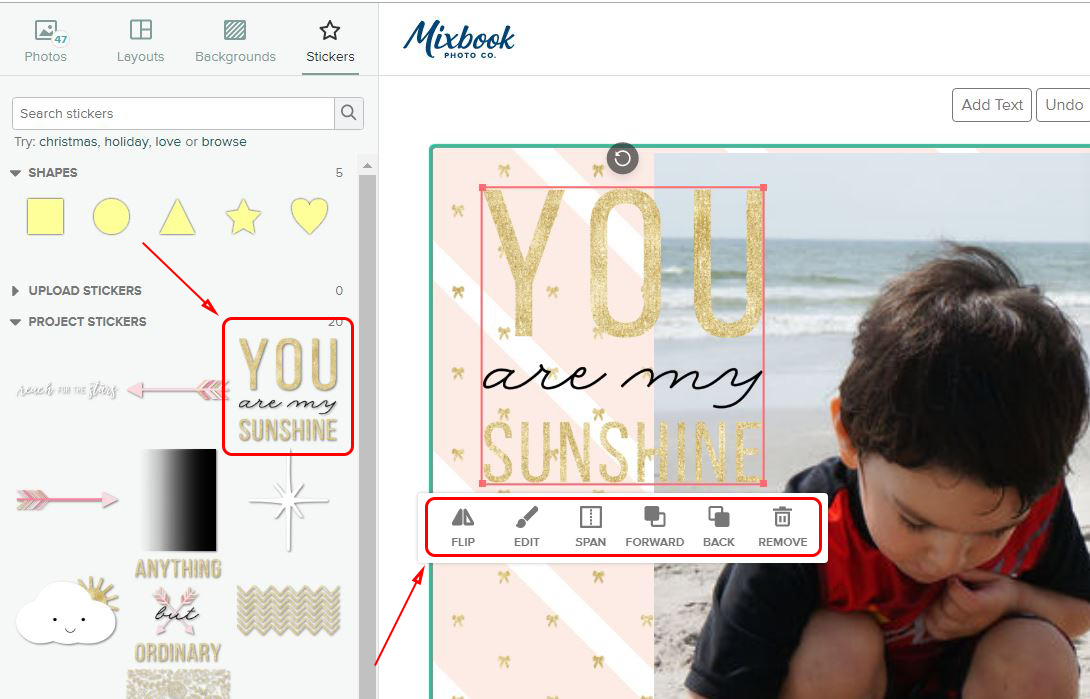
Thus, you can add drop shadows and effects; adjust the opacity or color; flip and span stickers, etc.
Add and edit text
Click on the Add Text button just above the two-page spread. This places a text box on your page and opens the text options ribbon. (Mixbook doesn't offer drop shadows or other effects for text.) Drag the box into position; choose a font, color and size; and start typing.
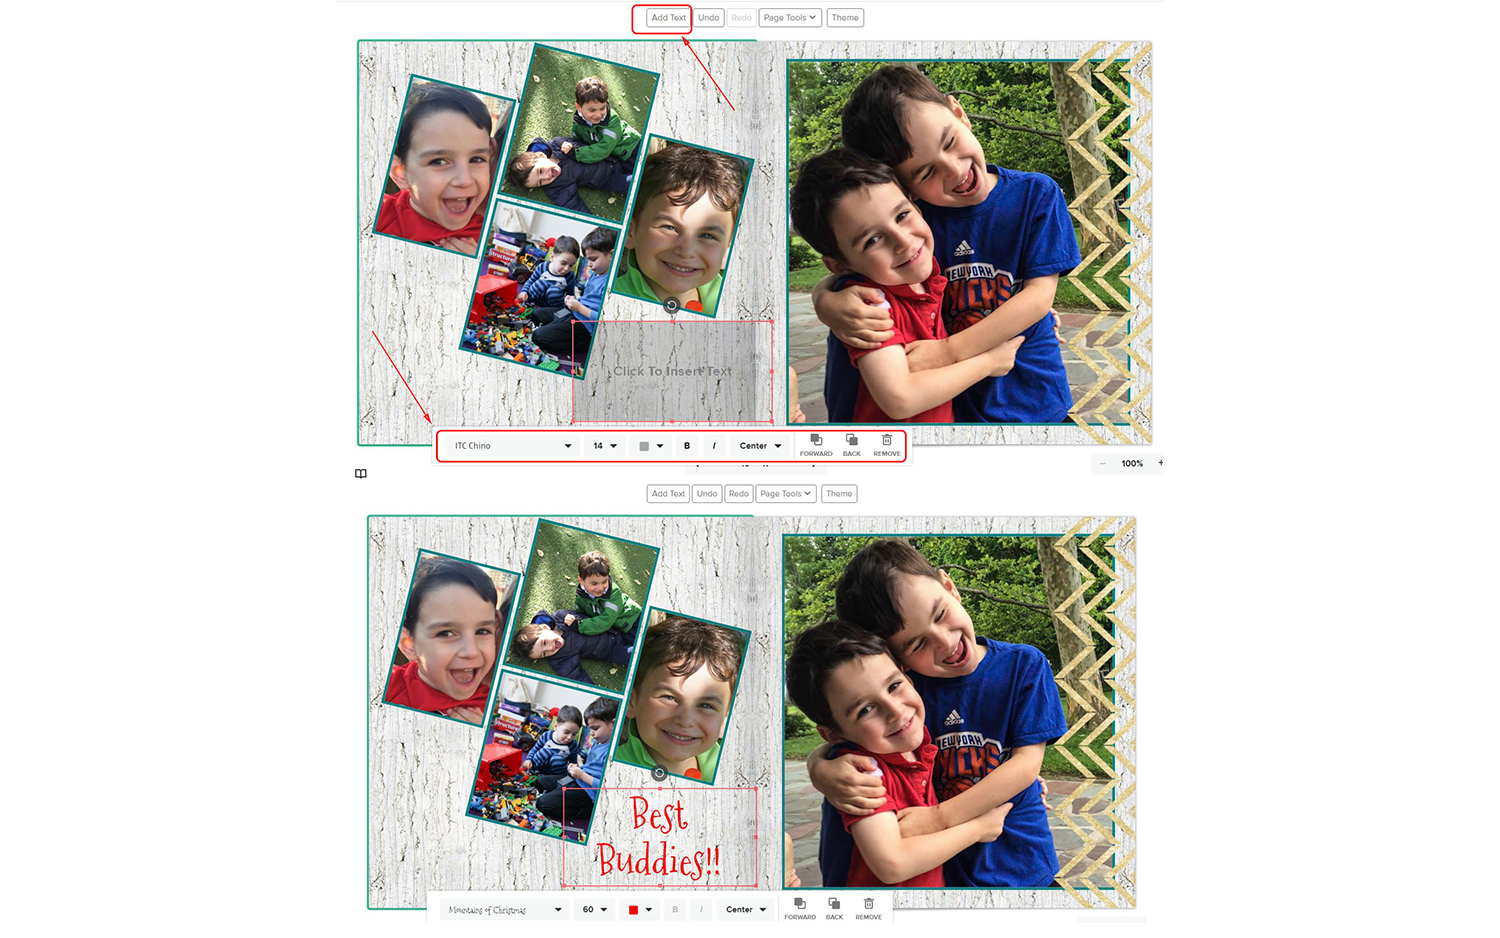
To change your font, size or color:
- Click on the text box.
- Drag the cursor to select the text you want to change.
- Use the text options ribbon to change the text to the look you want. You can have different fonts, sizes and colors in a single text box.
Proofread your book
Before sending your book off to be published, it's critical you look over it to make sure that there are no spelling or punctuation errors, that all of the photos are in the correct place, and that all of the backgrounds and other effects are in the right position.
In the All Pages view, check for the following:
- Do all of your page designs fit nicely together?
- Are the pages in the right order?
MORE: Best Photo-Editing Software From Beginner to Pro
Return to the Work Area view, and use the navigation arrows under the book to view each page one at a time, in order.
Check for the following:
- Is each photo in the position you want?
- Do you see any exclamation marks on a picture, warning that it's low resolution? (If so, it probably won't print well, and you should consider replacing it with another photo or making it smaller.)
- Proofread your text for typos, misspellings, grammatical errors or factual errors.
- Be sure you're consistent with shadows, borders and other effects on each page spread.
- Make sure any photos that span two pages don't have any key elements (such as a face) in the fold of the book.
- Have you repeated any photos?
Order your book
When you're happy with your book, click on the Order button.
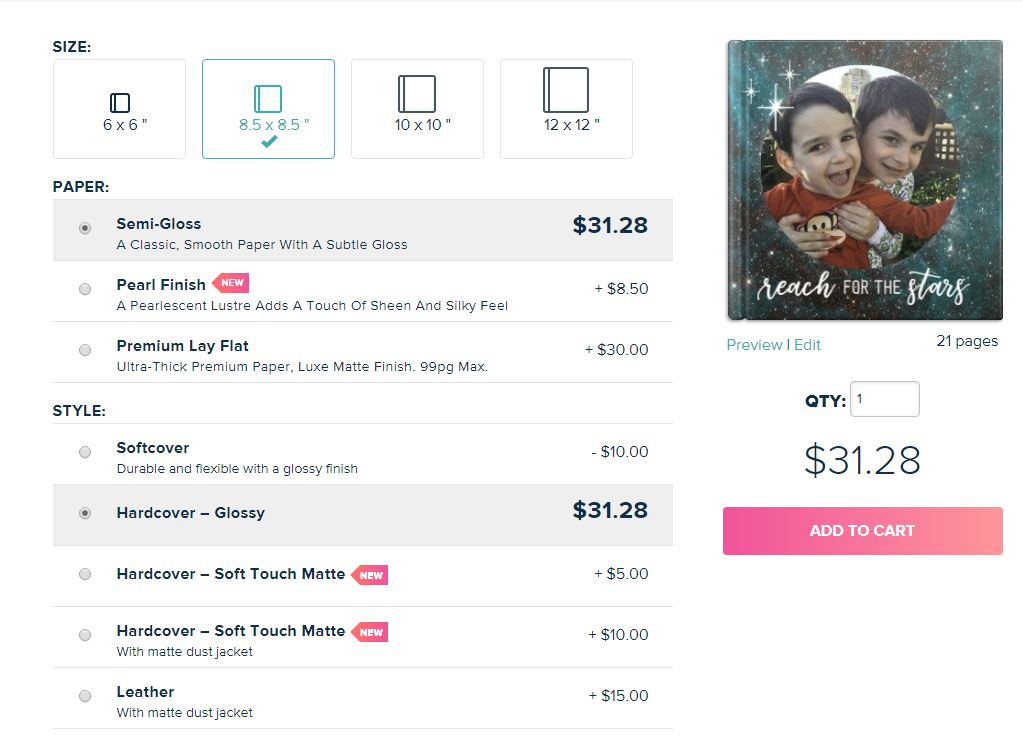
You have three choices to make: size, paper and cover material.
Size
The size options will depend on what shape book you selected when you first set up your book (square, or landscape or horizontal rectangle). Square books range in size from 6 x 6 inches to 12 x 12 inches, while landscape books can be as big as 14 x 11 inches. The only size option for portrait-style books is 8.5 x 11 inches.
Paper
We've found all of the paper stock used by Mixbook to be of a nice weight and quality. However, there are several options for finishes:
- Semigloss is the least expensive. Its sheen gives a nice dynamic dimension to your photos the way classic printed semigloss photos do.
- Pearl Finish is for those who prefer a matte-like paper for their photos. It has a sense of elegance.
- Premium Lay Flat binds the book so that, when you open it, the pages are fully flat. The paper is the heaviest of the three and has a smooth, rich quality.
Cover material
You can choose from three cover materials (listed in order from the least expensive to the most expensive): softcover, hardcover and leather.
- Softcover is a paperback book. It has a nice glossy finish.
- Hardcover is a hardback book. You can choose between glossy or matte, and whether to have a printed paper dustcover for it.
- Leather is a great choice for an impressive gift and comes with a printed paper dustcover.
One last thing...
Before you click on Add to Cart, we recommend clicking on Preview, located under the thumbnail of your book cover, to check it over one more time. Then, order and enjoy!
Credit: Tom's Guide

Sally Wiener Grotta is the president and lead analyst of DigitalBenchmarks test lab (www.DigitalBenchmarks.com). The scripts she created for various tech publications for testing and evaluating digital cameras, image quality, software and related technologies have become industry standards. Among her numerous books is the first major volume on image processing “Digital Imaging for Visual Artists” (McGraw-Hill), co-authored with Daniel Grotta. Her hundreds of reviews, stories and columns have appeared in scores of magazines, journals and online publications.
 Club Benefits


