How to transfer data from iPad to iPad
Here's how to transfer data from iPad to iPad quickly and easily
Here at Tom’s Guide our expert editors are committed to bringing you the best news, reviews and guides to help you stay informed and ahead of the curve!
You are now subscribed
Your newsletter sign-up was successful
Want to add more newsletters?
Daily (Mon-Sun)
Tom's Guide Daily
Sign up to get the latest updates on all of your favorite content! From cutting-edge tech news and the hottest streaming buzz to unbeatable deals on the best products and in-depth reviews, we’ve got you covered.
Weekly on Thursday
Tom's AI Guide
Be AI savvy with your weekly newsletter summing up all the biggest AI news you need to know. Plus, analysis from our AI editor and tips on how to use the latest AI tools!

Weekly on Friday
Tom's iGuide
Unlock the vast world of Apple news straight to your inbox. With coverage on everything from exciting product launches to essential software updates, this is your go-to source for the latest updates on all the best Apple content.

Weekly on Monday
Tom's Streaming Guide
Our weekly newsletter is expertly crafted to immerse you in the world of streaming. Stay updated on the latest releases and our top recommendations across your favorite streaming platforms.
Join the club
Get full access to premium articles, exclusive features and a growing list of member rewards.
You'll need to know how to transfer data from iPad to iPad if it's your lucky day for a tablet upgrade. One of main reasons why iPads are among the best tablets you can buy is that they're simple to use. And this is no exception — Apple make transferring data between two iPads really straightforward. However, there are a couple of different methods you can use and it's not immediately obvious which is best.
In our guide below we'll explain what your options are for transferring your stuff from an old to a new iPad, and how to do it. Make sure you've got some time to spare though, as even on one of the best iPads, sending all your data over can take a while!
How to transfer data from iPad to iPad using Quick Start
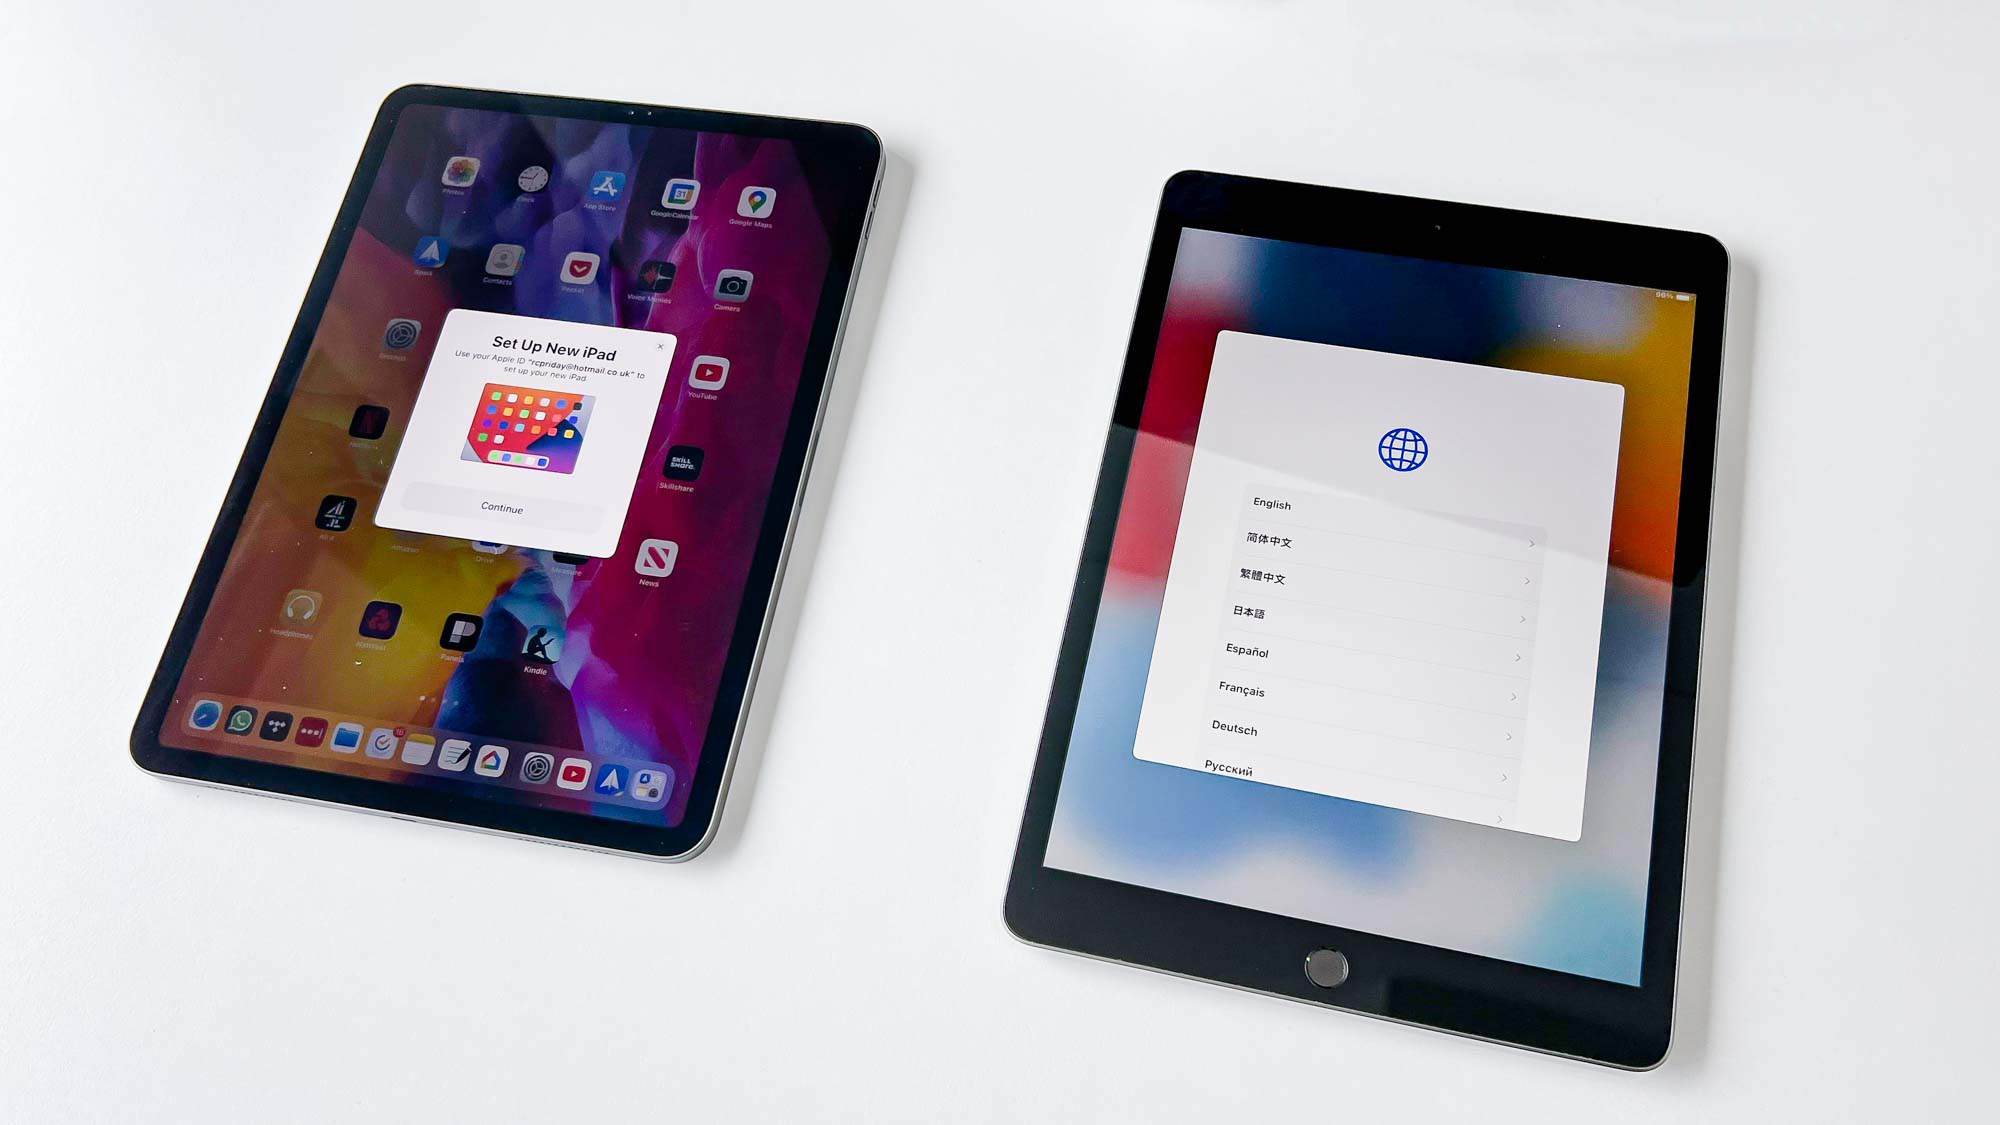
1. Place your new and old iPads next to each other to enable Quick Start.
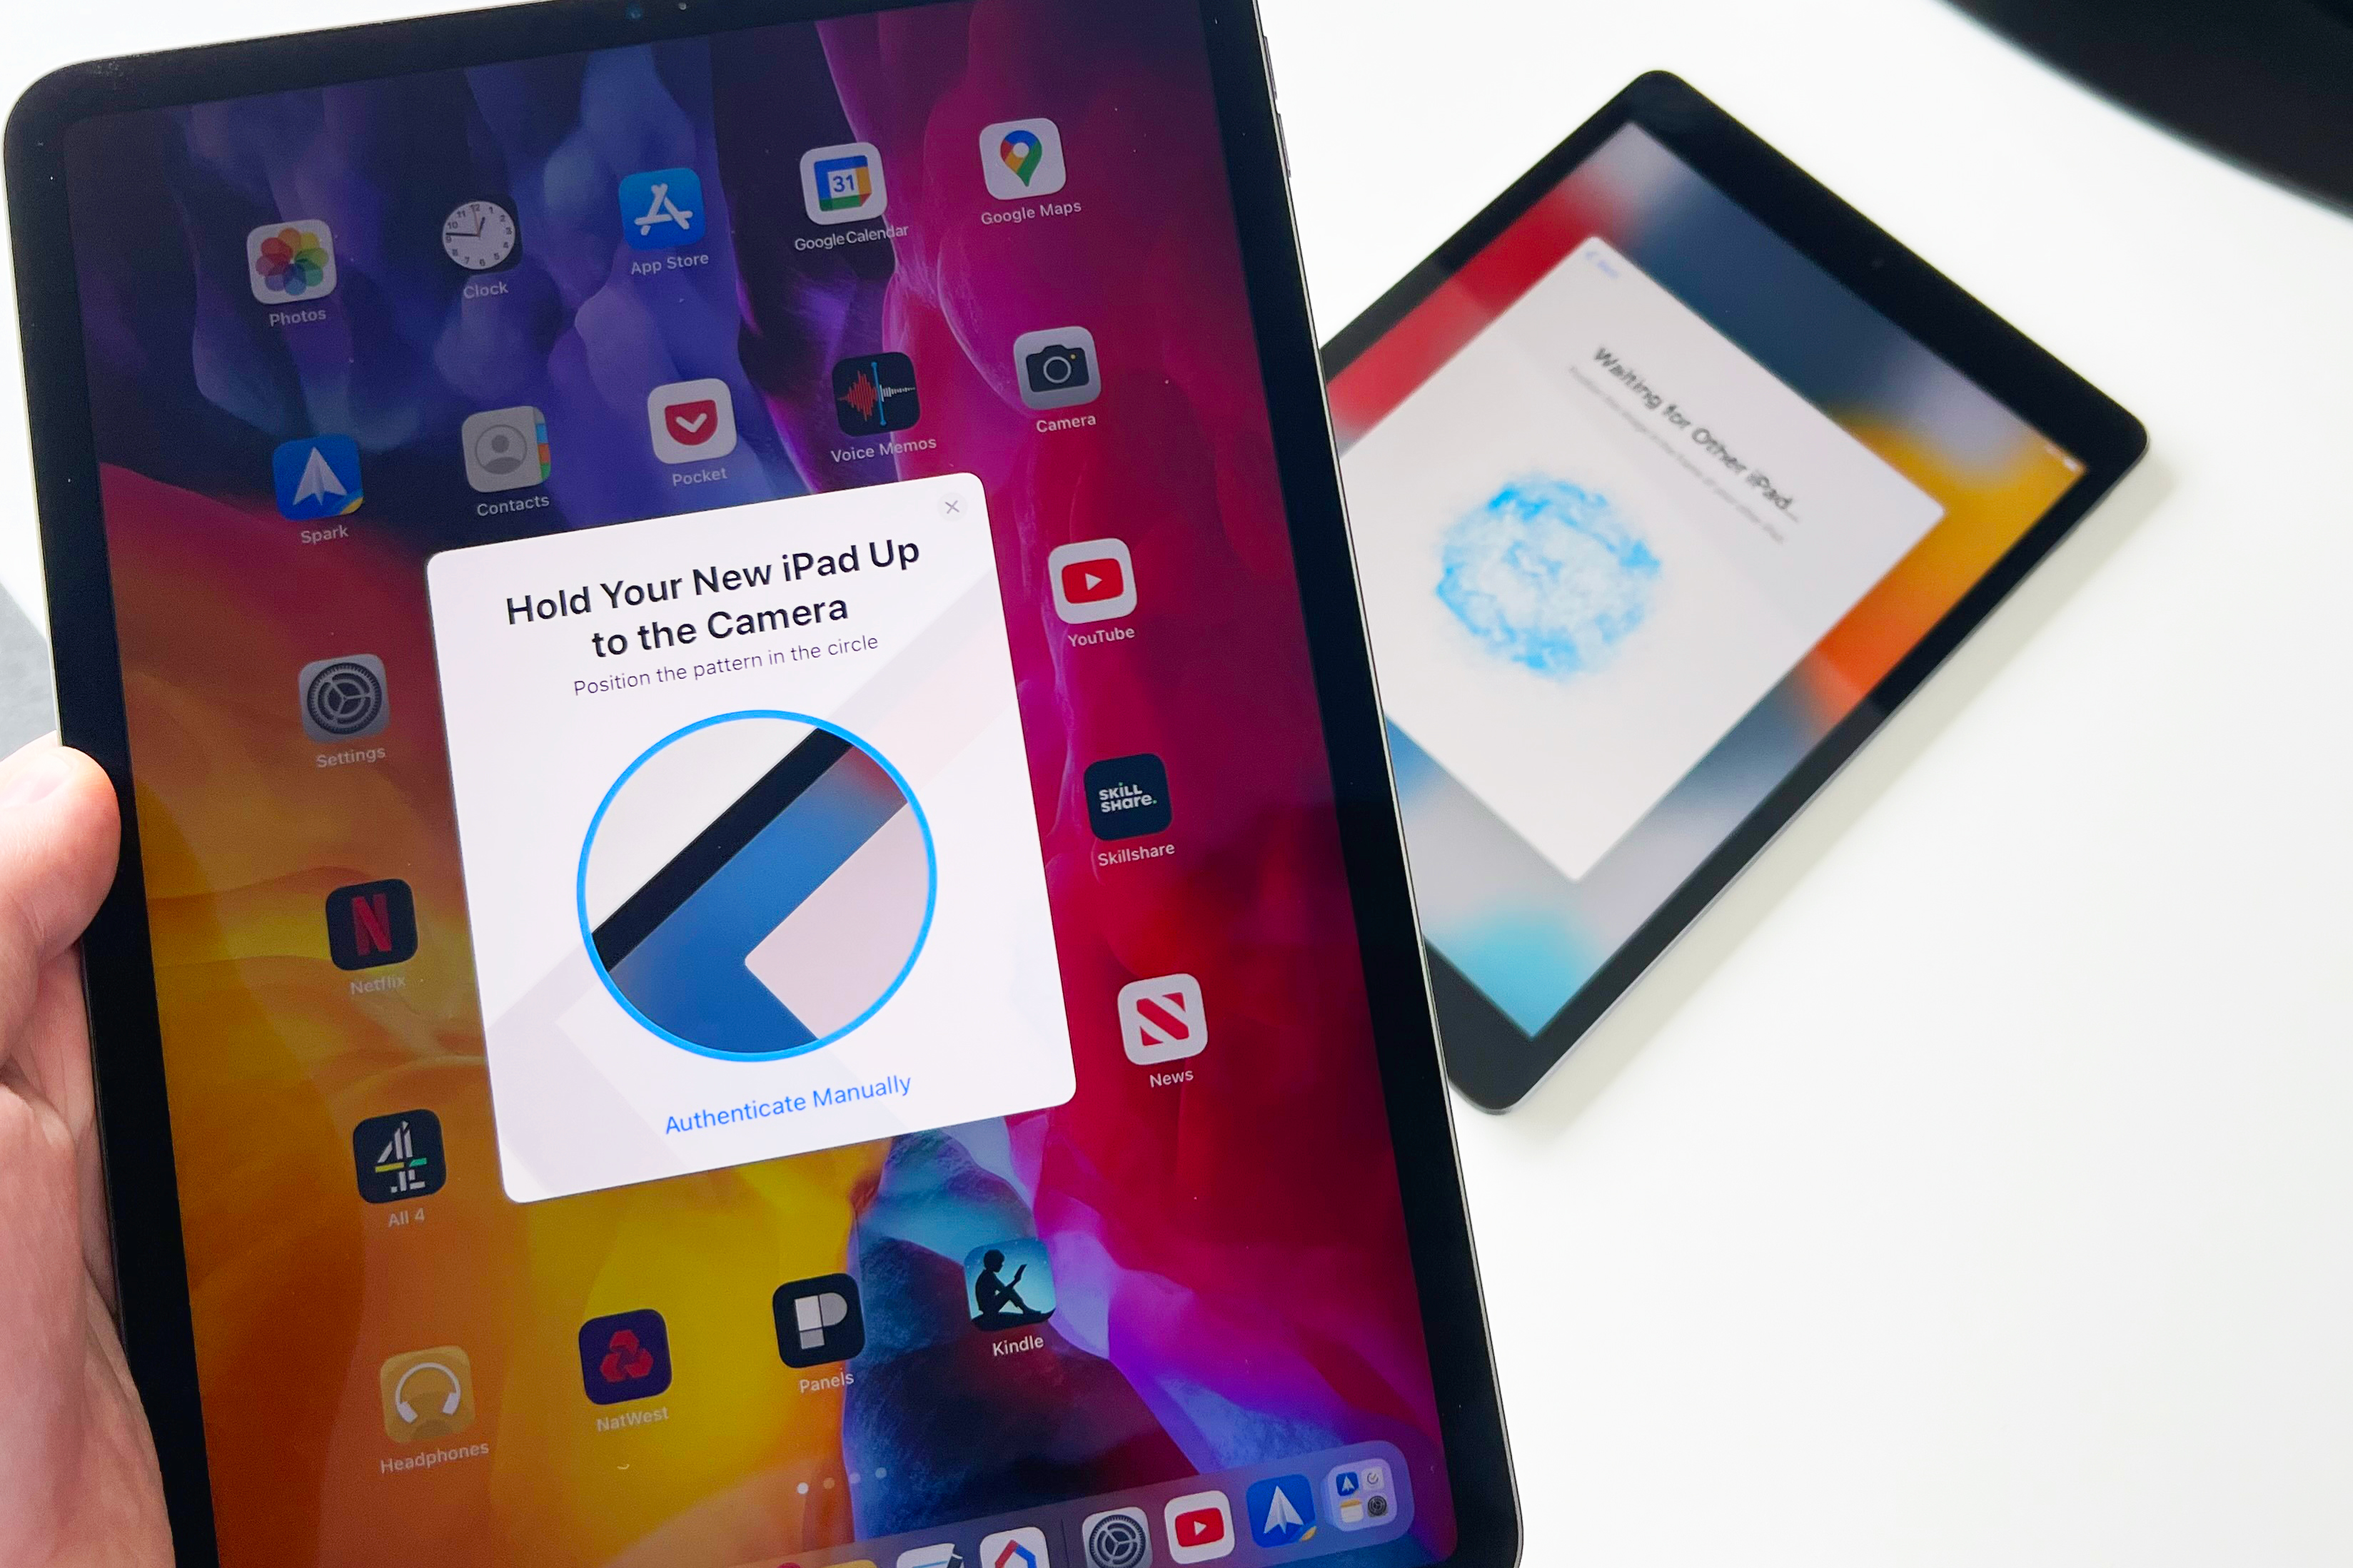
2. Scan the pattern on your new iPad with your old iPad.
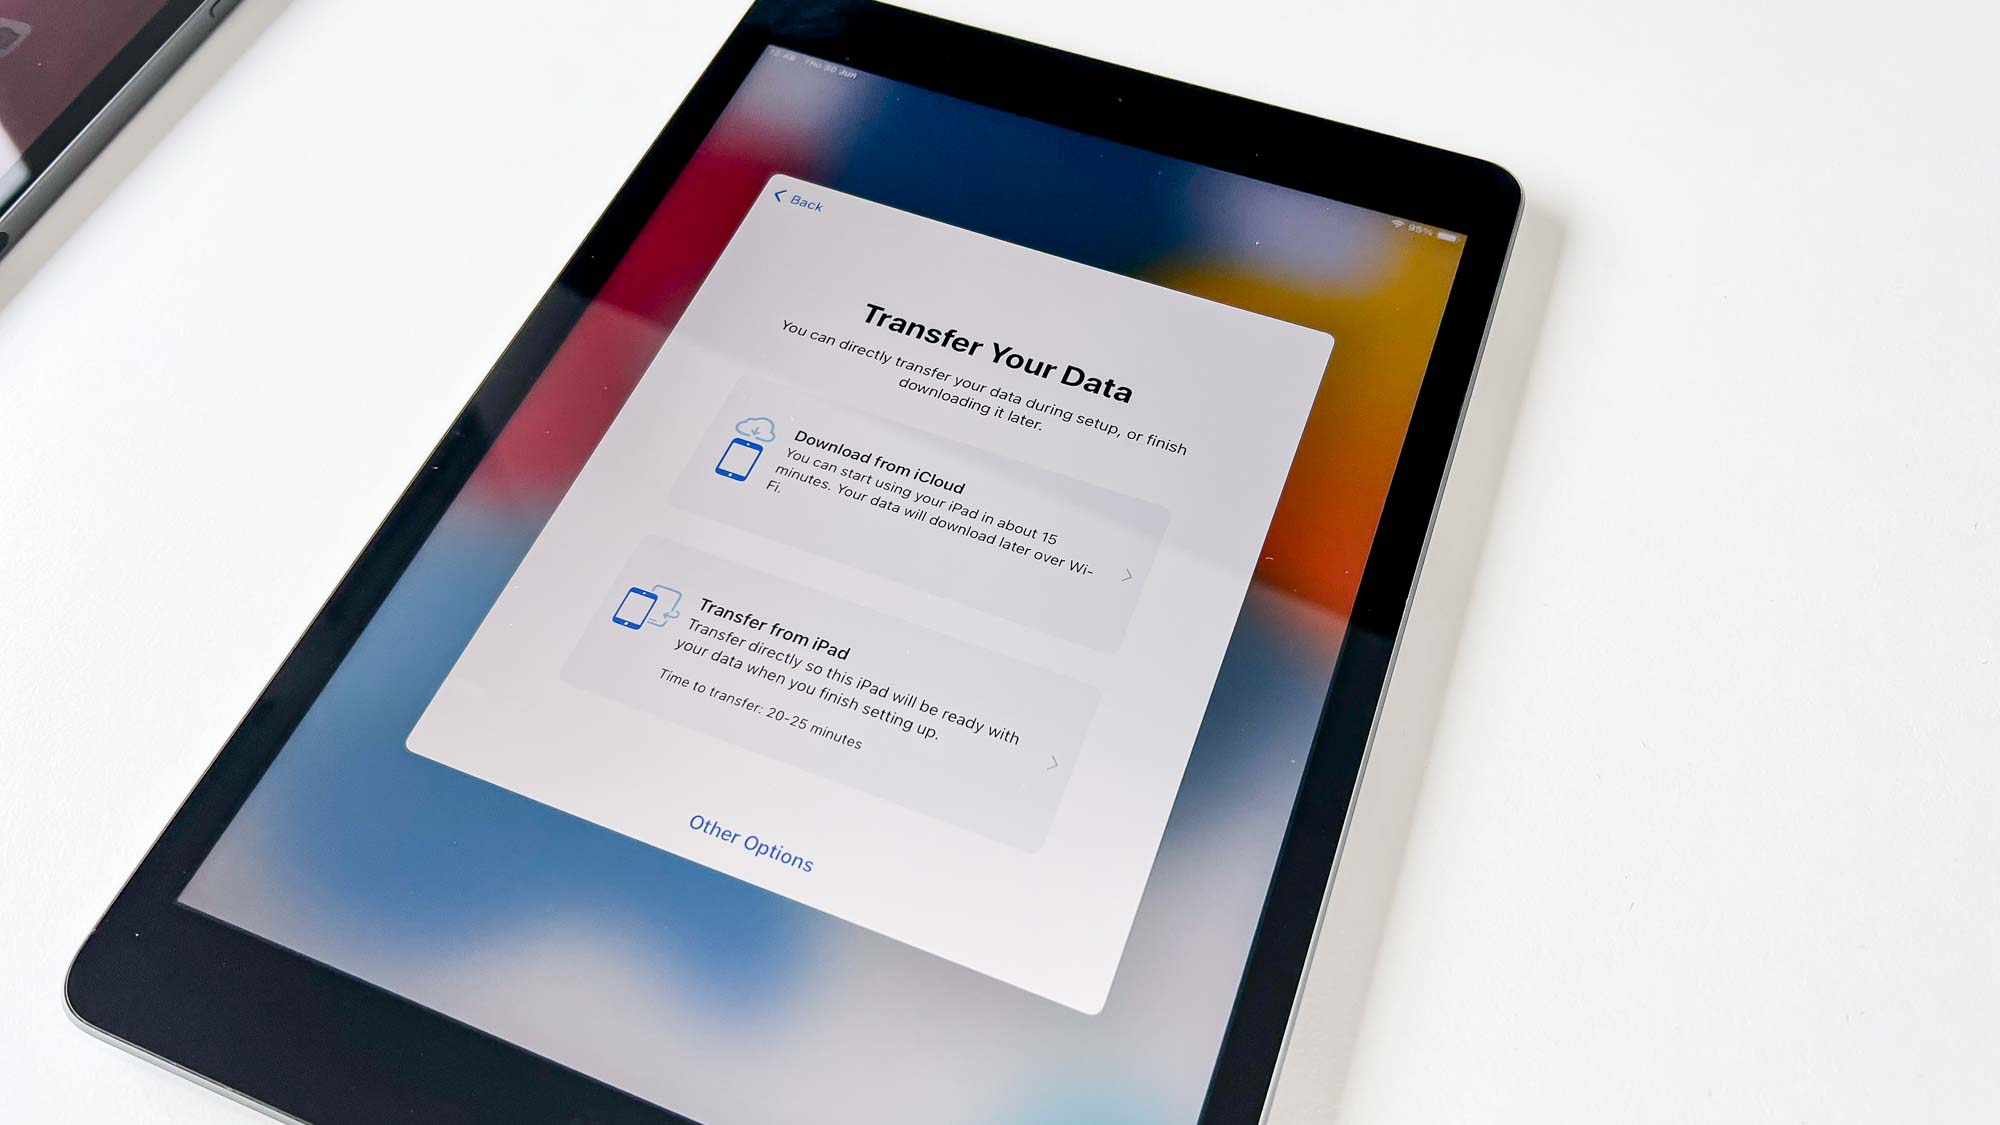
3. After some initial set-up steps, select either Transfer from iPad or Download from iCloud to send your data over to the new iPad.
4. Finish the set-up process and your new iPad will be ready to use with all your data present.
Read on to see detailed instructions for each step.
Get instant access to breaking news, the hottest reviews, great deals and helpful tips.
1. First, put your two iPads close to each other. This allows your new iPad to detect your old one and set up the data transfer.
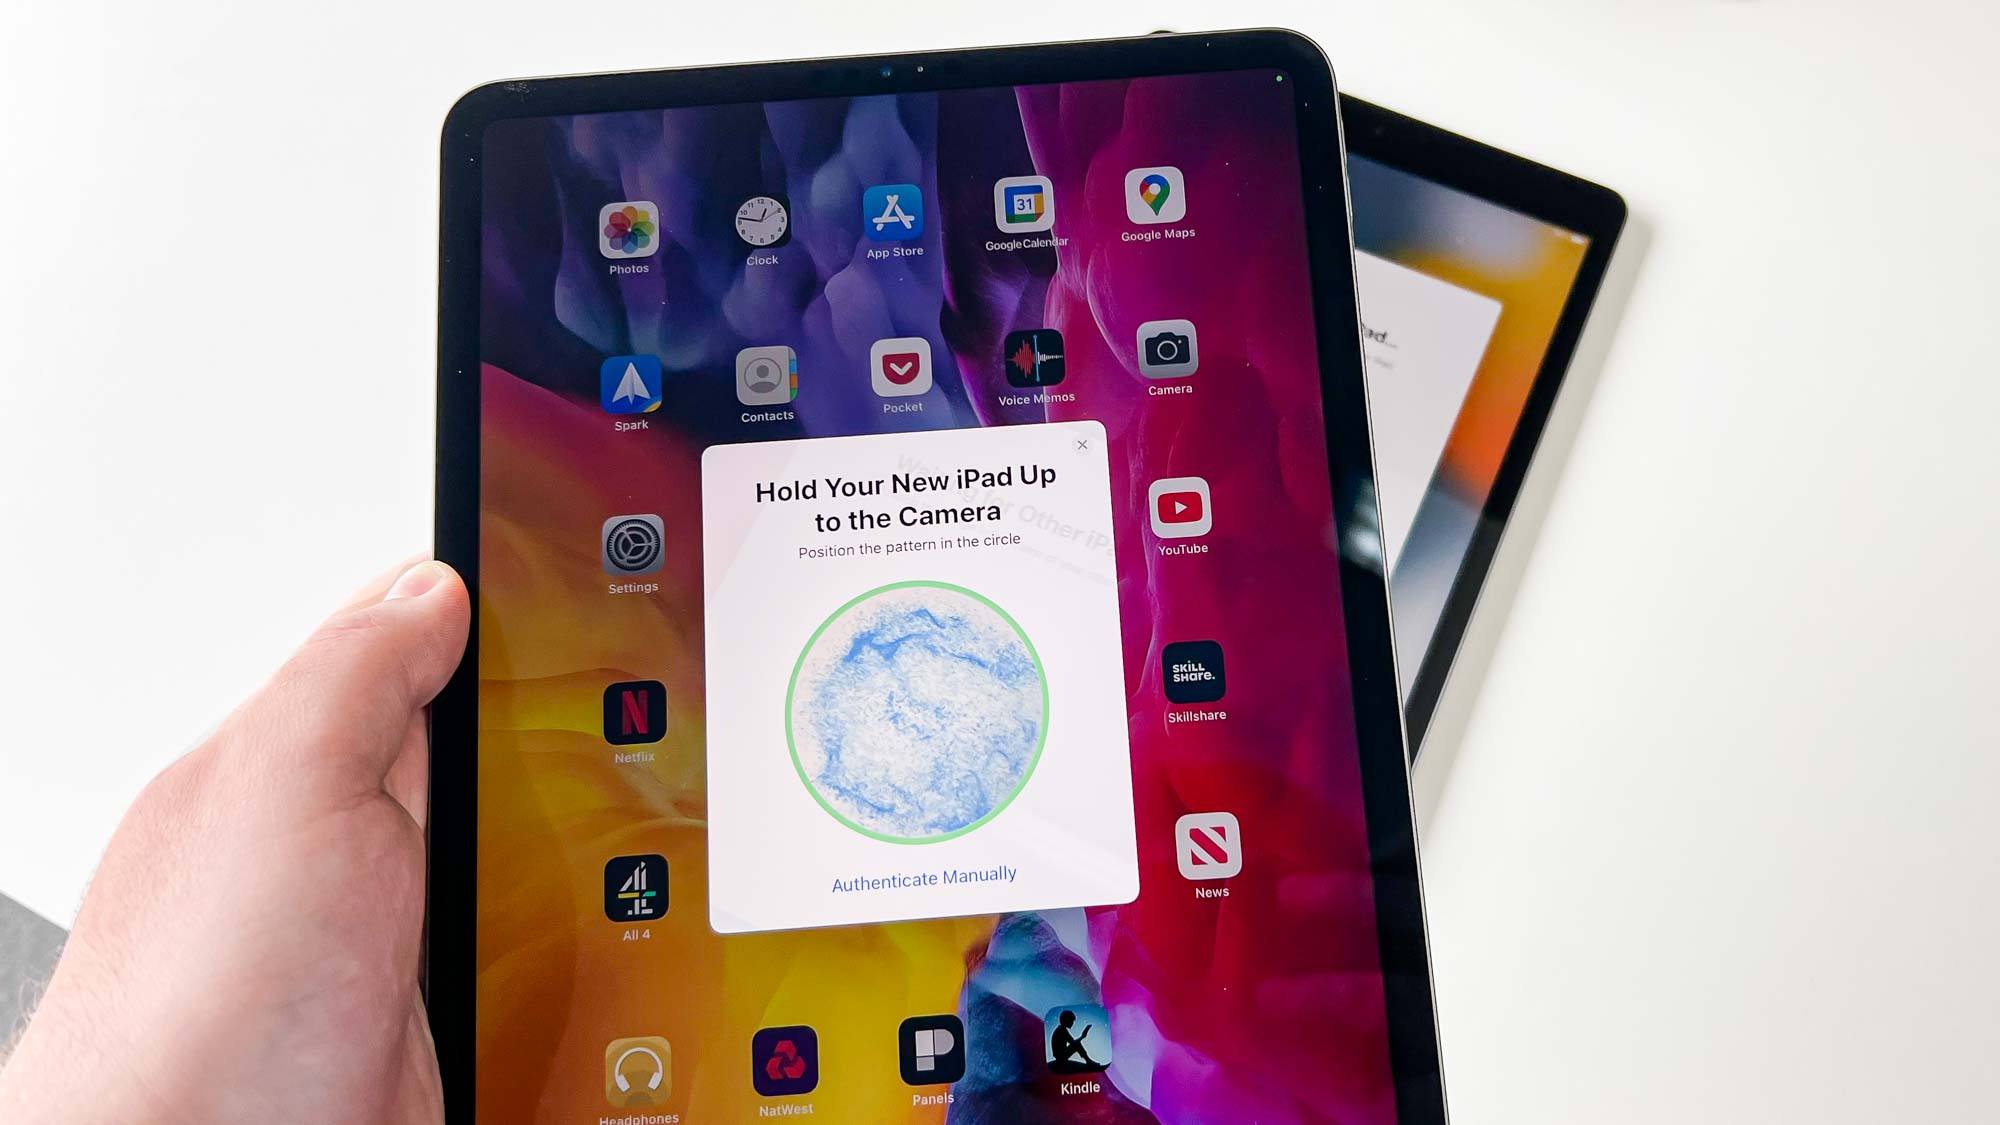
2. Your new iPad will start displaying a circle of waving dots, as you can see in the background of the image below. You need to scan this with the camera pop-up that appears on the old iPad to confirm it's these two devices you're looking to swap data between.
Move the pattern on the screen of the new iPad into view of the old iPad's camera. The circle will turn green on the old iPad's screen when the pattern is in view.
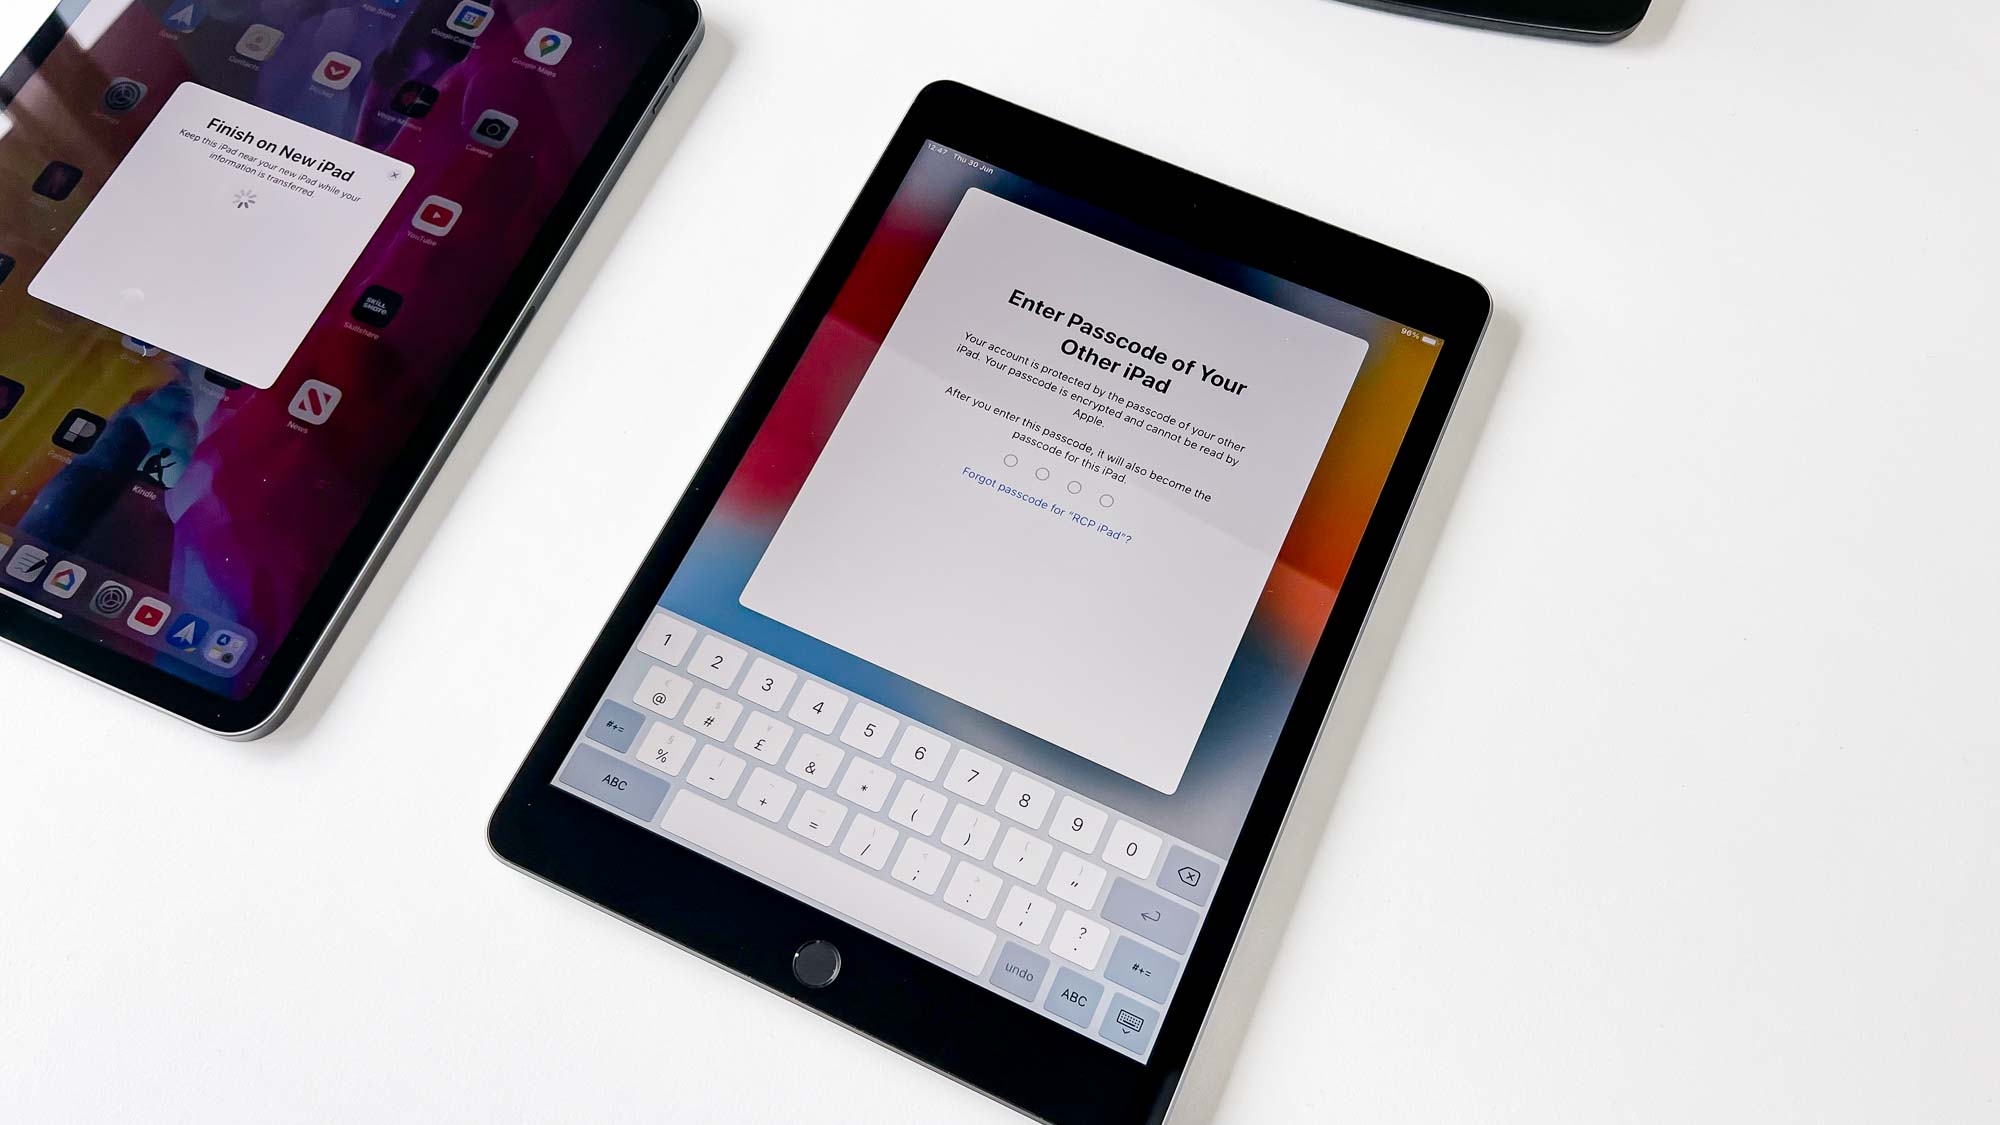
3. Now it's time to set up a few basic things on the new iPad. On the new device, enter the passcode or password of your old iPad, wait for the iPad to activate, and then follow the steps to activate Touch ID or Face ID unlocking.
4. When your new iPad asks where to import data from, select Transfer from iPad.
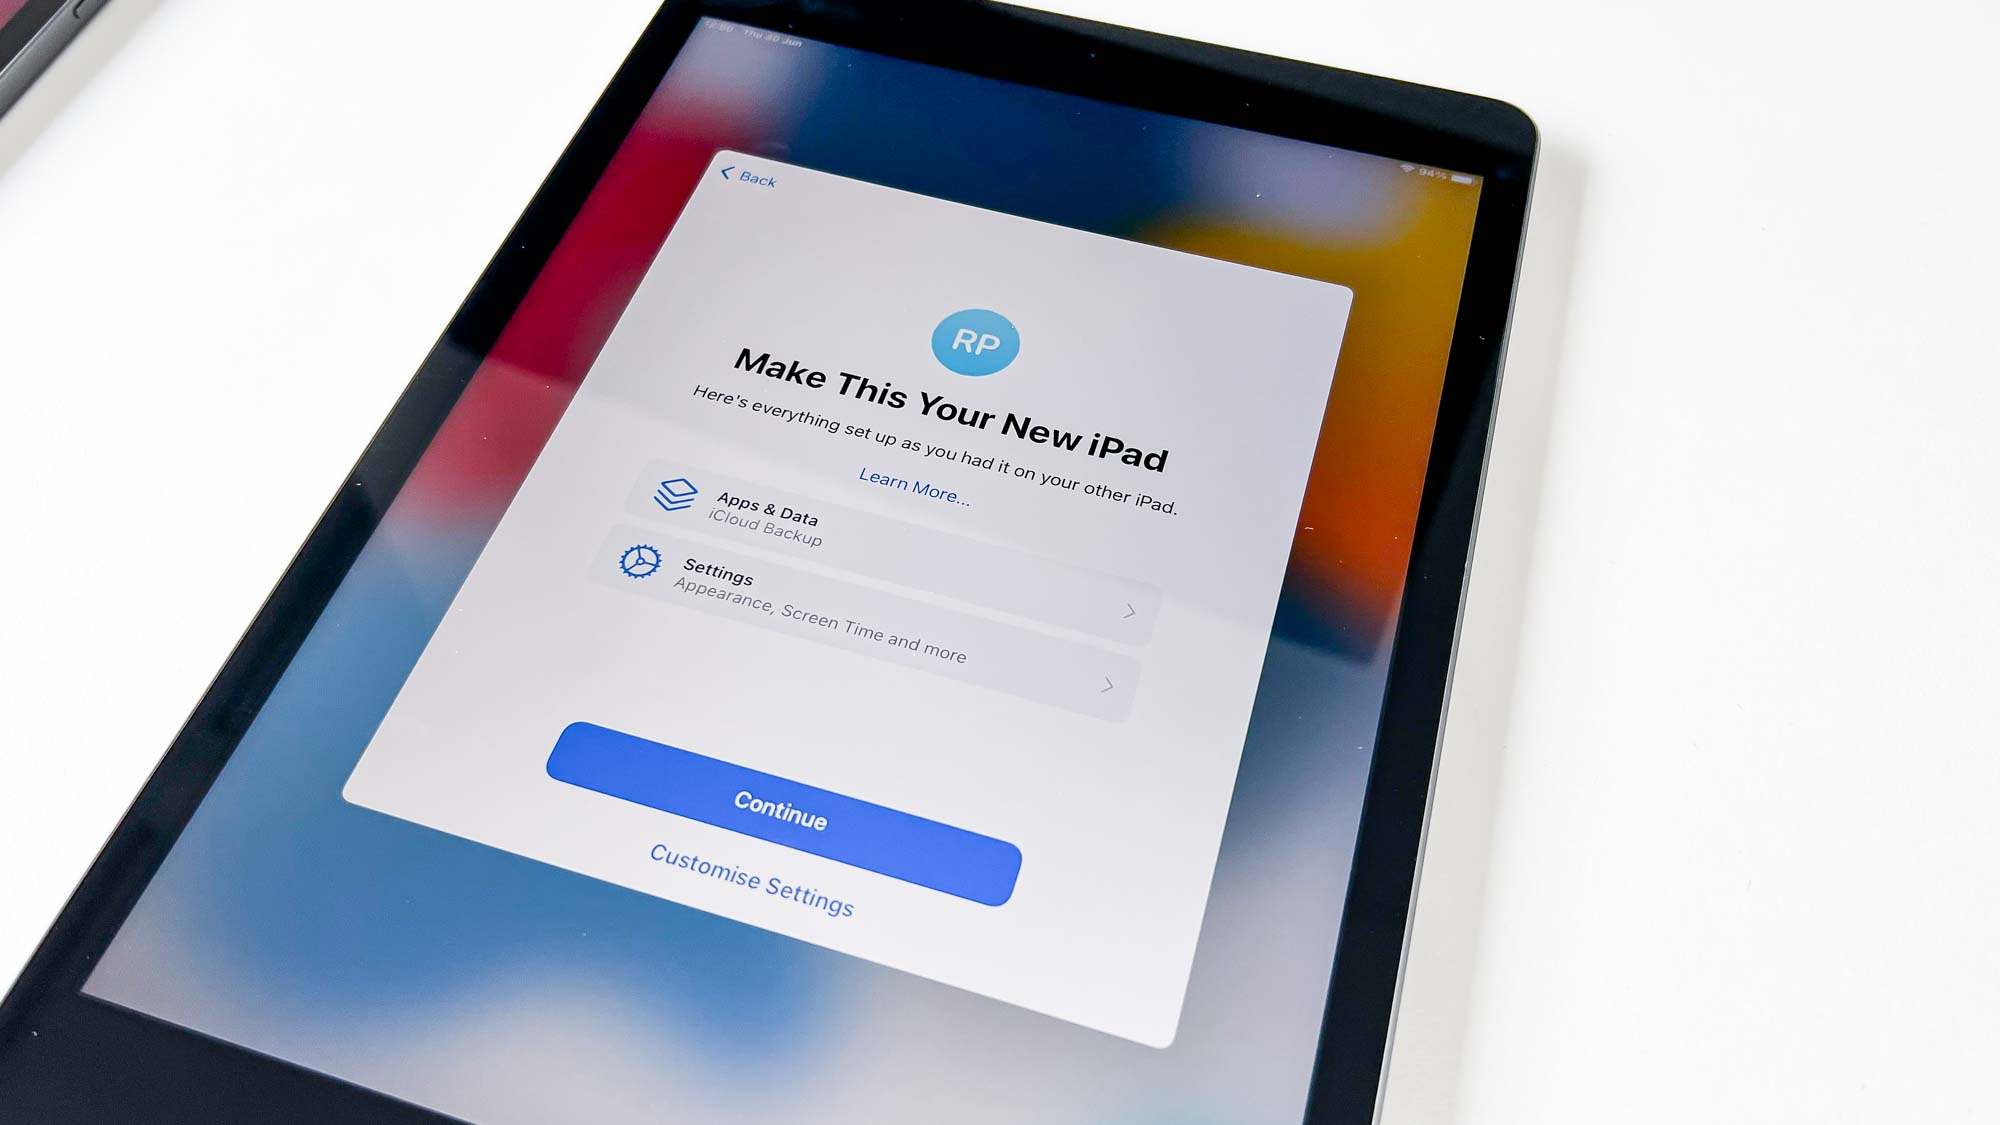
6. Now you have the chance to make any changes to the data you're transferring if you wish. By default, all your app data and settings will be sent over just as they were on your old iPad. If you want to leave something behind, then tap the relevant heading on this menu and change your chosen settings. Otherwise, tap Continue.
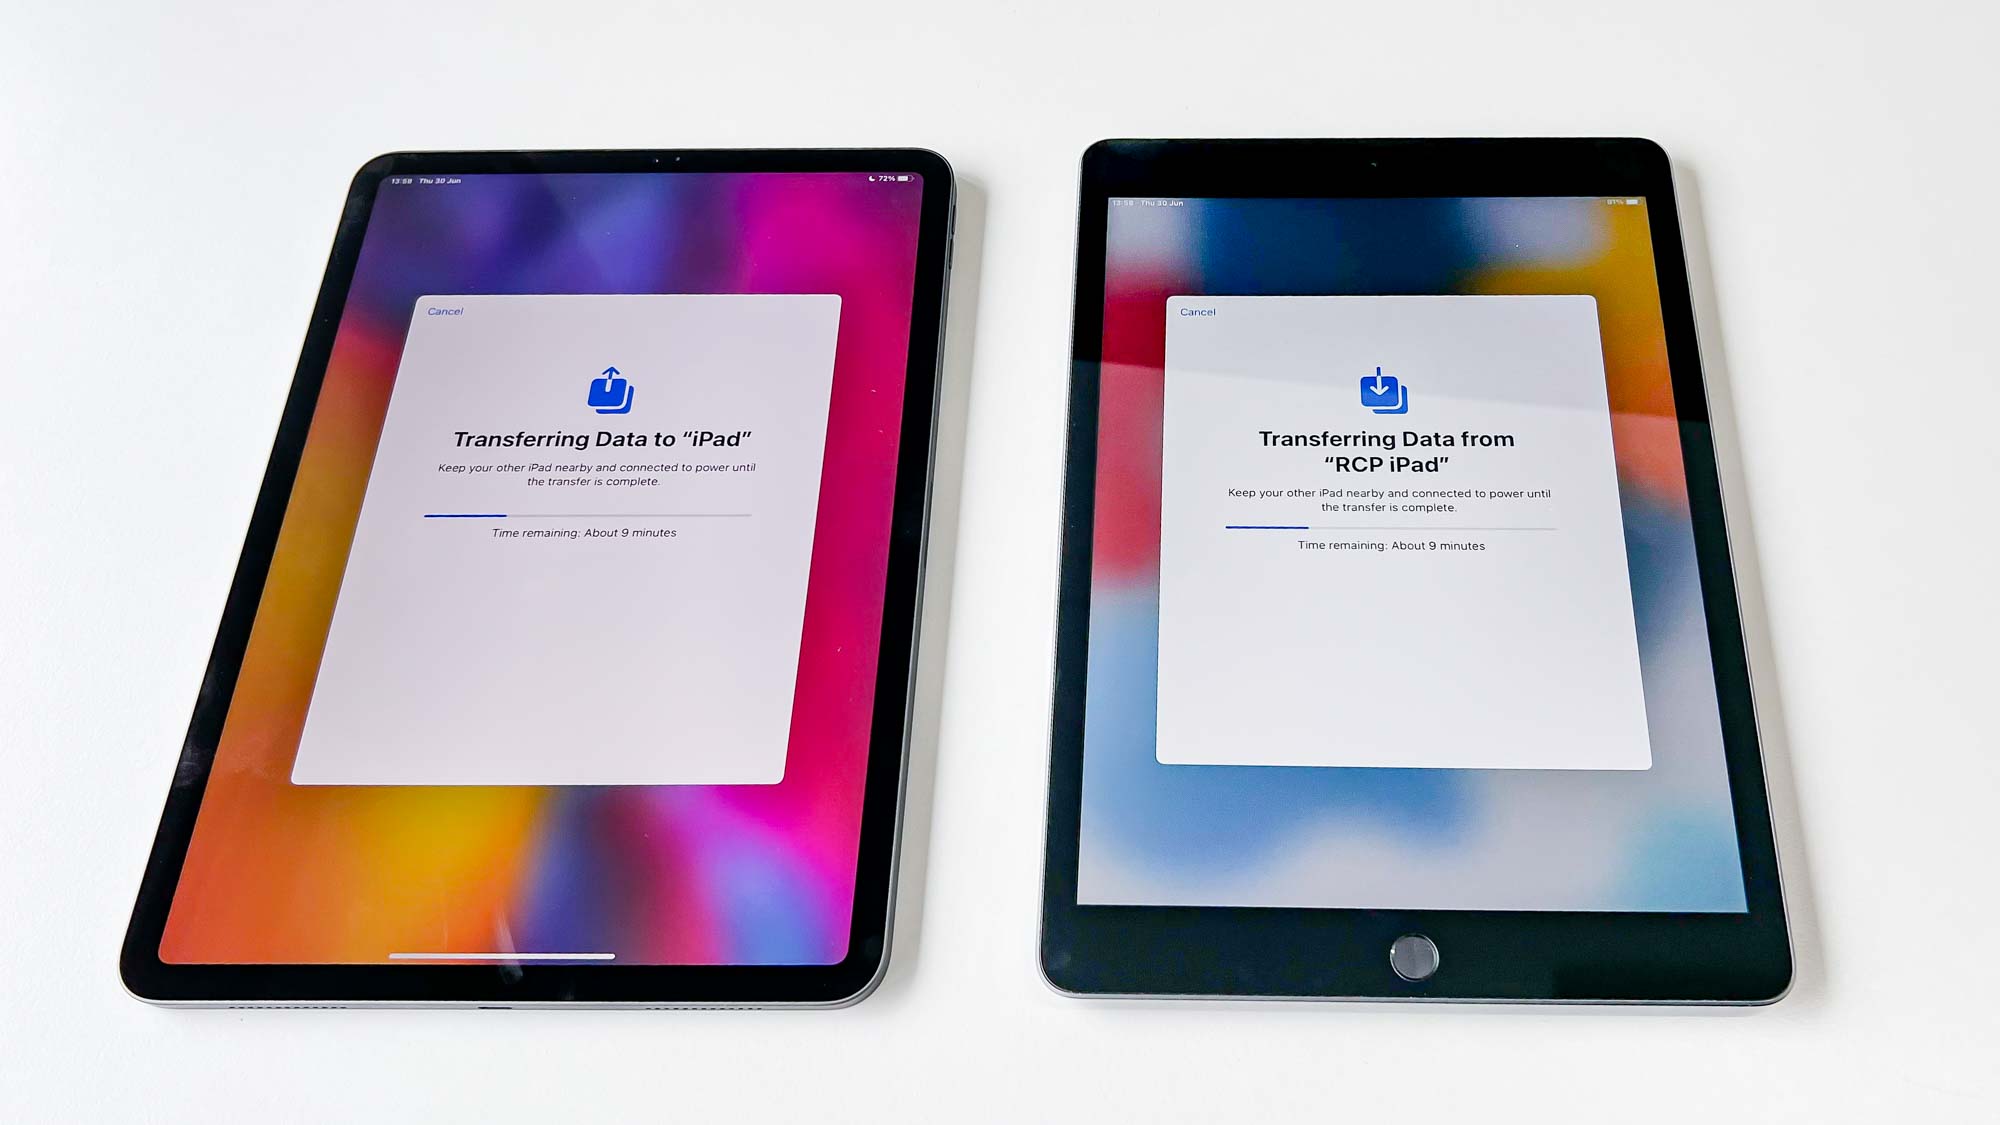
7. Your old iPad will then start sending its data over. Be prepared for a long wait to transfer everything over, and an even longer one if you need to also update the OS software on the new device.
8. Once that's complete, and your iPad has restarted, finish the set-up process by agreeing to the terms and conditions and setting up Apple Wallet, Siri, Screentime and so on. When that's complete, you'll arrive on the home screen with all your apps present, although some may not be fully downloaded yet. Give your iPad a little while and it'll eventually have everything downloaded and ready to use.
How to transfer data from iPad to iPad using a backup
An alternative way of transferring data from an old iPad to a new iPad is to use an iCloud backup of your old iPad. You don't need to use your old iPad to apply this second method, which can be useful if you want to use it normally while setting up your new one. However, it is also handy to use the Quick Start option since it'll let you skip some early parts of the set-up process like entering your Apple ID or your WiFi details.
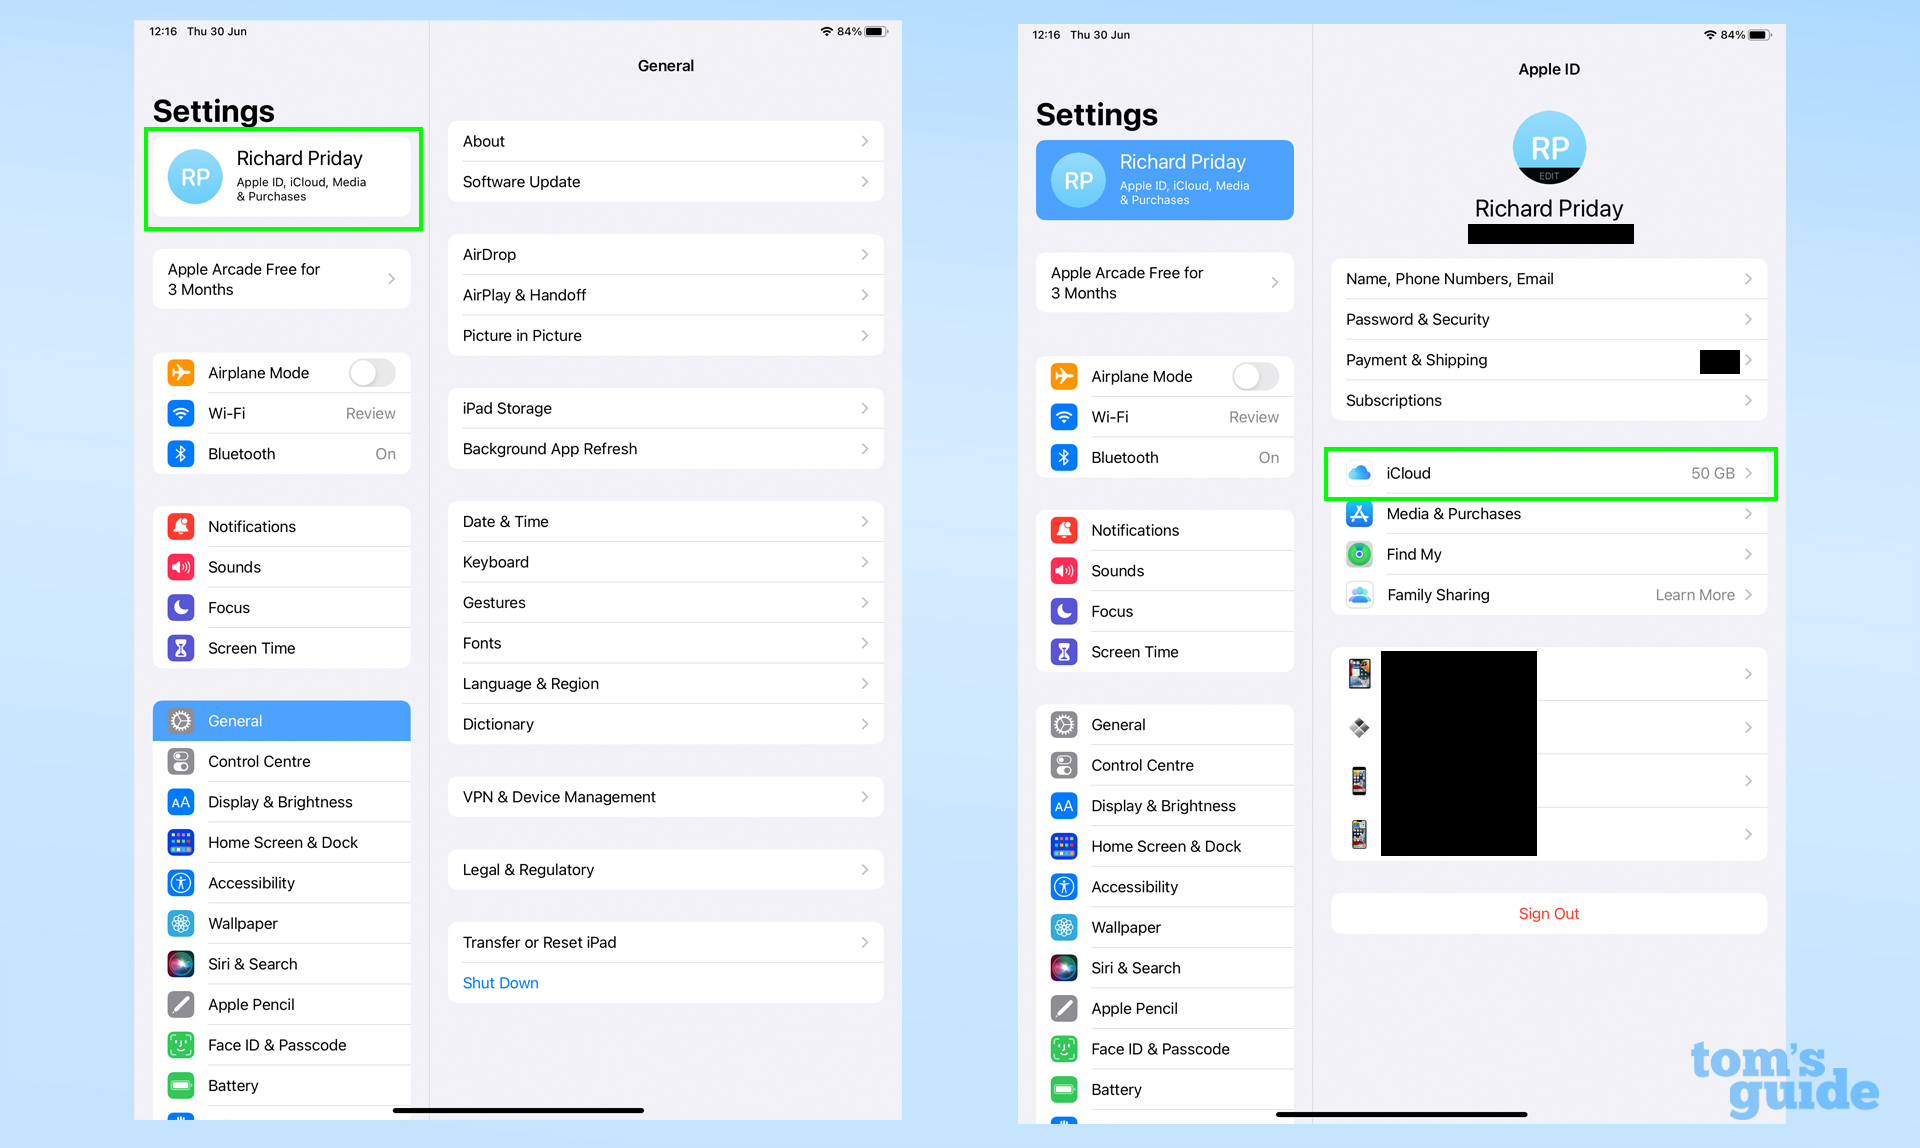
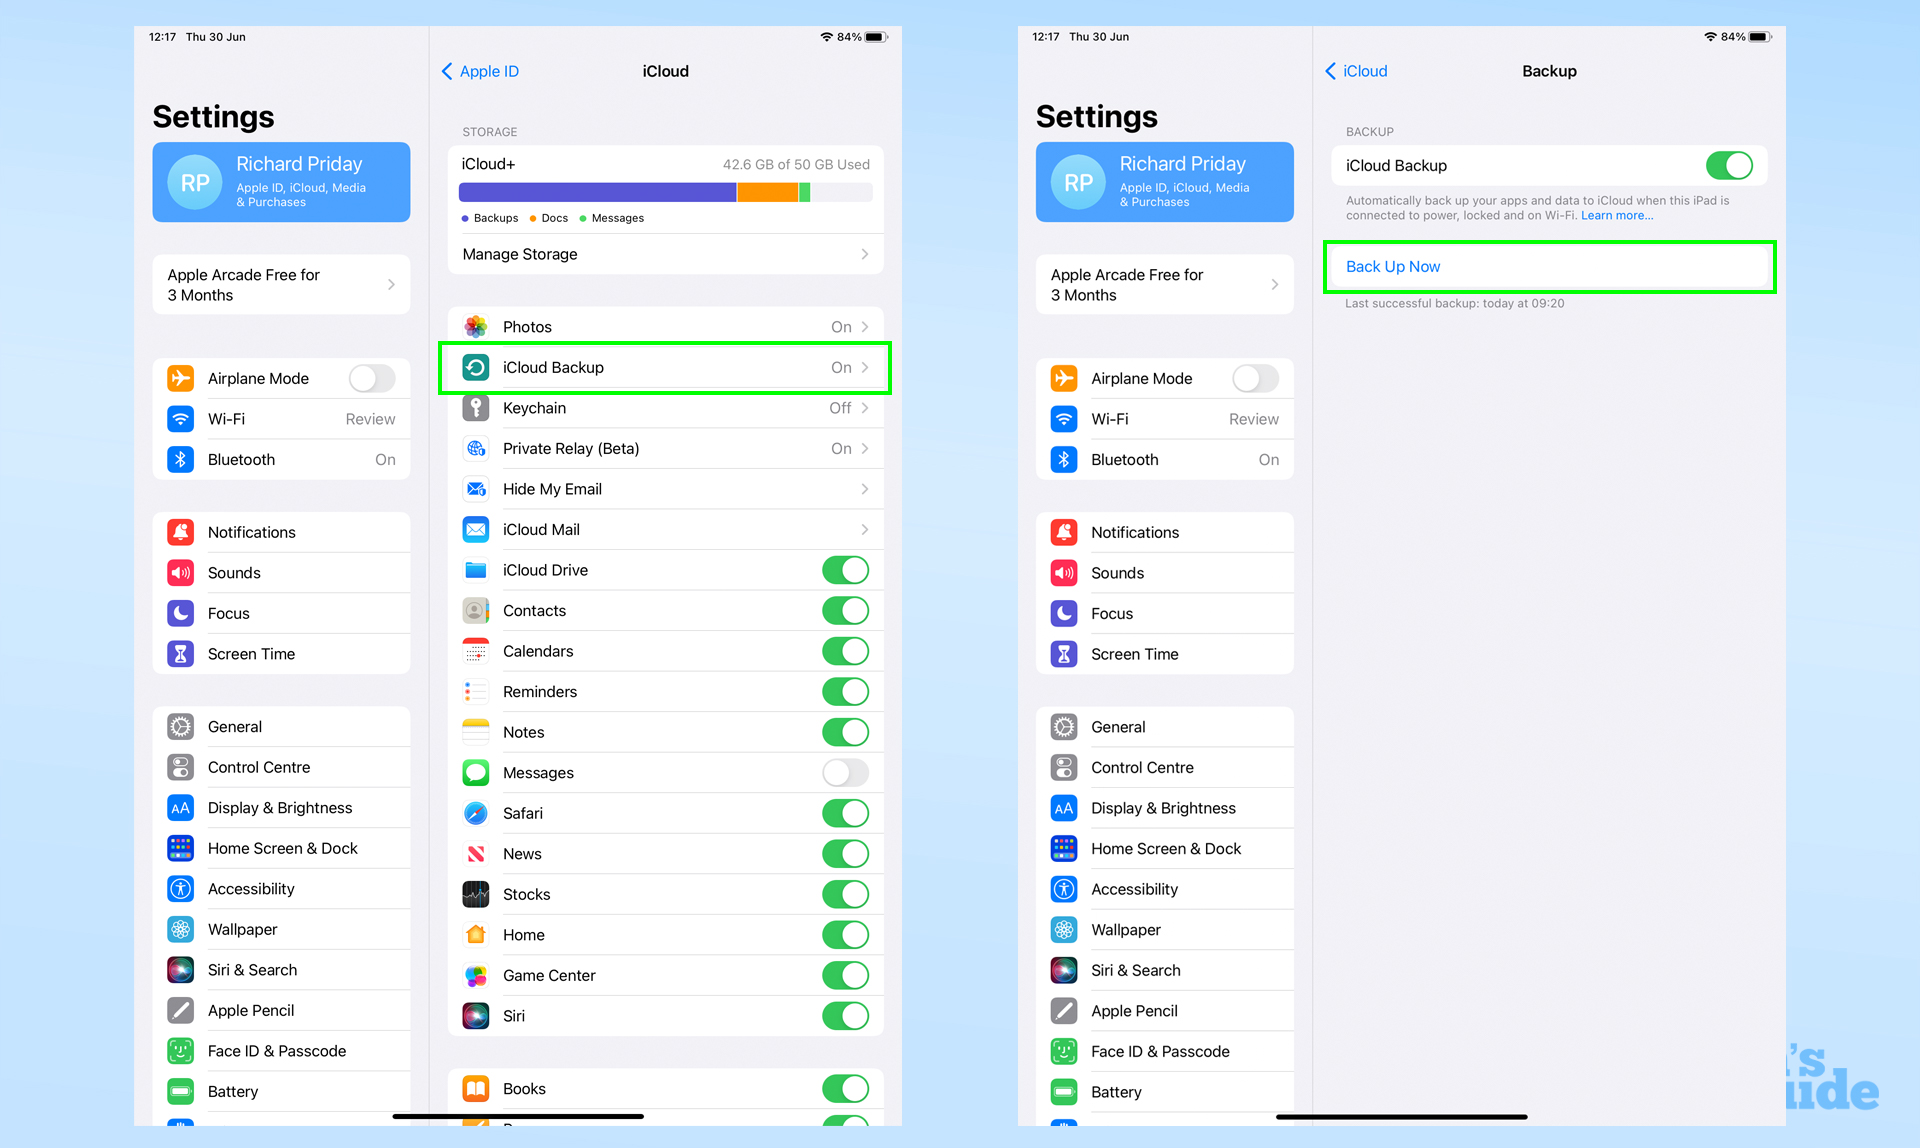
1. Before starting the iPad set-up process, first make sure your backup is up to date on your old iPad. To do this, open Settings, then tap your iCloud profile at the top. Select iCloud, and then iCloud Backup.
2. Under the Back Up Now prompt, you'll see the time you last backed up your data. Tap the Back Up Now button if you want a more recent copy to be taken. If the last back up was very recent, you can leave it as is.
3. Now, follow the first steps from the previous method — place the two iPads close together, scan the pattern and let the new iPad activate. Then set-up Touch ID or Face ID.
4. The difference comes when you get to the data import section. Here, tap the Download from iCloud option.
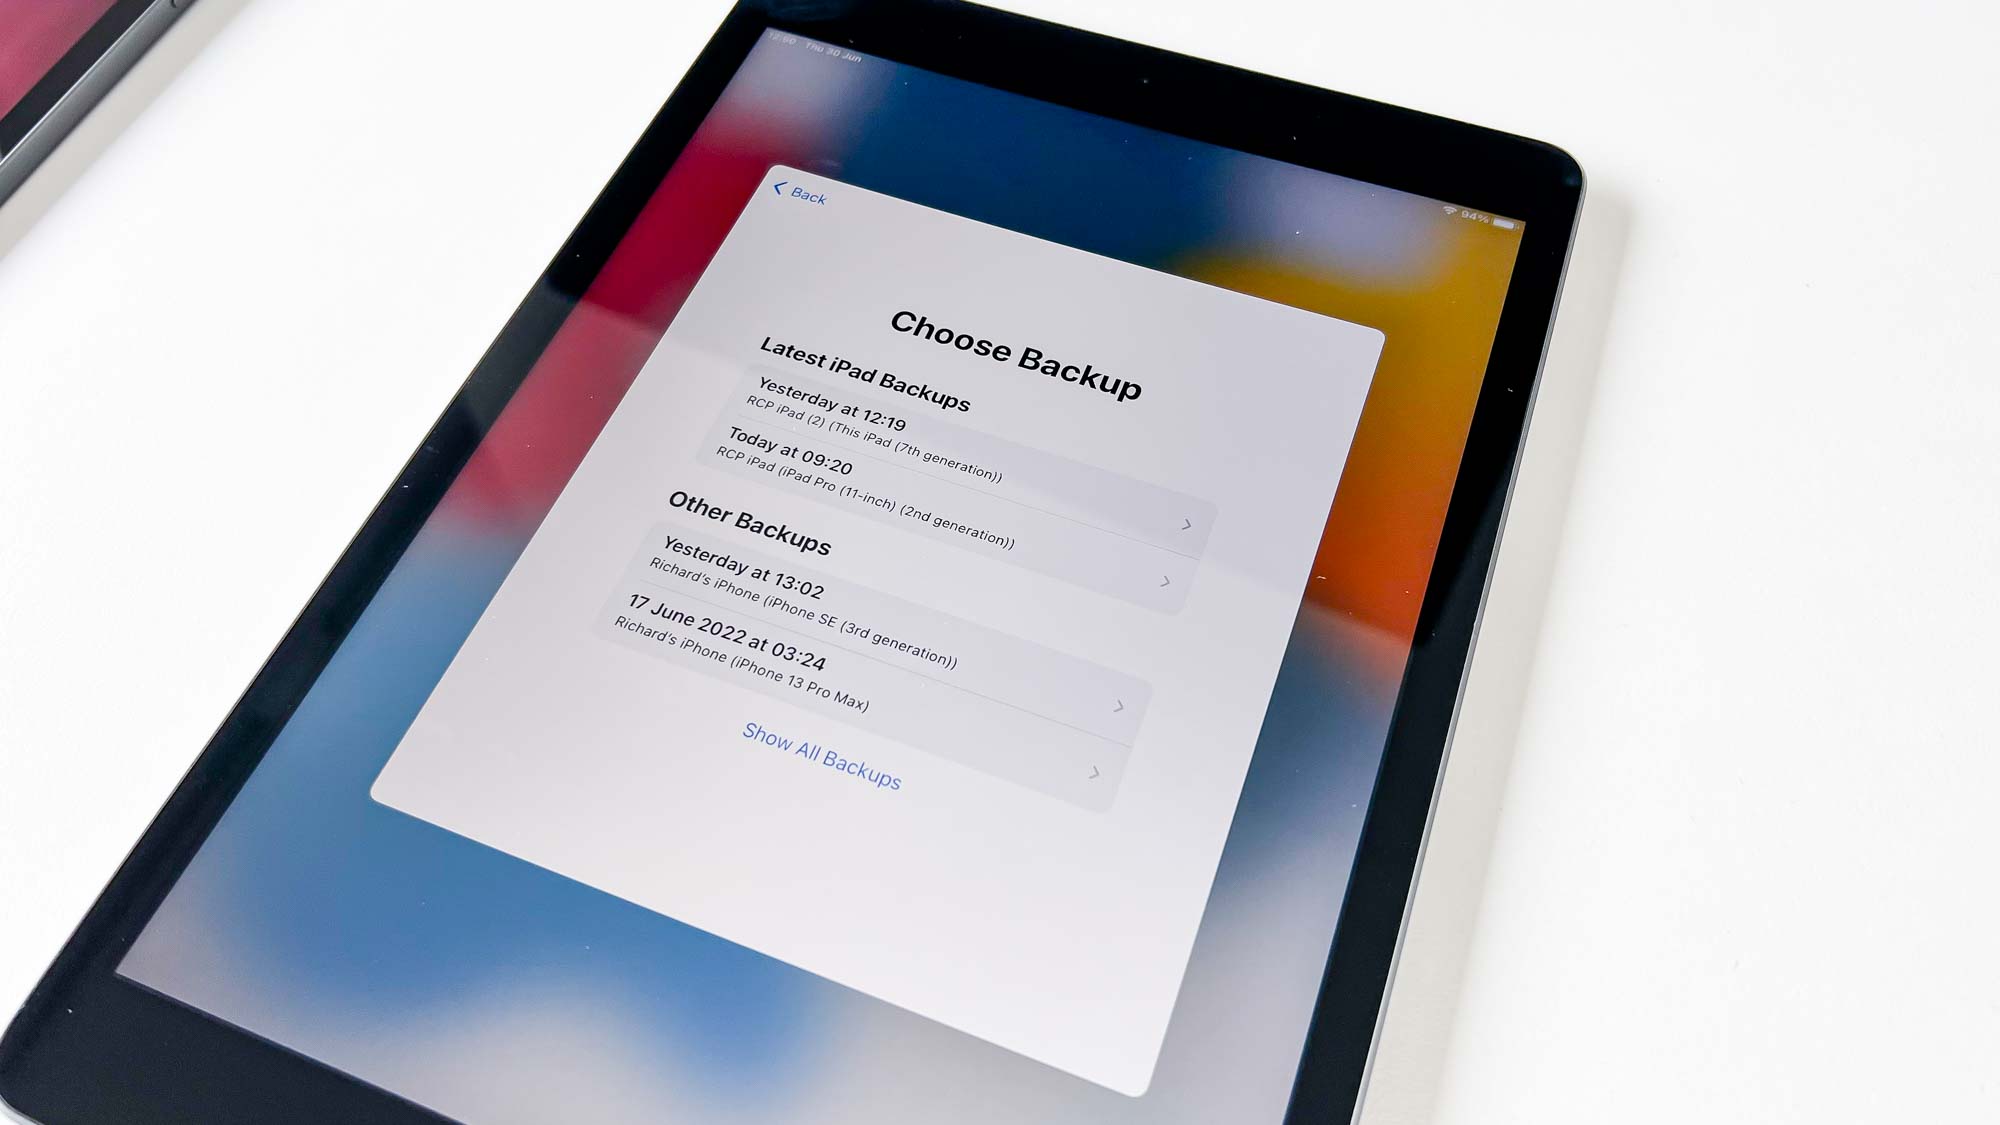
5. Select the backup you want to use, then confirm the data you want to import and the new iPad will start downloading it.
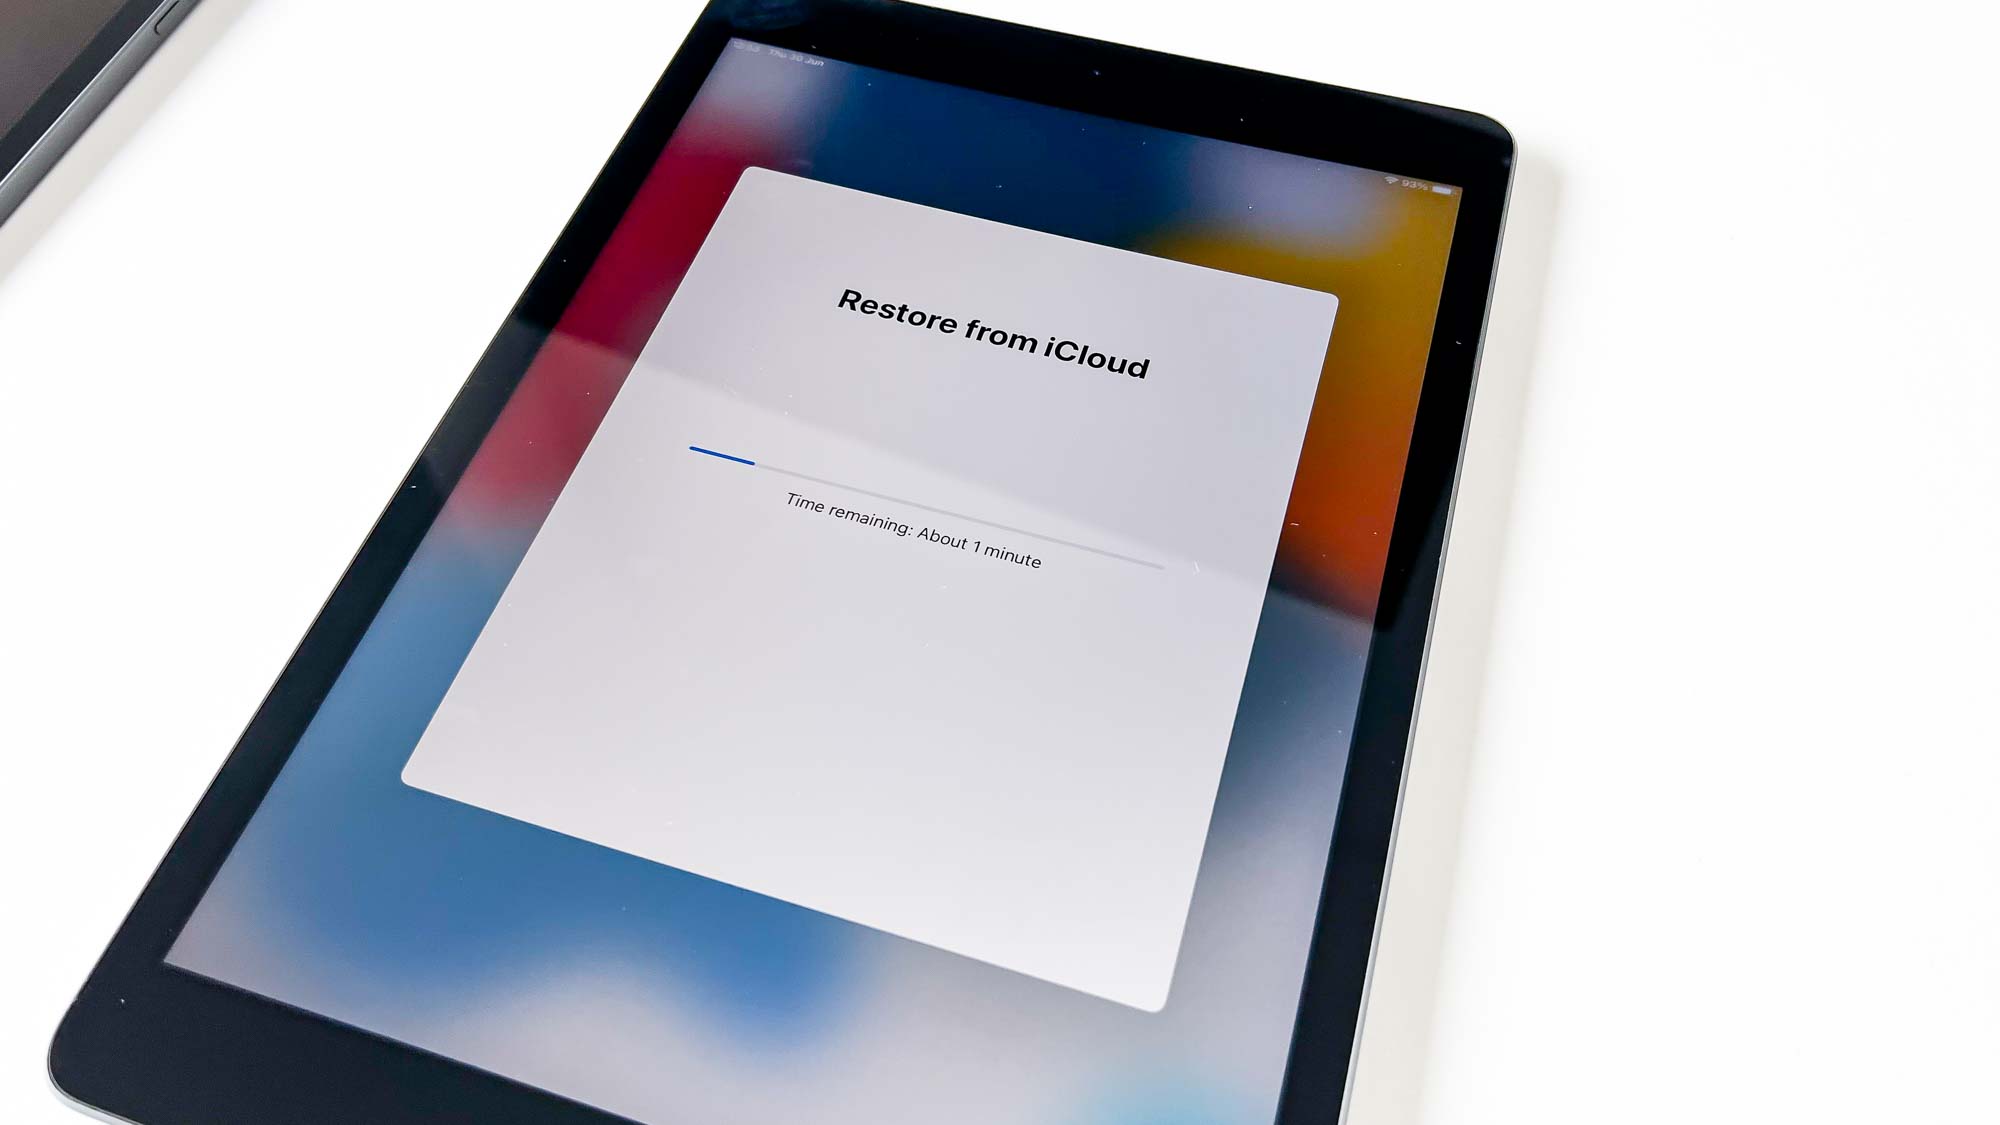
6. At this point, there's nothing to do but wait. Go and treat yourself to a cup of coffee perhaps while iCloud fills your new iPad up with your data.
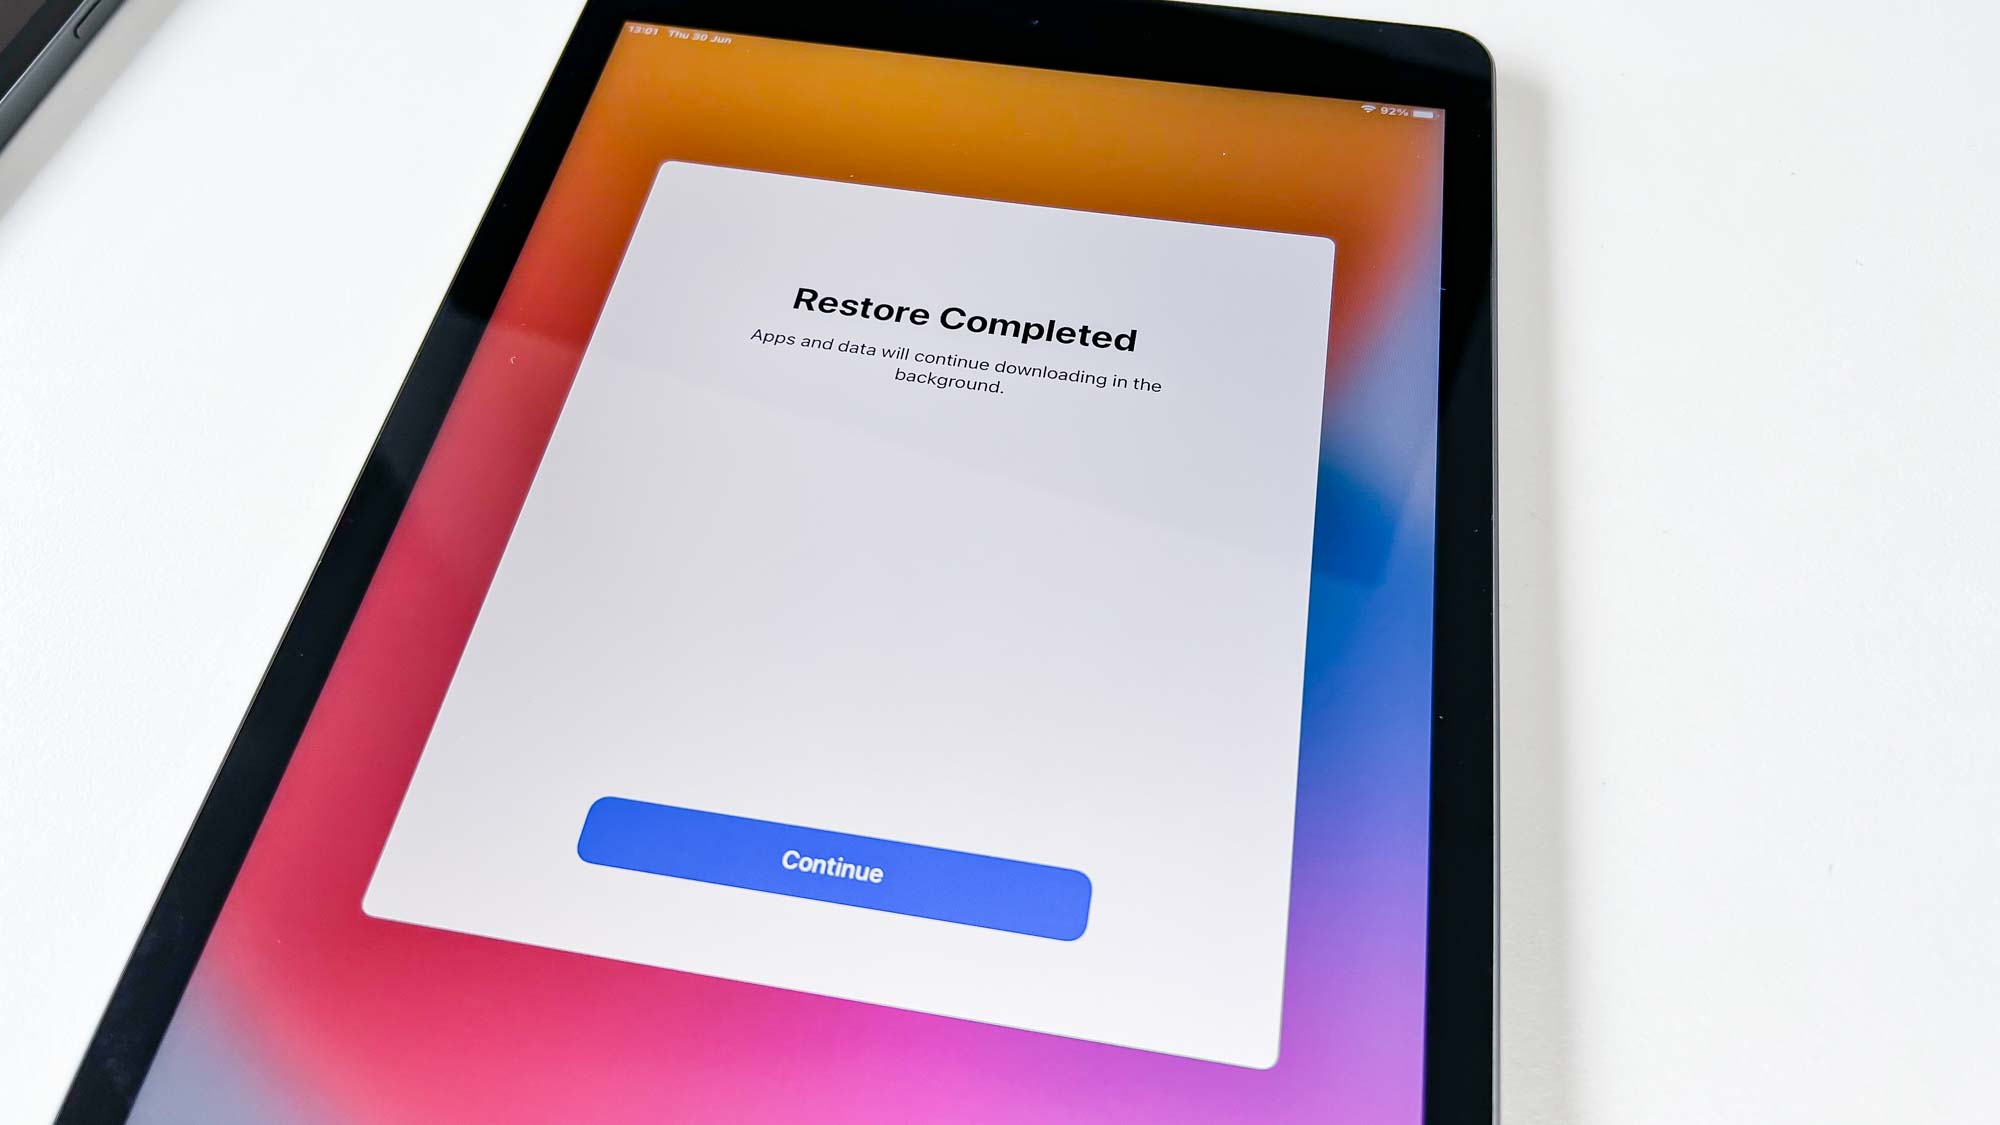
7. Once the restoration is complete, simply follow the remaining steps and after that (plus maybe a few restarts) you'll be good to go.
There's more for you to learn about your iPad that we can teach you. If you'd like to get an idea of how much your iPad is worth before upgrading, read our guide on how to check your iPad model and generation. We can also show you how to block websites on iPhone and iPad to keep inappropriate websites away from sensitive eyes, or how to switch Apple ID on iPhone and iPad if you happen to be sharing an Apple phone or tablet with someone else? If you are looking for more storage, you can look at our simple guide on how to upgrade iCloud storage on iPhone, iPad and Mac.
There's also our guide on how to edit PDFs on iPhone and iPad that'll help you sign or mark-up important documents, and how to screenshot a full page on iPhone and iPad for simple website capturing that are worth checking out too.

Richard is based in London, covering news, reviews and how-tos for phones, tablets, gaming, and whatever else people need advice on. Following on from his MA in Magazine Journalism at the University of Sheffield, he's also written for WIRED U.K., The Register and Creative Bloq. When not at work, he's likely thinking about how to brew the perfect cup of specialty coffee.
 Club Benefits


